In this article you will find the following:
Have you ever noticed that when you buy a new Mac, you’re immediately able to start using it in your native language? That’s because macOS comes preloaded with a huge set of localization files by default. Apple sells its devices all around the world, and these files mean users don’t have to download additional languages from the internet.
But they also take up space. That can be a problem because the more you use your Apple device and the more programs you install, the less free space you have. If you remove language files from your Mac, you can free up some much-needed storage space. Keep reading to find out how.
Before we start:
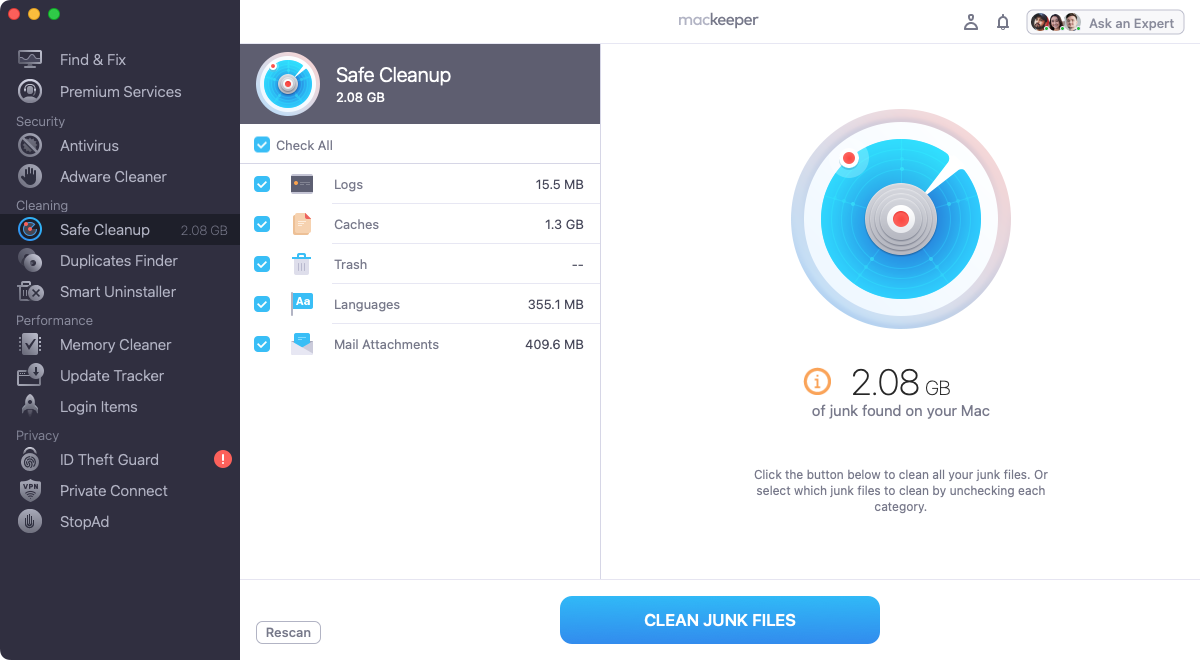
The fastest and easiest way to get rid of unwanted language files is to use MacKeeper. Its Safe Cleanup feature can search for and delete those files in a matter of moments.
Here’s how:
- Download MacKeeper and launch it. Select Safe Cleanup.
- Click Start Scan.
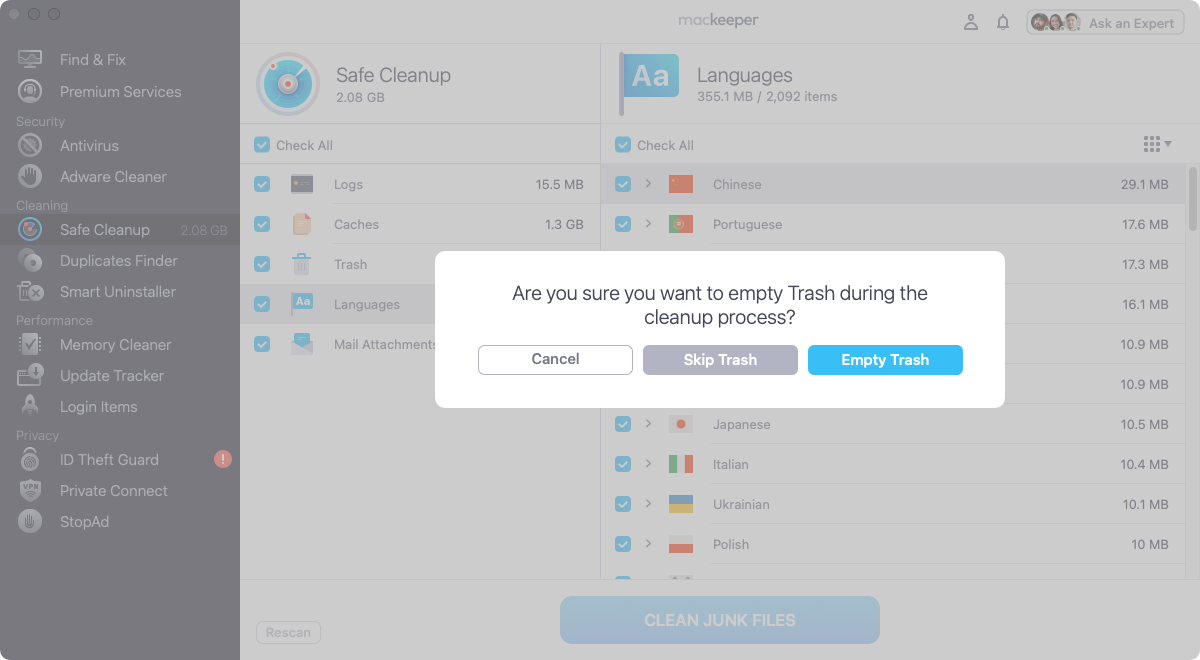
- When the scan is done, choose the language files to remove, and click Clean Junk Files.
- In the pop-up, confirm that you want to remove the files.
Give it a try, and let it do all the hard work for you!
What are language files on Mac?
Language or localization files are responsible for the language of any app’s interface. For example, in games, that could be anything from item descriptions to dialog.
Every application you have on your Mac uses pre-installed language files. That’s very convenient when you first start using your computer. But more often, you only need one of those languages, so the rest of the 150 language files they might have are just a waste of disk space. If you ever find there’s not enough disk space on your Mac, erase all those language files and get some storage back.
How to find language files on Mac
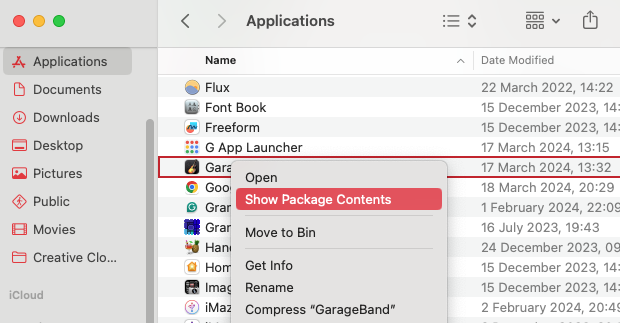
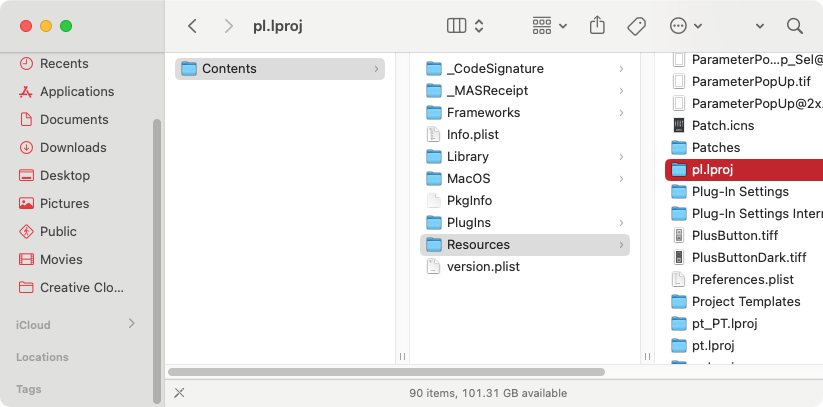
Of course, you need to be able to find language files on your Mac before you can delete them. Language data is stored locally for each application on your Mac. To see the list of languages, you need to gain access to the Resources folder of each particular app. These language files all end with the .lproj file extension.
Here’s how to find language files on your Mac:
- In your Applications folder, right-click an app and select Show Package Contents. This will reveal the Contents folder.
- In Contents > Resources, look for folders that end with .lproj—those are the language files. The two letters at the start of the folder names say what language they are.
How to remove language files on Mac
Removing language files from your Mac doesn’t impact its functioning, but it will help you get some disk space back. You can delete language files from your Mac in a few ways:
- Delete localization files via Terminal
- Remove language files via Finder
- Erase language files via Trash
- Get rid of localization files with third-party software
1. Delete localization files via Terminal
If you’re comfortable using text-based commands, you can also remove language files from your Mac using Terminal. Follow these steps to remove the unwanted languages:
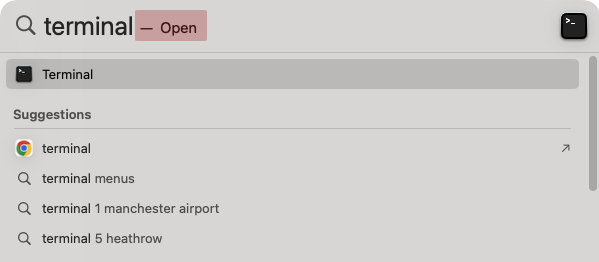
- Press Cmd+Space to open Spotlight. Search for and open Terminal.
- Type cd /Applications/Application.app/Contents/Resources, replacing ‘Application.app’ with the name of the app you want to remove language files from. Press Return.
- Type sudo rm -rf language.lproj, replacing ‘language’ with the short name of a language. For example, es.lproj for Spanish. Press Return again.
- Enter your macOS password and hit Return. If that language folder exists, it’ll be deleted.


Note from our experts: The problem with this method of erasing language files is you have to know whether those files actually exist and what they’re called. It’s much better to use one of our other methods.
2. Remove language files via Finder
To delete language files with Finder, you’ll need to separately erase each language pack for every third-party application on your Mac. Follow these steps to get rid of unwanted languages using Finder:
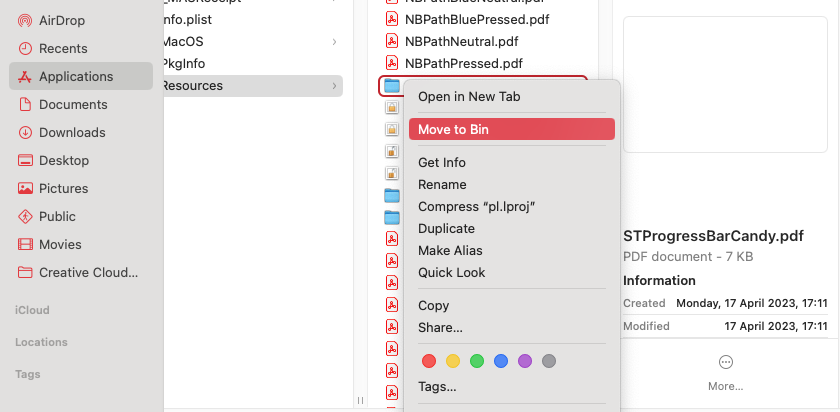
- Right-click an app and go to Show Package Contents > Contents > Resources. Look for any folders ending in .lproj, right-click one, and select Move to Trash (This is called Bin in some territories).
- Enter your password if prompted, and click OK.
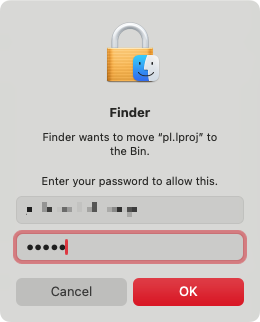
Hint from our team: Depending on the number of third-party apps you have on your Mac, this process may take a while. Every app has its own language files, and you’ll need to repeat this process for all of them. Not an easy task, though.
3. Erase language files via Trash
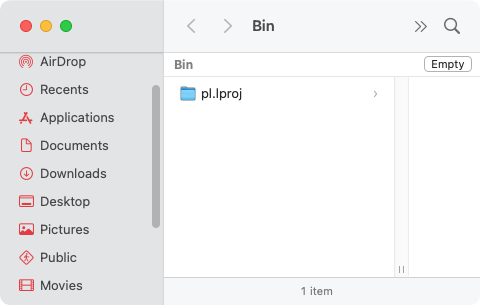
Sending language files to your Trash is just the first step in erasing them. For as long as they stay in your Trash, they’re still taking up space. Here’s how to empty your Trash to erase language files from your Mac permanently:
- Click the Trash icon in your Dock to up your Trash. You’ll now see your deleted language folders.
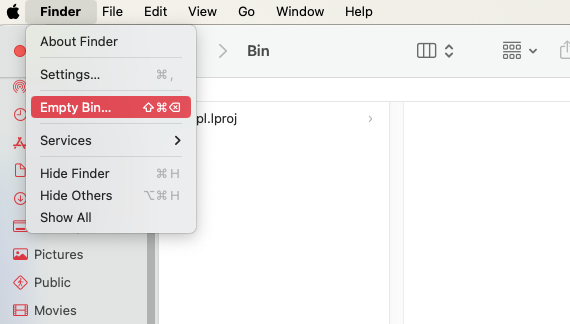
- In the menu bar, select Finder > Empty Trash.
- Click Empty Trash to confirm that you want to erase everything in your Trash.

4. Get rid of localization files with third-party software
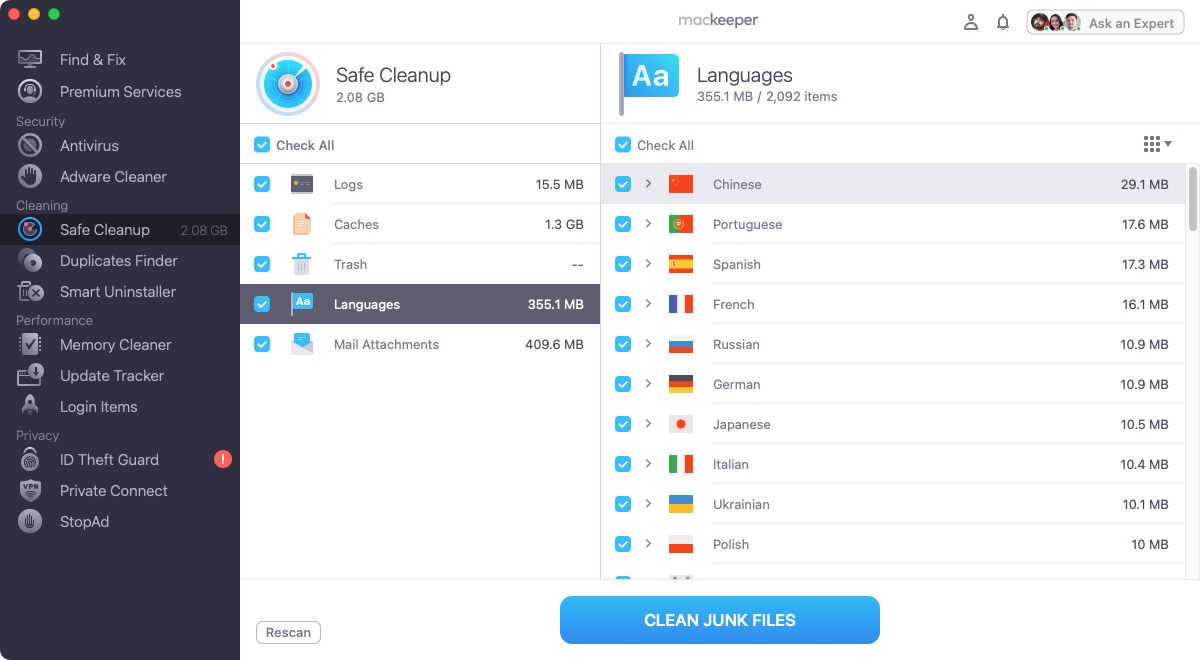
Removing language files with Finder is slow. Doing it with Terminal is even worse. Thankfully, you can use MacKeeper’s Safe Cleanup feature to automate and massively speed up this daunting process. This powerful junk file cleaner will search your Mac for language files you don’t need and let you erase them all at the same time. It’ll even take into account your geographic location and preferred languages, so the files you actually need will stay in place.
Here’s how to remove unneeded language files with MacKeeper:
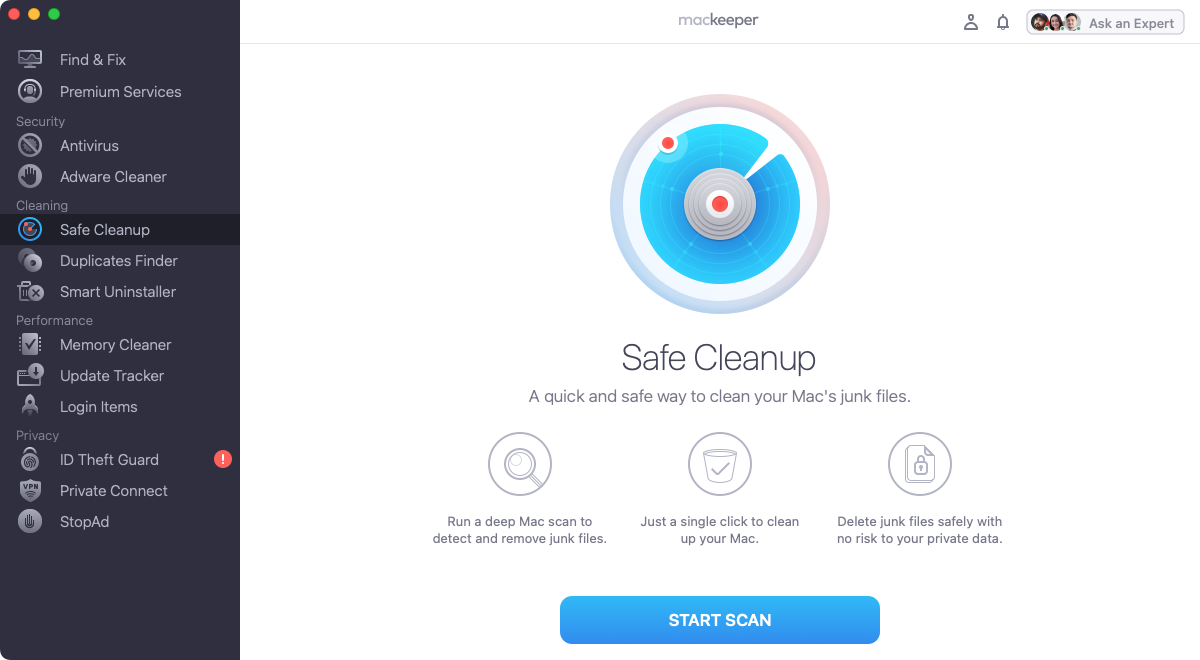
- If you’ve already downloaded our app, open MacKeeper, click Safe Cleanup in the sidebar on the left, then click Start Scan.
- When the scan is finished, click Languages.
- Select Languages, check those you don’t need, and click Clean Junk Files to get rid of the unneeded language files and any other junk you’ve flagged here.
- Click Skip Trash or Empty Trash.
Important: After you’ve deleted these language files, you’ll be unable to use the affected applications in any language other than the ones used by your system. If you ever need to use another language in an app, you’ll have to reinstall the app to renew the default language packs. If you cleared the .lproj files for Apple’s own default applications, you’ll have to reinstall macOS to get the rest of the languages back.
Removing language files on Mac
It makes sense for app makers to add lots of different languages to their apps. They don’t know who’s going to be using their software or what languages they speak. But spread out over lots of apps on a typical Mac, unneeded languages can often end up taking gigabytes of disk space. If your desktop Mac or MacBook disk is full, removing these files can help.
Annoyingly, if you want to delete unwanted language files manually using Terminal or Finder, you need to do it separately for every app—a long and laborious task.
That’s why you should check out MacKeeper. Its Safe Cleanup feature will do all the hard work for you, finding language files you don’t need, so you can clear them out and get back some much-needed storage capacity. Plus, it’ll clean your Mac in lots of other ways, too.
FAQ about removing unwanted language files on Mac
1. What is a .localized file on Mac?
Files that end in .localized tell Finder what language to use for folder names. For example, if you’ve set macOS to Spanish, your Download Folder will be called Descargas. If you delete .localized files, these folder names will default to English.
2. How do I delete unused languages?
There are loads of language files on your Mac, and they’ll need to be dealt with separately. That’s why it’s recommended to use MacKeeper’s Safe Cleanup feature to automate the whole process.
3. How do I manually delete files on Mac?
You can delete language files like you would erase any other data on your Mac—by locating them, sending them to Trash, and then emptying your Trash. You can also use Terminal, but that’s even more time-consuming.
4. How do I remove input language from Mac?
You can remove input language in macOS like this:
- In System Settings, select Keyboard from the sidebar.
- Under Text Input, click Edit.
- Select a language, and click the minus button.


