In this article you will find the following:
Google Chrome is one of the most popular web browsers for its quick searches and plethora of results. However, it’s not perfect. Many Mac users who have ditched Safari in favor of Chrome believe that it’s not as reliable as they had hoped. Specifically, some people experience unexpectedly slow loading issues as well as glitching and lagging,
If Chrome keeps freezing on your Mac and doesn’t work the way you want it, we advise you not to rush to remove it, as many factors can contribute to the poor performance of this browser. Fortunately, we have answers to help you minimize the impact of these factors to help you fix any unexpected Google Chrome issues instead of removing the browser altogether.
Before we start:
How do I stop Chrome from freezing? Sometimes Chrome gets bogged down with extensions and ads, causing it to glitch or freeze up. You can stop that from happening by installing MacKeeper’s StopAd extension.
Our StopAd feature can prevent ads from running on your computer unless you want them to, and it’ll also prevent trackers from following you online. Here’s how to prevent unwanted ads and trackers with MacKeeper’s StopAd:
- Download and install MacKeeper.
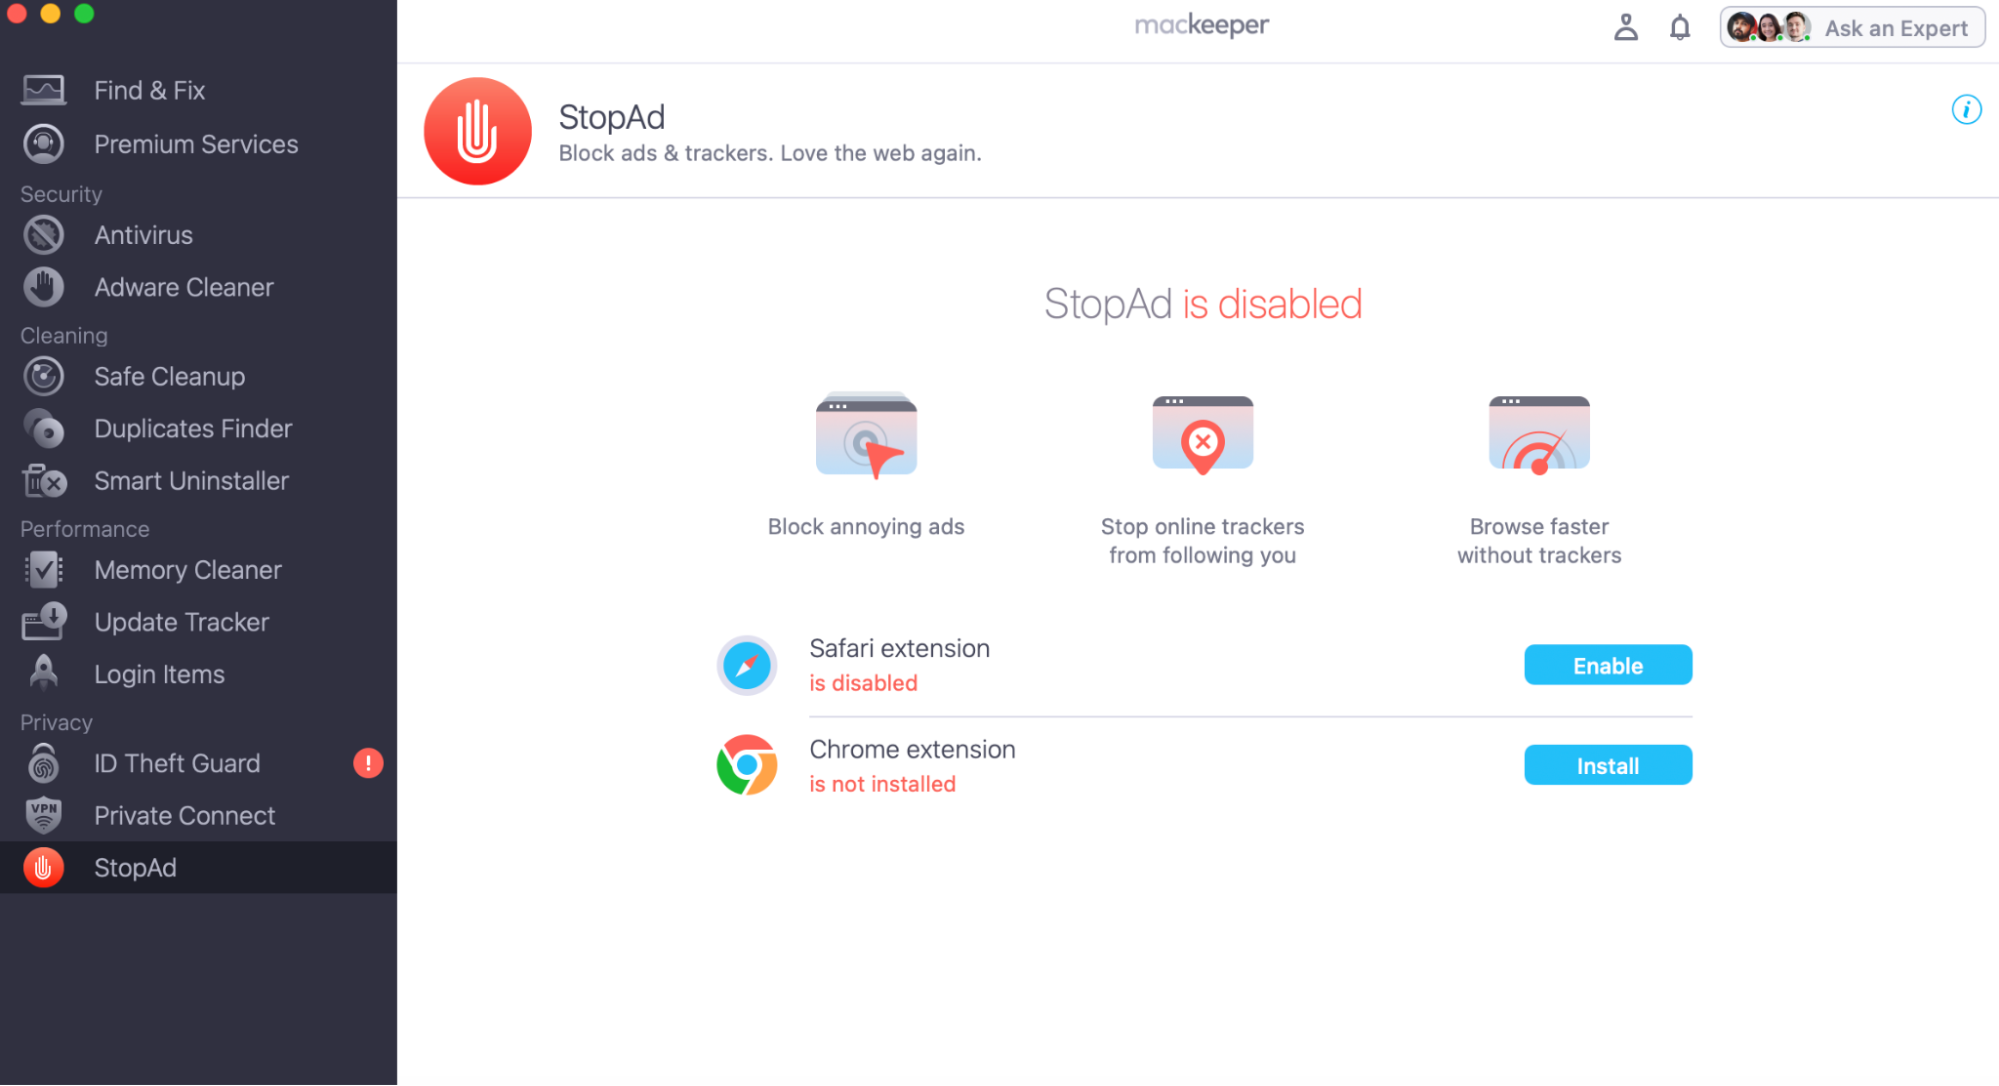
- Launch the app, choose StopAd, and where it says Chrome extensions, click Install.
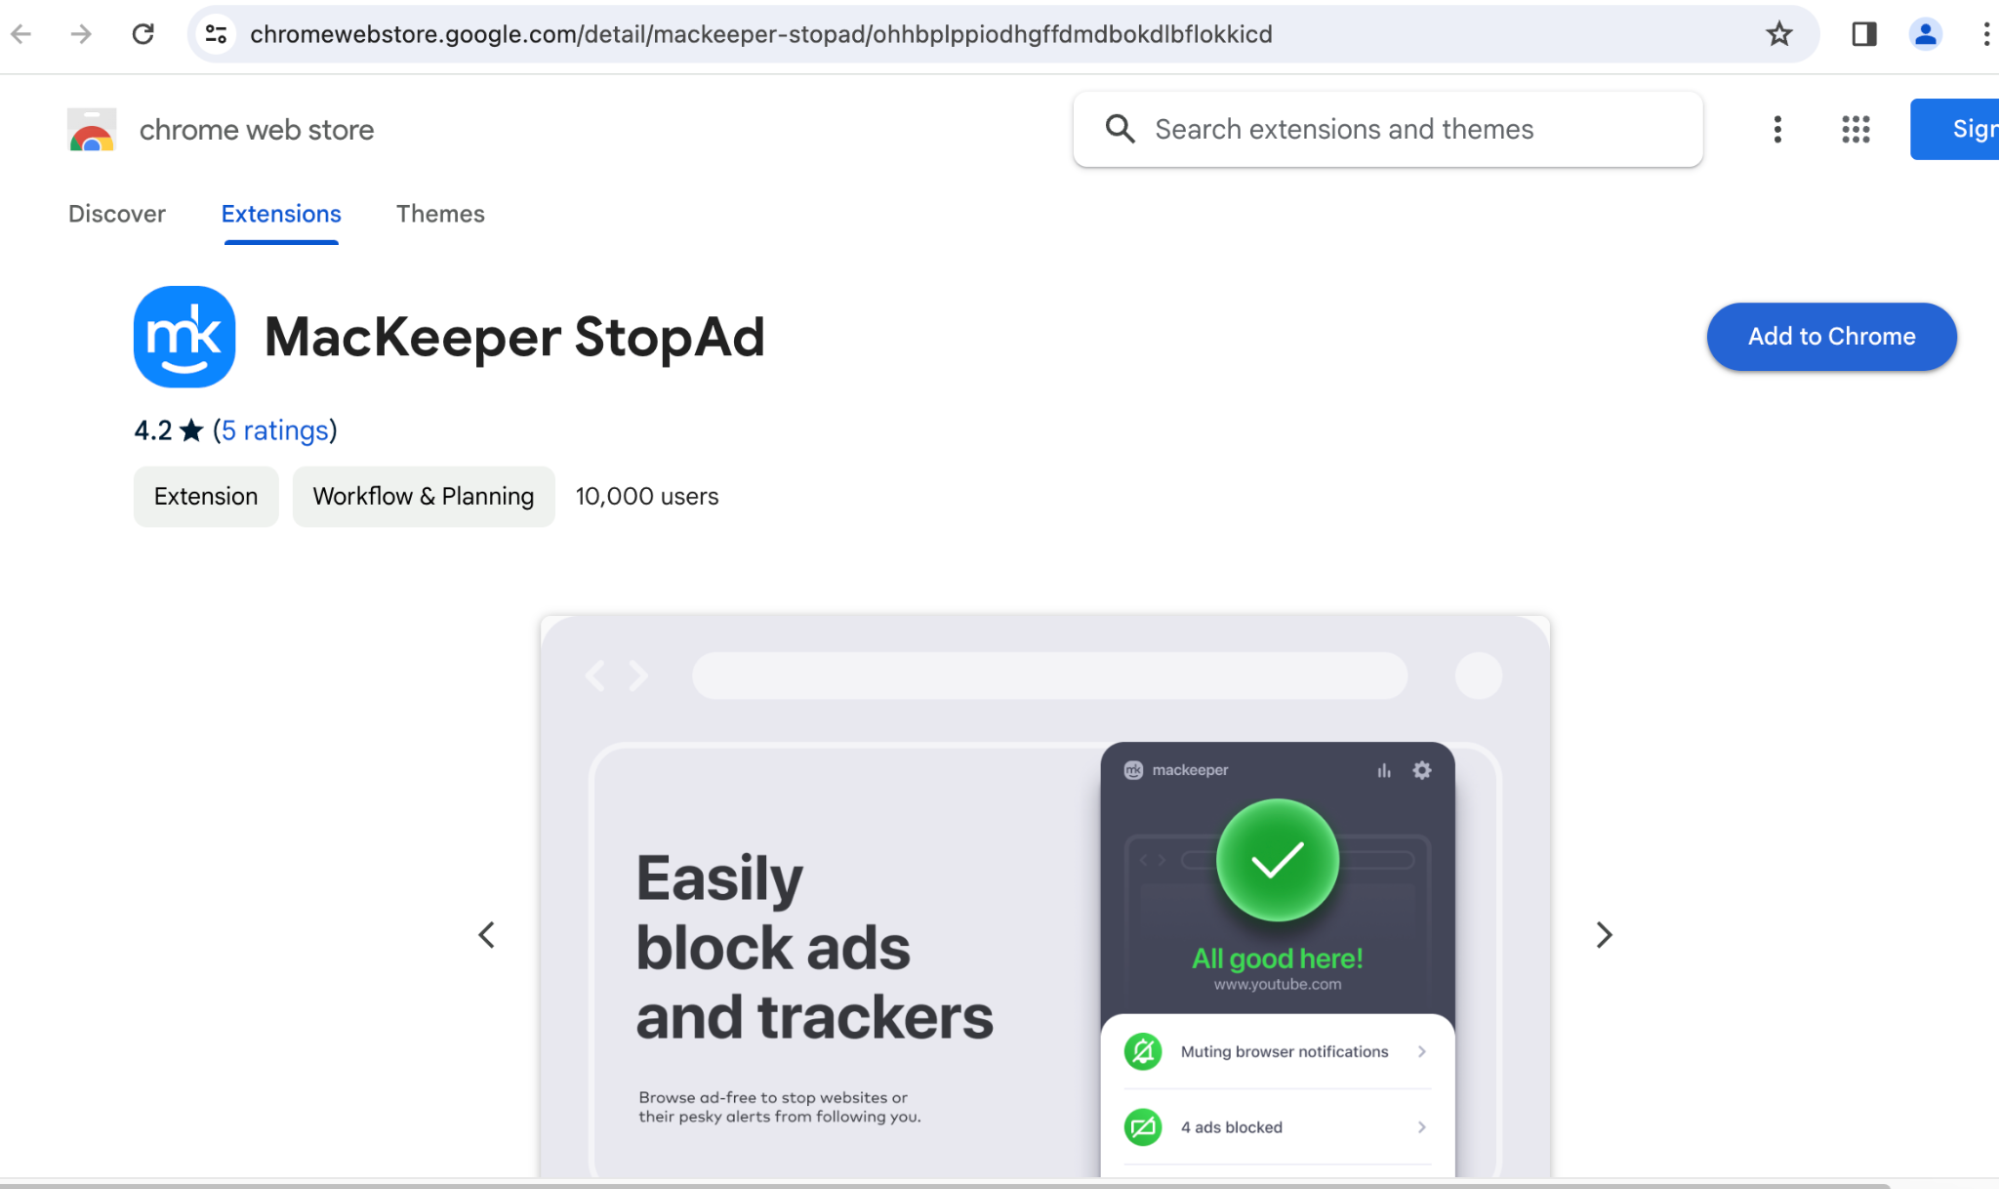
- This will open your web browser on the StopAd page of the Chrome Web Store.
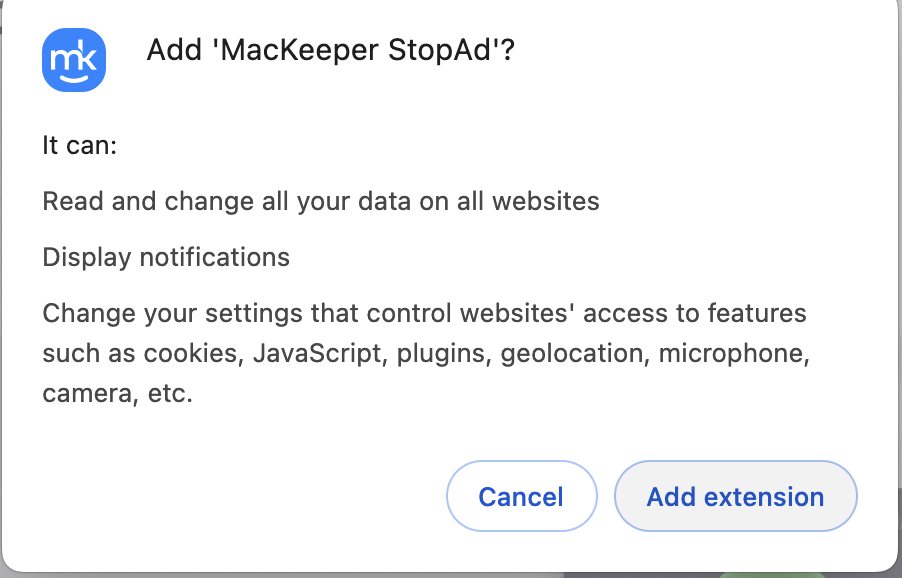
- Click Add to Chrome > Add extension.
Why does Chrome keep freezing on Mac
If you’re encountering persistent lagging or speed issues with the Chrome extension on your Mac computer, then your frustration is one shared by many users. This is why we want to share the common causes that could be leading to the browser unexpectedly glitching. That way, you’ll be more aware of what solutions to adapt to fix such issues.
In our guide, we'll explore the following causes that are likely contributing to Chrome not responding on Mac:
1. Visiting a malicious website
If you’re experiencing frequent issues with Chrome not responding on Mac, it could be linked to visiting malicious websites. Thus, our primary advice is to exercise caution when browsing the internet and ensure your browsing habits prioritize privacy and security to reduce the chances of malicious websites affecting your Mac’s stability.
2. Errors in a new version
Another common culprit that can cause Chrome to keep freezing on Mac is encountering errors in a newly released version of the browser. Despite rigorous testing, new versions may contain bugs or compatibility issues with certain Mac configurations, leading to instability. Regularly monitoring and updating both Chrome and your operating system can help address any lagging issues or glitches when browsing the internet.
3. Program data corruption
Program data corruption can be another significant factor contributing to Chrome freezing on Mac. When essential data within Chrome becomes corrupted, it can unexpectedly disrupt normal browser operations, leading to freezes and other performance issues. Here, clearing cache and cookies or even reinstalling Chrome are common troubleshooting steps to address data corruption on your Mac.
4. Extension failure
If you suspect something else is the cause for Chrome not responding on Mac, then it’s likely that the extension itself is failing to work correctly. Extensions, while useful, can unexpectedly conflict with each other programs leading to glitching. A solution? Review and manage your extensions to identify or resolve any issues causing freezes on your Mac.
If you want to learn how to delete extensions on Mac, read our attached guide to help you.
How to fix Chrome frozen on Mac
When Chrome keeps freezing on your Mac, it can disrupt your entire workflow and hinder productivity. But worry not, we’ll walk you through several practical solutions to address this issue effectively.
Below are the best solutions to resolve Chrome glitching and freezing:
- Clear browser cache and history
- Reset Chrome Settings
- Check updates for your macOS
- Update Chrome and extensions
- Turn off extensions or plugins
- Restart Chrome
- Check system resources and CPU
- Install the StopAd extension
- Scan your Mac for malware
1. Clear browser cache and history
Digital clutter accumulated on your computer can result in potential glitches and hindered performance. That’s why clearing the browser cache and history can help alleviate times when Chrome isn’t responding on Mac.
To clear Chrome’s cache and history on your computer:
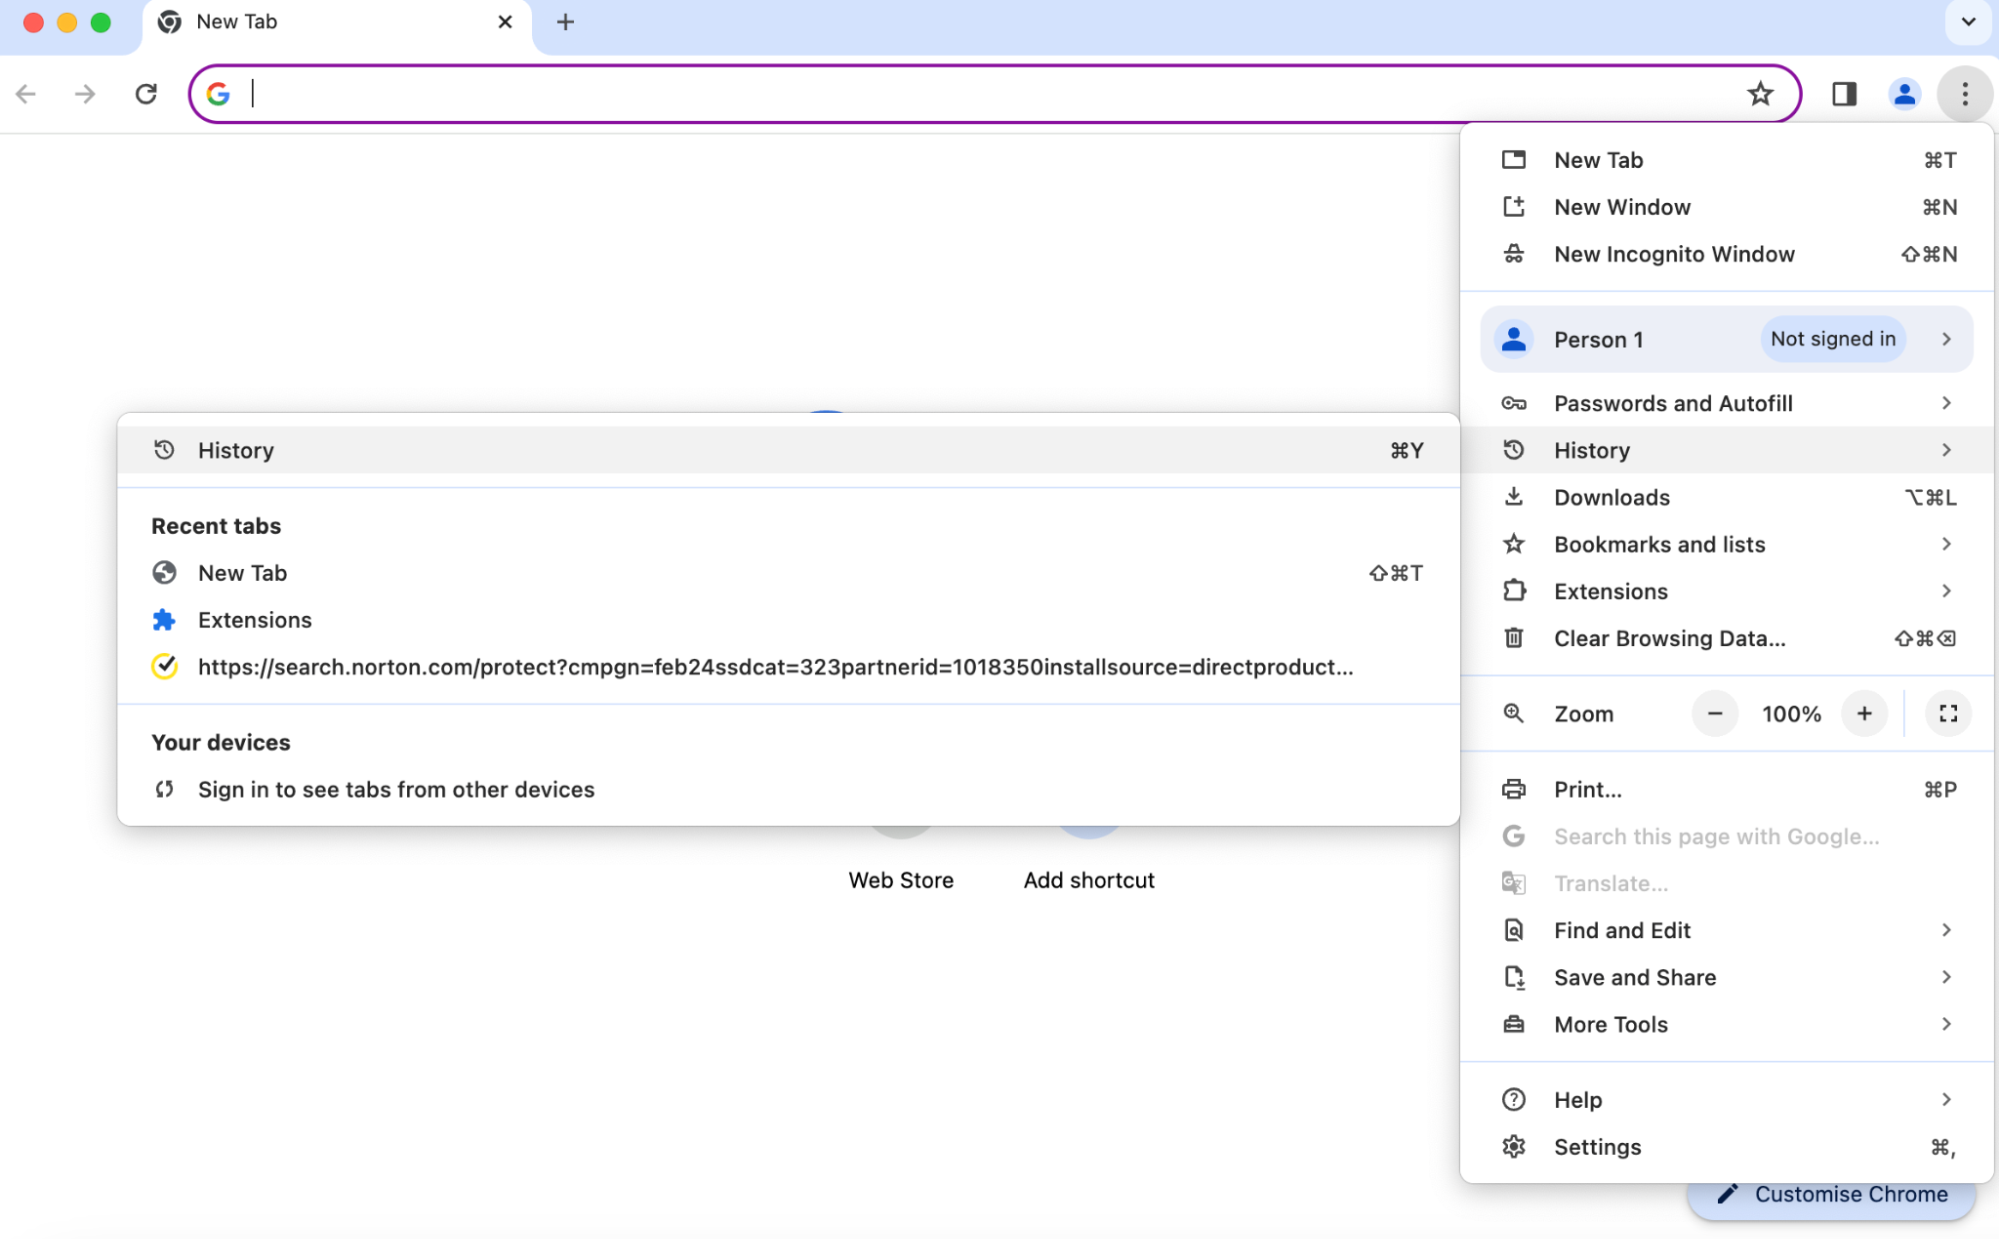
- Open Google Chrome.
- Click on the three-dot menu icon in the top-right corner of the browser window.
- Select History from the dropdown menu.
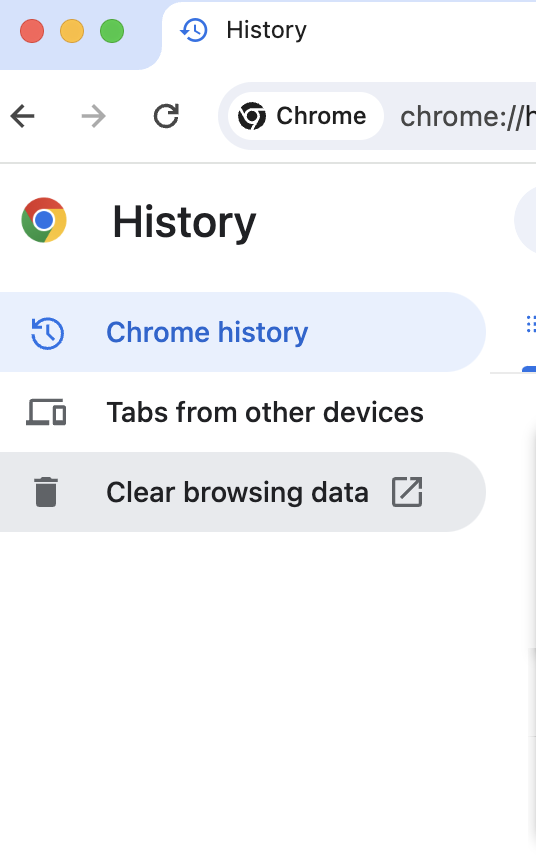
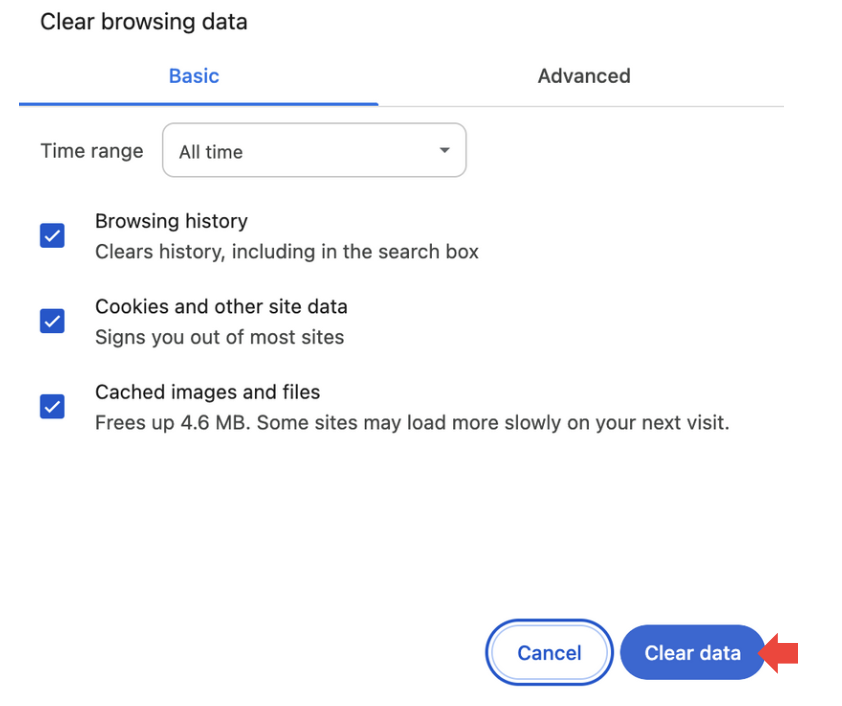
- In the History tab, click on Clear browsing data on the left sidebar.
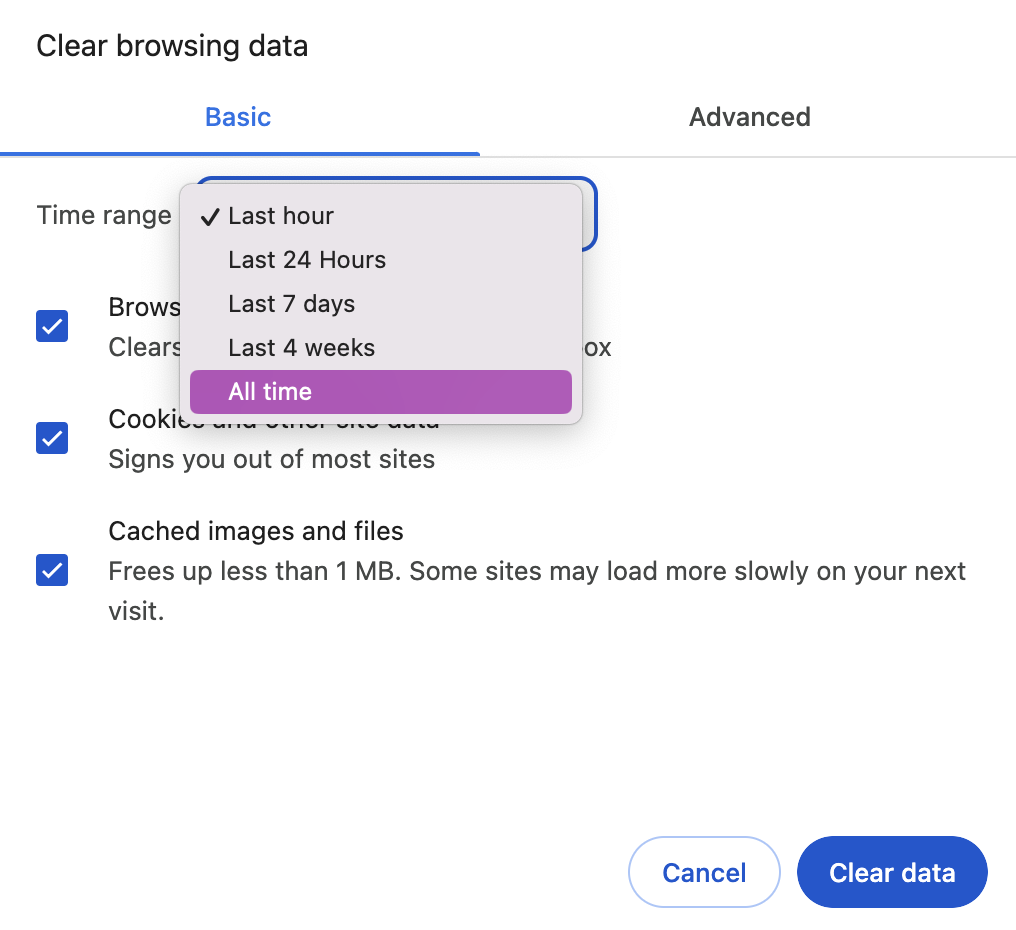
- Choose the time range for which you want to clear data.
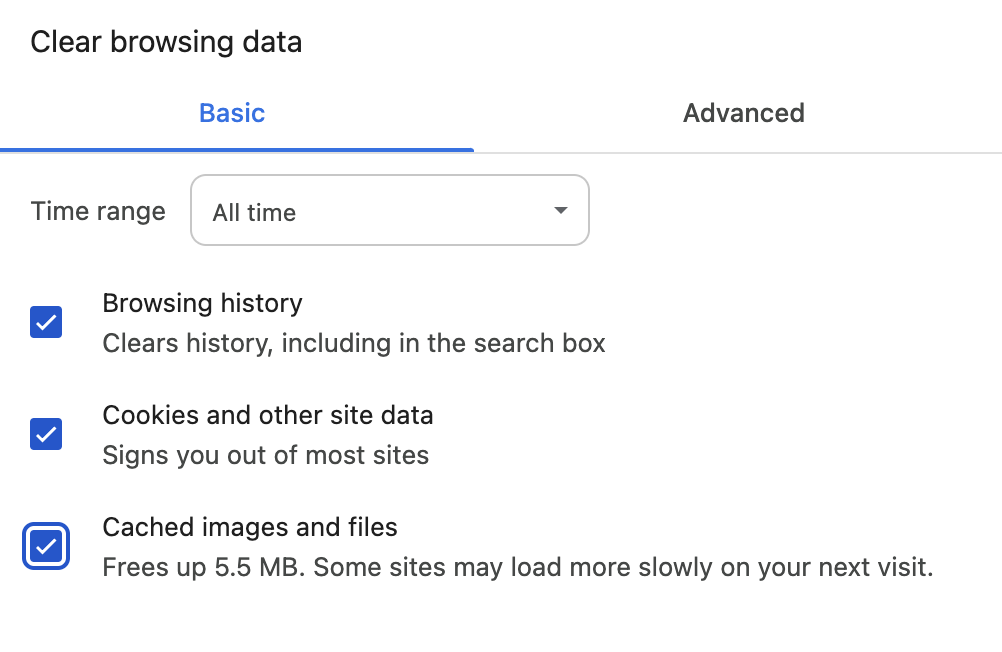
- Check the boxes next to Cookies and other site data and Cached images and files.
- Click on the Clear Data button to confirm.

2. Reset Chrome Settings
Resetting your Chrome settings can be a helpful troubleshooting step to resolve any configuration-related issues, and as a result, preclude the unwanted browser slowness and freezing.
To reset Chrome settings on your Mac, follow these steps:
- Open Google Chrome.
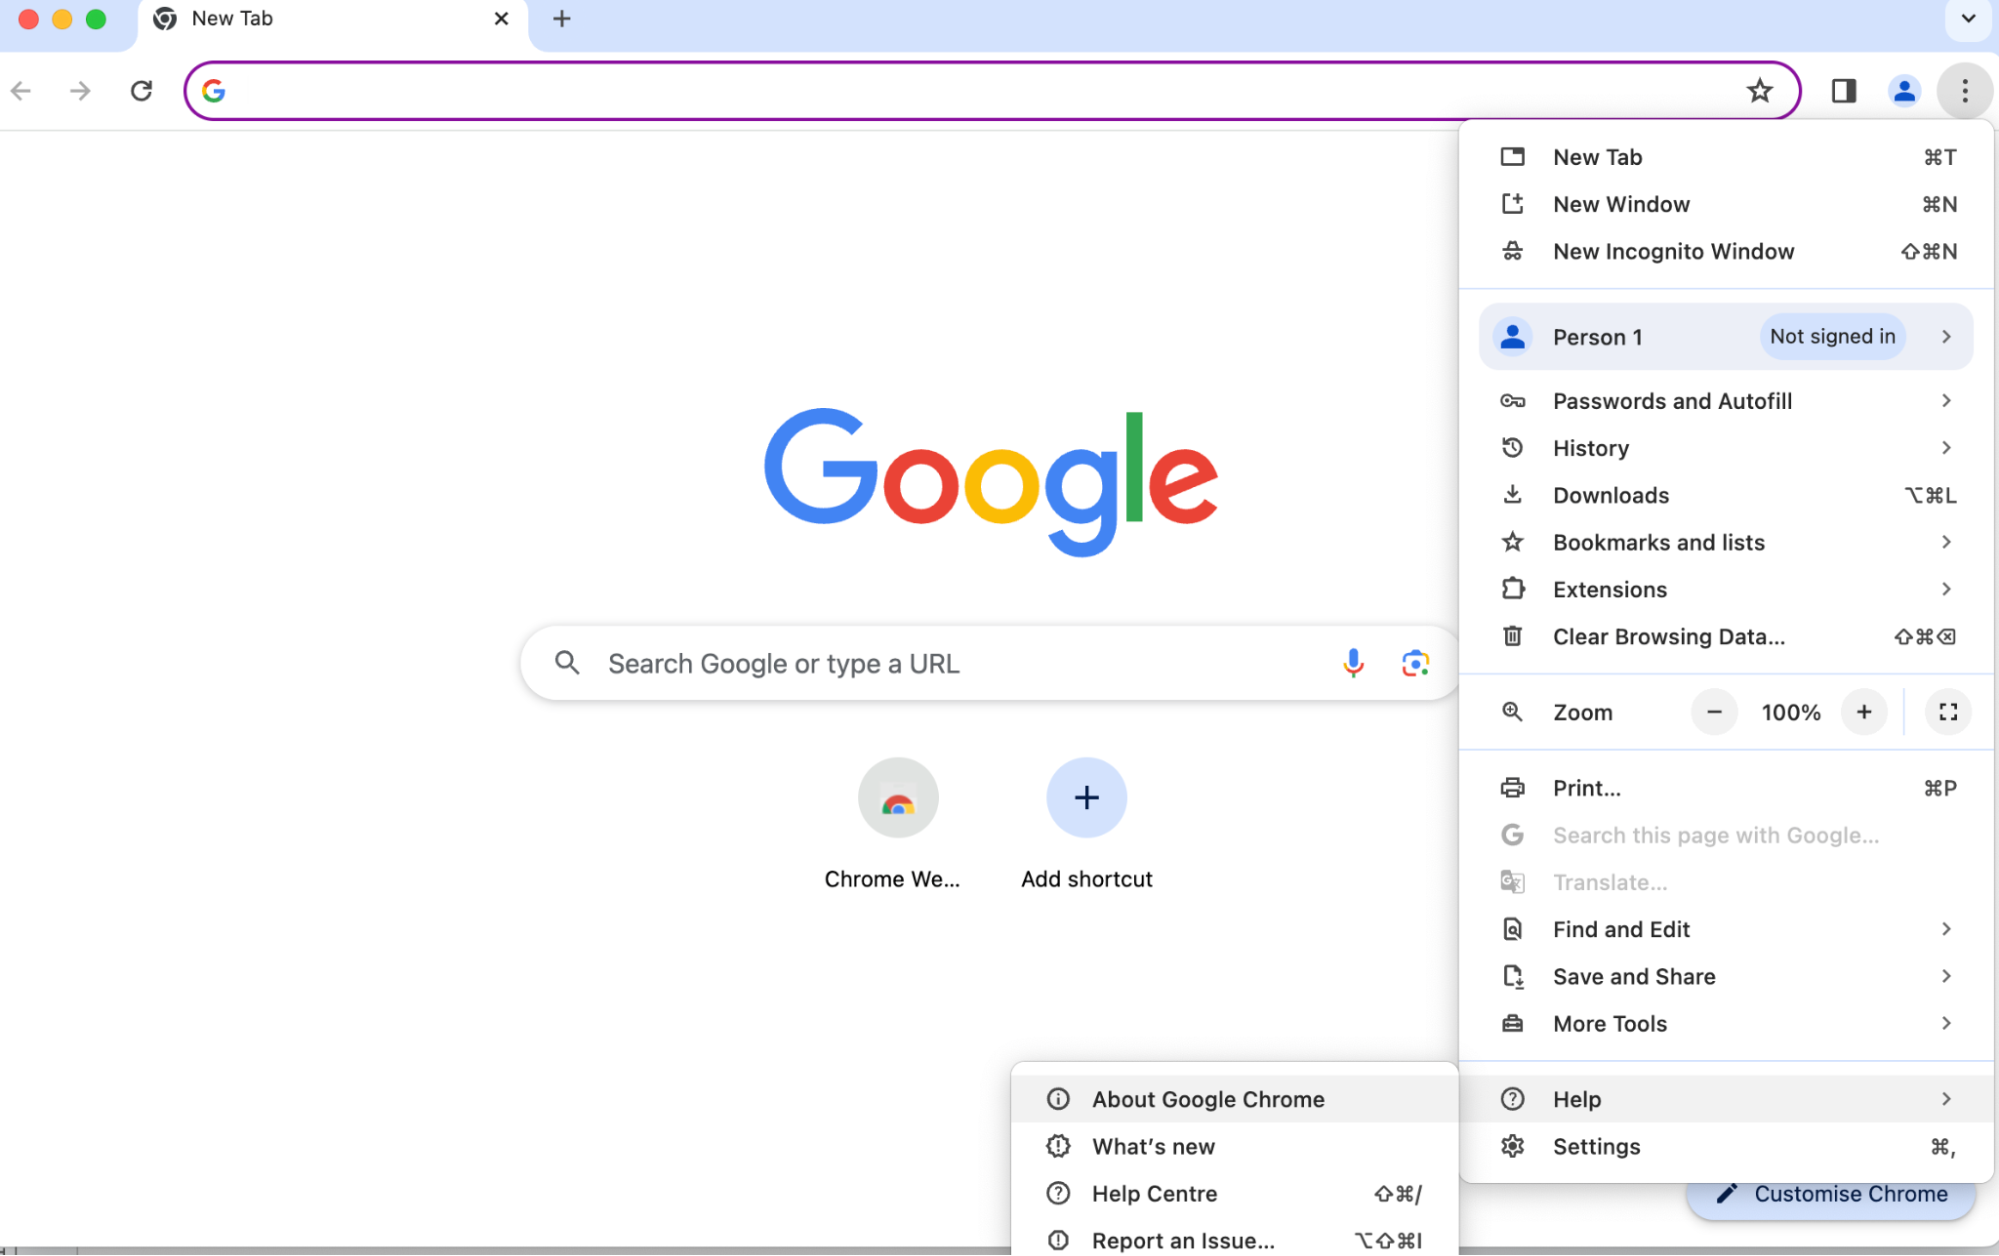
- Click on the three-dot menu icon in the top-right corner of the browser window.
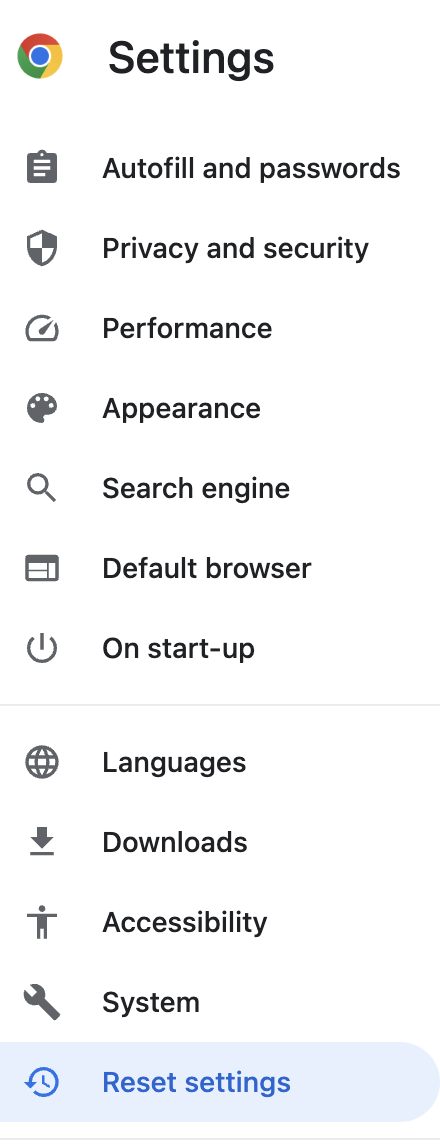
- Select Settings from the dropdown menu.
- Scroll down until you find the Reset settings.
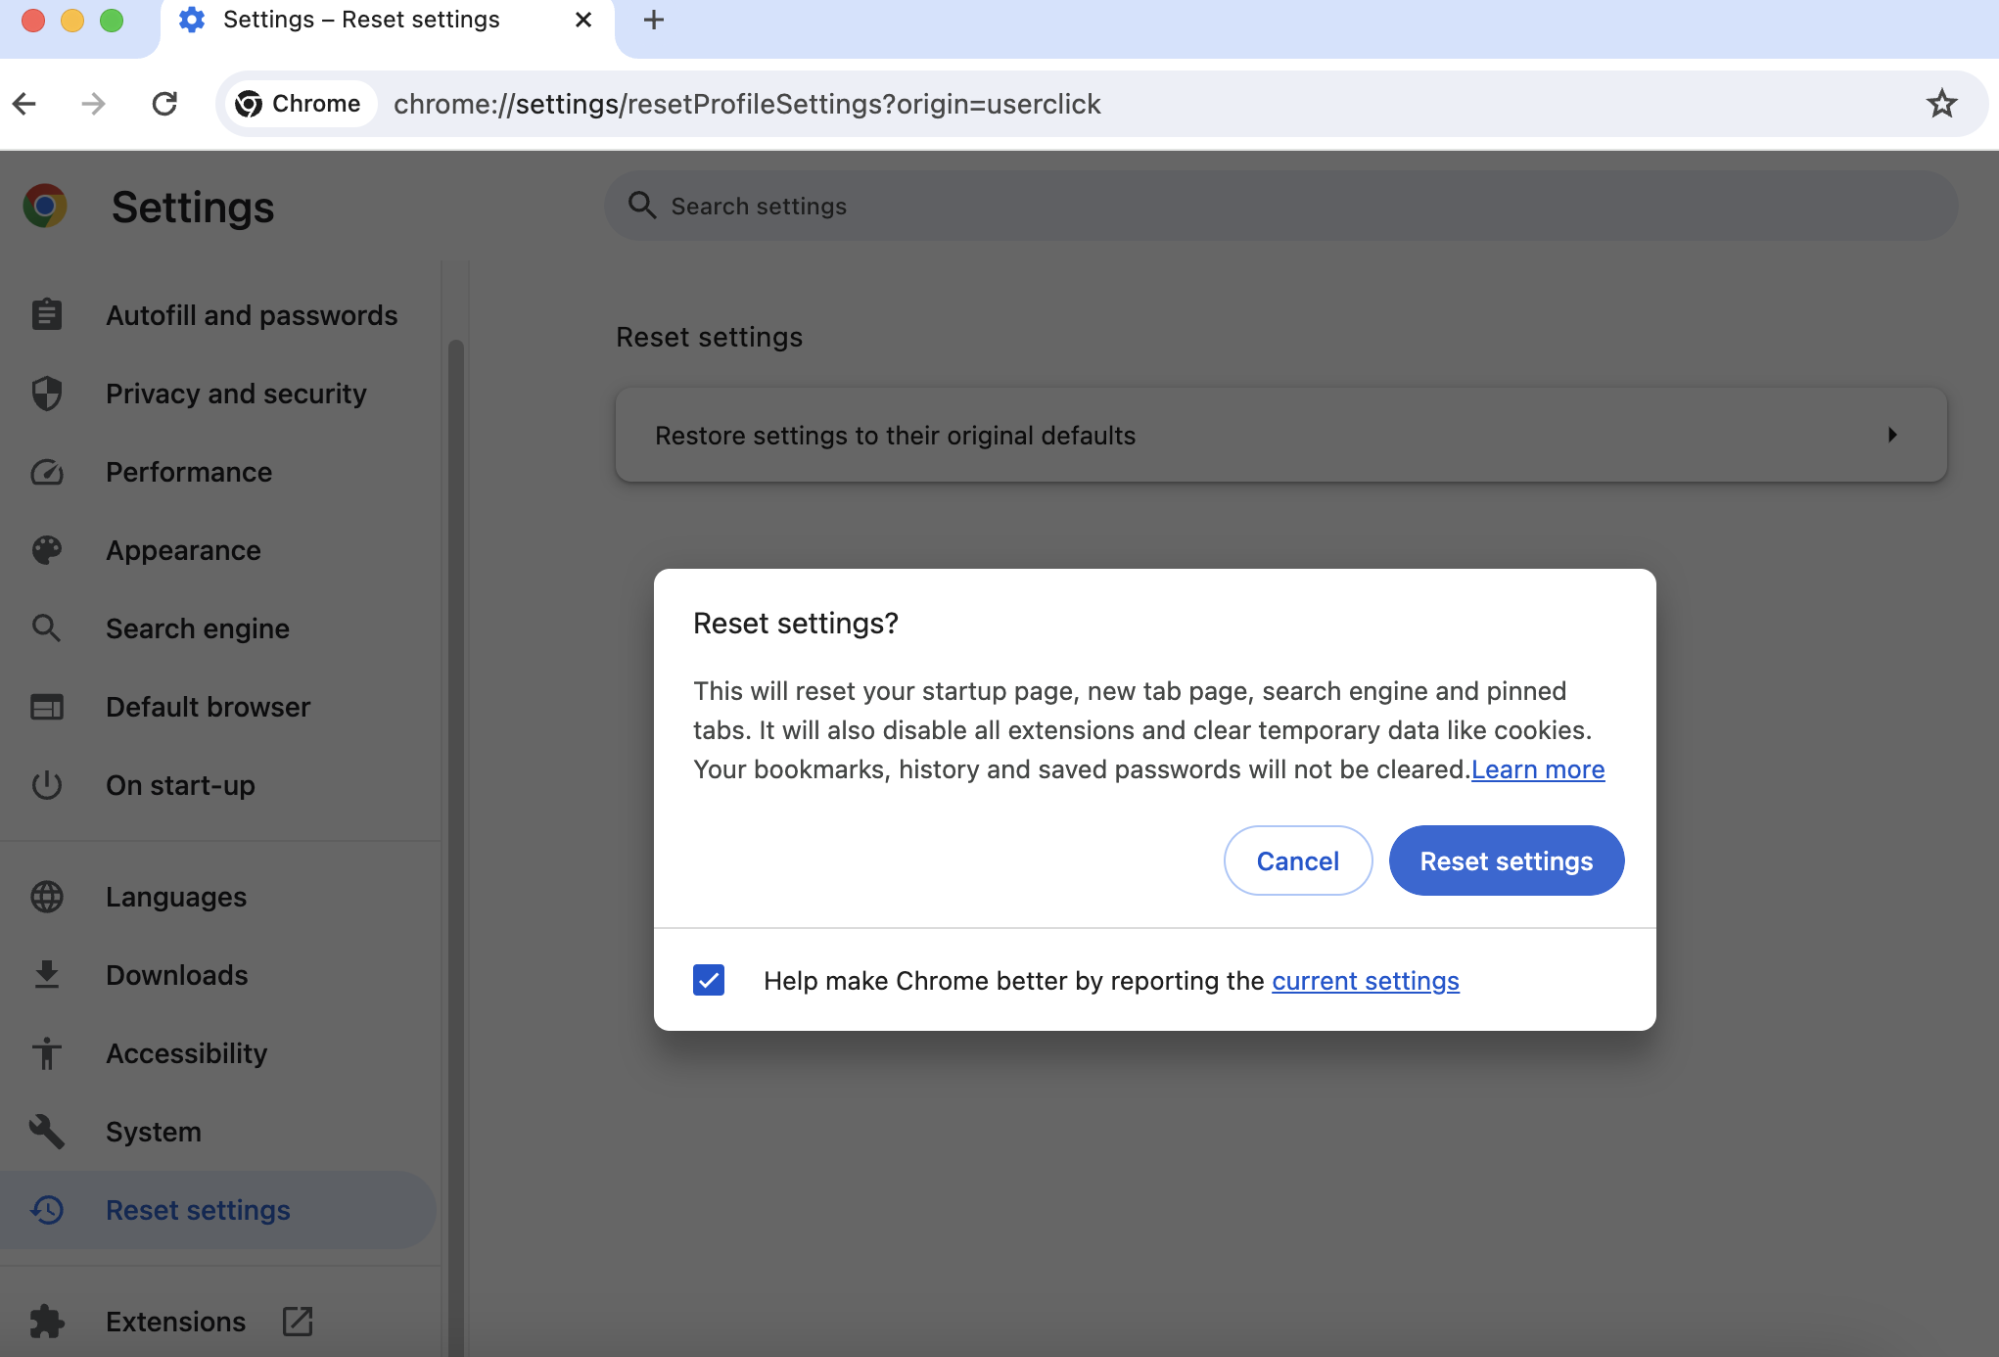
- Click on Restore settings to their original defaults.
- When a confirmation dialog will appear, click on Reset settings to confirm.
Tip from our team:
If you’re only using Chrome because Safari keeps crashing, then our supporting guide should help walk you through troubleshooting the browser and restoring it to its former glory. Try it yourself.
3. Check updates for your macOS
Another solution to stop Chrome from freezing on Mac would be to check that your macOS is up-to-date. Keeping your macOS renewed with necessary updates is crucial for maintaining system stability and resolving compatibility issues that could result in Chrome not responding on Mac.
To check for updates for your macOS, follow these steps:
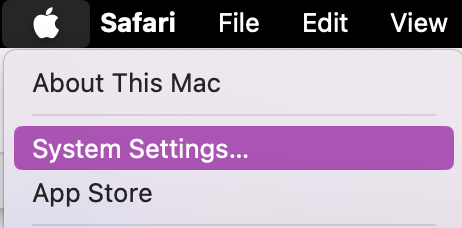
- Click on the Apple logo in the top-left corner of your screen.
- Select System Settings from the dropdown menu.
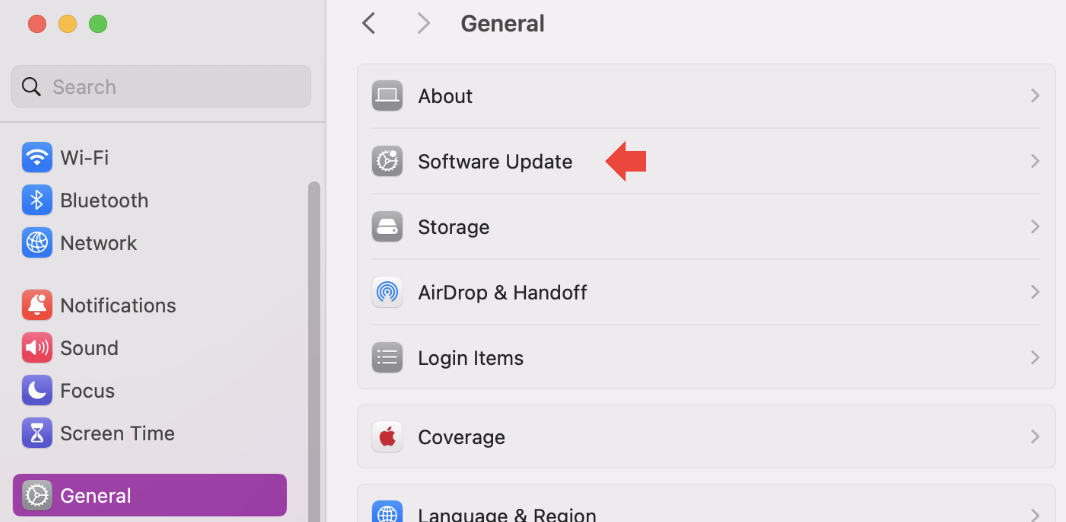
- Then go to General >Software Update.
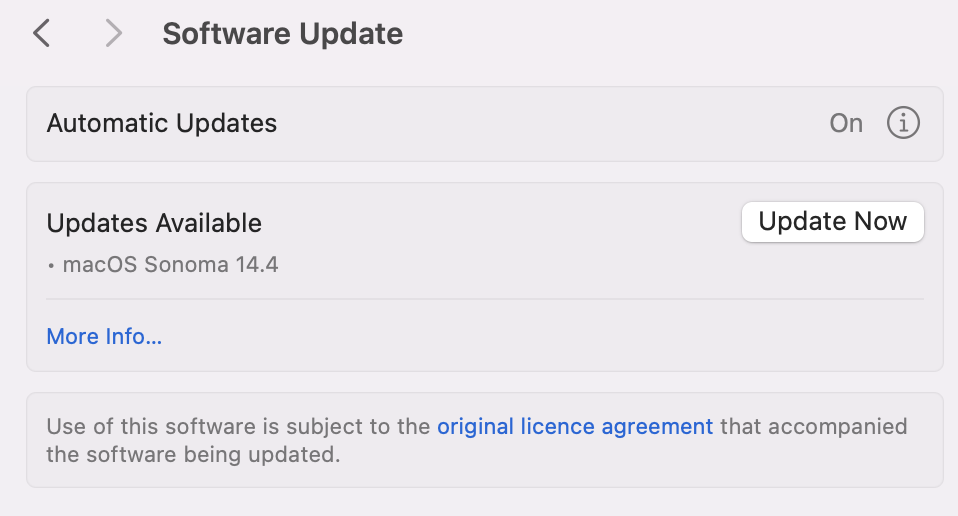
- Your Mac will then check for available updates. If updates are found, click on the Update Now button to install them.
- Follow the on-screen instructions to complete the update process.
4. Update Chrome and extensions
Keeping Chrome and your installed extensions up-to-date is essential for ensuring optimal performance and resolving unexpected glitching or compatibility issues that could lead to freezing on your Mac.
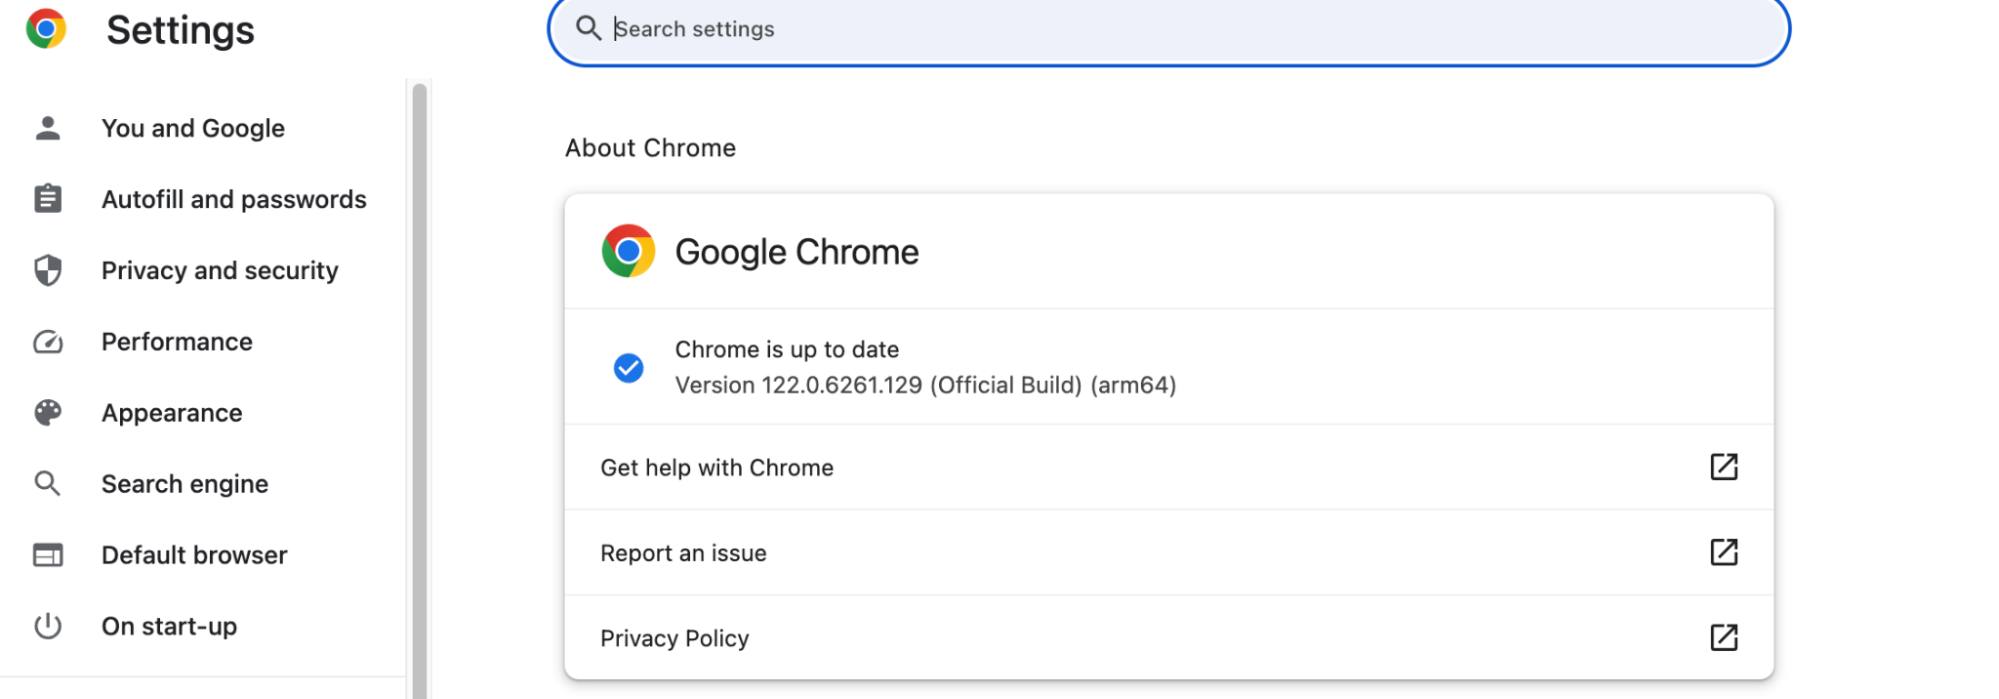
To update Chrome:
- Open Google Chrome.
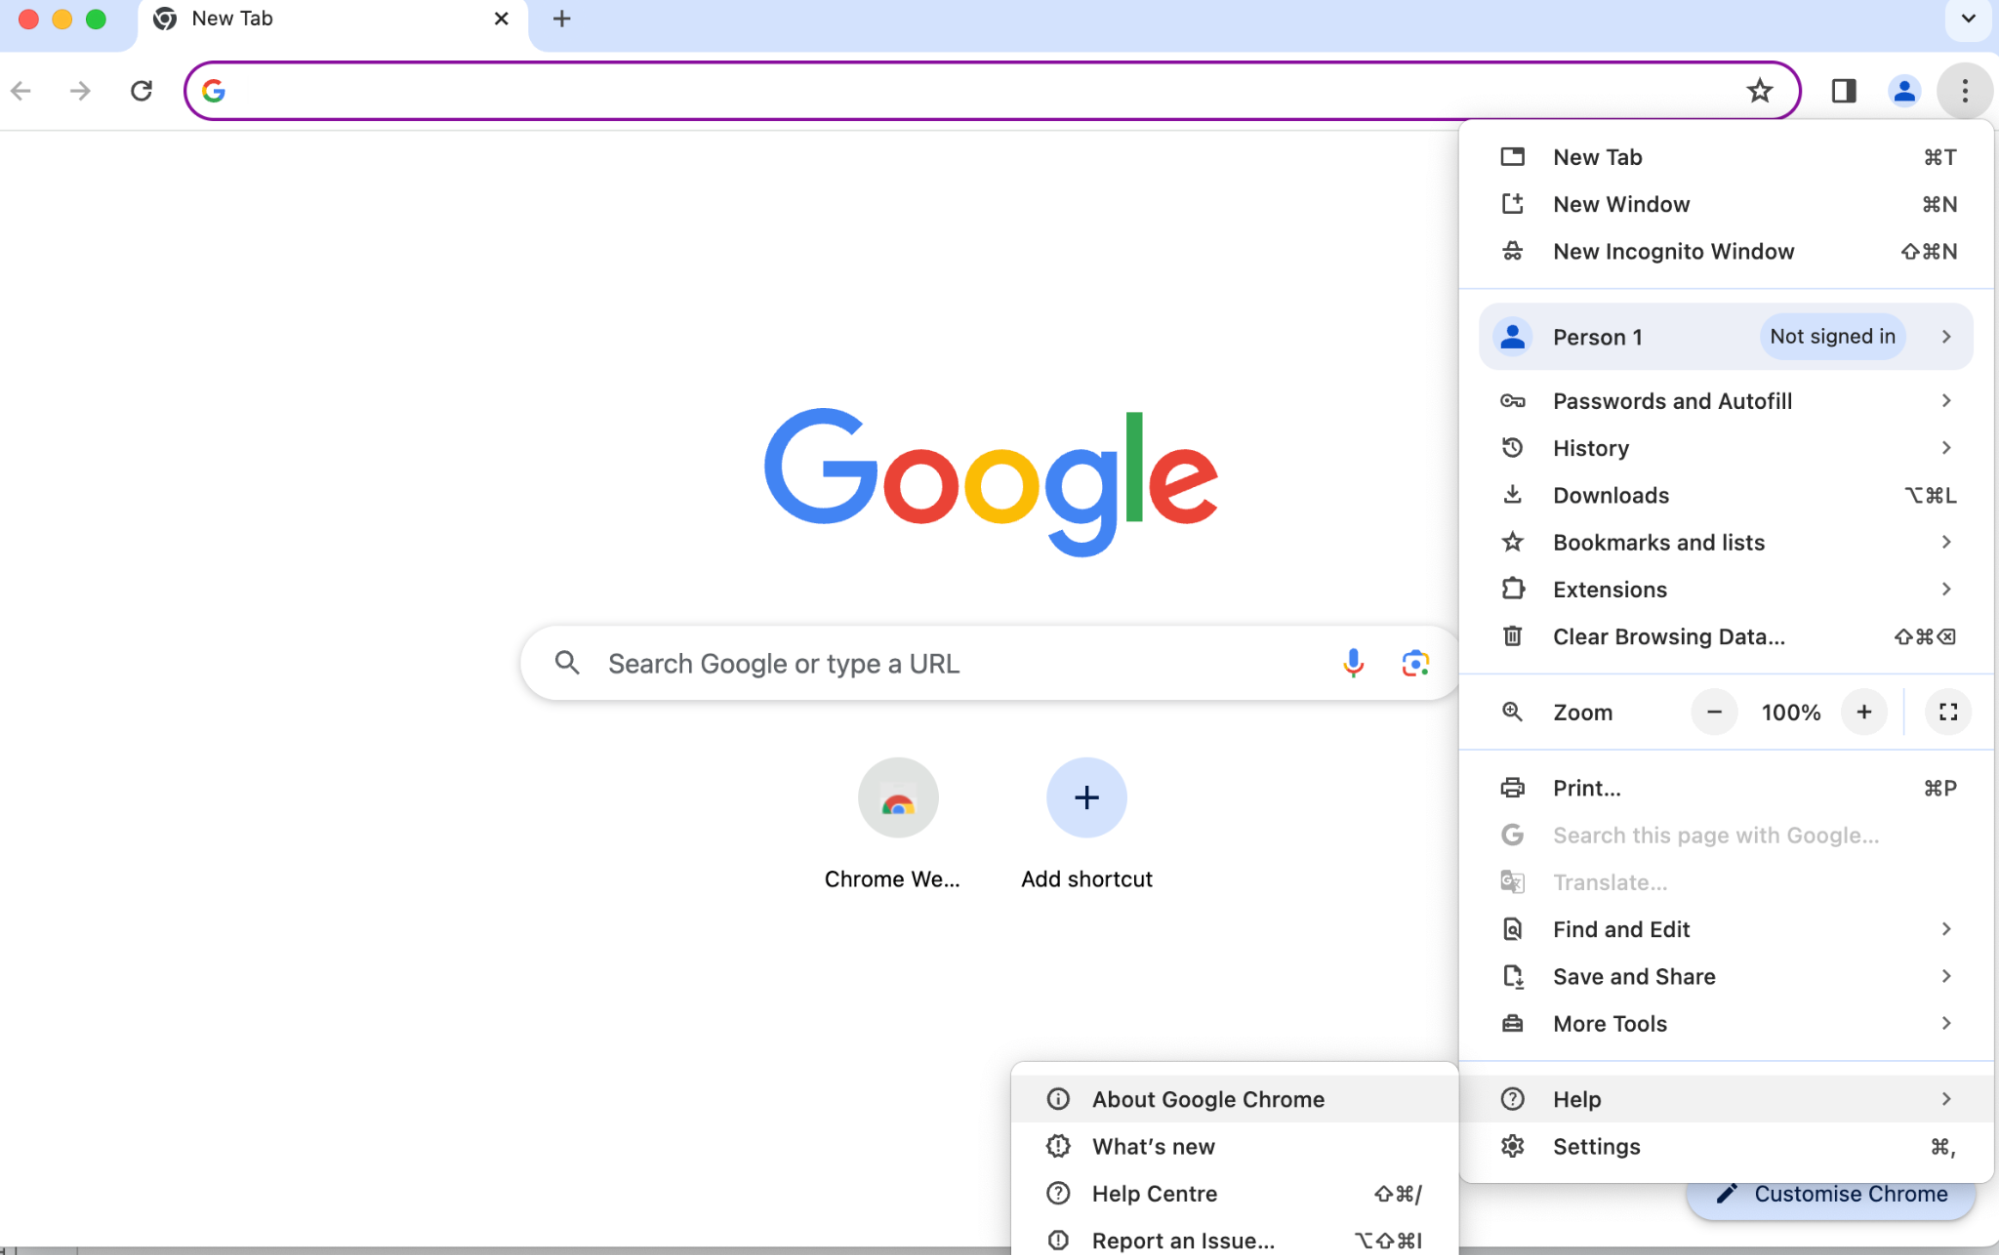
- Click on the three-dot menu icon and hover over Help.
- Select About Google Chrome.
- Chrome will automatically check for updates and install them if available.
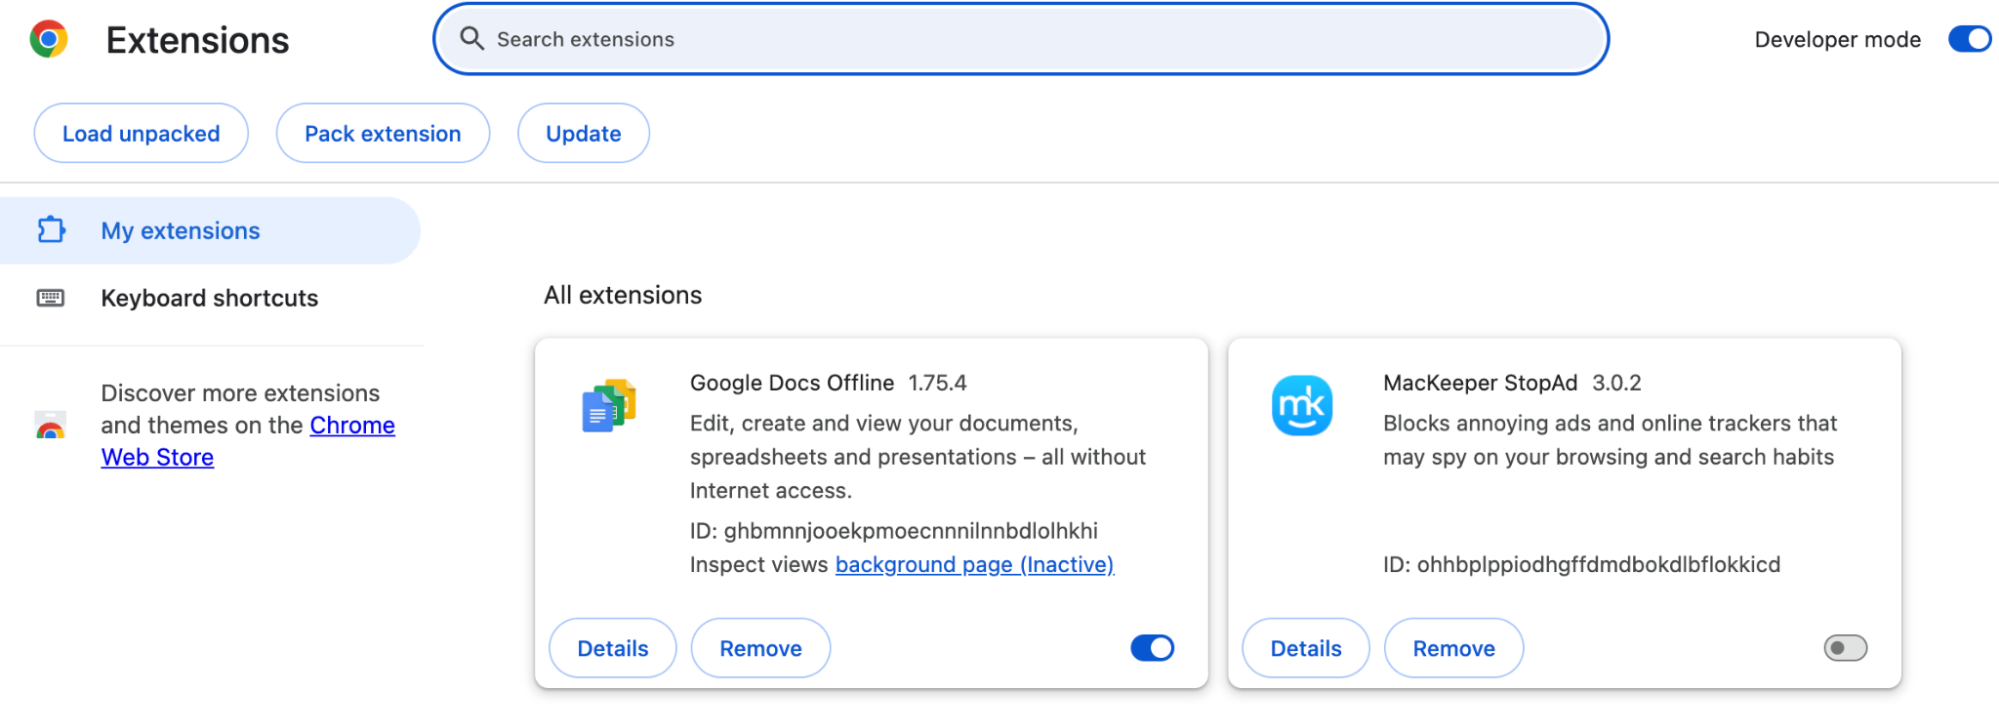
To update Chrome extensions:
- Click on the three-dot menu icon again, click on Extensions > Manage Extensions.
- Toggle the Developer mode switch in the top-right corner.
- Click on the Update button for each extension to ensure they are all up-to-date.

Hint from our experts:
After you update Chrome and extensions, don’t forget to refresh the browser to ensure changes are saved. If you‘re unsure how to refresh on Mac, this guide can show you how.
5. Turn off extensions or plugins
Disabling extensions or plugins in Chrome can also help troubleshoot any glitching or freezing issues you’re experiencing while browsing Chrome on your MacBook or Apple computer.
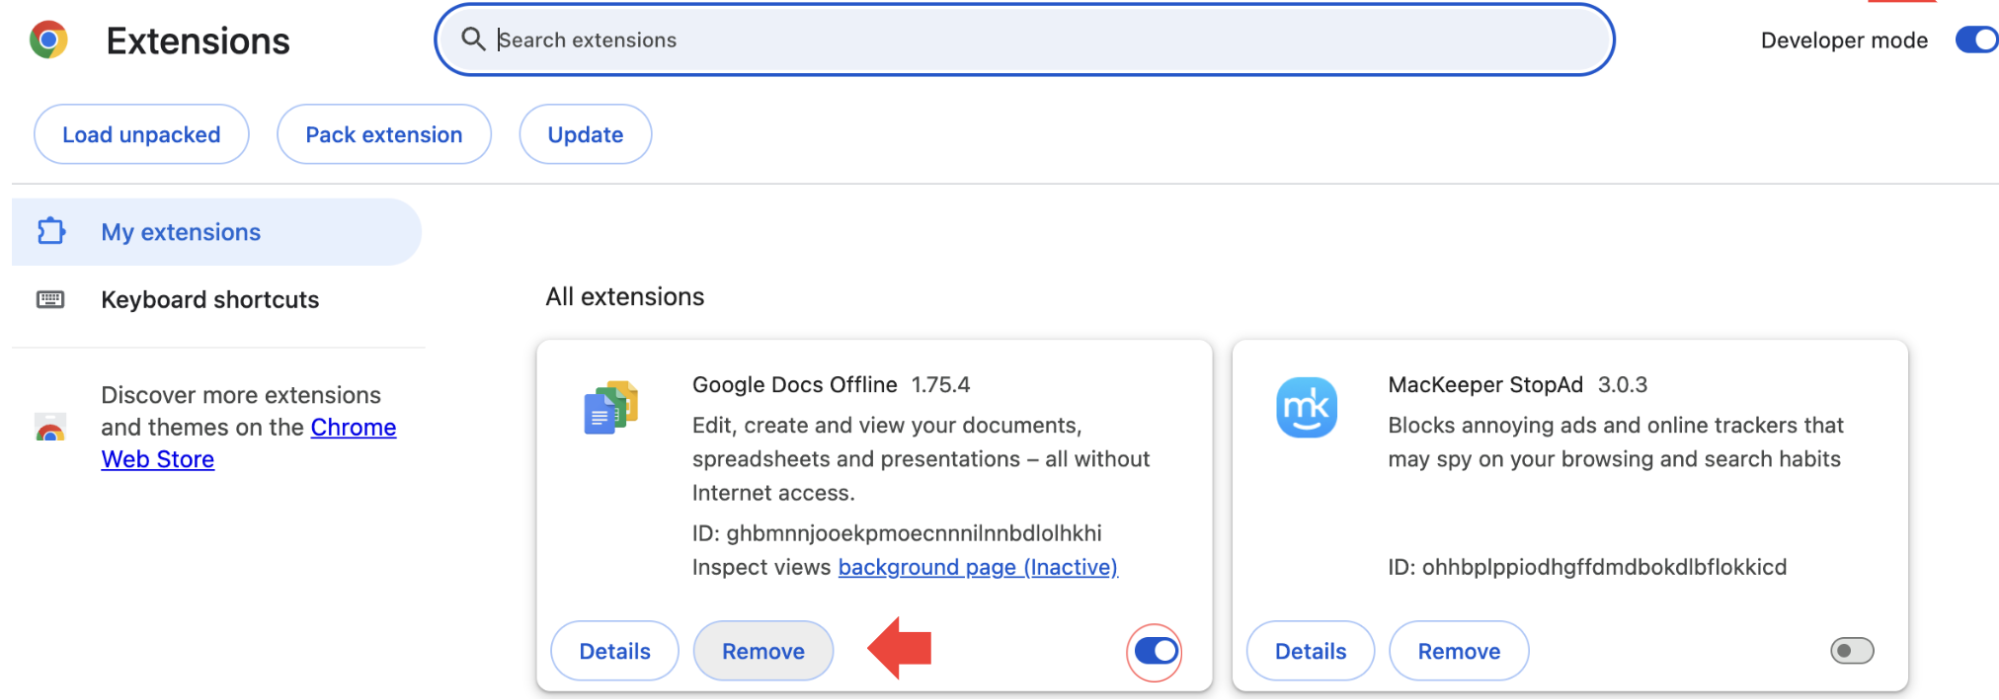
Here's how to turn off unwanted extensions or plugins:
- Open Google Chrome.
- Click on the three-dot menu icon in the top-right corner of the browser window.
- Hover over Extensions and click Manage Extensions.
- Toggle off the switch next to each extension or plugin to disable them one by one.

6. Restart Chrome
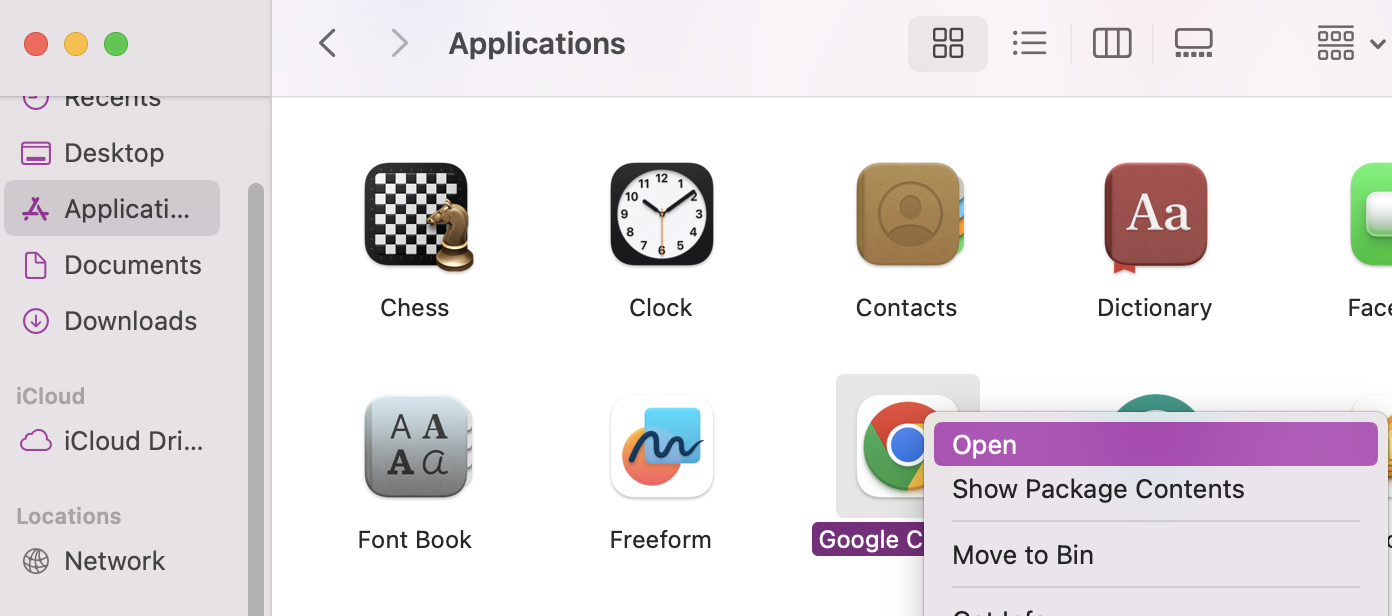
Sometimes, a simple restart of Chrome can remedy the issue of Chrome being frozen on Mac. Here's how to restart Chrome to help fix lagging and slowness:
- Close all Chrome windows and tabs.
- Reopen Google Chrome from your applications folder or dock.
7. Check system resources and CPU
Monitoring your Mac's system resources and CPU usage can help identify if resource-intensive programs or processes are causing Chrome to not respond on Mac. This could also cause issues with your MacBook overheating. If so, they could be the cause behind unexpected slowness and glitches.
Here's how you can check your system’s resources and CPU:
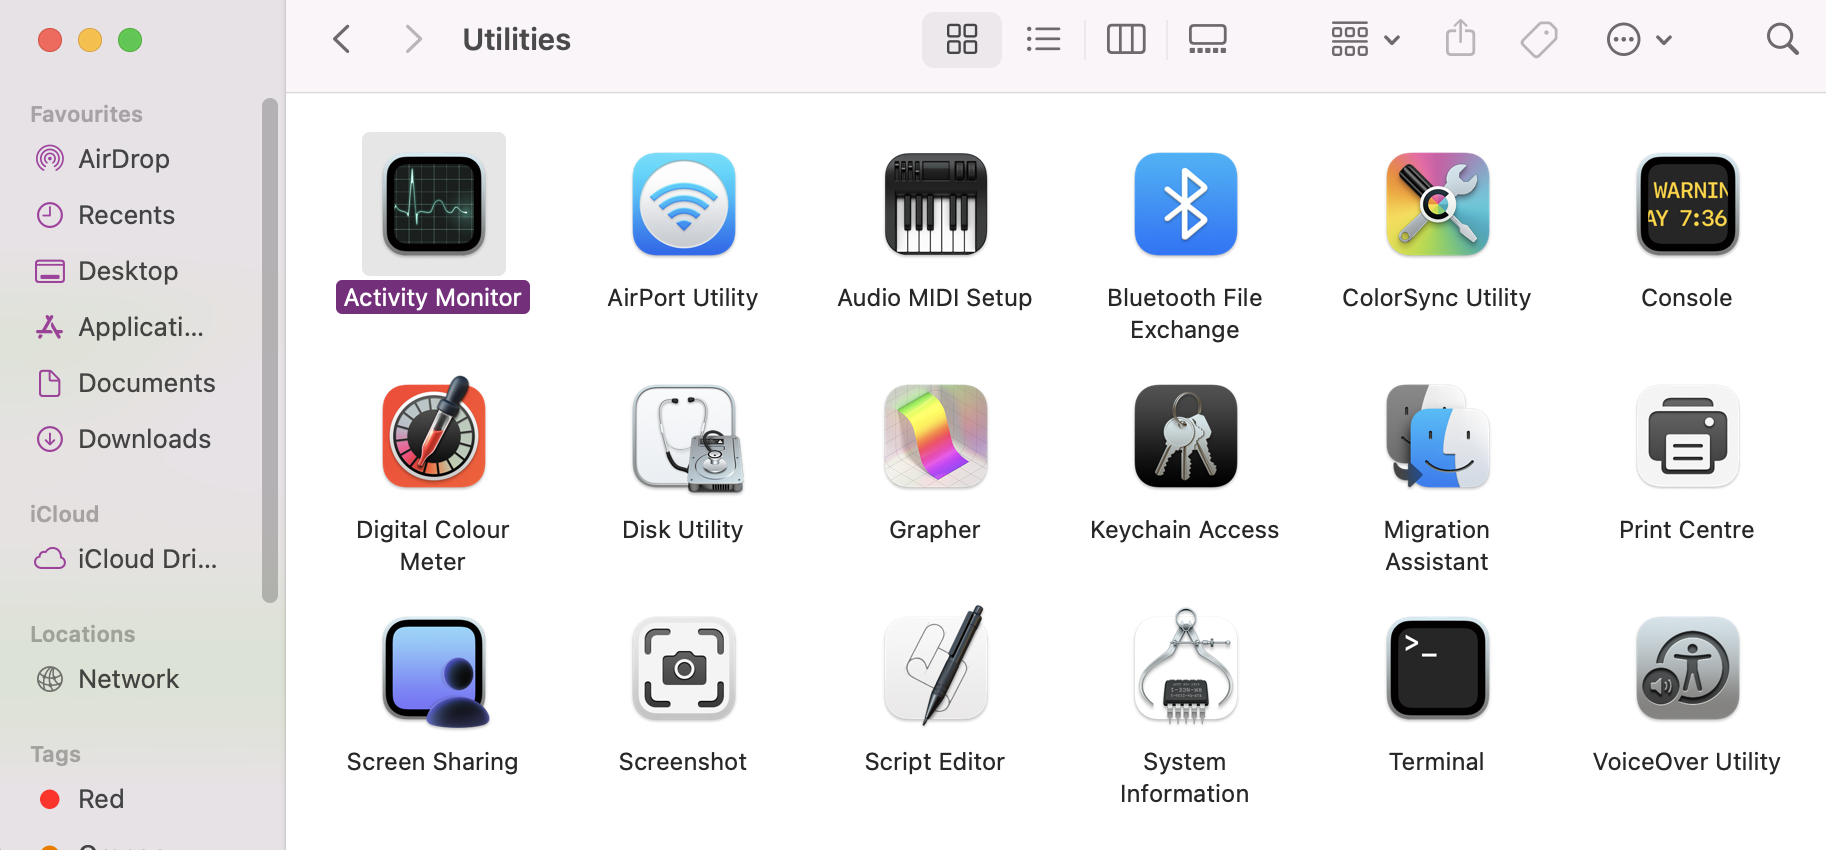
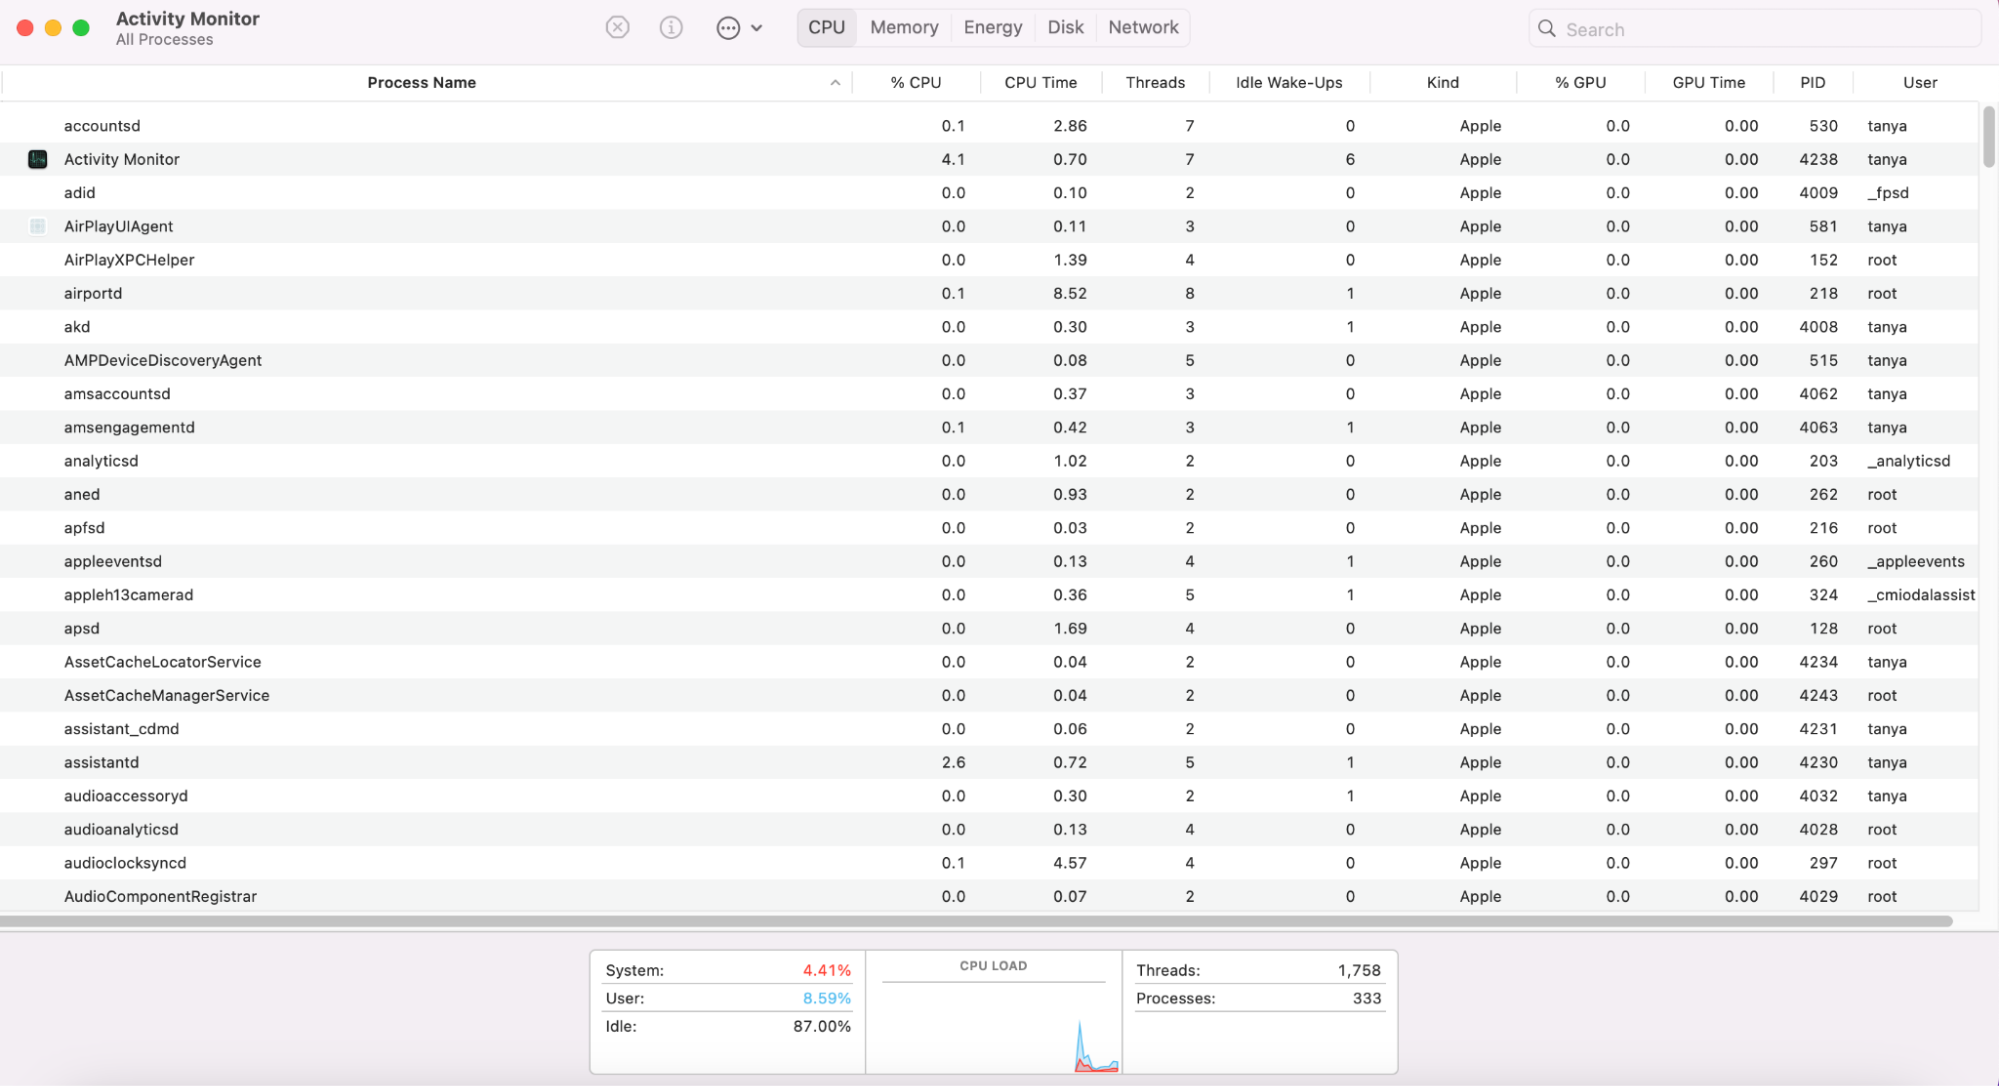
- In Finder, go to Applications > Utilities > Activity Monitor.
- Click on the CPU tab to view CPU usage.
- Look for any processes consuming high CPU resources, especially when Chrome freezes. Quit any that are very high, or you don’t recognize.
8. Install the StopAd extension
Another handy solution to help fix Chrome frozen on Mac could be to install a reliable ad blocker extension, like MacKeeper’s StopAd. This extension will improve Chrome's performance by blocking intrusive ads and scripts.
Here's how you can install and use MacKeeper’s StopAd extension:
- Download and install MacKeeper.
- Open the app, select StopAd on the left, and click Install/Enable for the relevant browser.
- Your web browser will now show the StopAd page of the Chrome Web Store. Click Add to Chrome and confirm by clicking Add extension.
9. Scan your Mac for malware
If you’ve exhausted all other solutions unsuccessfully, then your computer might be infected with malware, which can sometimes be the cause of Chrome not responding on Mac. We advise routinely running a malware scan on your MacBook computer. With the help of a third-party app, like MacKeeper, detecting and removing malicious software becomes quicker and easier.
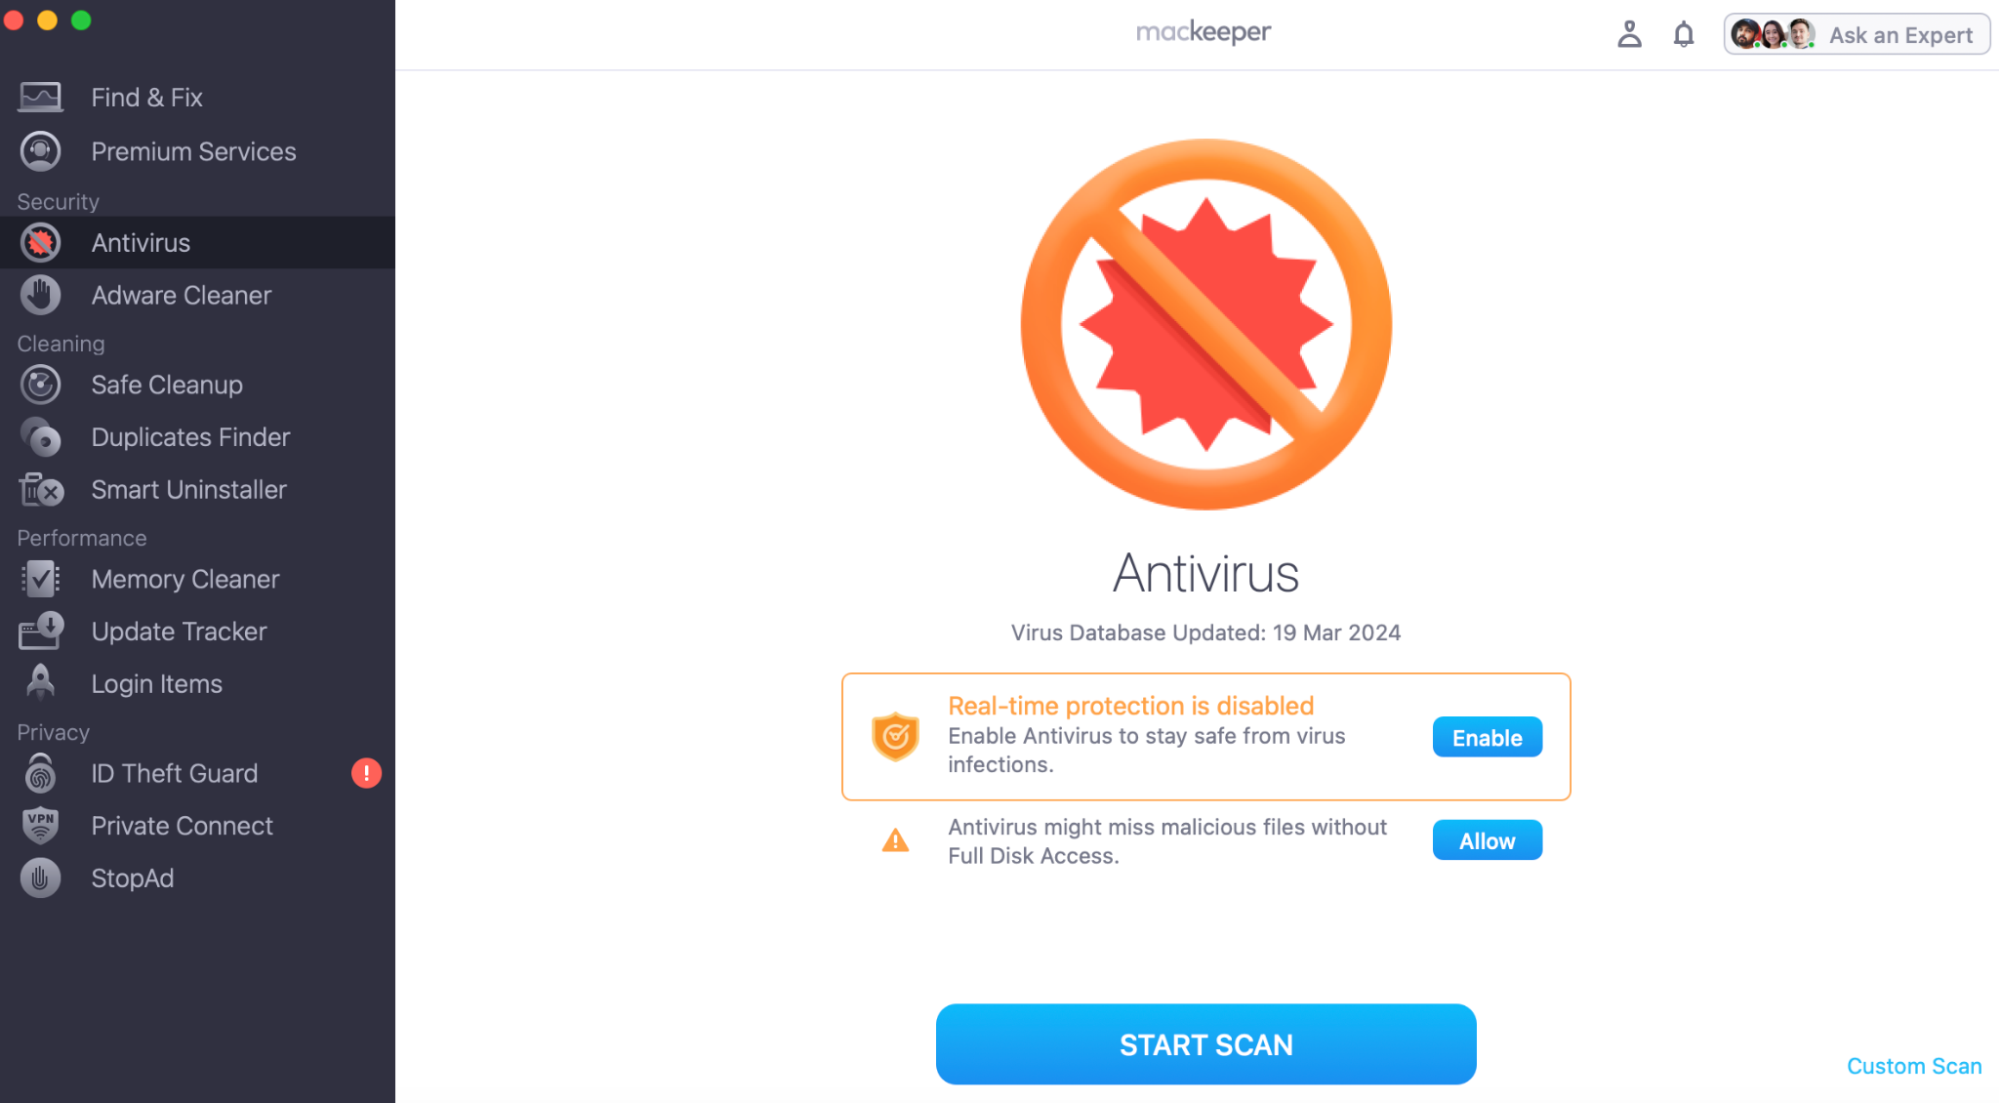
Here's how you can use MacKeeper’s Antivirus to scan your Mac for malware:
- Open the MacKeeper app.
- Choose Antivirus, and click Start Scan.
- Make sure to enable Real-time protection and full disk access.
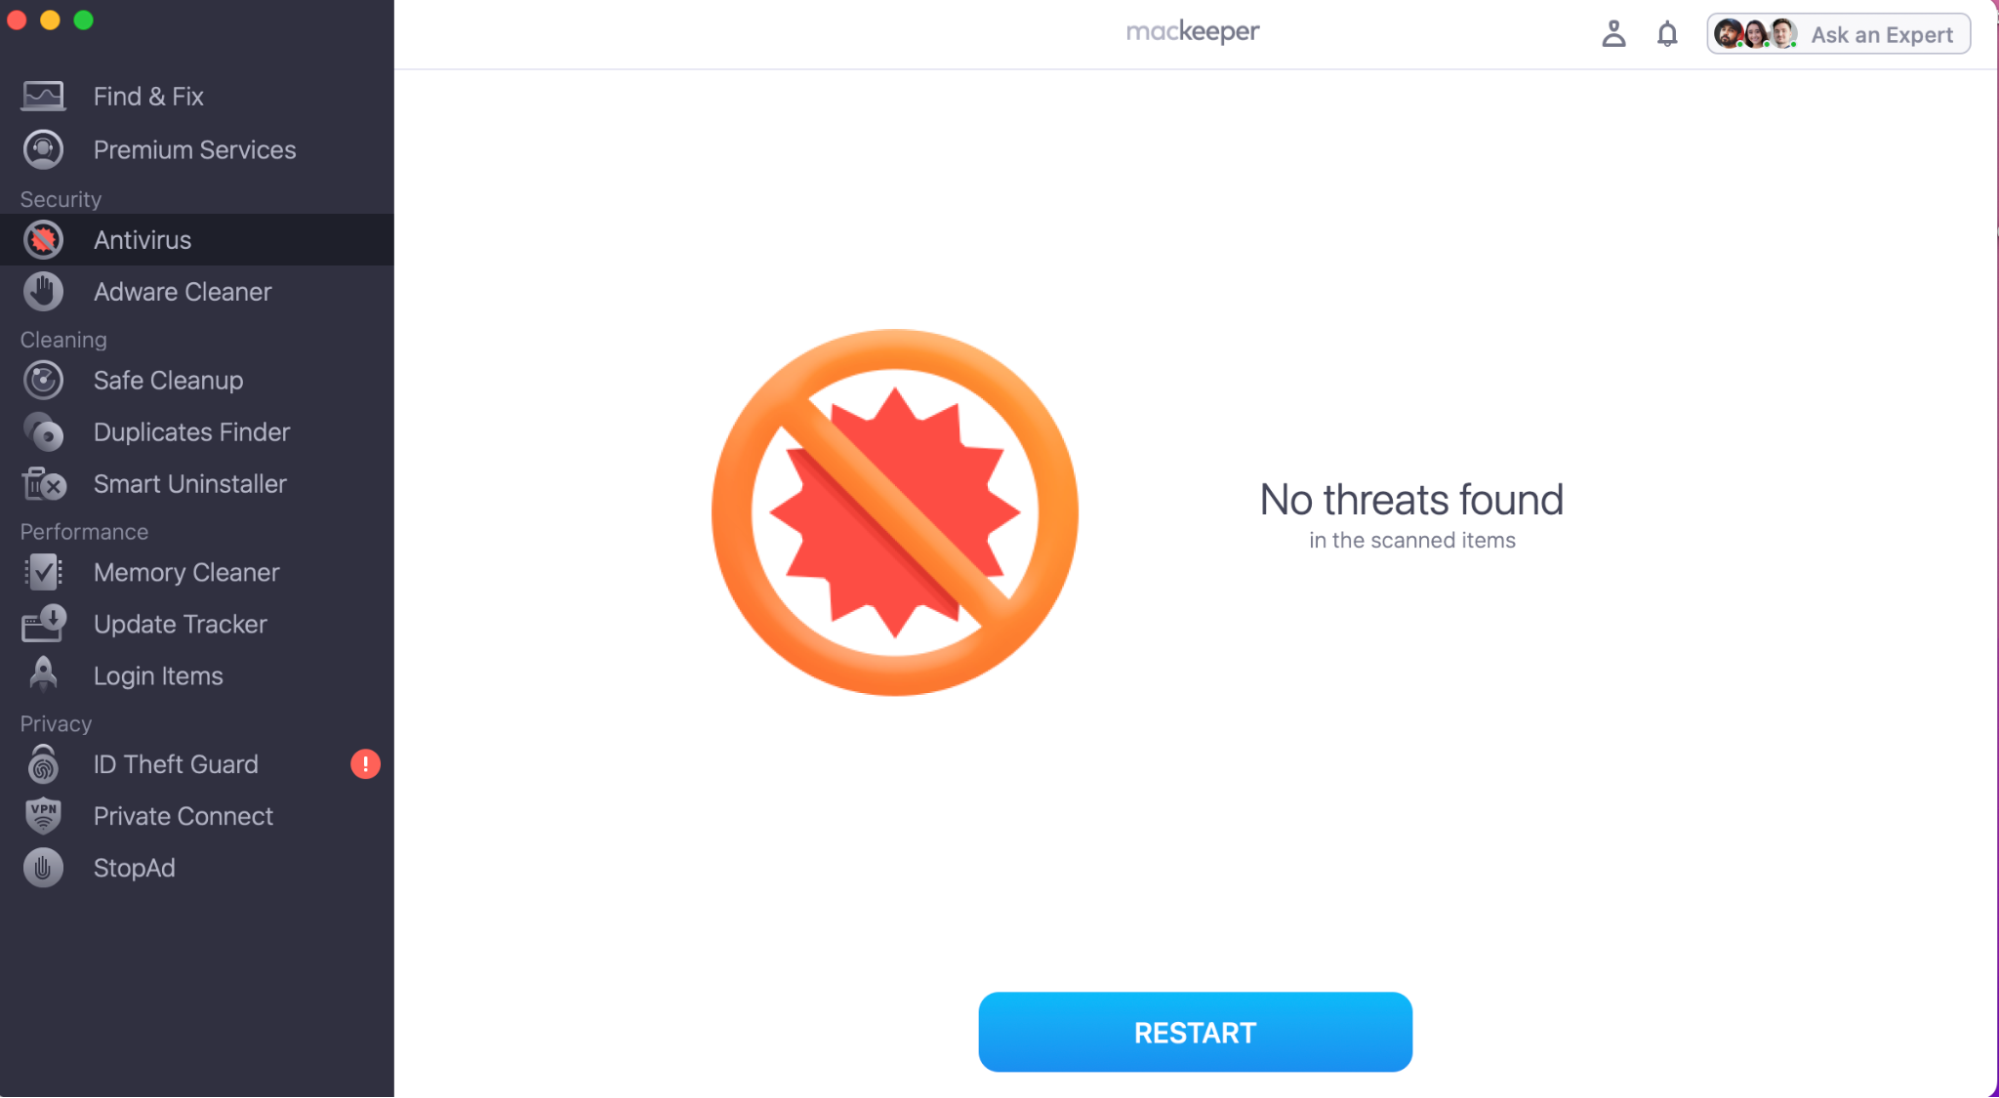
- If any threats are found, follow the on-screen prompts to move the malware to Quarantine.
Important:
A common type of malware that can be hiding on your Mac is called the Trojan virus, and it’s known to be a pest to remove. To learn how to remove the Trojan virus correctly, follow our step-by-step guide.
Smooth Chrome on Mac: Set your browser to work safely
Addressing glitching or freezing issues when Chrome’s not responding on your Mac doesn't have to feel overwhelming. By applying the solutions we've discussed, ranging from clearing cache to checking for malware, you'll find yourself regaining control over your browsing experience, ensuring smoother and more efficient sessions.
Also, don't forget about using MacKeeper's StopAd feature. It's a powerful tool that not only prevents unwanted ads from cluttering your browsing experience but also enhances your online privacy by blocking trackers. With StopAd, you have the power to customize your ad experience while maintaining control over your digital footprint.


