We’ve all deleted important files by mistake. But, luckily, when you delete a file from your Mac, it’s rarely gone forever. In fact, there are a few ways to restore deleted files from your Mac — you can even recover some files after emptying the Trash.
We’ll show you how to recover deleted files on your Mac, starting with the easiest method and working up to the trickier — but more effective options.
Before we start
If lots of files keep going missing, and you’re sure you didn’t delete them yourself, there might be some malware infecting your Mac. Malware comes in all shapes and sizes, and it’s possible to get malware on a Mac just like it is on a Windows PC.
Download MacKeeper to scan your Mac for free. Not only will this scan turn up any malware infecting your Mac, but you can also use it to free up more storage by deleting junk files clogging up your computer.
How is it possible to restore deleted files on a Mac?
For the best chance of data recovery, you need to stop using your Mac as soon as possible after deleting an important file. Not using your Mac will reduce the risk of it overwriting the deleted file to make space for new data.
This is because deleting a file on your Mac doesn’t actually delete it. Usually, deleted files get moved to the Trash folder where they stay until you choose to empty it — you might have set up your Mac to automatically empty the Trash every 30 days — but even emptying the Trash doesn’t truly delete a file from your Mac.
When a file is deleted from the Trash, your Mac stops showing it to you, but it still keeps that data written on the hard disk. Your Mac keeps this data behind the scenes until it needs to reclaim the space for new files, at which point it finally writes over the data, deleting it forever.
This is what makes it possible to recover deleted files from your Mac, even after you’ve emptied the Trash.
The sooner you stop using your Mac, the better. Once you’ve done so, follow these steps to get your files back.
1. Undo your last action to recover recently deleted files
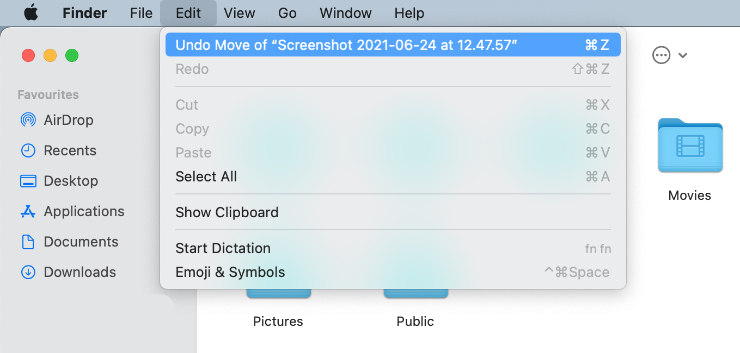
If you only just deleted something, the easiest way to recover it is by using the Undo action. This is usually only possible if you’re still using the same app you deleted the file from, be it Finder, Word, Photos, or another app.
Unfortunately, you can’t keep undoing your actions forever, so this option will only help if deleting the file was one of the last things you did.
Here’s how to restore a deleted file using the Undo action:
- In the app you were using, press Cmd + Z or go to Edit > Undo [Action] from the menu bar
- Keep repeating the previous step until you undo the delete action
- Your deleted file will be restored to its original location
2. Search the Trash to find and put back deleted files
The most common way to restore deleted files on a Mac is to find them in the Trash. This is a special folder that all your deleted files go to; they stay there until you choose to empty the Trash.
To restore deleted files from the Trash on your Mac:
- Click the Trash icon in the Dock to open it
- Browse the deleted files or use the search bar to find what you’re looking for
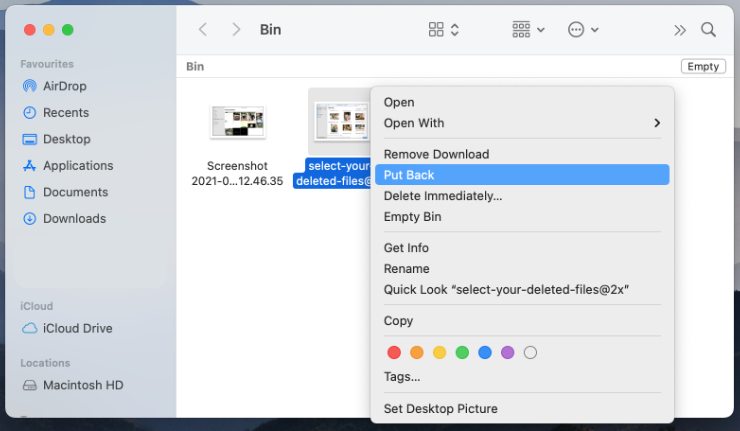
- When you find the deleted file you want to recover, Control-click on it and select Put Back from the pop-up menu
- Your deleted file will be restored to its original location
If you can’t find your deleted file in the Trash, it’s possible that it was never deleted properly. In fact, the file might have simply been moved to an unexpected place on your Mac. In which case, you can find it by searching your Mac:
- Using Spotlight: Press Cmd + Space to open Spotlight and type the name of your file to search for it. If Spotlight finds the file, click to open it, then save it to a new location
- Using Finder: Open a new Finder window and type the name of your file into the search bar in the top-right corner. Select This Mac above the search results to ensure you search your entire Mac. If Finder finds the file, click-and-drag to move it to a new location.
3. Check the Recently Deleted folder in different apps
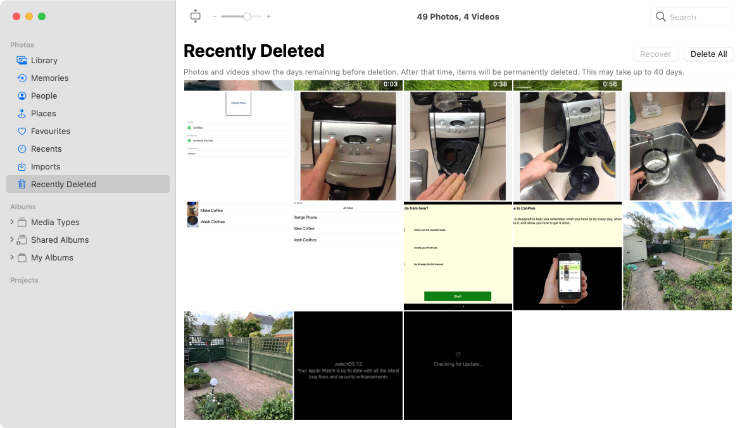
Not all deleted files go to the Trash. Some apps include a Recently Deleted folder, which automatically holds onto deleted files for 30 days, rather than sending them to the Trash.
This is particularly common in stock Apple apps, like Photos or Notes. But some third-party apps include similar features as well.
Open the app you deleted your missing file from and look around in the in-app albums, folders, or settings to see if there’s a Recently Deleted folder. Third-party apps may use a different name, like Trash or Deleted.
If you find one of these folders, search through it for your deleted file and use the in-app options to Put Back, Recover, or Restore it. This should return the file to its original location in the app.
4. Restore deleted files from a Time Machine backup
If you use Time Machine to back up your Mac, you should be able to recover deleted files from a previous backup.
Even if you haven’t made a backup in a while, your Mac automatically creates local snapshots for Time Machine, which might have your deleted files in them. To access these snapshots, just connect your Time Machine drive and complete a new backup — macOS will transfer the local snapshots across automatically.
Follow these steps to recover deleted files on your Mac using Time Machine:
- Connect your Time Machine backup drive
- Open a Finder window and navigate to the folder where your file was deleted from. Alternatively, open the relevant app the file was deleted from, like Pages
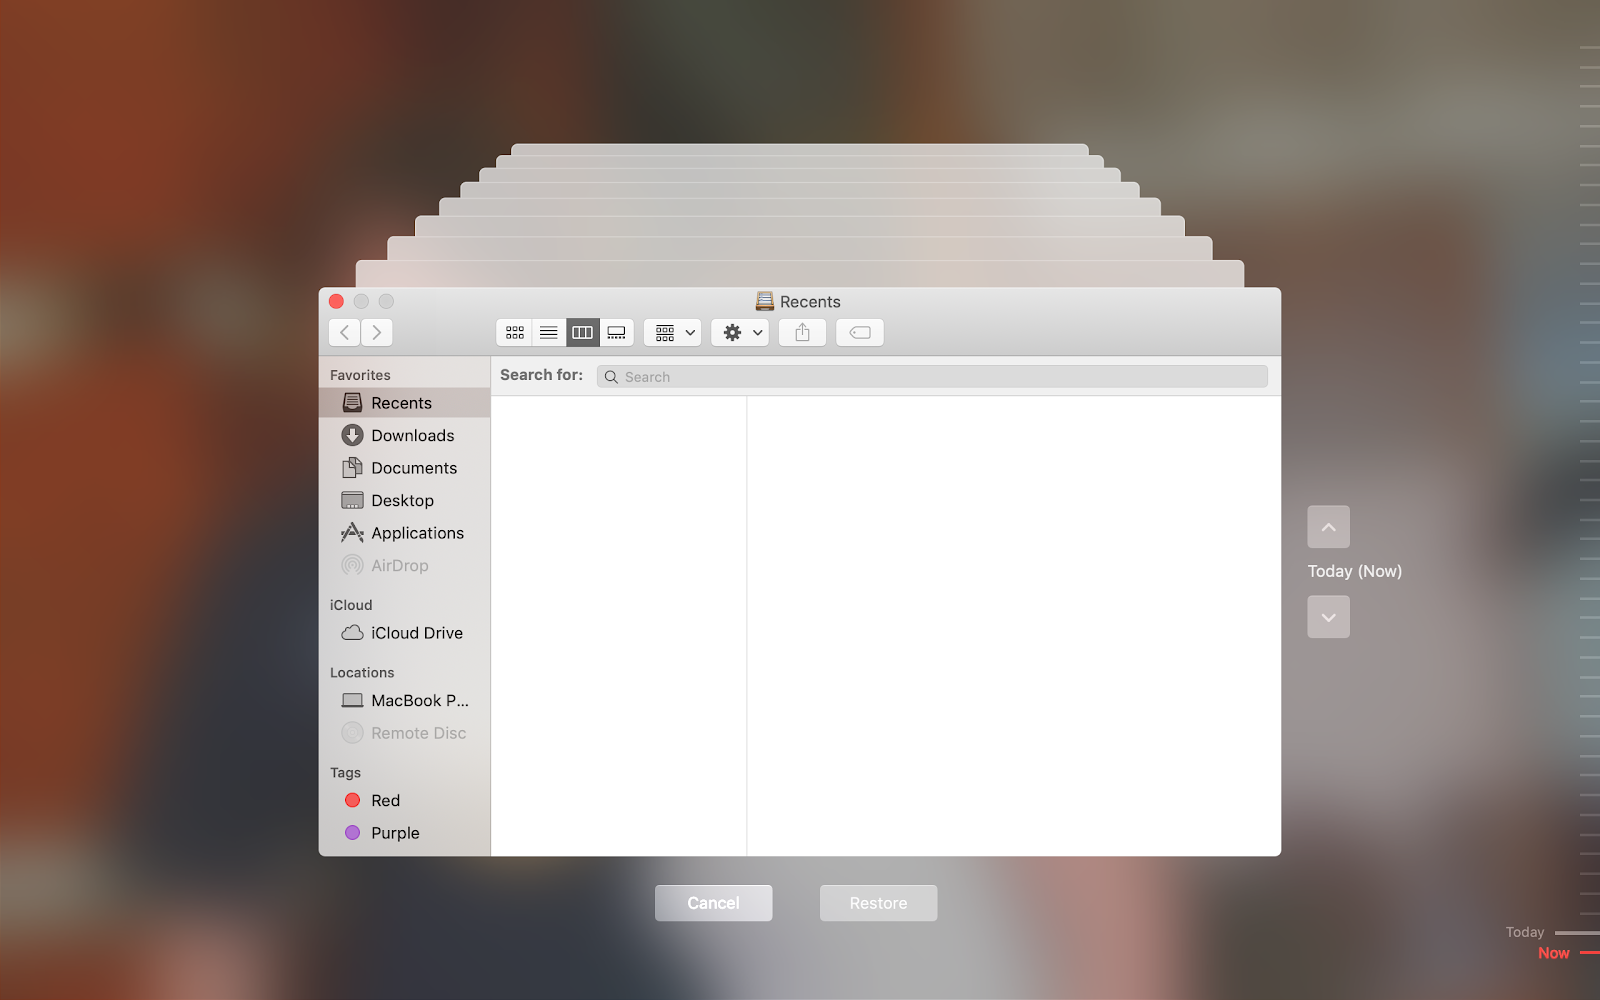
- Press Cmd + Space to launch Spotlight, then type Time Machine and hit Return to enter Time Machine
- Use the arrows on the right of the screen to move back in time to before the file was deleted. You should see it appear in the Time Machine window
- Select the deleted file, then click Restore
You can also use these steps to recover deleted files using third-party Mac backup software.
5. Use a third-party data recovery app
Numerous third-party apps are available that can help you recover deleted files on your Mac, even if you already emptied the Trash. Most of these apps achieve this by taking advantage that macOS doesn’t immediately overwrite any data when you delete a file.
One app you can use to recover deleted files is Stellar Data Recovery for Mac. Stellar is free to use, though you can also use a paid option if you’d prefer.
To use Stellar Data Recovery on your Mac, follow these steps:
1. Launch Stellar and Select What to Recover
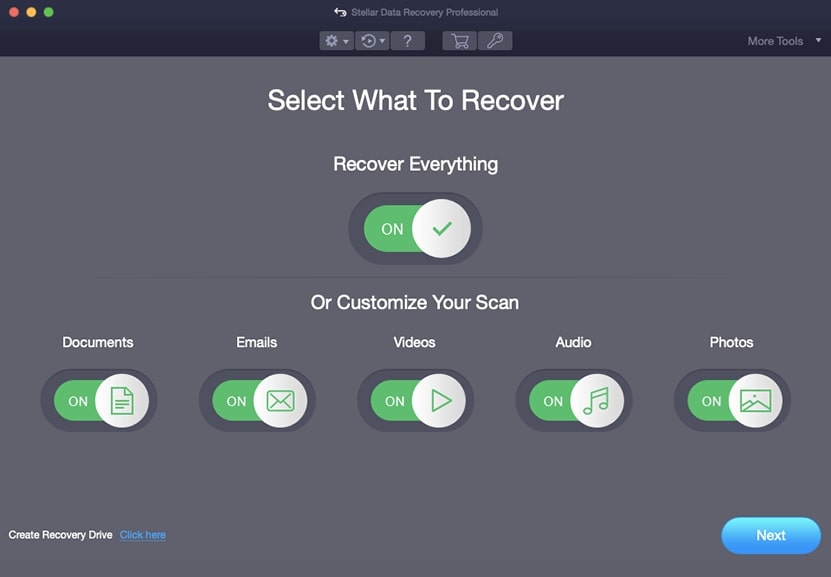
2. After selecting the desired files format now select the drive you’d like to scan
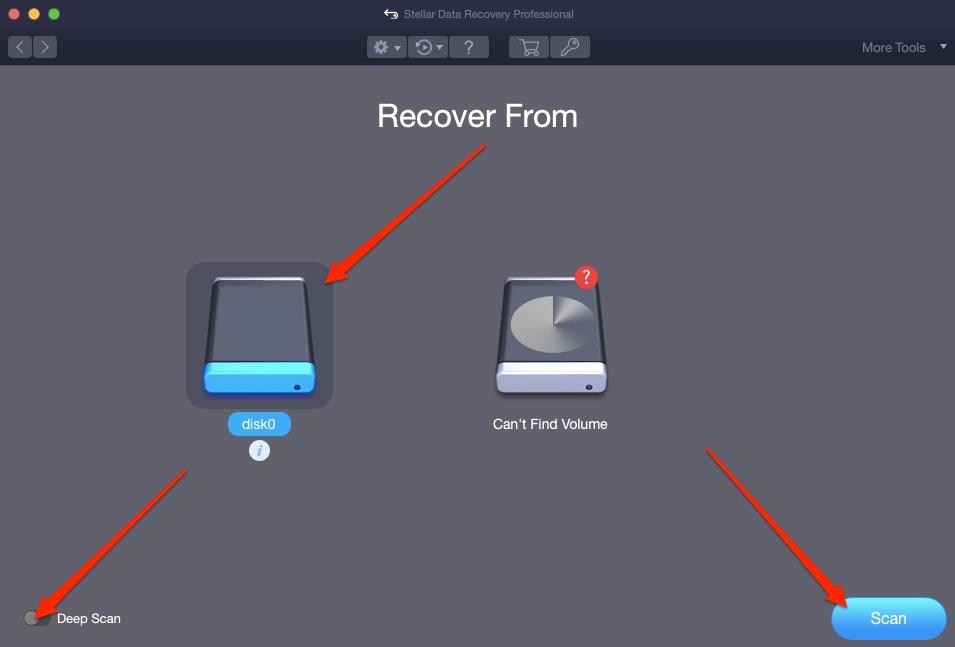
3. In the bottom right of the page, press Scan. If you want to go into real detail, toggle the Deep Scan feature in the bottom left after selecting your disk drive
4. If you haven’t got recoverable files during a normal scan, your app will perform a deep scan. If you’ve got files that you’d like to recover, these will show up in a list; select the ones you’d like to retrieve and click on Recover
Another popular data recovery app right now is probably Disk Drill.
Although you can download Disk Drill for free, you need to buy a PRO membership, which costs $89, in order to recover any deleted files. That said, we don’t recommend you pay for this before letting Disk Drill scan your Mac for recoverable files.
To use Disk Drill, follow these steps:
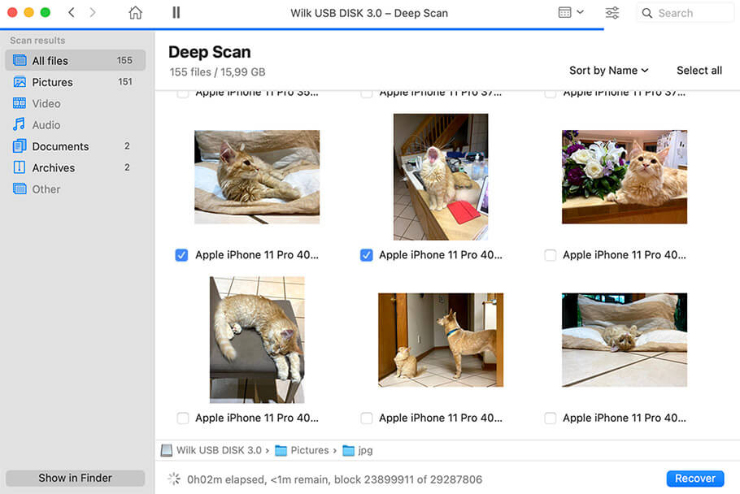
- Launch Disk Drill and give it permission to scan your drive. You will need to enter your Mac administrator’s password to allow this
- Agree to use the Basic Edition to complete the scan, then wait for it to complete
- If the scan turned up any recoverable files on your Mac, upgrade to a PRO membership
- Select the deleted file you want and click Recover
6. Hire a data recovery specialist
If you’re still unable to restore the deleted files on your Mac, it’s time to speak to a data recovery specialist. These specialists can offer a range of professional services to recover data from your Mac, though they can be quite costly and are rarely guaranteed to work.
Search for a reputable data recovery specialist in your area and speak to them about the options they can offer you. Hopefully, they’ll be able to restore the files that you lost.
Read more:


