How to Clear Photoshop Scratch Disk On Mac

Cleaning a Photoshop Scratch Disc can become a challenging task and take up a huge amount of time if you do it manually.
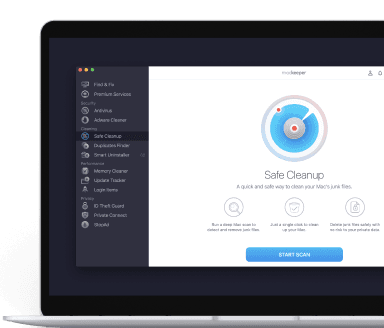
So if you want to speed up the process and free up your diary for other tasks, we have an alternative! All you need to do is to get MacKeeper—it has multiple tools to help you clean junk, cache, duplicates and free up your RAM, all in a couple of clicks.
Still if you want to dive deep in the process, let’s look at how to clear a scratch disk on your Mac in this article. We’re confident that at least one of these troubleshooting methods should do the trick.
How to Clear a Photoshop Scratch Disk on Mac
- What is a scratch disk?
- Why do I get a “scratch disks are full” error?
- How to fix the “scratch disks are full” error
- Fix scratch disk errors with ease
What is a scratch disk?
By default, active applications store temporary files on your Mac’s RAM (random access memory). However, with Photoshop, things are a little different. Like other apps, Photoshop stores temporary project files and data on your RAM, but if it fills that RAM, it'll use one of your hard disks to store any extra data. This makeshift memory is known as a “scratch disk”.
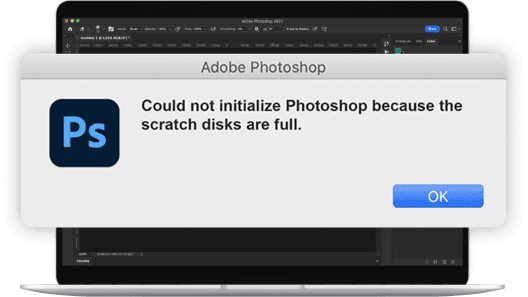
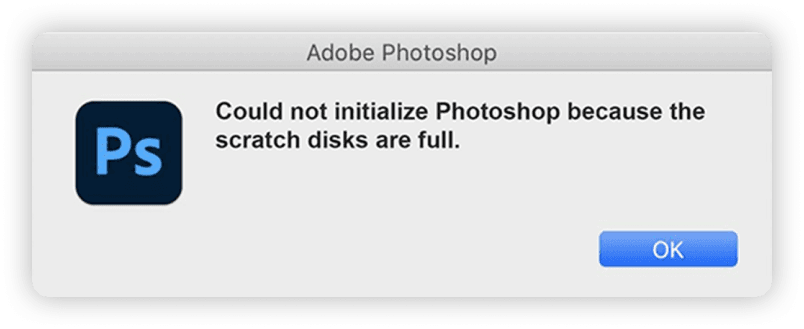
Why do I get a “scratch disks are full” error?
As you create and edit images in Photoshop, the app simultaneously creates a bunch of temporary cache files in the background. These files help Photoshop run faster, but they can quickly accumulate, running into tens or even hundreds of gigabytes, and filling up your hard drive in the process. This negatively impacts Photoshop's performance in the long run and can lead to the scratch disk error.
You may also get this error message if the temporary files aren’t removed from the scratch disk when you stop using the app. Typically, Photoshop, just like any other app, should purge temporary files from the RAM and scratch disk portions of your Mac’s hard drive. But that doesn’t always happen. If Photoshop crashes during usage or you force it to quit, the temporary files remain and accumulate.
To reiterate, the Photoshop scratch disk error occurs because:
- There's limited memory (RAM) available for Photoshop on your Mac
- The temporary virtual memory (scratch disk) partition of your Mac’s hard disk or SSD is also maxed out and unavailable.
How to fix the “scratch disks are full” error
1. Clear your Photoshop cache
By deleting Photoshop’s cache, you’re essentially clearing the scratch disk. This will resolve the “scratch disk is full” error and get Photoshop working correctly again. The only downside of clearing the app’s cache is that previous versions of your projects will be removed from your Mac.
Before you proceed, make sure you save current projects so you don’t lose any recent changes.
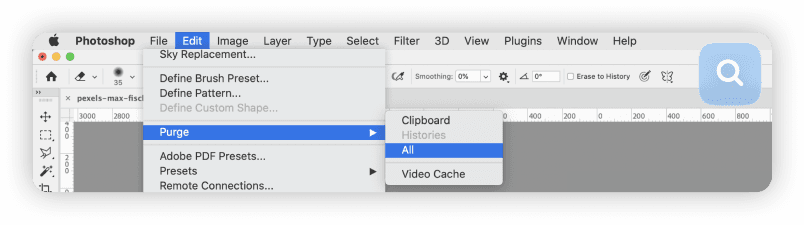
Here’s how to clear Photoshop’s cache:
- Launch Photoshop and open a project
- From the menu, go to Edit > Purge > All. This will clear all the various Photoshop caches
- Click OK on the confirmation prompt
- Repeat these steps for other projects, then check if that resolves the ‘scratch disk is full’ error.
Although we chose to clear all our caches here, there are five options when it comes to Photoshop caches. Here’s what these cache categories contain:
Undo: This is a record of the most recent commands you used. Clearing this category means you won’t have access to the most recently applied command
Clipboard: This is a record of things (files, elements, images, etc.) that you have copied. You won’t be able to paste this data after clearing this cache
Histories: This temporary file holds the previous version(s) of your project. Deleting this cache file means you’ll no longer have access to any project changes
All: This option deletes all Photoshop’s cache files
Video Cache: Holds changes made to a video file or project. You can’t restore changes made to a video project when you delete this cache
If an item/category is grayed out, this signifies that the cache has already been cleared.
MacKeeper can solve this problem in a couple of clicks! Its powerful Safe Cleanup and Duplicates Finder tools can scan your Mac in a matter of seconds, find duplicates, cache, and junk, and delete them for good, keeping all the necessary data safe.
2. Delete your Photoshop temporary files
In the rare instance that you cannot clear Photoshop’s cache using the above method, you can manually delete the app’s temporary files from Finder. It requires more effort, but it gets the job done. Plus, it’ll resolve the errors relating to full scratch disks.
Before deleting these temporary files, make sure you save any ongoing projects and close Photoshop.
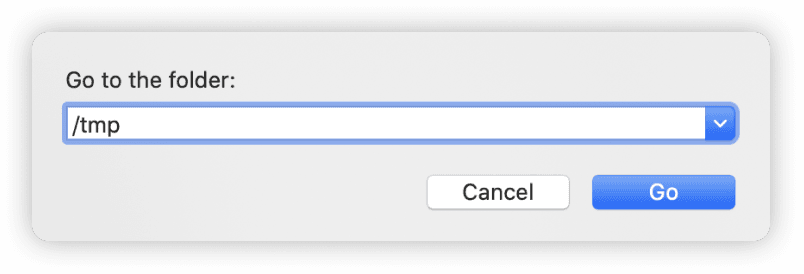
- Click Go on the menu bar and select Go to Folder
-
Type /tmp in the dialog box, and click Go. This will open a new Finder window containing your Mac’s temporary files and folders
- Now, carefully peruse the folders and look out for any starting with Photoshop Temp and a bunch of numbers at the end. Temporary files have a .tmp extension, so make sure you’re indeed deleting temporary files, not other file types
-
Find a typical Photoshop temporary file with this structure: Photoshop Temp78403. Right-click on these folders/files and move them to Trash
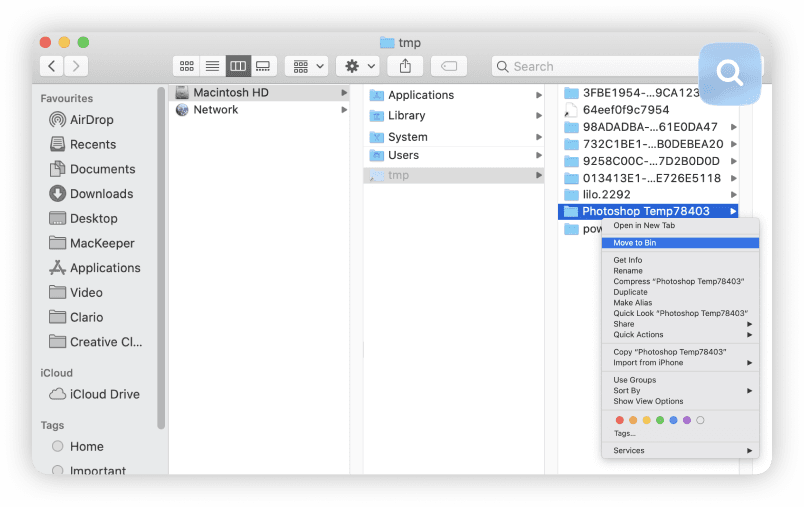
- Delete as many temporary files as you can find. Launch Photoshop again and the error should no longer pop up on your screen
3. Remove hidden Photoshop files
Just like other apps, Photoshop creates hidden cache files to speed up the process of loading. Nevertheless, you can easily find and delete them if needed.
- Open Finder
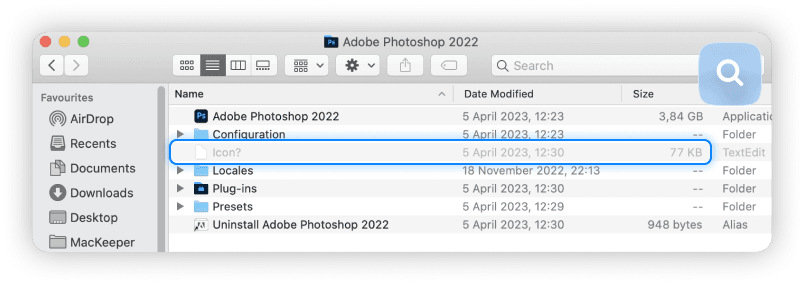
- Find the Photoshop folder and press Command + Shift + Period simultaneously
-
Now you see the available hidden files—they are grayed-out. Select the folder you want to delete and drag it to Trash
- Press Command + Shift + Period again to stop displaying hidden files
4. Increase Photoshop’s RAM
All apps use RAM to perform their tasks; the more RAM they use, the better their performance is. You can allow Photoshop to use more RAM manually to boost app operation.
-
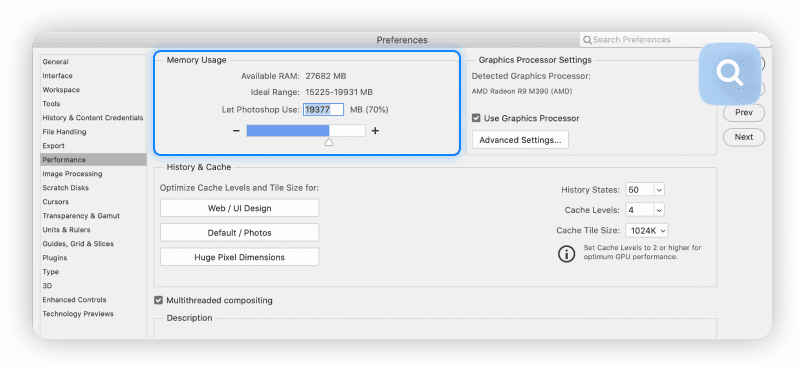
Click Photoshop in the main menu, select Preferences, and choose Performance
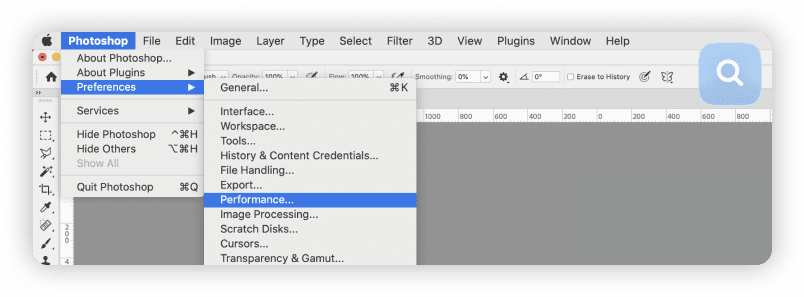
-
In the Memory Usage field, find the Let Photoshop Use box and drag the indicator to the point you need or use + and -. Then click OK
5. Move Photoshop scratch disk to an external hard drive
If you’d rather not delete files on your hard disk, an effective workaround is to configure Photoshop’s scratch disk partition on an external disk. There’s a catch, though: you need to have this external disk plugged into your Mac at all times—or whenever you need to use Photoshop.
Here’s how to get it done:
-
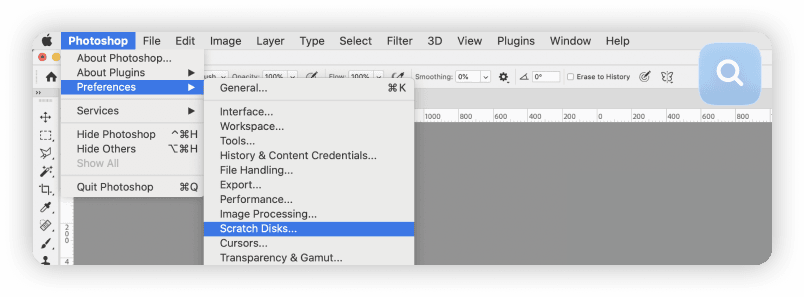
Launch Photoshop and click Photoshop on the menu bar
-
Go to Preferences > Scratch Disks
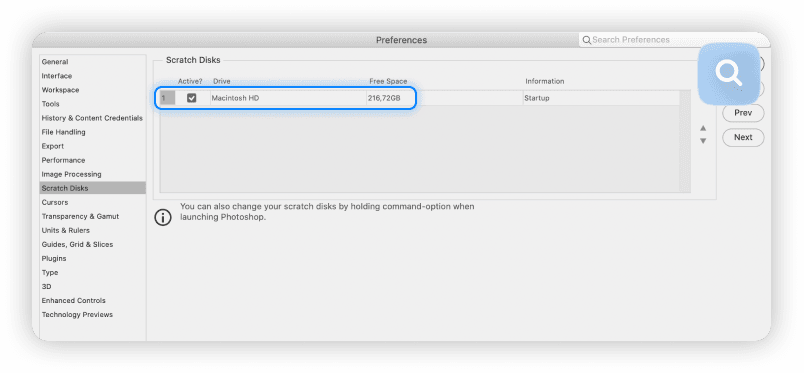
- In the Scratch Disk Preferences window, choose the external drive you want to use as the scratch disk and uncheck the built-in hard disk with low storage space
- Click OK to proceed
- Force quit Photoshop (use the Command + Option + Esc shortcut), and reopen the app. Photoshop will now use the external hard disk as the scratch disk.
If Photoshop won’t open due to the ‘scratch disk is full’ error, follow the steps below to change Photoshop scratch disk settings without opening the app:
-
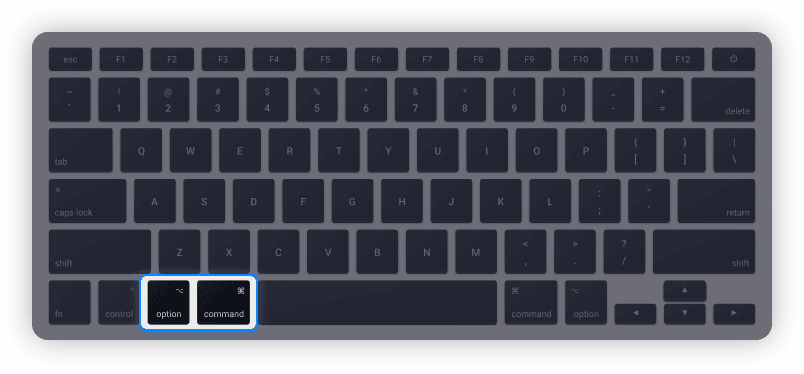
Launch Photoshop, and hold the Command + Option keys immediately. That should launch the Scratch Disk Preferences window
- Add the external hard drive as a scratch disk, and click OK to proceed.
Remember, you’ll need to have the external disk plugged into your Mac. Otherwise, you’ll get the scratch disk full error.
The other option is to get MacKeeper to take control of your storage. Just in several seconds, it is able to delete all duplicates, junk, and unused apps to get your gigabytes back. The best part is that it’s much cheaper than an external hard drive.
6. Reset Photoshop preferences
By resetting Photoshop’s preferences, you’re basically restoring the app to factory settings. This has the potential to fix problems preventing Photoshop from working correctly, including the “scratch disks are full” error. There are two ways to reset Photoshop’s preferences: using keyboard shortcuts or from Photoshop’s preference menu.
Reset Photoshop preferences using a keyboard shortcut
You can reset Photoshop using a keyboard shortcut, and it works for all versions of Photoshop on Mac. Just make sure you close or force-quit Photoshop before you proceed.
- First, make sure you close or force-quit Photoshop
- Afterward, hold the following keys: Command + Option + Shift
- Without releasing the keys, launch Photoshop
- A dialog box asking if you want to delete Photoshop’s Settings File will pop up on the screen. Click Yes to proceed
- Relaunch Photoshop and check if that fixes the error.
Reset Photoshop from the preference menu
Before you proceed, make sure you save current or ongoing projects so you don’t lose recent or unsaved changes.
- From the menu, go to Photoshop > Preferences > General
-
In the General tab, click Reset Preferences On Quit

- Click OK on the dialog box asking “Are you sure you want to reset preferences when quitting Photoshop?” to proceed
- Close and relaunch Photoshop to reset the app’s preferences.
7. Disable auto-recovery in Photoshop
By default, Photoshop saves your files and projects automatically at intervals from five minutes to one hour. Although this feature comes with its benefits, it causes Photoshop to consume a lot of memory and hard disk space.
Disabling auto-recovery will reduce the amount of storage used by Photoshop, thereby freeing up space for temporary files (or scratch files). If Photoshop is quite stable on your Mac and it barely crashes, disable the auto-recovery feature. Our team warns you to always save your projects before you close Photoshop so you don’t lose recent changes or modifications.
To disable auto-recovery, launch Photoshop:
-
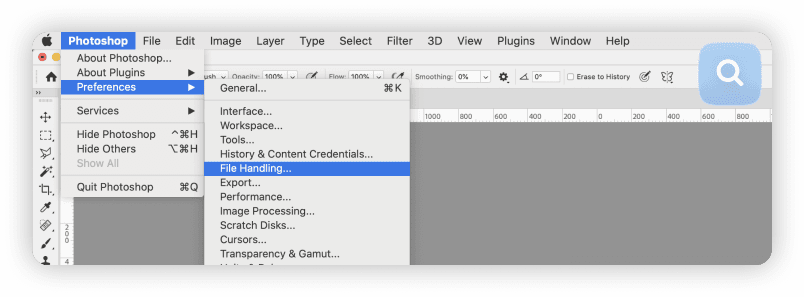
Go to Photoshop > Preferences > File Handling in the main menu
-
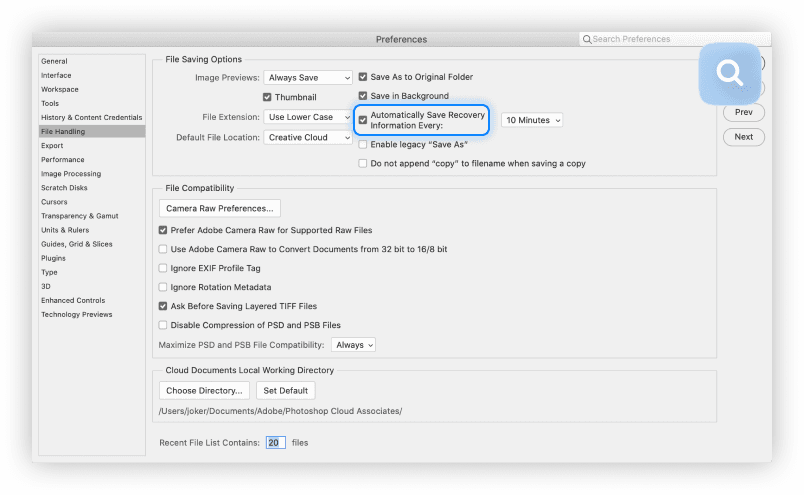
Uncheck the option that reads Automatically Save Recovery Information Every
- Click OK to save your changes.
Fix scratch disk errors with ease
The major solution to scratch disk errors is to free up additional space on your Mac. Doing this manually can be exhausting, so we recommend you use an app like MacKeeper to free up space on your Mac within minutes. Our Safe Cleanup tool will find and remove unnecessary cache files, trash, and junk at the click of a button. Also, test our Duplicates Finder to delete the redundant image copies and save even more space on your lovely Mac. And take advantage of our Memory Cleaner to free up your RAM, manage memory usage, and monitor resource-intensive processes.