I can do it easily now, but when I got my first Apple computer, I wasn’t sure how to scroll on a MacBook.
I became increasingly frustrated whether I was trying to browse the internet, look through the content of documents, or scroll through my photos in Finder. It just wasn’t working for me.
If you’re in the same situation and looking for information, don’t worry. In this article, I’ll explain what scrolling is and the different ways you can scroll on your Mac.
A note from our experts:
How to use MacKeeper’s Premium Services:
- Download MacKeeper and follow the on-screen steps to install and activate it.
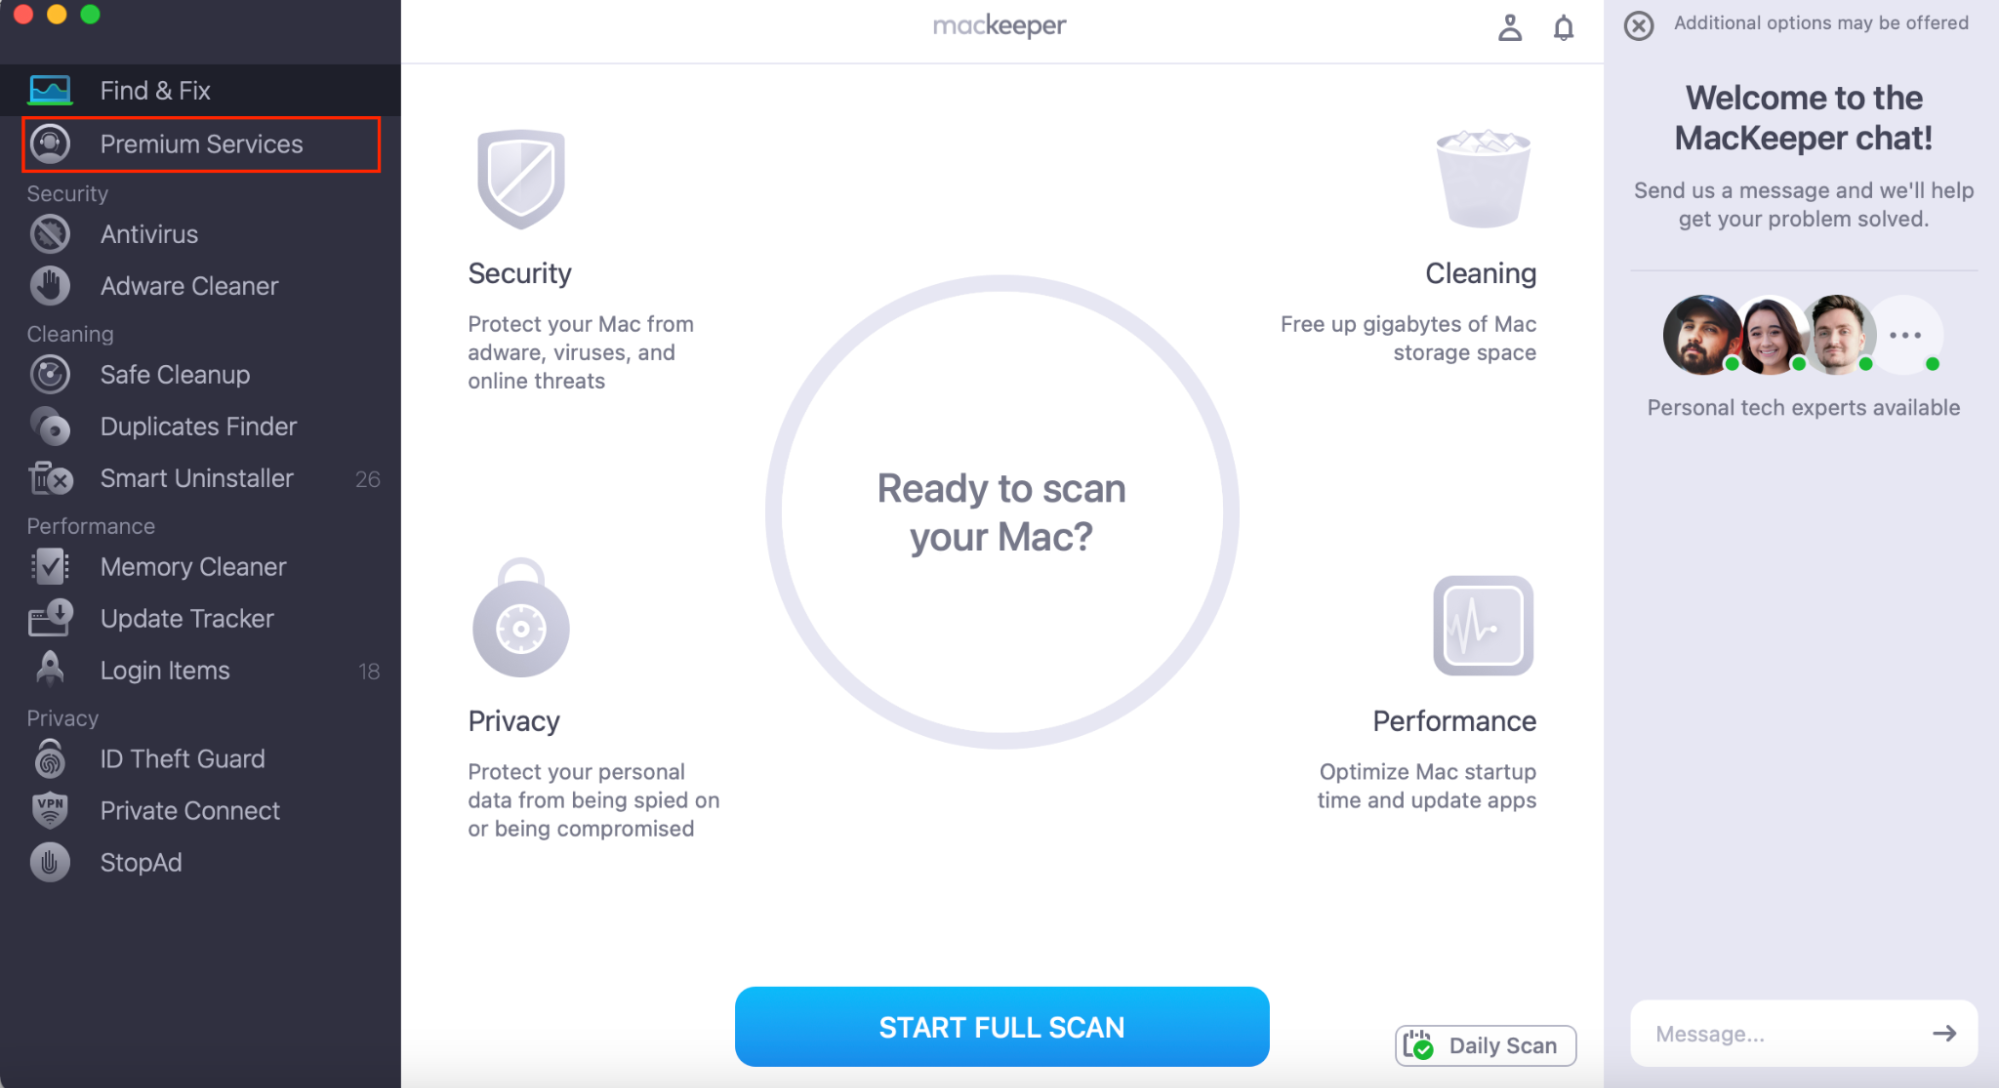
- Open MacKeeper and choose Premium Services from the sidebar.
- Click Chat Now to connect with Mac experts who can help you with your laptop problems.
In this article you will find the following:
What is scroll on Mac
Scrolling is when you move up, down, left, or right in an app window. You might scroll in your web browser, Finder, software such as Word or Excel, gaming apps, etc. When using your Mac, it’s virtually impossible to avoid scrolling.
Scroll on a Mac with a trackpad
One of the easiest ways to scroll on a MacBook is with your trackpad.
How to scroll on MacBook with your trackpad:
- Put two fingers on your trackpad.
- Drag your fingers up or down to scroll.
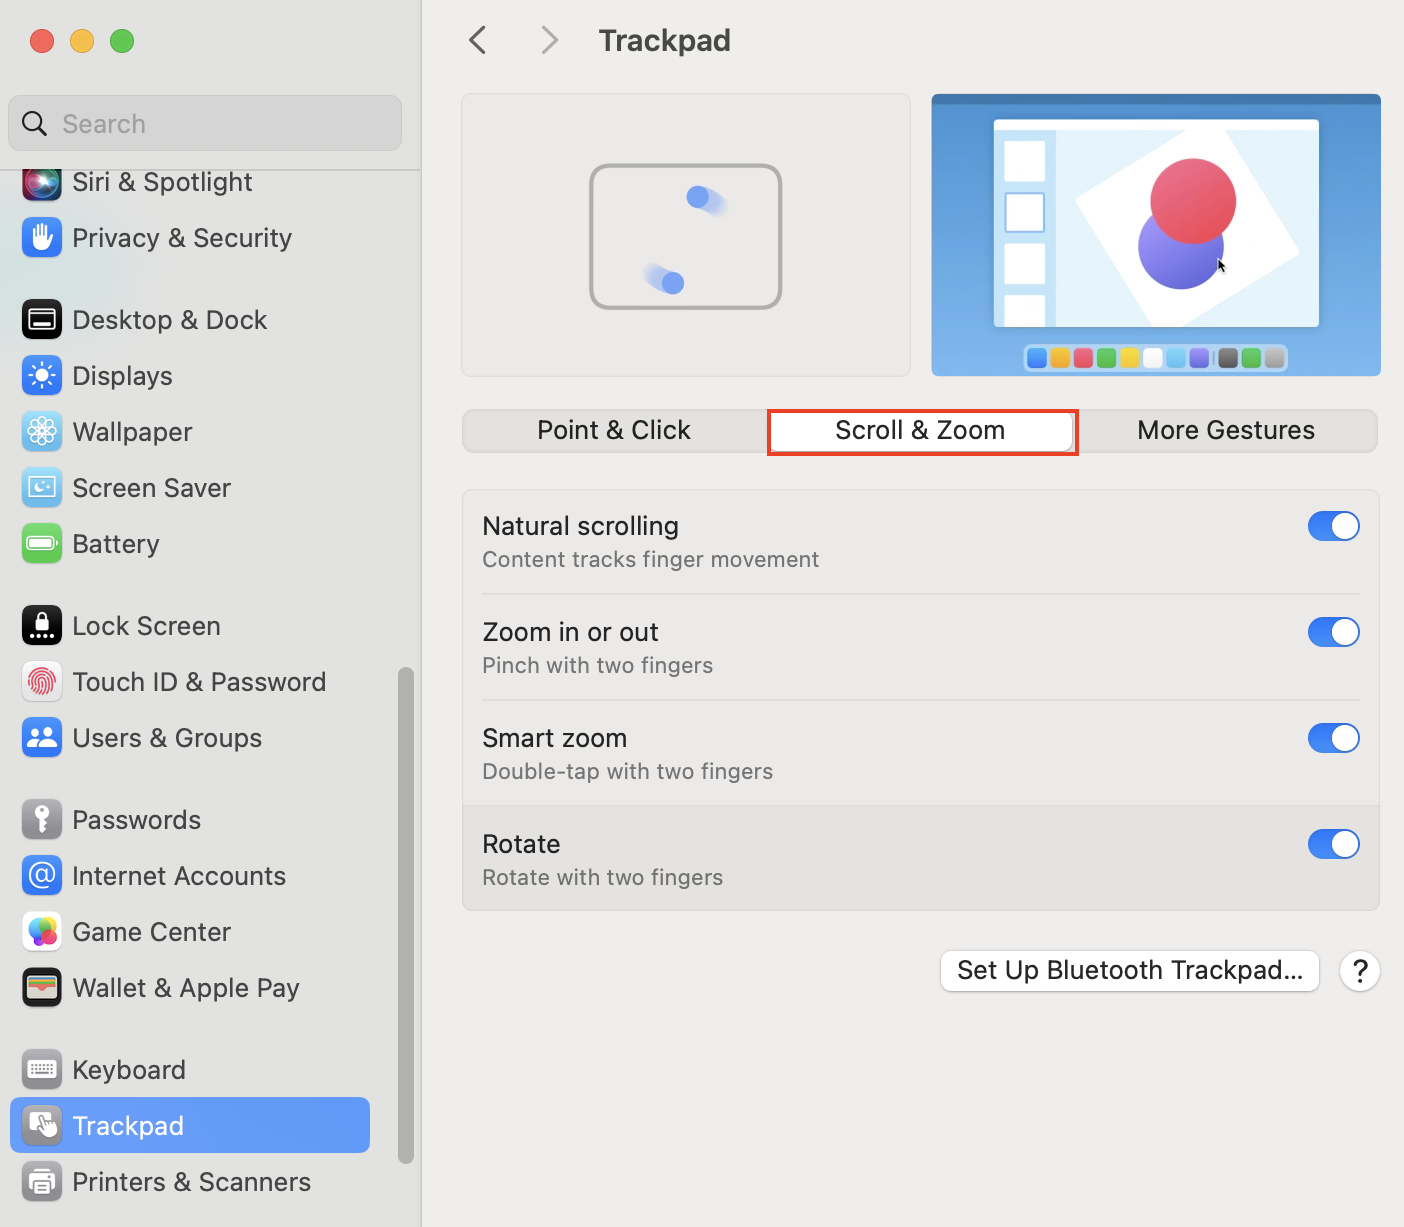
Apple’s default method of trackpad scrolling is natural scrolling. This means that the page scrolls down when you drag your fingers up, and vice versa. This might be confusing if you’re used to Windows PCs, as they do the opposite. On the other hand, if you’re used to mobile devices, natural scrolling probably feels intuitive.
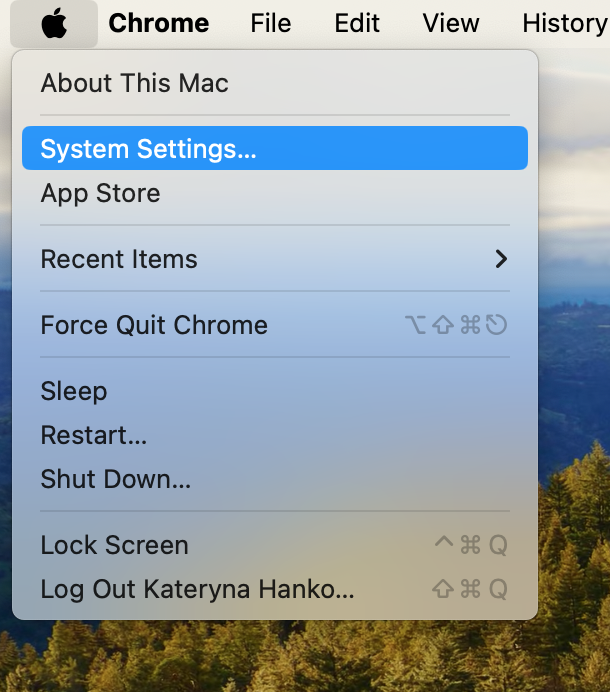
You can customize your trackpad preferences in System Settings. This is where you can turn natural scrolling off, allowing the page to move in the same direction as your fingers. Here’s how:
- Go to Apple menu > System Settings.
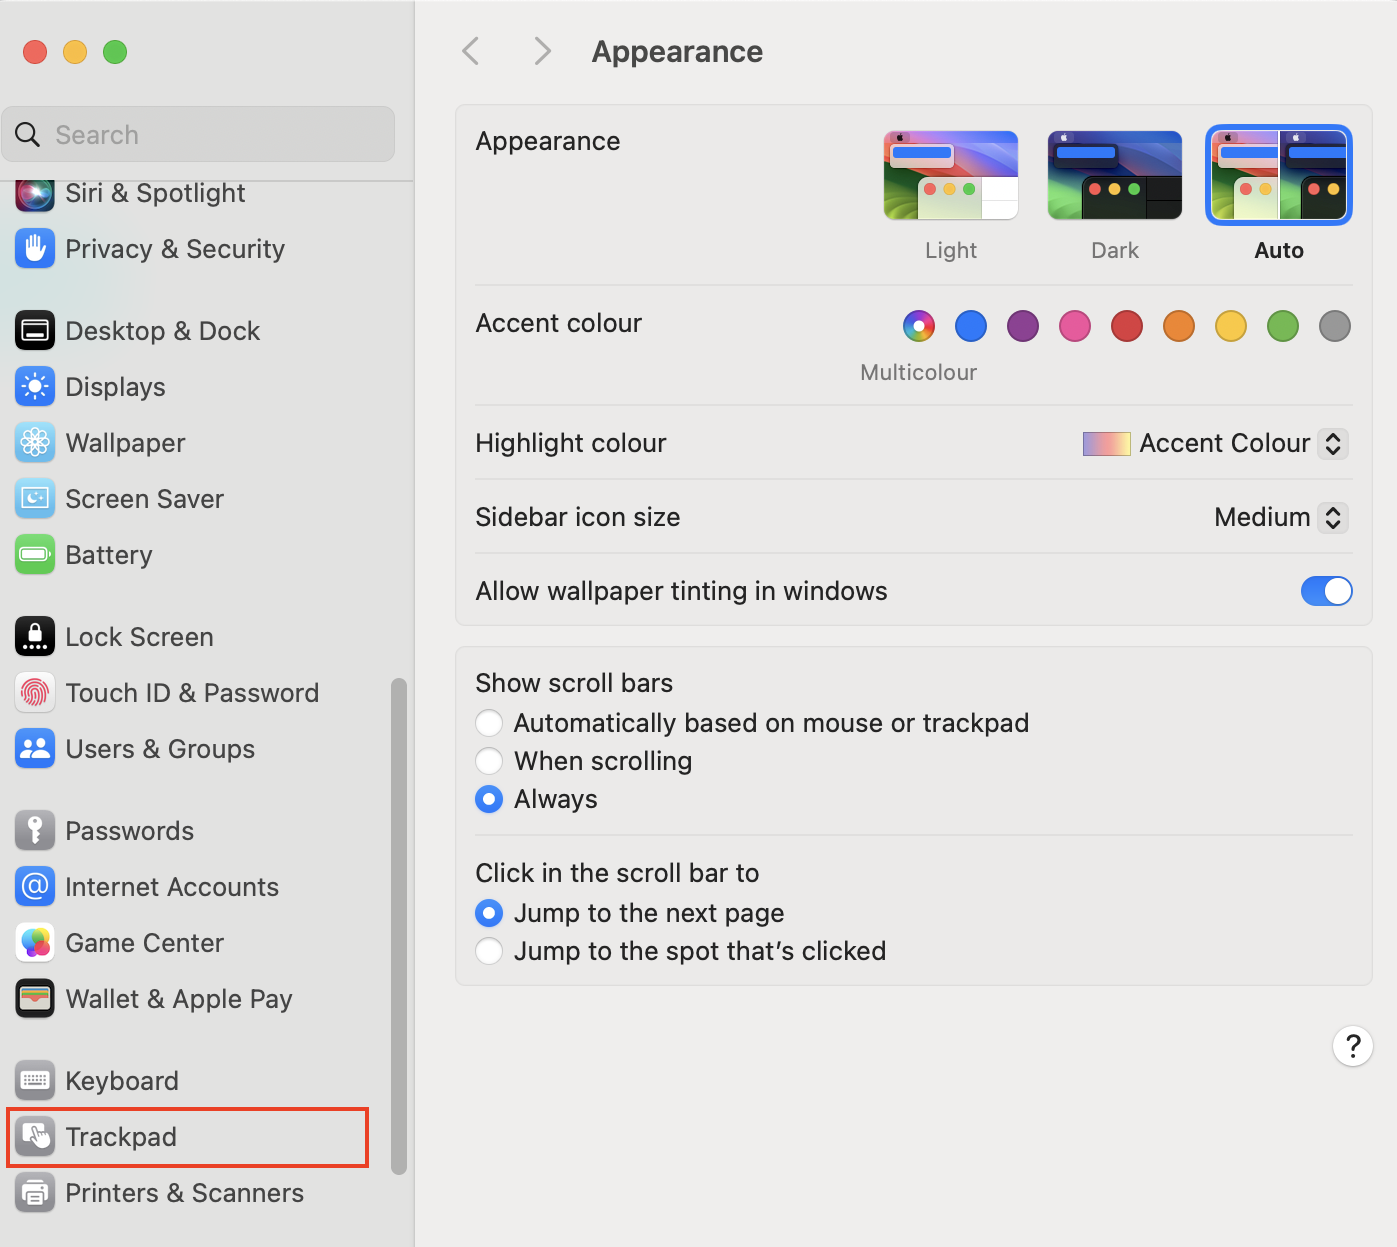
- Select Trackpad in the sidebar.
- Click the Scroll & Zoom tab to change your trackpad scrolling settings.
A hint from our team:
Your trackpad can also help you to rotate, open the Launchpad, and zoom out on Mac. Have a look at the options available under each tab to learn more about the trackpad’s functions.
Scroll on a Mac using a mouse
If you have a mouse, you can use it to scroll on a MacBook. First, identify if your mouse is an Apple-specific Magic Mouse or another type of mouse.
If you have a Magic Mouse, you can scroll on your MacBook by sliding one finger up and down the mouse’s surface. If you have a different type of mouse with a scroll wheel, simply roll the wheel to scroll.
Important:
If you have a Magic Mouse, you can also use Multi-Touch gestures to zoom, swipe between pages, and more.
If the Magic Mouse is not connecting or if you have other issues with your MacBook, you might want some personalized advice.
Fortunately, the team at MacKeeper is here to help. MacKeeper’s Premium Services offer personalized support, whether you need help with your apps, performance issues, or setting up other devices. And it’s all free with your MacKeeper subscription!
How to use MacKeeper’s Premium Services:
- Open MacKeeper and choose Premium Services from the sidebar.
- Click Chat Now.

Scroll on a Mac via scrollbars
If you’re used to Windows PCs, you might expect to always see scrollbars at the side of your screen. However, on a Mac, this isn’t the default option. Instead, you’ll only see scrollbars when you’re actually scrolling.
If you’re like me and would prefer to have scrollbars auto-enabled, though, it’s an easy fix.
To enable scrollbars on a Mac:
- Go to Apple menu > System Settings.
- Choose Appearance from the sidebar.
- Under Show scroll bars, select Always.
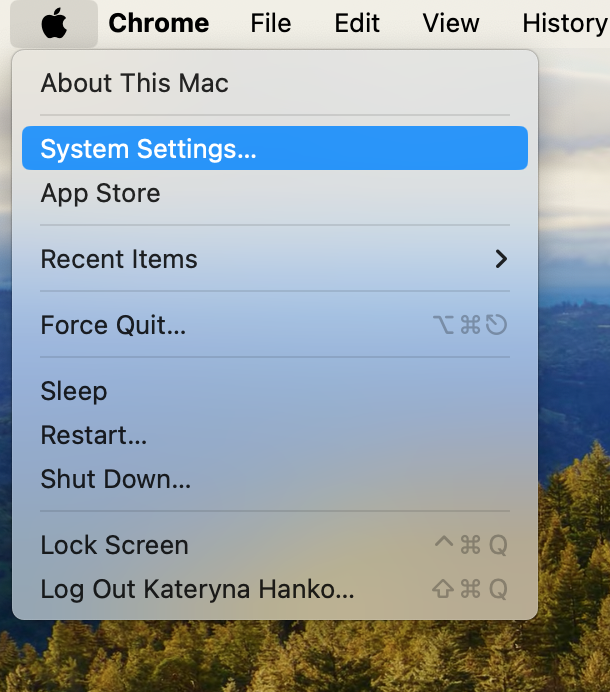
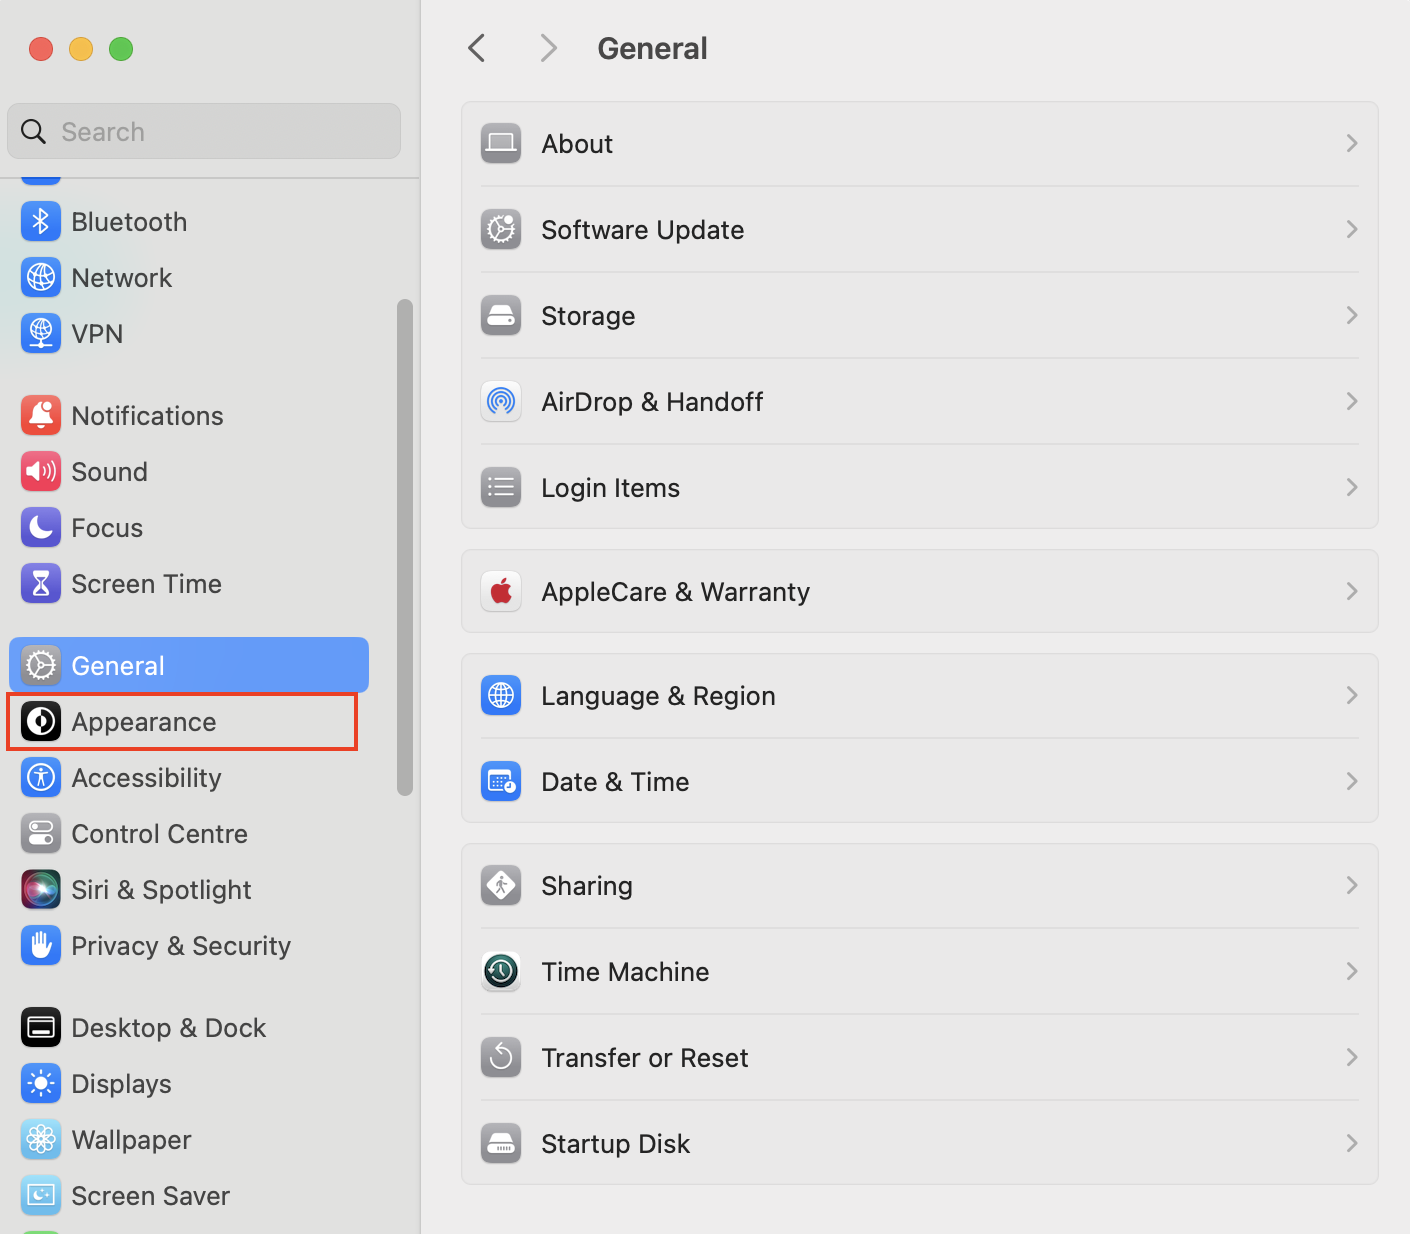
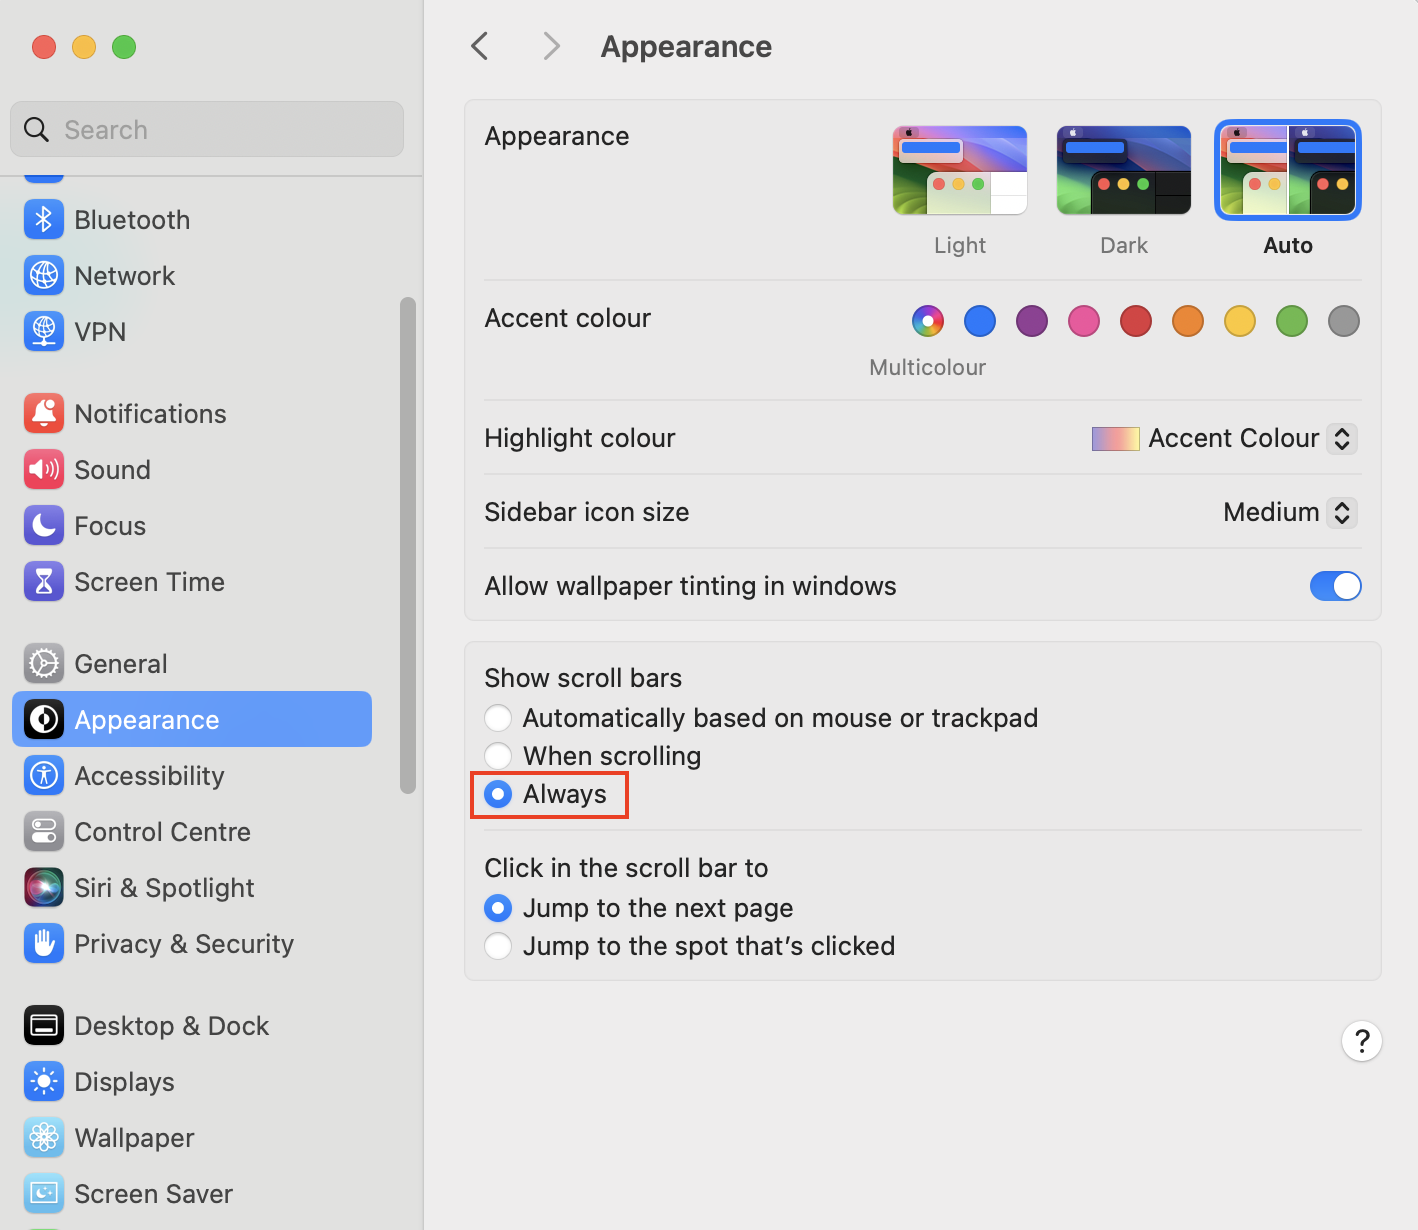
Now you’ll be able to scroll on a MacBook using your scrollbars much more easily.
Scroll on a Mac using a keyboard
You can also scroll on MacBook using your keyboard.
Keys to press to scroll:
- Arrow keys: scroll up, down, left, and right
- Space bar: page down
- Shift + Space bar: page up
- Command + Up arrow: scroll to the top of the page (equivalent to Home on a standard QWERTY keyboard)
- Command + Down arrow: scroll to the bottom of the page (equivalent to End on a standard QWERTY keyboard)
These keyboard shortcuts may not work in all apps. For example, if you’re typing in a document, Terminal, or an online document editor, pressing Space won’t cause the page to scroll down–instead, it’ll simply enter a space. When this happens, you’ll need to use another method to scroll on MacBook.
| Action | Keyboard shortcut |
| Scroll down | Down arrow |
| Scroll up | Up arrow |
| Scroll left | Left arrow |
| Scroll right | Right arrow |
| Page down | Space bar |
| Page up | Shift + Space bar |
| Go to top of page | Command + Up arrow |
| Go to bottom of page | Command + Down arrow |
Conclusion
When you’re working out how to use a Mac, there are lots of new skills to learn. However, whether you use a MacBook Air or Pro, these instructions should help you to scroll more easily in the future.
If you’re still struggling, why not call in the professionals for help? MacKeeper’s Premium Services can support you with any Mac-related problems, day or night.


