In this article you will find the following:
Using a Mac isn’t difficult. They’re generally seen as being more user-friendly than most Windows PCs. But if you’ve never used one before, then there's a bit of learning involved, especially if you’re accustomed to Windows.
In this Mac beginner’s guide, we’ll cover all the basics you’ll need to help you learn how to use a Mac. We’ll show you how to get used to the change from a Windows device to a Mac laptop, as well as share our tips on getting you set up. There will also be step-by-step instructions from our team to help you navigate Mac operating systems for troubleshooting.
Before we start:
If you’re just getting started with Mac and new to macOS specifics, don't let the intricacies of a new system overwhelm you. Instead, why not let some helpful software make the transition easier for you to navigate? We’re talking about MacKeeper.
This all-in-one app, created by our expert developers, would automatically assist you with keeping your apps up-to-date, your storage clutter, and your Mac system safe. Our experts recommend you start with our Antivirus tool to ensure your laptop is protected against any cyber threats from day one.
To use MacKeeper’s Antivirus for your peace of mind:
- Download MacKeeper and install it.
- Open the app and choose Antivirus from the left panel menu.
- Enable real-time protection to protect your device 24/7.
- Click Start Scan, and if anything is found, choose to Move to Quarantine.
Mac introduction
Ready for our new Mac user tutorial? It's more than just a laptop—it’s a device that you’ll wish you started using sooner. Work or play, a Mac laptop or iMac can accommodate all the essentials and more. With different macOS and device versions, like the popular M1 or newer M2 model, there’s no limit to what you can do. Get set to jump into the awesome world of Mac, where innovation and simplicity are the name of the game.
Here are all the important aspects for your intro to Mac:
- What operating system does Mac use
- Difference between MacBook Air and Pro
- What can you do on a MacBook
- Is MacBook user-friendly
What operating system does Mac use
Mac operates on macOS, a user-friendly system perfect for anyone seeking seamless integration on a fast and reliable device. If you're looking to do work with MacBook, macOS provides an innovative platform through Sonoma integration that can work efficiently with your laptop needs. So, whether you’re a beginner or a seasoned user, the macOS operating system ensures simplicity and innovation.
Difference between MacBook Air and Pro
The MacBook Air model prioritizes functionality and affordability, making it more popular for those getting started with a Mac. On the other hand, the MacBook Pro also excels in performance and caters to users looking for advanced features with the integration of the M2 chip. We’ve examined hardware and processor differences among the two most popular models to ease up your choice:
| Feature | MacBook Air | MacBook Pro |
| Primary Focus | Functionality and affordability | Performance and advanced features |
| Recommended Use | Beginners and casual users | Power users and professionals |
| Processor | Various (M1, M2) | Various (M1, M2, or New M3) |
| Performance | Good for everyday tasks | High-performance tasks, multimedia editing |
| Portability | Very lightweight | Slightly heavier but still portable |
| Screen Sizes | 13 or 15 inches | 14 or 16 inches |
| Retina Display | Liquid Retina display | Liquid Retina XDR panel |
| Integrated Features | Standard features for daily use | Advanced features with M3 chip, enhanced audio |
| Price Range | Generally lower | Generally higher, especially for high-end models |
What can you do on a MacBook?
An Apple MacBook opens up a world of possibilities, perfect for both beginners and seasoned users, making the MacBook user-friendly for all. It offers a versatile platform for users to work, create, and entertain. The MacBook laptop is all about customization, efficiency, and exploring all the essentials with tools like Launchpad. It’s more than just a laptop, as you can do so much on a MacBook, including:
- Boosting productivity with various work and study apps.
- Engage in creative design and video editing tools.
- Enjoy music, Apple TV, and games for entertainment.
- Stay connected through messaging, video calls, and social media.
- Surf the internet seamlessly with Safari.
- Ensure safe browsing with built-in security features.
- Personalize your MacBook with colorful backgrounds, themes, and settings.
- Easily collaborate on projects with colleagues or friends.
Is MacBook user-friendly?
MacBooks are renowned for their user-friendly design, making them an ideal choice for beginners. With the integration of cool features and an optimized macOS, you can ensure a smooth learning curve. Whether navigating with the touchpad, exploring through Finder, or customizing your experience with AirPods, your MacBook experience is tailored to work efficiently and comfortably for your needs.
If you’re switching from Windows to Mac
Microsoft Windows has been the dominant operating system for decades. Today, it still holds around 87% of the market. But Macs have a strong following, too. Many Windows users switch up their laptops and decide to upgrade to a Macintosh Apple machine for its reliability, impressive processor speed, and beginner-friendly design.
And when they start using MacBook, they’re going to notice a few big differences:
Standard hardware, all made by Apple
Microsoft licenses Windows to computer makers and sells it to individuals. So it’s designed to run on hardware made by many different companies. Apple does things quite differently. Apple developers don’t sell the macOS software to anyone. It’s exclusive to Mac users, meaning it’ll only run on computers that Apple itself makes.
There are some drawbacks to this, but one big plus point is compatibility. Because Mac software and peripherals only have to work with a small set of computers, they’re much less likely to have compatibility problems than Windows PCs. Therefore, all Mac users can start using MacBook knowing that both the hardware and integrated macOS are robust as well as reliable.
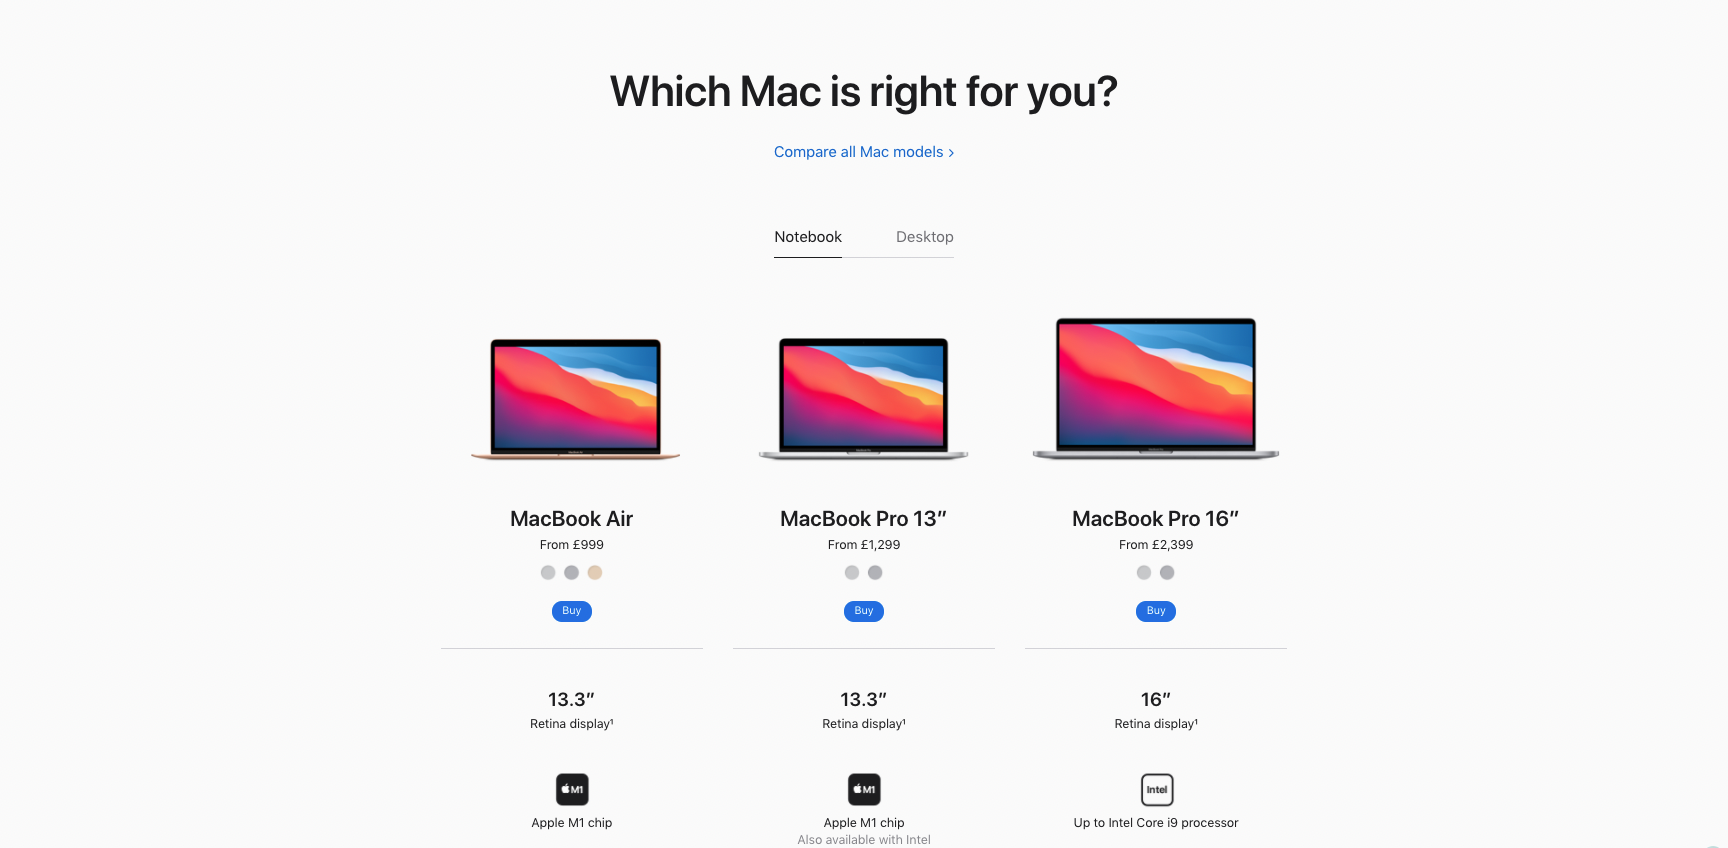
A different operating system
Apple computers use their own operating system, called macOS, which used to be called Mac OS X. Based on Unix, this is different from Windows both inside and out. At first, it may take time to adjust as it might be hard to use Mac after Windows, but it’s easy once you learn all the setup tips and cool tricks. It’s a bit like starting a new job. You need to have a look around to find where everything is and what everything does, and then you’ll quickly get the hang of everything.
No Start menu
On Windows, you can access many of the integrated features of your computer through the Start menu. And you can open that menu using the Windows key on your keyboard. But there's no startup menu on macOS, meaning all apps and files are organized differently. Interestingly, there are third-party add-ons that can add a Start menu to macOS, which might be worth checking out if you want to further customize your Mac experience. With time and simple Mac training, you’ll get used to not having a start menu; it’s not necessary for an optimized laptop experience.
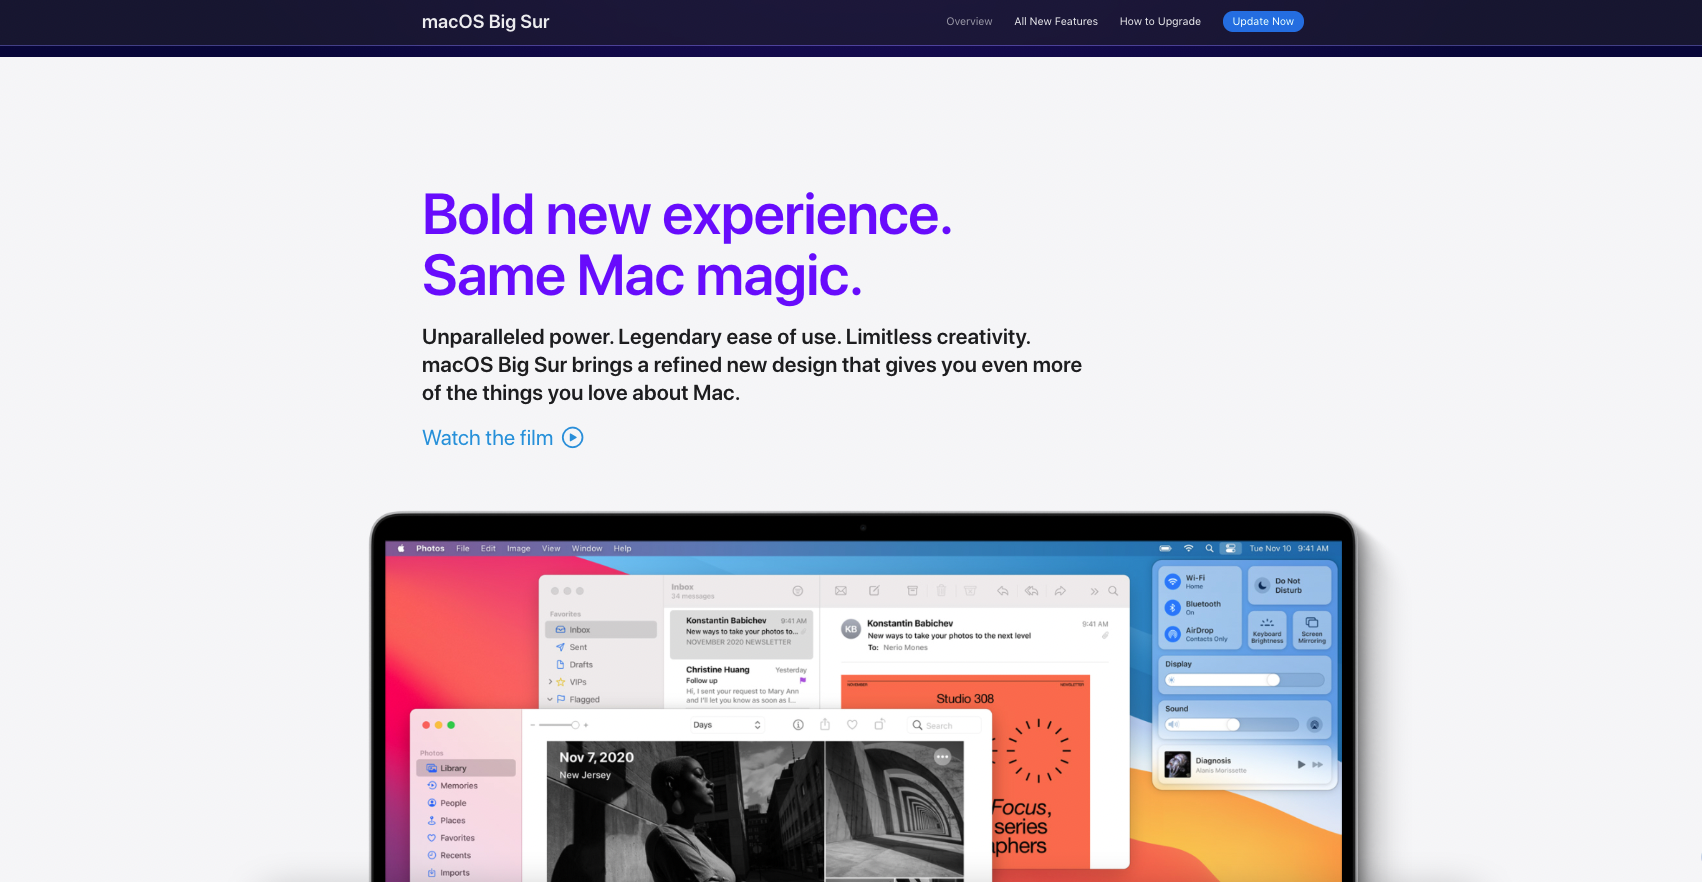
Different shortcuts
If you're transitioning from Windows to macOS, here's a helpful tip for first-time Mac users: familiarize yourself with the Command (Cmd) key. If you’re coming over from Windows, you’ll be accustomed to using the Ctrl key for most keyboard shortcuts like copying and pasting. On macOS, you’ll use the Command (Cmd) key for most Mac keyboard shortcuts, which will have either a picture of an Apple on it or a cloverleaf symbol. This subtle difference may be confusing initially, but it's a fundamental part of understanding how to use Mac effectively. Once you’ve had the chance to get familiar with these keys and uncover all Mac’s secret shortcuts, you’ll soon be working away on your laptop efficiently.
Finding your way around macOS
Navigating macOS shares some similarities with Windows. They’re both window-based visual interfaces operated by mouse and keyboard. Basic actions like right-clicking to open files, clicking and dragging items into folders, and utilizing a trash bin for deleted files are universal. But there are some big differences, too. In this guide, we'll spotlight essential elements of macOS to assist beginners in getting acquainted with the system.
We’ll help familiarize yourself with:
The Dock
Running along the bottom of the screen, you have the macOS Dock. This is a set of essential shortcuts to apps installed on your iMac or Apple laptop. It includes apps your Macintosh came with and ones you’ve installed yourself. You can click and drag app icons here to create your own customized shortcuts. You can arrange and delete the shortcuts anytime you wish by dragging them off your Dock (don’t worry, it doesn’t delete the apps themselves). If you want to see more options on the Apps located in your Dock, right-click, and more options will be displayed.

Spotlight
Spotlight is the name given to the macOS search function. As well as searching your Mac, Spotlight will look for things on the internet, in the App Store, and in various other places. It’s a cool feature that is perfect for all your essential daily tasks; it’s also super easy to help you use Mac effectively.
You can access Spotlight by clicking the magnifying glass icon at the top right of your screen or press Cmd + Space. In the Spotlight search window, just type what you’re looking for, and it’ll start giving you suggestions.
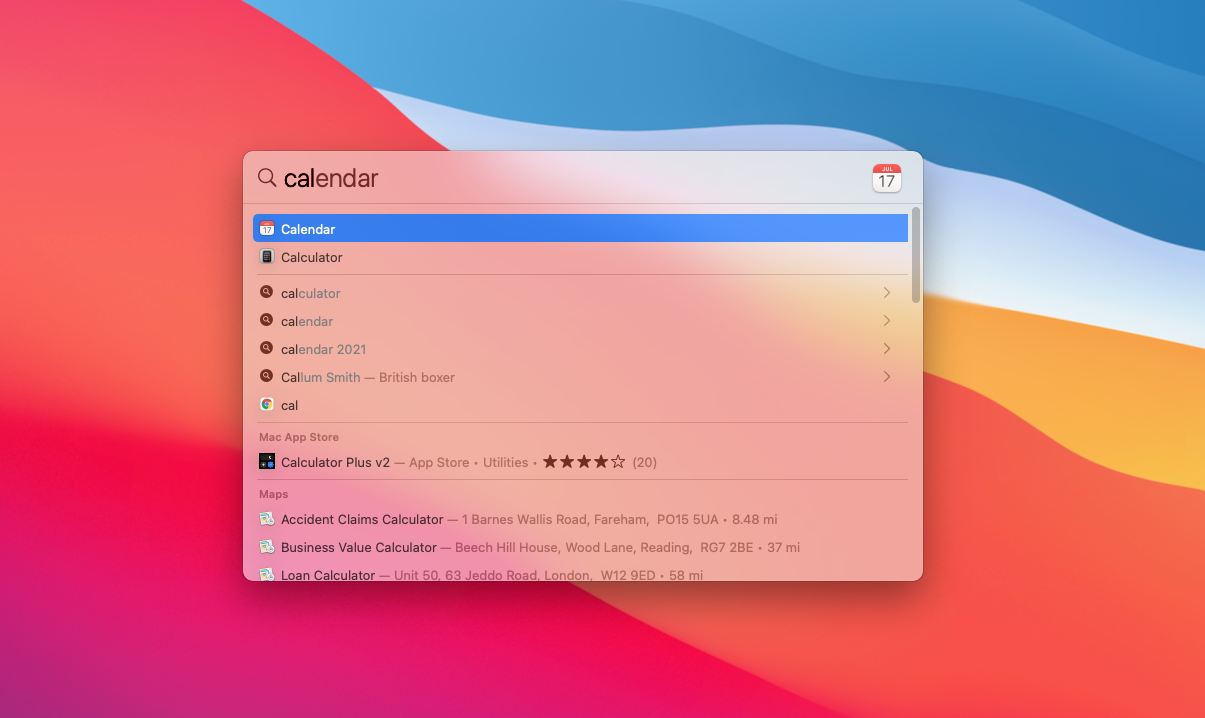
Menu Bar
At the top of your screen, you’ll find the macOS menu bar that can help make your MacBook user-friendly. This will change depending on which app you’re currently focused on. So if you’re using Safari, you’ll see options and settings for Safari. On the far left, there’s an Apple icon. This stays the same, no matter what app you’re in, which provides an integration of system shortcuts and options to shut down, log out, or restart. Therefore, it's quick and easy for Mac beginners to get used to. On the right side of the menu bar is your notification area, which includes essential shortcuts to apps and settings, including Wi-Fi, date, and time.
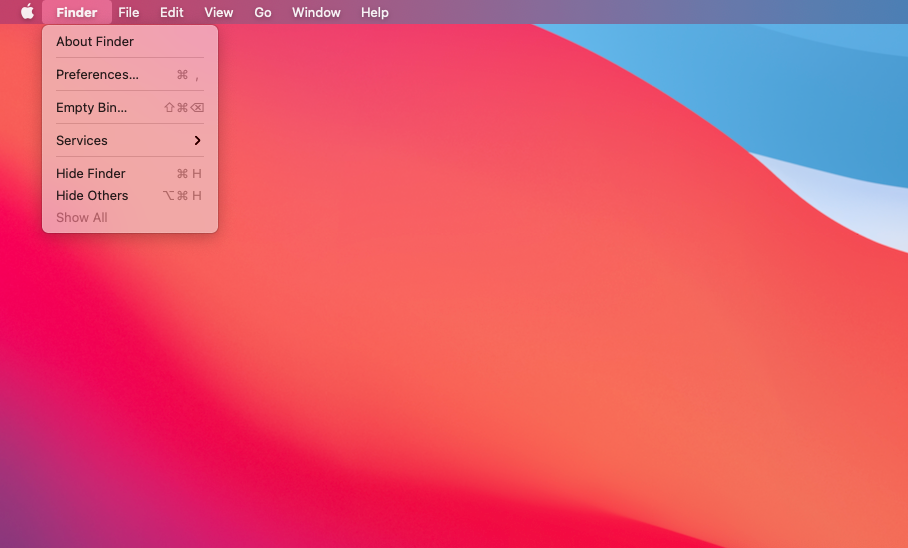
The App Store
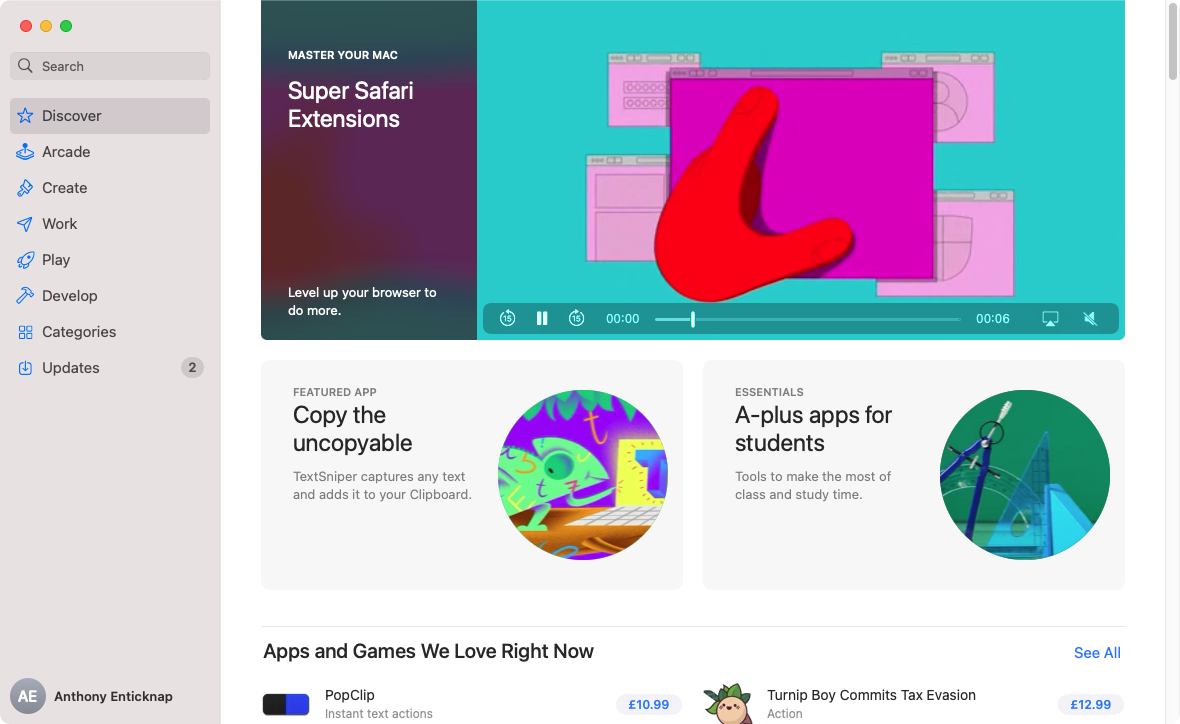
Like iPhones, Macs come with their own App Store. The big difference with macOS is you don’t have to use it. You can download and install apps from anywhere. A major advantage of using the App Store is that Apple controls what’s allowed, therefore protecting you from suspicious apps containing malware. The App Store is stocked with apps created by Apple developers, which are all compatible and safe for laptop or iMac use. Just be cautious if you download apps from third-party sites. Consider reading online reviews to ensure you are getting started with Mac safely.
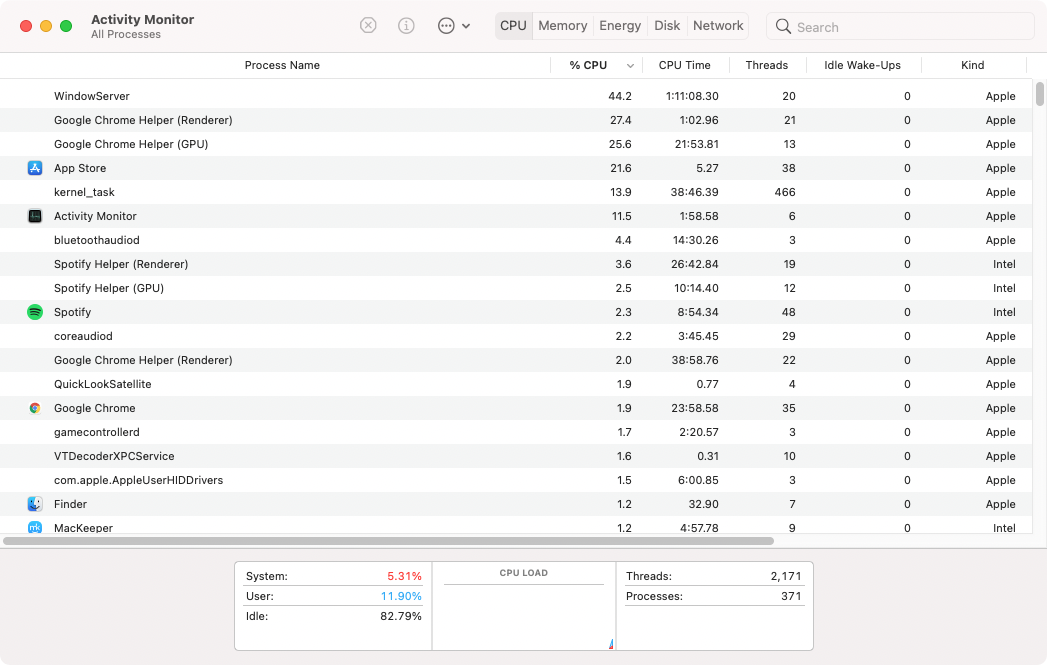
Activity Monitor
Just as Windows has its Task Manager, macOS has an Activity Monitor. You can find this under Applications > Utilities, or you can open it using Spotlight. The data may look complicated and overwhelming at first, but it’ll show you your laptop or iMac’s memory, CPU, energy, disk, and network use. All Mac users, beginners or pros, can use Activity Monitor to select processes and force them to close, which is useful if you’re having problems with an app when learning how to use a Mac.
Safari
Another first-time Mac user tip that Apple beginners will find helpful is to get familiar with Safari. This web browser is made especially for Macs and is well-supported in the Macintosh development community. It has plenty of plugins available, and it's popular among users, too. It has everything you’d expect from a modern browser, including a private browsing mode. You don’t have to use Safari, though. The browser you were using before is likely to still be available on a Mac laptop or iMac, which includes Chrome. All the most popular browsers are available for macOS.

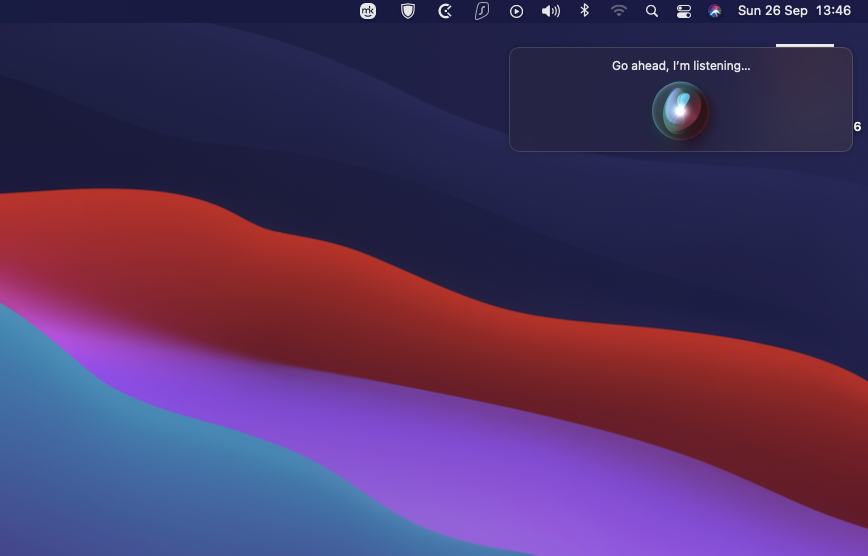
Ask Siri
Siri is Apple’s voice assistant—the same one it uses on iPhones. It allows you to do all kinds of things, from opening apps to searching for things on the internet. To open Siri, click the Siri icon in the top right of your menu bar or press and hold Cmd + Space. This is a great tool to utilize in your Mac training, as it can make search functions and other general tasks on your laptop easier to perform.
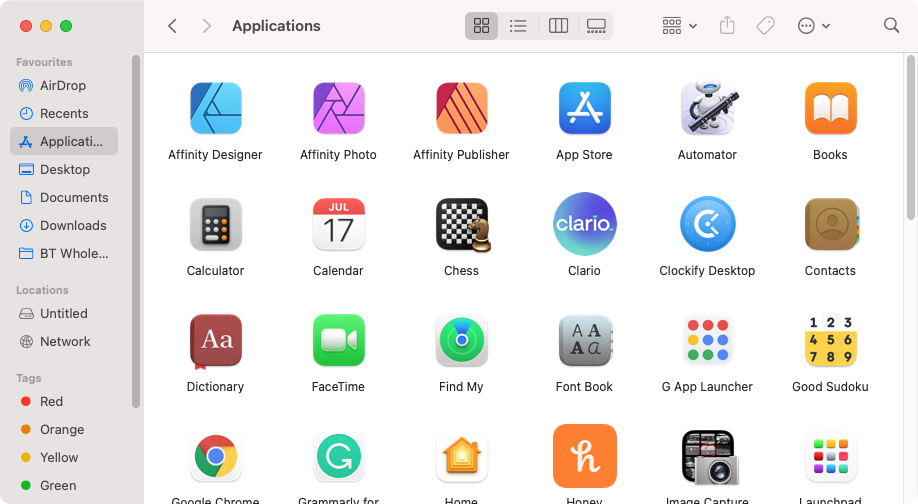
Apps
Something that might make MacBook complicated to use for beginners is not taking the time to understand how Mac Apps work first. On macOS, your apps are stored efficiently in the Applications folder, which can be accessed via Finder. Unlike on Windows, the Applications folder doesn’t generally contain any other folders. That’s because macOS apps are usually self-contained, so they’re represented by just one single icon, which you double-click to run. Some apps may need other files to run, which are stored in other parts of your Mac. In those cases, there may be some leftover files to deal with after you delete the main app.
System Preferences
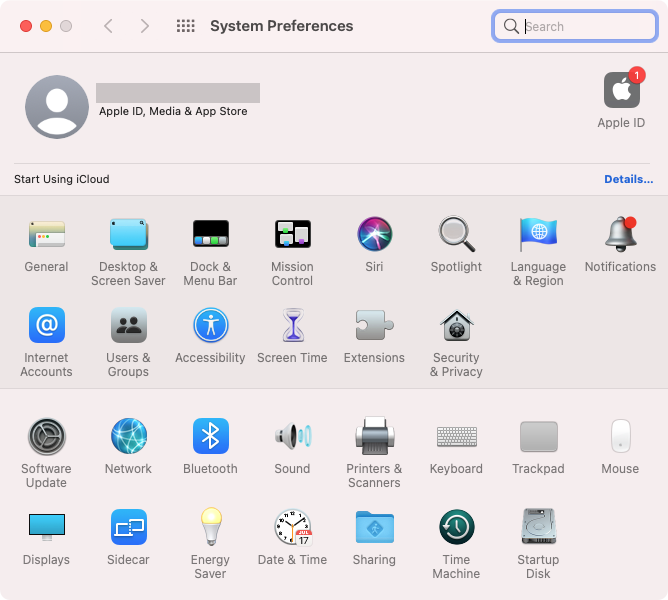
This is basically like Windows’ Control Panel. It’s where you can tweak system settings and control how your Mac runs. You can get to System Preferences in several ways, the most popular method is by clicking on the Apple icon in your menu bar. From here, you’ll be taken to your laptop settings, which you can customize and change or keep as the default. This includes altering displays, Bluetooth, networks, printers, and so on. There’s quite a bit there, so it’s worth going in and having a look yourself to help you understand and use Mac effectively. Just don’t change anything if you’re unsure what it does.
Setting up a new Mac
Getting your new Mac is exciting. Before diving in, our experts offer essential tips for first-time Mac users. Tailored for beginners, our guide plans to cover everything from essential setup tasks to understanding seamless integration, ensuring an efficient start.
We'll walk you through how to do the following on your new Mac device:
- Set up internet
- Change scroll direction
- Visual customization
- Set up your printer
- Get your backups ready
- Add users
- Install cybersecurity
Set up internet
To kick-start this new Mac user tutorial, let’s first help you set up your internet. If you use an Ethernet cable for internet access, you just need to plug it into the back of your Mac as normal.
To set up your connection for Wi-Fi, you’ll need to do the following:
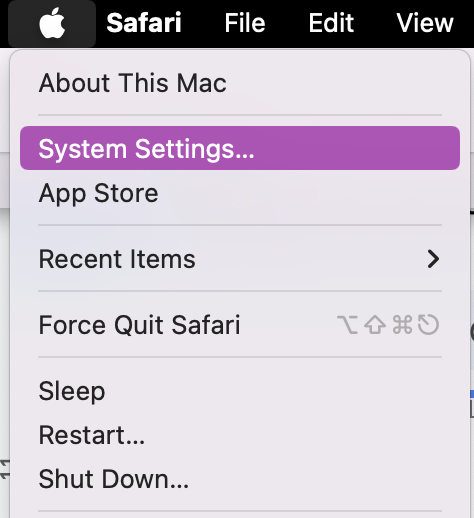
- Click on Apple Icon and select System Settings.
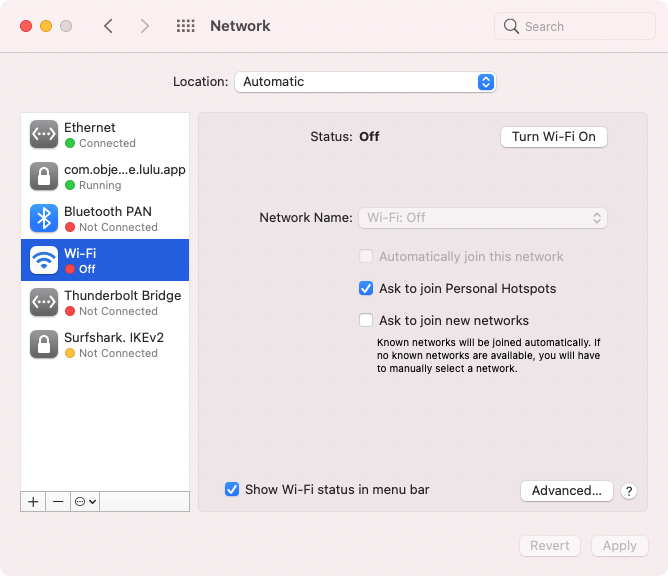
- Click on Wi-Fi and make sure it’s turned On.
- Use the drop-down menu to search and connect to your Wi-Fi. You’ll need to enter your password and wait a few seconds to connect.
Change scroll direction
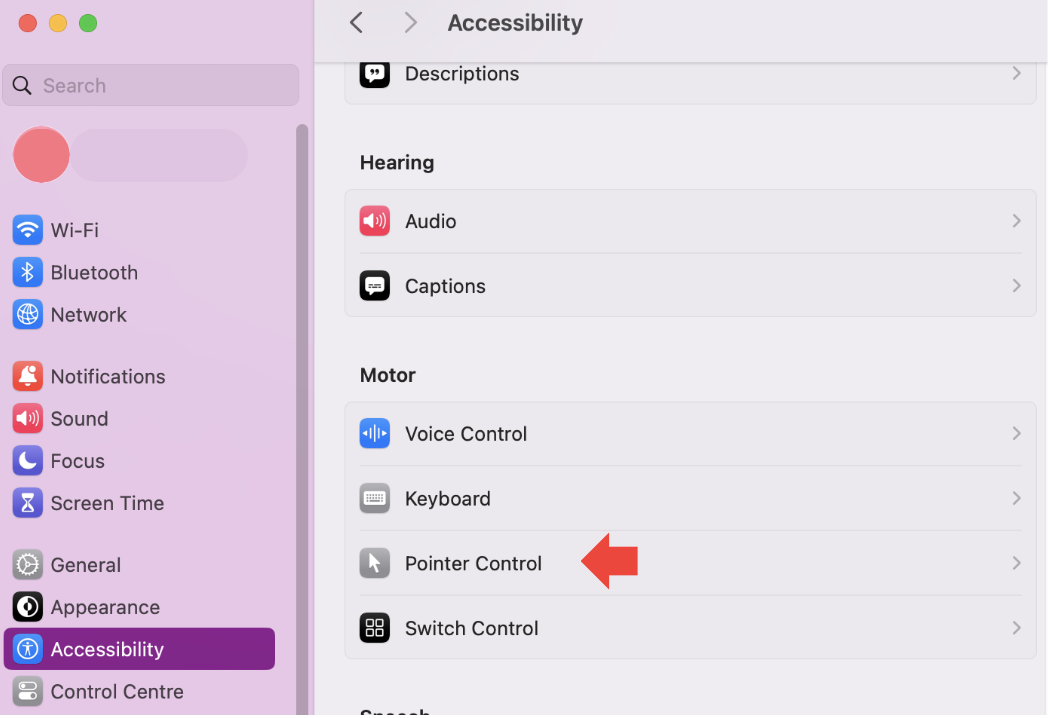
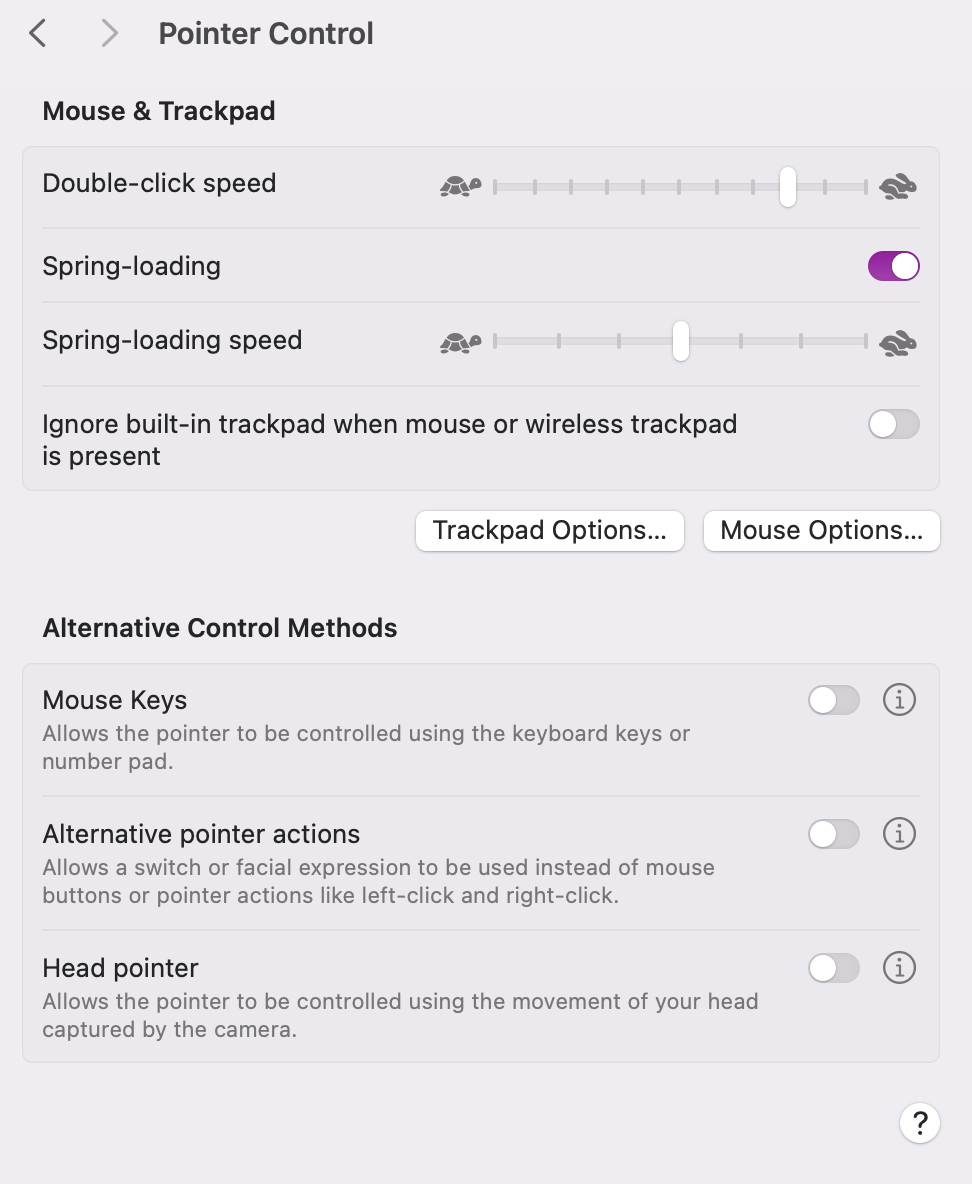
During your initial Mac training, you may find that when you scroll, by default, it goes in the opposite direction to what you might be used to. You can customize and change your Mac’s scroll direction by following these steps:
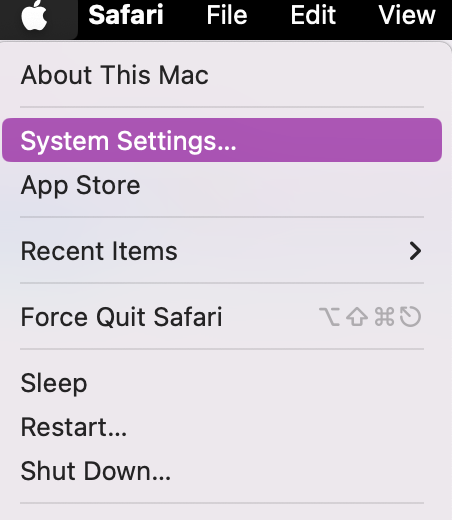
- Click on the Apple Icon and select System Settings.
- Select Accessibility> Pointer Control.
- From here, you’ll be able to customize the Mouse and Trackpad Options to your preferred scroll direction and click speed.
Visual customization
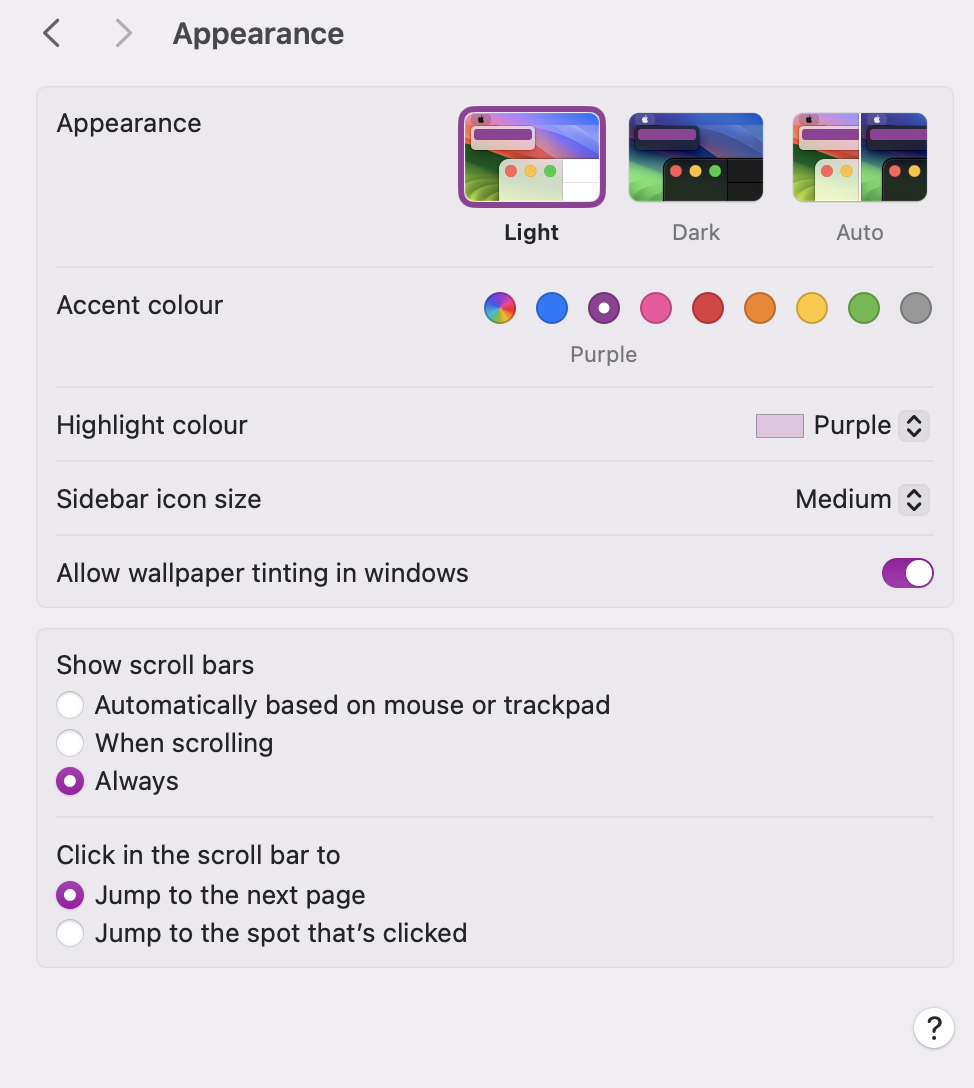
As you might expect, you can customize the look of macOS. You can change the desktop background, screensaver, and color elements, all accessible via your System Settings. For a personal touch, you can even change your login image to something unique and cool. Let our new Mac users tutorial walk you through steps on how to change your macOS to alter visual customization:
- Click on the Apple Icon and open System Settings.
- Click Appearance to open the customization panel. From here, you can alter your desktop features to your preferences.
Set up your printer
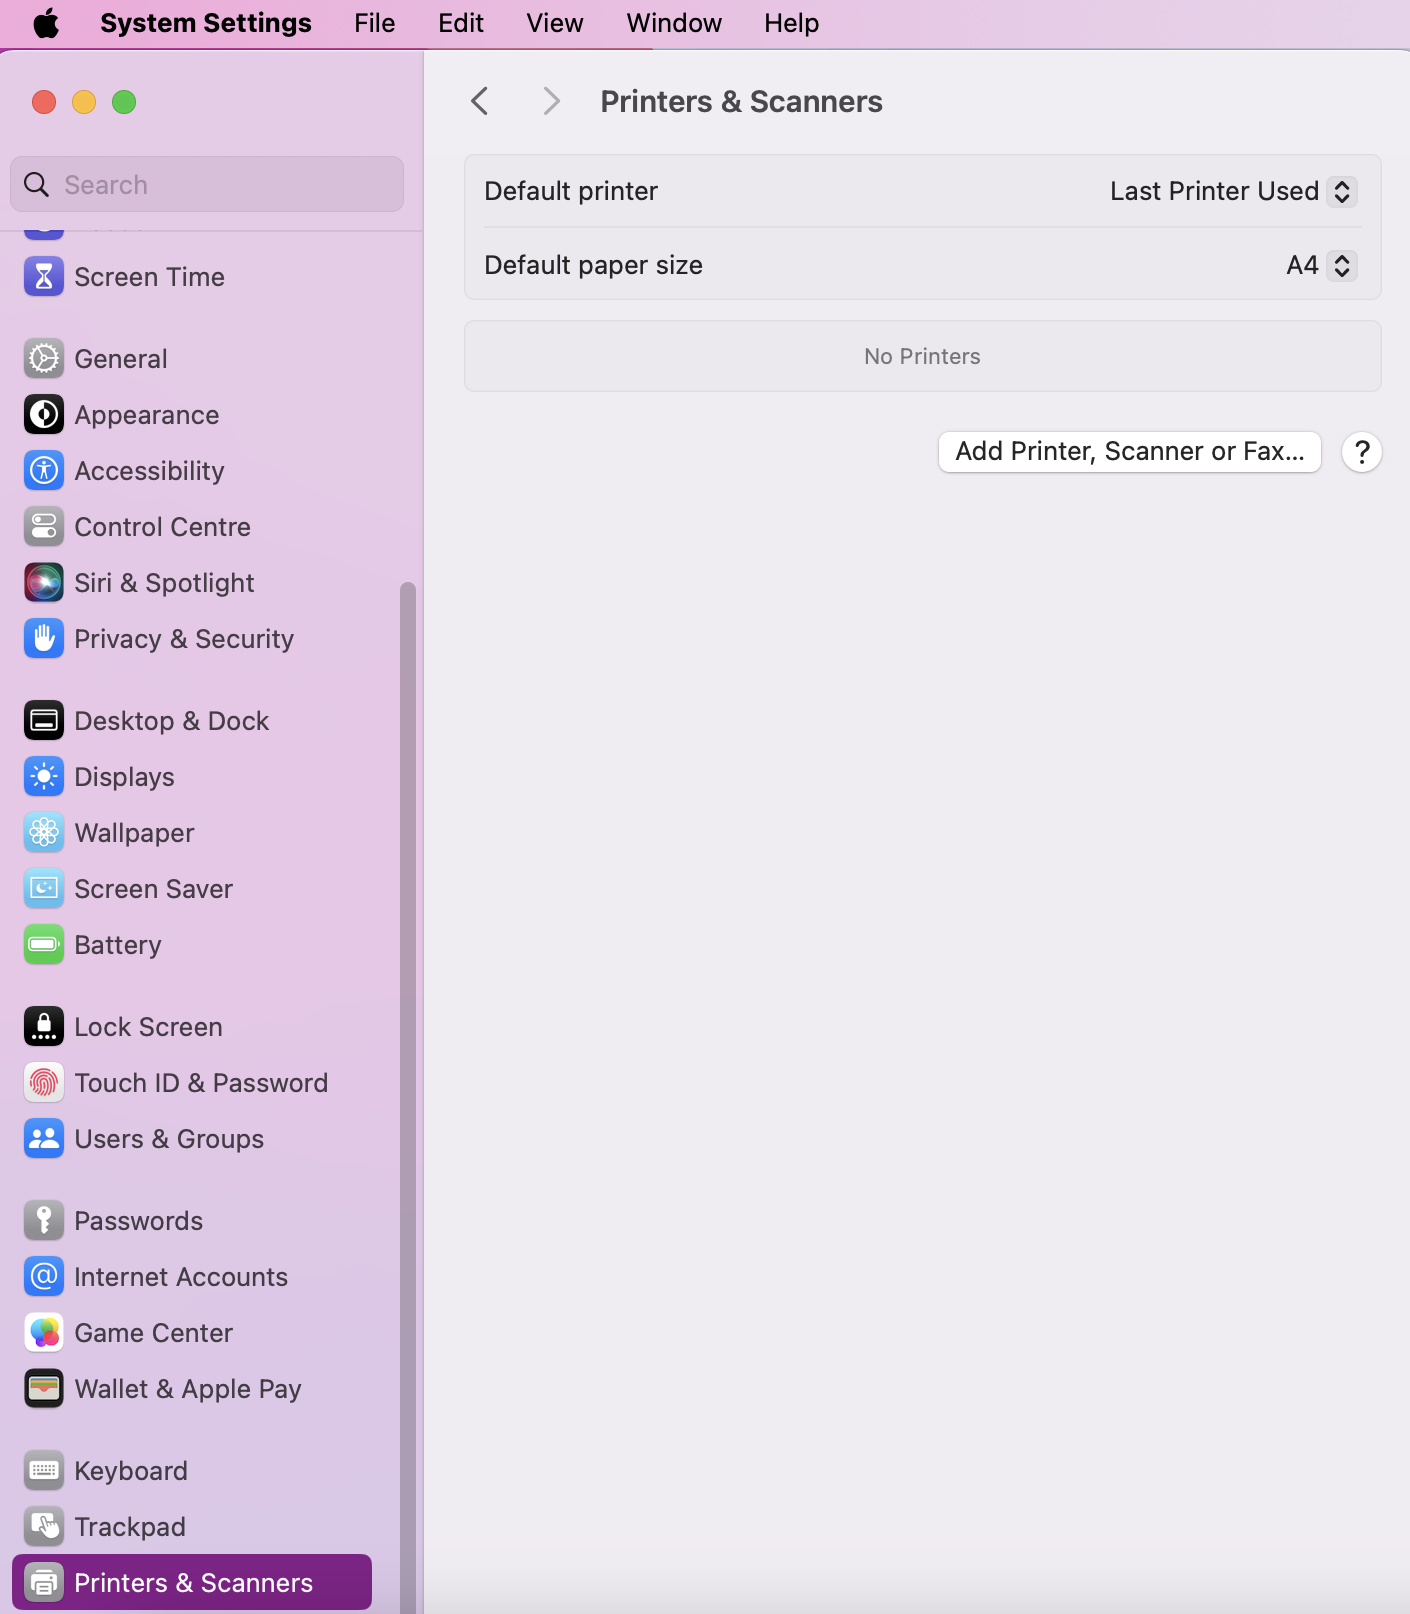
Connecting printers to your Mac is usually pretty easy, even for beginners. Especially if your printer is already connected to your network. Here’s how you can set up your printer on your Macintosh laptop:
- Open System Settings via the Apple Icon.
- Scroll down until you see Printers & Scanners and click on it.
- Your device will automatically scan for available printers, but if your printer isn't found or listed, then you’ll need to click the Add Printers, Scanners, or Fax button to manually add your printer.
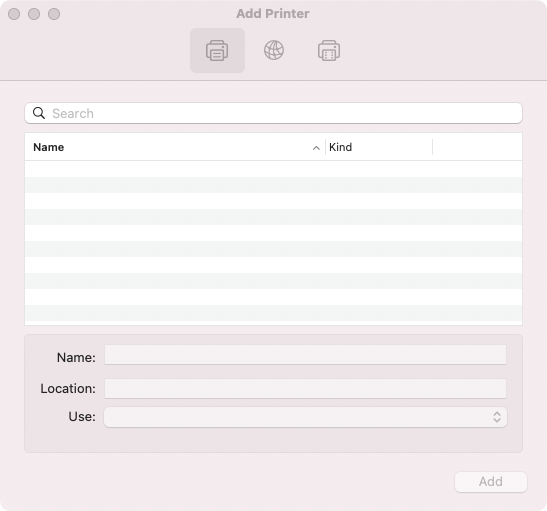
If you’re connecting via USB, then you might need to install some extra software, but even that should be trouble-free.
Get your backups ready
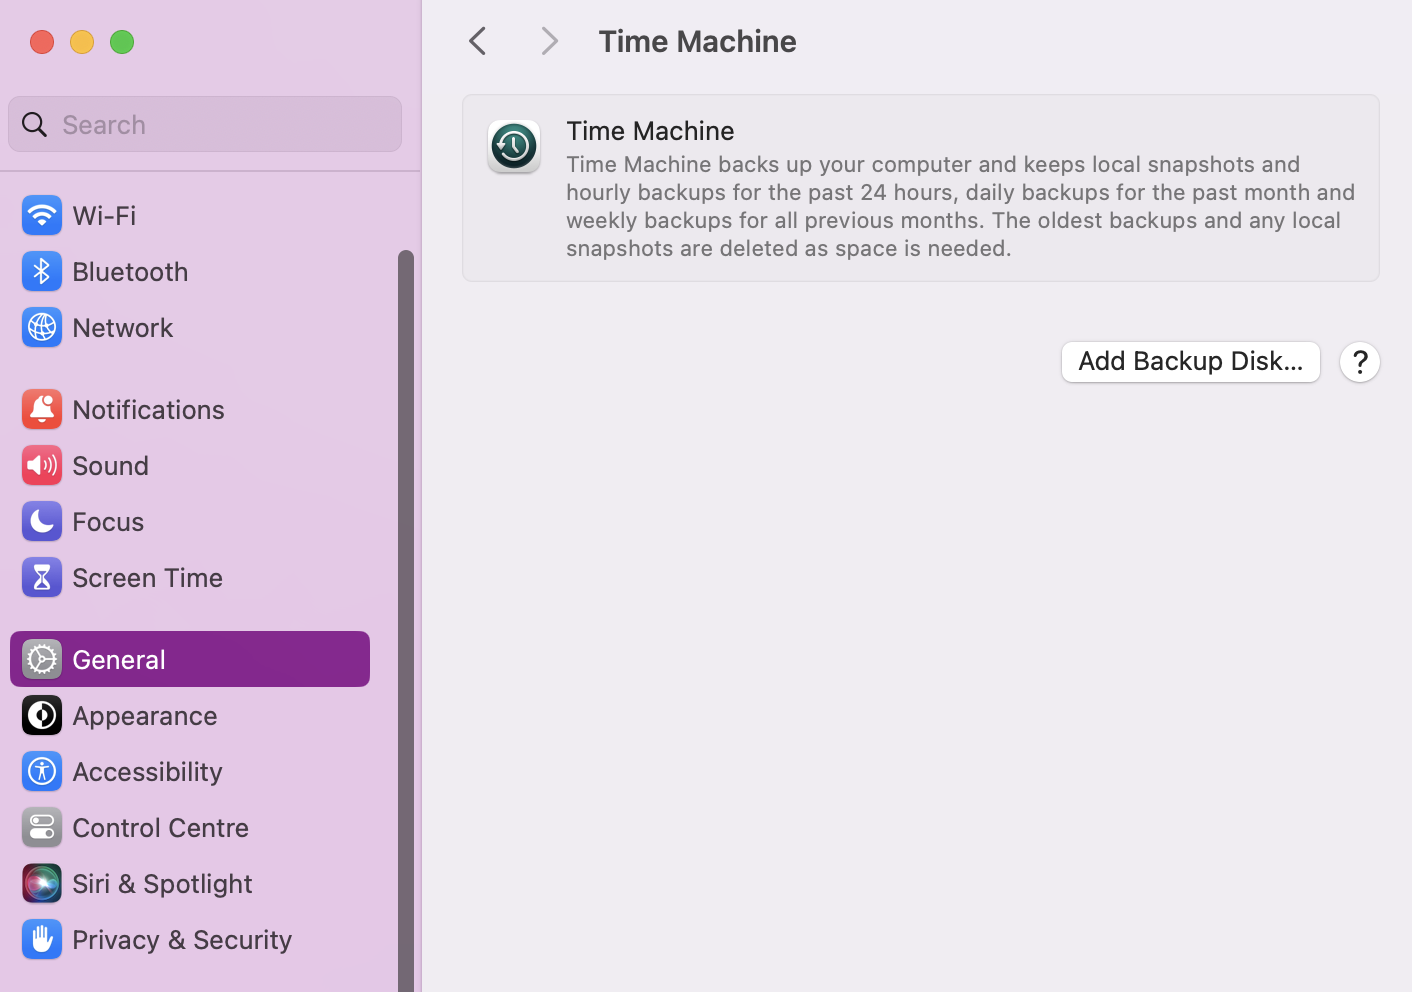
Apple rather handily has its backup software integrated into macOS, and it’s called Time Machine. It’s a lifesaver for new Mac users looking to work with MacBook. The feature is a handy tool for automatically backing up your essential files and apps. It also makes recovery a breeze if anything goes wrong. Time Machine can be set to automatically back up your Mac, so if anything goes wrong, you can reinstall your files and apps exactly how they were.
Here’s how you can get your backups ready with Time Machine:
- Open System Settings by clicking the Apple Icon or Spotlight search.
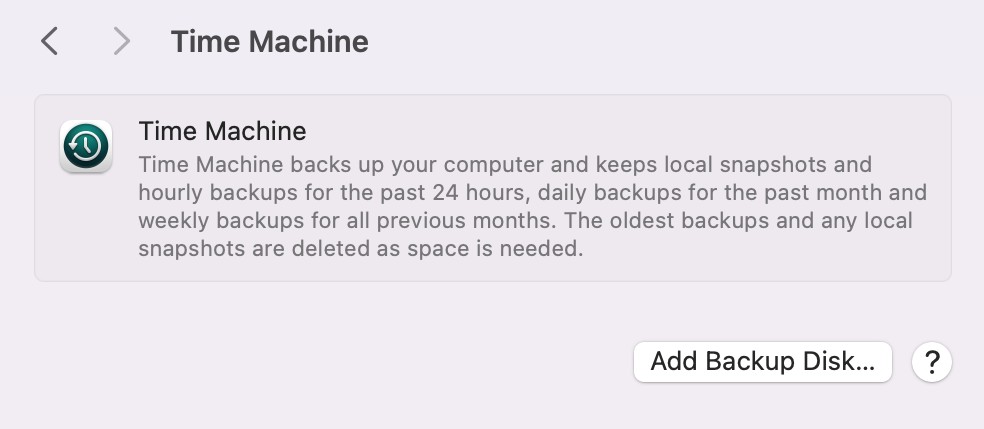
- Go to General > Time Machine.
- Click Add Backup Disk, select your backup space, and click Set Up Disk.
Add users
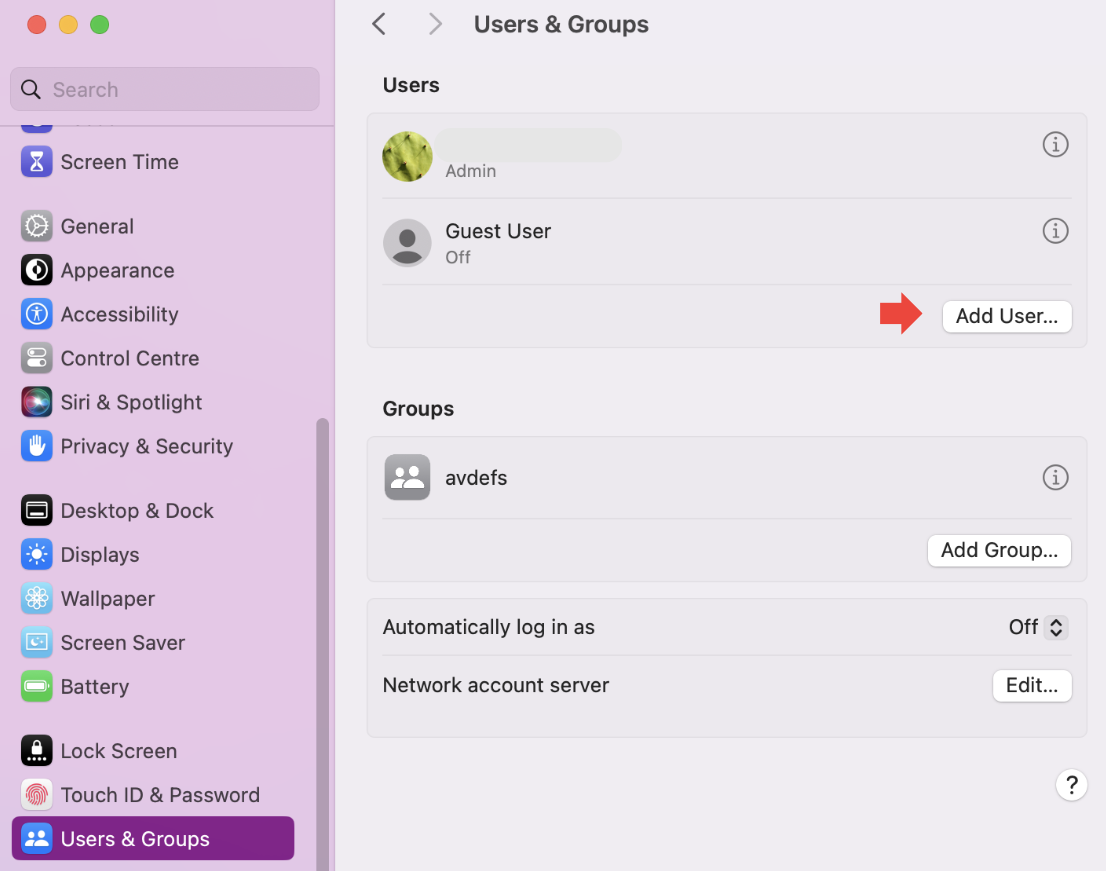
If you’re not going to be the only new person using your new Mac, then you might want to set up some new users. Adding users means everyone will be able to log into the shared Mac and have their own cool apps and customized settings.
Follow the steps below for our basic Mac tutorial on how to add users:
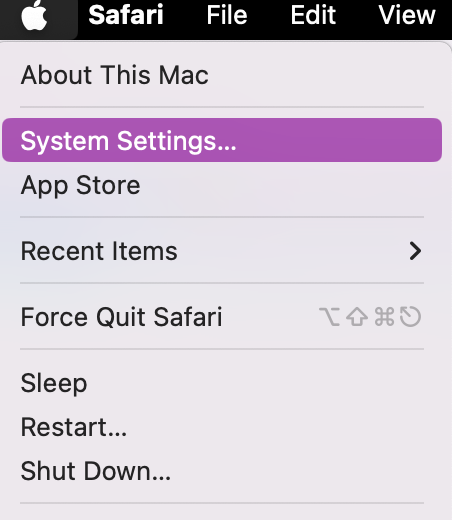
- Open System Setting from your Dock or by clicking the Apple Icon.
- Select Users & Groups and click the Add User button. Admin verification will be required to add any new users to your Mac laptop.
Install cybersecurity
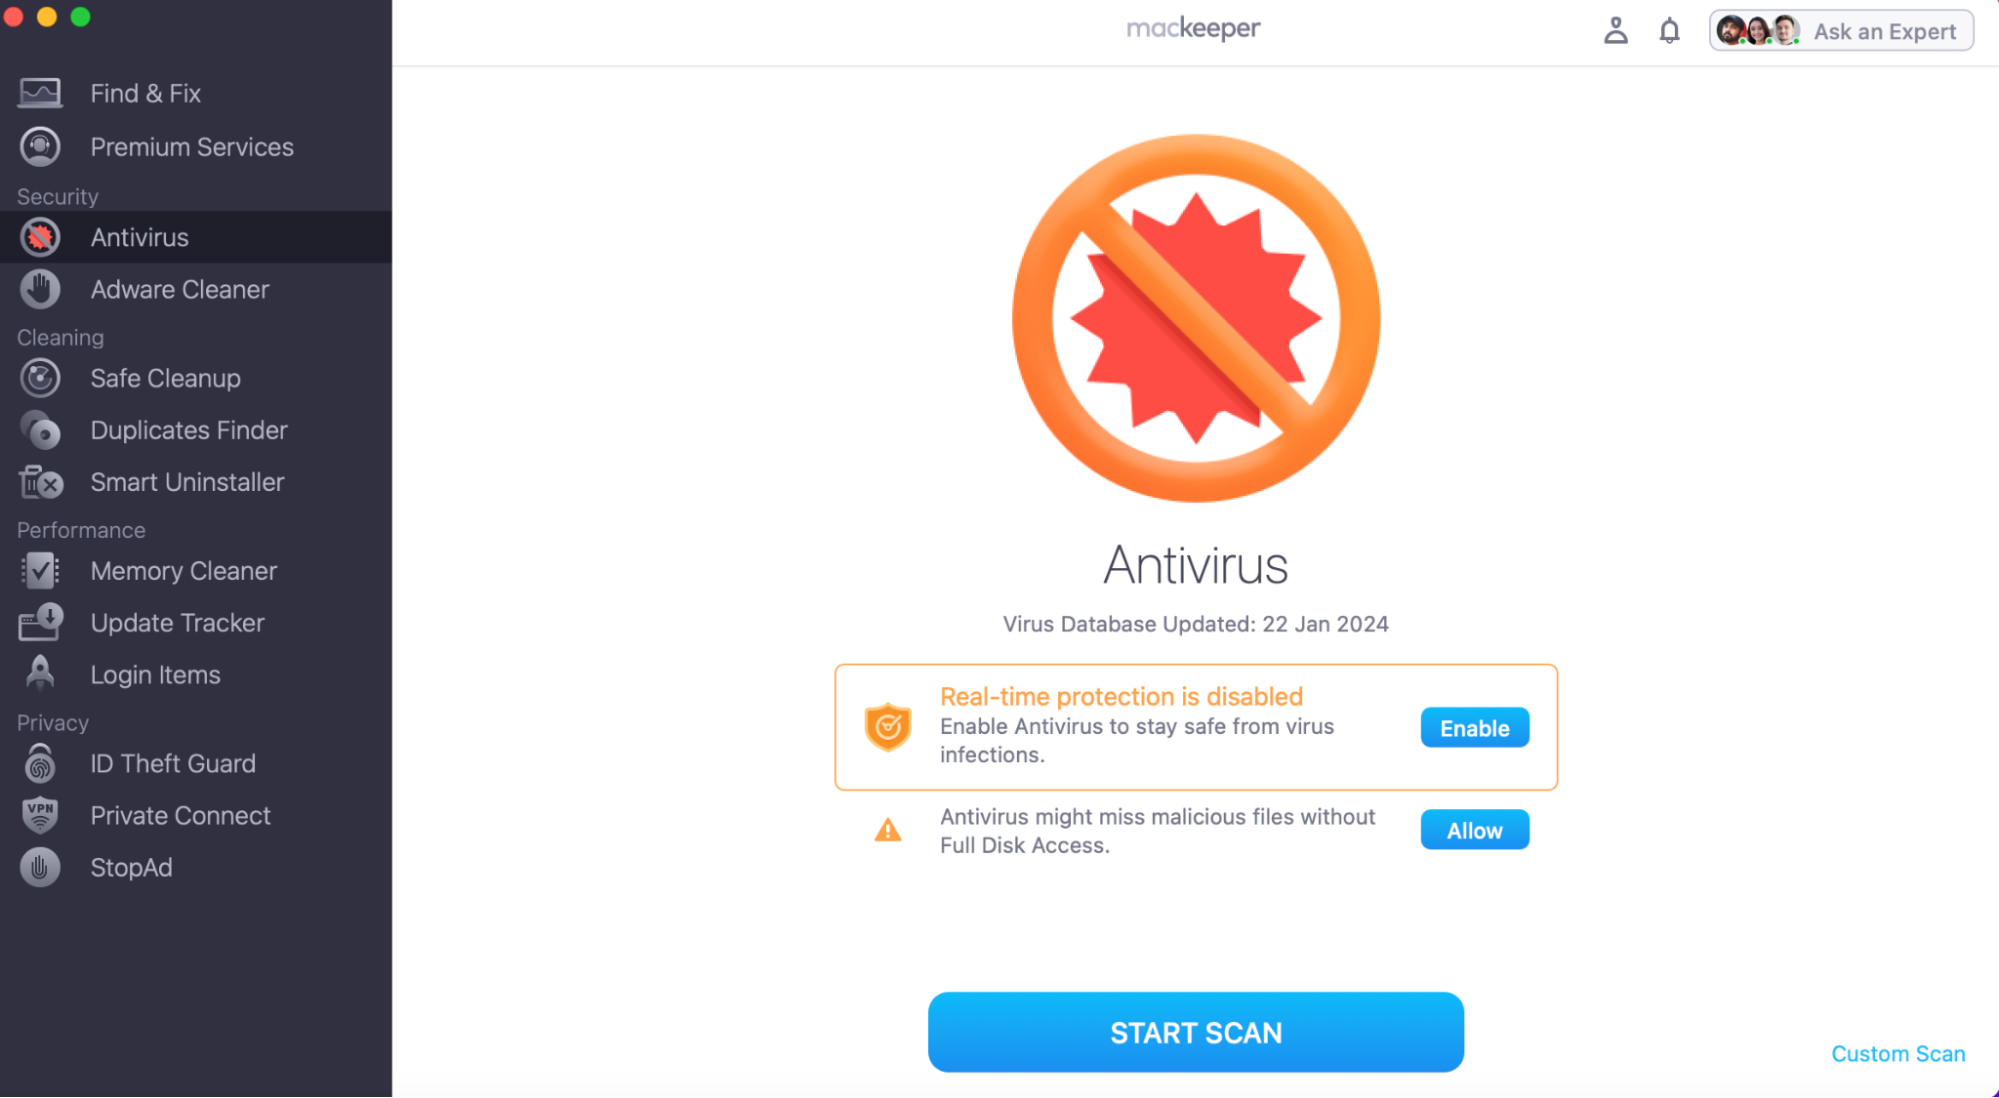
Using a Mac without antivirus used to be common practice, but these days it’s not recommended. There’s a lot more malware for macOS than there used to be, including ransomware. That’s why it’s a good idea to install our app MacKeeper as soon as you start using a MacBook. Among the other perks, our built-in Antivirus will offer you real-time protection and on-demand scans.
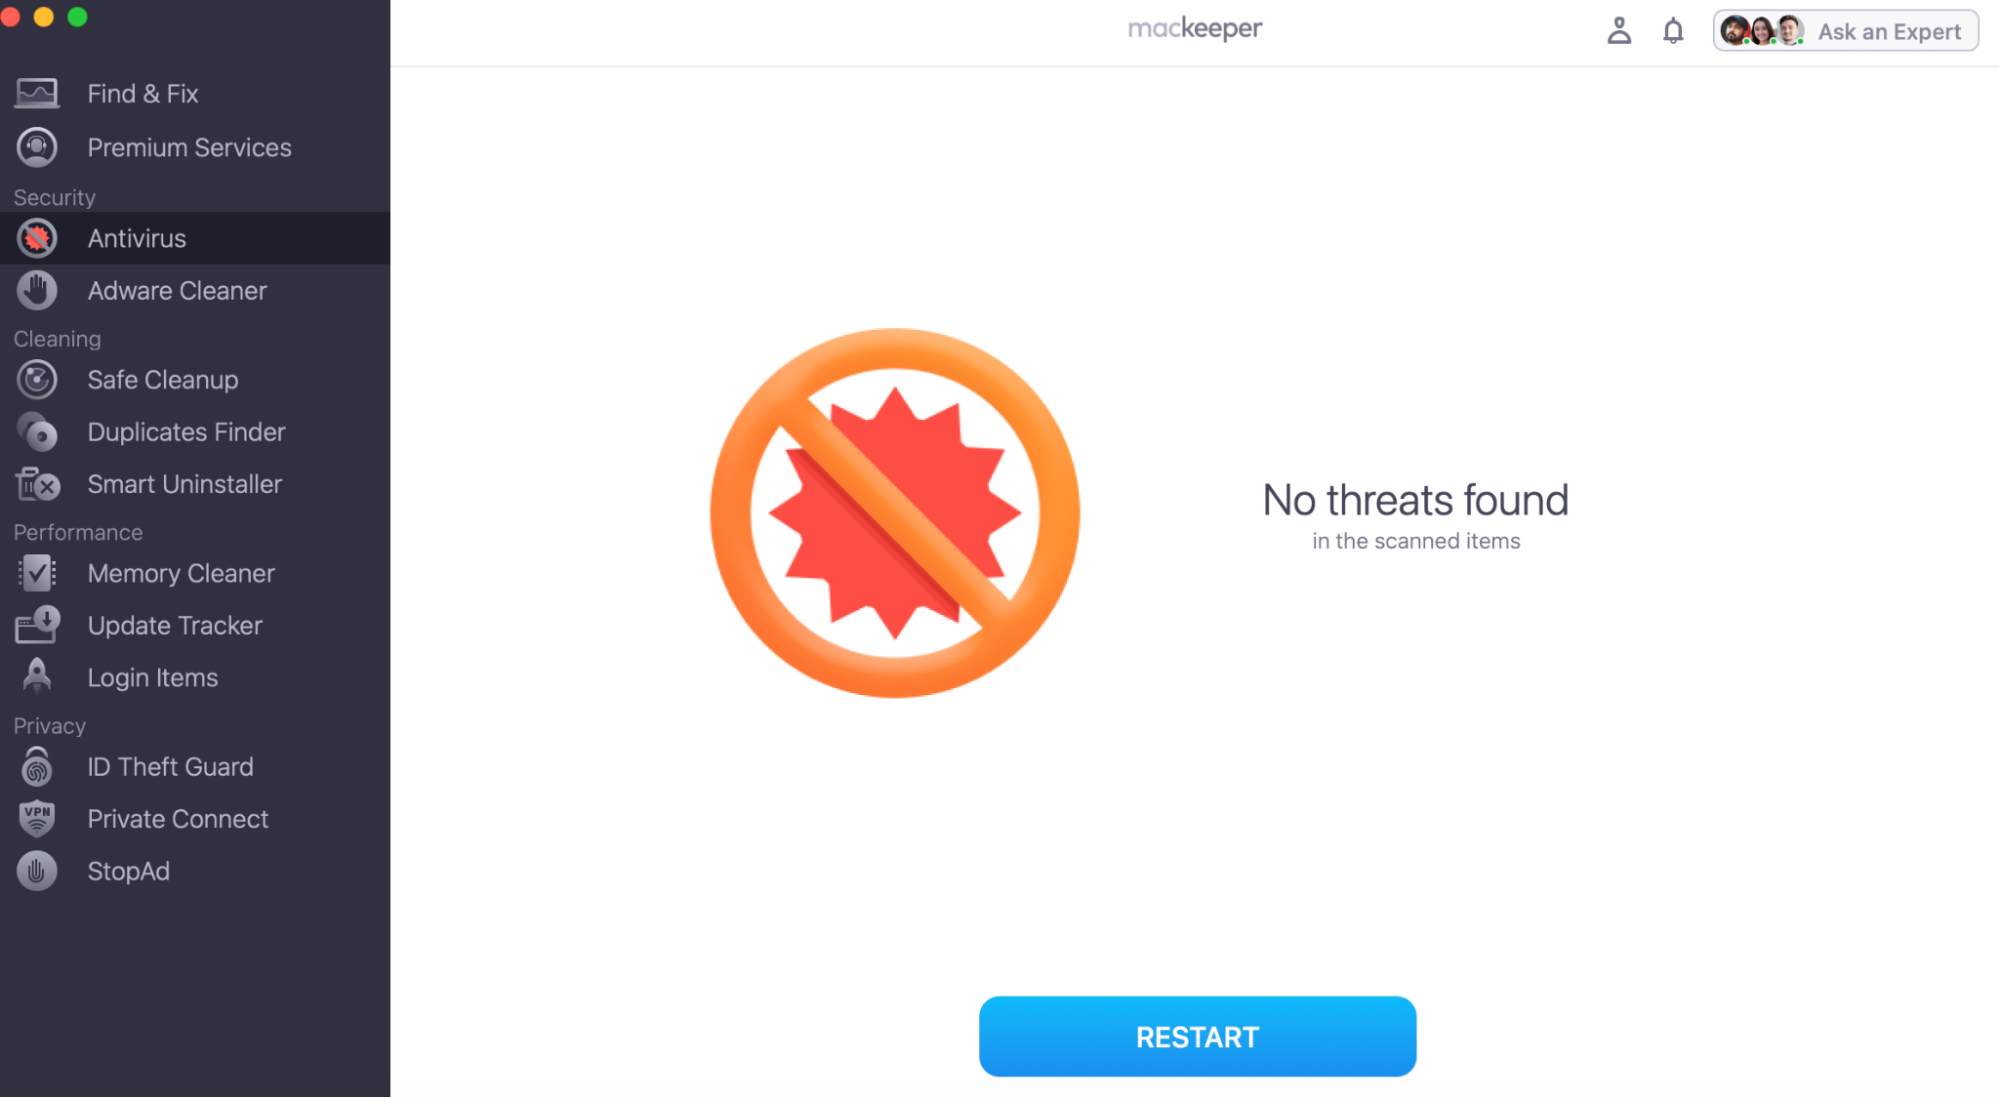
Here’s how MacKeeper’s Antivirus can be used to protect your MacBook:
- Launch the MacKeeper app.
- Select the Antivirus features from the left-hand side panel.
- Enable Real-time protection and allow full disk access.
- Click Start Scan, and if anything is found, choose to Move to Quarantine.
Essential tips and tricks for new Mac users
So you’ve got your new Mac, and it’s all set up. You might now be thinking, what next in my Mac training? In this second half of this guide, we’ll now cover the essential tips and tricks for Mac beginners to master:
- Screen grabs and recordings
- Force apps to quit
- Save your battery
- Find your cursor
- Share files wirelessly
- Right-clicking
- Auto unlock with Apple watch
- Use multitouch gestures
Screen grabs and recording
macOS has built-in screen grab and screen recording functionality integrated into its system that are both cool tools to have in your tool belt. It’s all done through the Screenshot app, which you’ll find in the Utilities folder. In older versions of macOS, it was called Grab.
To learn how to use a Mac screen grab and recording technology, you can use these keyboard shortcuts:
- Press Cmd + Shift + 3 to screen grab your whole screen.
- Press Cmd + Shift + 4 to grab a portion of your screen.
- If you follow that shortcut by pressing Space, you can switch to grabbing a screenshot of a particular app or window.
- Press Cmd + Shift + 5 to open a screenshot, where you can access all features, including video recording.
Force apps to quit
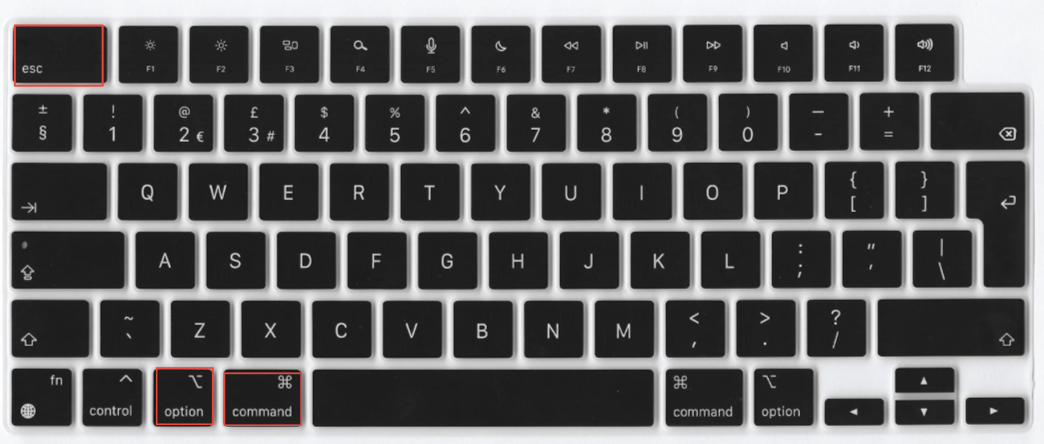
Although you can force quit Mac apps from Activity Monitor, there's a quicker way. In this MacBook user guide for beginners, we’ve included the steps to demonstrate how you can safely force quit apps:
- Press Option + Command + Escape to open the Force Quit Applications tool.
- Then select the app, and click Force Quit.
- macOS will ask if you really want to quit, so choose either Cancel or Force Quit.
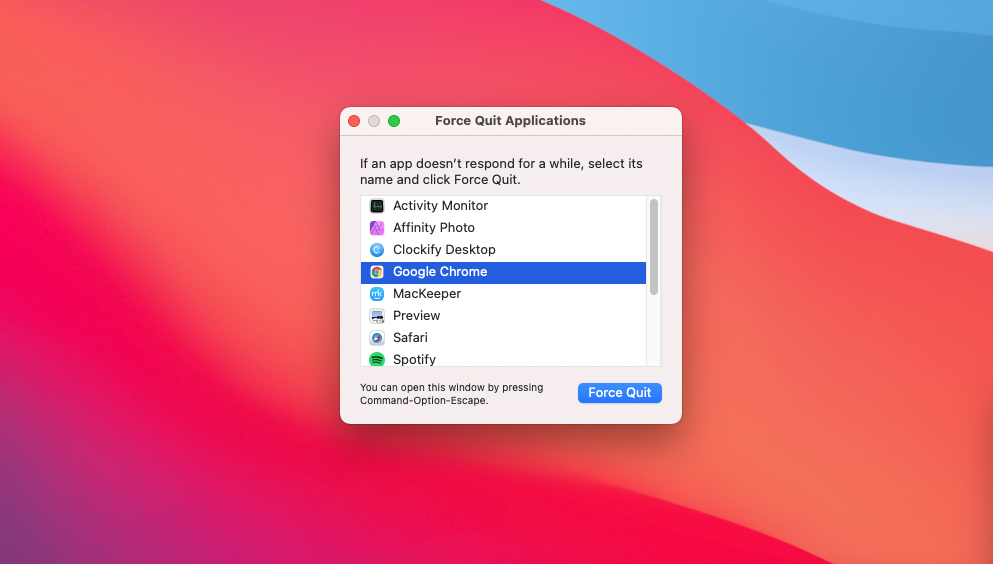
This feature is useful to remember if you ever need to deal with an app refusing to close or if the Mac keeps shutting down unexpectedly.
Save your battery
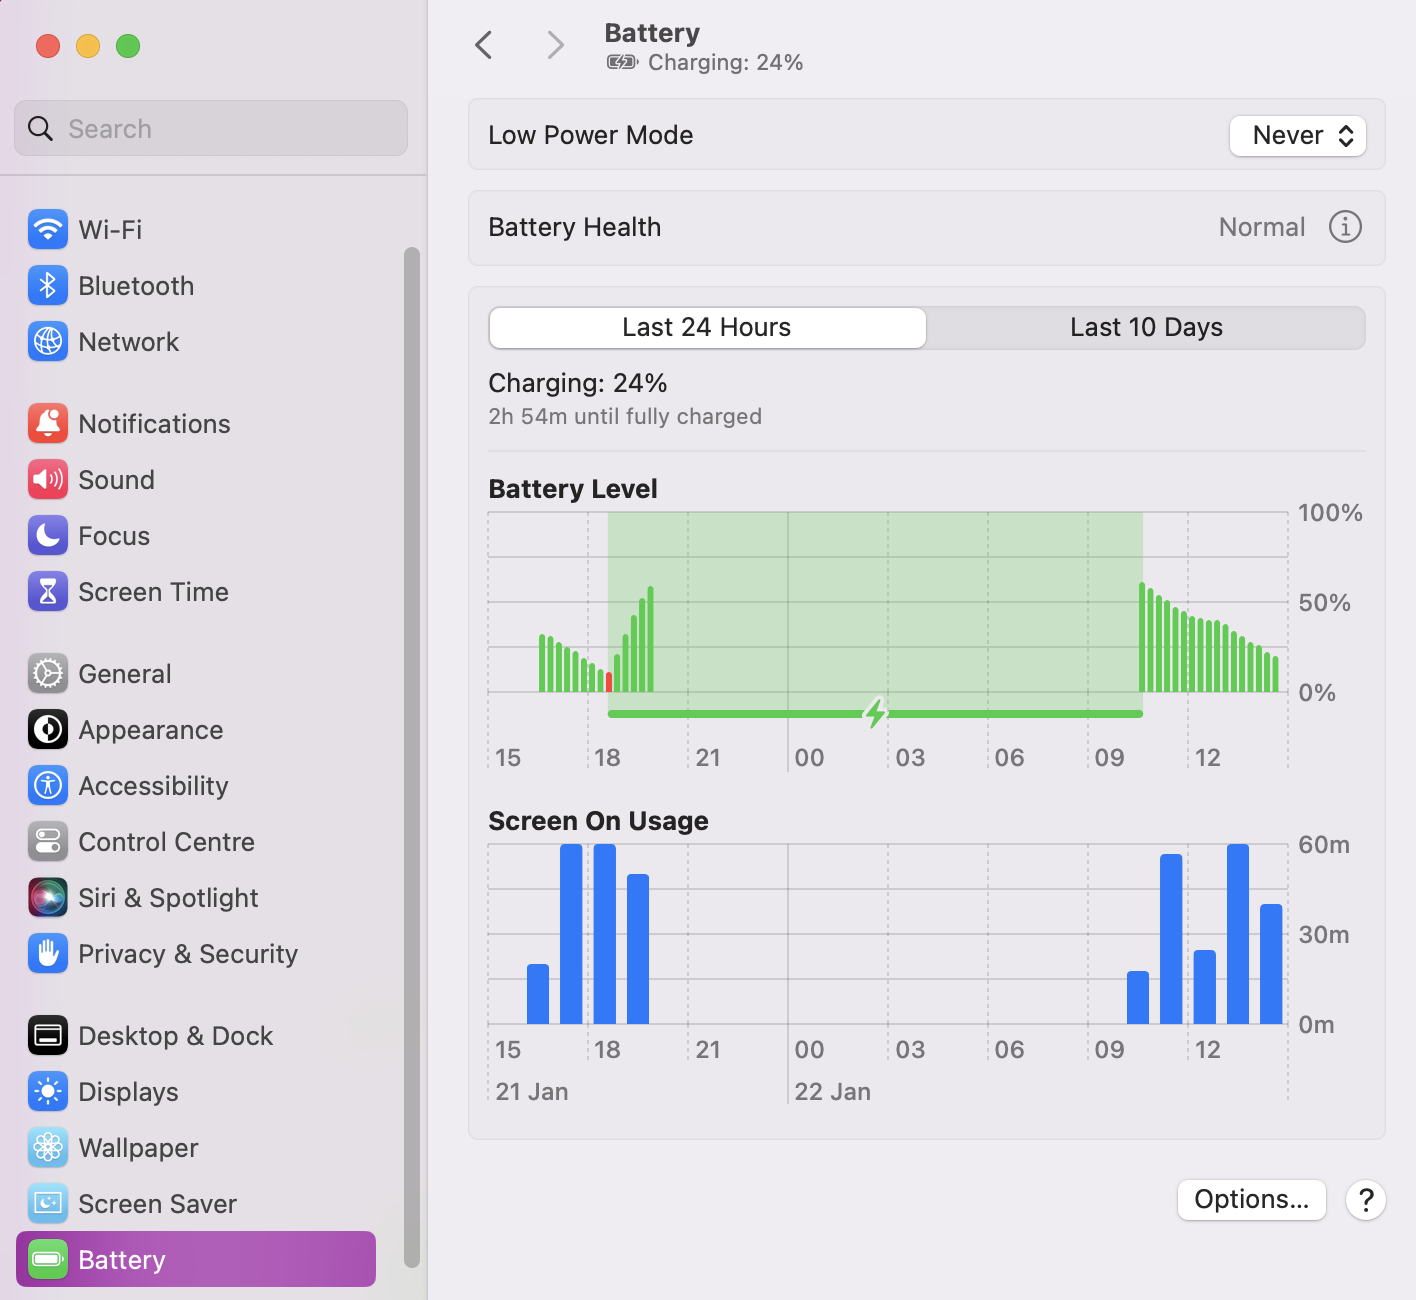
Sorting out your battery use is one of those essential Mac training tasks everyone should know about, including beginners as well as regular Apple users. Whether you’re using a MacBook Pro or MacBook Air, you’ll want your battery to last as long as possible.
Here’s how to efficiently enhance the device battery to help make it last longer:
- In System Settings, click on Battery.
- Choose how long it takes your MacBook to go to sleep if it’s not being used. You can also track battery usage, and health, as well as put your device in Low Power Mode to conserve energy.
Find your cursor
When you’re deep in the middle of a piece of work or engrossed in a web article, you might lose track of where the mouse cursor is. Our handy tip, especially for beginners, is to move your mouse around or move your finger around on your MacBook’s trackpad. This quick cursor visibility trick ensures a smoother experience as you start using a MacBook.
Share files wirelessly
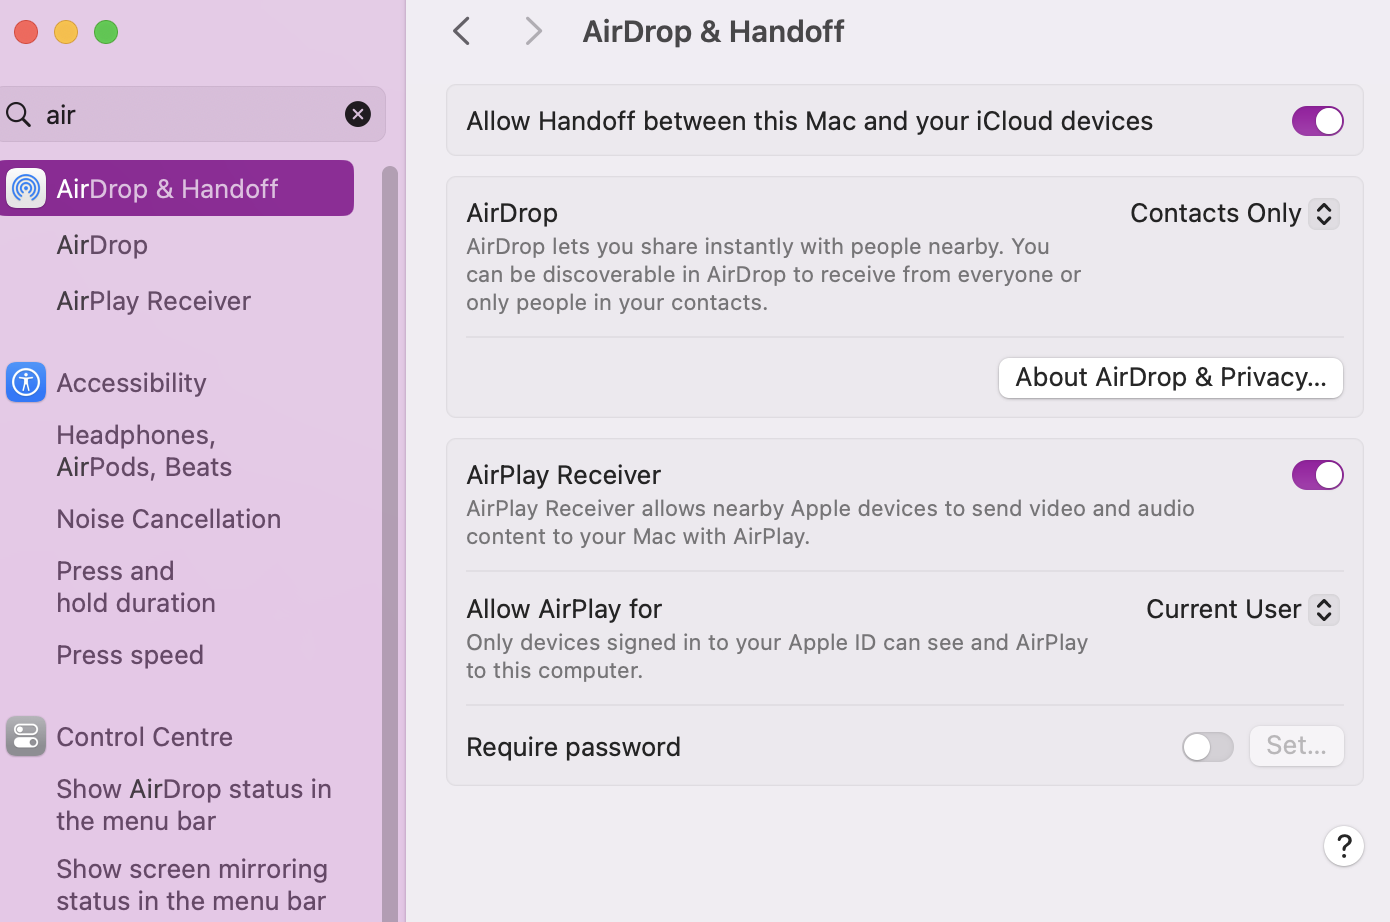
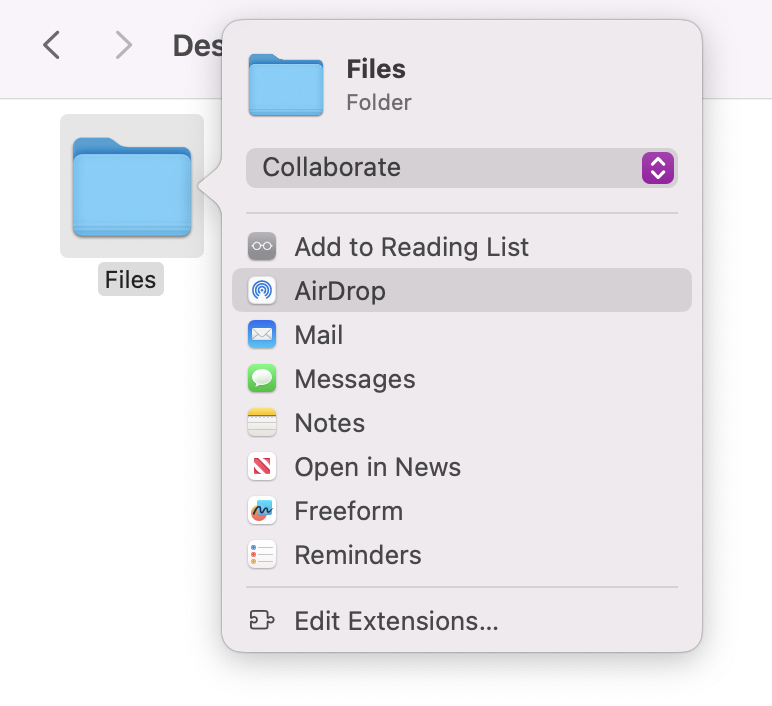
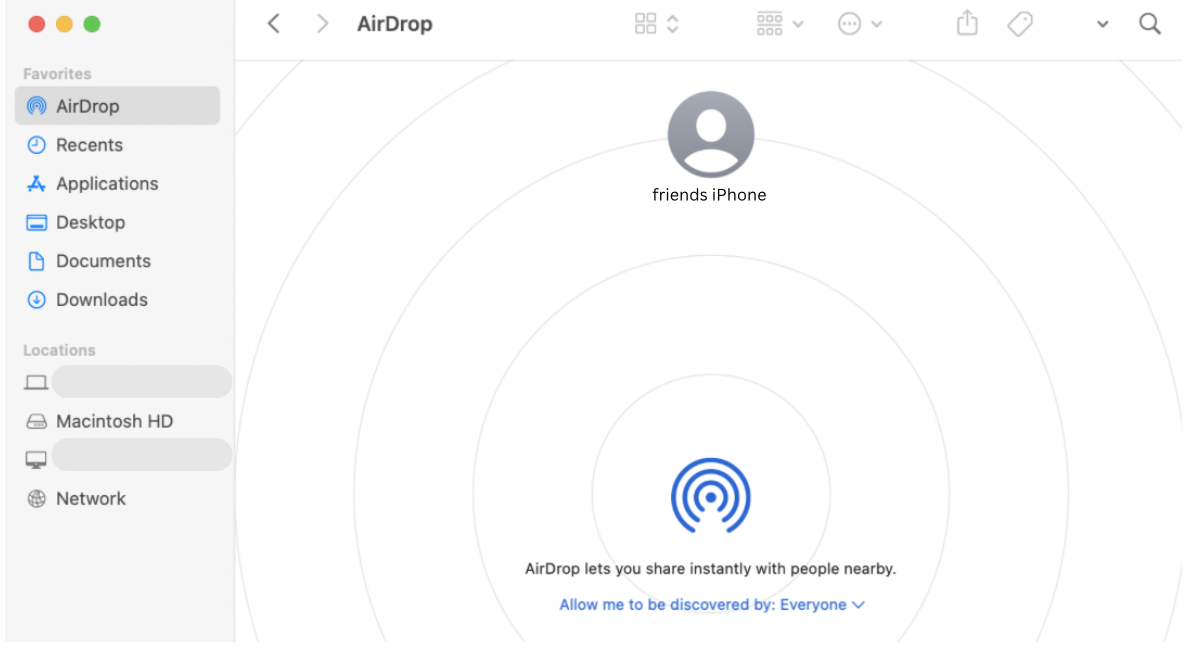
If you have an iPhone, Apple has made it easy to share all your essential files or images between your phone and your Mac by using AirDrop. Assuming it’s enabled on both devices, here’s how you can easily share files wirelessly:
- Make sure your Mac and iPhone Wi-Fi and AirDrop settings are both turned on.
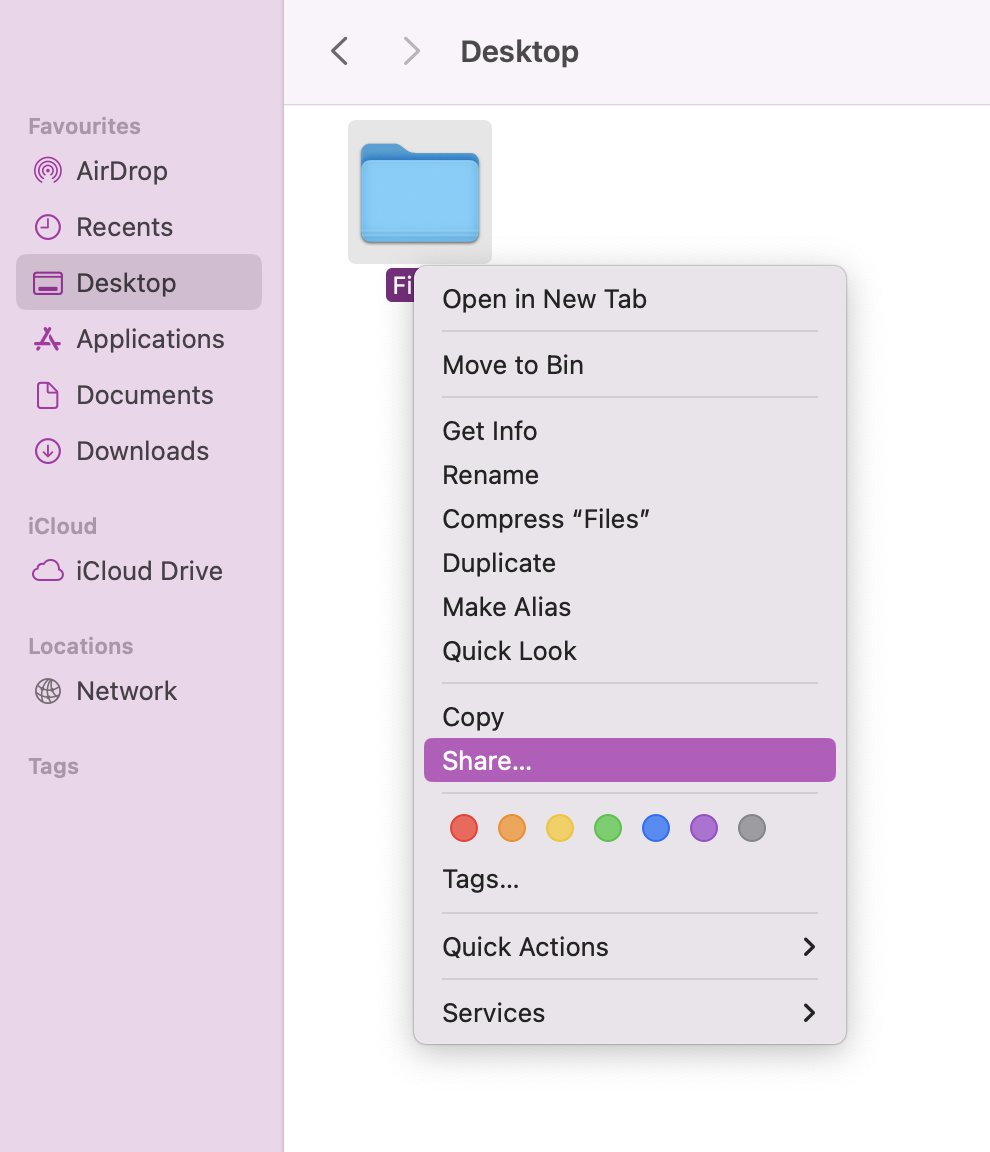
- Then, on your Mac, right-click the file that you want to share.
- In the menu that appears, hover over Share and click on AirDrop.
- Click on the recipient iPhone from the list to send the file.
- Click Done.
Hint from our team:
If you’re experiencing connection issues when using AirDrop, you might need to follow our guide on how to make Wi-Fi faster on Mac.
Right-clicking
With earlier Macs, there was no right mouse click. By default, Mac users would have to hold down the Ctrl key while clicking to access context menus and so on. Today, macOS supports right-clicking on the laptop trackpad and mouse, making it easier to learn how to use a Mac.
Auto unlock with Apple Watch
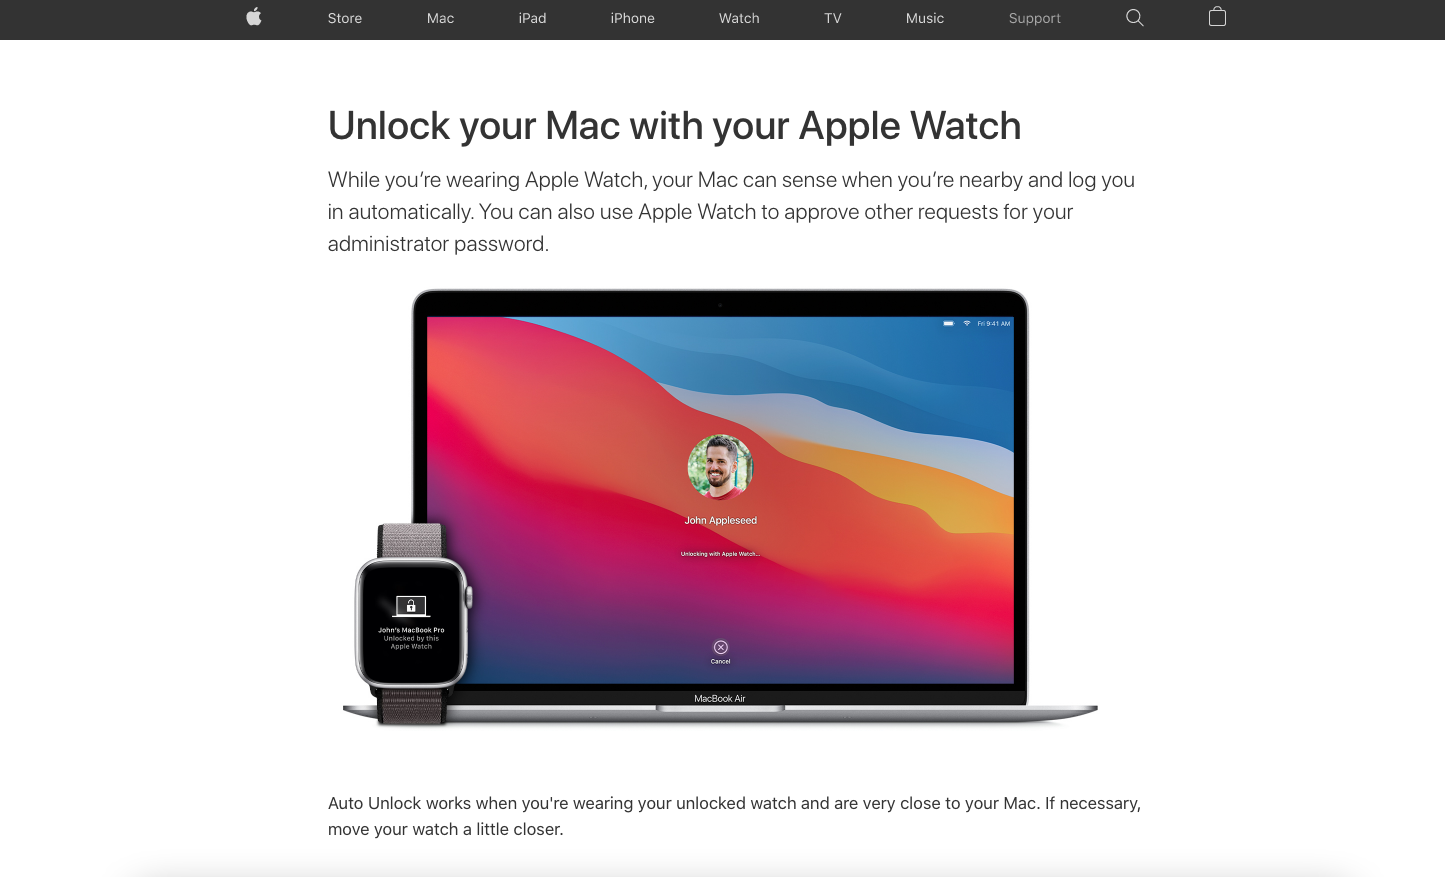
Apple Watch owners can set their Mac to unlock when the two devices are near each other automatically. This software integration saves you from having to type in your password to unlock your Mac. Another first-time Mac user tip worth knowing is that you can also use your Apple Watch to approve other password requests on macOS.
Use multitouch gestures
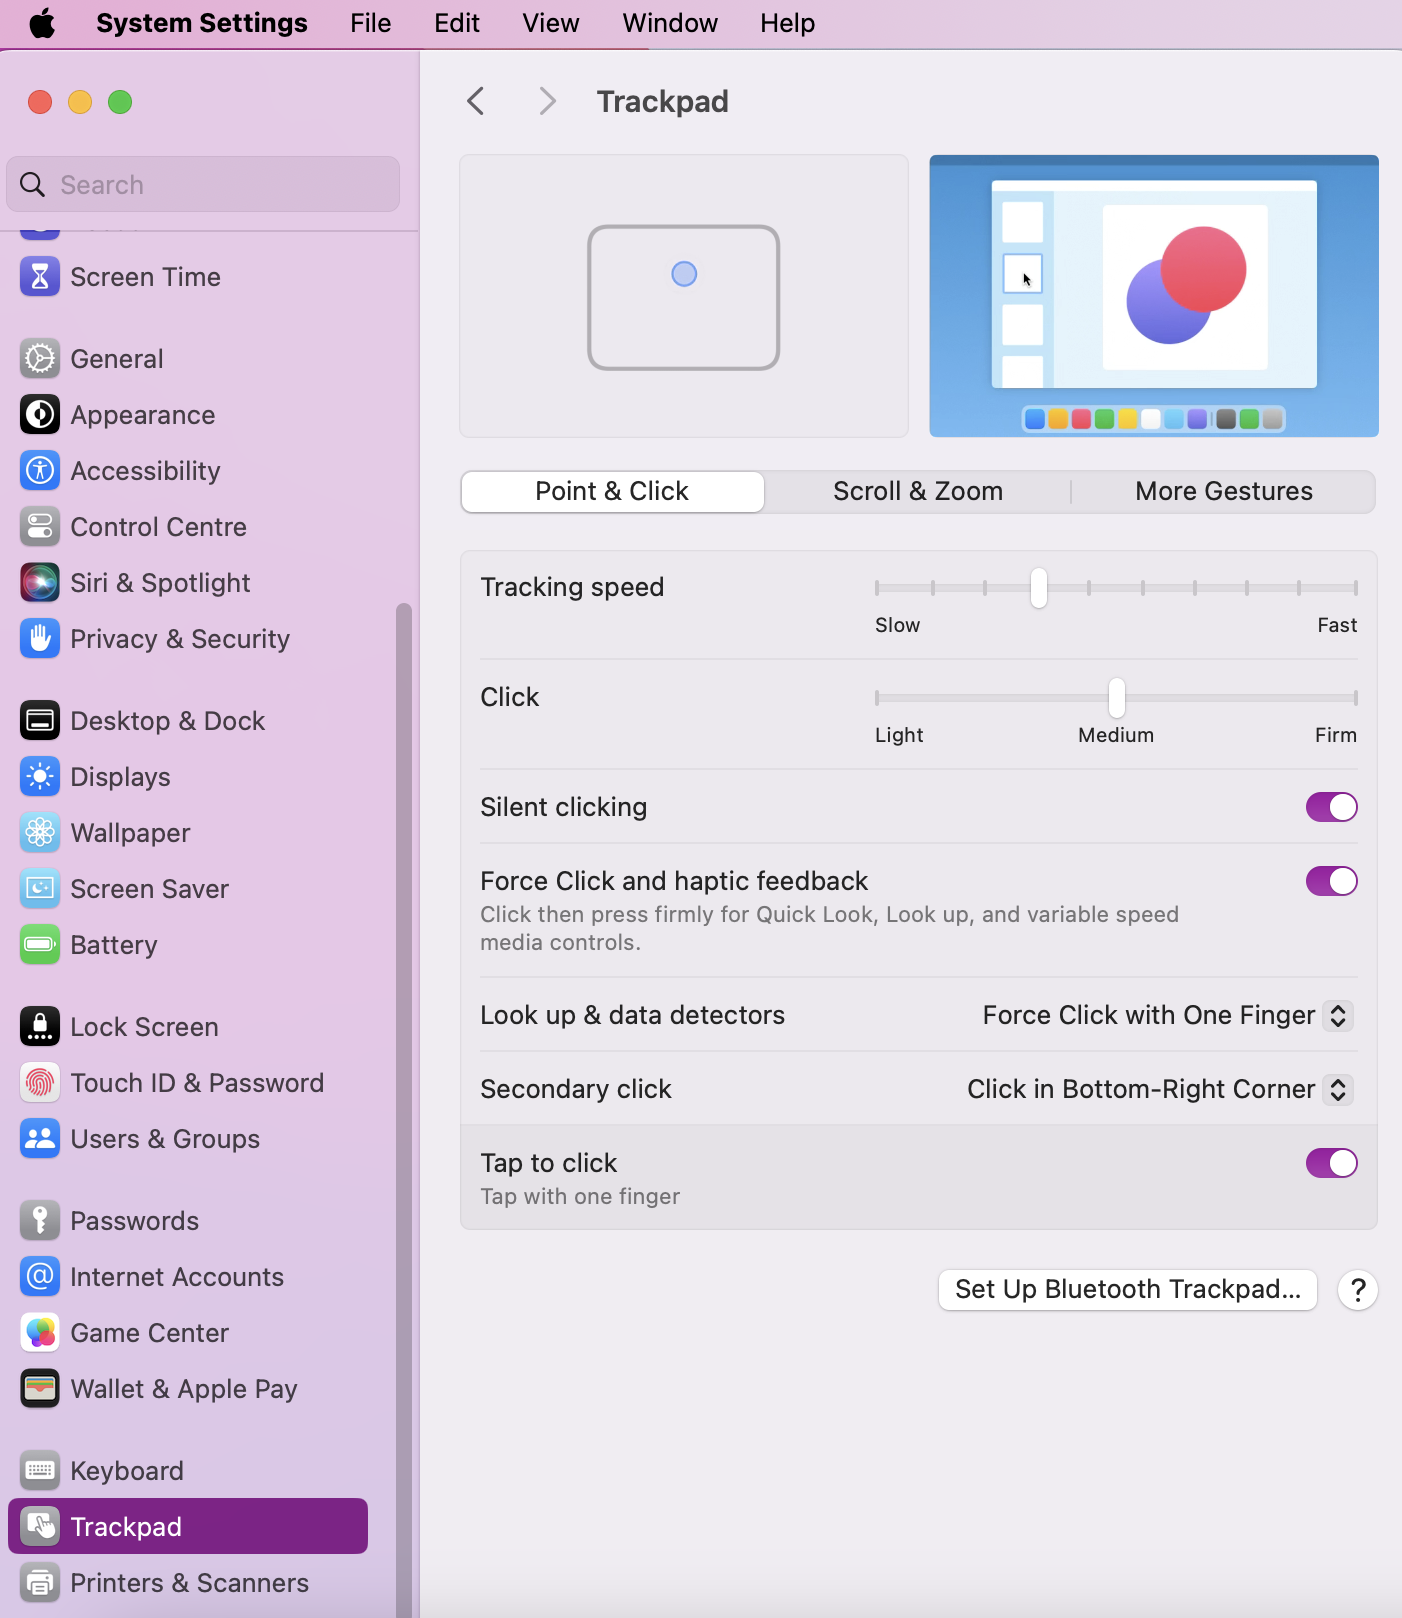
Using your MacBook trackpad or an external Apple trackpad, you can use various multitouch gestures to control macOS. They include swiping with two fingers to scroll, pinch zooming, and two-finger tapping for right-click. These gestures are perfect for beginners and developers alike, as they’re not complicated to get the hang of.
Here’s how you can explore the multitouch gestures to enhance your integration into macOS Sonoma:
- In System Settings, scroll until you see a Trackpad, and click on it.
- Customize your multitouch gestures to meet your preferences.
Troubleshooting your Mac
Most of the time, your Mac will probably run smoothly, but all computers can run into problems from time to time. To help show you how to use Mac efficiently, here are a few common issues you might encounter and need to troubleshoot to fix these Mac problems:
Mac freeze-ups
One of the last things you want when you first start using a MacBook is for it to freeze up. You can be right in the middle of an essential work task or download, and then out of nowhere, your system just stops responding. You might be able to move the mouse cursor, but you can’t do much more. There are many reasons this might happen and several different ways to stop your Mac from freezing up, but the most common cause is an overloading processor.
Note from our experts:
It might also be worth checking how much storage you have on your laptop, as too much can cause lagging and performance issues. We recommend you go into Finder and delete duplicate photos and files you find to relieve your storage space. You can also use MacKeeper's Duplicate Finder to do it all automatically, with no effort spent.
If your Mac won’t turn on
Getting your Mac to power up should be easy. If it doesn't turn on, there are some steps you can take to get it working again quickly so you can continue important work with a MacBook or an iMac. This can be as simple as checking your power cables and plugs, or it can involve resetting various settings, including factory resetting your Mac.
Problems with sound
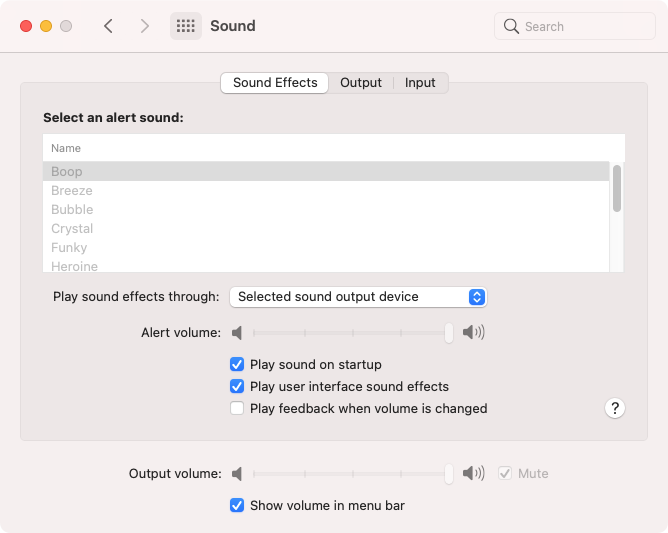
Without sound, you can’t, of course, enjoy music or videos on your Mac. For starters, you should check your speakers and headphones to make sure they’re working and plugged in properly. Then you should start digging into the settings in the System Settings. Check different apps, try your audio hardware on a different computer, and see if your Mac needs updating.
Slow performance
Sometimes you might find your Mac does everything it’s supposed to, just very, very slowly. There are many reasons why your Mac might be running slowly. The most common explanations behind the slow performance include:
- Having too many apps or processes running at once
- Hardware failures
- Malware infections or cyber-attacks
To fix your Mac, you should try to use a process of elimination to find the cause. If you still need help, you should contact an expert to get professional help to solve the issue. When you suspect there might be malware on your Mac, use an antivirus app like MacKeeper to help quickly find and remove malware.
Running out of space
This is particularly a problem with newer Macs, which might come with fast processing chips like the M2 or M3 pro, but limited solid-state drives (SSDs). The smallest one Apple offers at the moment is 256GB, which can easily fill up if you download a lot of cool content or essential apps for work or gaming. If you find you’re running out of space, you can clear caches and log files, delete unneeded downloads, and erase old email attachments. These are just a few of the ways you can quickly get back Mac storage space.
Enjoy using your Mac
Throughout this in-depth intro to Mac for Windows users, we covered subjects that are still just the tip of the iceberg. The more you learn how to use your Mac, the more you’ll discover tricks, secret shortcuts, and cool things you can do with it. Our guide is just a Mac and MacBook 101, but the possibilities are endless, so perhaps the best advice from our team is to simply enjoy using your Macintosh laptop or iMac computer.
You’ll find it even easier to benefit from your Mac experience if you’re spending less of your own time performing maintenance and system checks. That’s why allowing our MacKeeper app to assist you along your journey is a good idea. Let MacKeeper focus on keeping your device optimized, up-to-date, and free from cyber threats with a host of optimization and Antivirus tools. That way, you’ll spend more time enjoying your Mac and having fun.


