How to Permanently Block Websites on Safari on Mac
Blocking websites is not a trivial task, and you may require expert help. MacKeeper’s Premium Services can help you set all important configurations and show you how to permanently block websites on Safari on a Mac in the most efficient way.
Use Screen Time to block websites in Safari on Mac.
To create a Safari restriction list, go to System Settings > Screen Time > Content & Privacy > Content Restrictions, select Limit Adult Websites, click Customize, and add websites you want to block.
Choose Allowed Websites Only to specify the list of websites that can be opened in Safari.
You can modify the host file in Terminal to block the website at the system level.
Use third-party tools to block websites in Safari without Screen Time.
Use tools like StopAd to block ads, pop-ups, and online trackers.
You can access just about any website on Safari, but there are times when you’d want to restrict some websites for one reason or another. Maybe you share your Mac with your family, or your kids use it for school and entertainment. Maybe you just prefer not to access certain websites. Whatever the reason, Mac allows you to block websites from launching on Safari.
There are several ways to ban websites on Safari on your Mac, the obvious being third-party apps. But you can also blacklist websites using Mac’s Screen Time feature, and in Safari through your router. Not sure how that works? We’ve got you covered. This article will show you all the ways to block websites on Safari on your Mac.
A note from our experts:
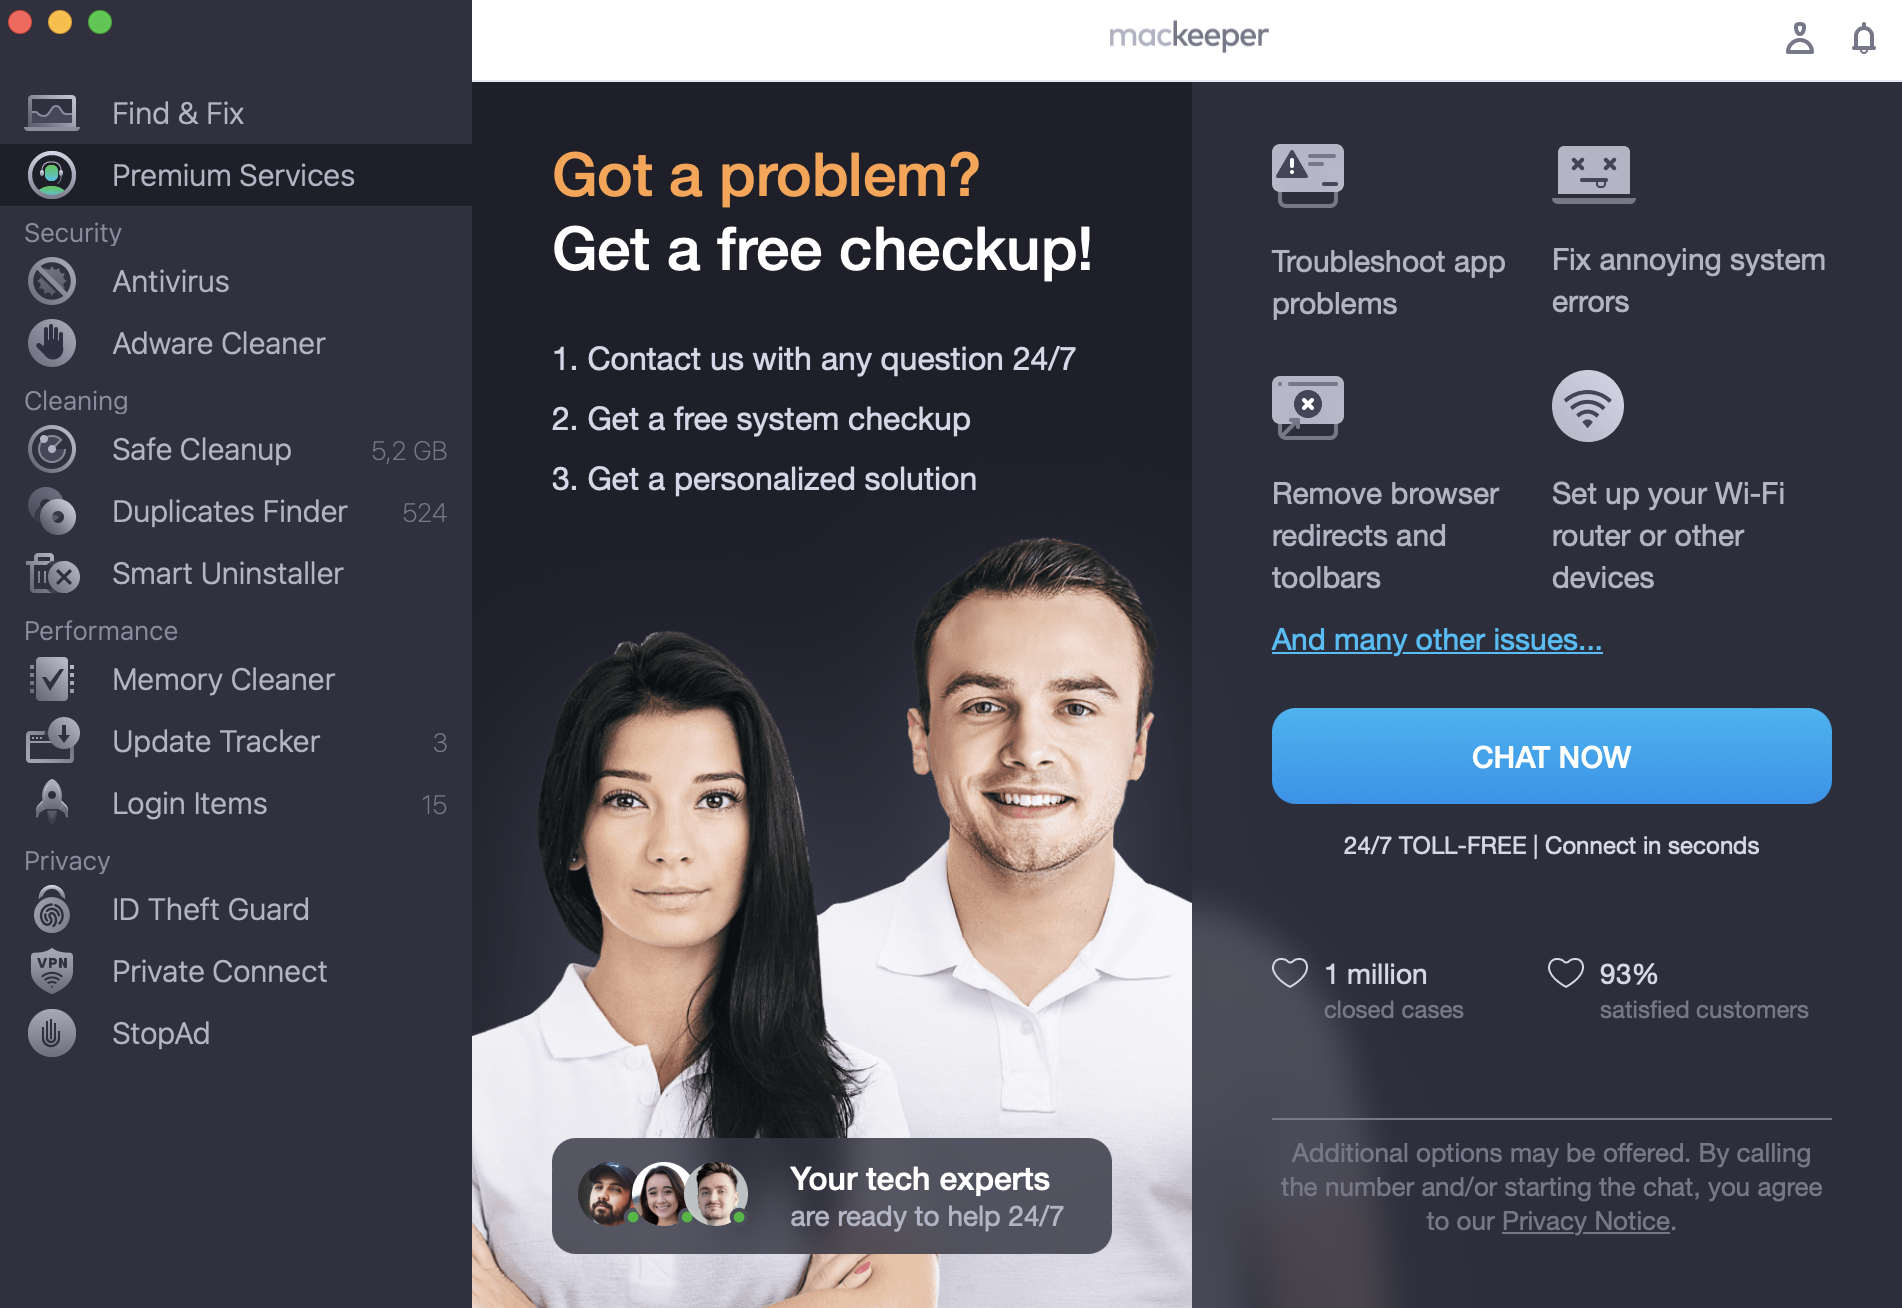
Sometimes you might need help to solve the issue with your Mac. If blocking websites is one of them, ask our experts to help. Use MacKeeper’s Premium Services, which are available 24/7.
Launch our app and click Premium Services on the left.
Start a chat with an expert to get your issue resolved.
Step 1. MacKeeper > Premium Services > Chat nowStep 2. Start a chat with one of our experts
Let’s have a look at all the ways you can block websites on Safari on your Mac.
How to block websites on Safari on Mac
The easiest way to block websites on Safari on a Mac is to use Screen Time settings. You can restrict access to specific websites on Safari or open only allowed websites. This is also how to block undesirable websites on Google Chrome.
How to block websites in Safari on a Mac using Screen Time
Apple's Screen Time helps you manage and track how you use apps and websites on your Mac. Alongside downtime schedules and app limits, it gives you the cleanest built-in way to shut out unwanted sites, and from our experience it's the method most people should reach for first.
To set a list of websites you want to access on Safari:
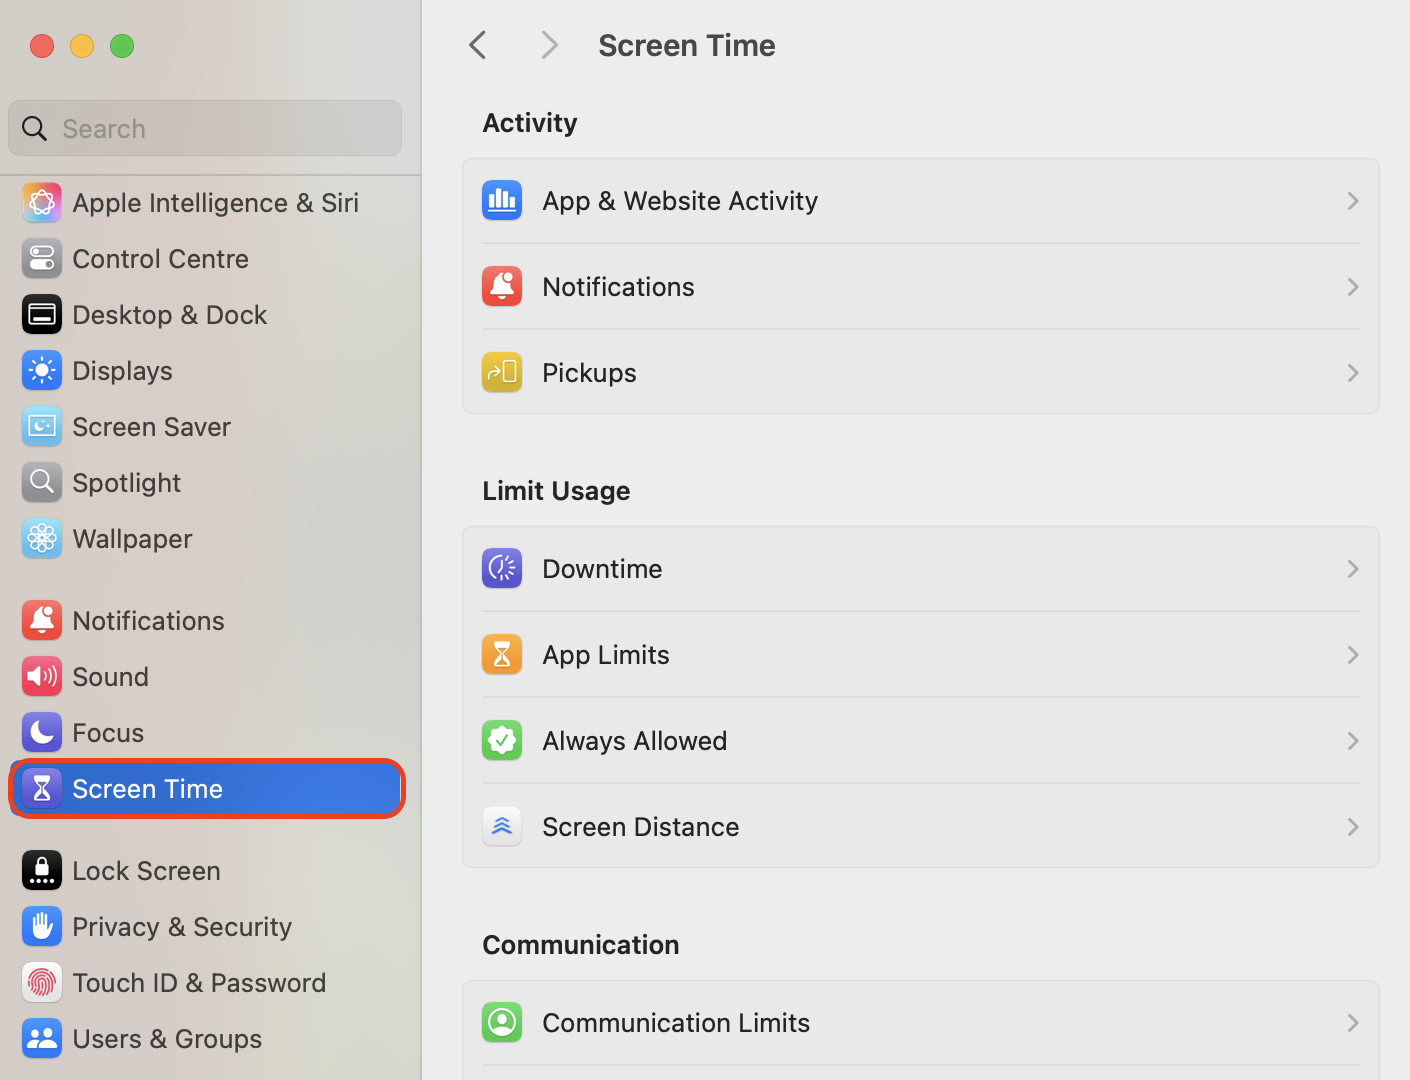
Open the Apple menu, select System Settings, then click Screen Time in the sidebar.
Turn on App & Website Activity if it isn't already enabled—the rest of the options stay greyed out until you do.
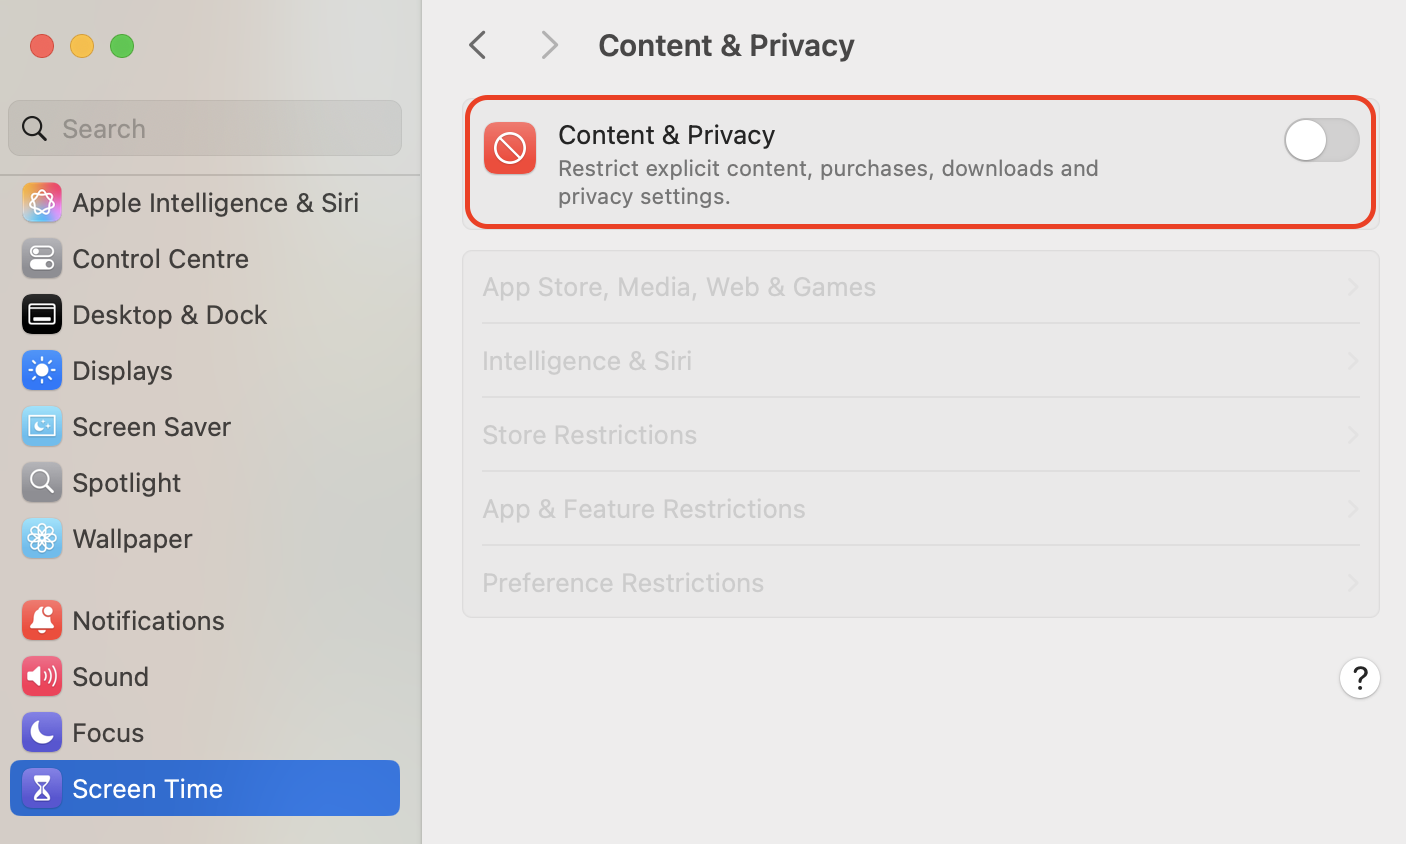
Click Content & Privacy, then switch Content & Privacy on.
Click App Store, Media, Web, & Games. On older macOS versions, this pane is called Content Restrictions.
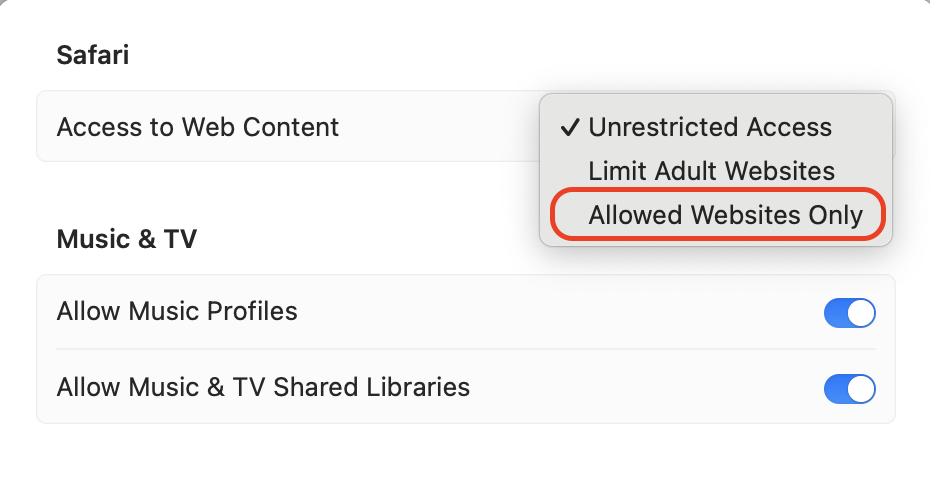
Open the Access to Web Content menu and choose Allowed Websites Only.
Click Customize, use the plus icon to add every site you want to permit, then click Done. Anything outside that list simply won't load in Safari.
Step 1. Open System Settings and click Screen Time in the sidebar to beginStep 2. Click Content & Privacy and switch the Content & Privacy toggle onStep 3. Open App Store, Media, Web, & Games and set Access to Web Content to Allowed Websites Only
And here's how to block individual sites while leaving the rest of the web open:
Go back to System Settings > Screen Time > Content & Privacy > App Store, Media, Web, & Games.
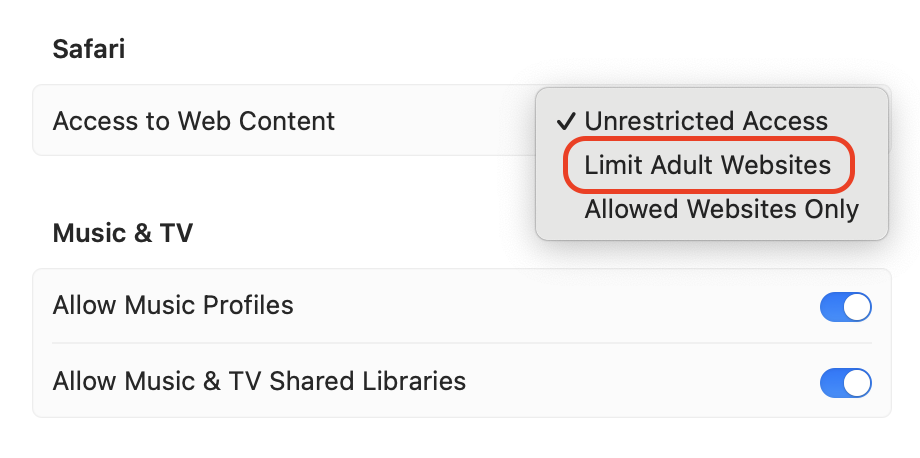
Set Access to Web Content to Limit Adult Websites.
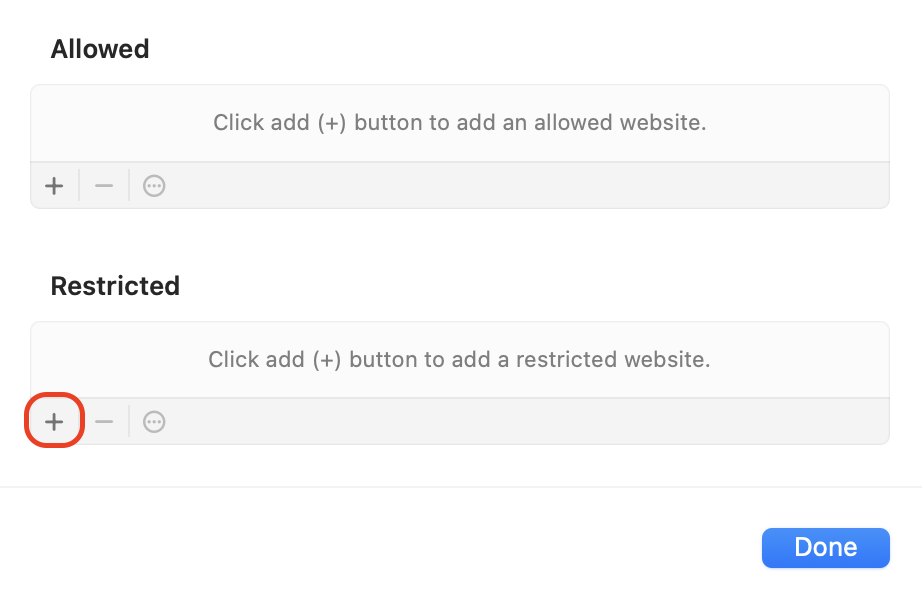
Click Customize to open the allowed and restricted lists.
Under Restricted, click the plus icon, type the full URL, and click Done.
Repeat for every site on your list, then click Done to save.
Step 1. Choose Limit Adult Websites, then click Customize to open both listsStep 2. Click the plus icon under Restricted and enter each website you want blocked
That's it—Safari will now refuse to open the sites you've listed.
A tip from our experts: If you're setting these limits for a child, scroll down in Screen Time and turn on Lock Screen Time Settings to create a four-digit passcode. Without it, the restrictions are two clicks away from being switched off.
How to block websites in Safari on a Mac with Terminal
Terminal is Mac’s interface that allows you to block websites without parental controls. It works by blocking websites from opening on the local IP address. As this is a more technical method, only attempt it if you’re comfortable with using command-line prompts.
To restrict access to the website using Terminal:
Launch Finder on your Mac
Click on Applications, then double-click on the Utilitiesfolder.
Double-click on Terminalto launch it.
Start by backing up the host file. This is an important step, in case anything goes wrong. To back up the host file, type “sudo /bin/cp /etc/hosts /etc/hosts-original” on a new line and press the Returnkey.
Enter your Mac’s admin password when prompted, then press the Returnkey again.
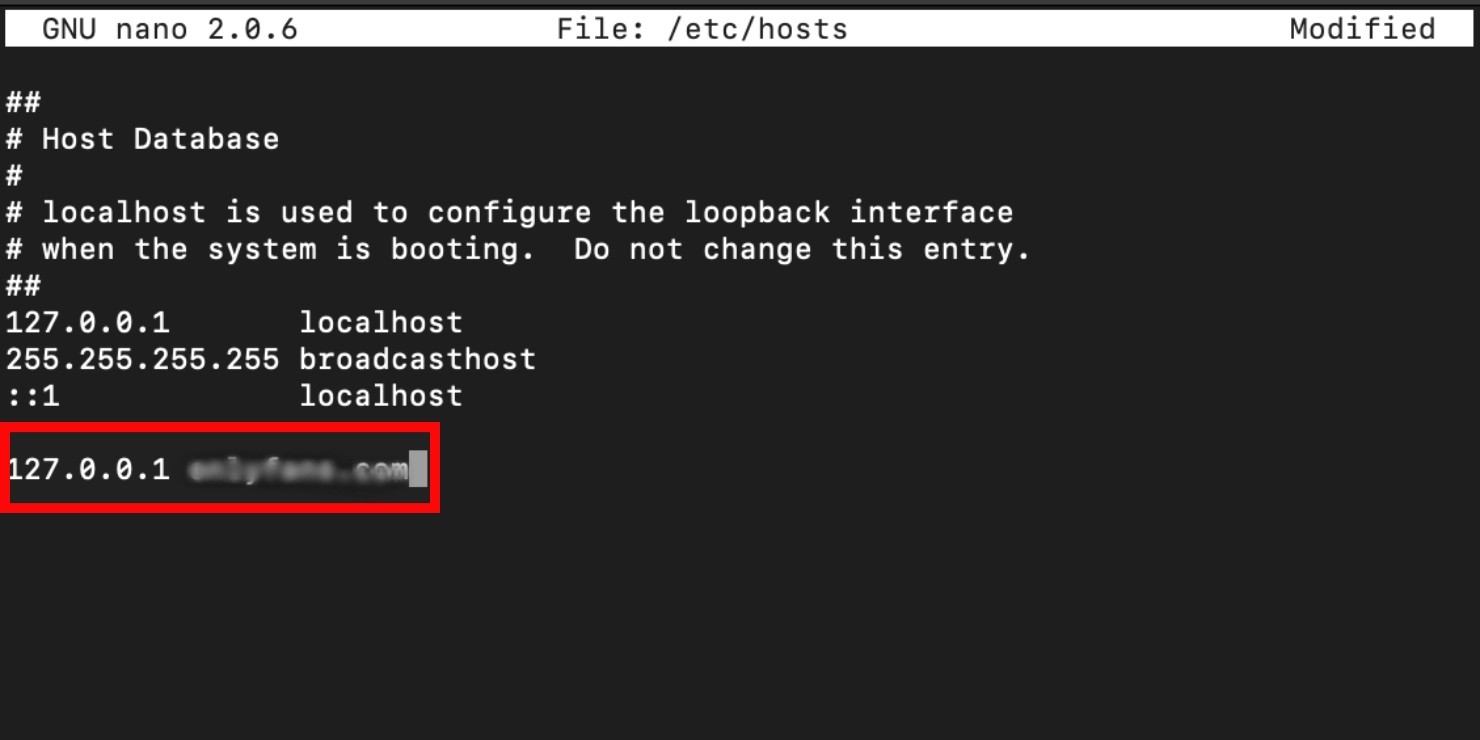
Type “sudo nano /etc/hosts”, followed by the Returnkey.
Using the down arrow key on your Mac, go to a new line and add the URL of the website you want to block, with the local IP address “127.0.0.1” before it, separated by a space. Be sure to add all the versions of the website on a new line, For example, “127.0.0.1 onlyfans.com” and “127.0.0.1 www.onlyfans.com”. Do this for every website you want to block.
When you’re done, press Control-O. Now press the Returnkey. Your blocked websites are now saved.
To exit Terminal, press Control-X.
If you’re uncomfortable with using this method, there are more ways to block websites on Safari.
How to block websites in Safari on a Mac through router
You can also adjust settings directly on your Wi-Fi router to block websites without touching Screen Time at all. As our team has found, this approach is the most thorough of the lot, since it restricts the site across every device on your network rather than one specific Mac.
Here's the process from your Mac:
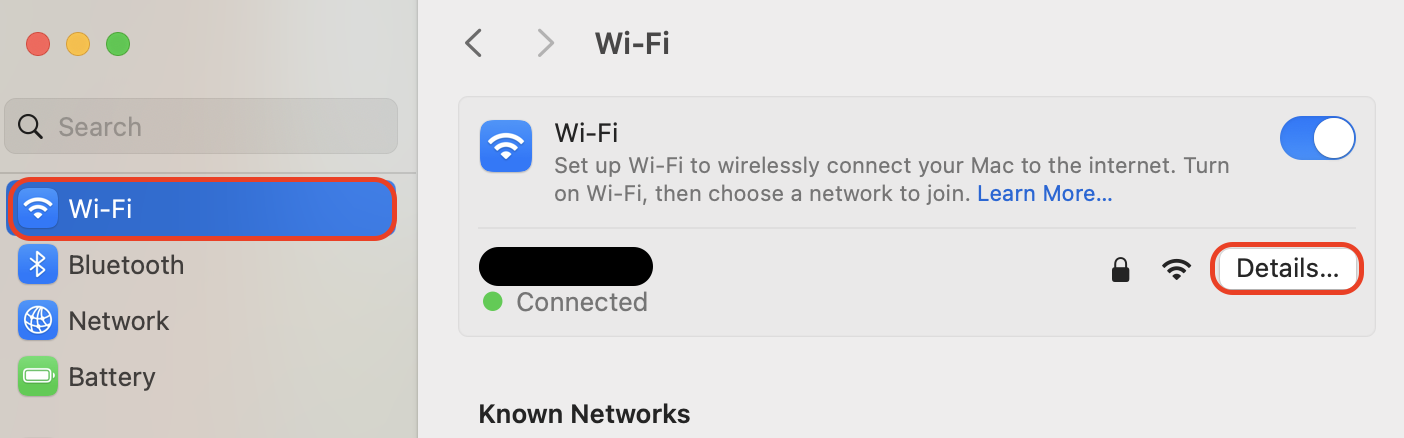
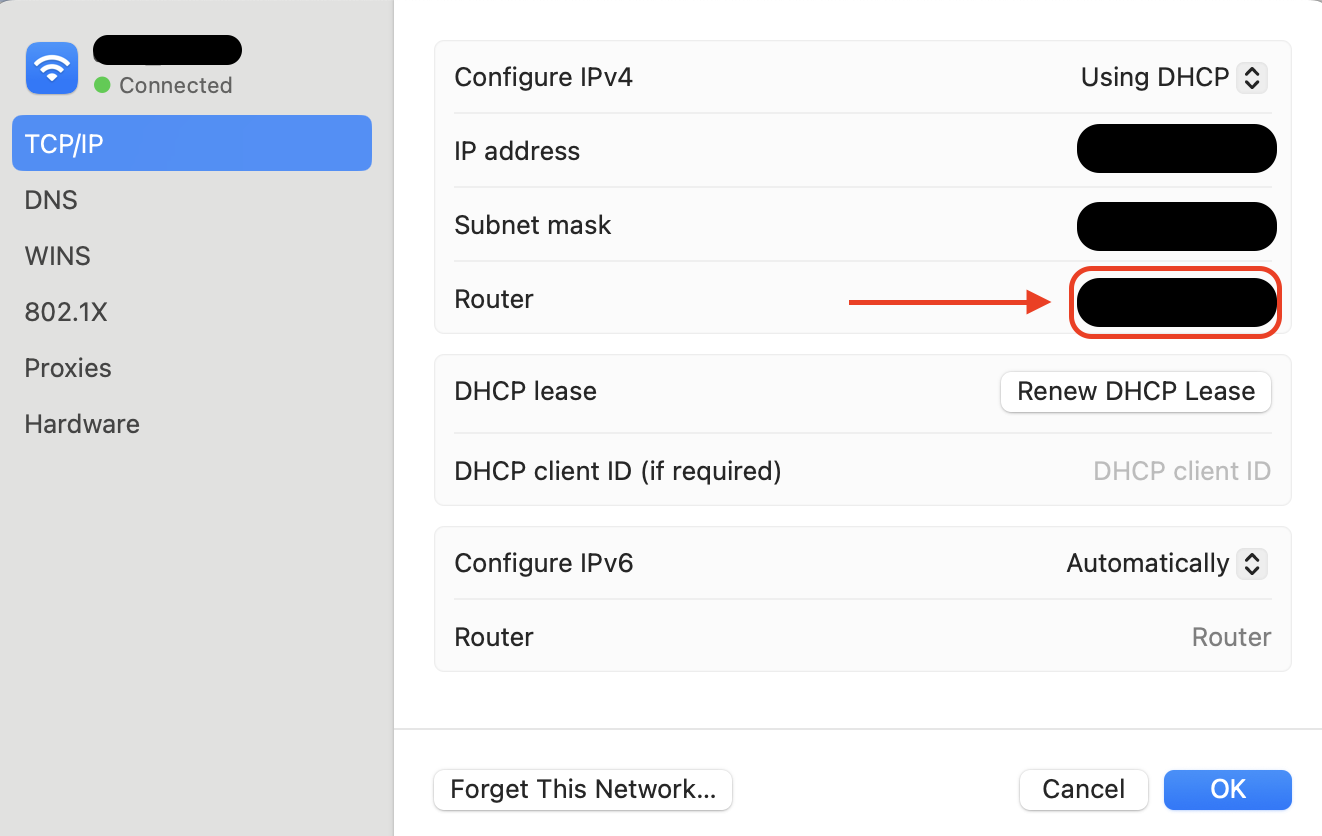
Find your router's IP address—it's usually printed on a label underneath the device. Alternatively, go to System Settings > Network > Wi-Fi > Details… > TCP/IP, where it appears next to Router.
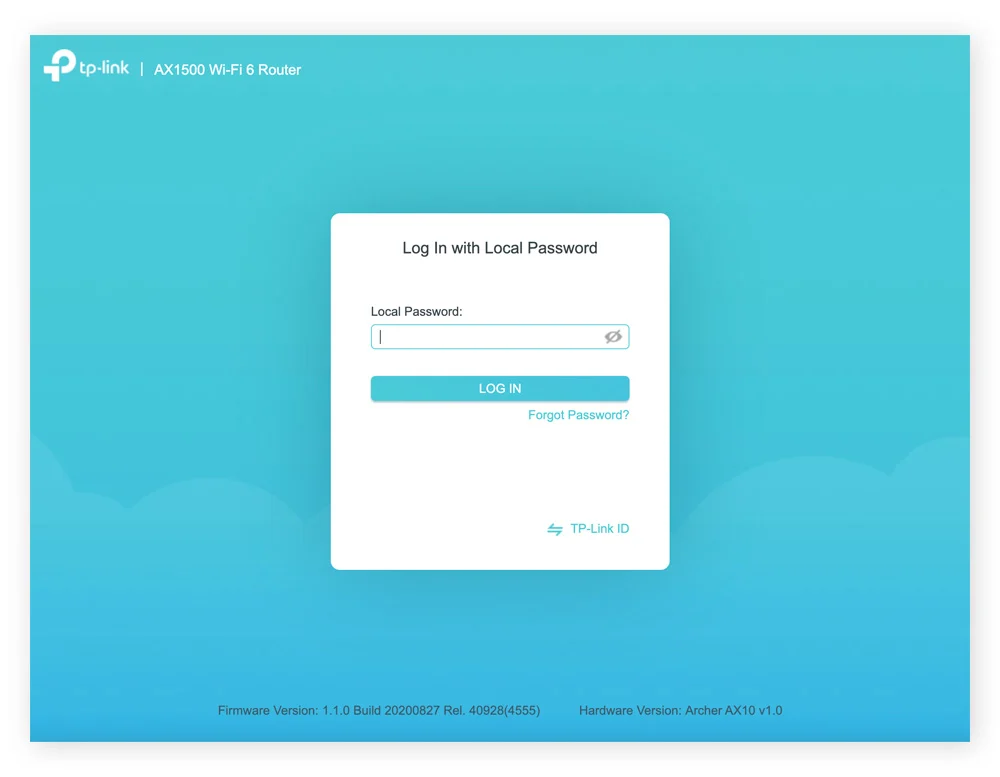
Type that IP address into Safari's address bar and press Return.
Enter your router's admin name and password when prompted.
Look for a section named Parental Controls, Access Restrictions, or URL Filtering—the wording varies between manufacturers.
Add each website you want to block and save your changes.
Step 1. Go to System Settings > Network > Wi-Fi and click Details next to your networkStep 2. Open the TCP/IP tab and copy the address shown next to RouterStep 3. Enter your router's IP address in Safari and sign in with your admin credentials
You're all set. Just remember to repeat this if you ever swap out your router.
How to block websites in Safari on a Mac using third-party website blocker apps
Up until now, we’ve shown you multiple ways to restrict access on a device level. The final way to block websites on your Mac is with the help of third-party apps. Here are three apps we recommend:
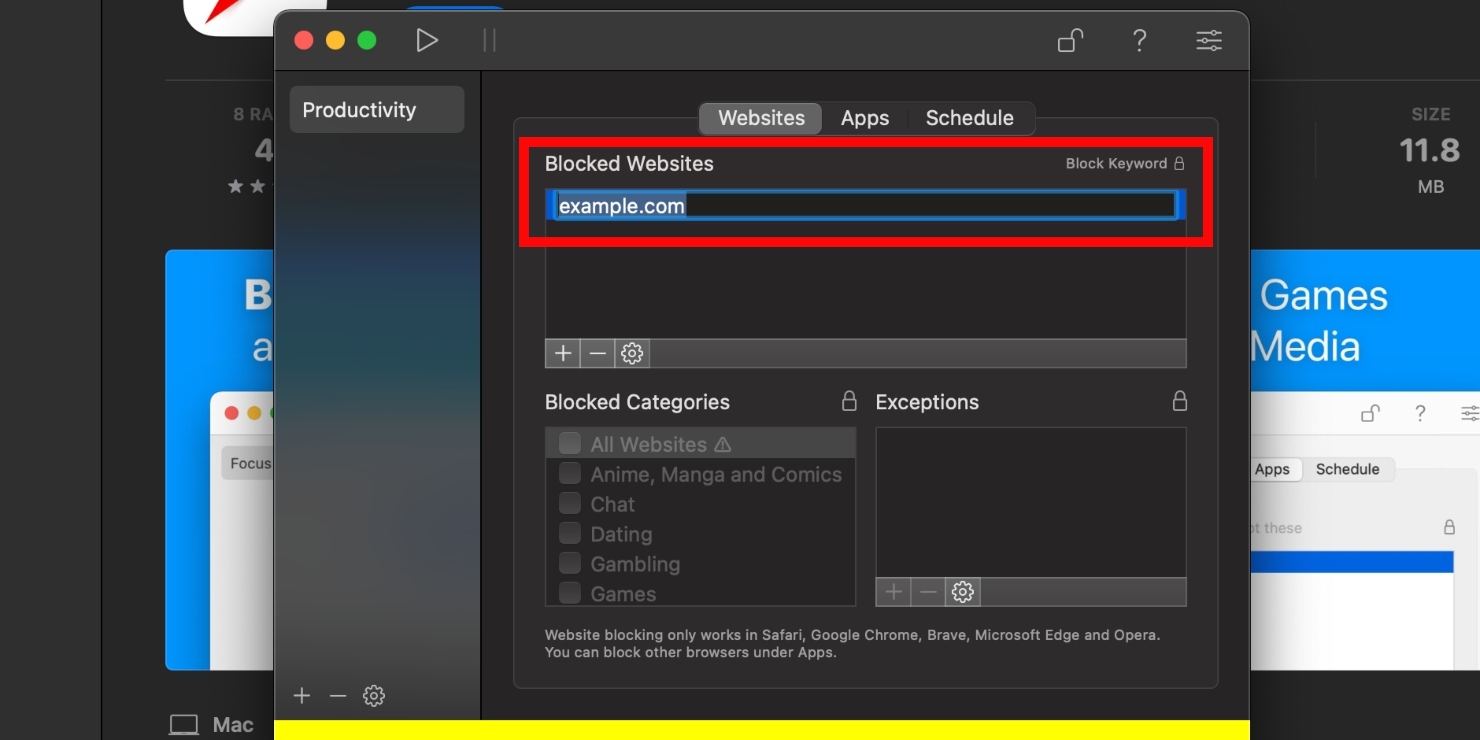
1Focus
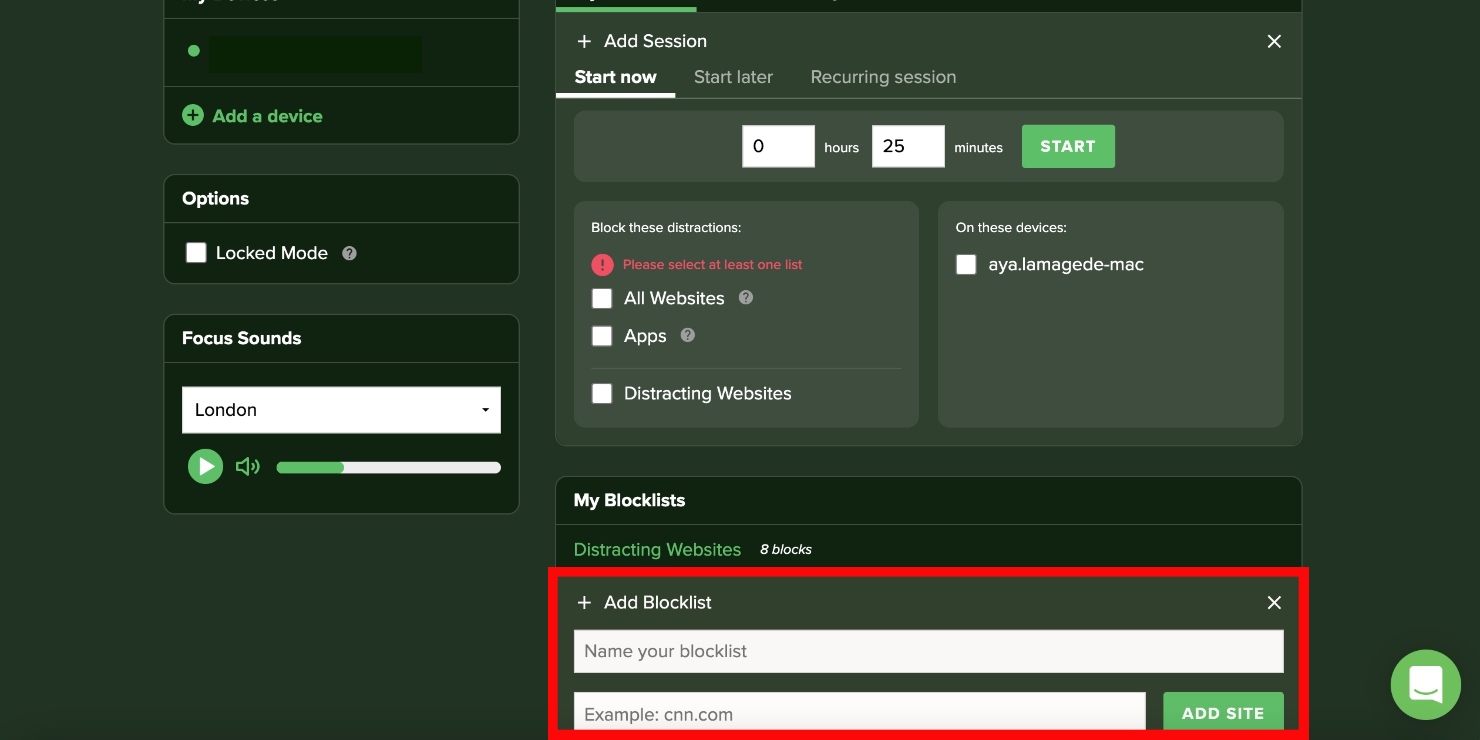
As the name suggests, 1Focus helps you stay focused on any work or task you’re busy with by eliminating distractions, like websites. This is one of the more popular focus apps. Blocking websites on 1Focus is easy.
1Focus allows you to block websites on the free version, but you can do more with in-app purchases. The free version lasts for 14 days, after which you’ll have to pay around $2/month or $10/year, unless you cancel your trial before the trial period is up.
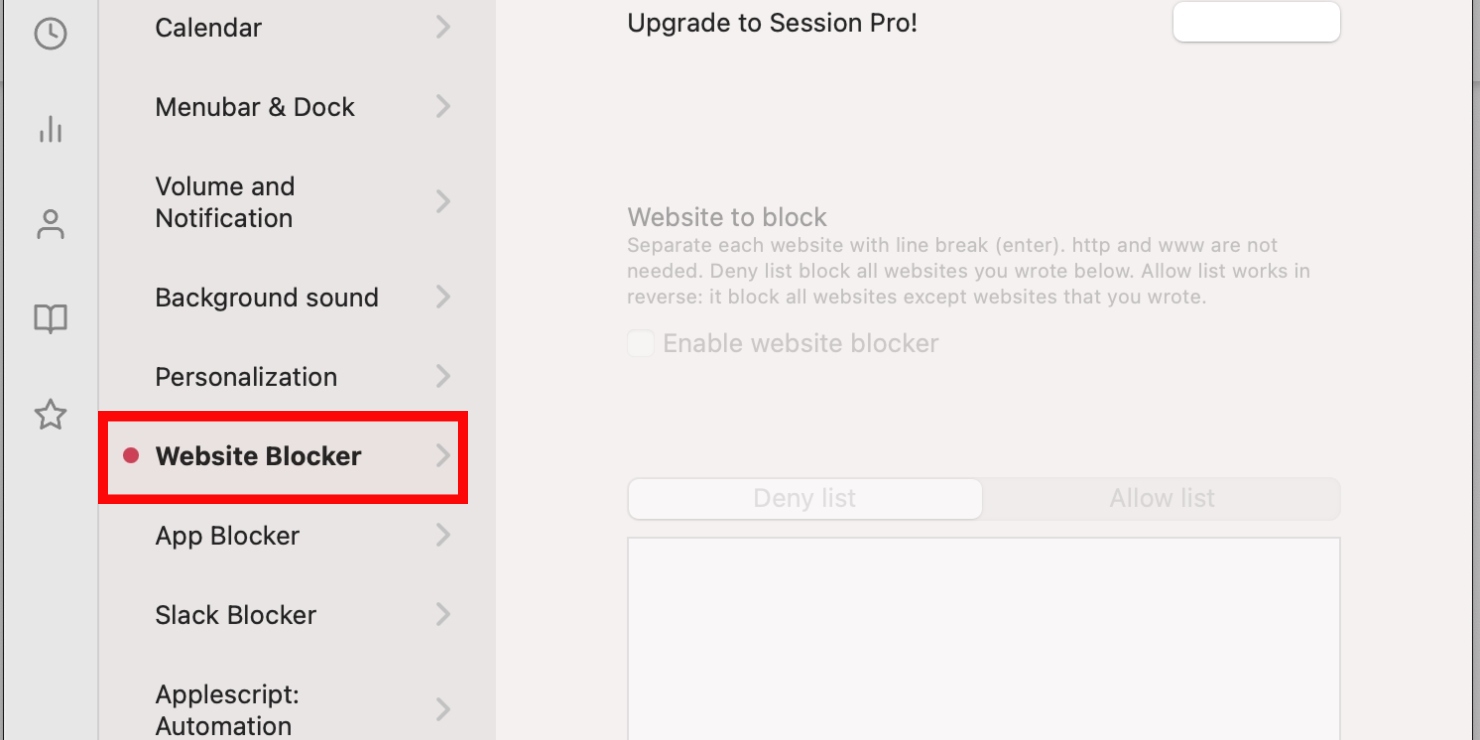
Session
Session allows you to work in 25-minute sessions. What makes it unique is that it has a wellness element to it — the app prompts you to breathe before you start a new session and take a break when you’re done. You can block websites to limit distractions while you work or study. The app is free, but to use the Website Blocker feature, you’ll have to upgrade to the Pro version.
If you’re impressed with the free version of the app and are willing to upgrade, you’re looking at paying around $4/month.
Freedom
This focus app helps you limit distractions across all your devices simultaneously, unlike other website blockers which are device-specific. Like other apps, Freedom allows you to create a list of blocked websites. Checking the optional Locked Mode box locks in your sessions by not allowing you to edit your blocklists while you work.
Freedom offers you six free sessions. When you’ve used them up, you’ll have to pay $7/month to continue using the app.
Reasons to block websites on Safari
People come to us with all sorts of motives for restricting a site, and rarely is it just about willpower. Here are the reasons we hear most often:
Protecting kids from adult content. Screen Time's restrictions stop age-inappropriate sites from opening on a shared or family Mac, even by accident.
Cutting distractions. Social media and news sites eat into study and work hours, and blocking them removes the temptation entirely rather than relying on self-control.
Avoiding phishing and scam pages. If you've already run into a fraudulent site, blocking the domain keeps anyone on your Mac from landing there again.
Reducing malicious ads and trackers. Sites heavy with pop-ups and third-party trackers can expose your browsing habits, and some serve adware alongside their content.
Saving bandwidth. Streaming and video-heavy sites can drag down a shared connection, especially on a busy home network.
Can I permanently block a website in Safari?
Yes, though "permanent" depends on the method you pick. A Screen Time restriction protected by a passcode is the closest thing to permanent on a single Mac, since nobody can lift it without the code. A router-level block is broader still and lasts until you change the setting or replace the router. Terminal edits to the hosts file also persist, but anyone with admin access can undo them in a minute. In our experience, combining a Screen Time passcode with a router rule is the most reliable setup.
Block unwanted websites easily on your Mac
Mac offers multiple ways to block websites in Safari. Most of these are built-in solutions, but you can also blacklist websites through apps found on the App Store and online. Choose the method that is most suitable for you from the options laid out in this article.
We respect your privacy and
use cookies
for the best site experience.
Privacy Preferences Center
We use cookies along with other tools to give you the best possible experience while using the
MacKeeper website. Cookies are small text files that help the website load faster. The cookies we
use don’t contain any type of personal data meaning they never store information such as your
location, email address, or IP address.
Help us improve how you interact with our website by accepting the use of cookies. You can change
your privacy settings whenever you like.
Manage consent
All cookies
These cookies are strictly necessary for enabling basic website functionality (including page
navigation, form submission, language detection, post commenting), downloading and purchasing
software. The website might malfunction without these cookies.