In this article you will find the following:
How to set up additional email on your MacBook
To add email to a MacBook or any other Mac, open the Mail app, select Mail > Add Account, and take it from there.
A note from our experts:
Just do as follows to check your Mac for breaches.
- Download MacKeeper. Run it, and select ID Theft Guard.
- Click Check For Breaches.
- Check if any of your email addresses have been compromised. Select an address to learn more.
Let’s look at this in more detail.
1. Add email account via macOS Mail app
Whether it’s your first address or you want to add another email to Mail on Mac, you can do so easily through the Mail app:
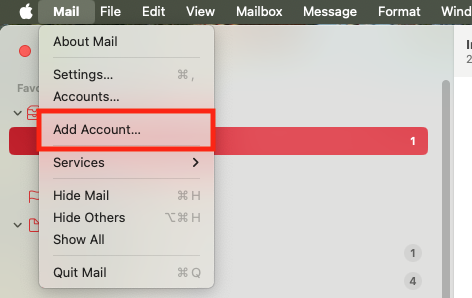
- Open Mail, then choose Mail > Add Account from the menu bar.
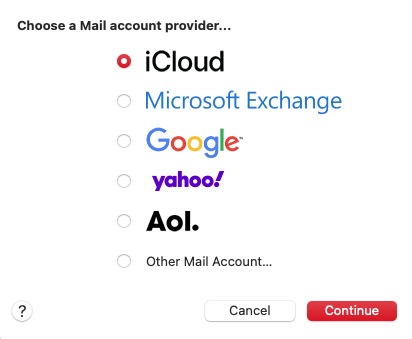
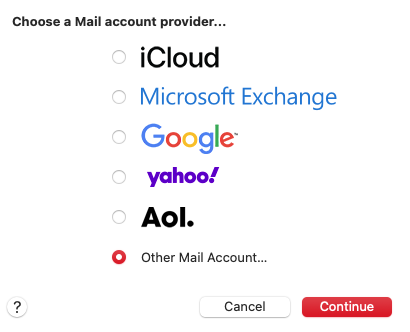
- Select the type of account you want to add (but not Other Mail Account), then click Continue.
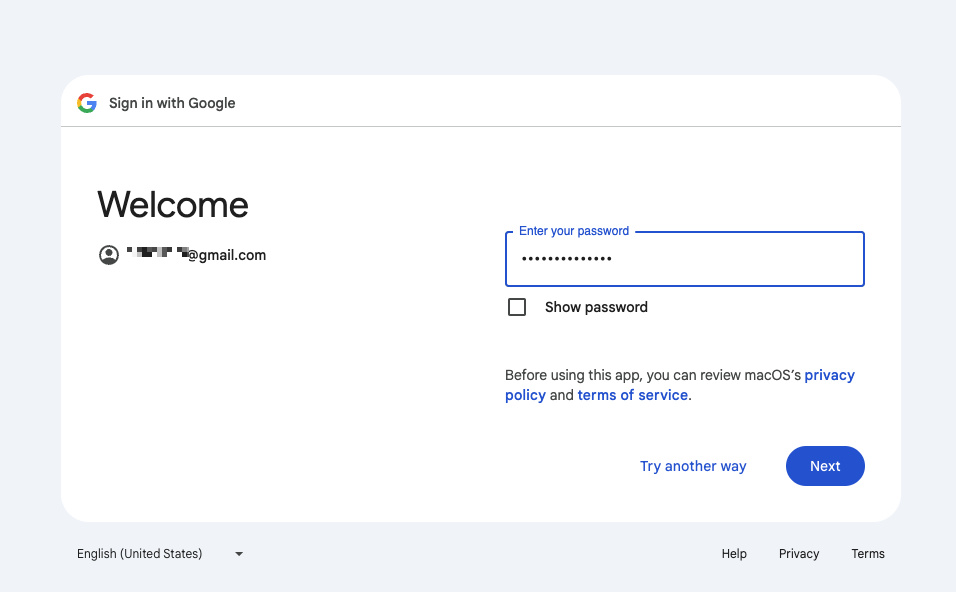
- Type in the email address, then click Next. Add the password, and click Next again. Follow the sign-in process, making sure to enable any needed permissions.
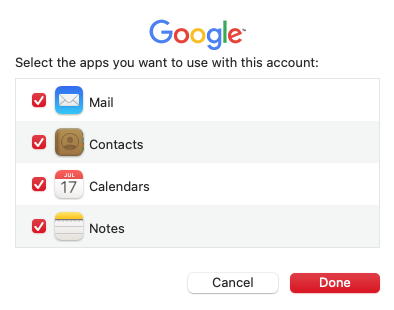
- Finally, make sure Mail is selected in the list of apps that can use this account, then click Done.
A bonus tip from our team:
Want to keep your Google email in order? Check out our guide on how to create a folder in Gmail on Mac.
2. Set up email account manually
If the type of email account you want to add isn’t listed by macOS, you’ll need to add it manually. Your account will support POP3 (Post Office Protocol), IMAP (Internet Message Access Protocol), or both—and you’ll need to add the right type of server settings. Check with your email or IT support provider if you’re unsure:
- In Mail, select Mail > Add Account. Then select Other Mail Account, and click Continue.
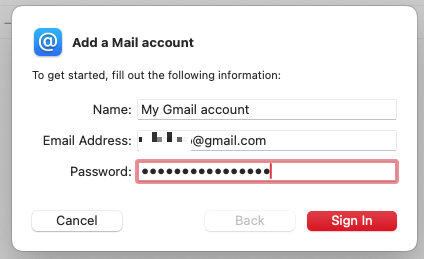
- Give the account a name, then add your email address and password. Click Sign In.
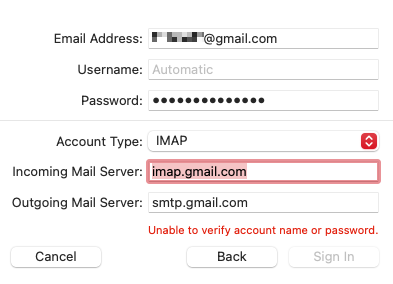
- Choose IMAP or POP3, then enter your email server details and click Sign In.
- Select what apps will use this account, then click Done.
A note from our experts:
Using a webmail account? Read our guide on how to organize emails for more information about keeping your emails in order.
3. Using system preferences
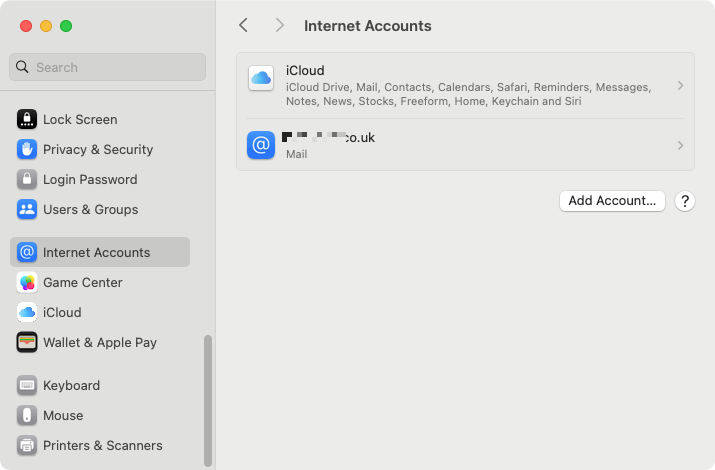
You can also add, view, and change email accounts in your Mac’s System Settings:
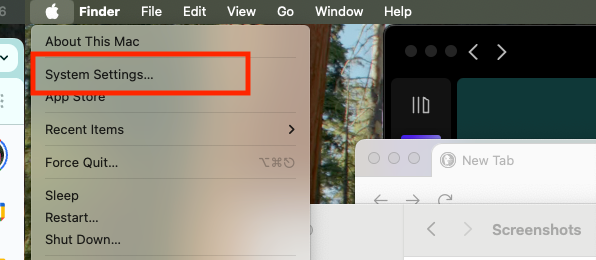
- Click the Apple icon in your menu bar and select System Settings.
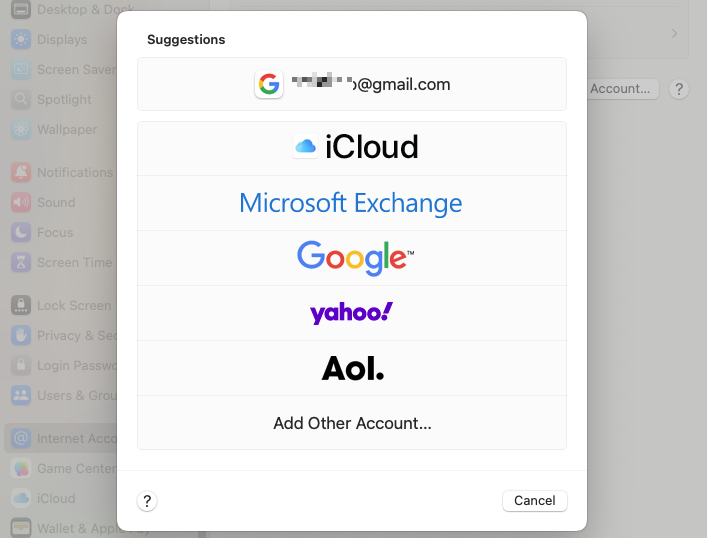
- Select Internet Account from the side menu, then click Add Account.
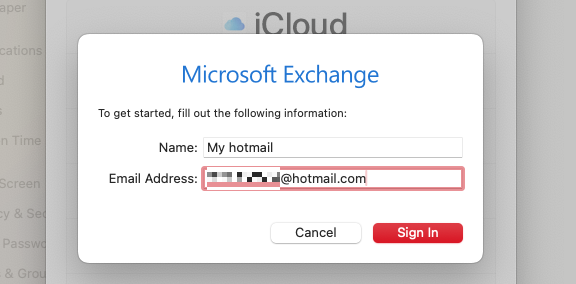
- Choose a type of account to add, and follow the sign-in process.
- If you chose Add Other Account, follow this by selecting Mail account, then manually add your login information, such as your incoming and outgoing IMAP server addresses.
An extra hint from us:
We don’t want you to get a virus from an email on your Mac, so make sure to install antivirus software like MacKeeper to keep you safe and protect your privacy.
Common issues when adding email to MacBook
It’s usually easy to add email to a Mac, but sometimes, you may experience problems with Mail not working on your Mac as expected.
Common issues include:
- Incorrect login details: Make sure you're using the right email address and password.
- Incorrect server settings: Double-check your incoming and outgoing mail server addresses and ports are right.
- Authentication problems: If your email provider uses additional authentication methods, such as two-factor authentication, make sure it’s set up properly.
- Network connectivity: If you don’t have a stable internet connection, you may not be able to download emails.
- Outdated Mail app: Update your Mail app to the latest version to avoid any issues.
- Email provider service issues: If your email provider is having server issues, they can prevent you adding email to Mac. Check with your provider to find out more.
- Interference from security software: Firewalls and other security software might disrupt your email setup process.
Remember to stay safe
When you add an email address to your Mac, you create another potential way for malware to get on your computer. Data that would otherwise be stored on a remote email server gets downloaded to your machine, so it’s important to have antivirus installed.
Whether you use webmail or the Apple Mail client, your email address and login details can also be stolen and used by criminals. Protect yourself with MacKeeper’s ID Theft Guard. If any of your details end up on the dark web, MacKeeper will let you know.
Here’s how to use ID Theft Guard:
- Open MacKeeper, select ID Theft Guard, then click Check For Breaches.
- MacKeeper will search for email addresses you use and check if they’ve been involved in data breaches.
- Add new emails by clicking Scan new email.
- Select an address that has been compromised. Verify the email address, if you need to, then view where the breaches come from.
This simple process can help you to avoid bigger problems further down the line. Give it a try today!


