In this article you will find the following:
Reasons to downgrade macOS Sonoma
Why do users want to go back from Sonoma? There are quite a few reasons, including slower device performance, poor stability in particular apps, or even just personal preference.
Essential preparations before you downgrade
Before you downgrade a macOS on your computer, you should check whether your system is fully prepared to avoid any unnecessary problems. Also, compare Sonoma vs Ventura to learn more about what you're losing and gaining when going back to the previous OS version.
To safeguard your data and be sure that the downgrade goes without a hitch, we recommend you do the following:
- Back up all your important data. To avoid losing files during the downgrade process, back up your system using Time Machine or another trusted backup tool.
- Save files created after the update. Transfer any documents, photos, or recent work created after upgrading to Sonoma onto an external drive or cloud storage.
- Check app compatibility with Ventura. Before you downgrade, verify that your most-used apps will work smoothly on macOS Ventura. Some may only support newer macOS versions.
- Prepare available storage space. Give yourself the reassurance that there's enough free space on your Mac’s hard drive.
- Disconnect any non-essential external devices. Unplug any unnecessary external devices like USB drives or peripherals to prevent them from interfering with the downgrade.
- Prepare a bootable installer. If using a bootable USB for the downgrade, ensure it is correctly formatted and has the Ventura installer ready to go.
After taking care of these preparations, you should be ready to downgrade without any trouble. With your files backed up, app compatibility checked, and a bootable installer set up, switching back to macOS Ventura should be pretty straightforward.
A note from our experts:
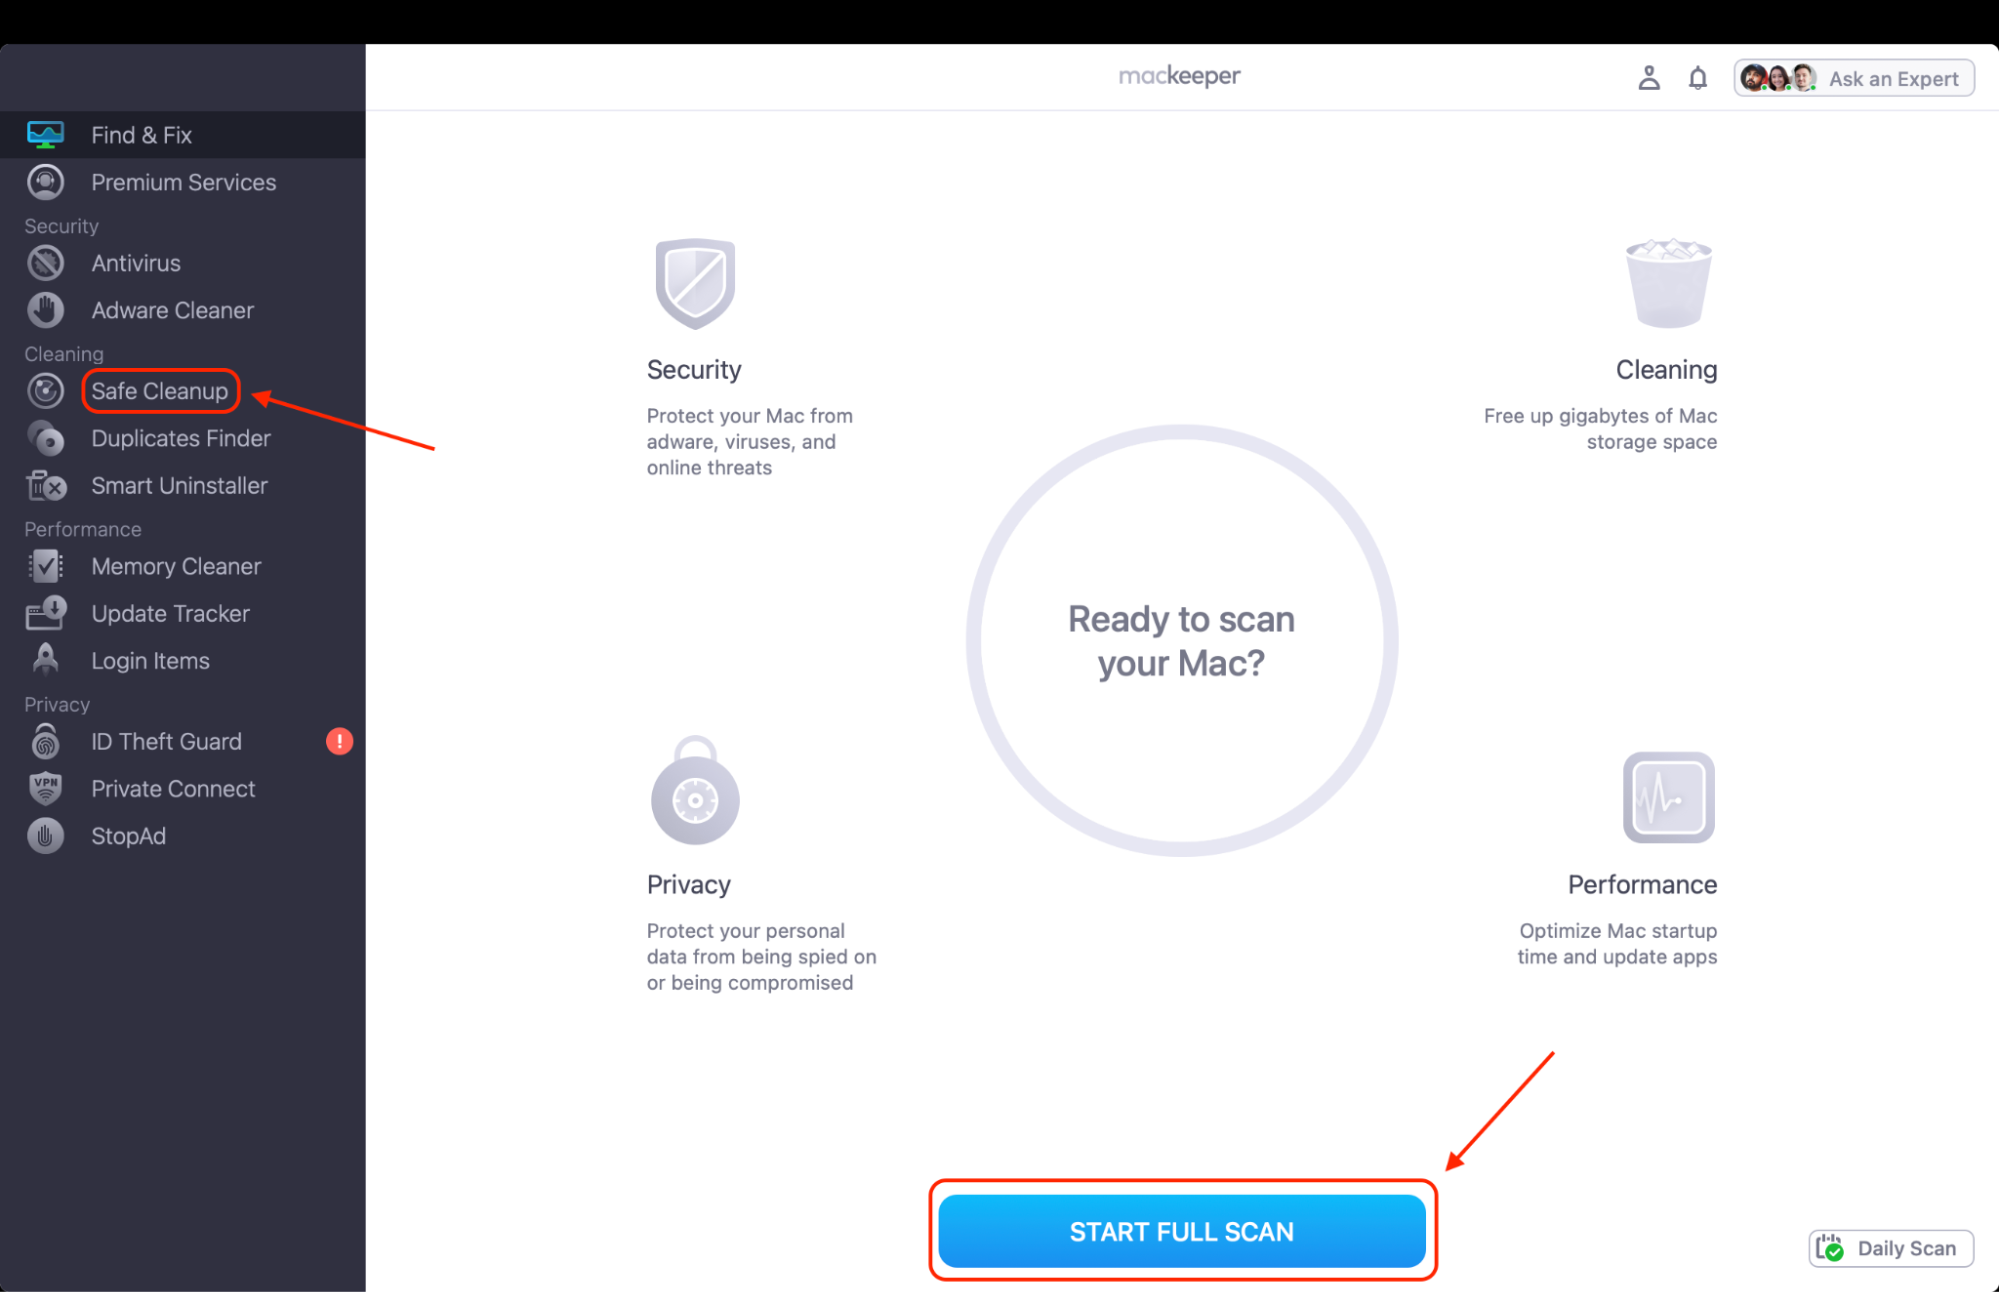
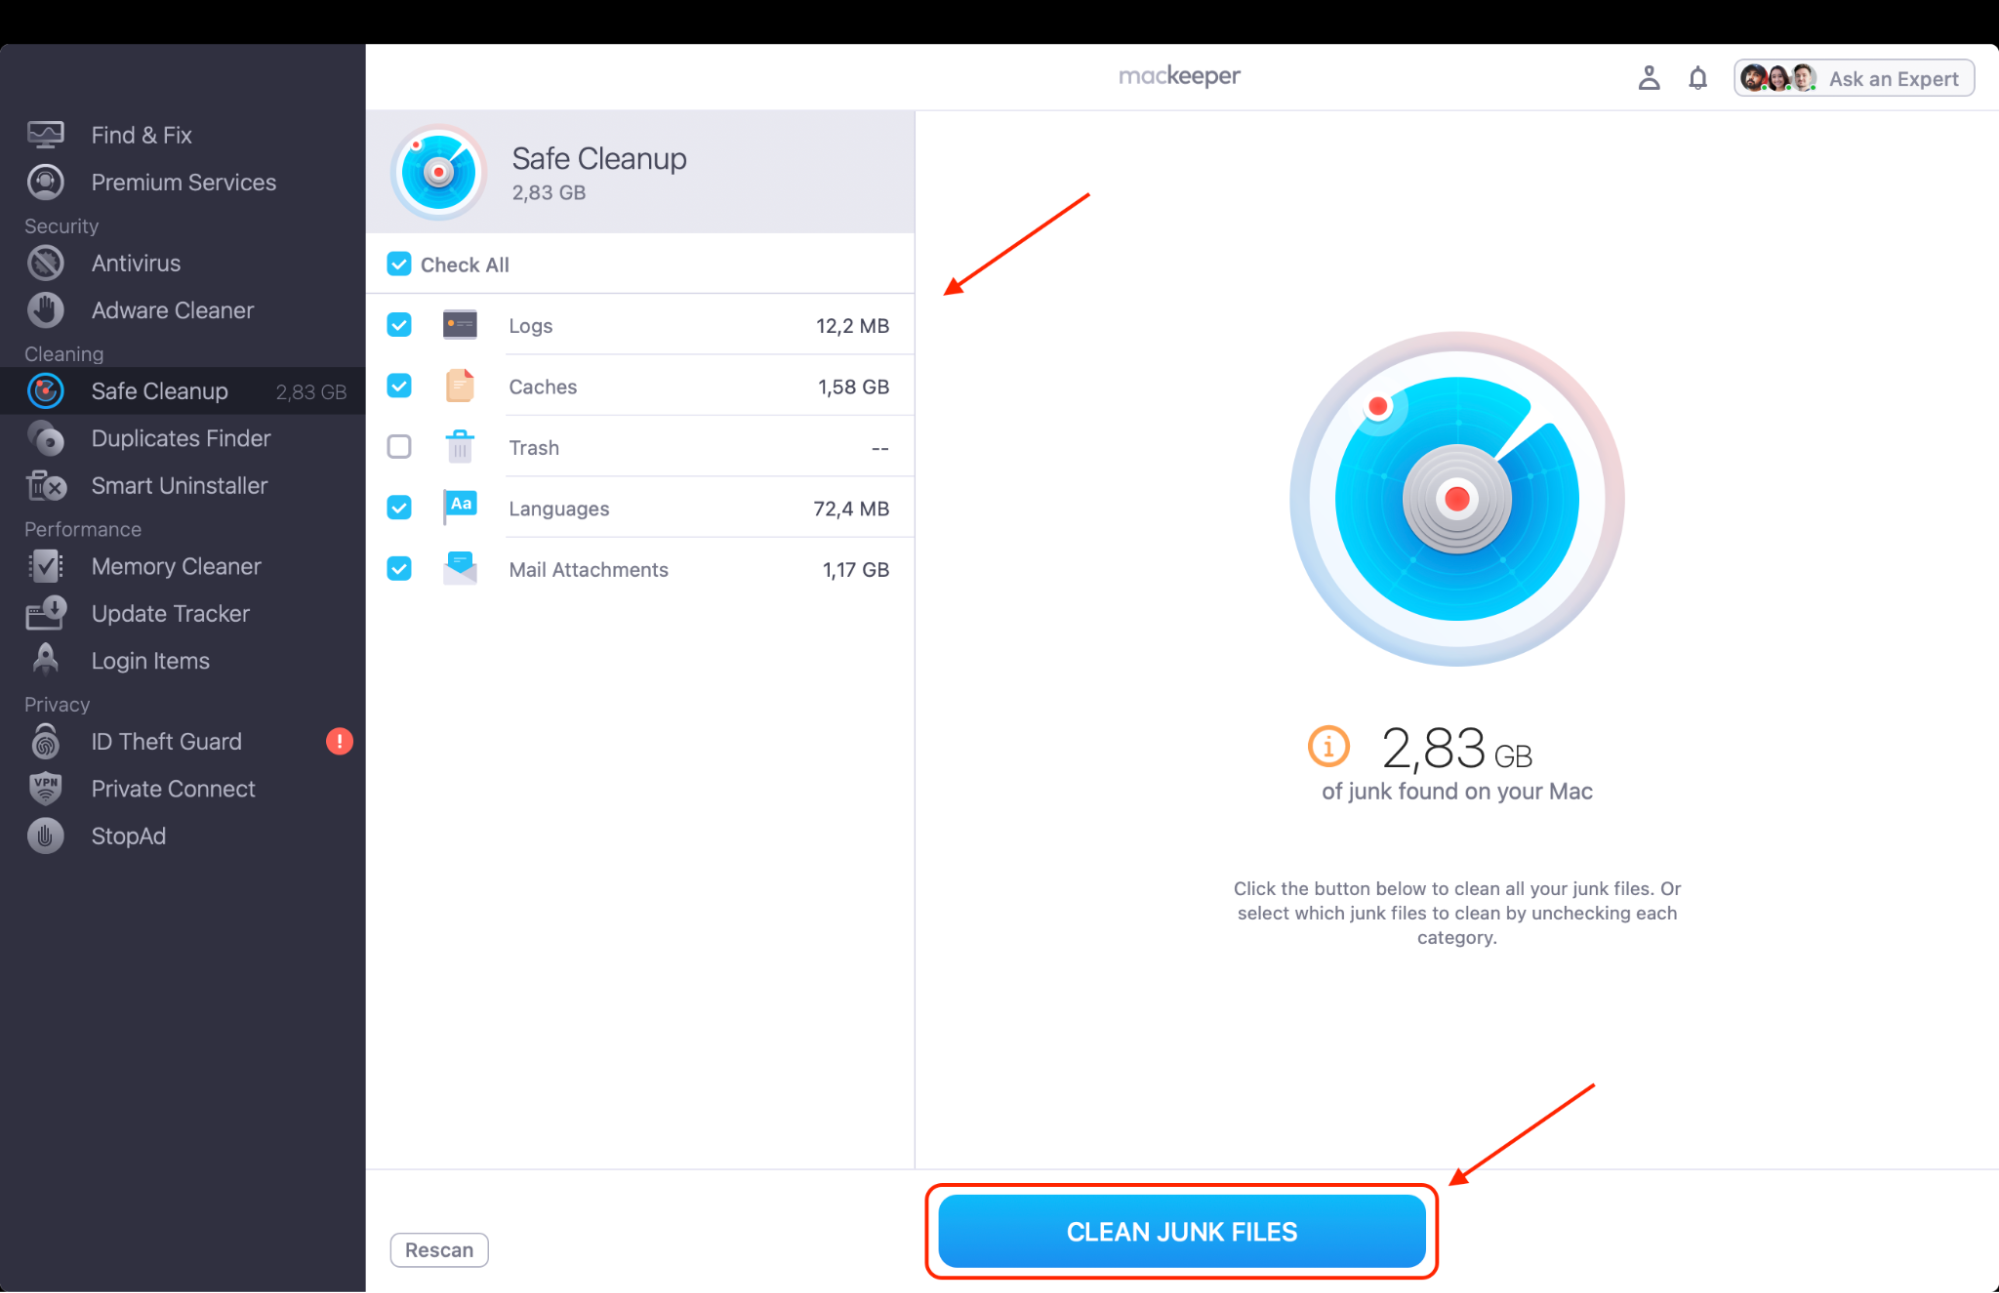
Here’s the quickest method to go with your Mac’s cleaning:
- Download MacKeeper from our website, then install the app on your Apple machine.
- Once MacKeeper is on, choose the Safe Cleanup option from the left-side panel.
- Hit Start Scan and just wait for our app to give your device a fresh lease of life.
- As soon as the scan is done, choose the files to delete and click Clean Junk Files.
Best ways to downgrade macOS Sonoma
Based on our personal tests of various macOS downgrade methods from Sonoma to previous versions, we’ve selected the top three ways for you to try with your a Mac:
- Use a Time Machine backup to downgrade from macOS Sonoma
- Go back from macOS Sonoma in recovery mode
- Revert from macOS Sonoma with a bootable installer
1. Use a Time Machine backup to downgrade from macOS Sonoma
Restoring from a Time Machine backup is one of the easiest ways to downgrade from macOS Sonoma to an earlier version, but it does come with a caveat. Time Machine will overwrite everything during the restoration, so make sure you’re ready before starting.
An important reminder from our experts: We highly recommend backing up any important documents, photos, or any work you've done since the macOS upgrade. After the downgrade, any data not backed up will be gone for good. To avoid losing anything important, use cloud storage or transfer files to another Mac or external drive for safekeeping.
Now, let's split the process into manageable and comprehensive steps:
- Ensure any files you’ve created after your most recent backup are stored safely, such as on an external drive, a second Mac, or via cloud storage.
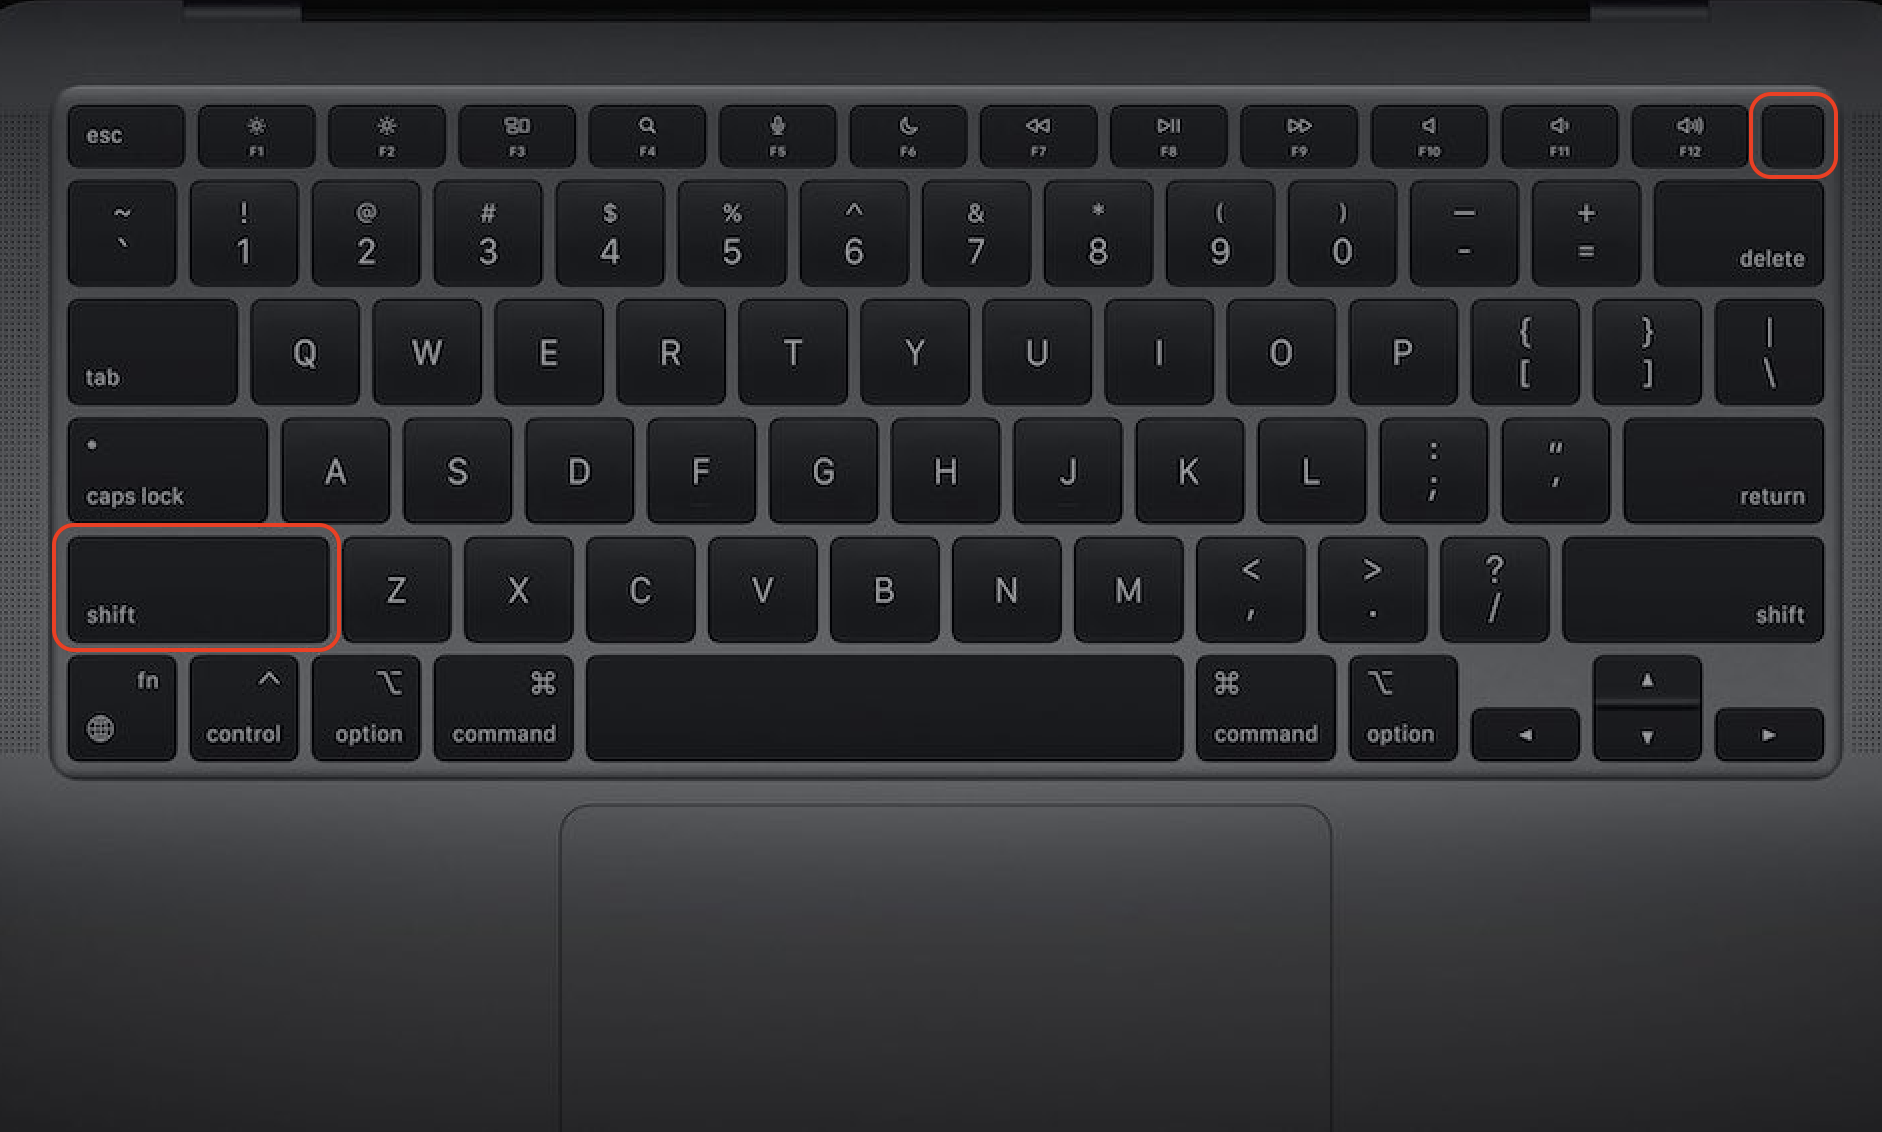
- Power off your Mac, since you’ll have to restart it in Recovery mode to begin the downgrade process. If you’re using a MacBook with Apple Silicon, press Shift while holding the power button. On an Intel-based Mac, turn it on and immediately hold Command-R until the Apple logo appears on your screen.
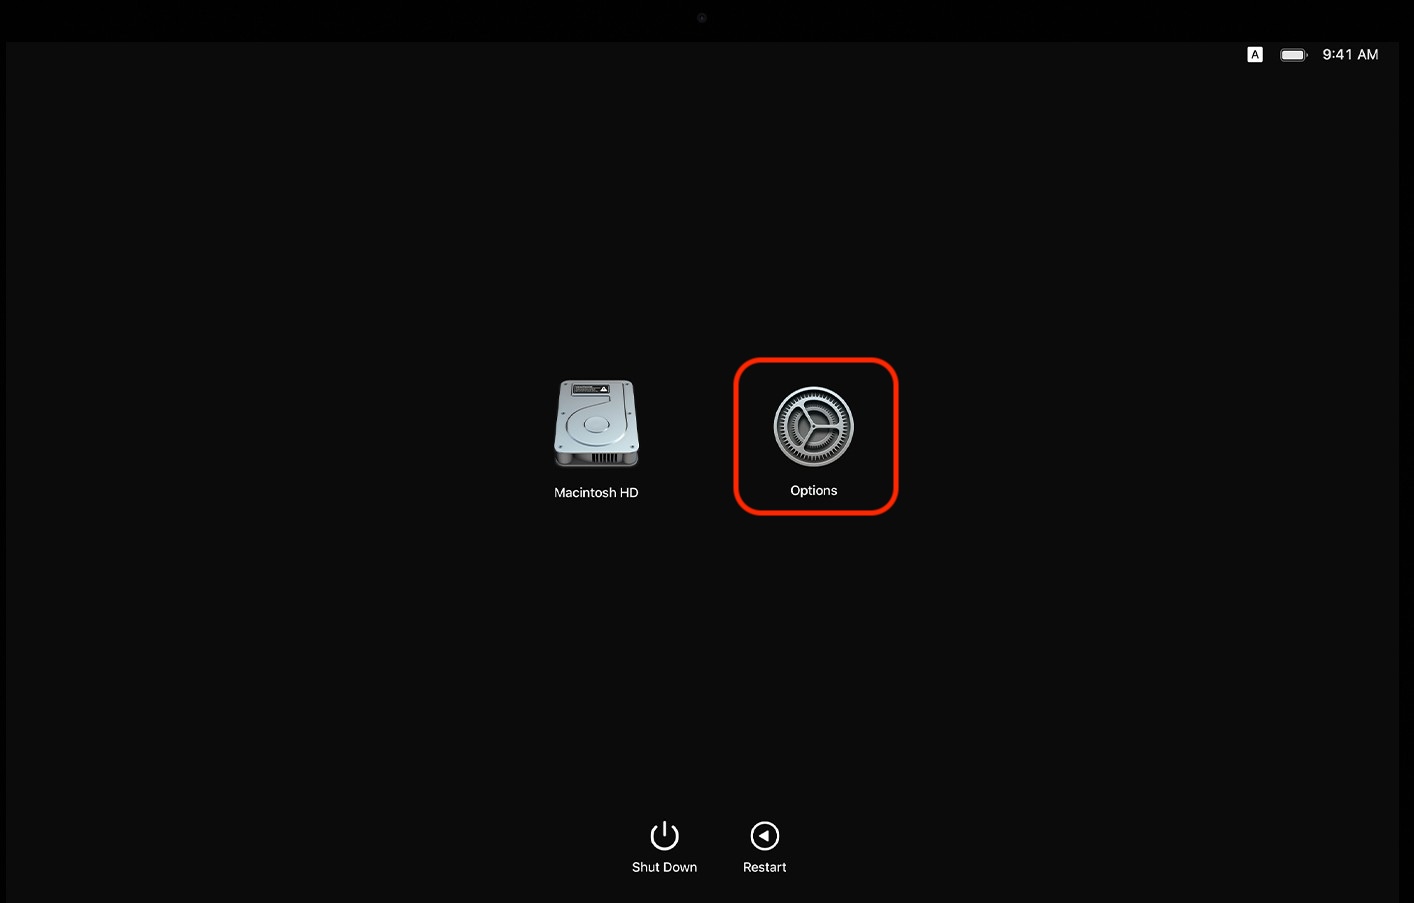
- Once you're in Recovery mode, click on Options, then select Continue to move forward.
- Enter your administrator credentials when prompted to gain access to your Mac’s Recovery features.
- Click Restore from Time Machine Backup in the macOS Utilities menu and then hit Continue. Afterward, click Continue again to proceed.
- From the available options, select your Time Machine disk as the source for the restore operation. This disk should contain a backup of your system made before upgrading to macOS Sonoma.
- Browse through the list of backups on your Time Machine disk and select the one created before installing Sonoma. Ensure that the backup was made when your system was running macOS Ventura or an earlier version.
- Once you’ve selected the appropriate backup, click Restore and allow your Mac to begin downgrading macOS and restoring your files from the backup.
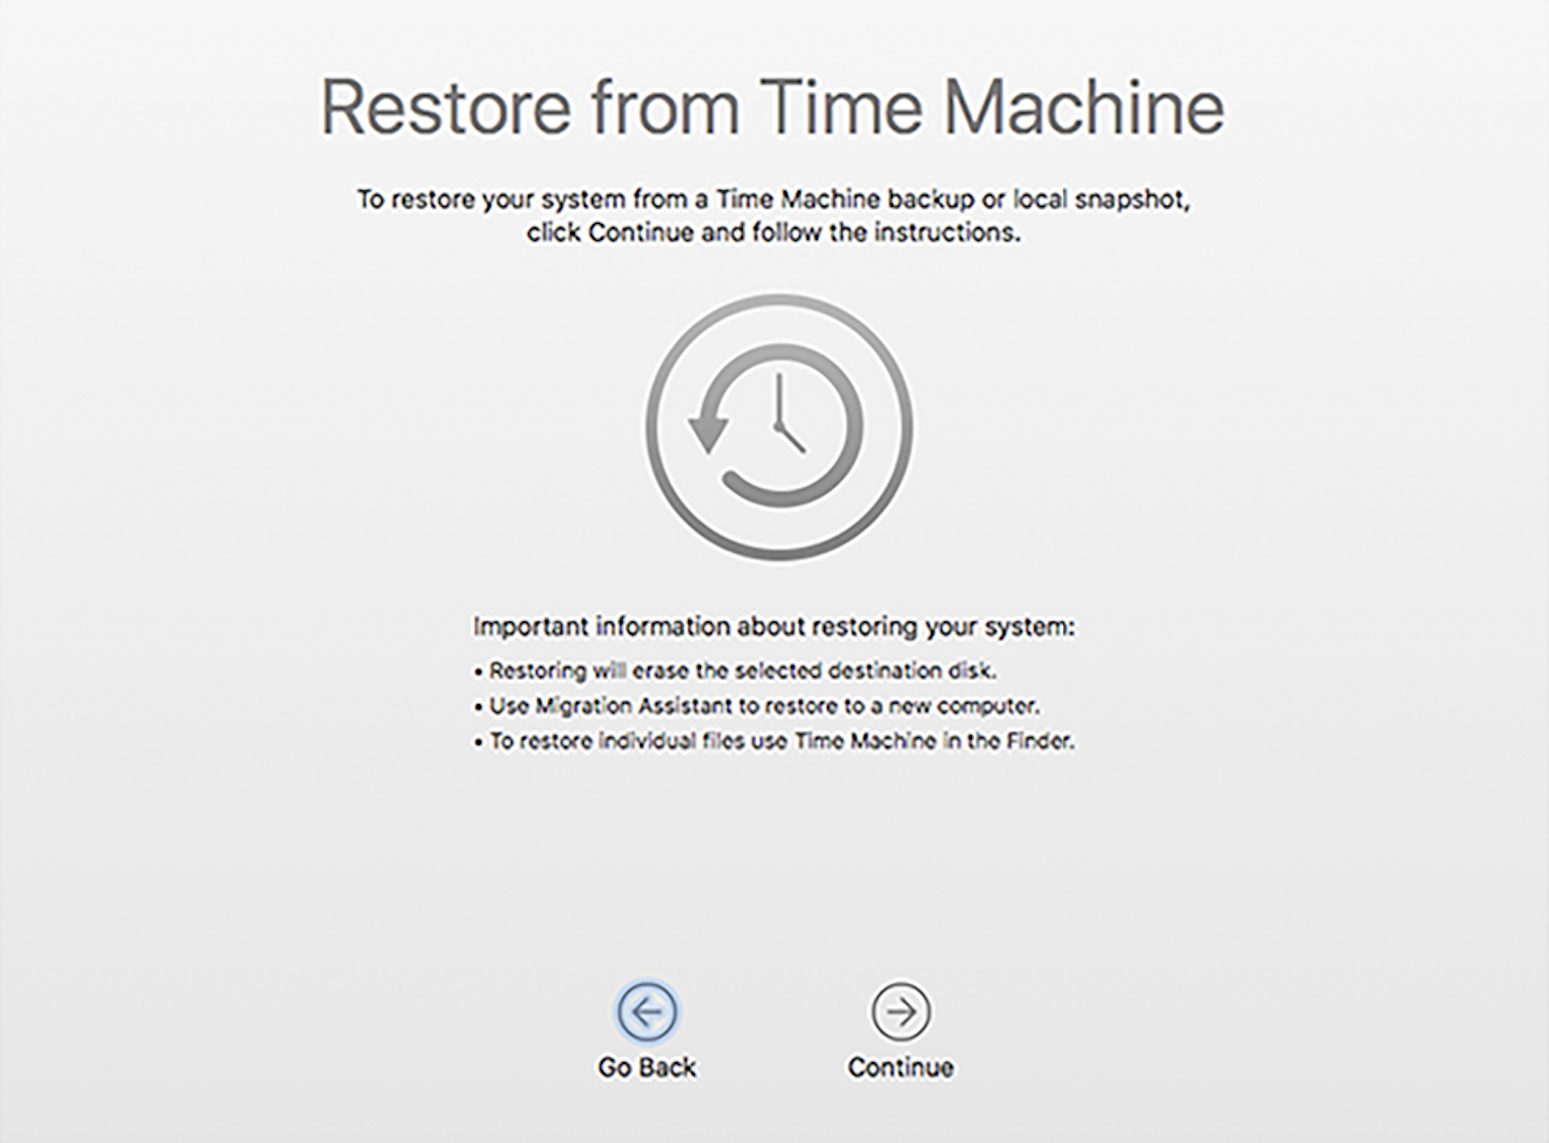
After the process is complete, your Mac will reboot to the older version of macOS, with all data and settings restored to your chosen backup. Any files created after that backup will be lost unless you saved them beforehand. With the downgrade complete, you can now transfer back your saved files and enjoy a more stable macOS version that better suits your needs.
2. Go back from macOS Sonoma in recovery mode
If you don’t have a Time Machine backup or merely prefer another method, Intel-based Macs offer a way to downgrade macOS by using Internet Recovery. So, if you still want to go back from macOS Sonoma, the recovery mode method allows you to reinstall the macOS version that originally came with your Mac. From there, you can manually upgrade to Ventura or another preferred version.
Important: If your Mac shipped with an older macOS than the one you want to downgrade, we recommend this option for making a smooth transition. Also, to be on the safe side, before proceeding, make sure your Mac is connected to the internet as this process requires an active network connection.
Here are some detailed steps to follow to go through this process:
- Shut down your Mac or MacBook to prepare it for Internet Recovery mode.
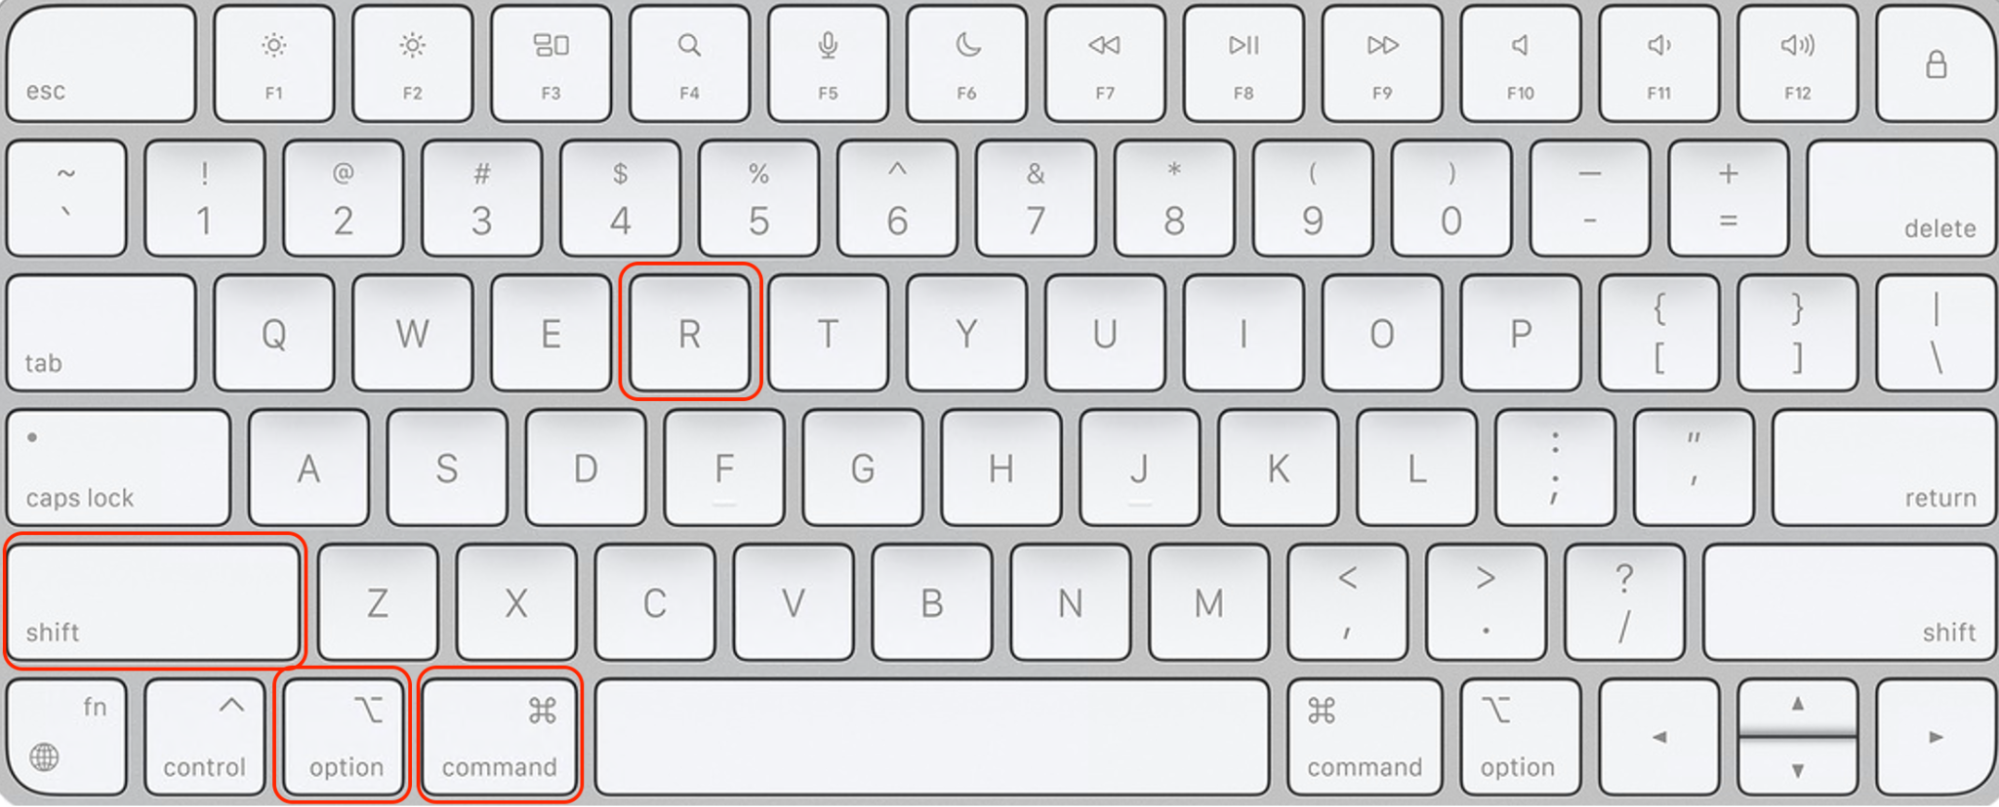
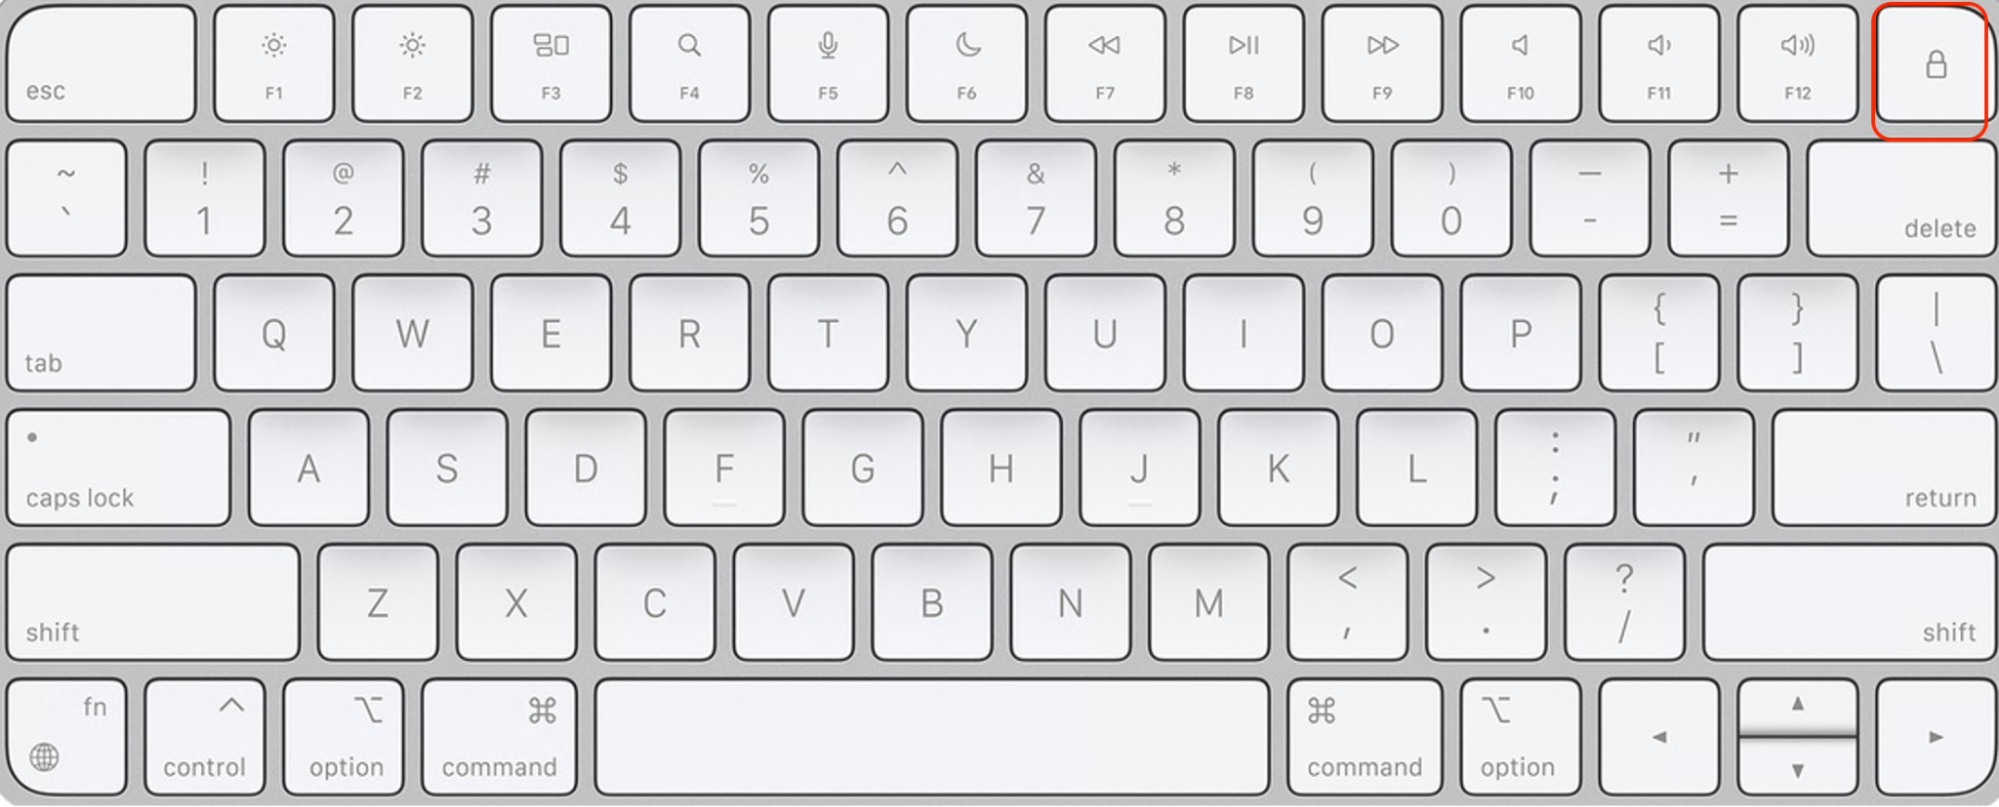
- Hold down Shift + Option + Command + R to access this mode, then press the power button, and your machine will turn on. Keep holding the keys until you see the Apple logo or the spinning globe show up on the screen.
- Release the keys once the logo appears. This allows your Mac to boot into Internet Recovery.
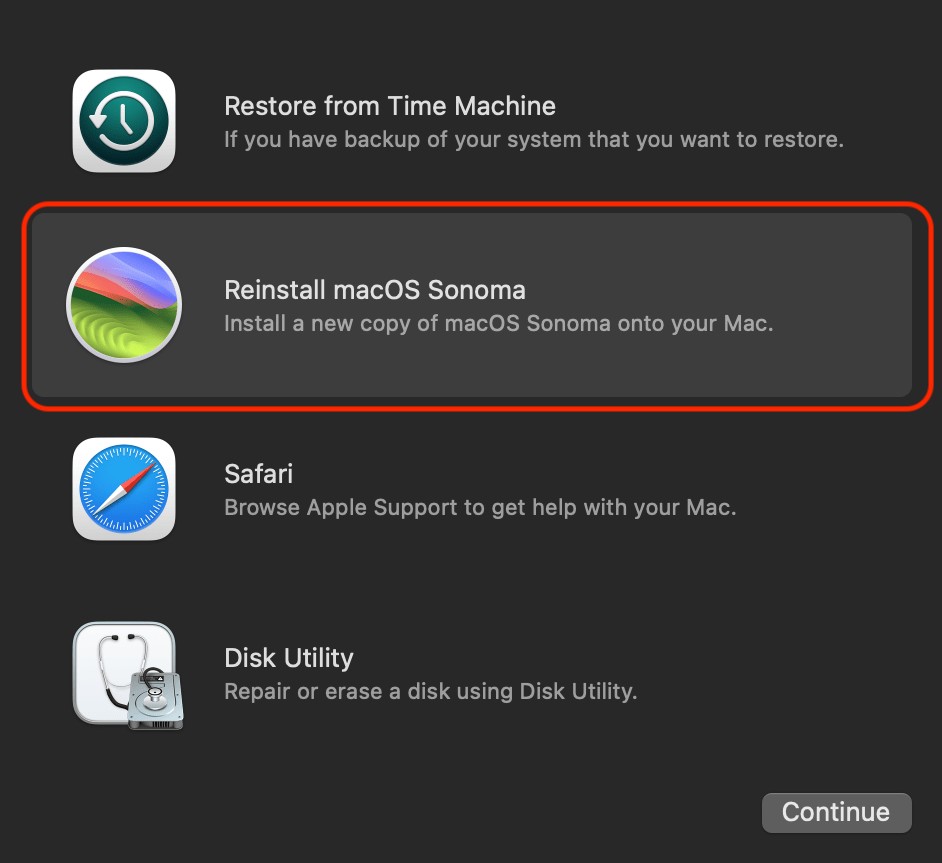
- In the Utilities menu that appears, select Reinstall macOS and click Continue to proceed.
- Your Mac will now reinstall the macOS version that was pre-installed when it originally shipped. This could be an earlier version, allowing you to revert back from Sonoma.
- After the reinstallation process is complete, you can manually upgrade your system to the previous version of macOS that your machine initially came with.
Your Mac will boot up with the older macOS version as soon as the installation is finished. From there, you can upgrade to any subsequent OS version if needed or continue using the restored version. Just be sure to transfer any files you saved before the downgrade, since the process will leave your system clean, and you’ll need to reintroduce any lost data.
3. Revert from macOS Sonoma with a bootable installer
Downgrading macOS Sonoma with a bootable installer provides a dependable way to revert to macOS Ventura, especially if you’re comfortable working with Terminal. Using a USB drive for the installation ensures a clean process, but it requires wiping your Mac's SSD. So, again, backing up all your crucial files beforehand is always something to remember. Once done, follow our instructions:
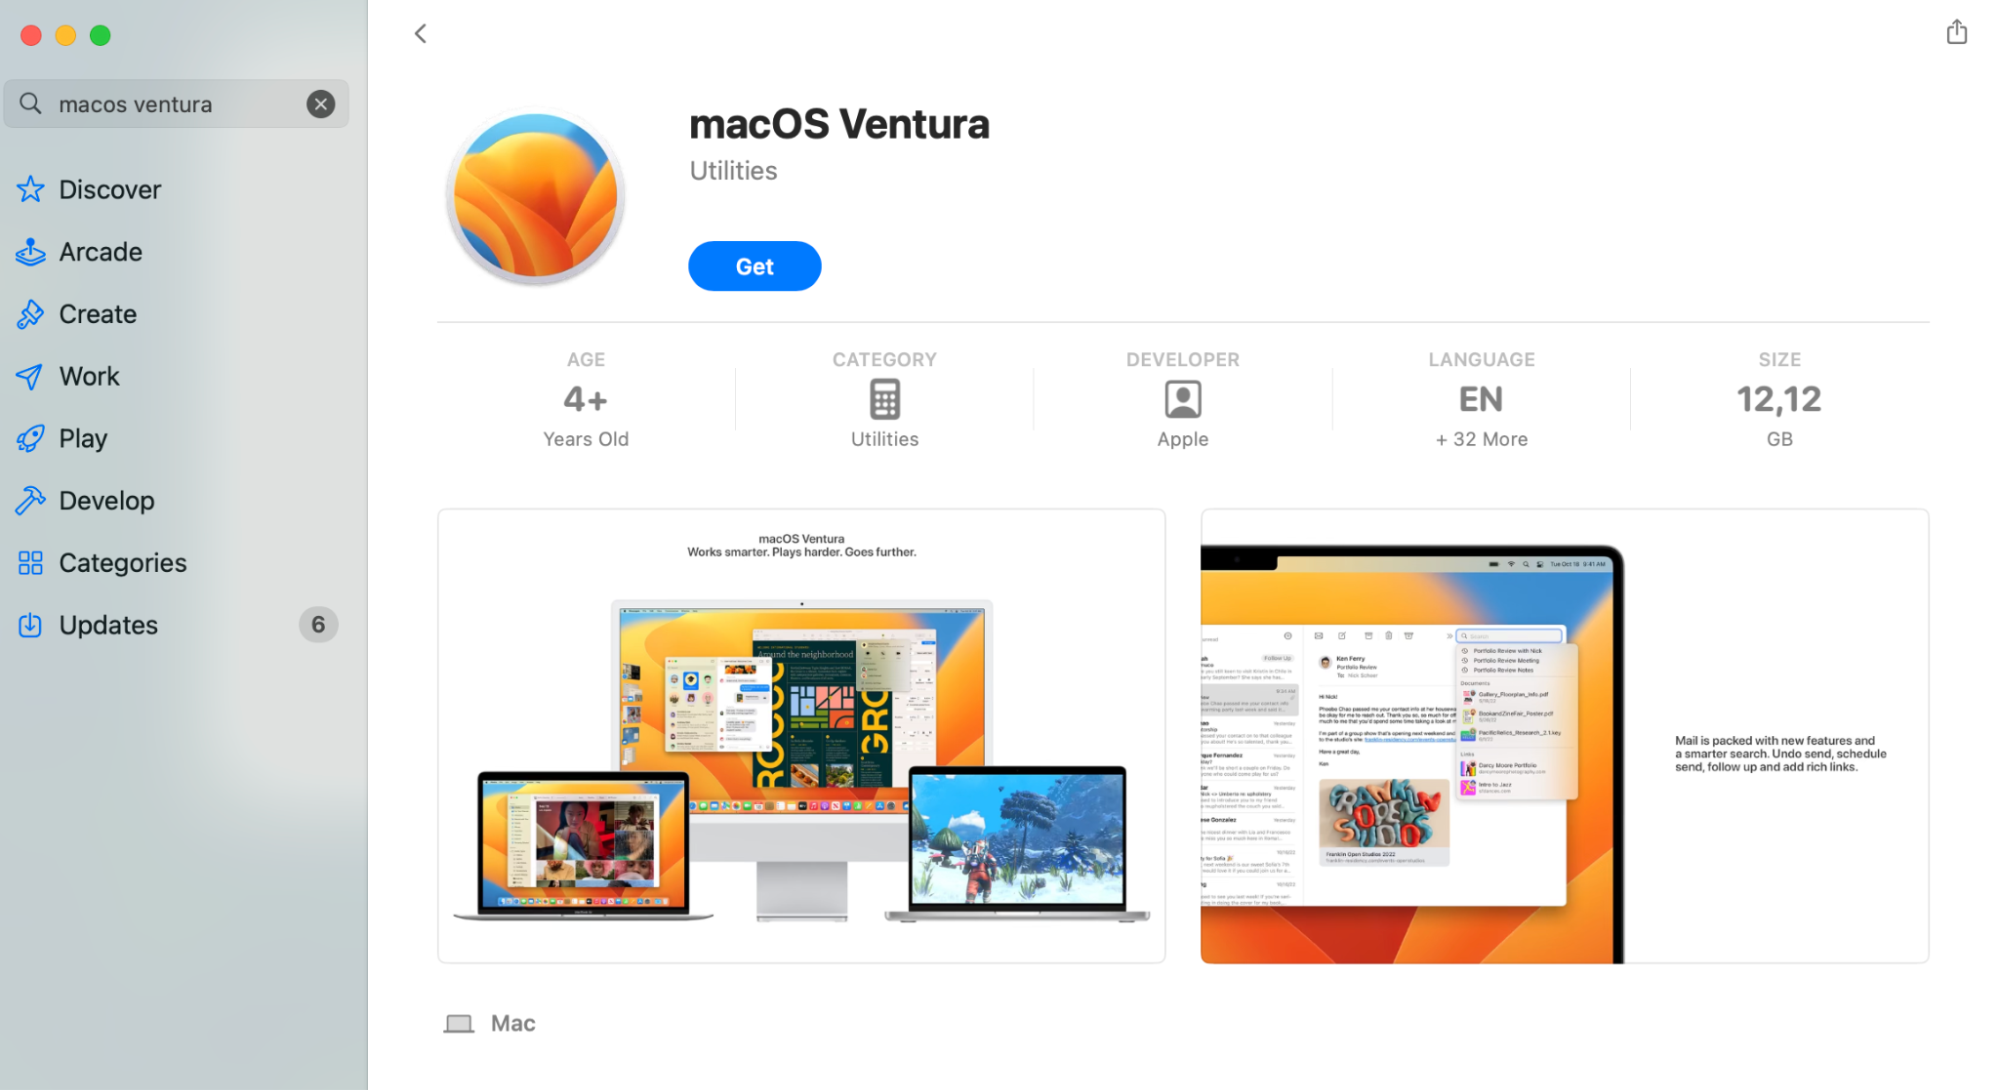
- Locate the macOS Ventura installer in the App Store and begin the download. If it opens automatically, quit the installer by choosing File > Quit to avoid running it.
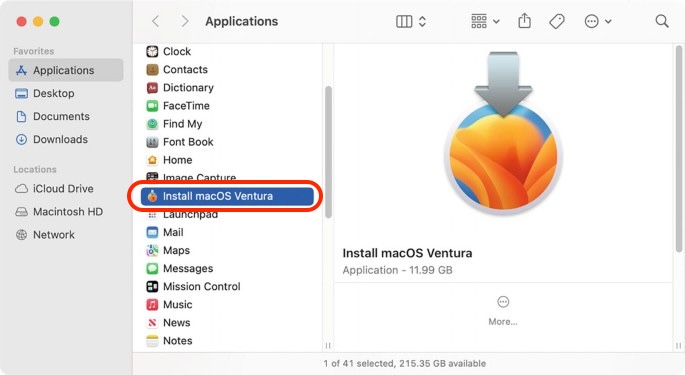
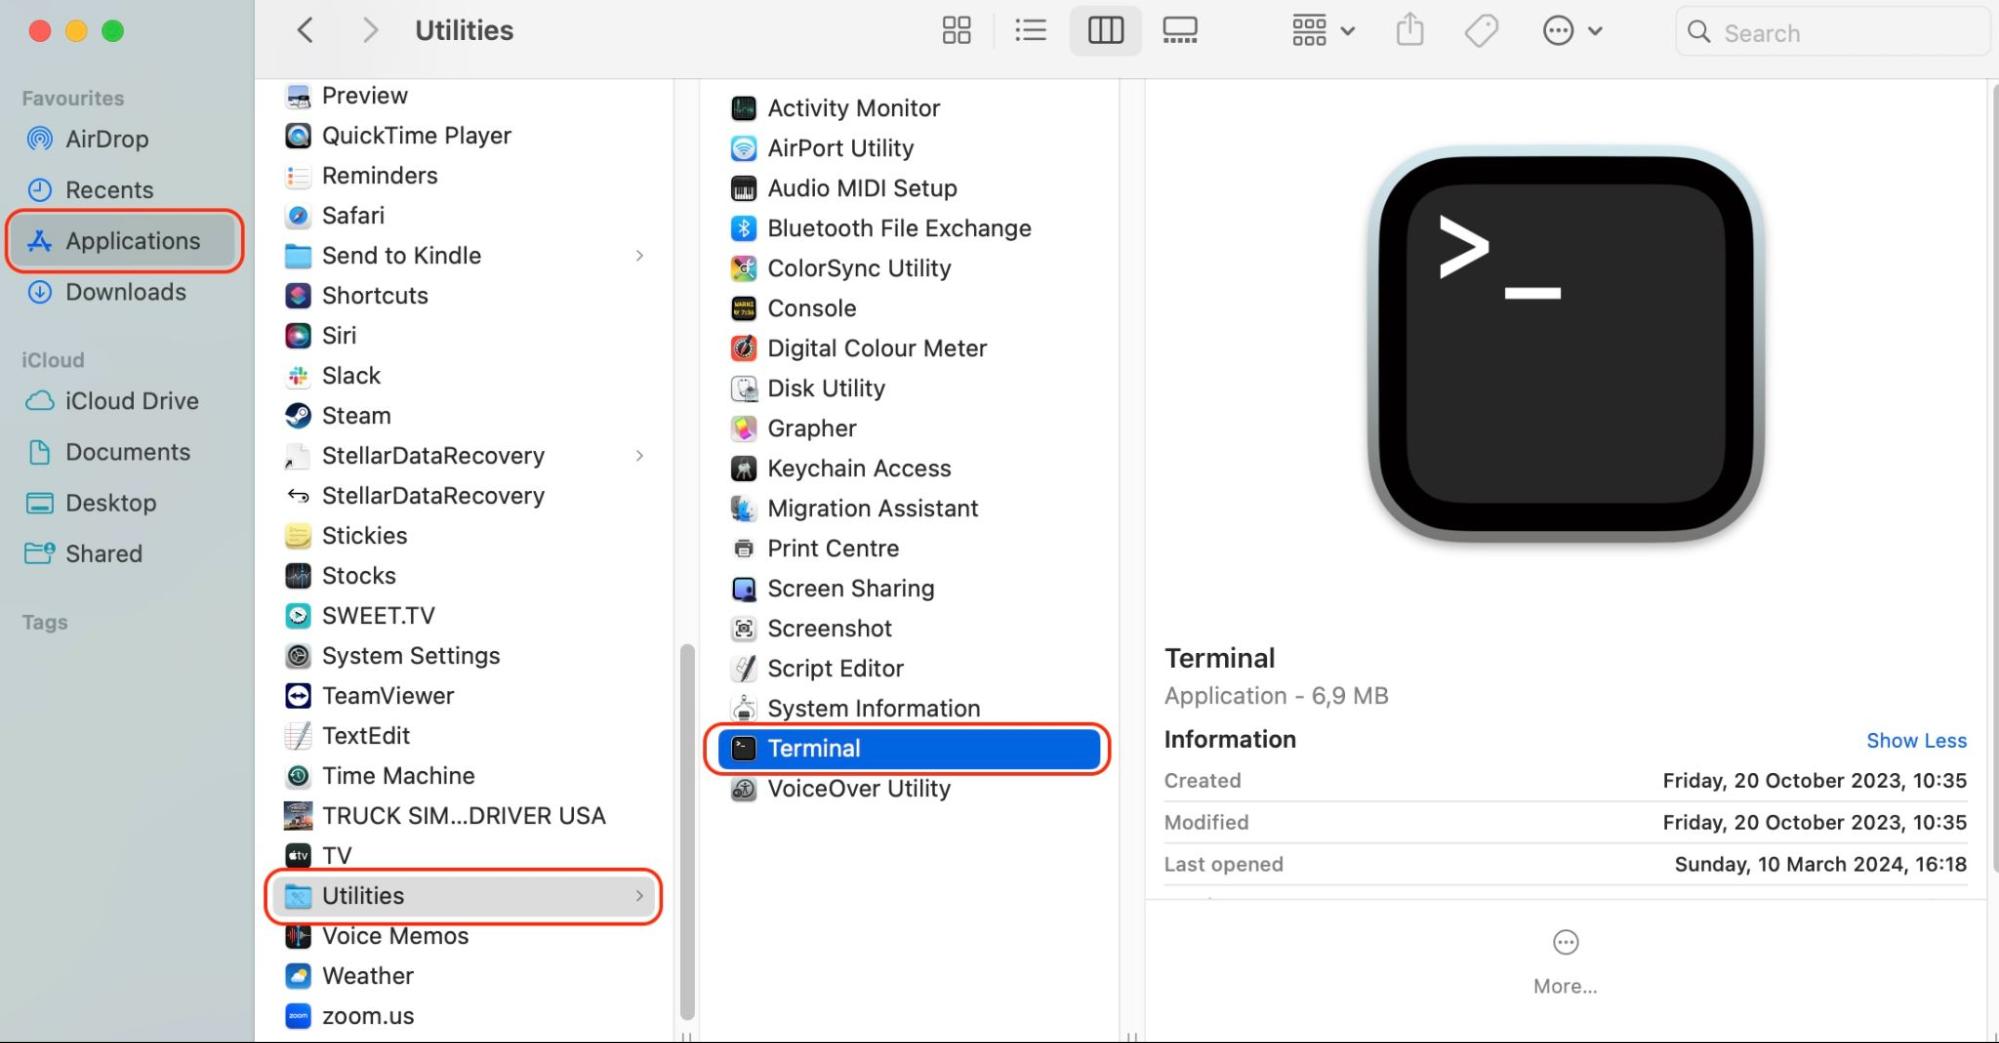
- Check your Applications folder to confirm that the installer has been saved correctly.
- Insert a USB drive (16GB or more) into your Mac. Ensure the drive is empty, then rename it to something recognizable, like Ventura Installer.
- Open Terminal from Applications > Utilities, as this tool is required to create the bootable installer. Enter the following command: sudo /Applications/Install\ macOS\ Ventura.app/Contents/Resources/createinstallmedia --volume /Volumes/MyVolume—replace "MyVolume" with the name of your USB drive.
- Hit Return and wait while Terminal creates the bootable installer. Once done, quit Terminal.
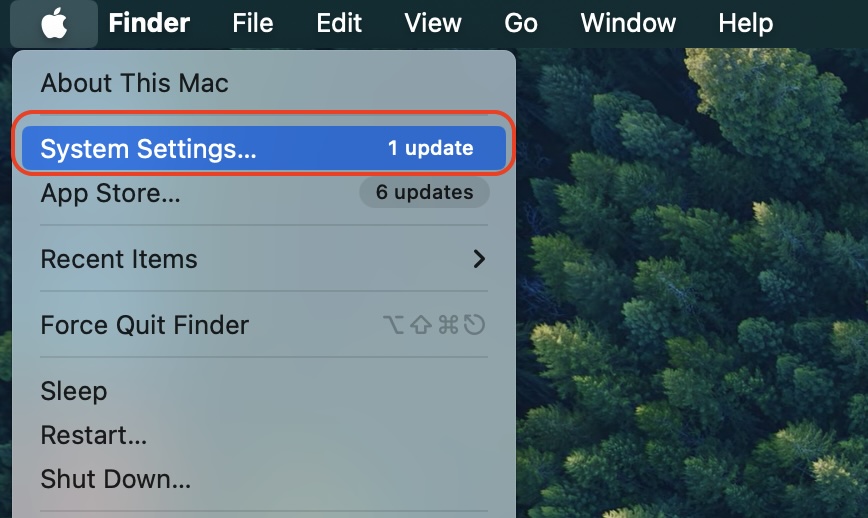
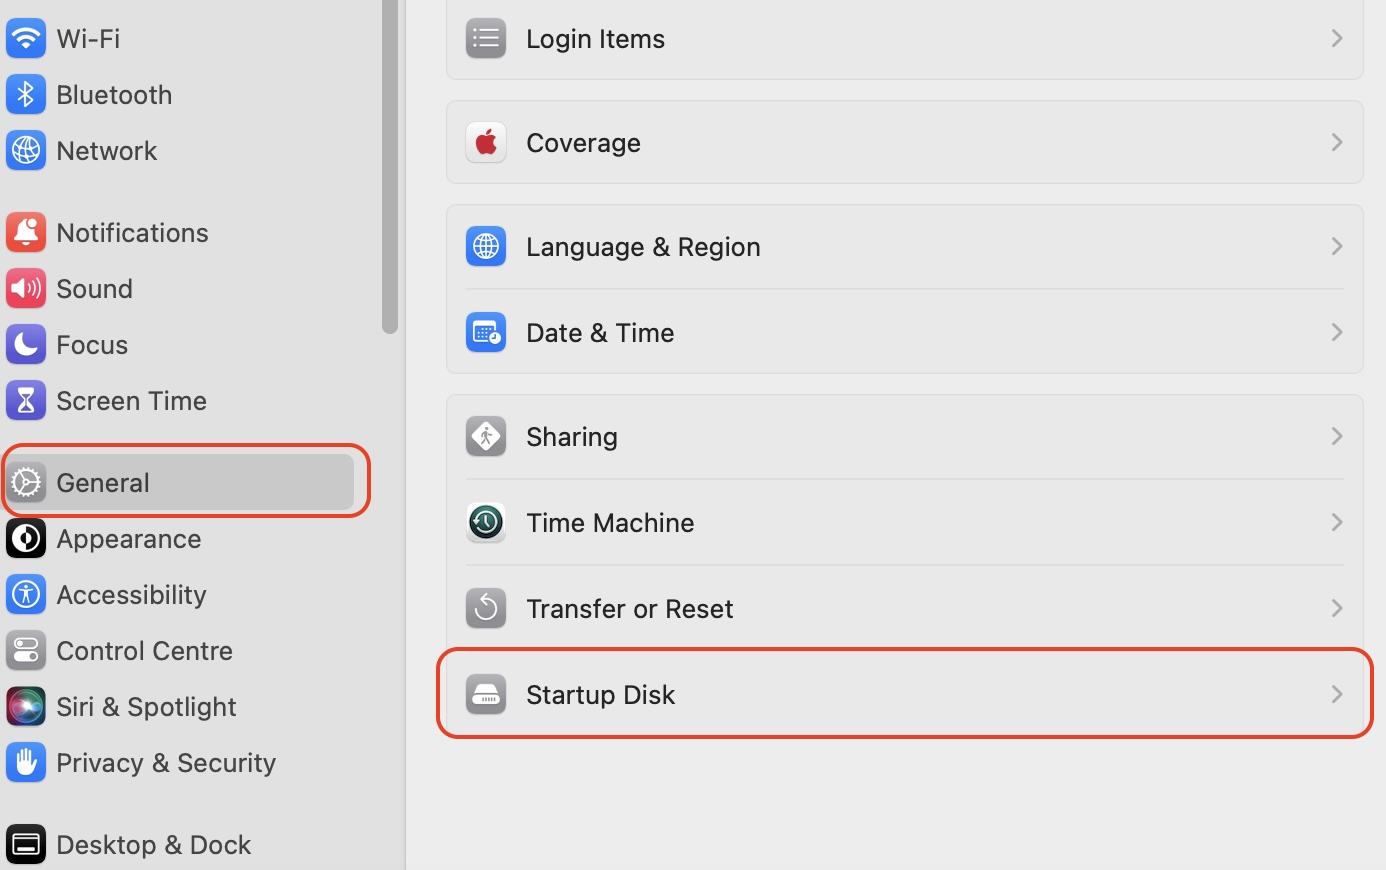
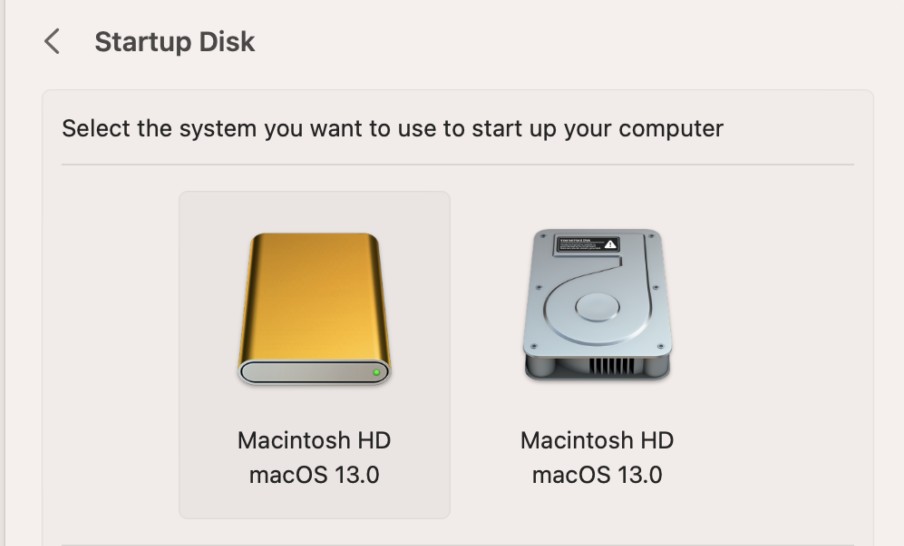
- In the Apple menu, go to System Settings > General > Startup Disk. Select the USB drive you’ve just prepared.
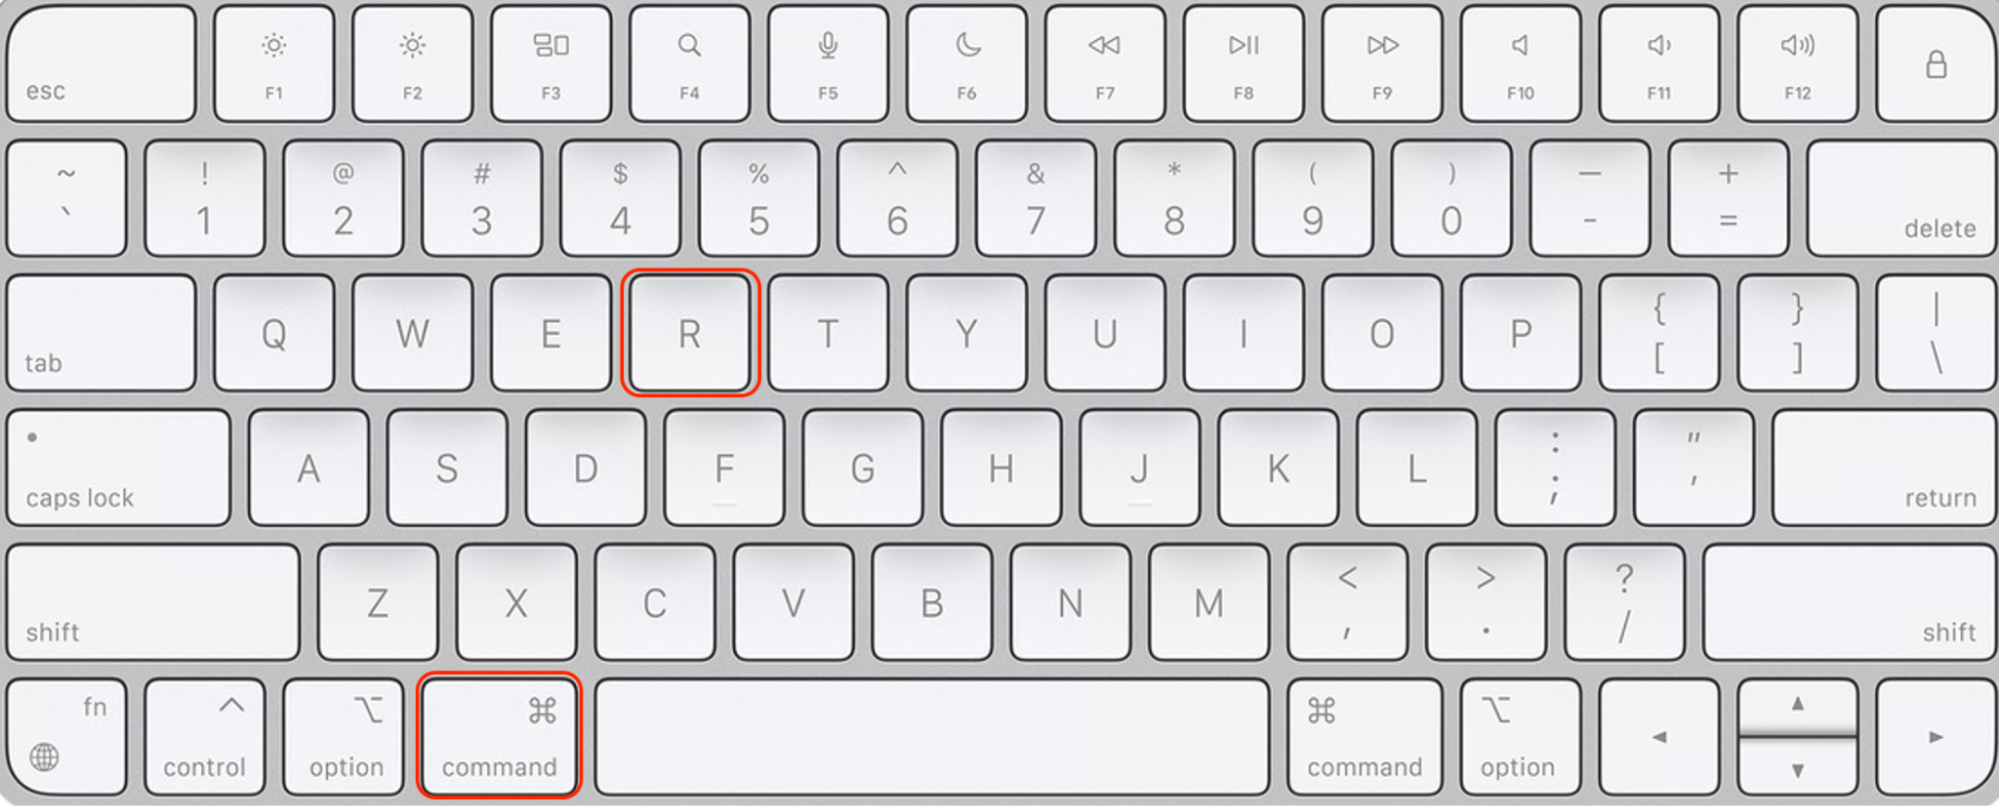
- Shut down your Mac, then restart it in recovery mode by holding down Command-R on Intel Macs or the power button on Apple Silicon models until startup options appear.
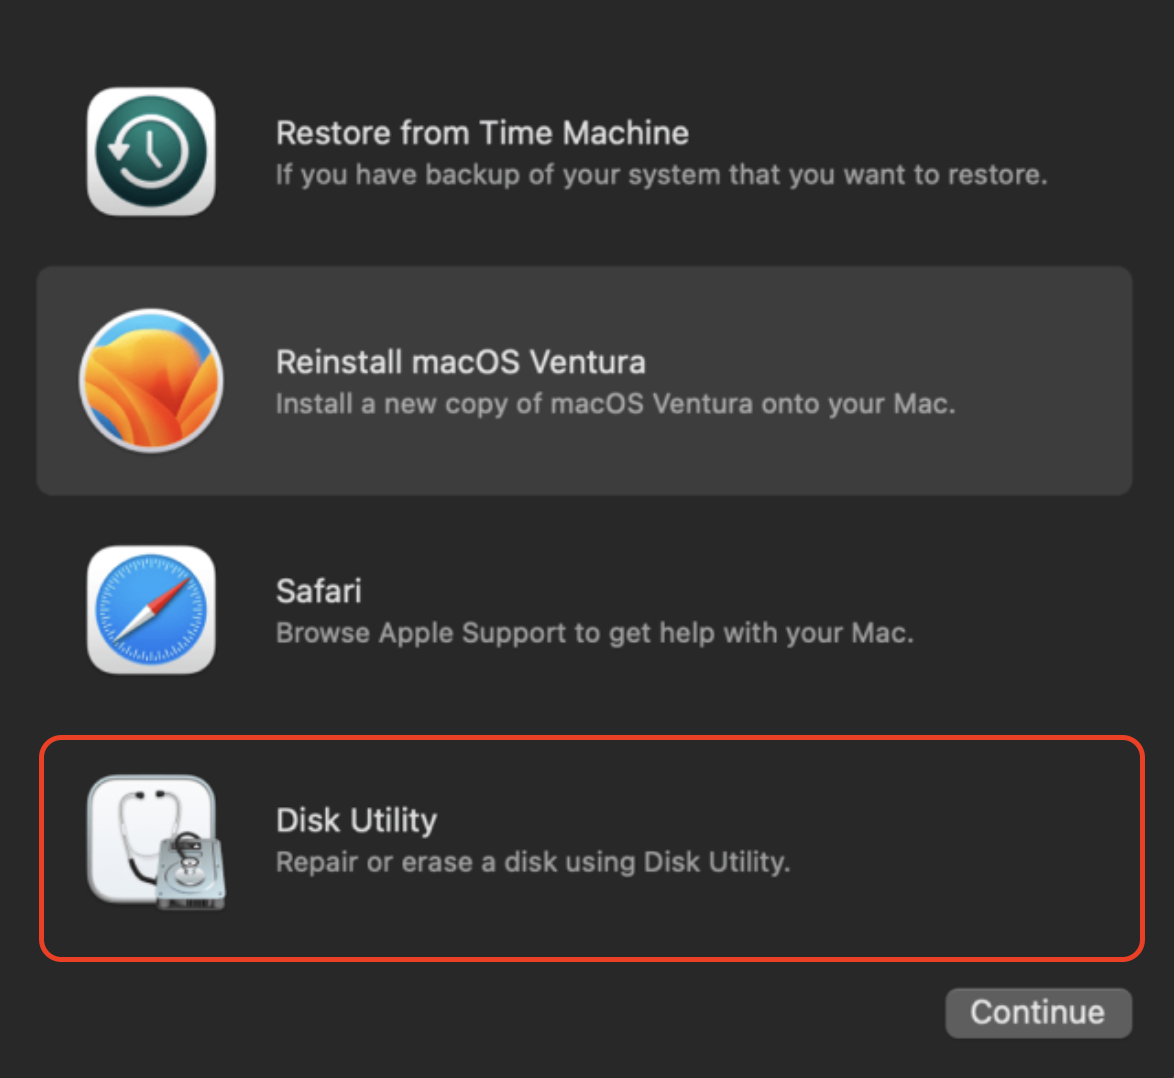
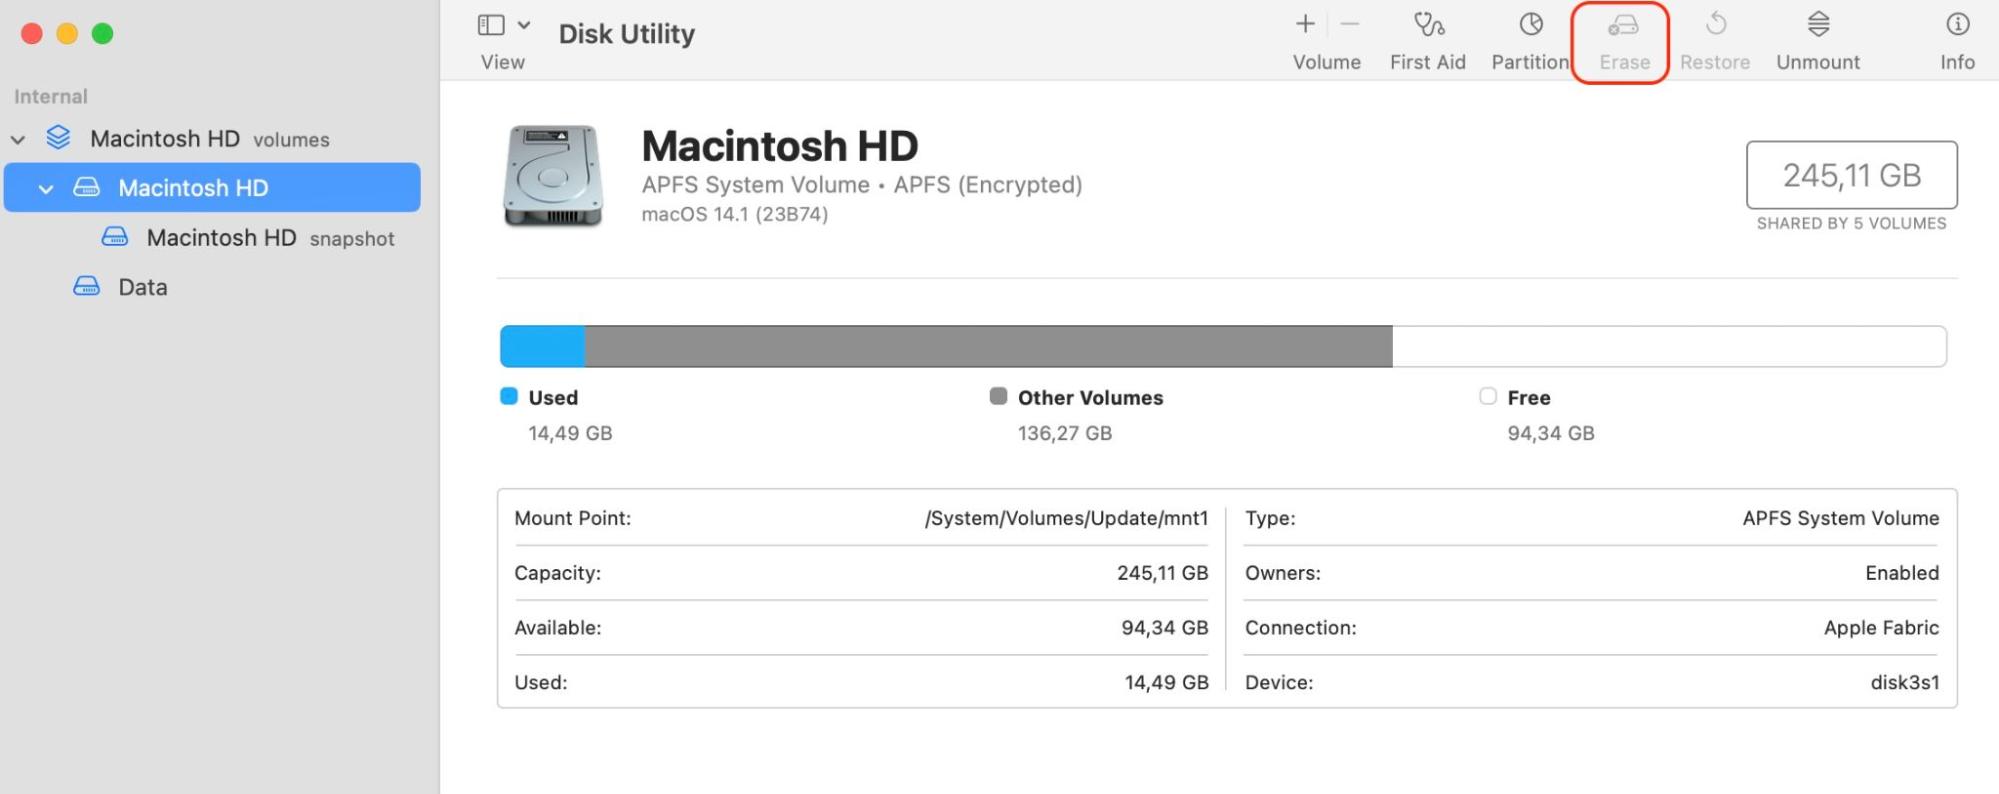
- In the macOS Utilities menu, select Disk Utility. Choose your startup disk and click Erase, then follow the instructions to wipe the drive completely.
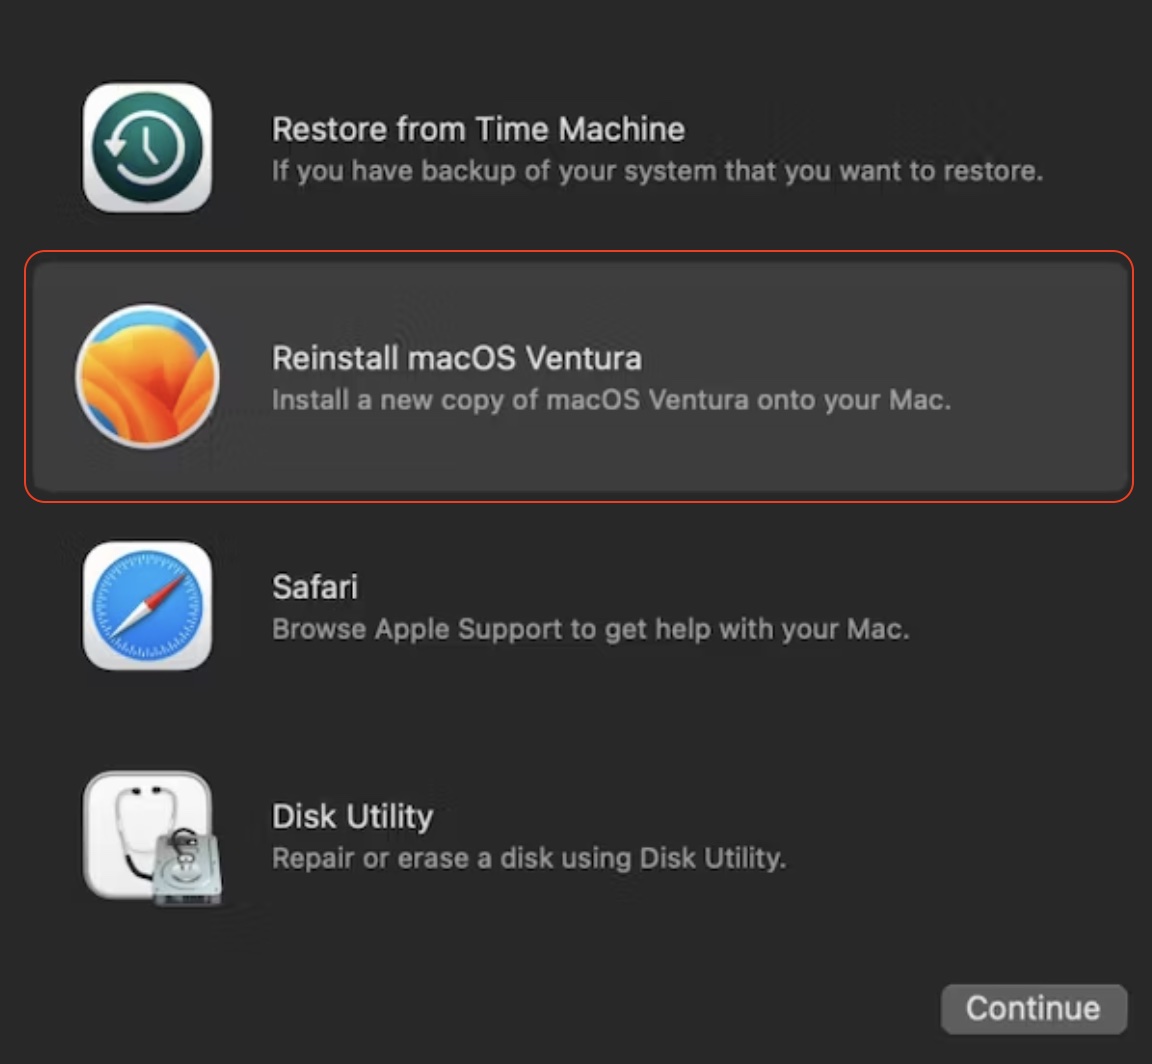
- Once the disk has been erased, return to macOS Utilities and select Reinstall macOS Ventura. Follow the prompts to begin reinstalling Ventura on your Mac.

After completing the installation, your Mac will restart with the earlier OS version, providing a fresh system free of macOS Sonoma’s issues. You can now restore any backed-up files and enjoy a more stable environment on your device.
Fixing issues when downgrading your macOS Sonoma
When you’ve summoned up enough courage to downgrade your macOS Sonoma, you could face a few common issues that may affect both your system’s performance and your data’s safety. Don't worry, downgrading is a manageable task, and with the right steps our team has prepared for you, you can troubleshoot any questions that arise.
Below, you'll find the most widespread macOS downgrade issues we’ve found for you, along with easy-to-follow solutions on how to identify and fix them.
1. Damaged files and lost information
A frequent concern during a downgrade is the risk of data loss or file corruption. Most often, this typically happens due to incomplete backups, interruptions during the downgrade process, or software conflicts.
Solutions:
- Ensure you have complete copies of your important files, documents, media, and any system data. Using Time Machine or a trusted third-party backup tool will safeguard your data before downgrading.
- In case some files go missing or become corrupted during the downgrade, tools like EaseUS Data Recovery Wizard for Mac can be lifesavers. So take advantage of this software and recover files from backups or damaged drives without any worries about losing important data.
- After the downgrade, if you notice missing files, immediately run a recovery program to search for any inaccessible or damaged data.
2. Troubles with compatibility applications and programs
Once you downgrade, apps that were recently updated for macOS Sonoma may experience reduced functionality or crash frequently. Software developers often release updates tailored for newer operating systems, which can cause incompatibility when reverting to Ventura, for instance. Performance issues or missing features are common, especially in apps that heavily rely on newer frameworks introduced in Sonoma.
Solutions:
- Visit the developer’s website or look through support forums to find any updates specific to the required macOS version.
- Find software versions optimized for your target macOS version to avoid compatibility issues.
- Running programs in compatibility mode may resolve instability problems with certain apps.
3. The drivers are either missing or invalid
Downgrading can result in the loss of suitable drivers, directly impacting the functionality of hardware components such as printers, external storage devices, or scanners. Without the proper drivers, these devices may either stop working entirely or behave erratically. Newer drivers optimized for macOS Sonoma may not function correctly on the previous macOS version, resulting in issues like unrecognized devices or limited functionality.
Solutions:
- Google the manufacturer’s website and download drivers specifically for your preferred macOS version.
- Follow any prompts to install and update the necessary drivers for your hardware.
- If drivers aren’t available, reach out to the manufacturer or consider using alternative hardware.
Post-downgrade optimization tips
After downgrading your current macOS, you may notice that your Mac’s performance is still less than optimal. To boost your system, we suggest you take a few steps to optimize it for enhanced efficiency, including:
- Declutter your Mac. Old update files, system junk, and unused language files can quietly eat up storage space and slow down your device. MacKeeper’s Safe Cleanup feature can really help here. By using this option, you can delete unnecessary files and restore some of your Mac’s lost speed. Complete the scan, review the files MacKeeper recommends for removal, then hit Clean Junk Files to free up space and instantly improve your Mac's speed.
- Remove large files and apps you no longer need. Even temporary system files and residual caches from previous updates can accumulate over time, affecting your Mac's efficiency. By tackling these cluttered areas, you not only free up storage but also help your device access necessary files more swiftly.
- Monitor your system's health. Check for outdated drivers and identify resource-heavy apps that could be draining performance. Simple actions, such as closing unused applications or updating software to versions optimized for earlier versions of macOS, can create a smoother user experience.
Once you combine these steps with MacKeeper's assistance, you're equipping your Mac to run efficiently without the lingering effects of previous software versions. Congrats, you're good to go.
Looking to achieve smoother MacBook performance?
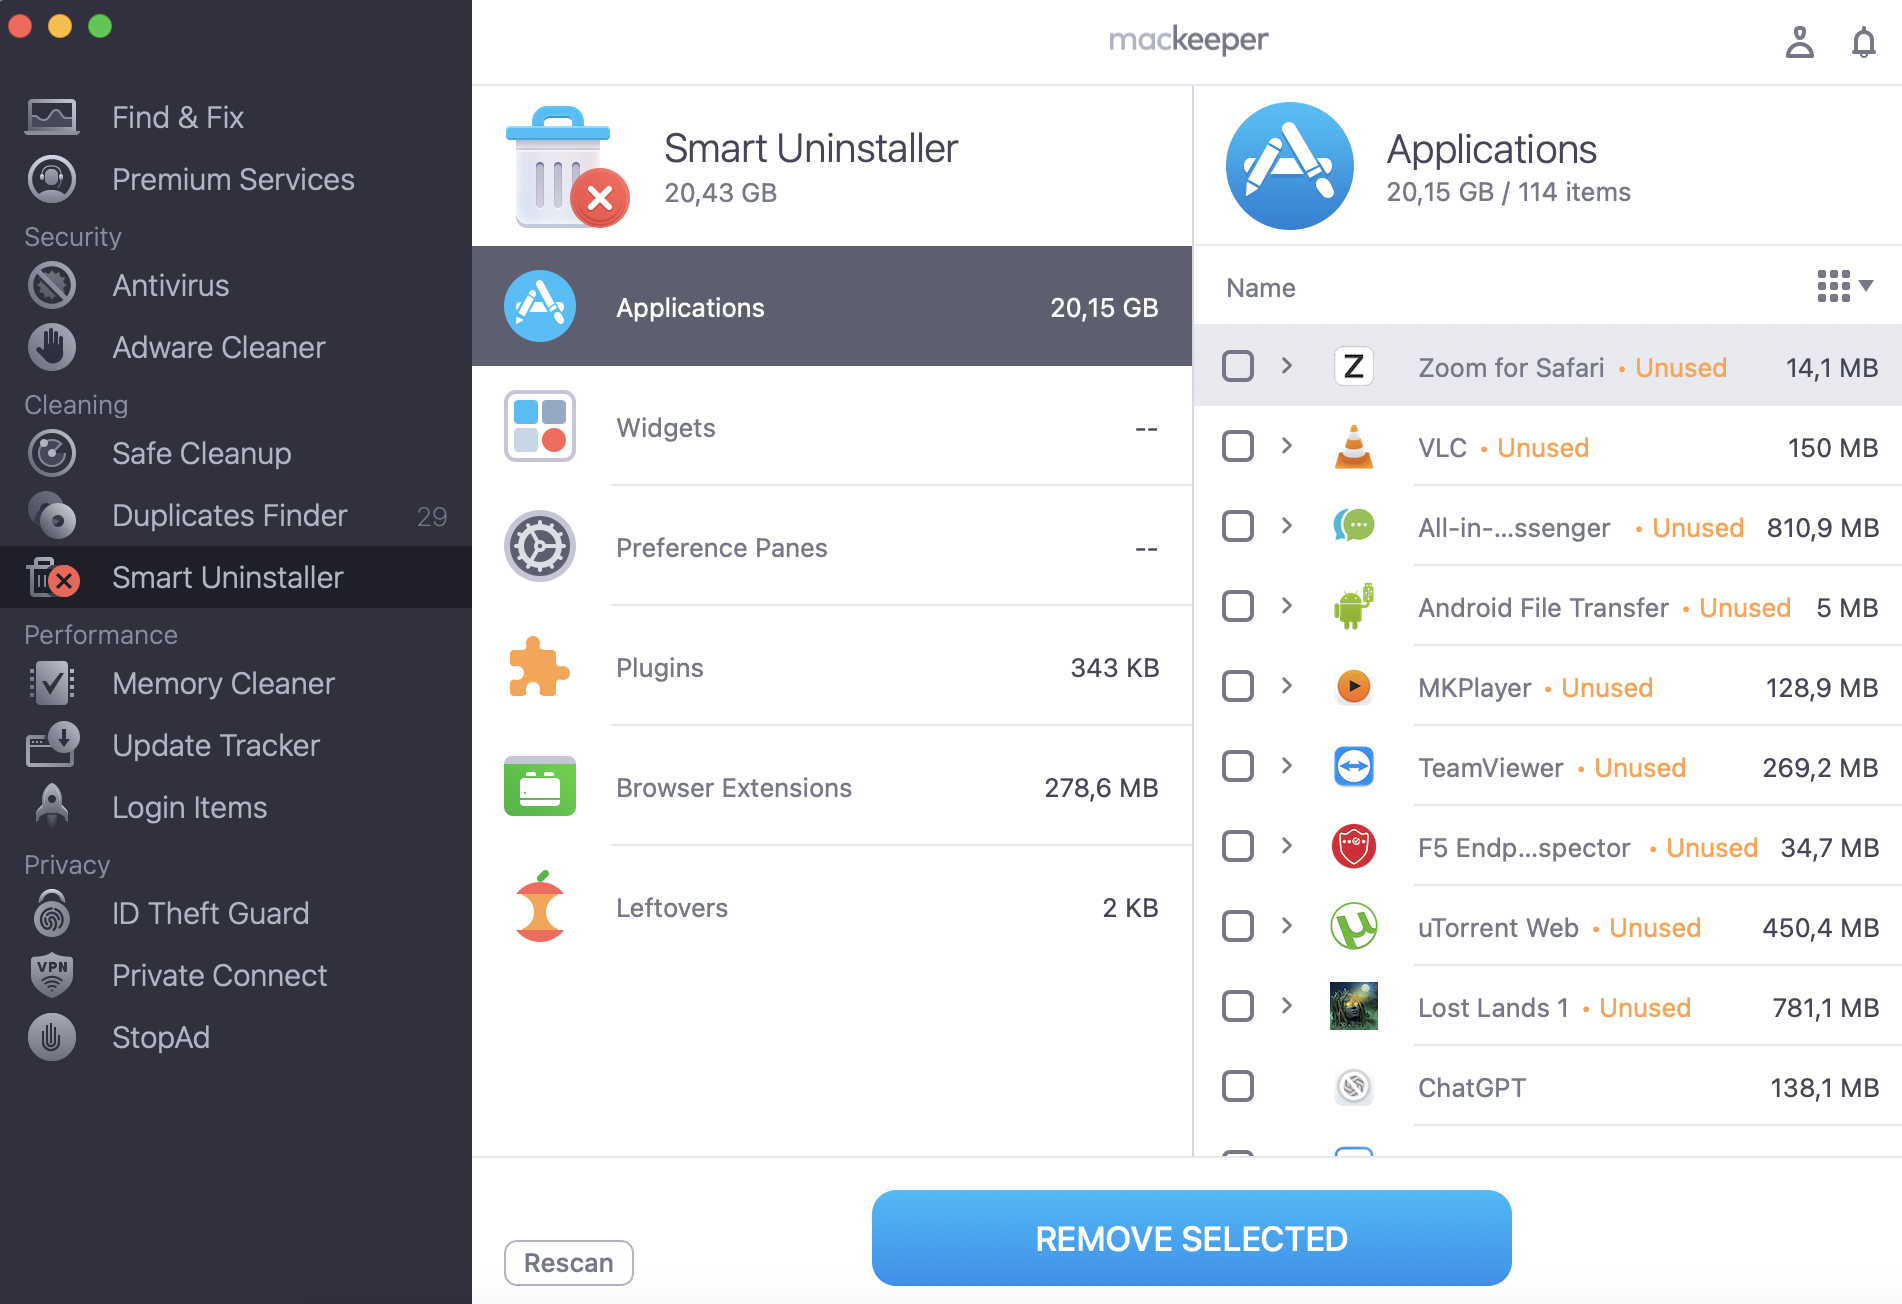
Do you want to get even more out of your Mac? Alongside the basics, you can try a few additional tricks to keep things running efficiently. For instance, removing old or unused apps completely with MacKeeper’s Smart Uninstaller—along with their leftover files—can open up lots of extra storage. And if your Mac feels slow, clearing out old data on your device can noticeably speed things up.
If you choose to install the older version of macOS, consider focusing on overall system optimization within the MacKeeper app to maintain peak performance. A streamlined, clutter-free system minimizes the risk of future issues. After all, keeping your Mac in top shape means fewer hiccups and a more reliable experience, no matter which version you’re using.
How to boost performance without downgrading
If you’re hesitant about downgrading from macOS Sonoma or simply want to explore other solutions first, there are several ways to improve your machine's performance without rolling back to the previous macOS version. After all, a downgrade isn’t always necessary—sometimes, all it takes is a few tweaks to get things running smoothly again.
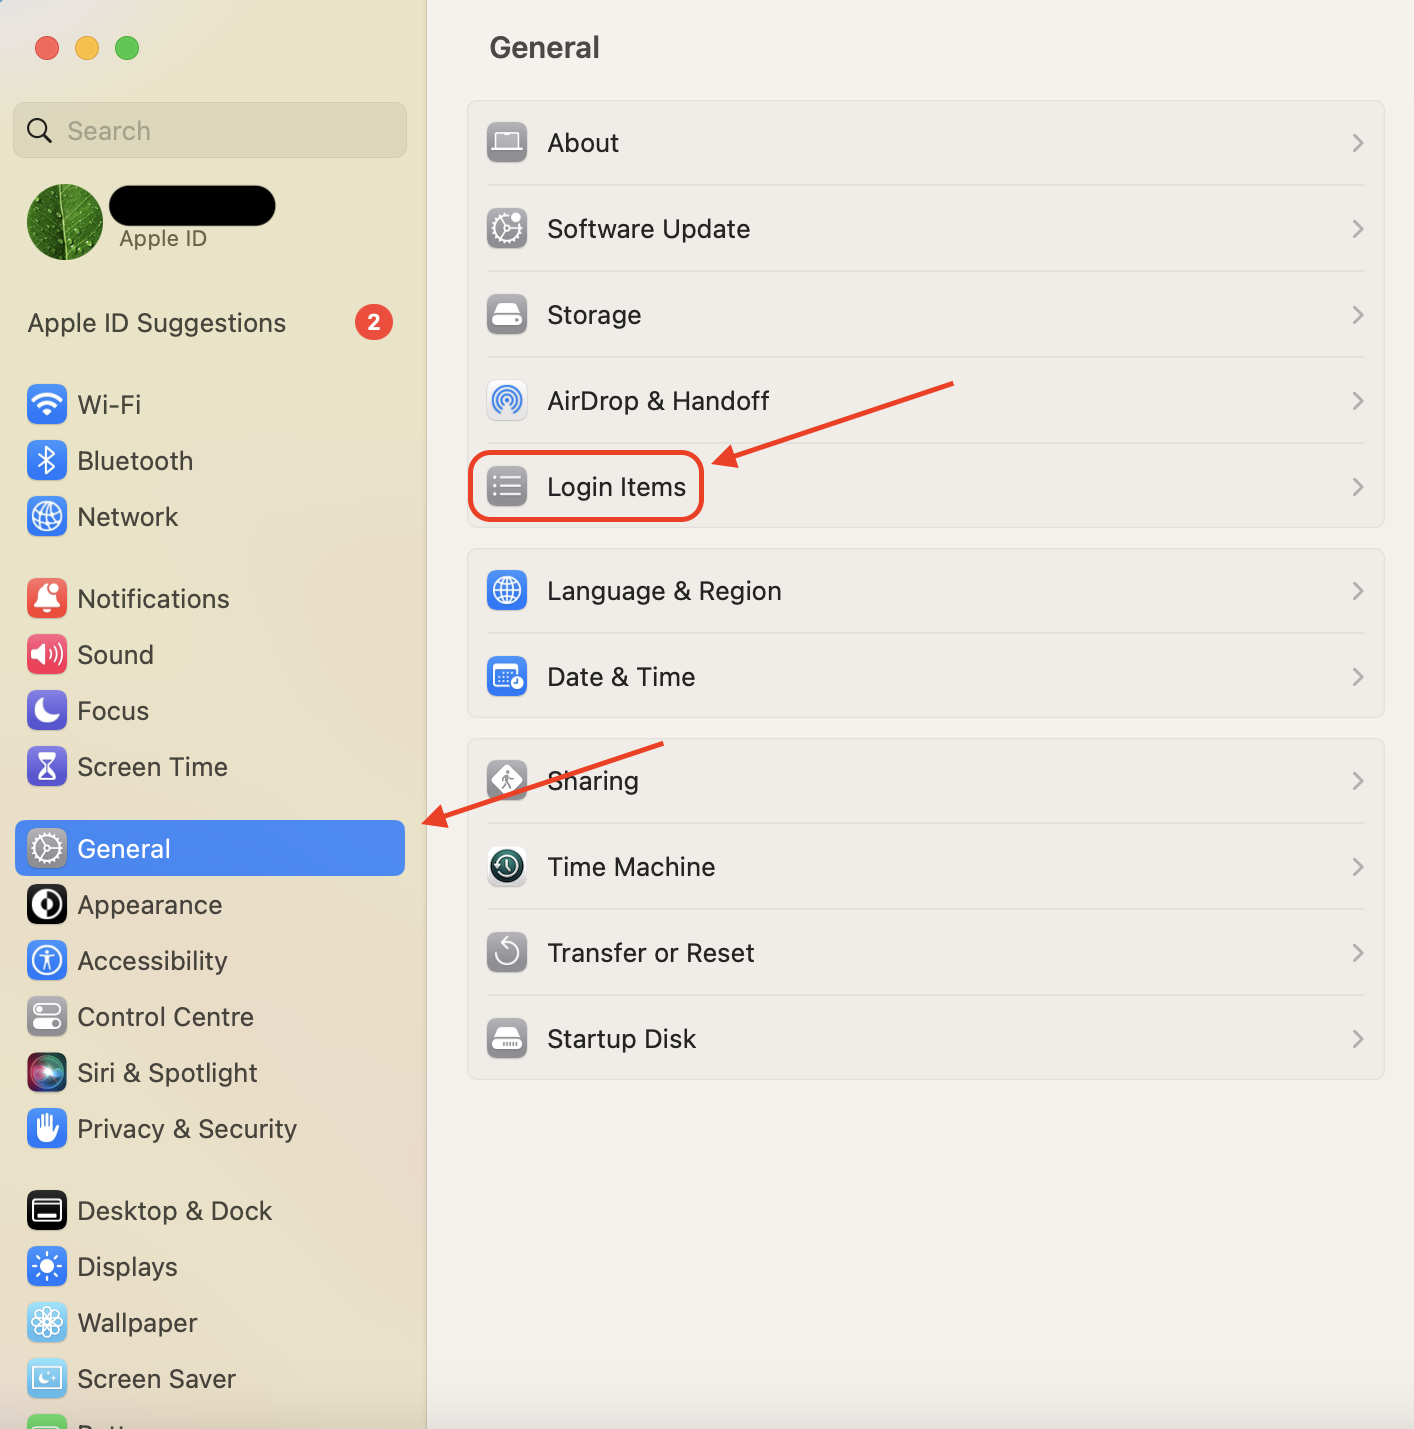
- Start by managing your system’s startup items. Many apps set themselves to launch at startup, which can slow down your Mac’s boot time and eat up vital resources. Disabling non-essential apps from automatically starting up will free up memory and improve your device’s responsiveness right off the bat. Look for these settings under System Settings > General > Login Items.
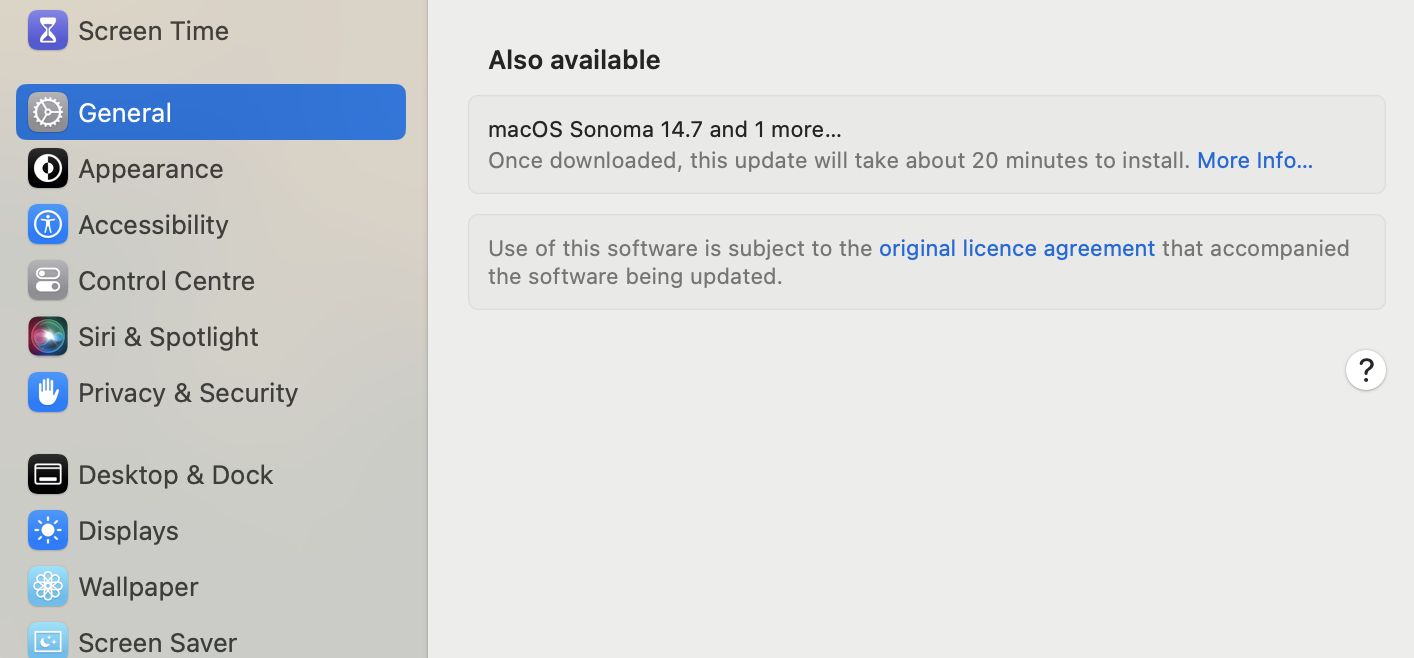
- Update your macOS to the latest minor version of Sonoma. Apple frequently releases patches that address bugs and compatibility issues. Installing these updates could resolve the problems you’re facing without needing to roll back the macOS update to an earlier version. In many cases, these minor updates offer crucial improvements that stabilize performance.
- Only keep the software you need. Clearing out unnecessary programs and files can give your Mac a performance boost and free up valuable storage space. To get it running like new again, it’s always a good idea to look for outdated drivers and software that might be causing issues.
Ultimately, these proactive measures can save you from the more drastic step of downgrading, helping you enjoy a more stable and responsive experience with macOS Sonoma. So, if you’re on the fence about reverting, give these methods a try first. You might just find they offer all the improvements you need without the hassle of an entire system rollback.
When you should avoid downgrading
Even though downgrading macOS might seem like a quick fix to solve performance or compatibility issues, it’s not always the best solution. Quite often, the process introduces more complications than it solves. That's why you should be careful while considering whether downgrading is the right decision for your situation. Still, even if you've made a lot of mistakes as you downgrade, there's always a fix, one of the quickest being to factory reset a MacBook.
If your Mac is a newer model that came with macOS Sonoma pre-installed, you won’t be able to downgrade. The hardware in these models is designed to run the latest macOS versions, and reverting to an older one may result in hardware incompatibility issues. Similarly, downgrading could cause issues with apps designed particularly for Sonoma. Some apps might no longer function properly or experience bugs and stability issues after reverting to the previous OS version.
One more factor to consider is the time and effort you put into this. As you've noticed, downgrading is a lengthy process that requires you to back up your data, reinstall the operating system, and reconfigure settings. If you rely on your Mac for work or productivity, this process could lead to downtime, and you'll spend the evening drinking tea instead of crossing out tasks in your project management tool.
You should also think about the benefits of staying with macOS Sonoma. While you might face initial problems, newer macOS versions often receive updates that address bugs and improve performance. Instead of downgrading, you may find that merely troubleshooting or waiting for a patch resolves your issues without reverting to an older operating system.
Conclusion
So, you’ve decided to downgrade macOS Sonoma. It would be a good call if the latest macOS wasn’t cutting it for you. But remember, the journey doesn’t end here. To really get your Mac back to its old self, a little post-downgrade cleanup is a must.
That’s where MacKeeper’s Safe Cleanup swoops in to save the day. Why let unnecessary files and hidden clutter hang around, slowing down your Mac? Instead, do the quick scan, choose the files to clear up space, and give your Mac the boost it needs.


