In this article you will find the following:
Why you might need to reinstall macOS
Reinstalling macOS can resolve persistent software glitches, remove malware, enhance performance, or ensure compatibility when upgrading. It provides your device with a fresh start, eliminating issues that slow down or disrupt your Mac’s functionality.
A note from our experts:
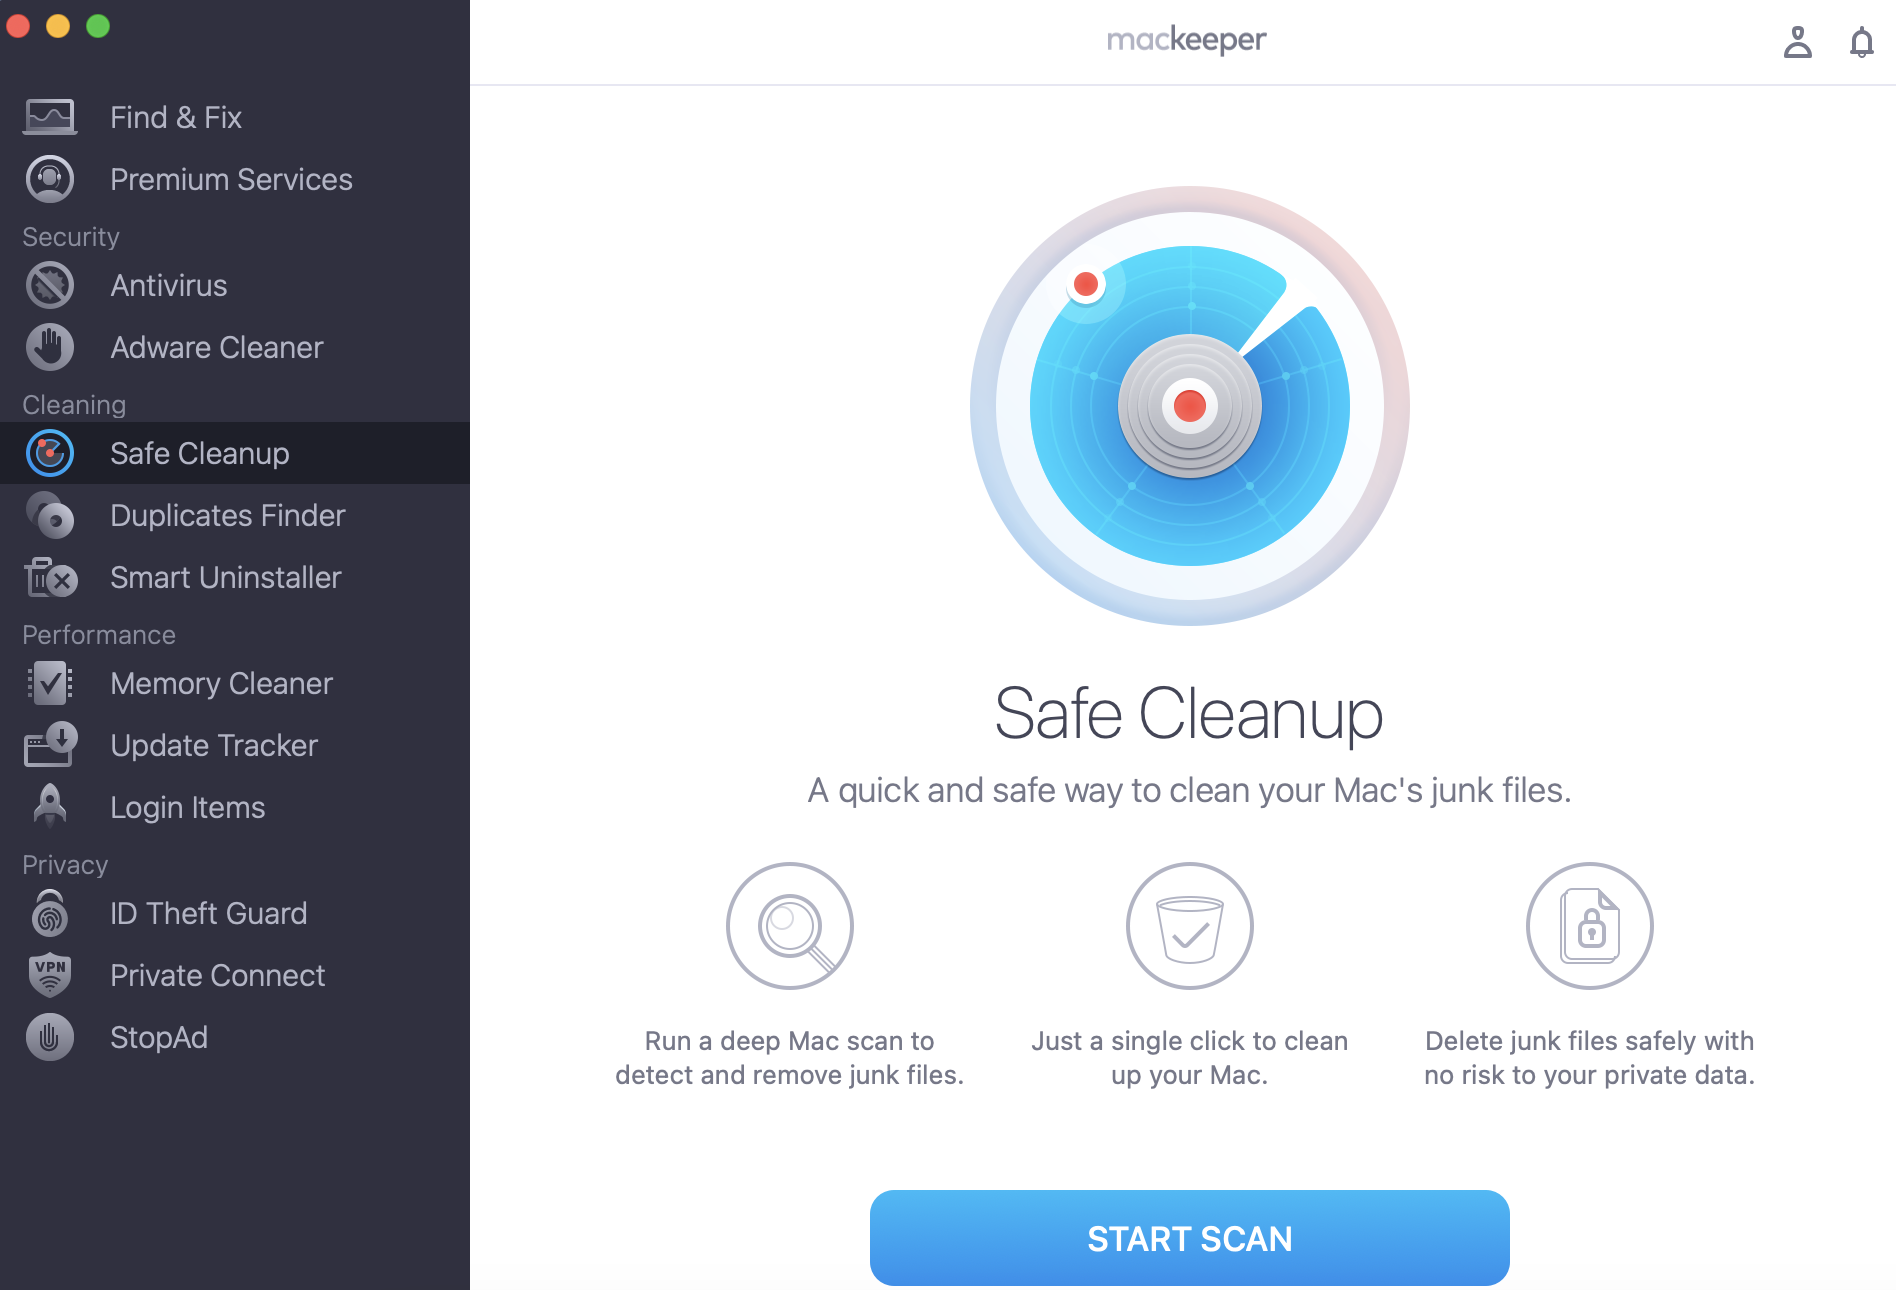
Here’s how to use MacKeeper’s Safe Cleanup:
- Download and install MacKeeper, then open the app.
- Select the Safe Cleanup feature from the sidebar.
- Click Start Full Scan to detect junk files.
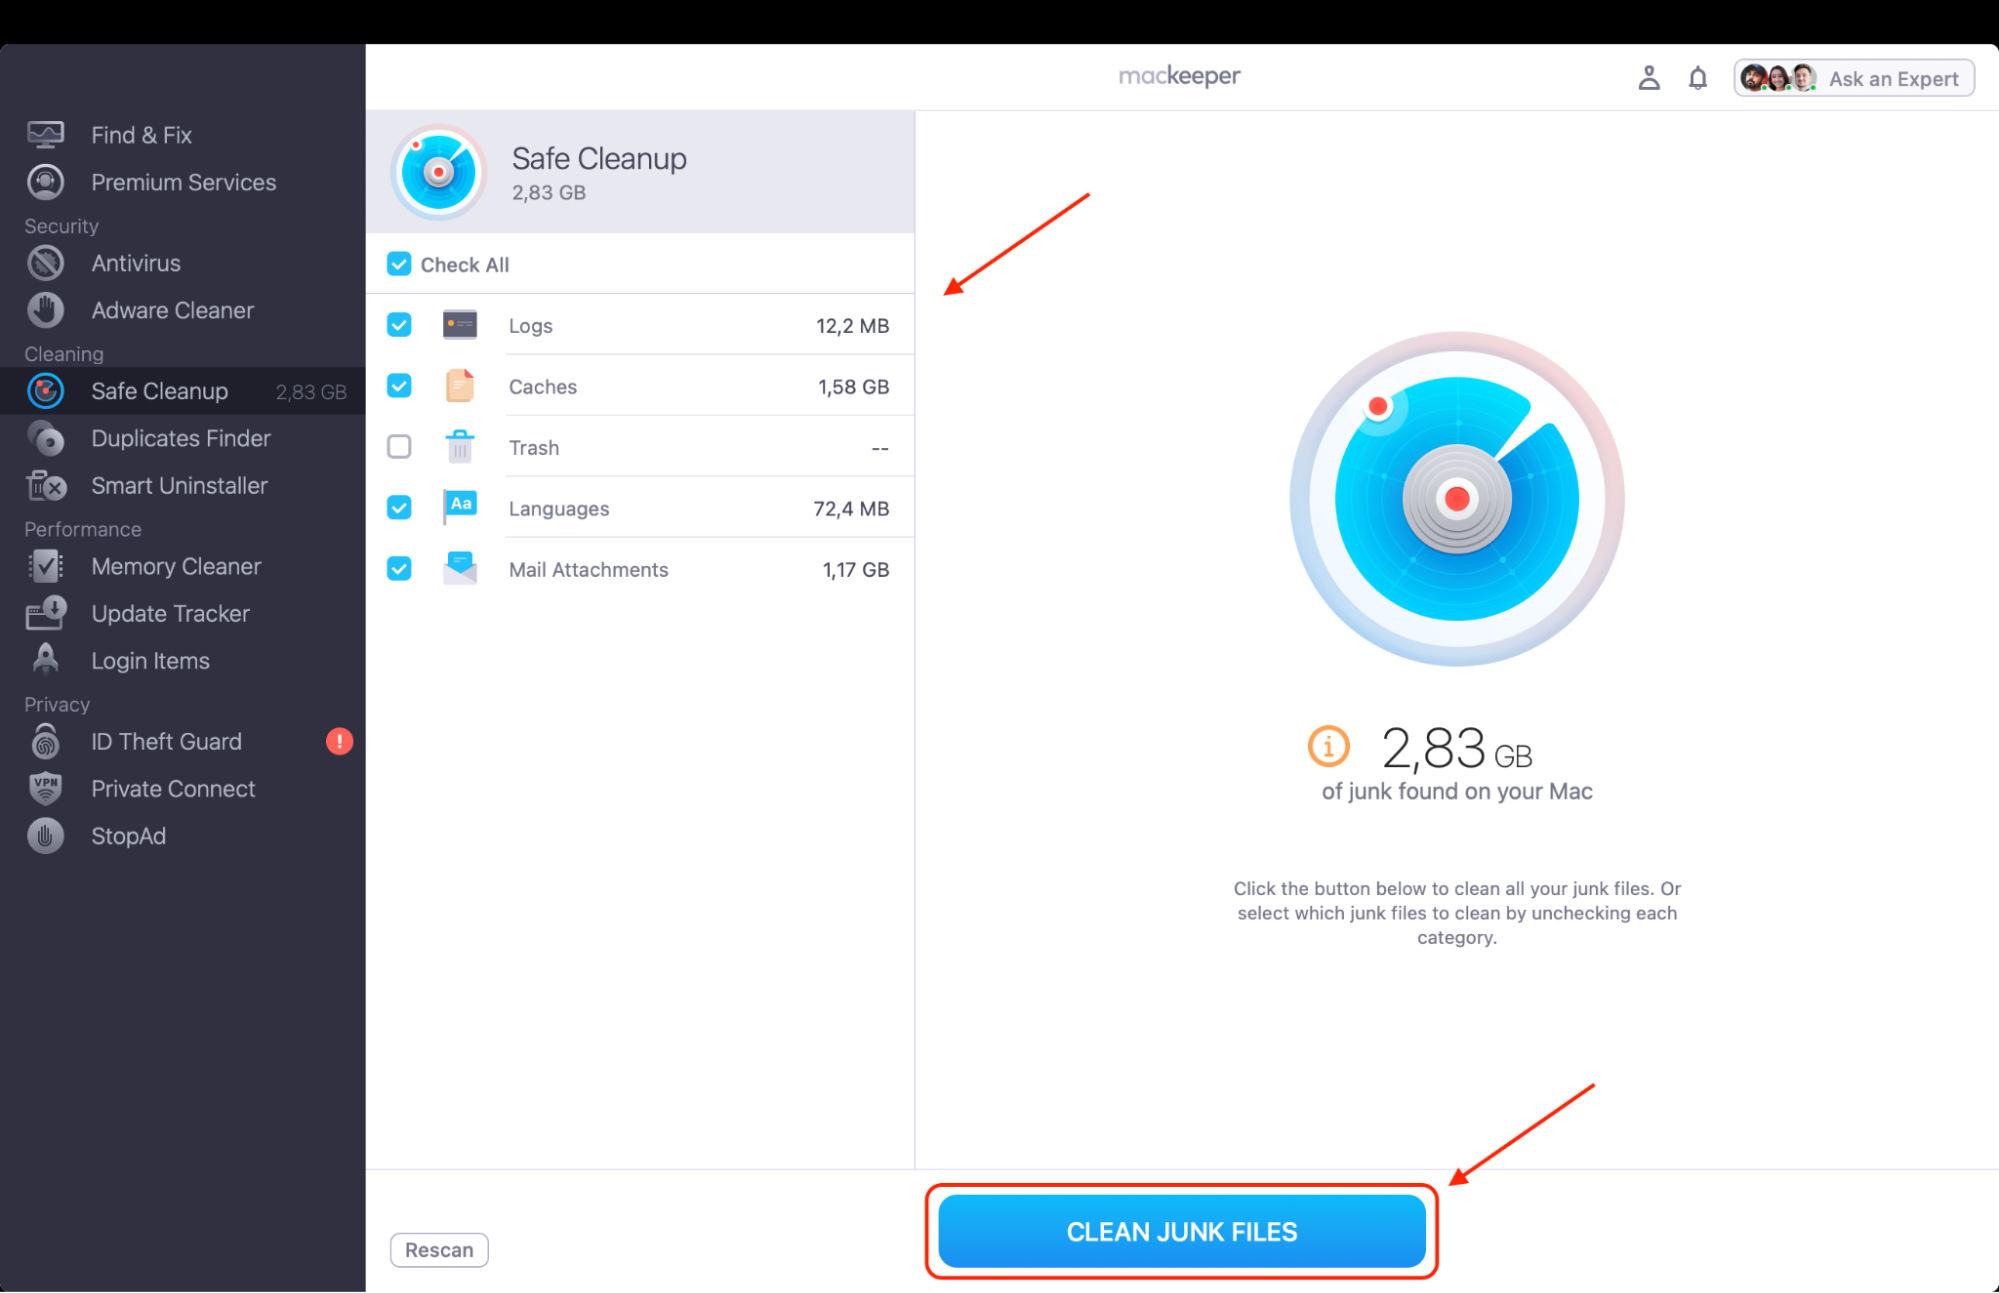
- Review the scan results and confirm what you want to remove.
- Click Clean Junk Files to complete the process.
Prerequisites for reinstalling macOS
Before you initiate a clean install of macOS, you should correctly prepare your system to ensure a smooth, hassle-free process and protect your data from potential loss.
1. Backing up your data
Start with backing up your data. It’ll prevent accidental data loss during the macOS reinstallation process, and here are a few things you need to consider beforehand:
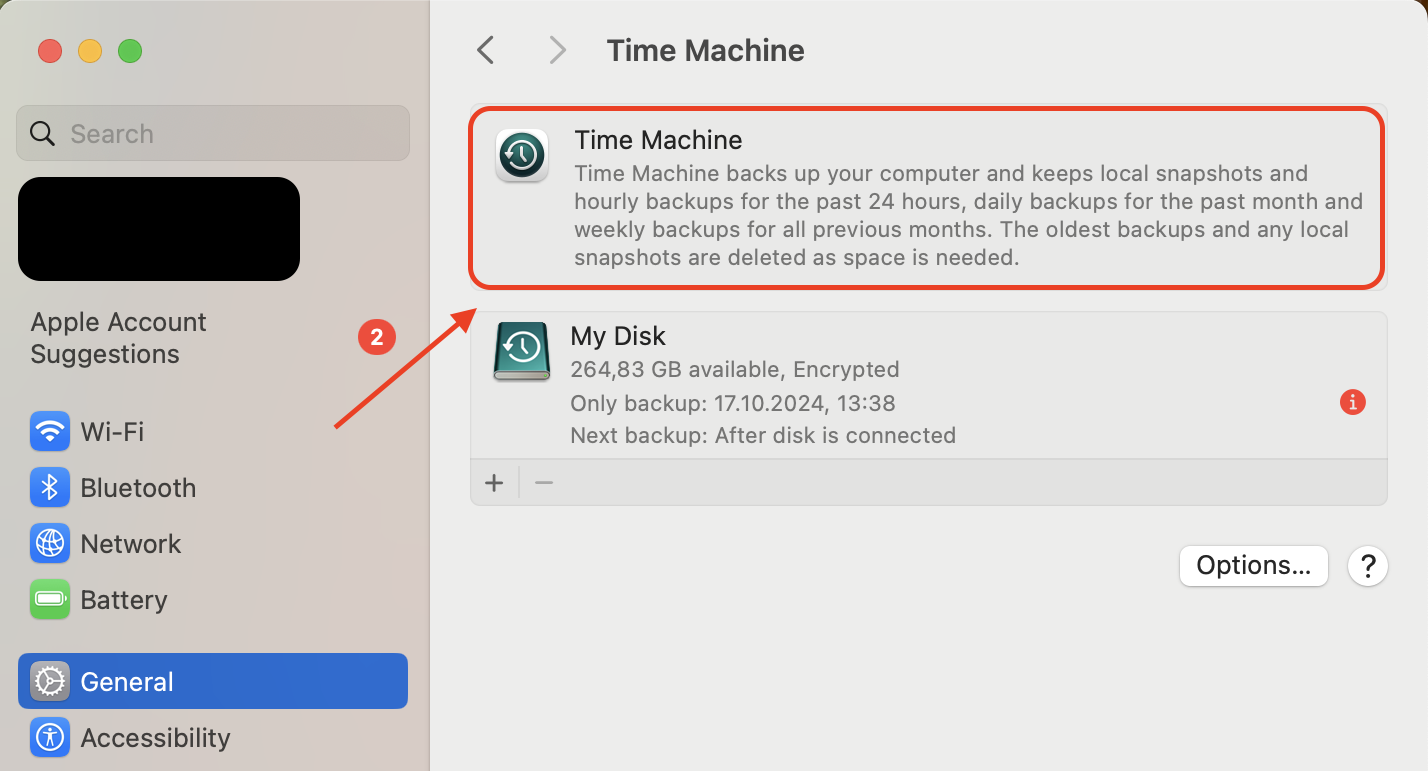
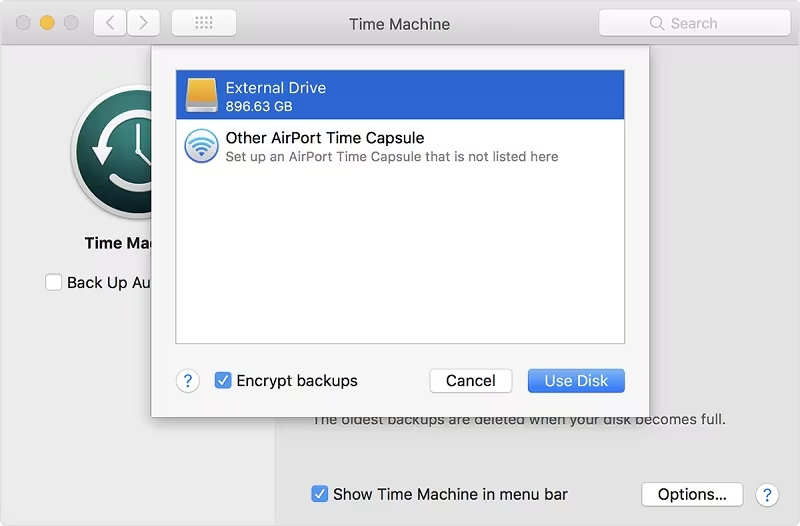
- Use Time Machine to create a full system backup and ensure you can easily restore your files.
- Verify that your backup includes all critical documents, applications, and system settings to avoid any data gaps.
- Encrypt your backup for additional security, especially if you are storing sensitive or personal information.
- Consider using cloud storage options like iCloud or Google Drive for remote access and extra peace of mind.
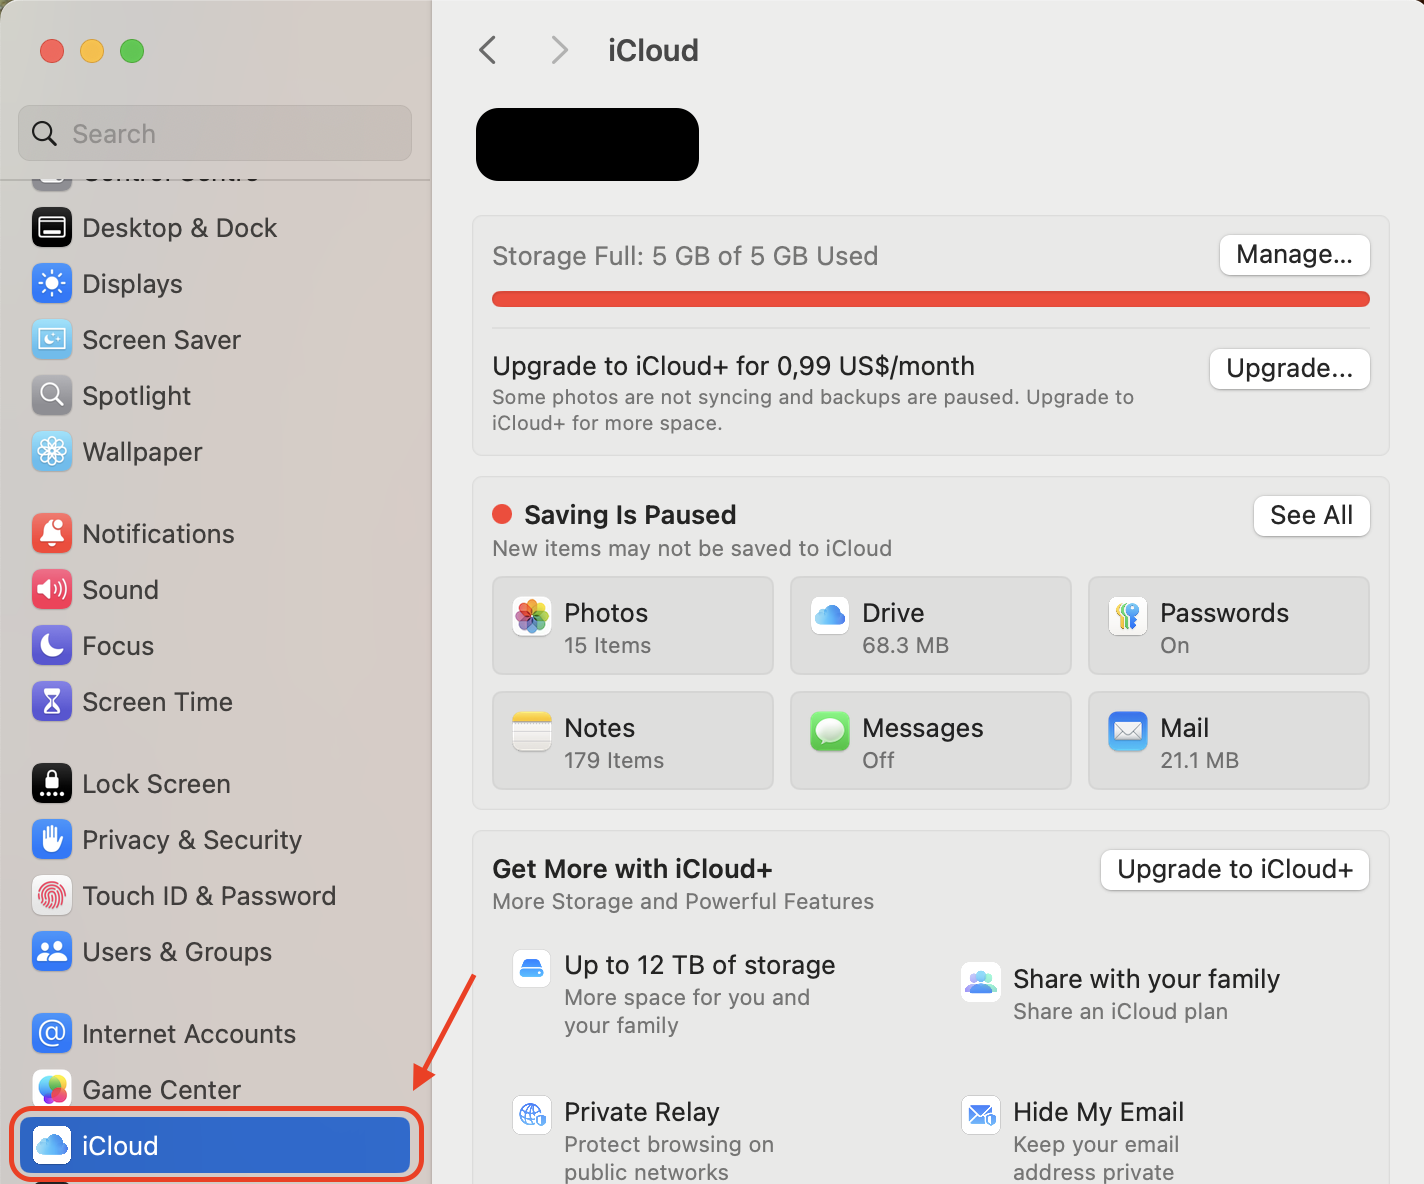
2. Checking macOS compatibility and version
Checking macOS compatibility and version brings you one step closer to desired device functionality. It’ll help you avoid unexpected errors or performance issues. Here’s what to do:
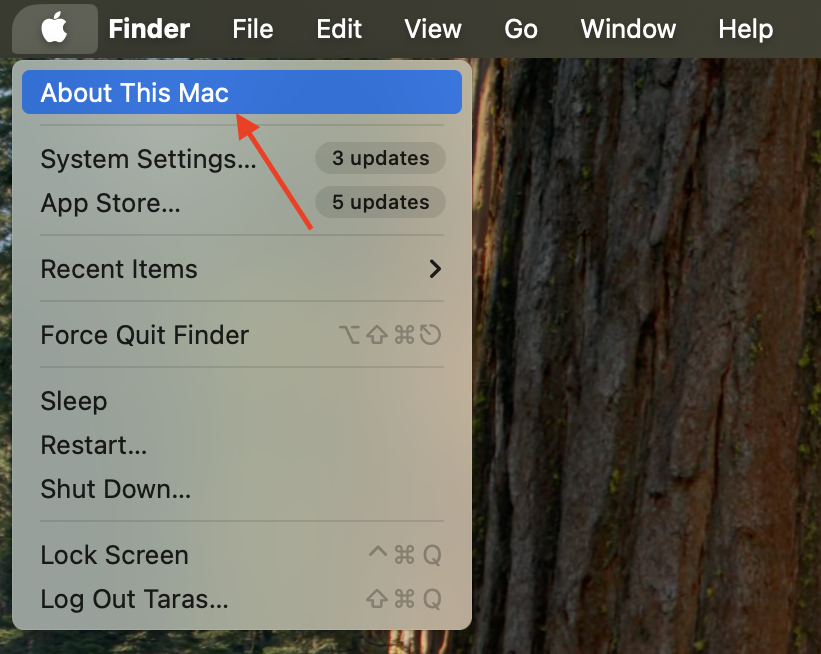
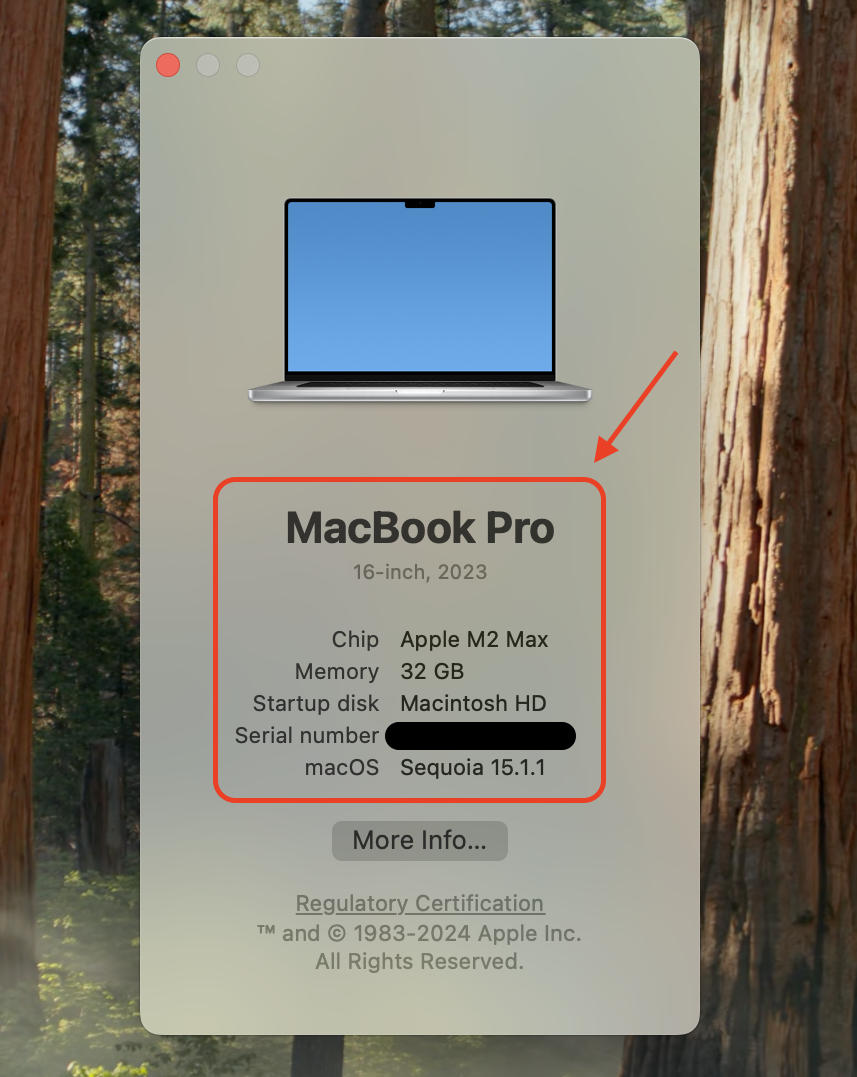
- Visit Apple’s official website or open the About This Mac section to verify compatibility with the desired macOS version.
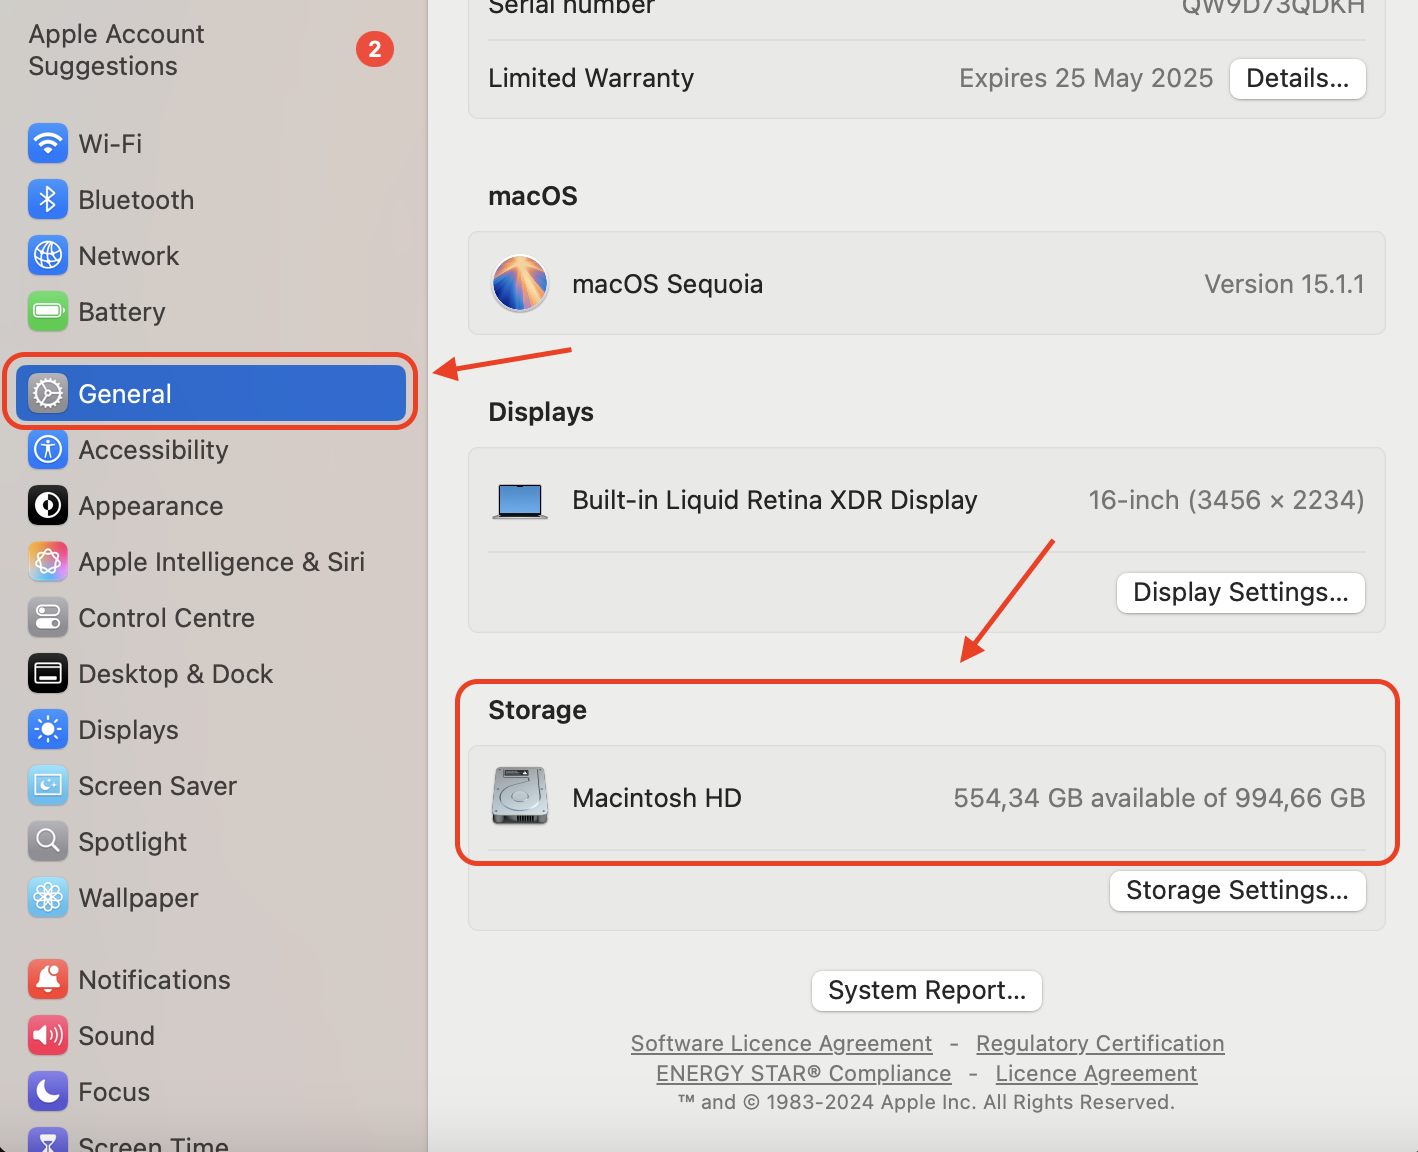
- Ensure you have at least 20GB of free disk space, as macOS installations often require significant storage.
- Clean up your storage by deleting unnecessary files or using tools like MacKeeper to optimize any available space.
- Review the system requirements for your chosen macOS version, including processor type, RAM, and disk format.
3. Ensuring a stable internet connection
Ensuring a stable internet connection is essential for downloading macOS files and avoiding interruptions during the installation process. In case you already have any connection issues, check out our guide on Mac Internet Recovery. Then, do the following:
- Test your connection speed using online tools to confirm it is fast and reliable for large downloads.
- Switch to an Ethernet connection if possible, as wired connections are more stable than Wi-Fi for critical tasks.
- Restart your router to resolve connectivity issues or improve performance before beginning the download.
- Limit other internet activities, such as streaming or large file downloads, to prioritize bandwidth for your macOS installation.

4. Charging your Mac or ensuring sufficient power
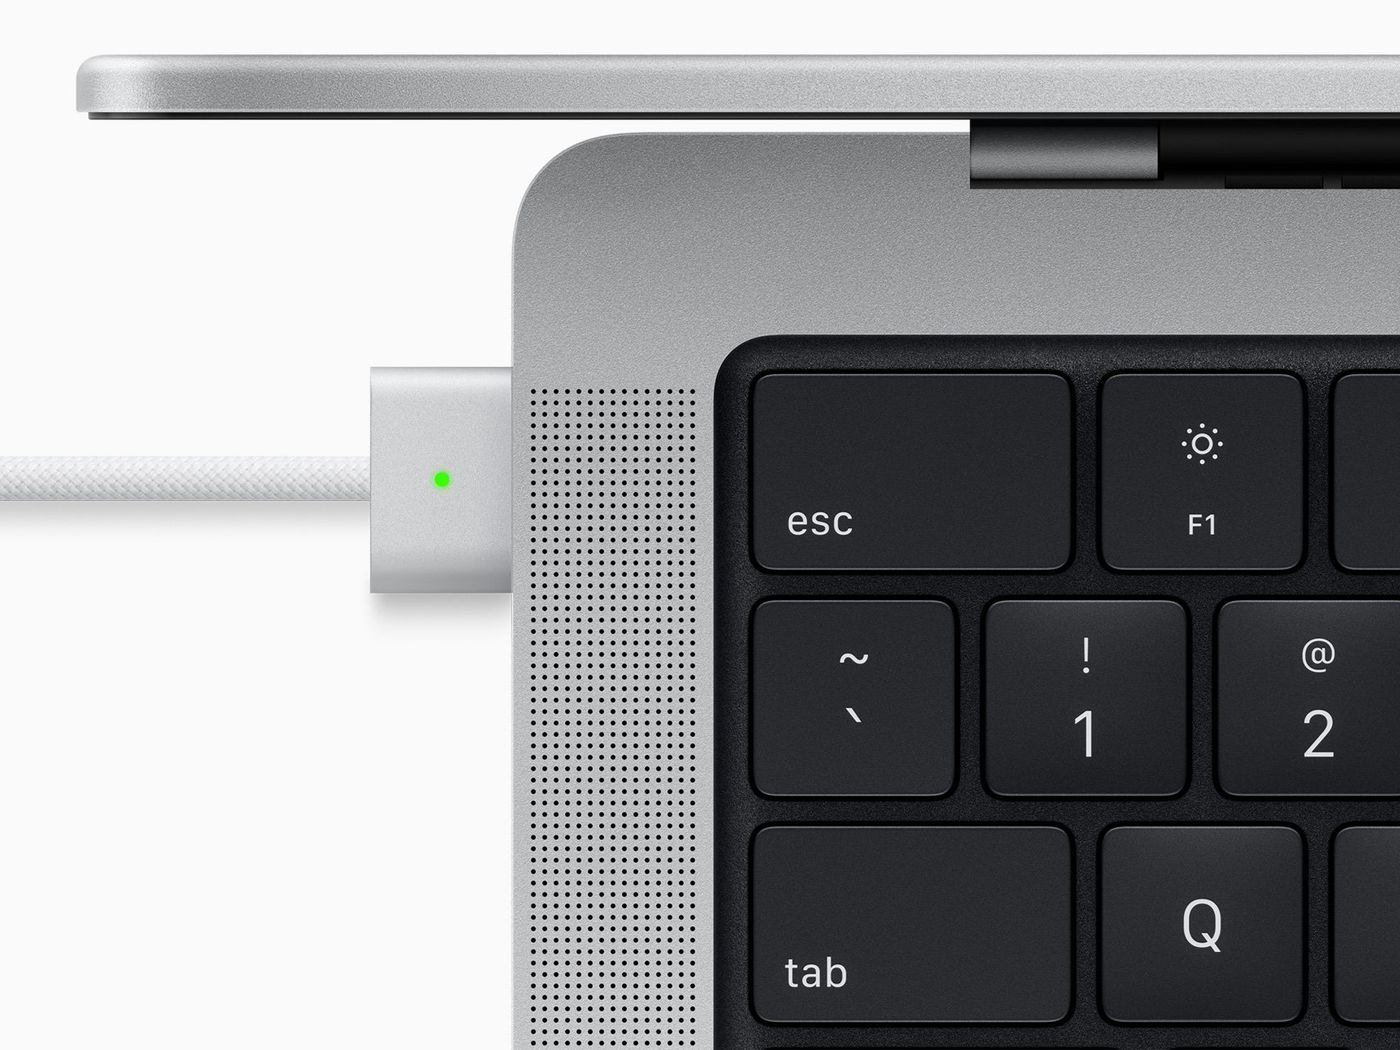
Charging your Mac or ensuring access to sufficient power is crucial to prevent interruptions during the macOS reinstallation process. Here a few tips from us on this:
- Keep your Mac plugged into a reliable power source throughout the installation to avoid unexpected shutdowns.
- Ensure the battery is fully charged if connecting to power isn’t possible, especially for portable devices.
- Avoid sudden power loss during installation, as it can cause incomplete files, system errors, or a corrupted operating system.
- Consider using an uninterruptible power supply (UPS) for added protection, particularly in areas prone to power outages.

5. Preparing installation media (if needed)
Preparing installation media is essential for reinstalling macOS on unsupported models or when troubleshooting significant system issues. Consider the following:
- Use a bootable USB drive if your Mac cannot reliably access macOS Recovery or the internet.
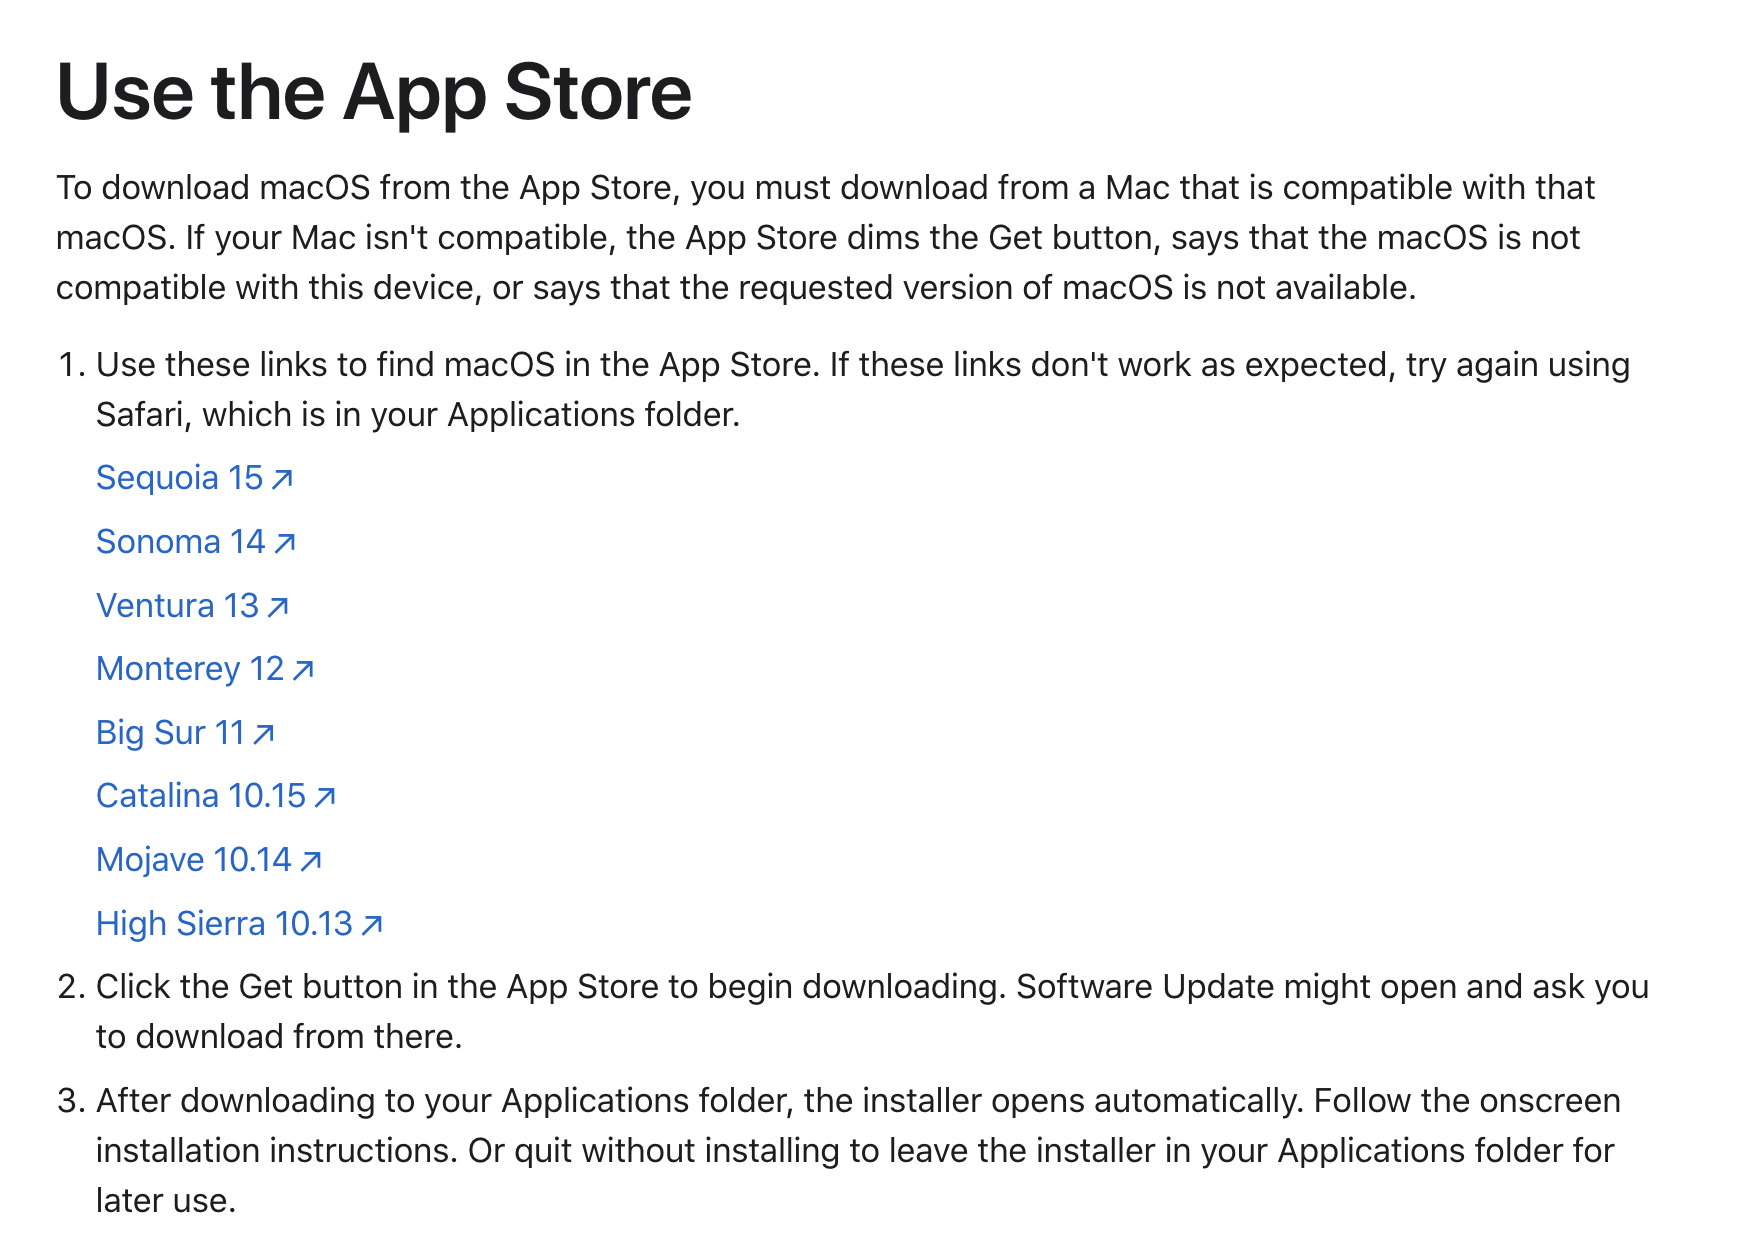
- Download the macOS installer directly from Apple’s website to ensure a clean and verified version.
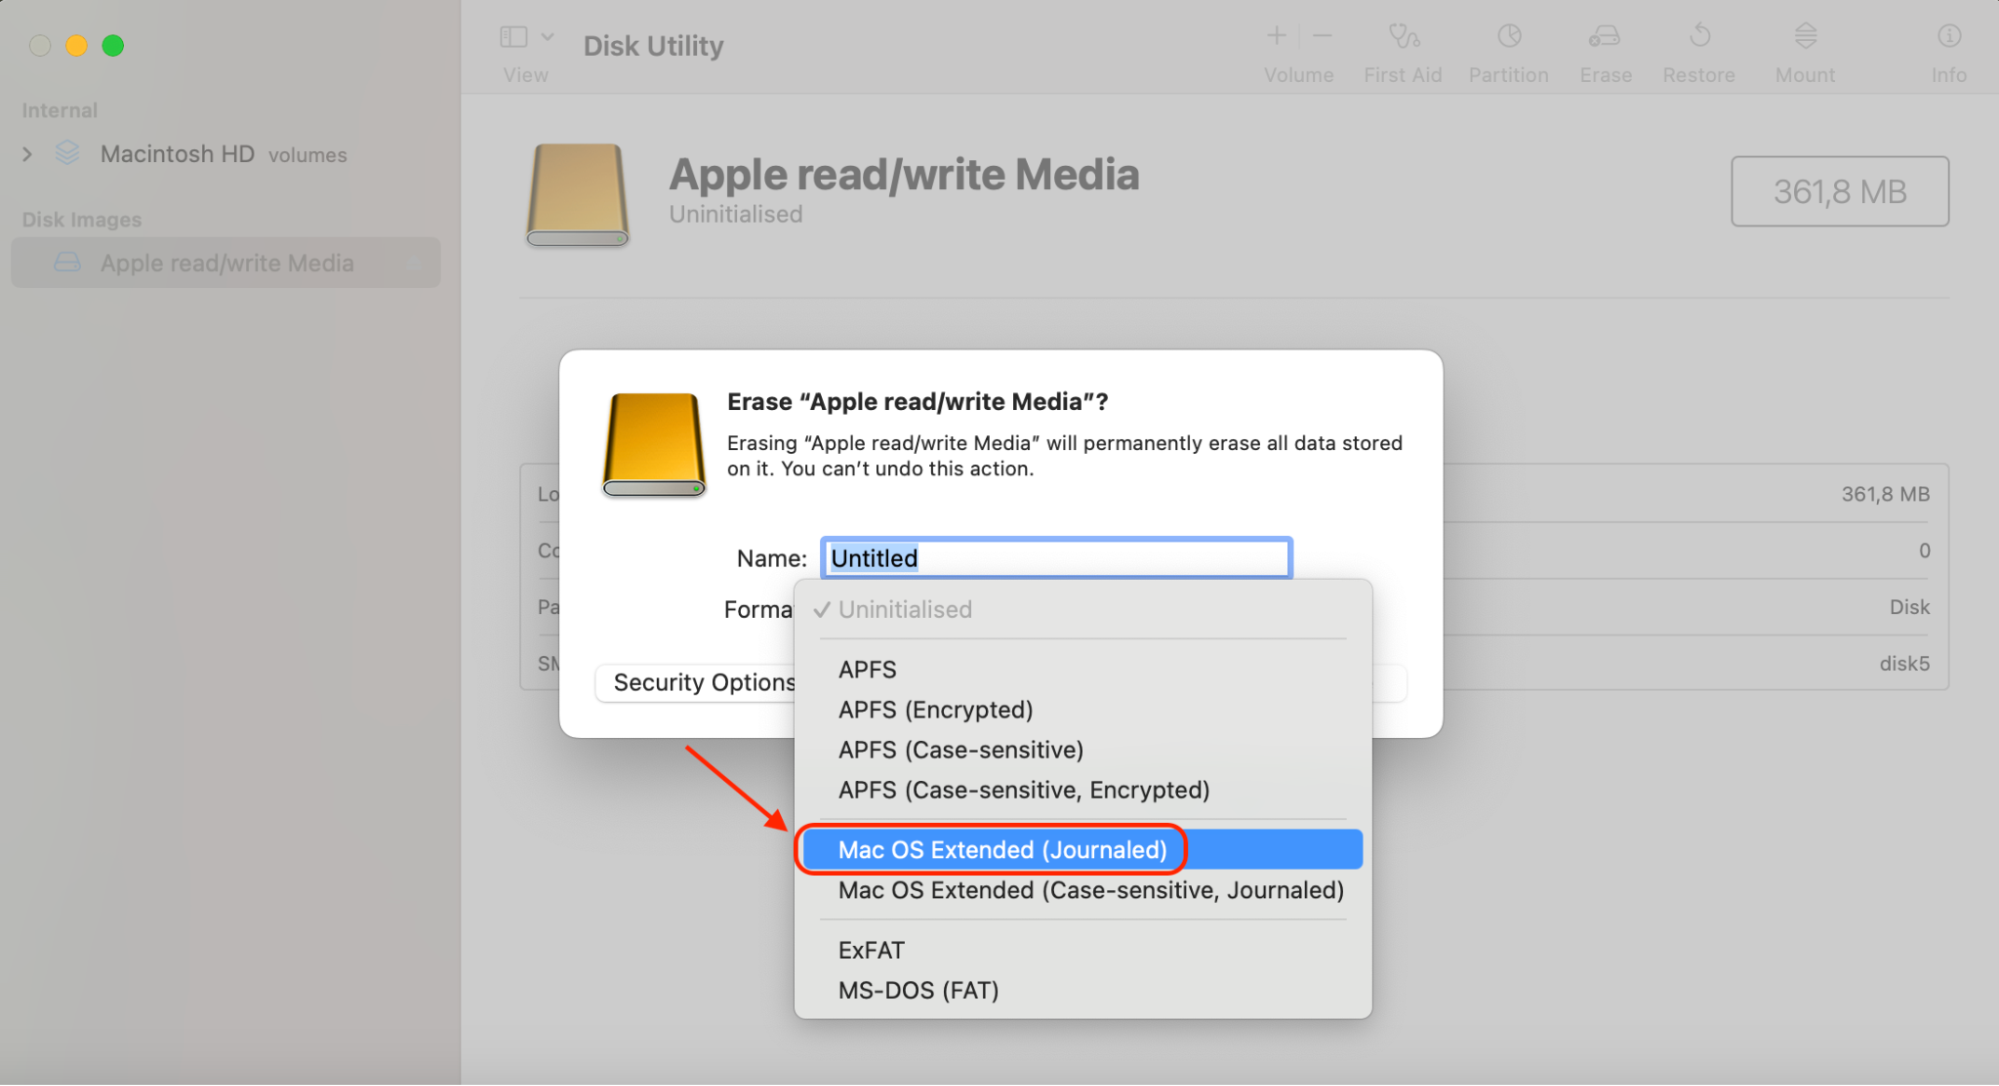
- Format the USB drive as Mac OS Extended or APFS using Disk Utility before creating the bootable media.
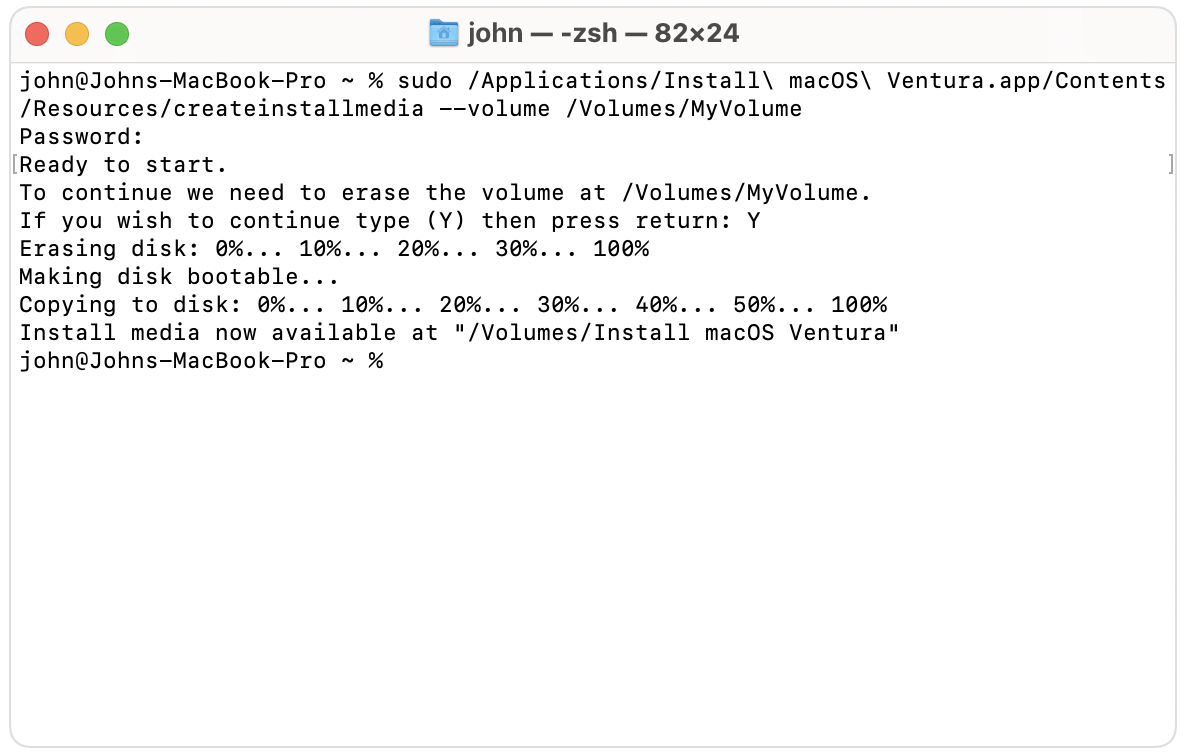
- Create the installation media using Terminal with the appropriate command for the macOS version you plan to reinstall.
6. Disconnecting external devices
Disconnecting external devices minimizes potential conflicts during the macOS reinstallation process and ensures smooth system operation. Catch our advice before you start:
- Remove unnecessary peripherals, such as hard drives, printers, or USB devices, to prevent software or hardware compatibility issues.
- Keep only essential devices connected, like a keyboard and mouse, to avoid disrupting the installation process.
- Disconnect external monitors if reinstallation errors suggest screen resolution conflicts or system detection issues.
- Reconnect devices one at a time post-installation to verify compatibility and proper functionality with the updated operating system.
7. Confirming Apple ID credentials
Make sure your Apple ID and password are accessible to avoid being locked out during the macOS setup process. For this, follow our tips:
- Apple services like iCloud, App Store, and Find My Mac require credentials to sync properly after reinstallation.
- Two-factor authentication codes may also be requested, so have your trusted device nearby.
- Reset your Apple ID password beforehand if you suspect you might have trouble remembering it.
- Ensure the same Apple ID is used to avoid losing access to previous purchases or subscriptions tied to your account.
8. Reviewing critical software and drivers
Some software or drivers might not function correctly after macOS reinstallation without updates. Just follow the below:
- Compile a list of software and tools you rely on daily to avoid disruptions post-reinstallation.
- Check the compatibility of your essential applications with the macOS version you’re installing.
- Visit device manufacturers’ websites to download the latest drivers for printers, scanners, or external displays.
- Save installation files or paid software links to ensure quick reactivation after reinstalling macOS.
- Verify license keys and activation details for premium tools to avoid issues with re-registering them.
A tip from our team:
If you can’t muster the courage to reinstall macOS, feel free to try our guide on how to downgrade macOS. Chances are, this might help you get rid of almost all the issues regarding your Mac’s operating system performance.
Steps for reinstalling macOS
Restart your Mac in Recovery Mode, select Reinstall macOS from the Utilities window, and follow the on-screen instructions. Confirm installation details, choose a disk, and let macOS reinstall while ensuring your device remains connected to power and the internet.
1. Restart your Mac and enter macOS Recovery mode
Entering macOS Recovery mode is the first step to refresh macOS and start anew, providing access to essential system utilities for troubleshooting and installation. Our team recommends ensuring your Mac is fully charged or connected to power before starting. Then, follow our below instructions:
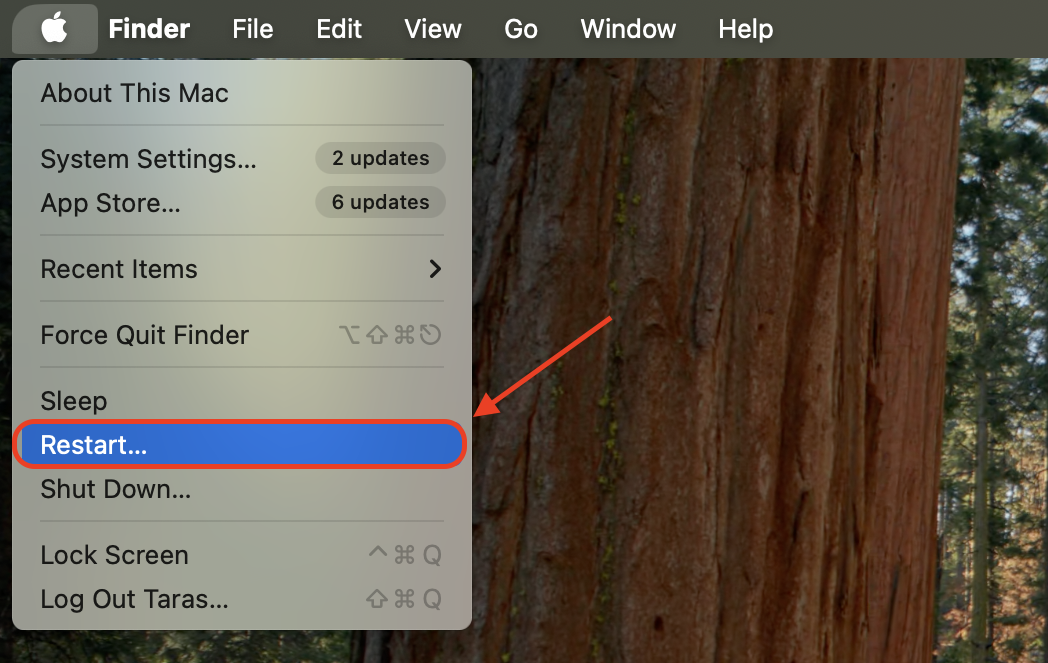
- Click the Apple logo in the top-left corner, then select Restart.
- Hold or Shift + Option + Command + R or Command + R as your Mac reboots to access Recovery mode.
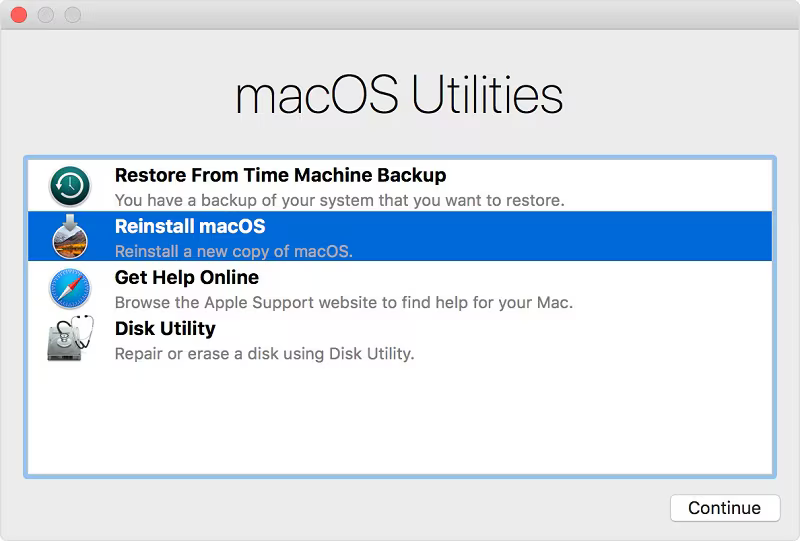
- Release the keys when the macOS Utilities window appears on the screen.
- If prompted, enter your Mac’s administrator password for authentication.
- Confirm you’re in Recovery mode by verifying the options displayed in the Utilities menu.

2. Use macOS Recovery to reinstall macOS
Using macOS Recovery lets you reinstall macOS directly from the system, ensuring a seamless process without needing additional media. We advise confirming a stable internet connection to avoid interruptions during the download. When this is in place, proceed further:
- Select Reinstall macOS from the macOS Utilities window.
- Click Continue to proceed with the installation process.
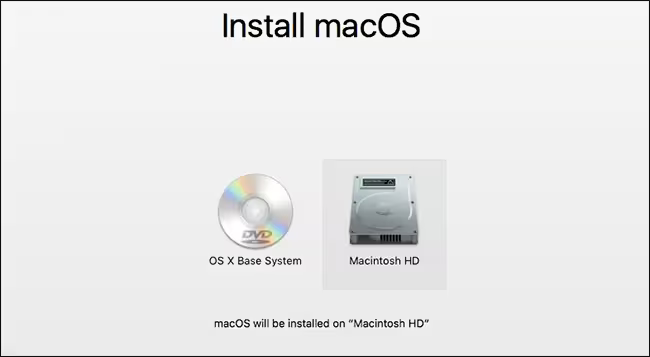
- Choose the destination disk where macOS will be reinstalled.
- Confirm your selection and allow macOS Recovery to begin downloading the required files.
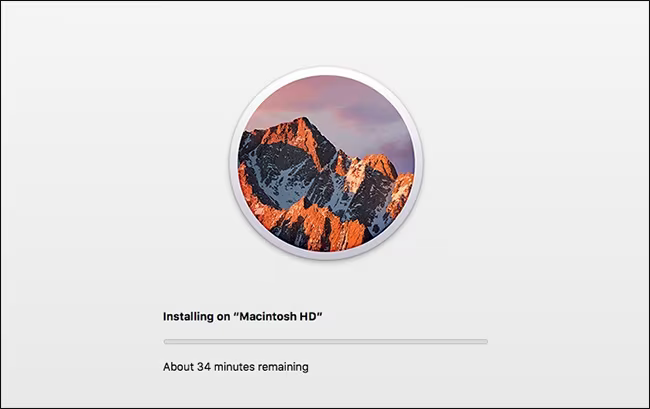
- Monitor the progress bar and avoid turning off your Mac until the process completes.
3. Follow on-screen instructions
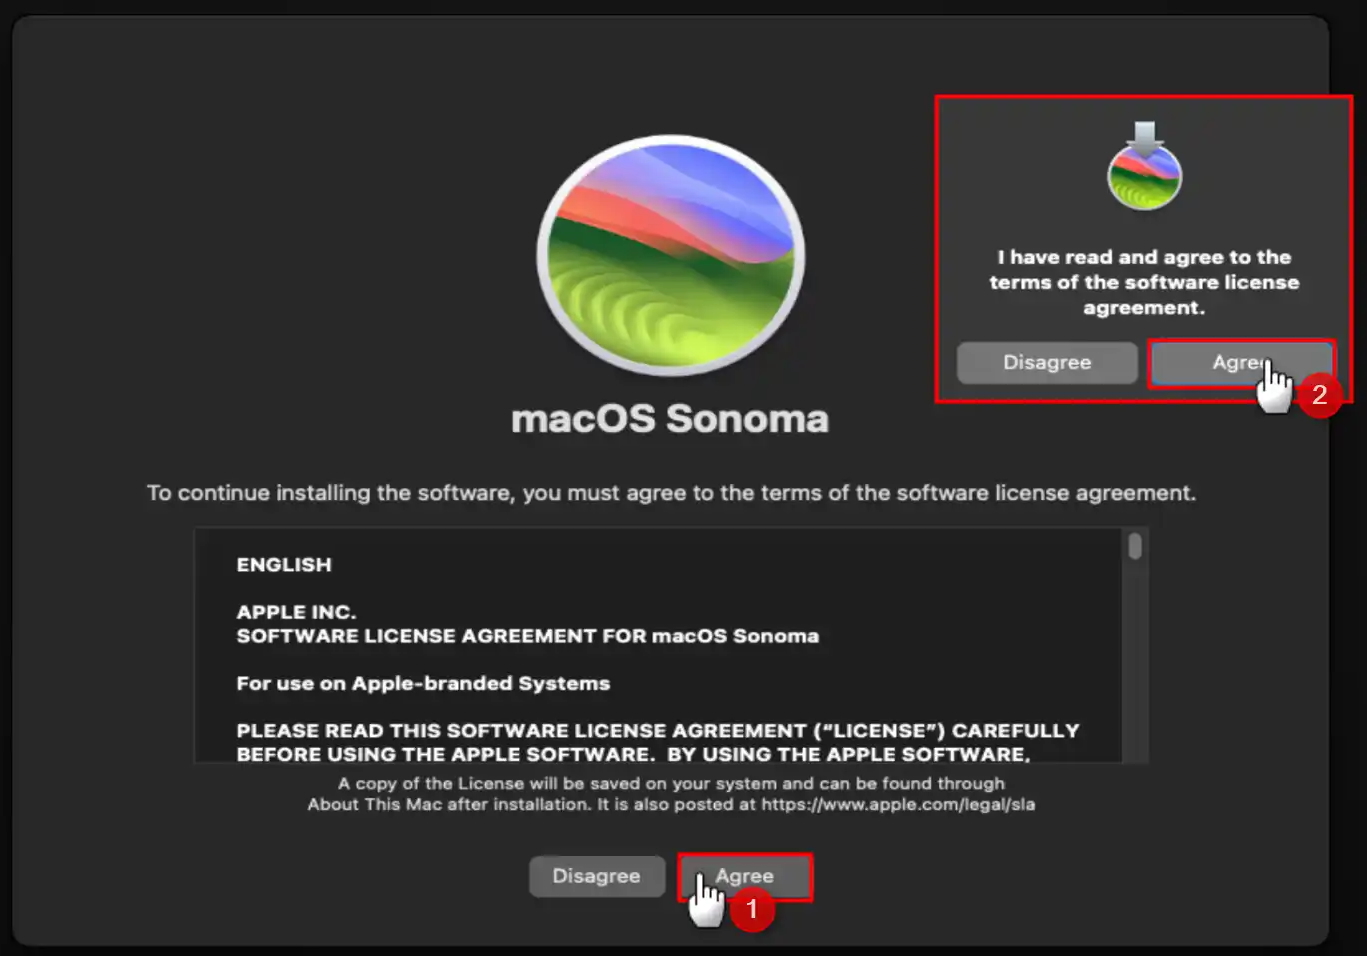
Following on-screen instructions ensures a guided and error-free macOS reinstallation. The step-by-step prompts make the process straightforward, even for users unfamiliar with advanced technical tasks. Just follow these steps:
- Review the terms and conditions, then click Agree to proceed.
- Follow the prompts to select the installation disk and confirm your choice.
- Provide your Apple ID credentials if required during the setup process.
- Monitor installation progress, which may take some time depending on your internet speed.
- Wait for your Mac to restart automatically once the installation is complete.
4. Reconfigure your Mac after installation
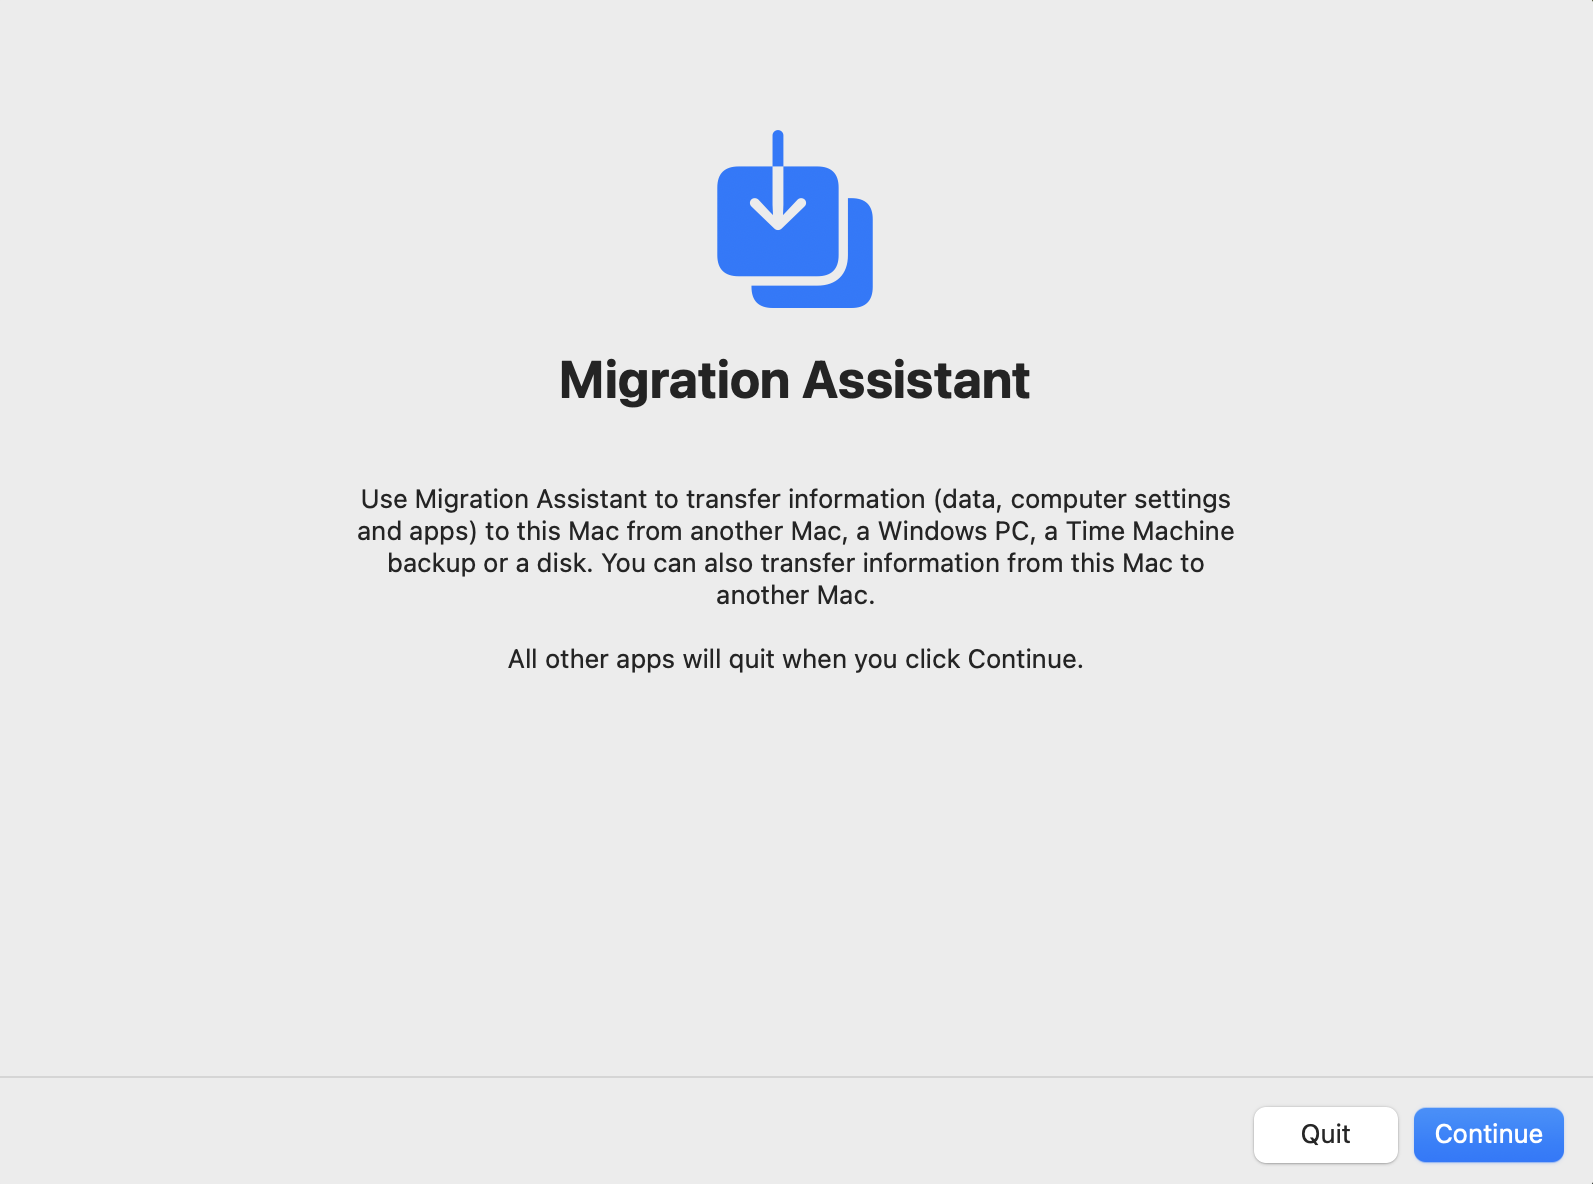
Reconfiguring your Mac ensures your system is optimized and personalized post-installation. Our team recommends restoring backed-up data and updating essential apps for a smooth user experience. The process will look like this:
- Follow the setup assistant prompts to configure language, region, and time zone.
- Sign in with your Apple ID to restore iCloud data and preferences.
- Use Migration Assistant to transfer files, settings, and applications from your backup.
- Check for macOS updates and install them to ensure system security and compatibility.
- Reinstall critical software and drivers, verifying functionality with connected devices.
How to reinstall macOS using a bootable USB drive
Reinstalling macOS using a bootable USB drive is an ideal solution when your Mac won't turn on, or has other critical issues. This method is reliable for older Macs or troubleshooting persistent issues. Our team has outlined the process to ensure a seamless reinstallation. Follow the steps below:
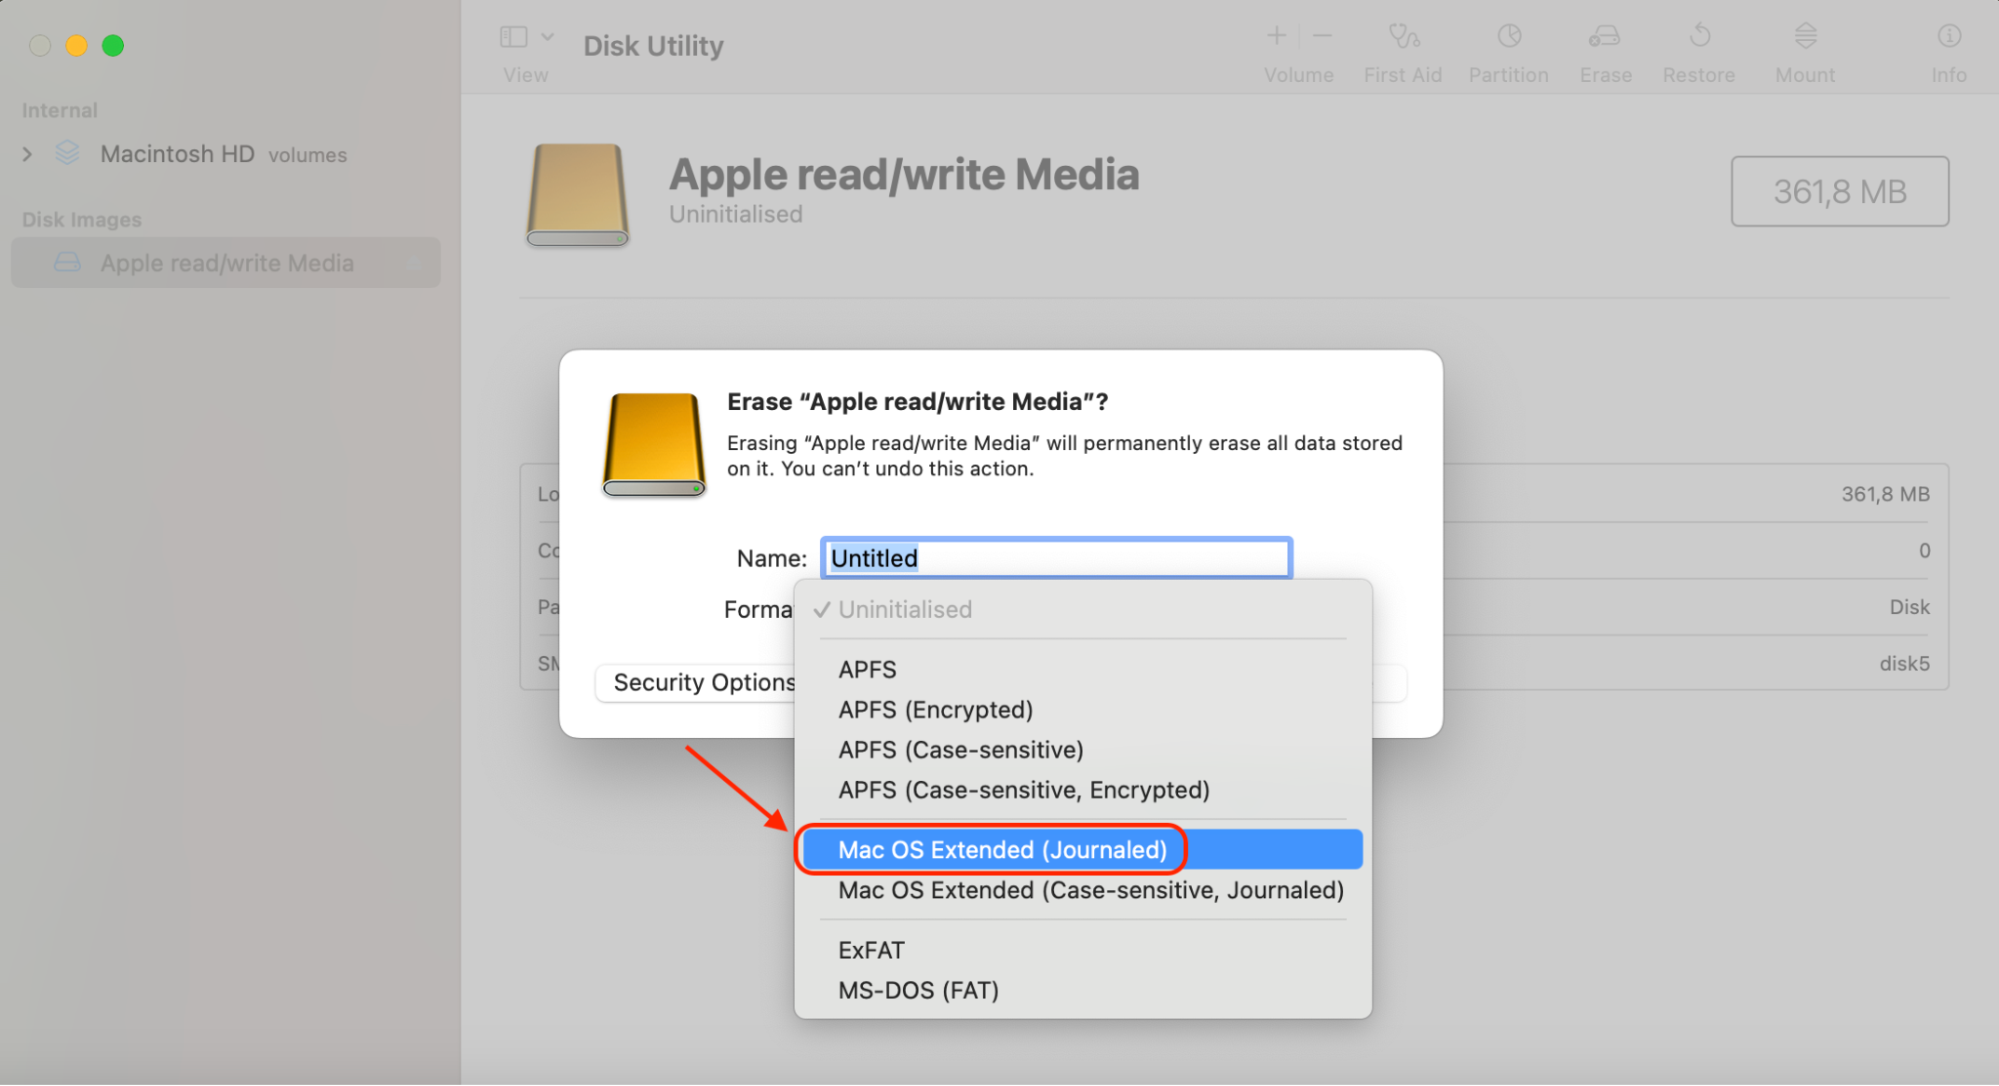
- Use an 8GB or larger USB drive and format it as Mac OS Extended (Journaled) with a GUID partition scheme using Disk Utility.
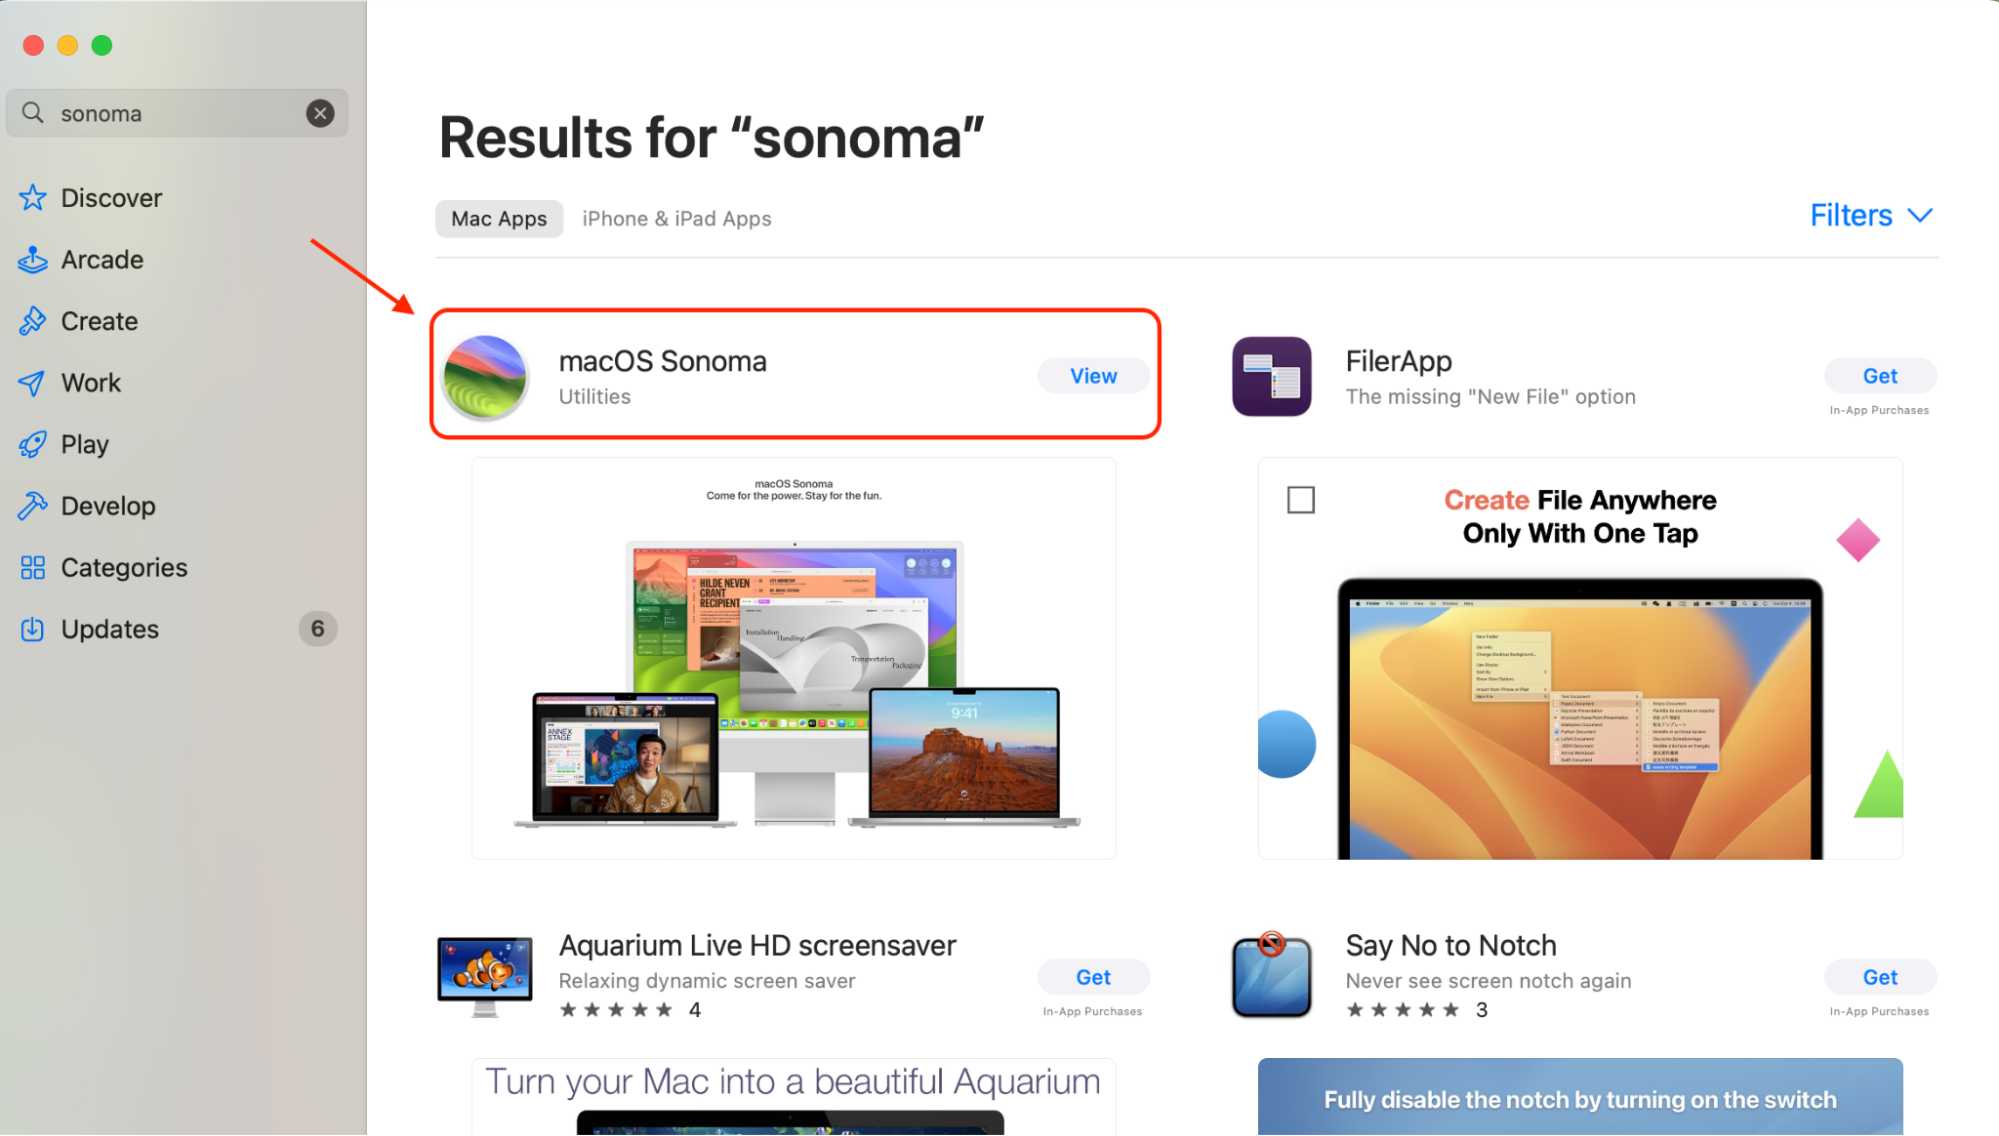
- Obtain the required macOS installer from the App Store and ensure it is in your Applications folder.
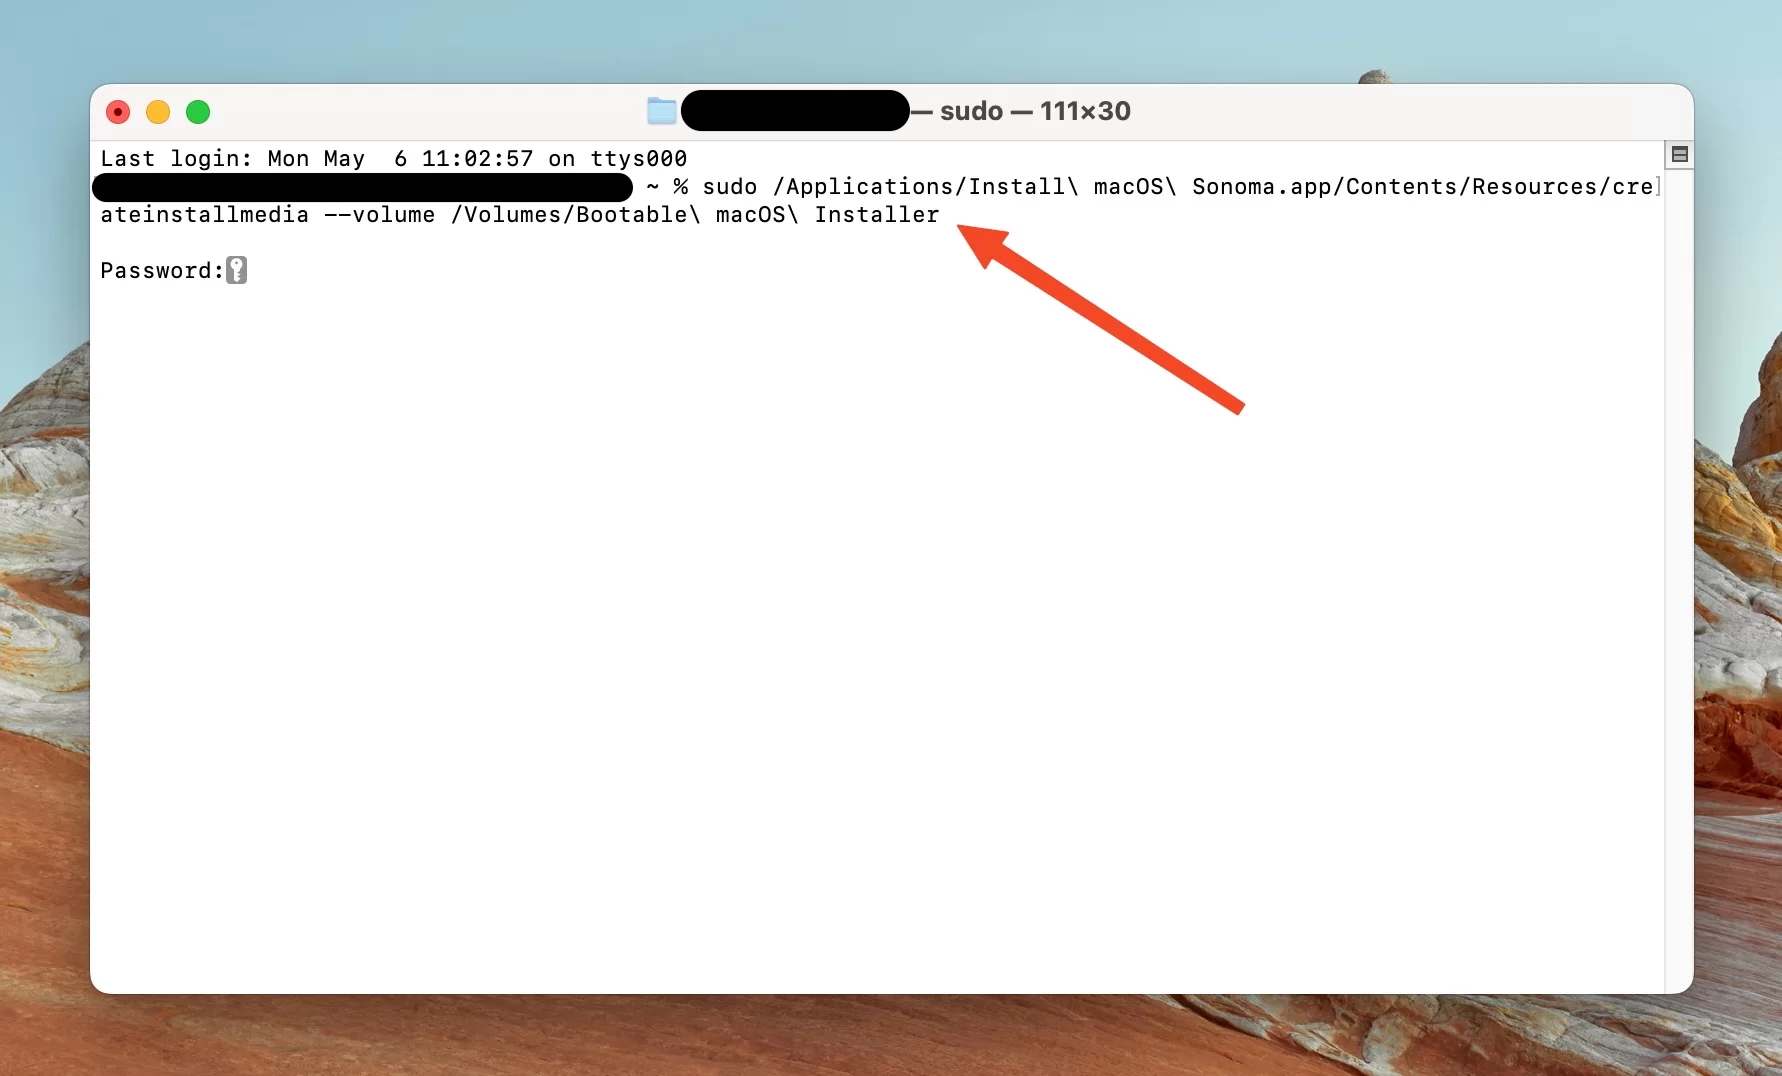
- Open Terminal and enter the correct command for your macOS version, like: sudo /Applications/Install\ macOS\ [Version].app/Contents/Resources/createinstallmedia --volume /Volumes/[YourUSBDriveName].
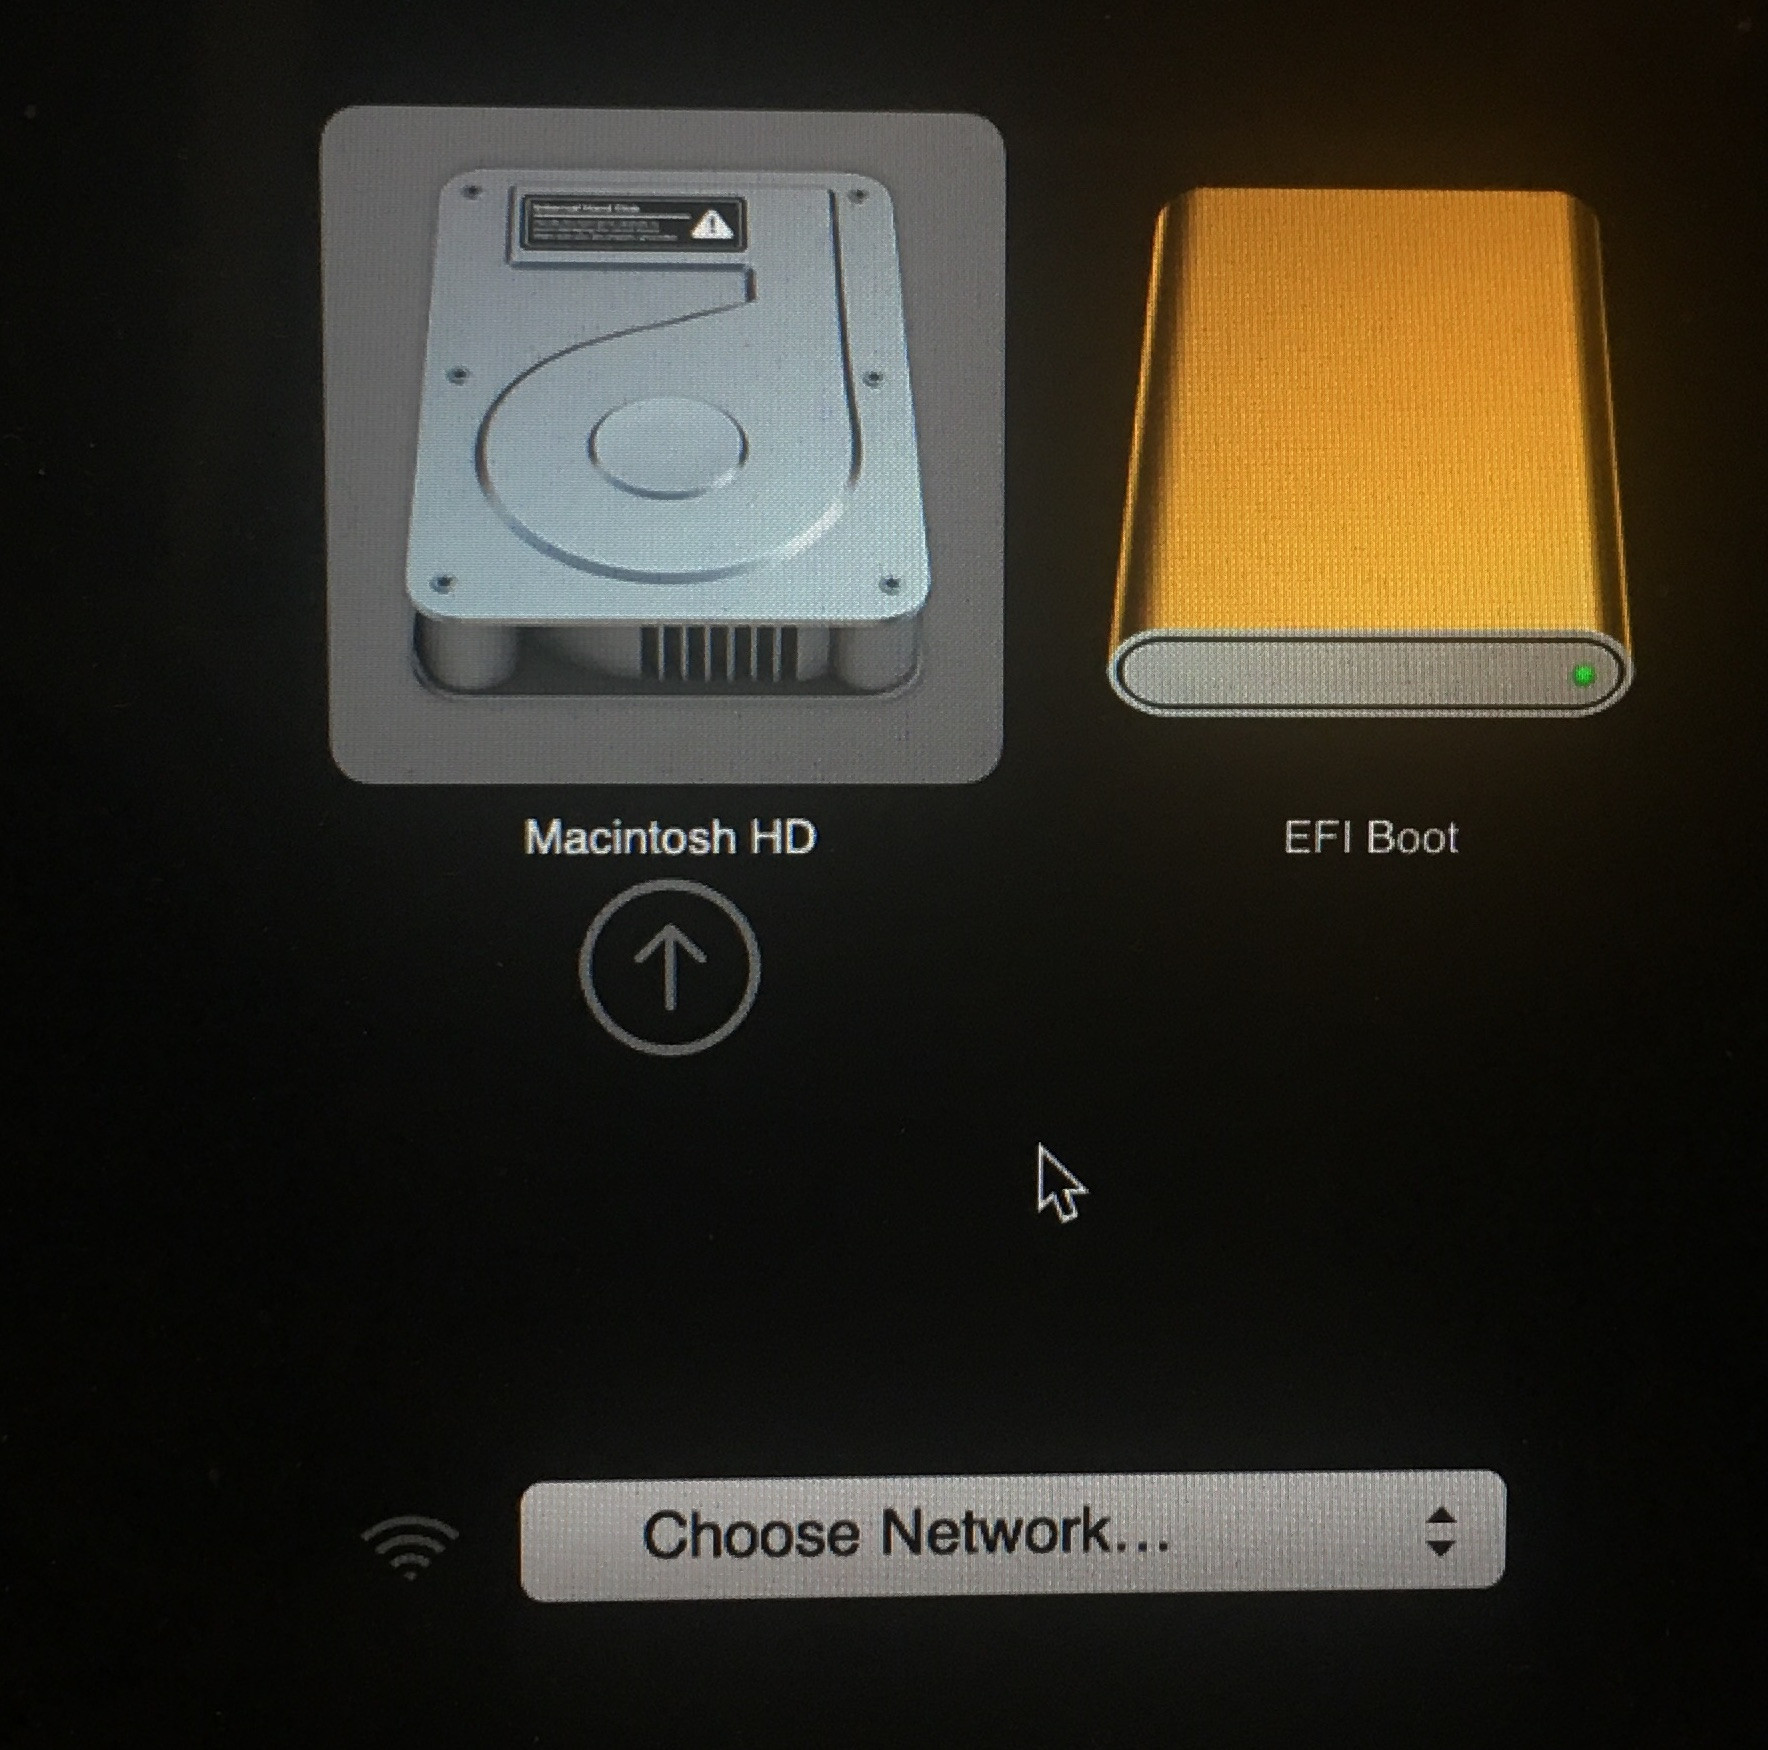
- Connect the USB drive, restart your Mac, and hold the Option key to access the Boot Manager.
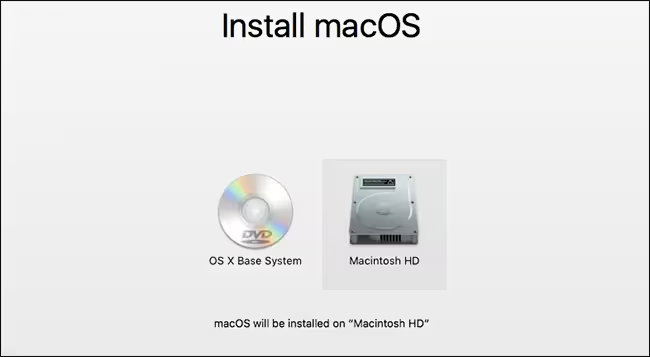
- Choose the USB drive from the list, click the arrow, and follow the on-screen instructions to complete the reinstallation.
Conclusion
A fresh macOS installation can breathe new life into your Mac, solving persistent issues and restoring peak performance. Preparing properly makes all the difference, and having the right tools on hand sets you up for success. MacKeeper’s Safe Cleanup is an essential companion, ensuring your Mac is free from unnecessary clutter before reinstallation.
Clearing out junk files creates the perfect foundation for a clean install, saving you headaches down the line. Our Safe Cleanup simplifies this process, making it quick and hassle-free to reclaim valuable storage space. A tidy system doesn’t just run better—it makes reinstallation a breeze.
Here’s how to use MacKeeper’s Safe Cleanup:
- Open MacKeeper after installation.
- Select Safe Cleanup from the sidebar menu.
- Start Scan to detect and list unnecessary files.
- Review the results and confirm the files to remove.
- Click Clean Junk Files to complete the process.
