In this article you will find the following:
Adding a single photo to Instagram is easy, but what if you want to do more? What if you have a whole treasure trove of amazing shots you want to share with friends, family, and followers? You could, of course, upload them one at a time, but that’s going to be slow and laborious.
Thankfully, there are a few different ways to post multiple photos on Instagram. You can even create cool collages that put together a bunch of your images in an eye-catching grid layout.
Whatever you choose, by following the tips in our guide, you can save time and get back to capturing more masterpieces to add to your feed.
Before we start
When you’re uploading photos to Instagram or anywhere else, you don’t want to waste time dealing with duplicate or similar images. As well as slowing you down, they take up space unnecessarily on your Mac. With MacKeeper’s Duplicates Finder, not only can you find exact copies of files, you can find images that are similar too.
- Select Duplicates Finder in MacKeeper
- Click Start Scan
- When the scan is finished, review the results and select what you want to delete
- Click Remove Selected > Remove.
With your Mac free of duplicate images, you can start uploading images faster and more easily. Try MacKeeper today and check out this handy feature.
How to add more photos on Instagram posts
Whether you’re using a Mac, iPad, or iPhone, it’s quick and easy to upload multiple pictures to your Instagram feed in one go. As well as posting them all at once, you can apply different filters to each picture, to create the look you want.
Uploading multiple Instagram images on a Mac
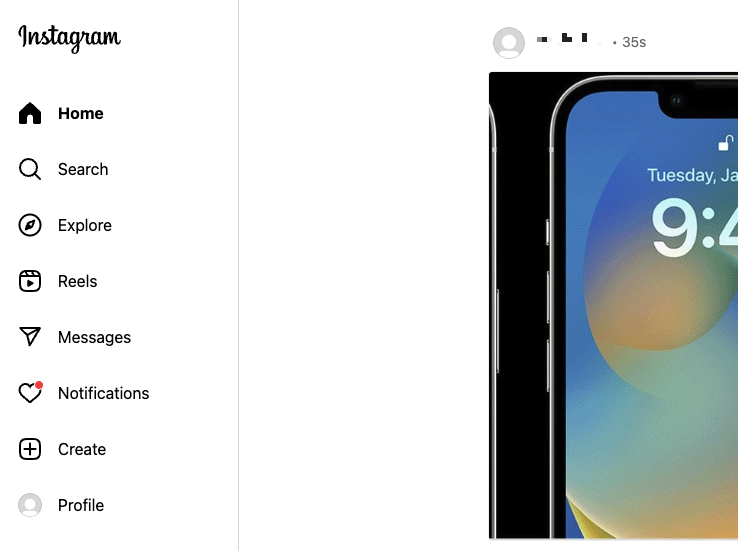
To use Instagram on your Mac, you’ll need to visit the Instagram website using a web browser like Safari or Google Chrome. From there, it’s easy to add several more images at once.
- In your browser, visit www.instragram.com and click Create in the side menu
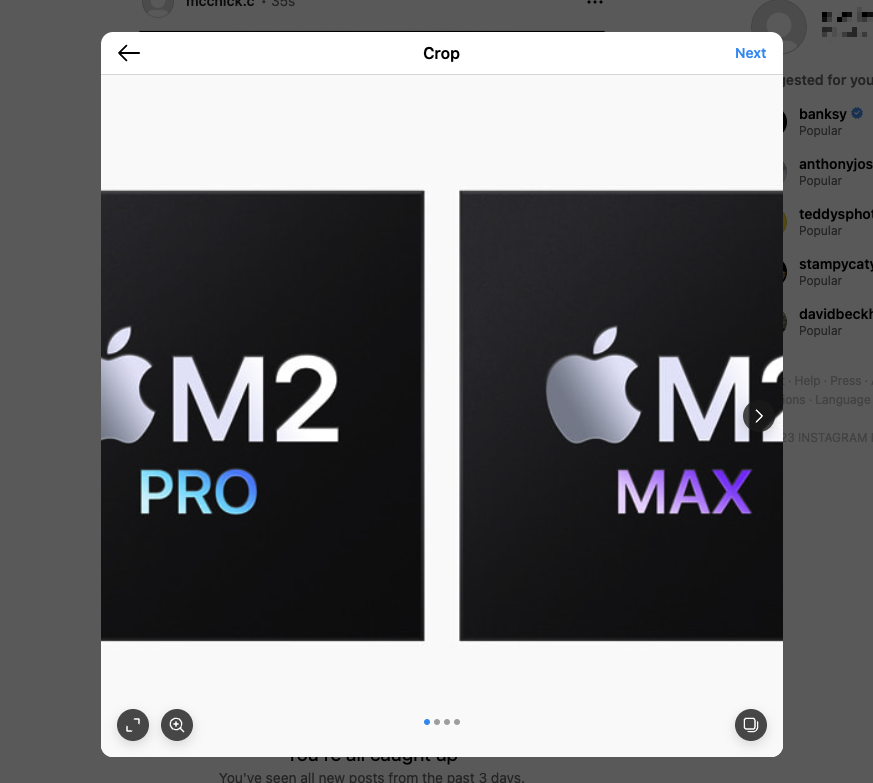
- Drag and drop multiple photos into the Create new post window
- For each picture, you can change the cropping, using the grid to get your composition right within the square. Click Next when you’re done
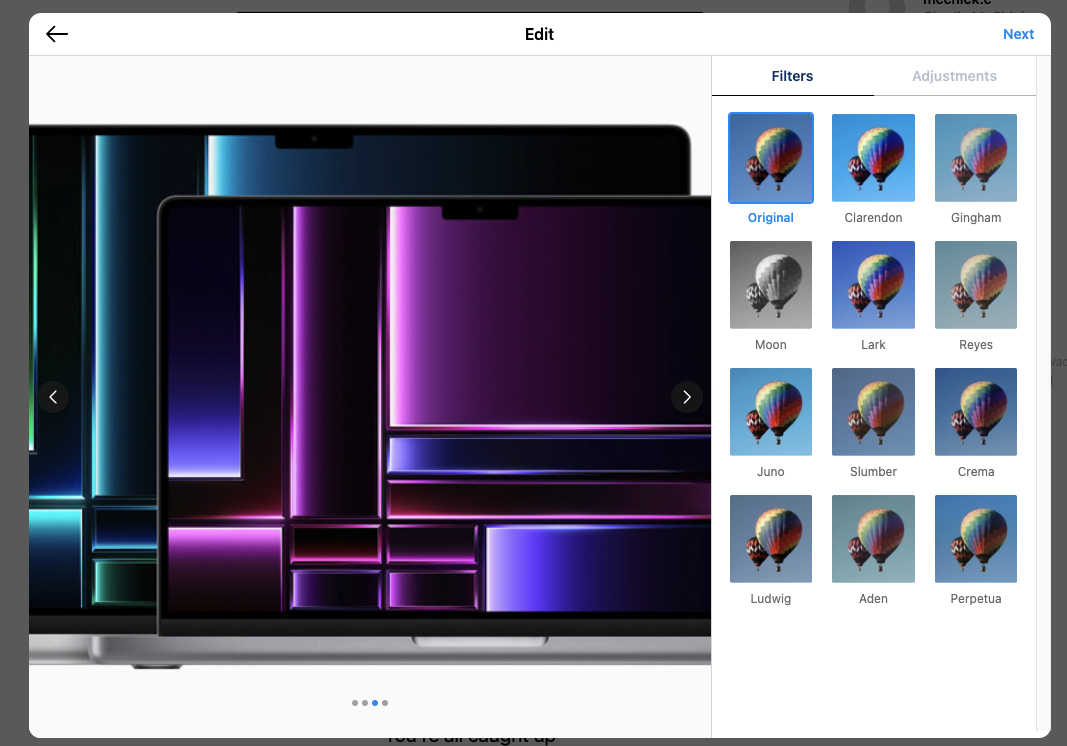
- Apply filters to each image, if you want, and click Next when you’re done
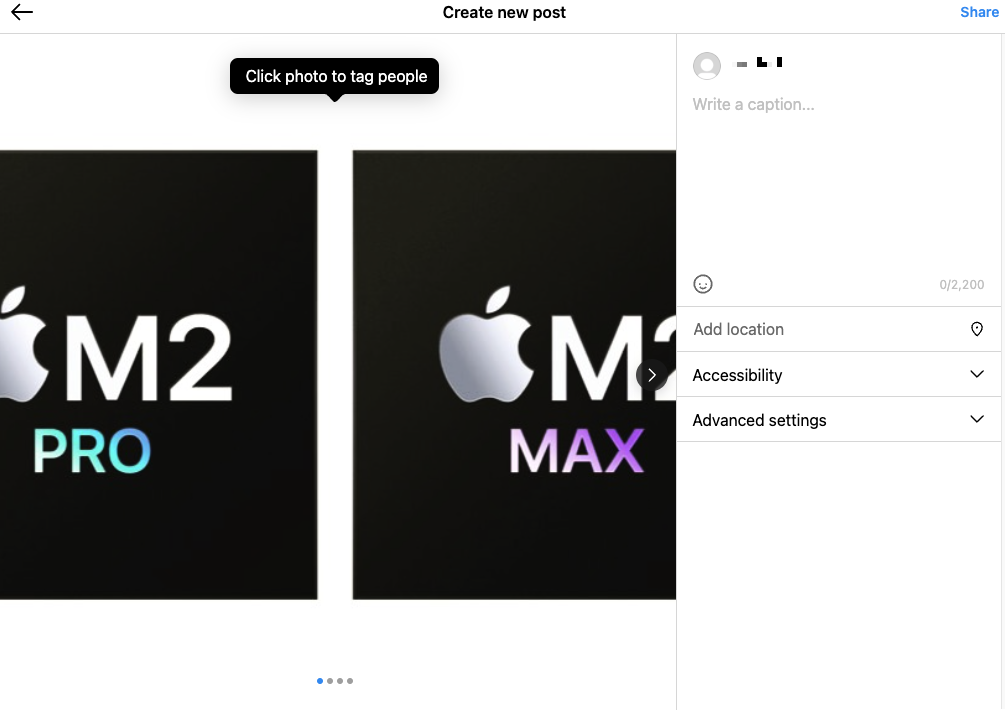
- Add captions and other info, then click Share to finish.

Adding several pics to Instagram for iOS
For most people, the most familiar way of using Instagram is with the mobile app. Thankfully, uploading multiple images using the Instagram app for iPhone is just as easy as it is on Mac.
- Open the Instagram app and tap the + icon
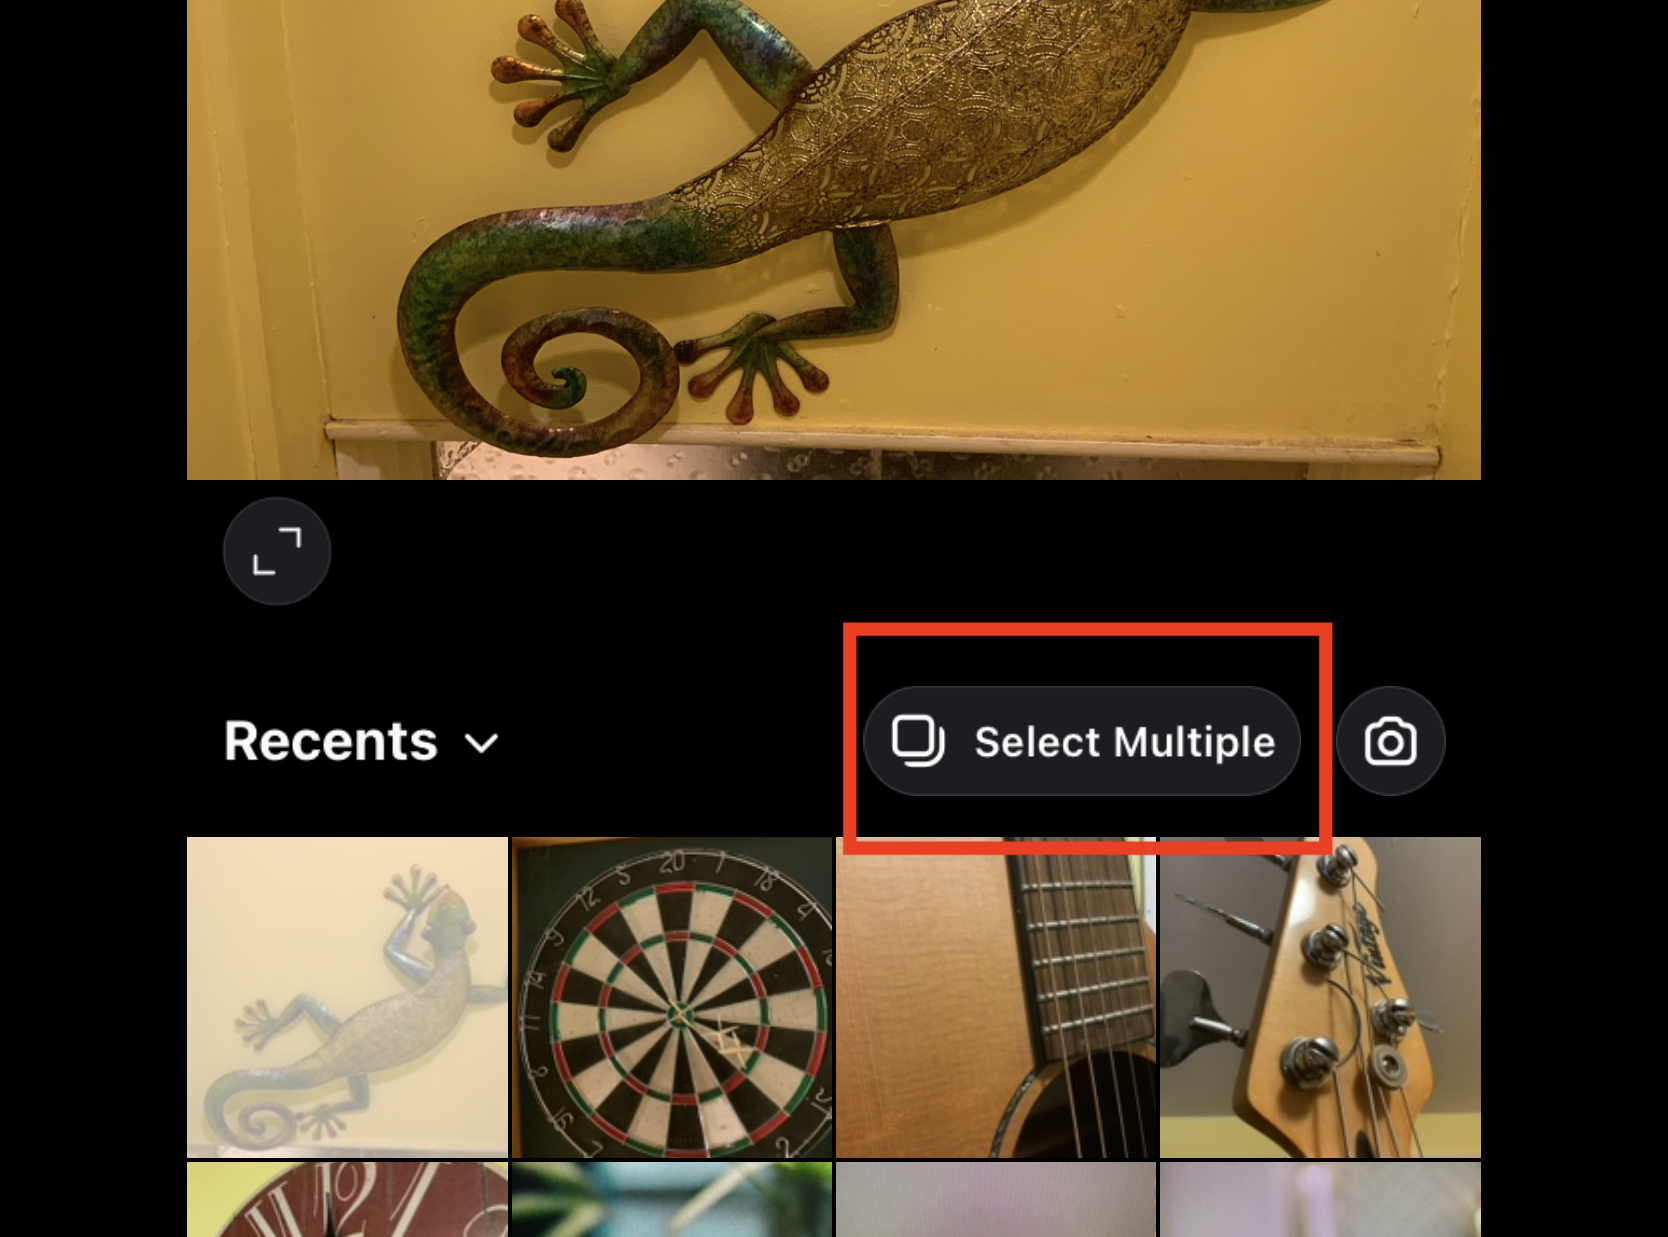
- Tap the stack icon. This might also say Select Multiple
- Select the images you want to add, and tap Next
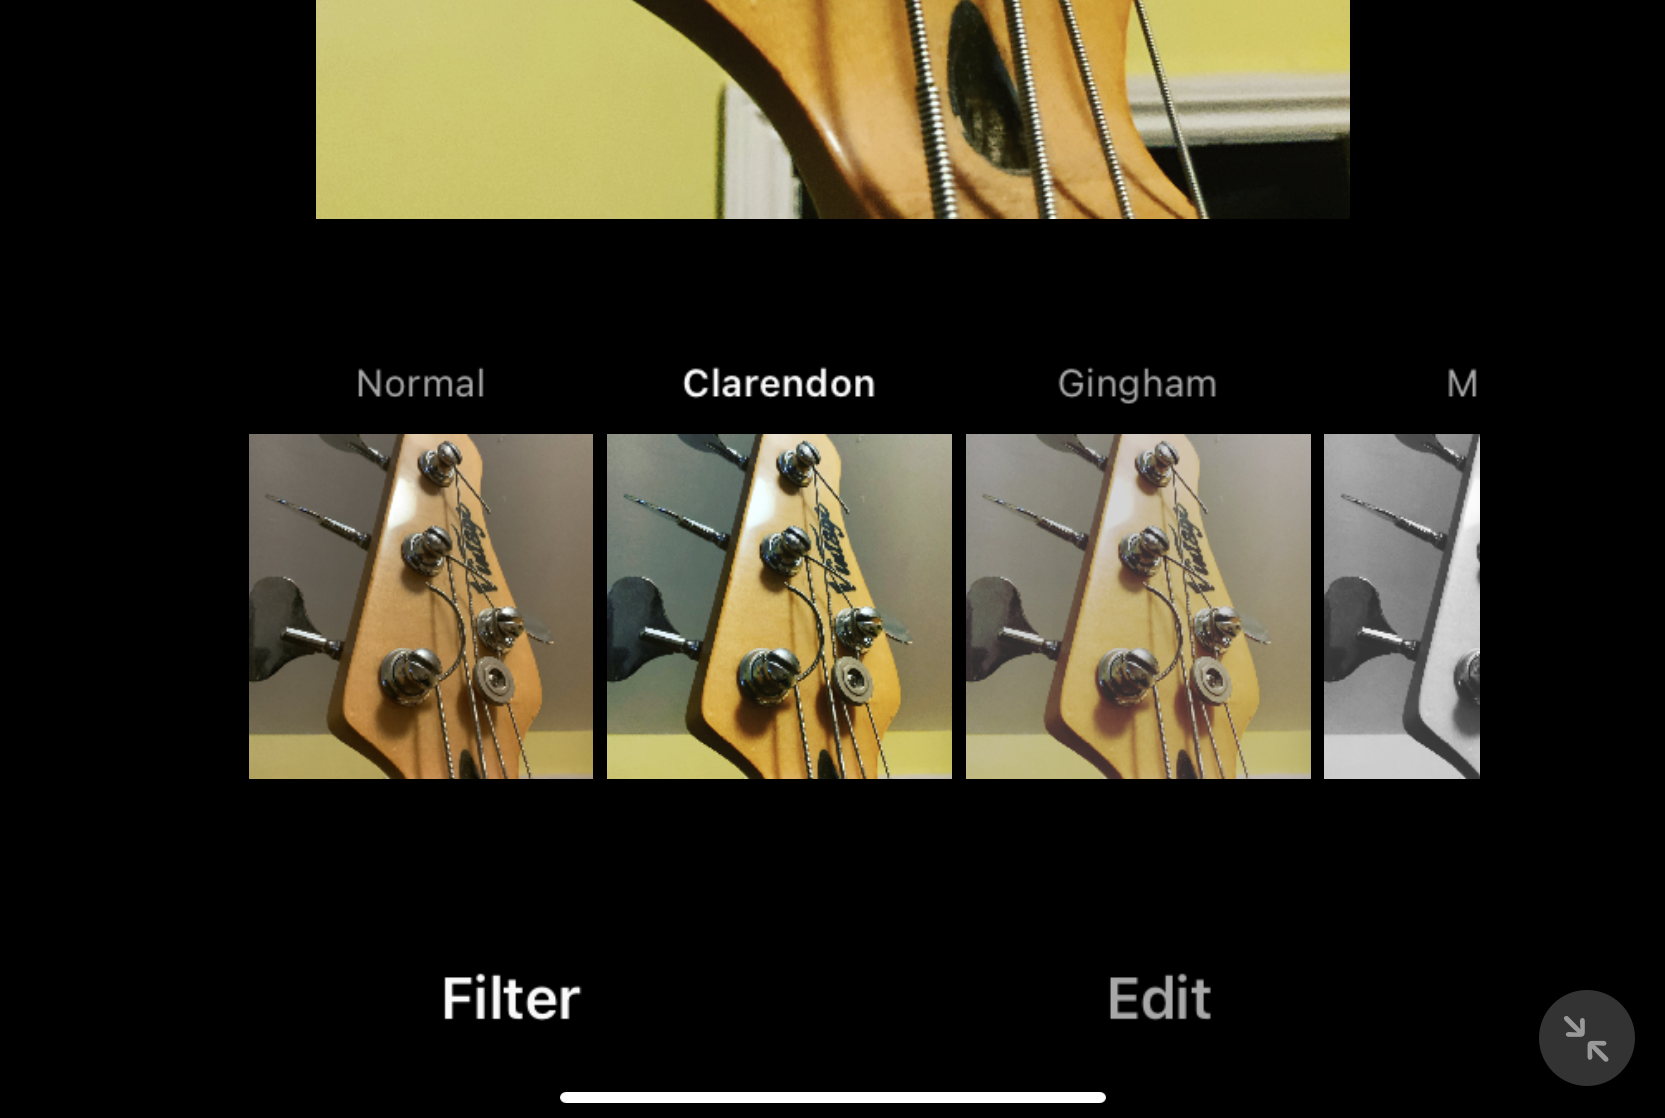
- Select filters, and tap Next
- Add your final details and click Share.



Want to see how others are doing it? Check out our guide on how to view Instagram without an account.
How to add multiple photos on Instagram story
Another way to add multiple images to your Instagram is to create a collage for your Instagram story. However, this feature is only available for the iOS and Android apps. The browser version is unable to create collages, so you won’t be able to do this on your MacBook Pro or desktop computer.
Creating a collage for your Instagram story on iPhone
Instagram lets you make collages in a variety of different layouts, and you can use new shots or existing ones. Follow these steps to create a collage in the Instagram app for iOS:
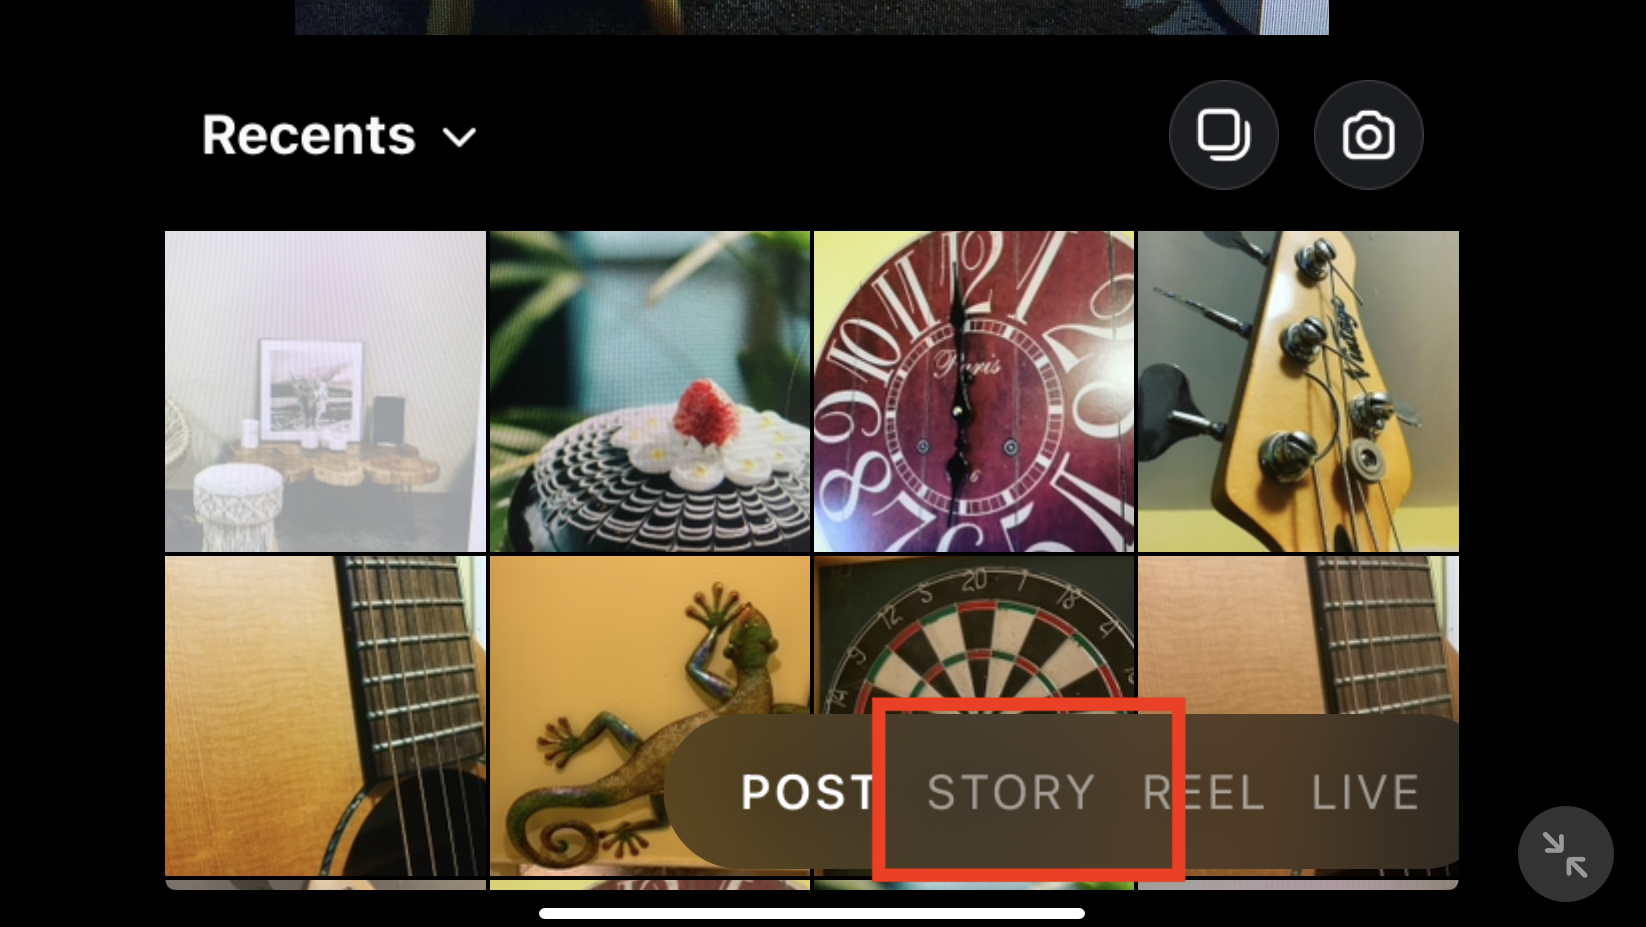
- In the Instagram app, tap the + icon, and select Story
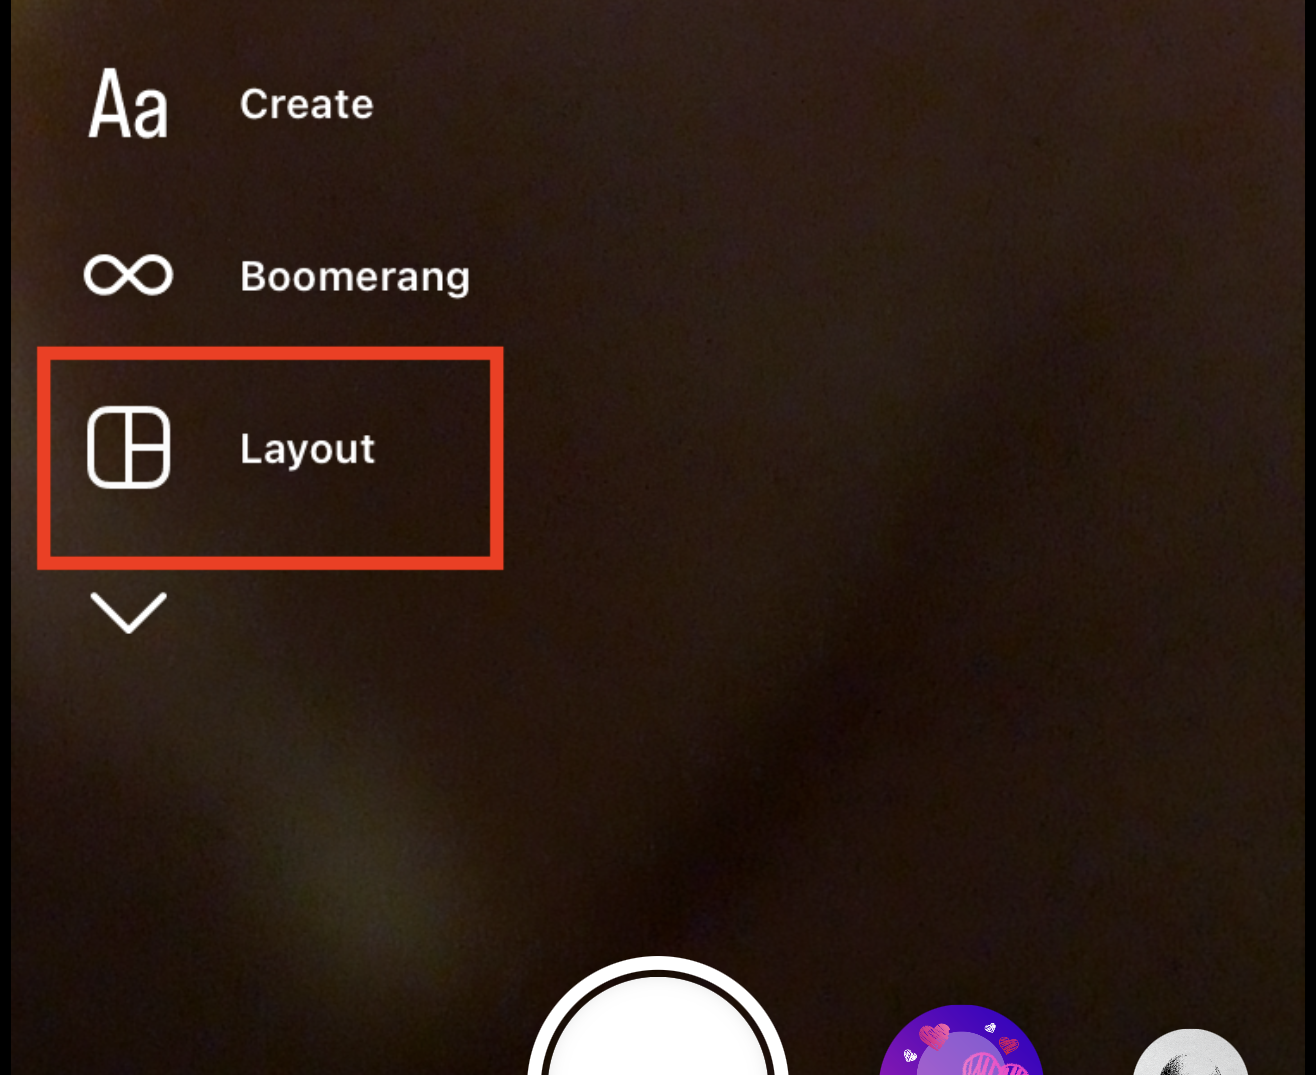
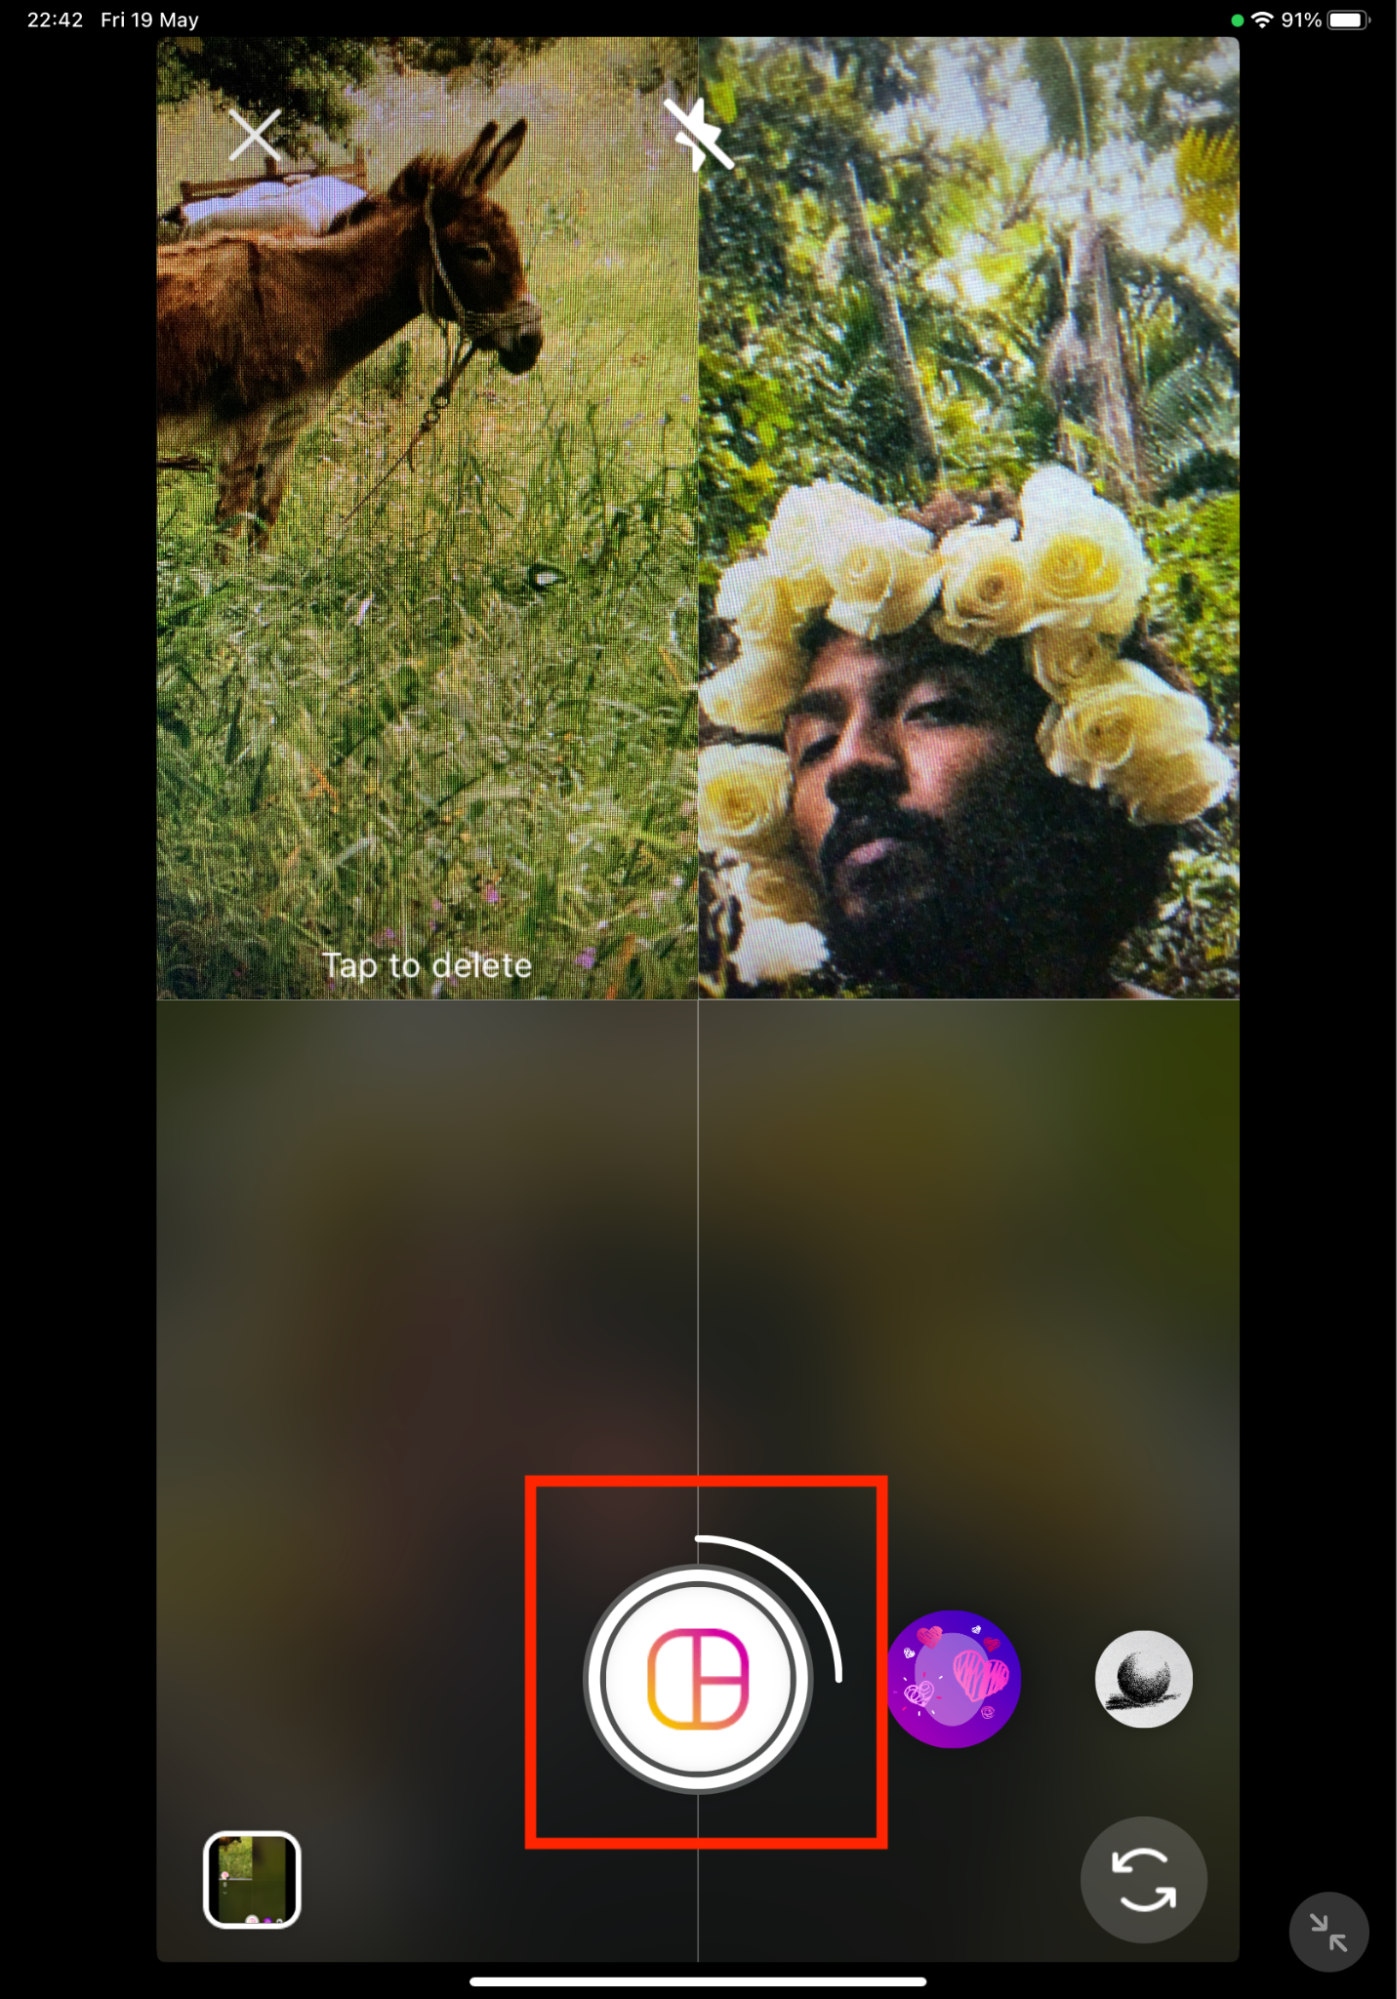
- Tap the Layout icon in the side menu. You’ll see a grid of rectangular boxes. If you want to change this, hit the down arrow and tap the Change grid button. You can then choose a mixture of landscape and portrait boxes
- Tap the collage button to take a picture in the first box. Repeat this with the other boxes
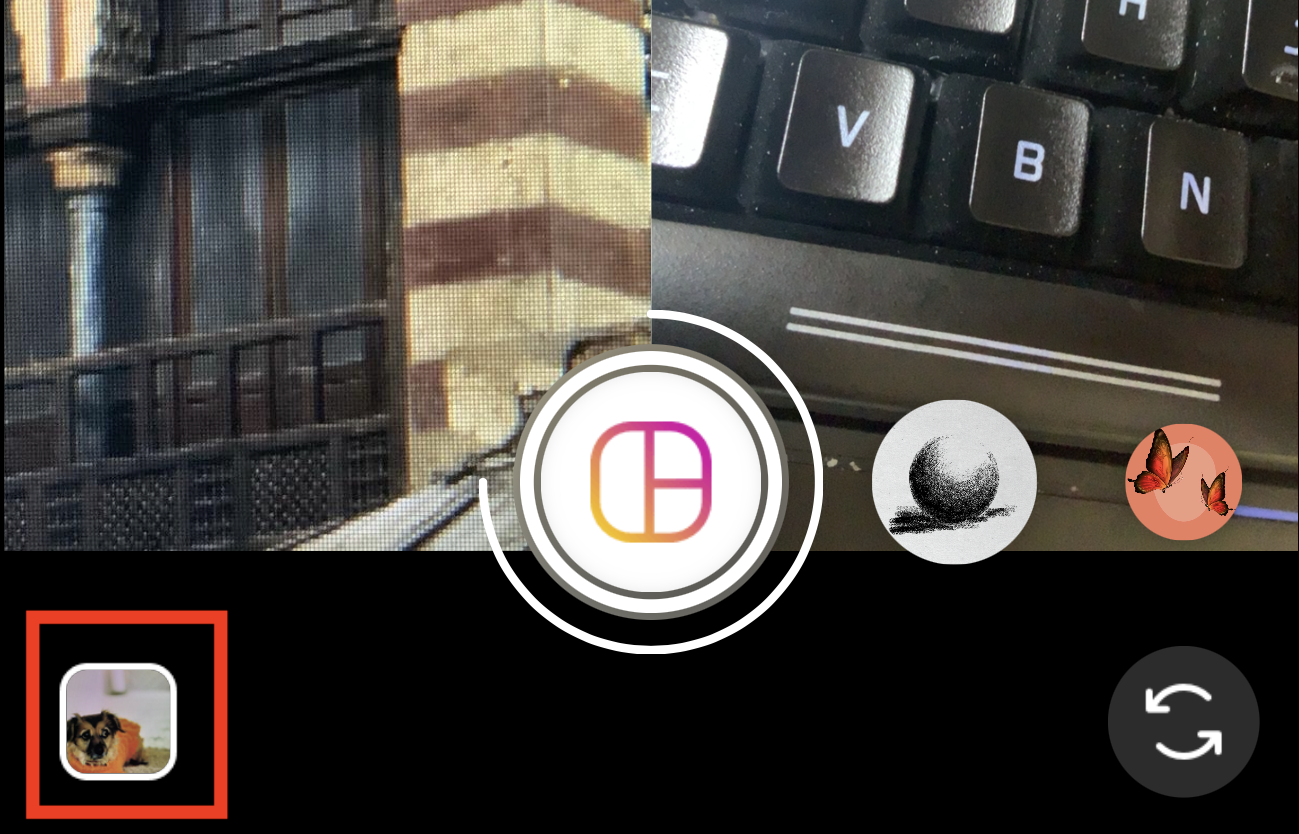
- To add an existing image, tap the thumbnail in the bottom left. When you’ve filled all the spaces in your collage, tap the tick and then the arrow in the bottom right
- Select who you want to share the collage with, and tap Share > Done.

Making a collage on a Mac with third-party tools
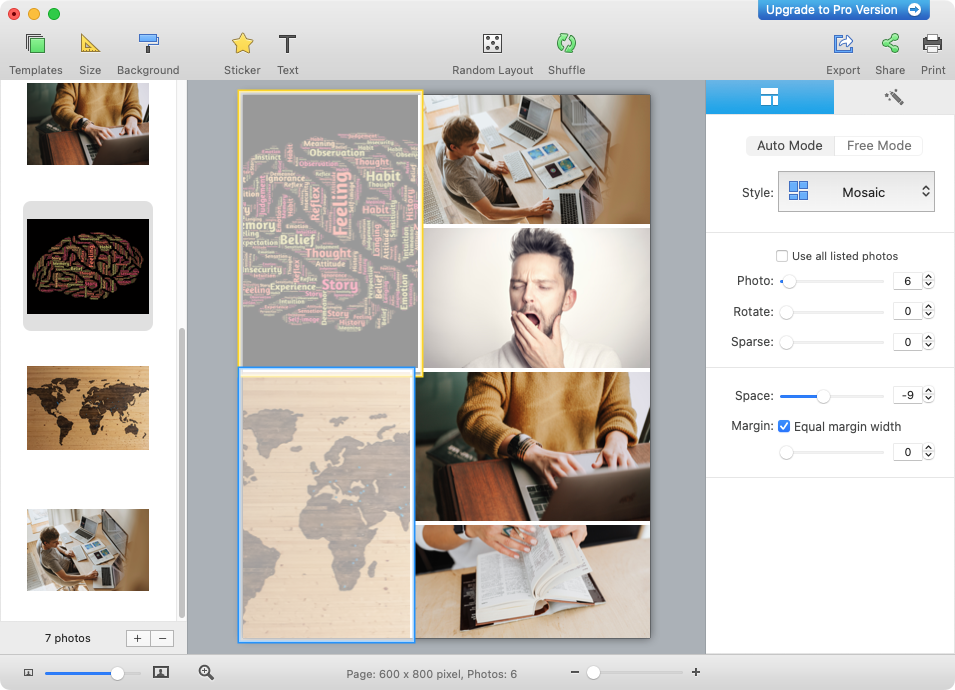
While the Layout feature isn’t available for the browser version of Instagram, you can still upload collages on your Mac. You’ll need to use either a photo editing tool or a dedicated collage app. To demonstrate, here’s how to create a collage with CollageIt 3 Lite from the Mac App Store:
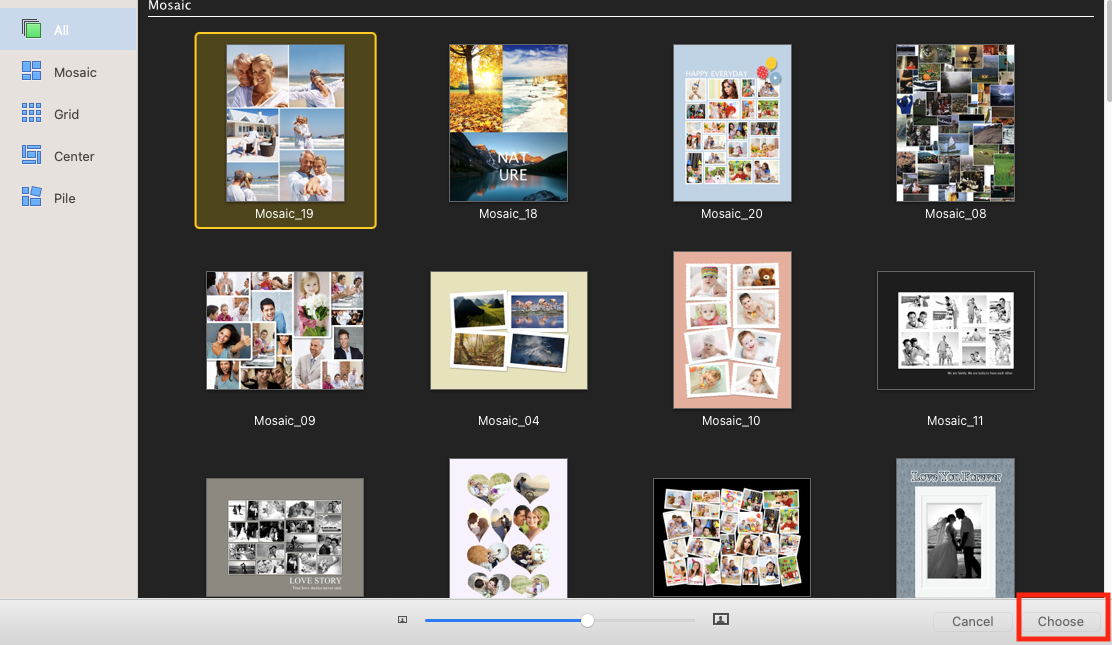
- Install and launch CollageIt. Select a layout for your collage, and click Choose
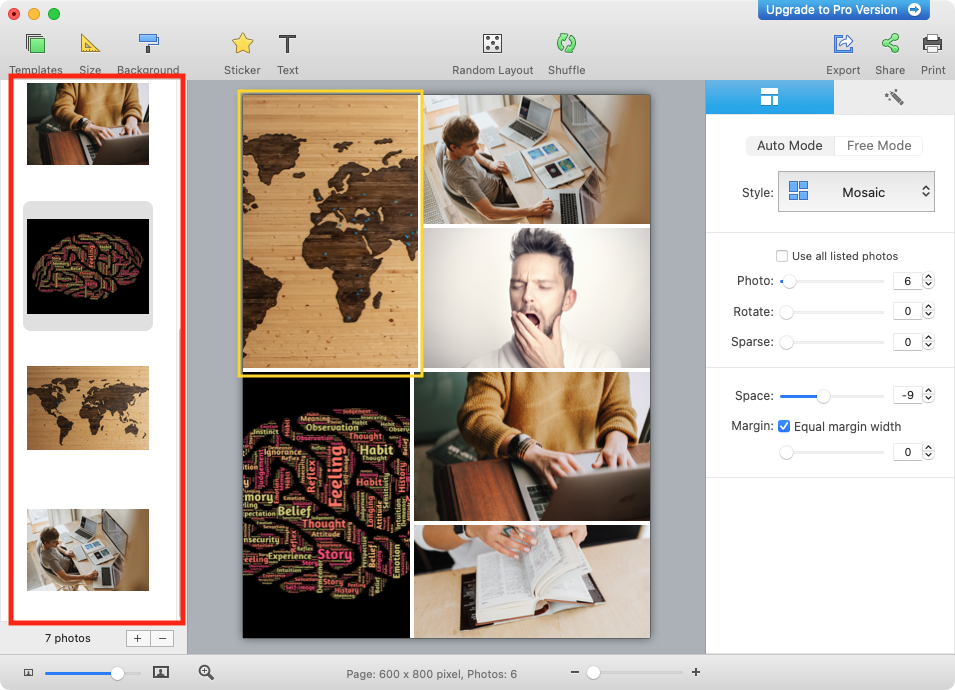
- Drag and drop your photos into the area on the left. They’ll automatically be placed in your collage
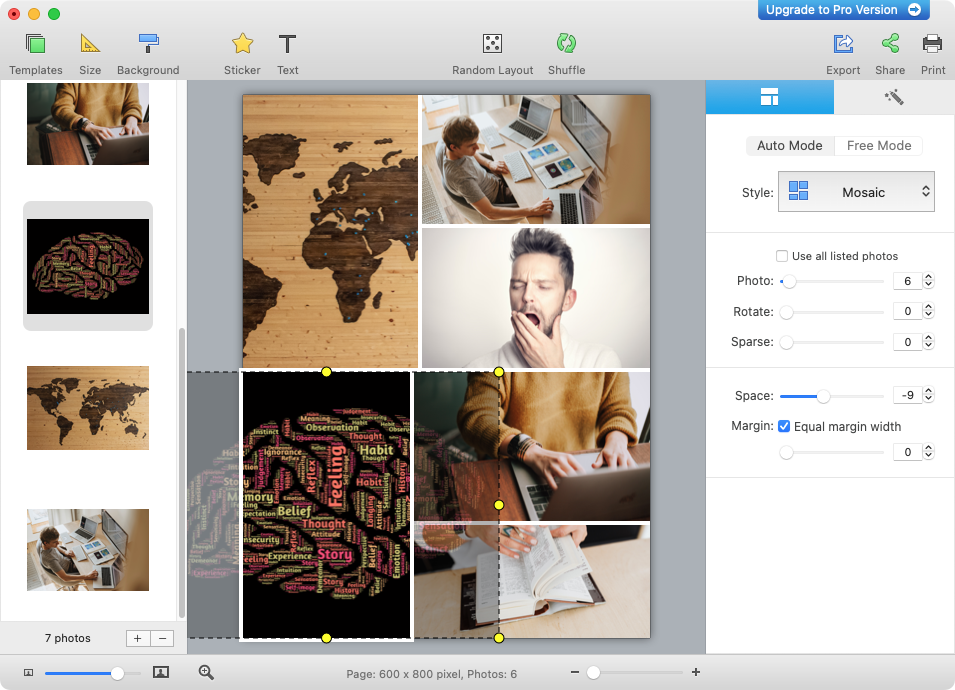
- To rearrange images, click and drag the boxes in your collage. You can also drag and drop images into the boxes from the library on the left
- Double-click an image in the collage to resize and reposition it
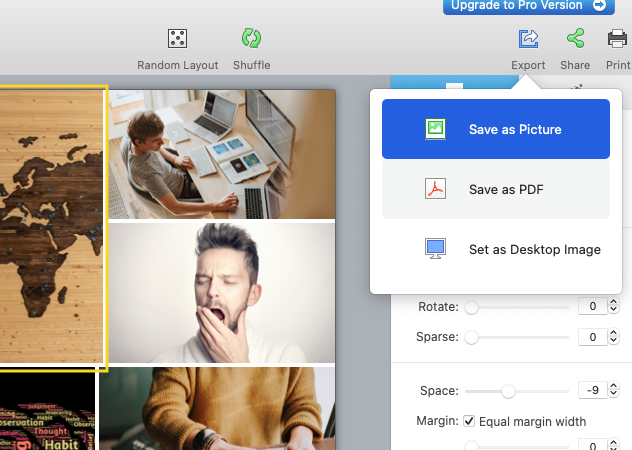
- Click Export > Save as picture to save your collage, ready to upload to Instagram.
How to upload multiple photos on Instagram without cropping
By default, Instagram crops all your photos to a square. When you upload multiple images, you can change the aspect ratio of the first image, but all the others you select from your gallery will stick to the same aspect ratio as that first image.
So how do you upload multiple photos with different sizes? The answer is photo editing software. All the images you upload together need to have the same aspect ratio, so they don’t get cropped in Instagram. If they aren’t the same size, that doesn’t matter, it’s just the ratio between the horizontal and vertical that needs to be the same.
For tips on how to edit photos on Mac, check our dedicated guide.
Editing images on a Mac before uploading them to Instagram
To get your images to the same aspect ratio without them being zoomed or cropped, or losing quality, you’ll need to add black bars to some of them. Because Instagram has a black background anyway, this is the best way of getting your photos ready.
There are, of course, many different photo editing tools for Mac. We’re using the free online editor Pixlr as an example, but the principles will be the same with any editor.
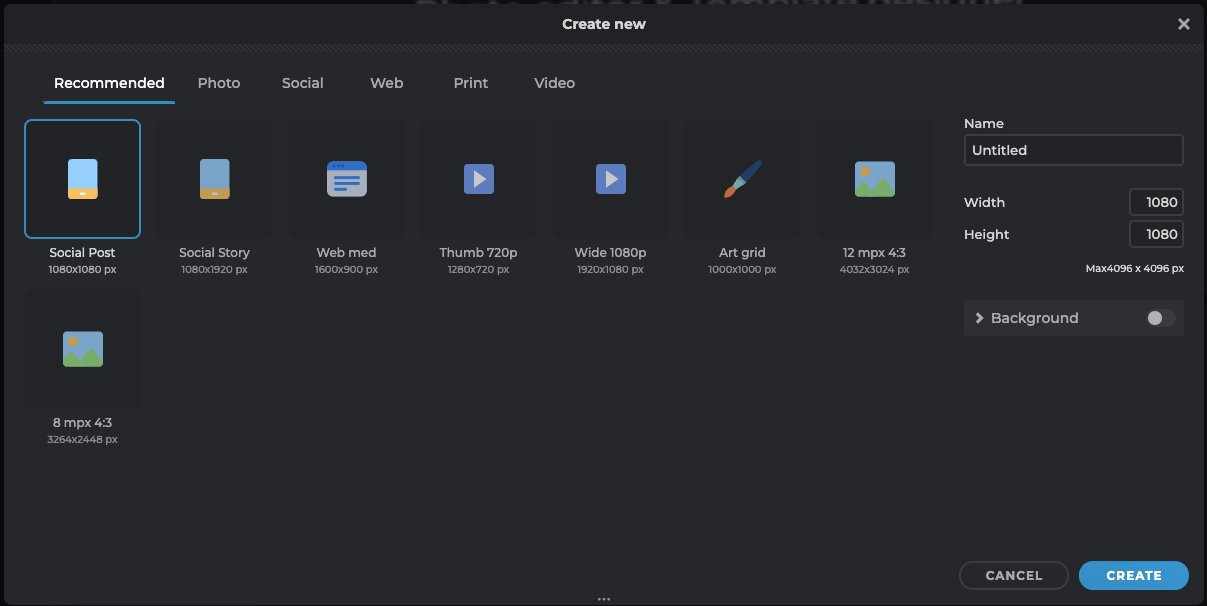
- Create a new blank canvas with the resolution and aspect ratio that’s right for your posts
- Add a black background
- Import one of your photos, then adjust the sizing and position it as you please
- Save and close the new image, then repeat with the rest.
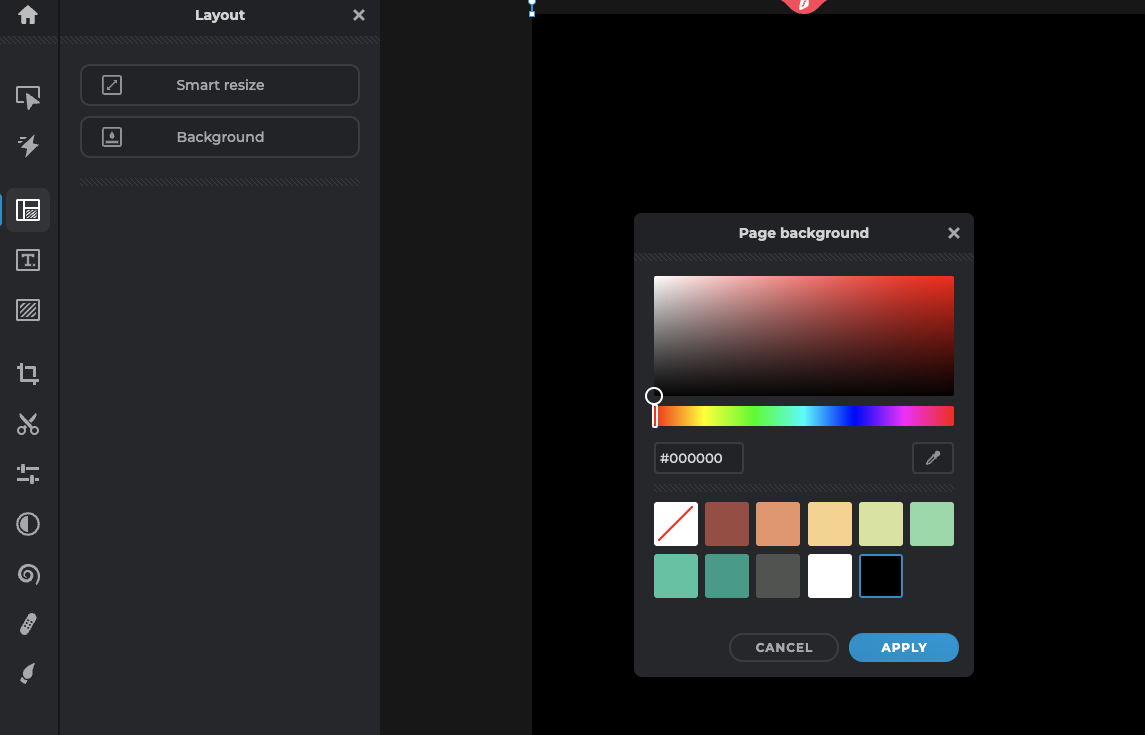
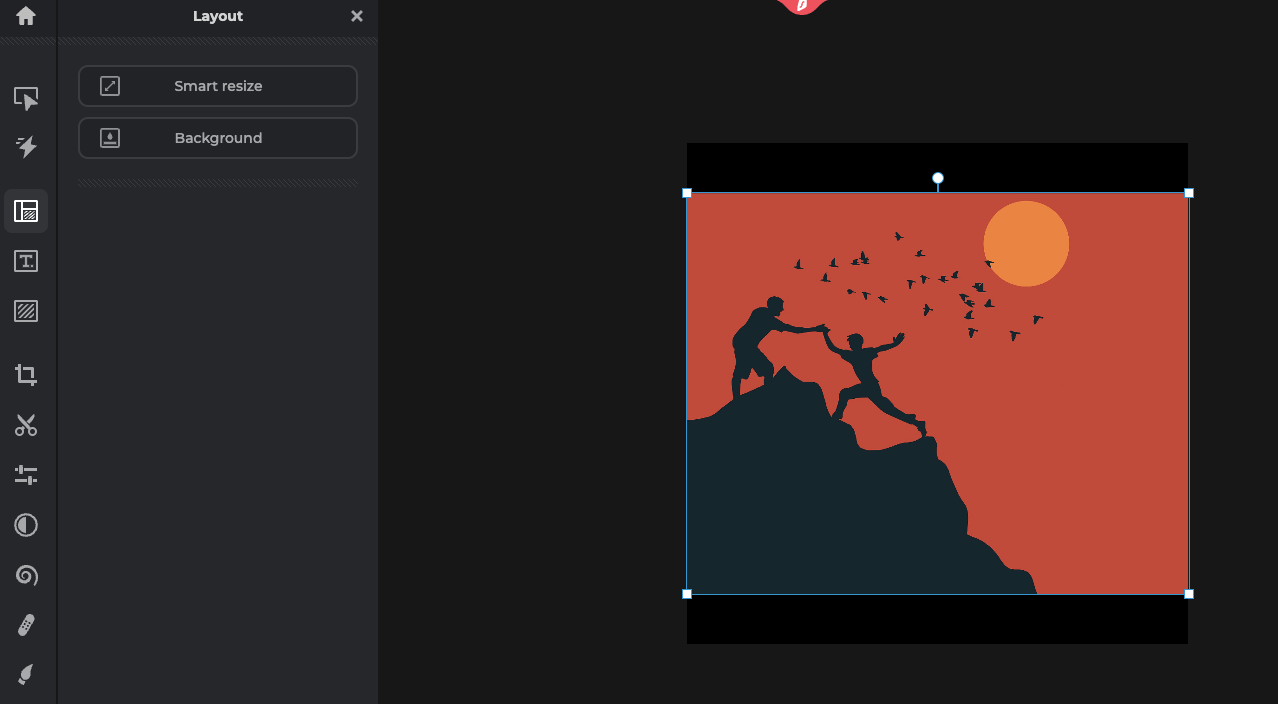
Now, when you upload these pictures to Instagram at the same time, you’ll get the full size image for all of them.
Preparing pictures on iOS to upload to Instagram without cropping
The processing for getting multiple images on Instagram without cropping on an iOS device is similar to Mac. You’ll need an image editing app that allows you to create a blank document and then import photos.
To demonstrate, we’re using Affinity Photo on iPad. There are fewer full image editors for iPhone, so it's a good idea to know how to move photos from iPhone to Mac, so you can do your editing there instead.
- Create a blank document at whatever size and aspect ratio you want
- Fill the background with black
- Import your images from your iPhone or iPad photo library
- Resize the image to fit in the black square or rectangular canvas. Repeat with your other images.
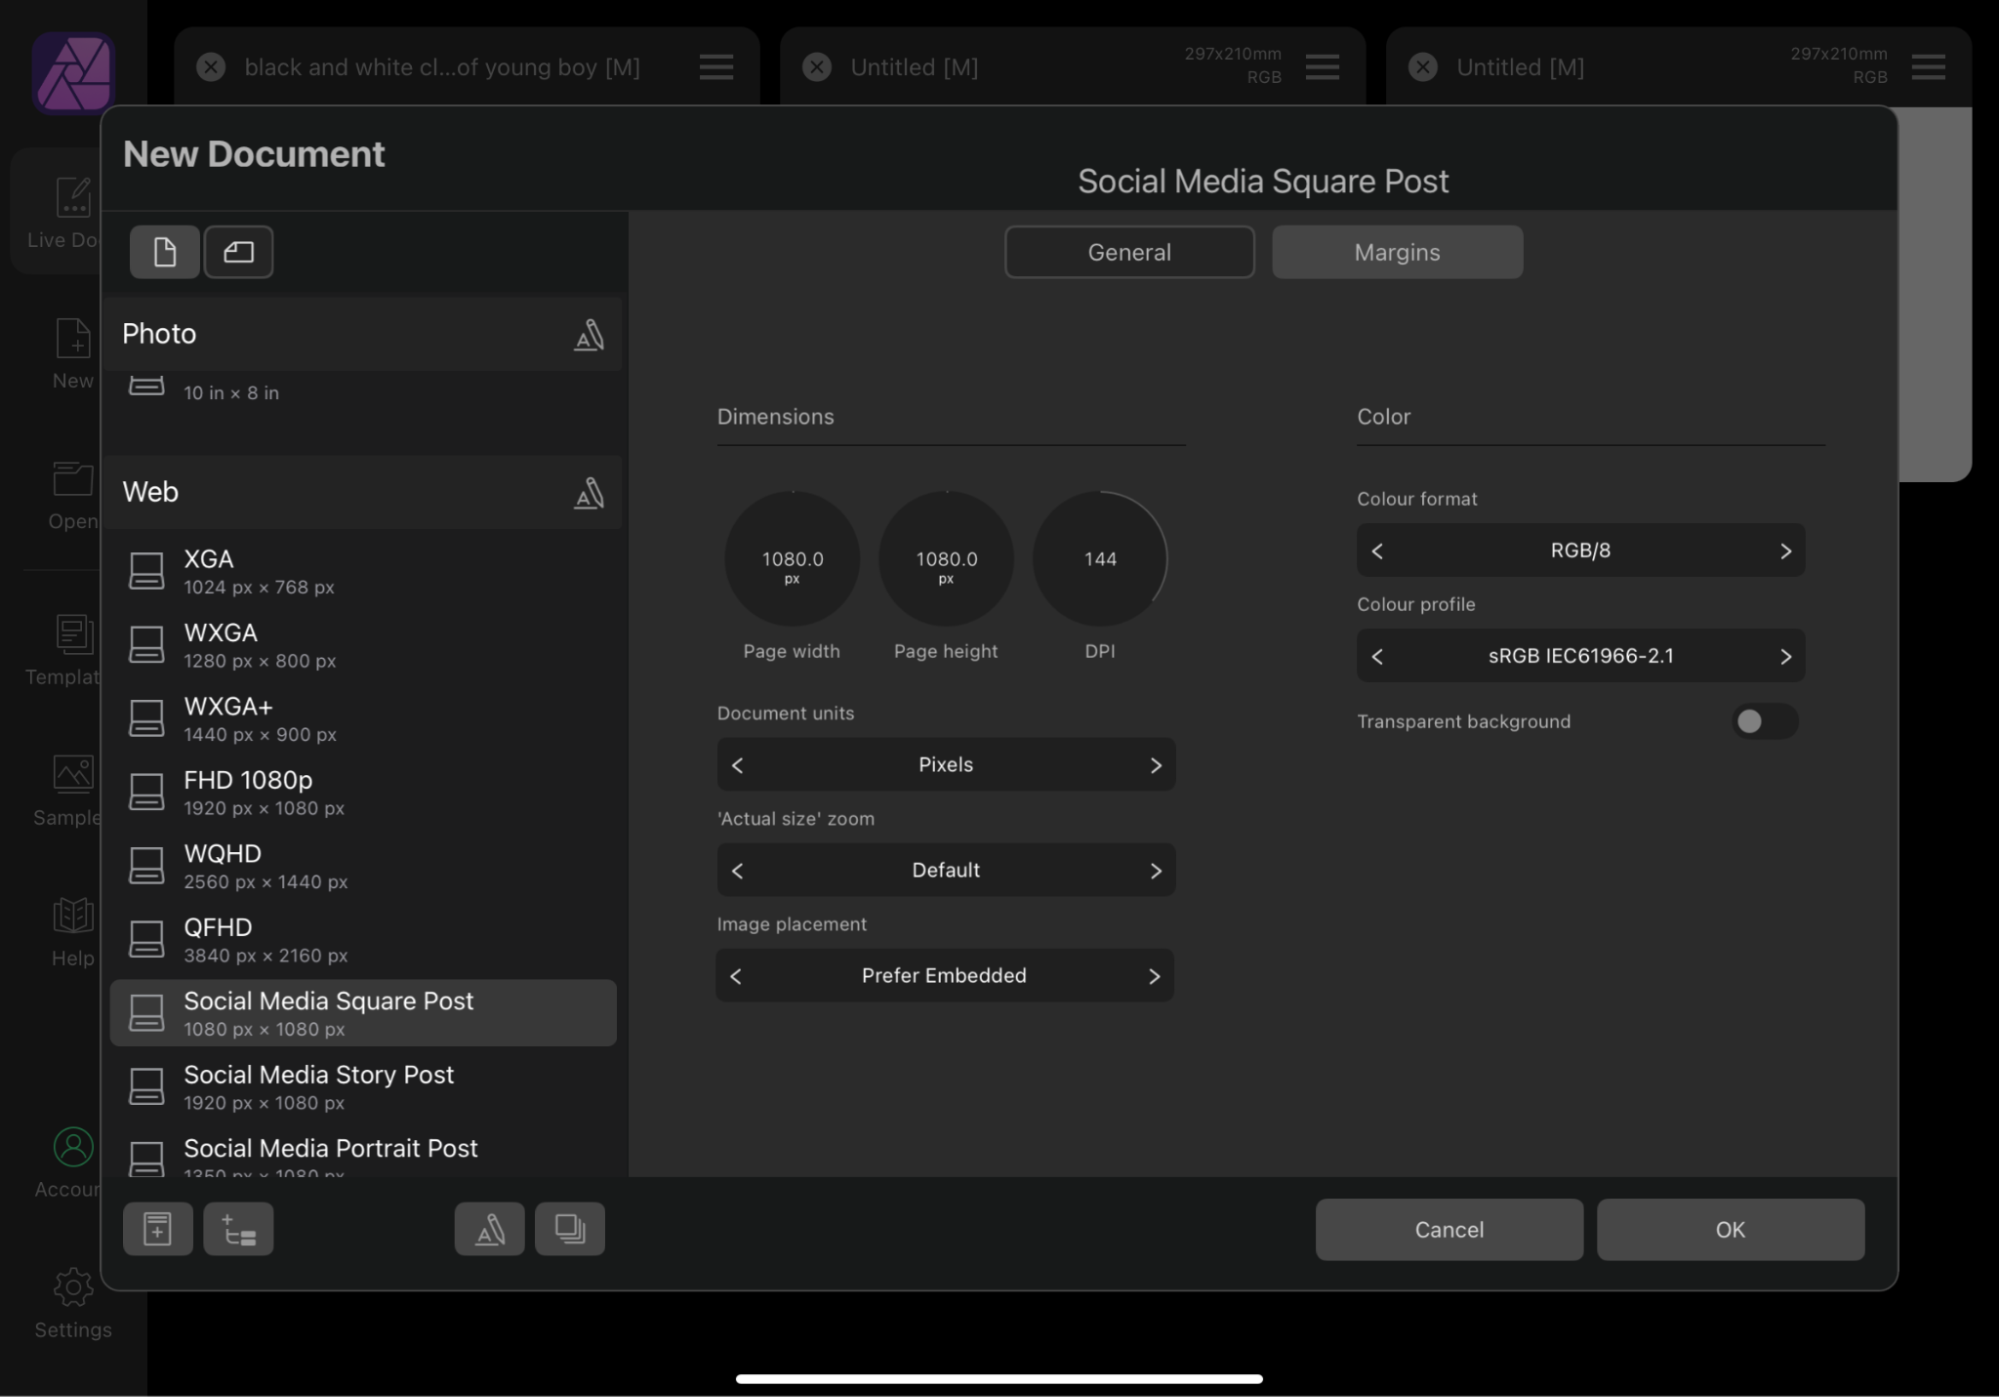
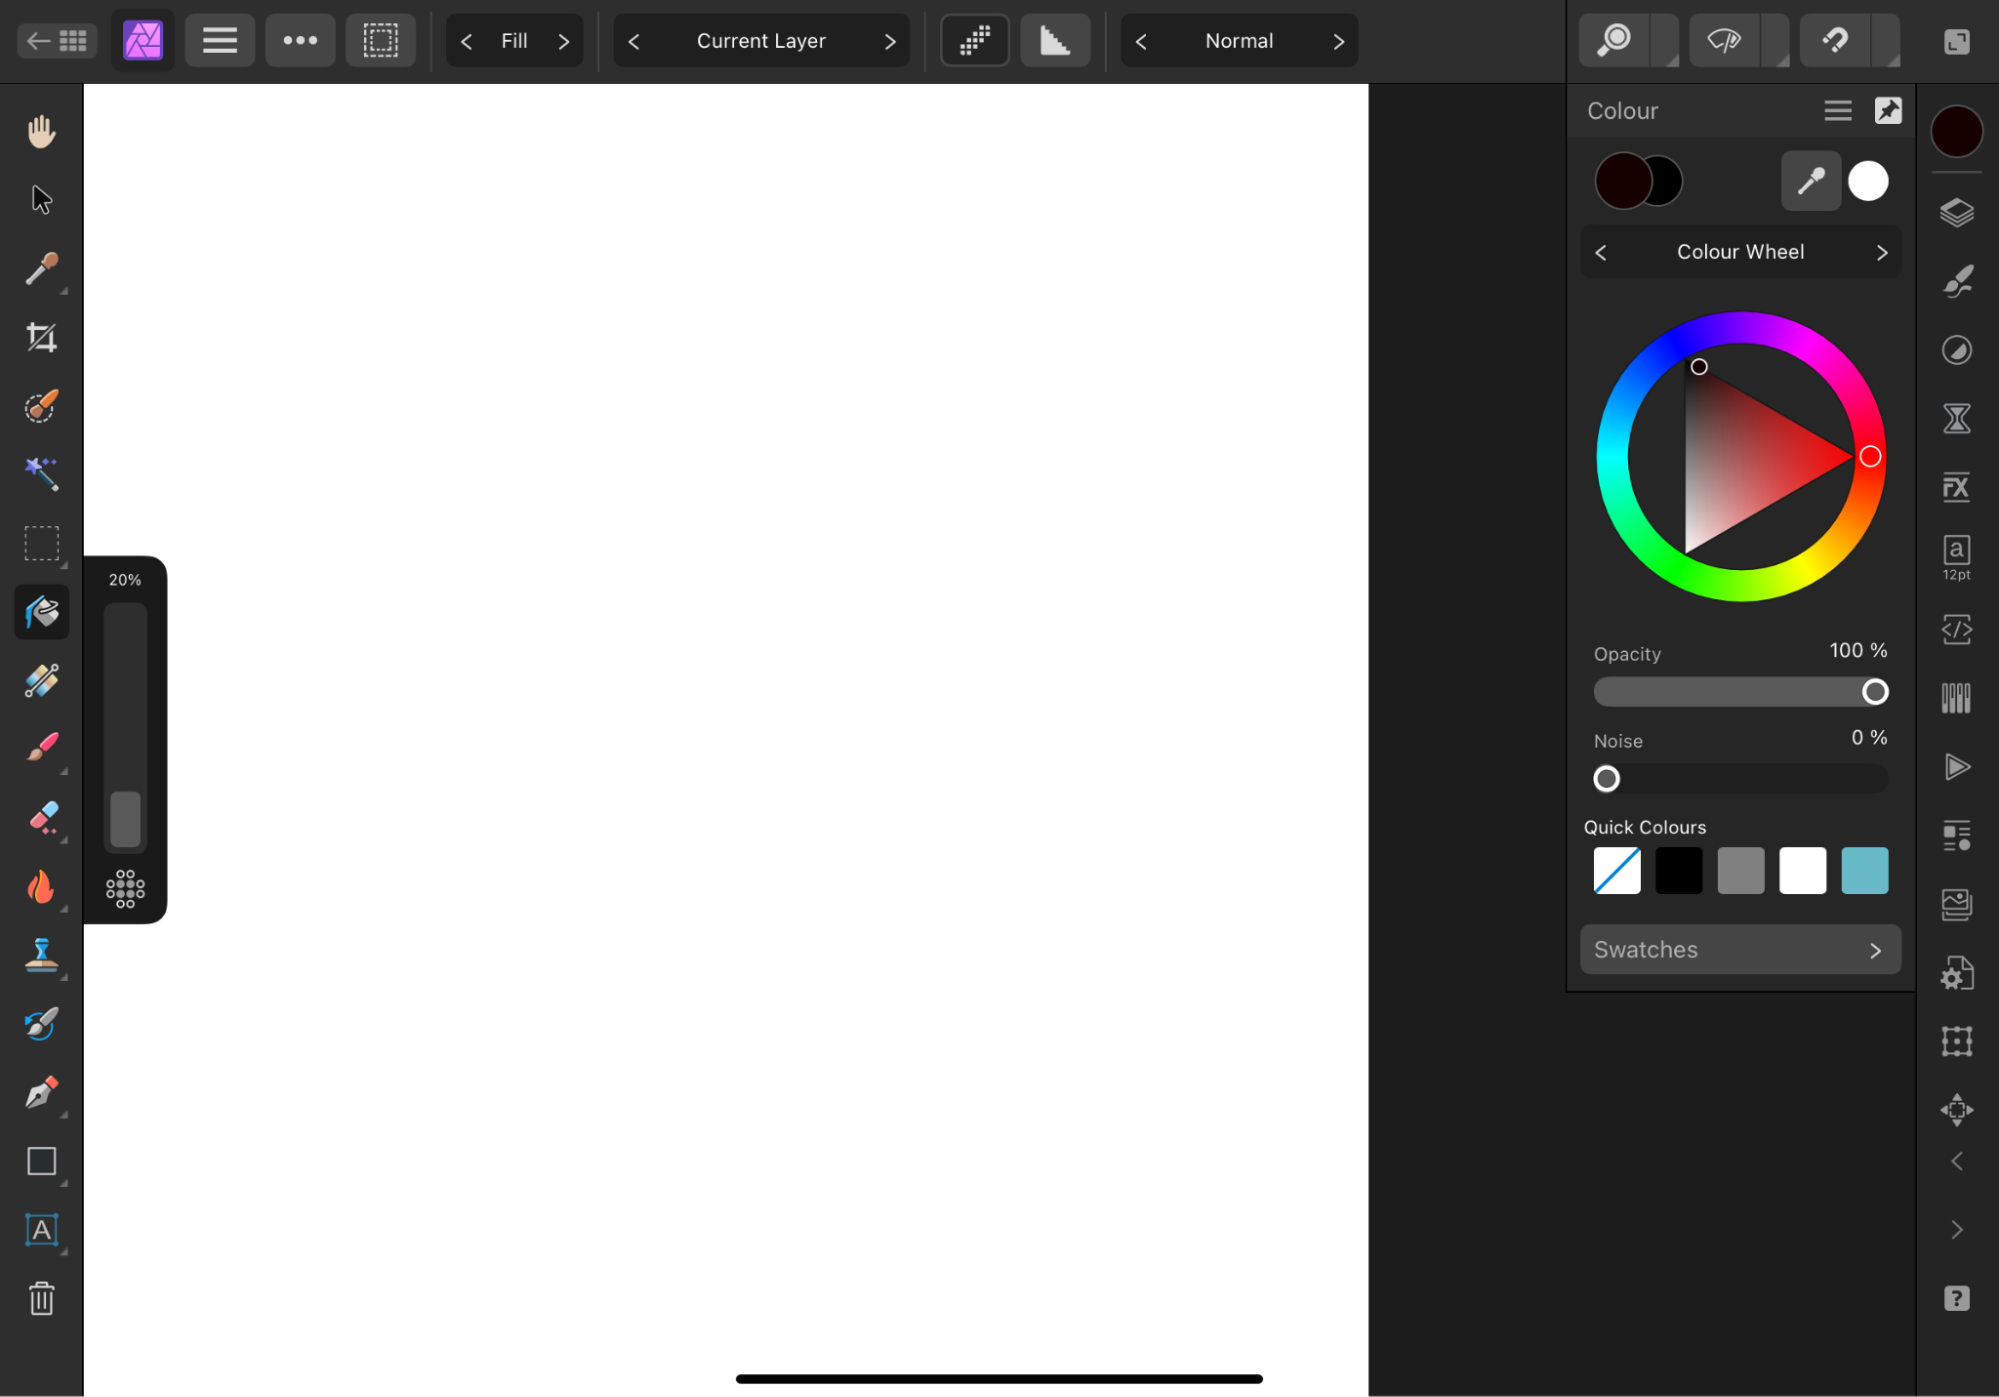
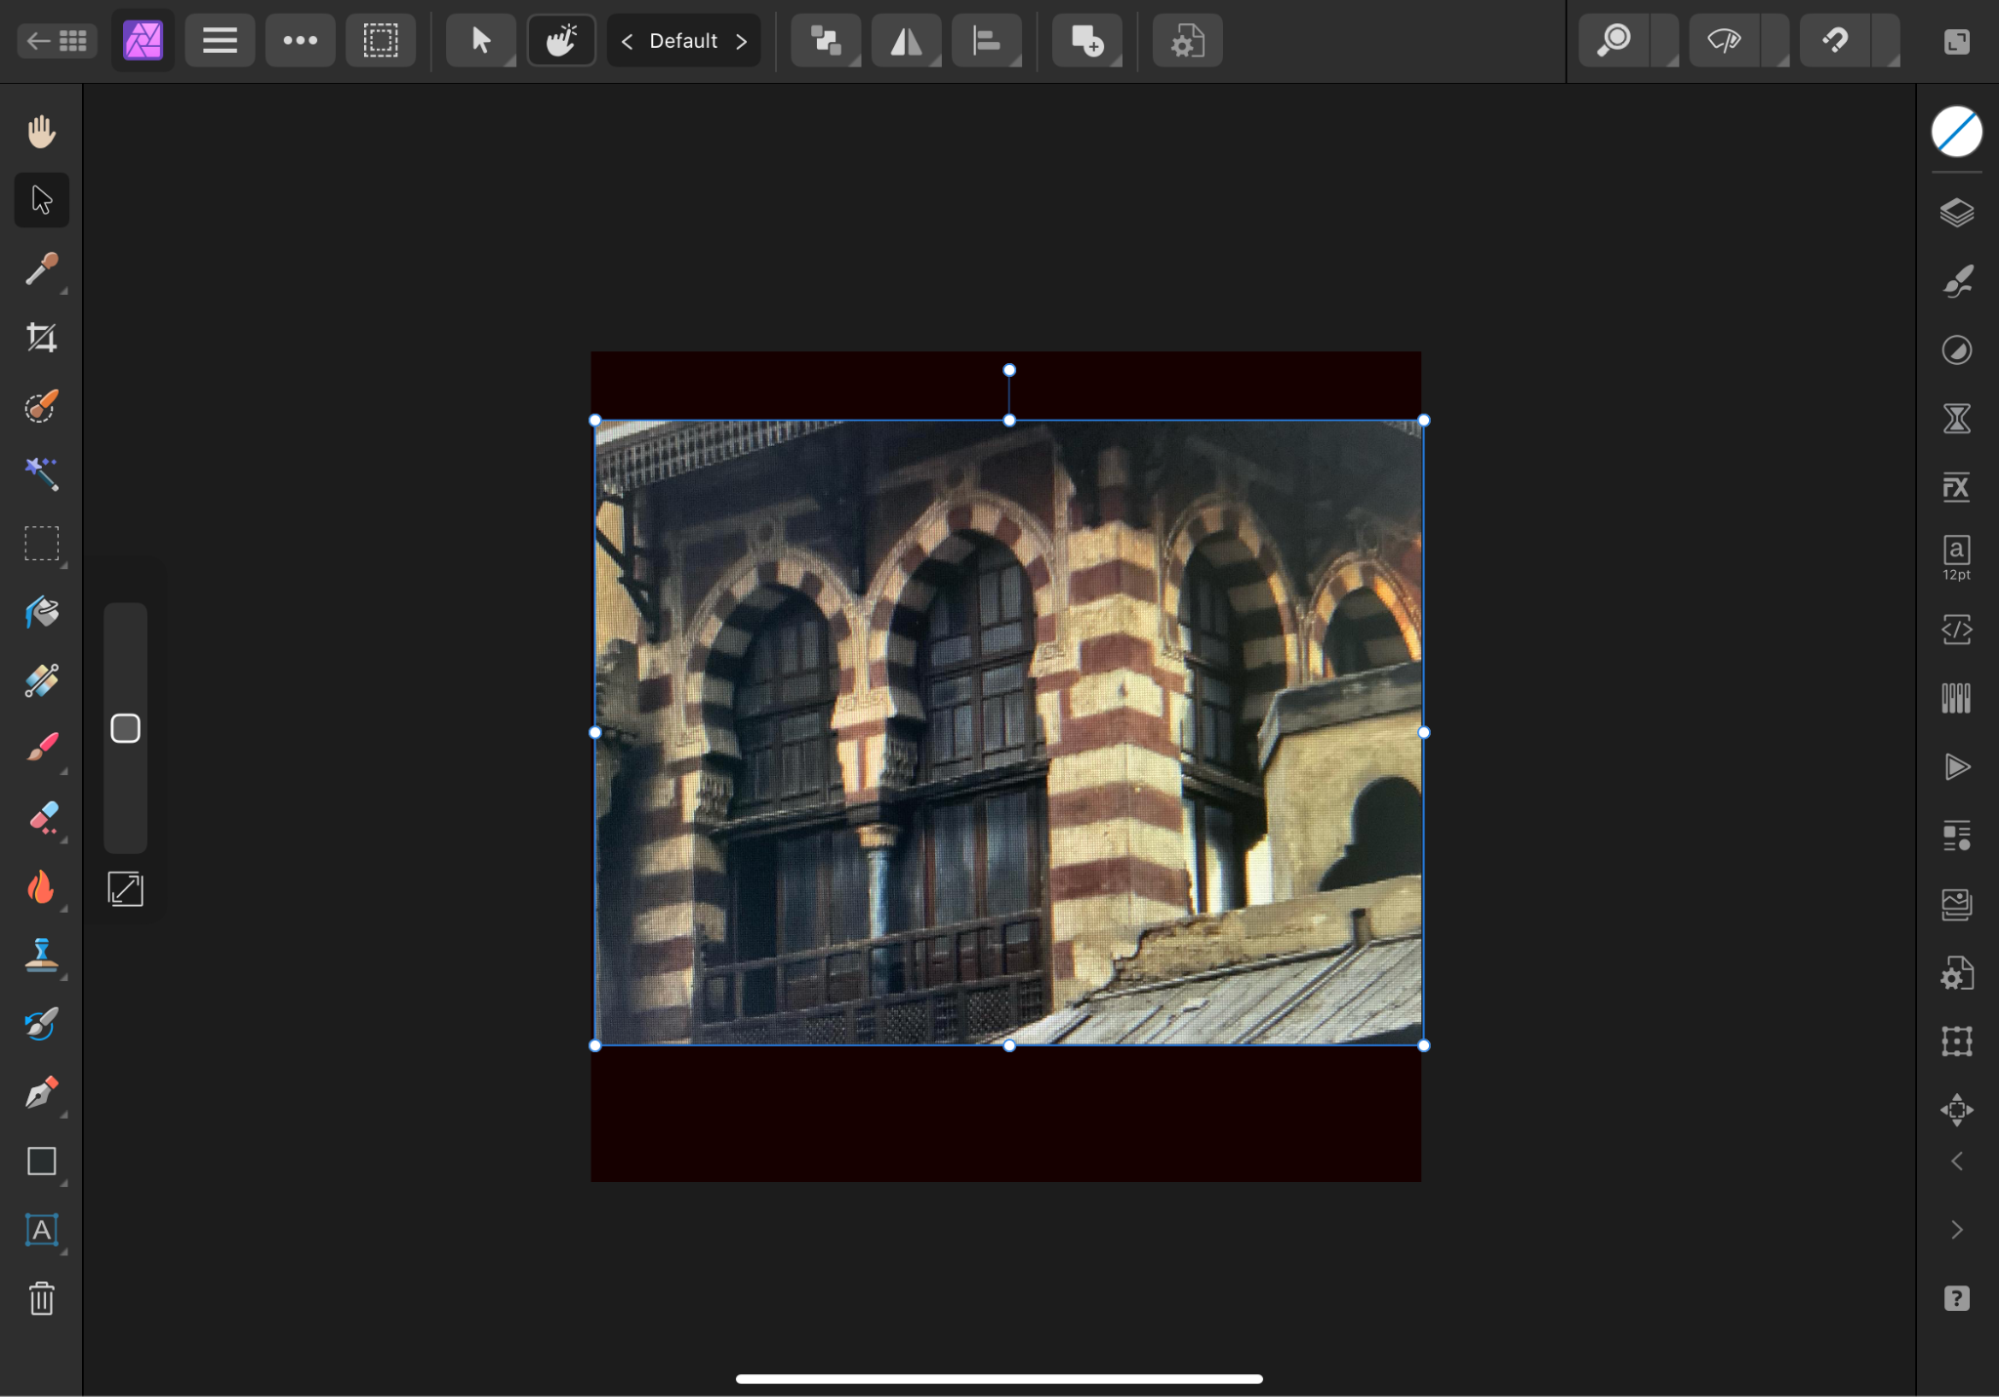
After you’re done, you can upload these images to Instagram at the same time, without any of them being cropped.
Adding multiple videos to Instagram
As well as images, you can upload short videos to Instagram too—thanks to its IG Reels feature. And like Instagram Stories, it even has its own Layout function for iPhone, so you can create video collages.
Creating a video collage with Instagram on an iPhone
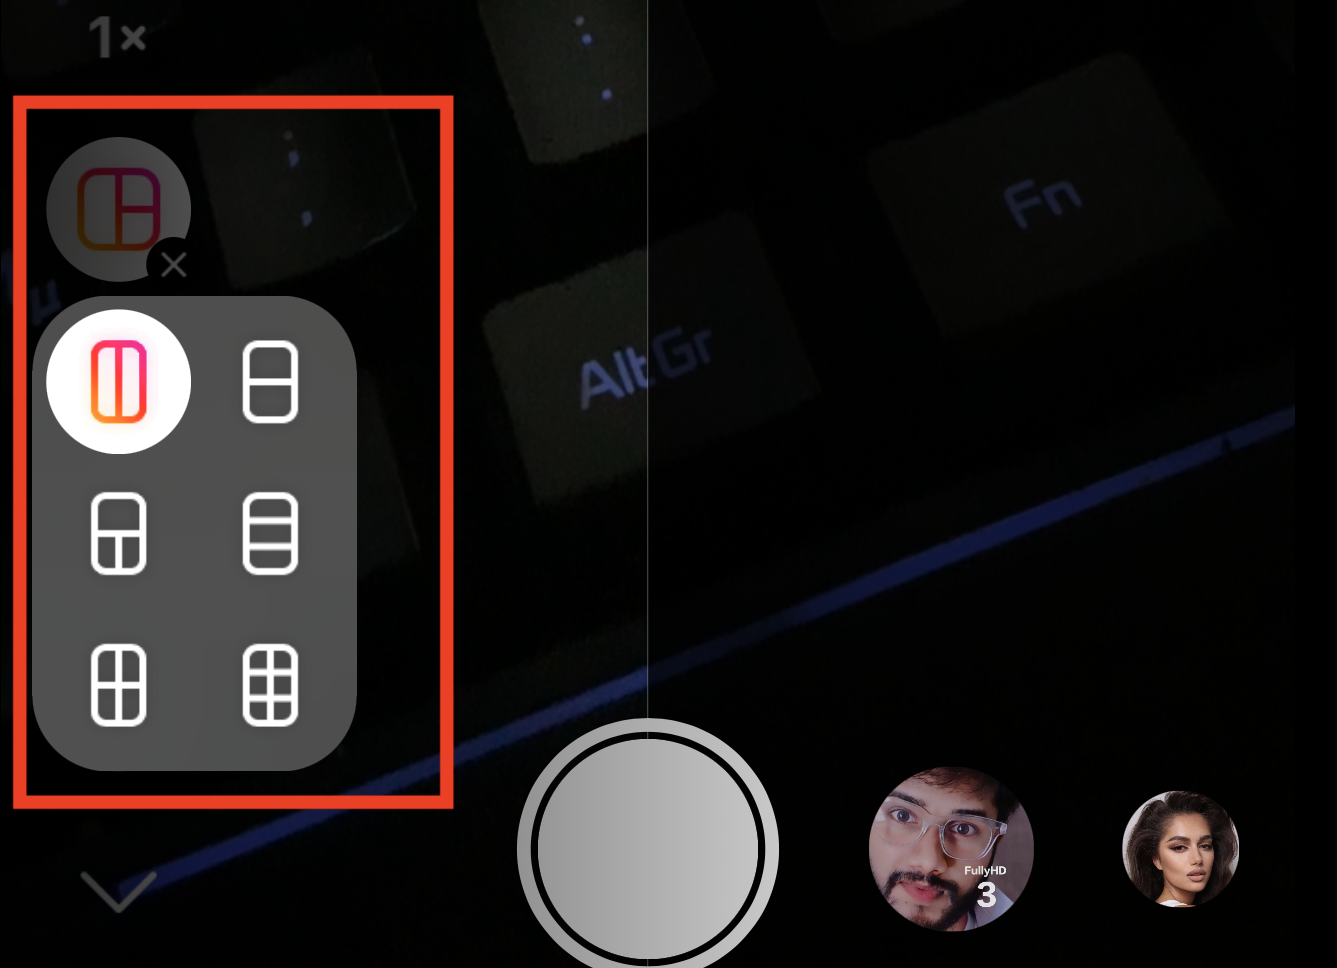
Follow these steps to use the Layout function in Reels:
- Open the Instagram app, and tap Reel
- Tap the Layout icon, then the icon below it to choose a layout for your collage
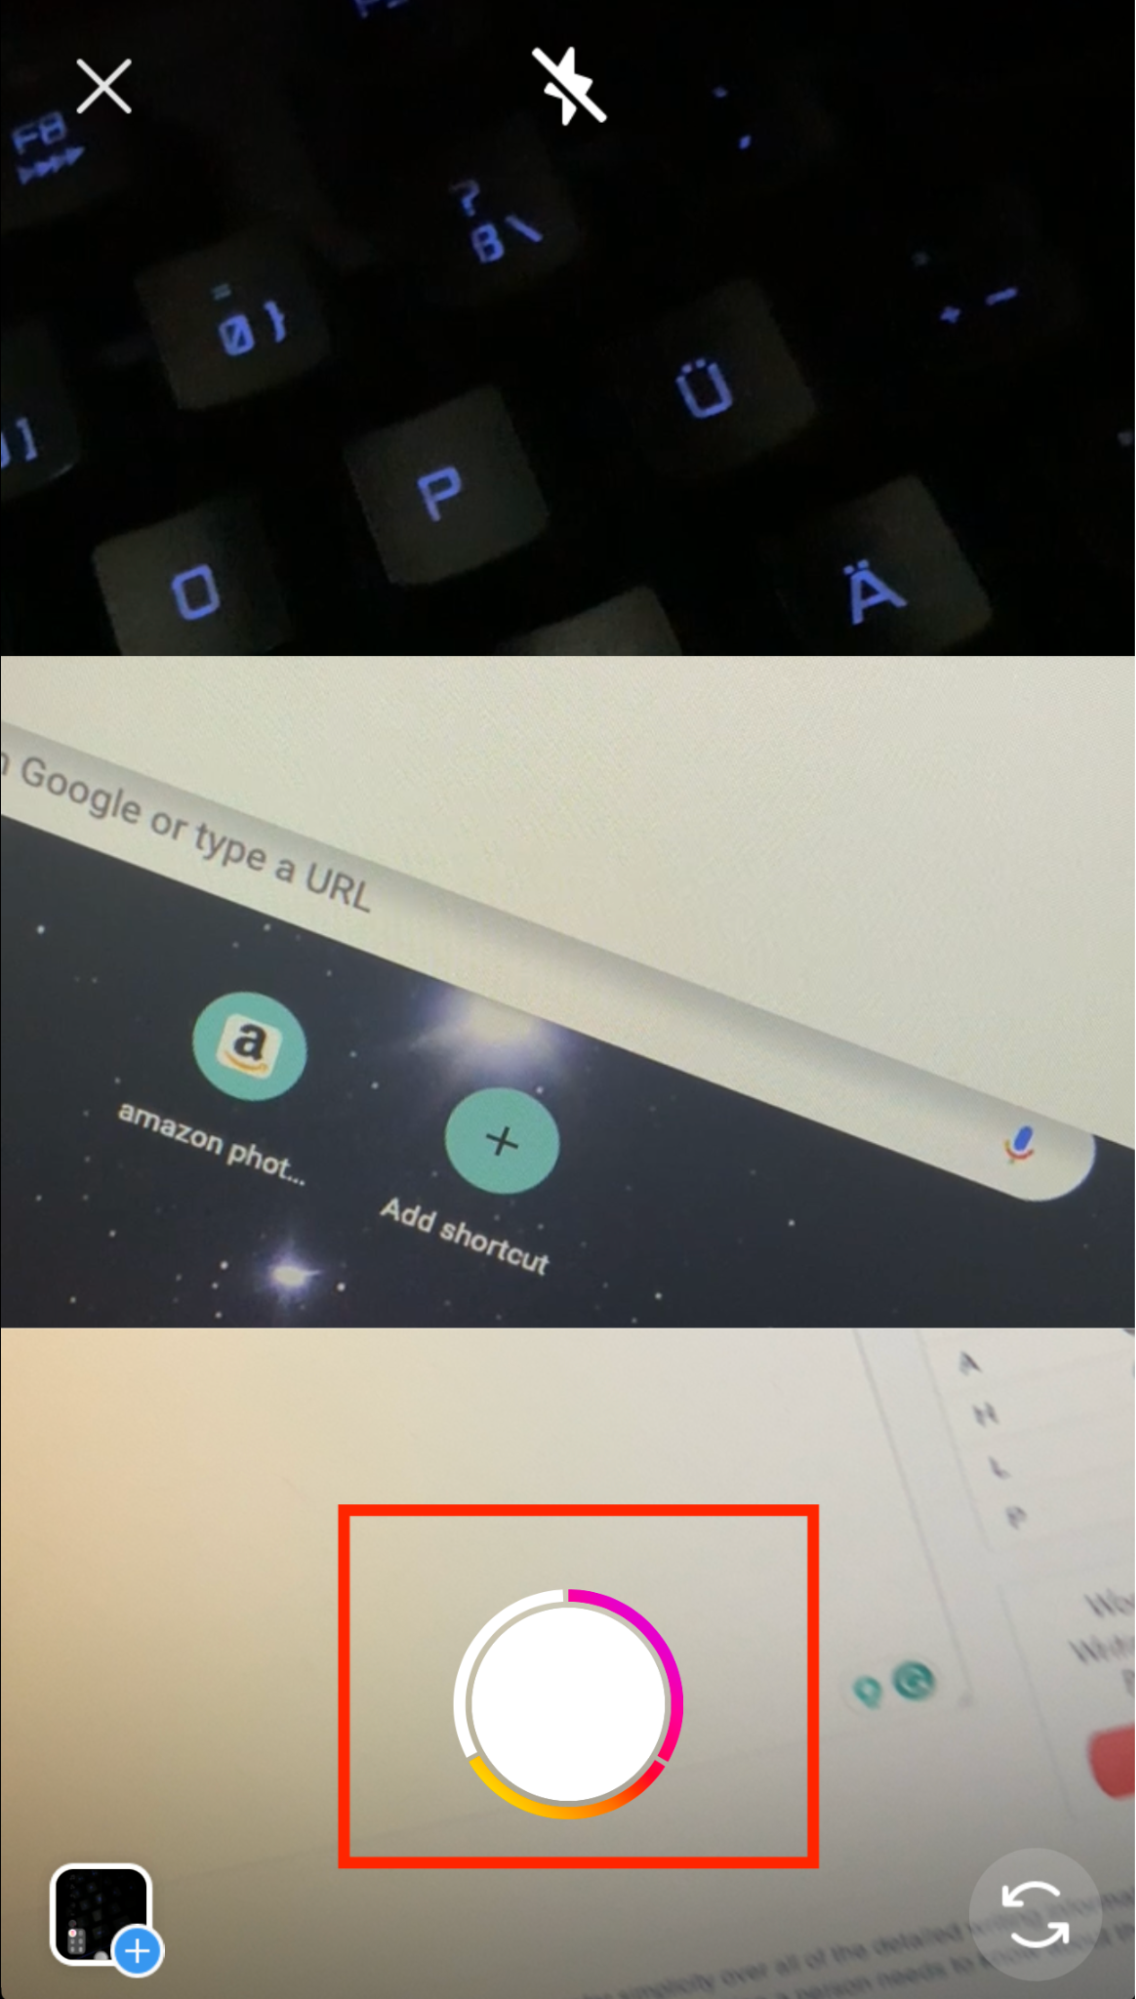
- Press the record button. You can record up to 30 seconds, or tap the button again to stop and move on to the next box
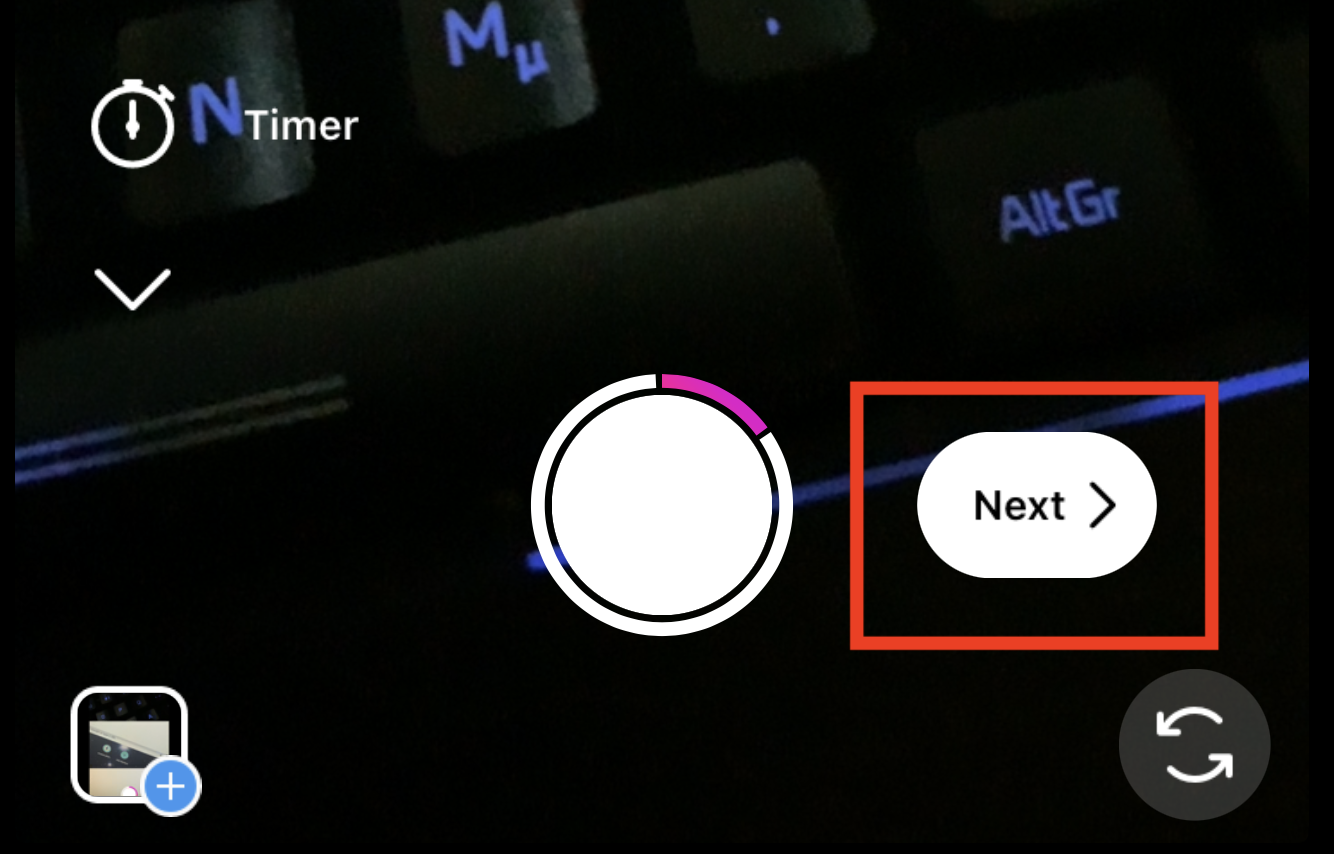
- When you’re done, tap Next, then Next again
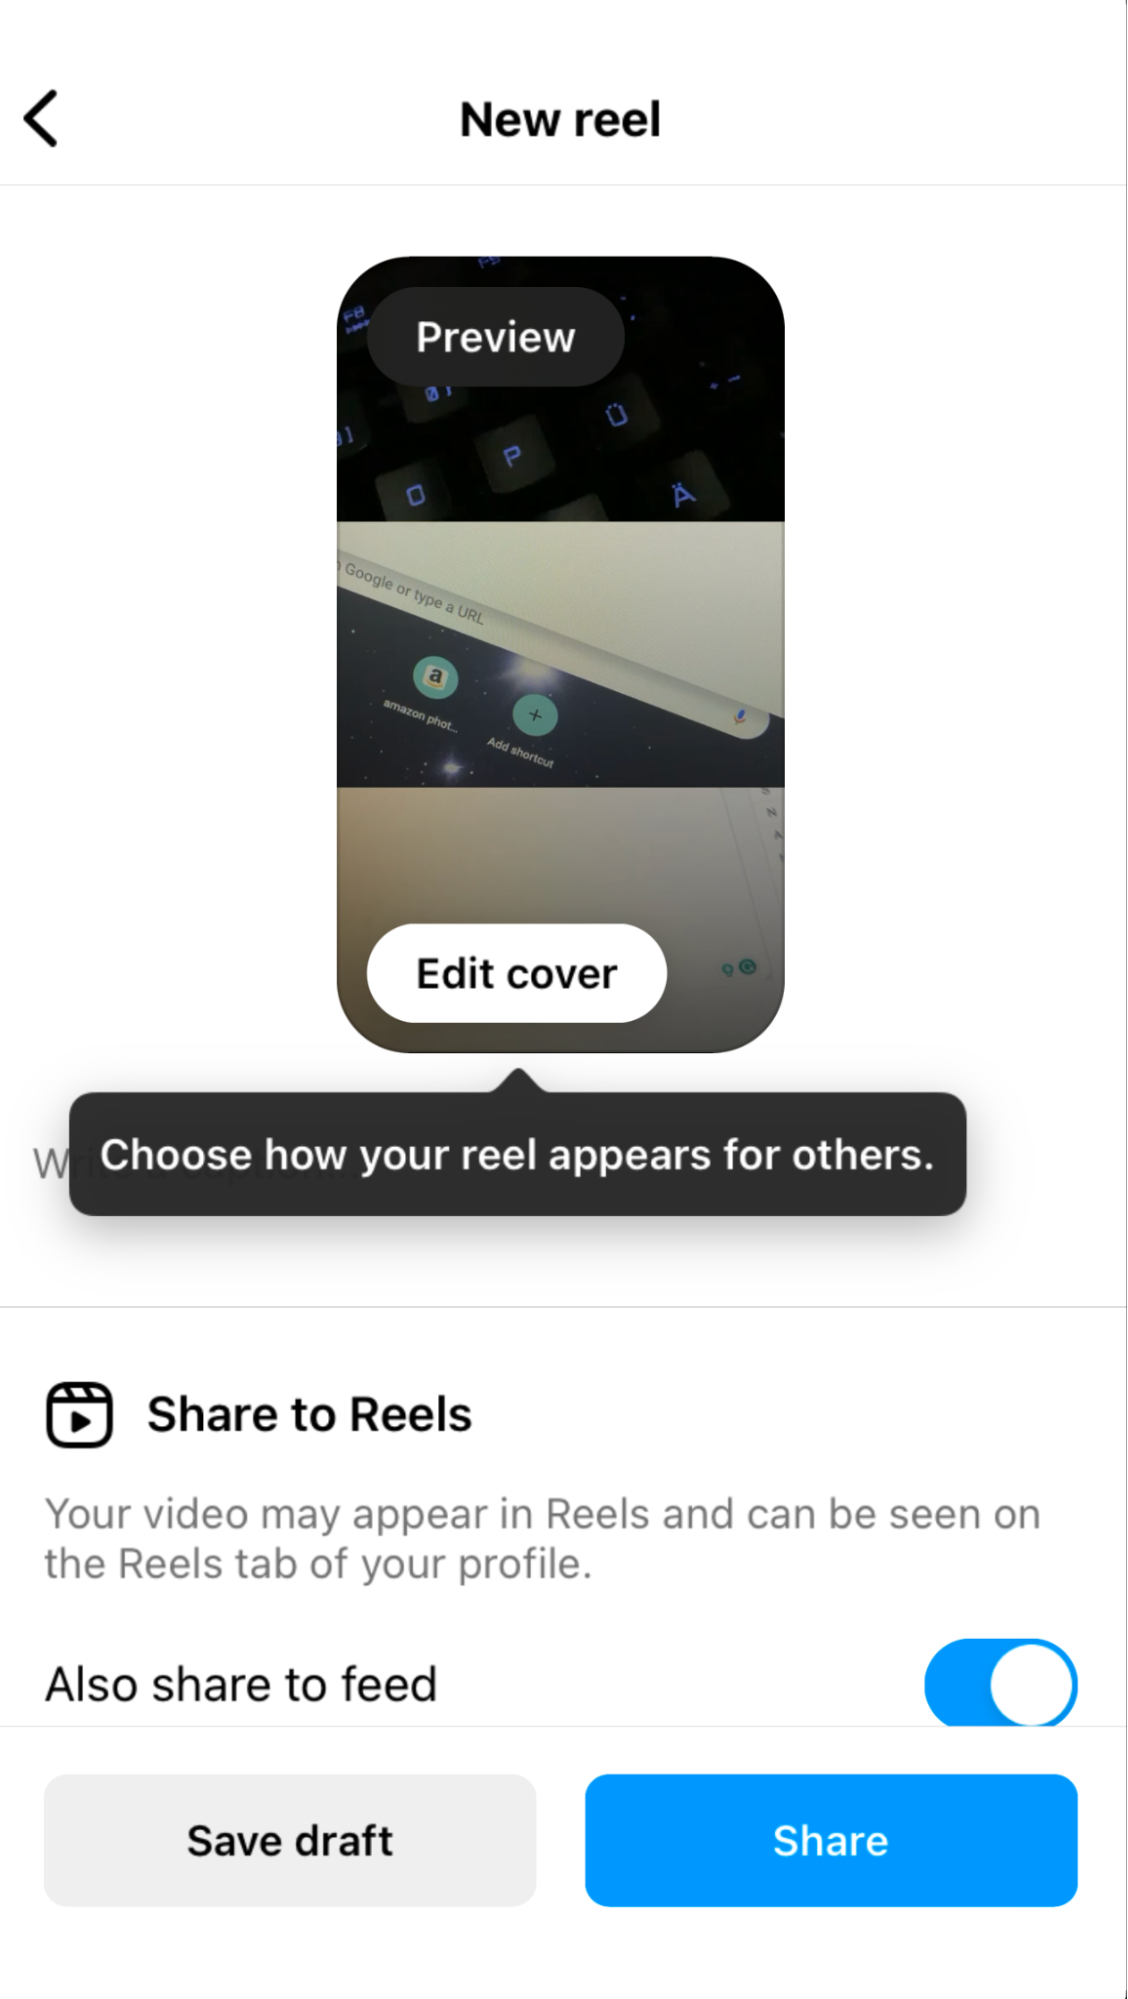
- Make any final changes and click Share.

Make your Instagram sing
By adding multiple images and creating collages, you can really bring your Instagram account to life. But that’s all you can do if you want to make your account stand out and attract followers. You can also create videos and collages of videos using a handy feature called IG Reels.
And if you really want to put the rhythm into your algorithm, you can even add music to your reels.
Whatever you decide to do, make sure to keep your Mac clear of duplicates using MacKeeper’s Duplicates Finder. That will save you time and make managing your photo collection easier.


