In this article you will find the following:
A lot of the time, web browser pop-ups are nothing more than an annoyance. Whether they’re trying to sell you something or get you to download something, they interrupt what you’re doing and get in the way.
Thankfully, most web browsers block them by default, but there are times when you want to enable pop-ups on your Mac. Some web chat and instant messaging services use pop-ups, for example.
Here, we’ll look at how to allow pop-ups in Safari and Chrome, two of the most popular Mac web browsers.
Before we begin
There is a dark side to pop-ups, of course. Scammers often use them to trick people into downloading malware. To prevent that from happening, you can protect your Mac with MacKeeper. As well as real-time antivirus, it offers ad-blocking features, privacy tools, and more.
How To Allow Pop-ups On Mac In Safari
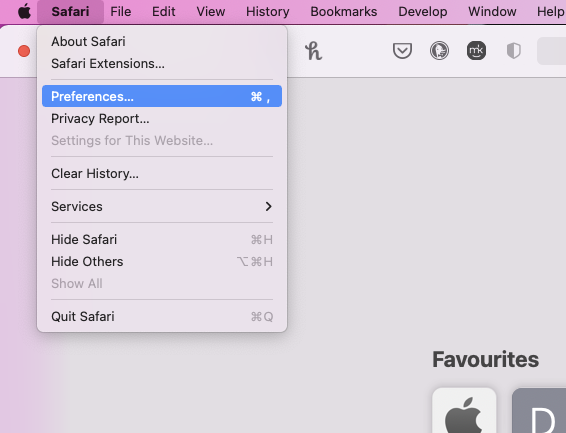
Stopping the Safari pop-up blocker on Mac takes just a matter of seconds. This will allow all pop-ups to appear, so be careful about doing this.
- In your Safari menu bar, select Safari > Preferences
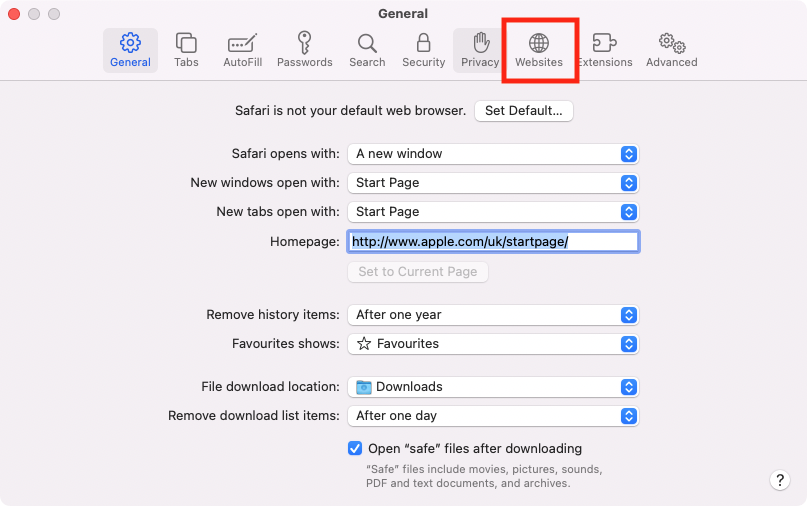
- Click Websites
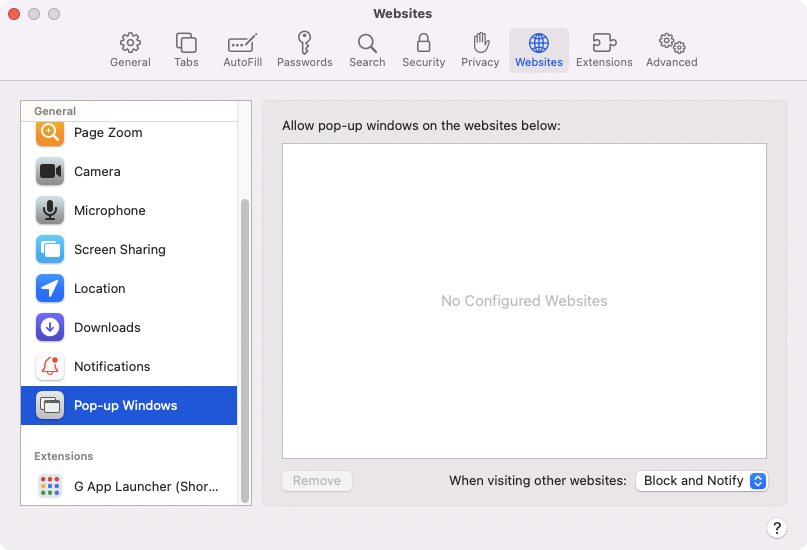
- Scroll down and select Pop-up Windows
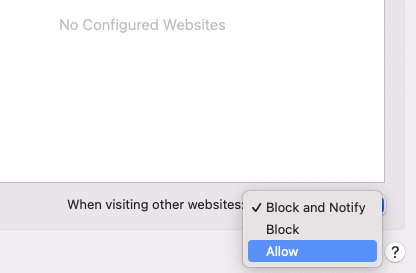
- Where it says When visiting other websites, select Allow.
Enable pop-ups in Safari for one website
It’s much better to block pop-ups on your Mac and make then make exceptions for particular sites. Here’s how to allow pop-ups for one site in Safari.
- From the menu bar, open Safari > Preferences
- Select the Websites tab
- Select Pop-up Windows from the sidebar
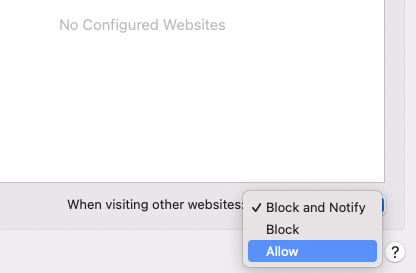
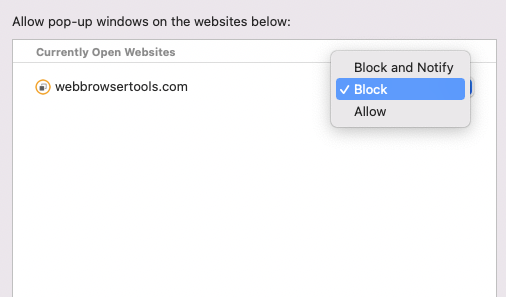
- Under Allow pop-up windows on the websites below, find the site you want to unblock, and use the dropdown menu to select Allow.
How To Enable Pop-ups On Mac In Chrome?
Enabling pop-ups in the Mac version of Chrome is just as straightforward. Follow these steps to stop Chrome’s pop-up blocker on all sites.
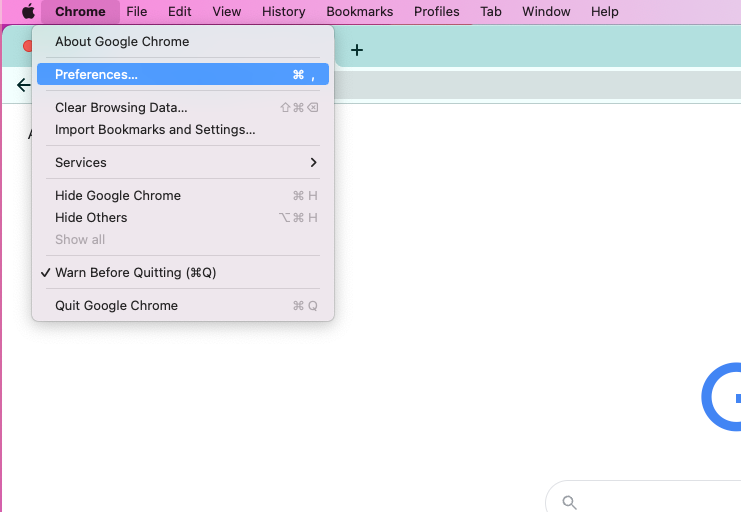
- In the menu bar, open Chrome > Preferences
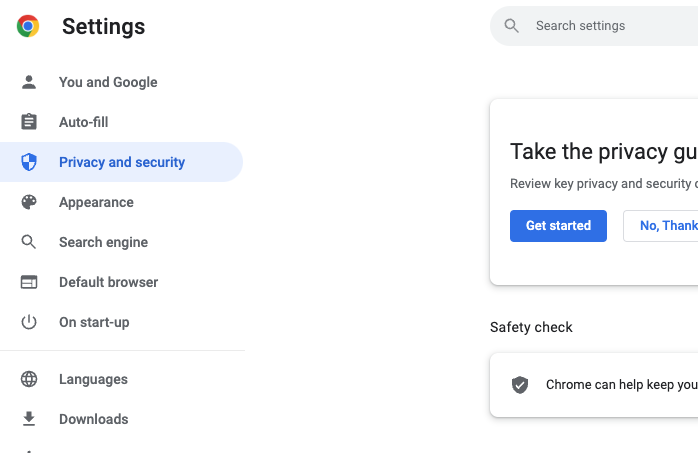
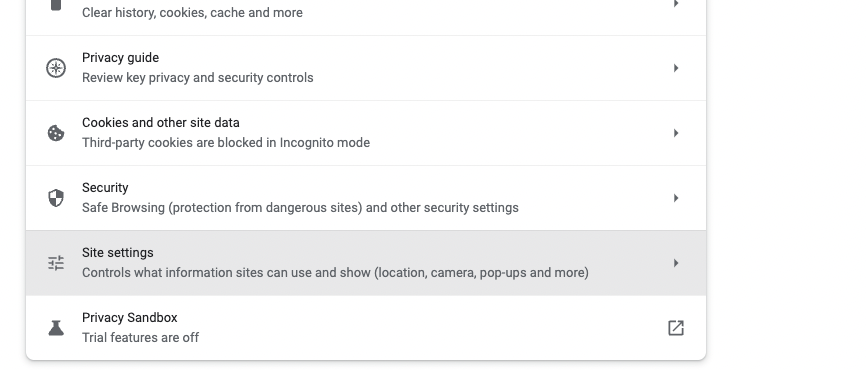
- Select Privacy and security from the sidebar
- Click Site settings
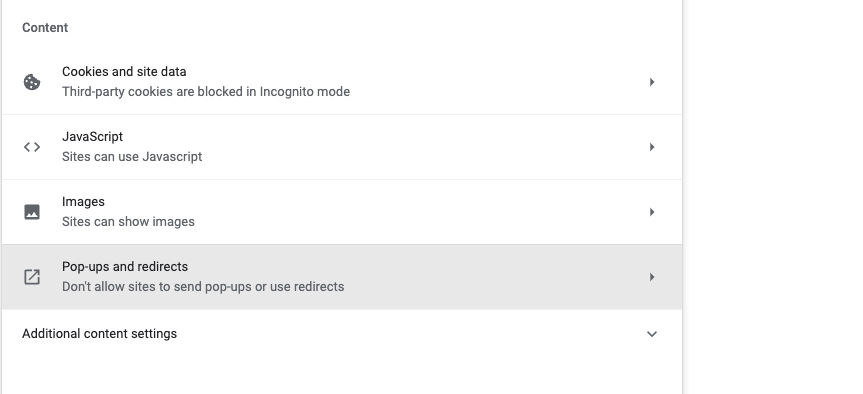
- Under Content, click Pop-ups and redirects
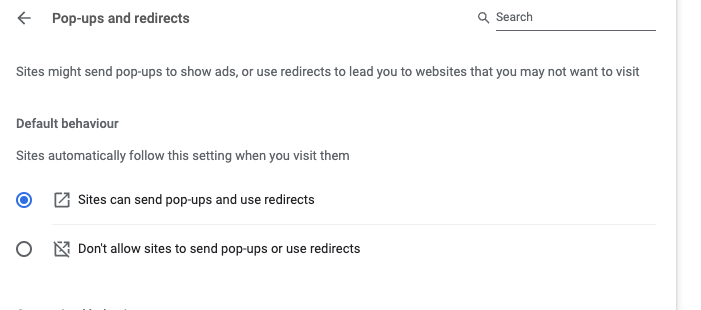
- Under Default behavior, select Sites can send pop-ups and use redirects.
Enable pop-ups in Chrome for one website
As with Safari, it's safer to block pop-ups on your Mac and allow them in Chrome for certain sites.
- Go to Chrome > Preferences from your menu bar
- Open the Privacy and security section
- Open Site settings > Pop-ups and redirects
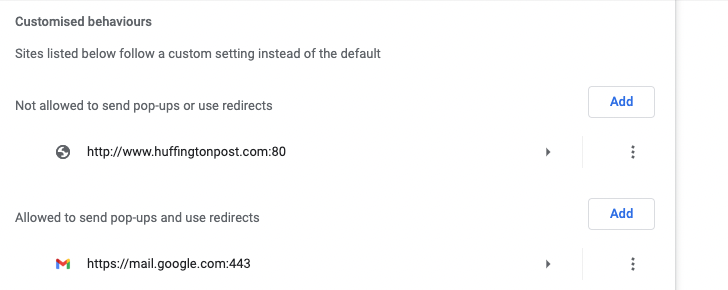
- Scroll down to the Customized behaviors section
- Click the three dots next to the site you want to allow pop-ups on, and select Allow.
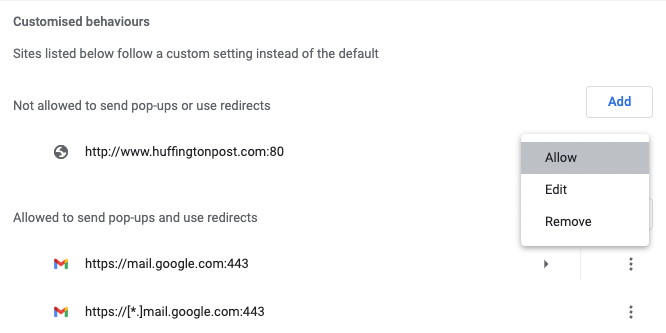
How to Stop Pop-Ups On Safari?
Whether you’ve enabled pop-ups for all sites or some, it’s easy to block pop-ups on your Mac at any time. Here’s how to do it in Safari.
- Open Safari > Preferences
- Select the Websites tab, and click Pop-up Windows in the sidebar
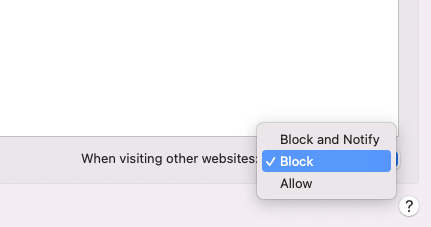
- To block all pop-ups apart from your allowed exceptions, select Block or Block and notify next to When visiting other websites
- Or to stop pop-ups for individual sites in Safari, find it in the list, and select Block.
How to Stop Pop-Ups In Chrome?
If you want pop-ups to be blocked in Chrome for Mac, you can do it easily from the browser’s preferences.
- Open Chrome > Preferences
- Open Privacy and security > Site settings > Pop-ups and redirects
- To block all pop-ups apart from your exceptions, select Don’t allow sites to send pop-ups or use redirects
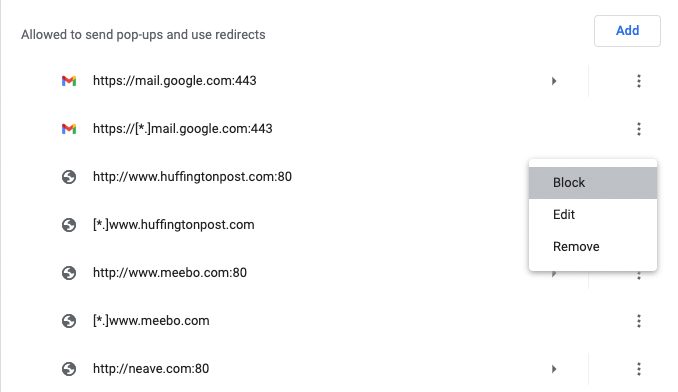
- For individual sites, look under Customized behaviors and find Allowed to send pop-ups or redirects
- In this list, find the site you want to block pop-ups on. Hit the three dots, and select Block.
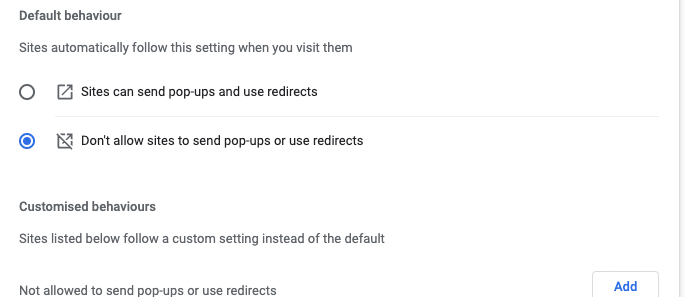
Note that there’s a slightly different process for blocking Chrome notifications. You’ll find those in settings in Chrome’s preferences, under Privacy and security > Notifications.
What if pop-ups show up anyway?
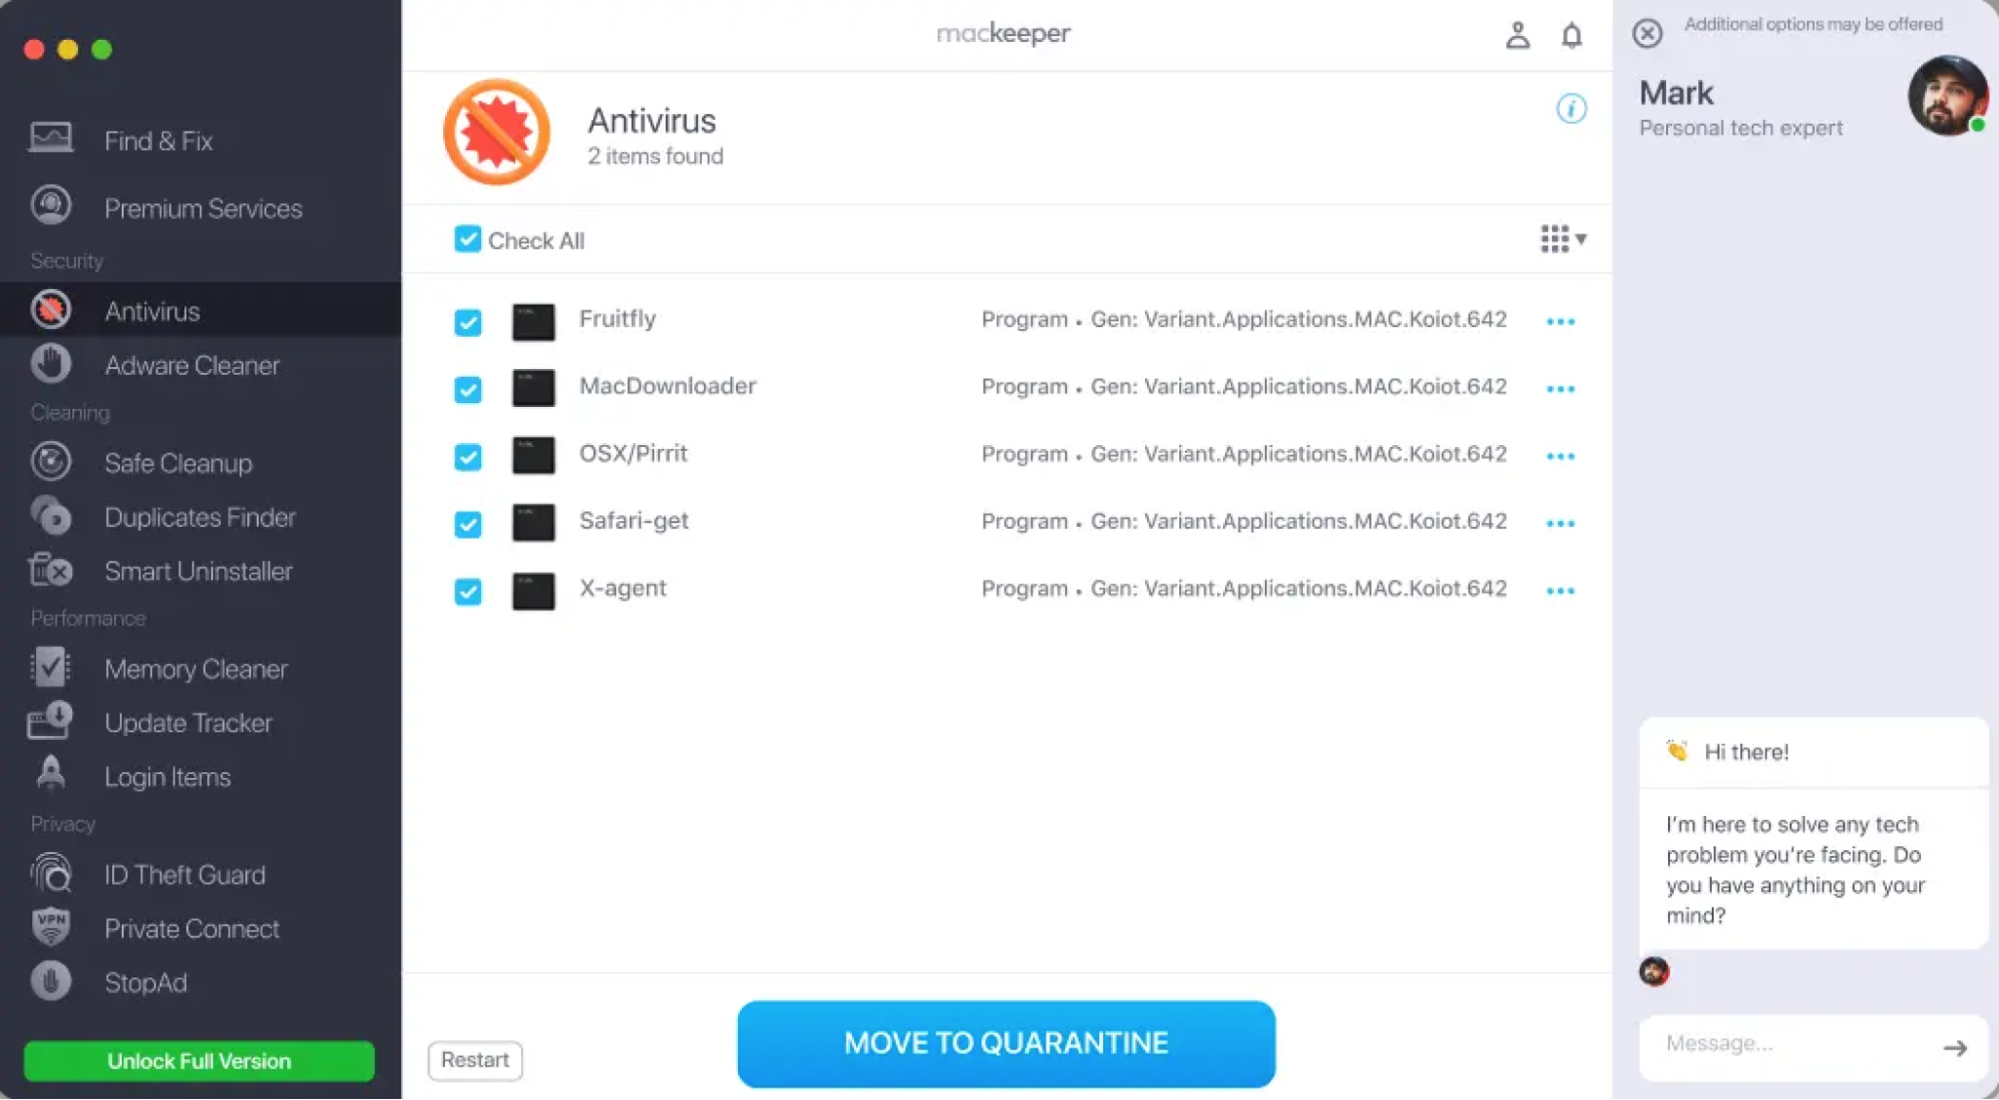
Whether you have an iMac, MacBook Air, MacBook Pro, or some other machine, pop-up blockers are easy to turn on and off. But you may find some pop-ups that ignore your settings and pop up regardless. This may be due to clever coding by sneaky website developers, or it can be caused by malware on your Mac. If you get persistent pop-ups on your Mac, make sure to run a full antivirus scan with MacKeeper. To do it, follow these simple steps:
- In the MacKeeper dashboard, choose Antivirus
- Click Start scan
- If MacKeeper finds malicious files on your Mac, move them to quarantine.
