In this article you will find the following:
Everyone has a favorite search engine. Although the basic functionality tends to be similar, switching to another search engine can be quite inconvenient, especially when your default system changes unexpectedly. This can happen for various reasons: a configuration change made by mistake, the installation of legitimate software, or, more seriously, the presence of malware. Fortunately, resolving this issue is straightforward and involves adjusting your browser settings.
Has your default search engine changed unexpectedly? Are you thinking about switching search engines? No matter your situation, our team of experts is here to help. Read on to learn how to set your default search engine on a Mac.
If you also need guidance on configuring your web browser, we recommend checking out our tutorial on how to set a default browser on Mac.
What is default search engine on Mac
A search engine is a feature available in any web browser installed on your Mac that allows you to search the Internet. This software system provides a list of hyperlinks that direct you to web pages with information relevant to your search. The default one is the one launched automatically on your device.
To illustrate the difference, consider Google services. Google Chrome is a web browser, while Google itself is a search engine. The search engine can also be accessed through other browsers, such as Safari.
A note from our experts:
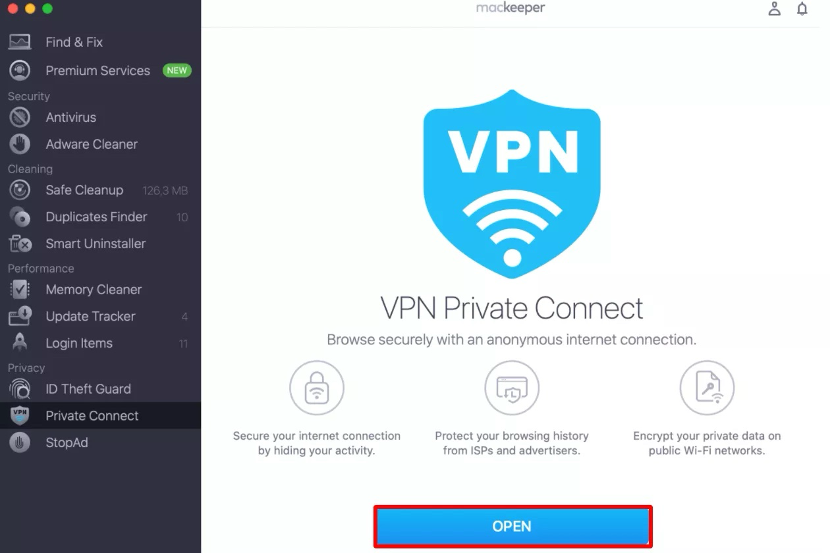
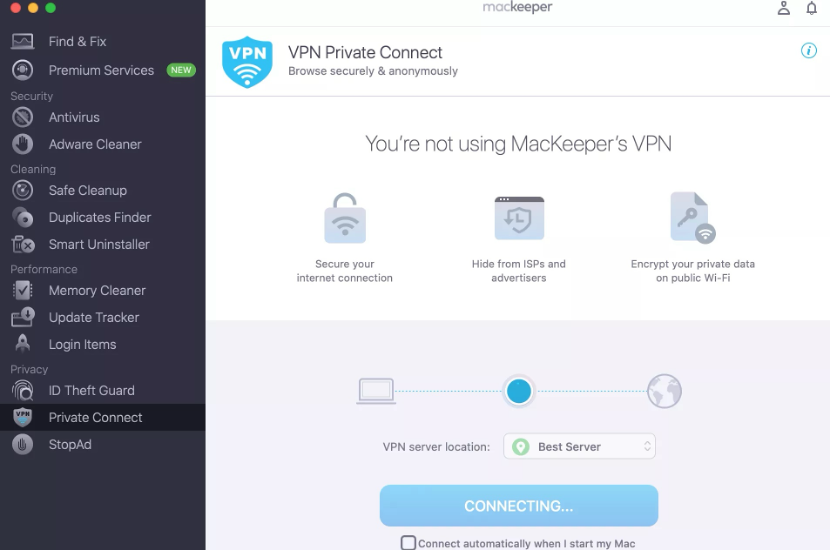
Find below our instructions to use MacKeeper’s VPN Private Connect on your Mac:
- Open the MacKeeper app.
- Under Privacy, select Private Connect.
- Hit Open.
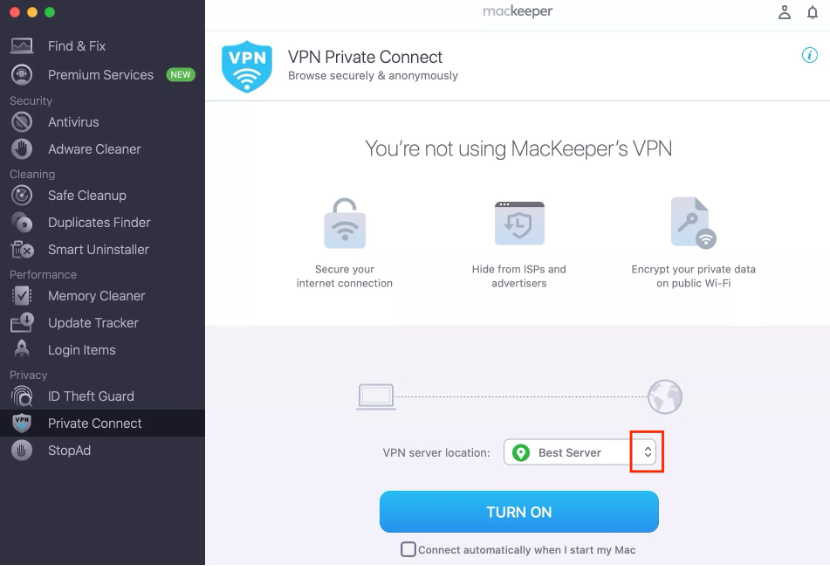
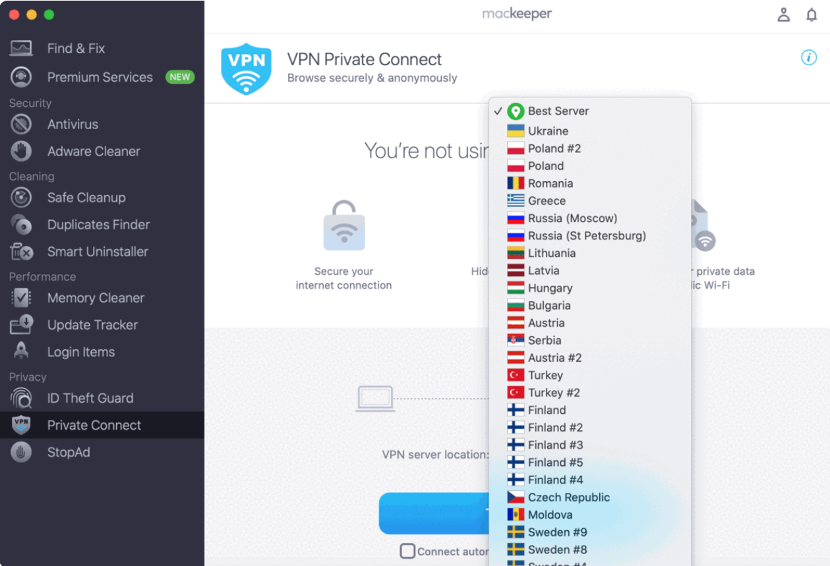
- Use the VPN server location dropdown menu to choose a location.
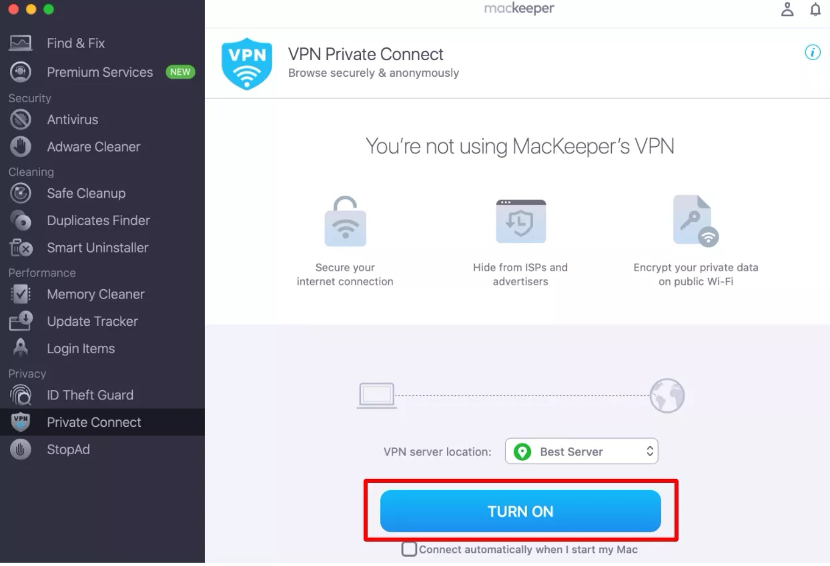
- Click Turn On.
Reasons to change default search engine on Mac
There are several reasons to change your default search engine. You may wish to revert to the settings you used before a program download “unexpectedly” altered them or enhance your Mac’s privacy and security.
We understand that the circumstances that brought you here may not be the most enjoyable, but we’re confident that by following our tips below, you’ll be able to reach the following goals and more:
- Improve search results relevance
- Enhance privacy and security
- Avoiding unwanted search engine redirects
1. Improve search results relevance
Not all search engines are designed the same way, nor are they meant for the same type of users. One reason you might consider switching search engines is to find an option that offers faster and more relevant results.
2. Enhance privacy and security
For those looking to enhance their privacy on a Mac, we recommend using search engines like DuckDuckGo. This is a significant reason to avoid the default option and reduce reliance on Google’s dominance.
3. Avoiding unwanted search engine redirects
Another common reason for changing your search engine is if some software–whether legitimate or malicious–has altered your settings. Unexpected changes to your search engine can often be a sign that your Mac has been infected.
If that’s the case, you may want to check out our tips on how to remove a browser hijacker.
How to switch default search engine on Mac
Whether you want to remove browser viruses or enhance your privacy, it’s time to change your Mac’s default search engine. The process is quite similar and straightforward across all main browsers. In short, you’ll have to go to your browser’s settings and switch to your preferred search engine from there. Particularly, there are a few options for you here:
- Change search engine in Safari
- Choose default search engine in Google Chrome
- Switch search engine in Firefox
- Change Opera search engine on Mac
1. Change search engine in Safari
Safari is the default browser on macOS, so we believe it’s likely you may want to change the search engine in Safari.
We recommend following these steps:
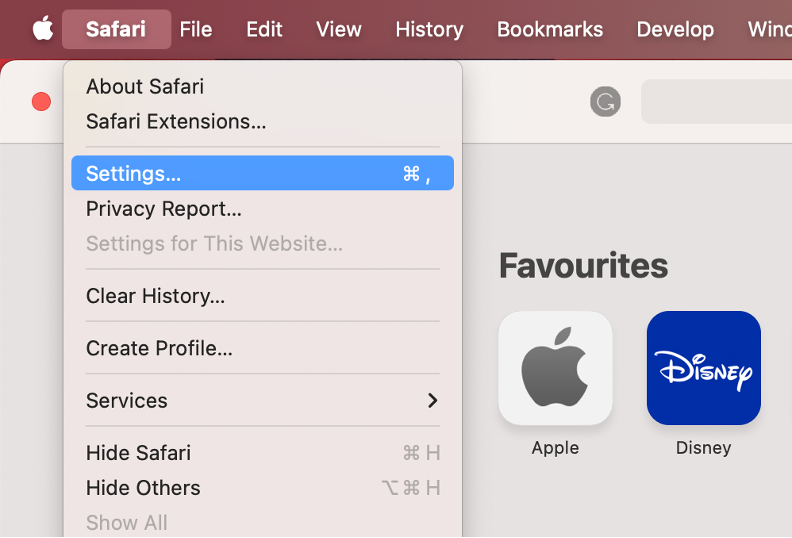
- Open Safari on your Mac.
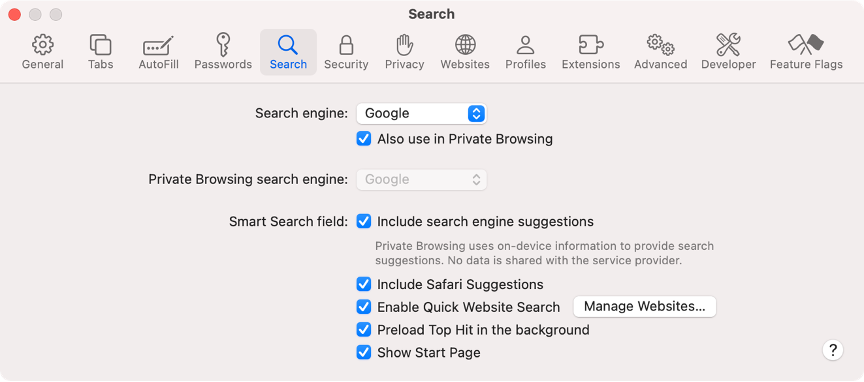
- Select Safari from the menu bar, then choose Settings.
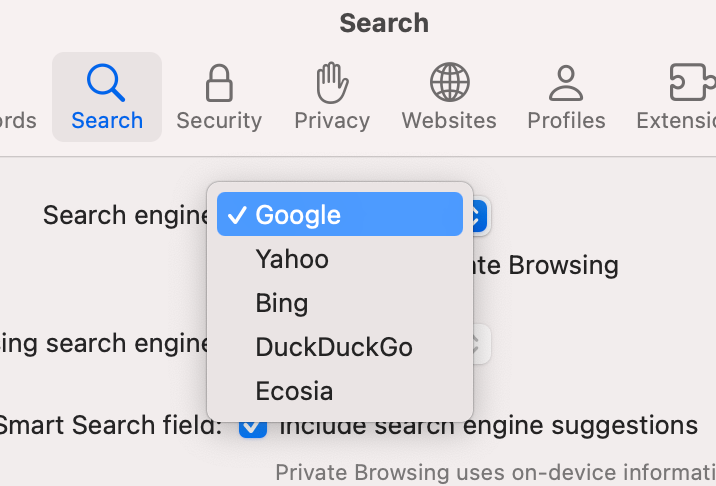
- Go to the Search tab.
- Use the Search engine dropdown menu to select your preferred search engine.
2. Choose default search engine in Google Chrome
Google Chrome is the most widely used browser across all operating systems. To fully utilize all its features, we suggest using Google as your search engine.
Follow our instructions below for a seamless experience:
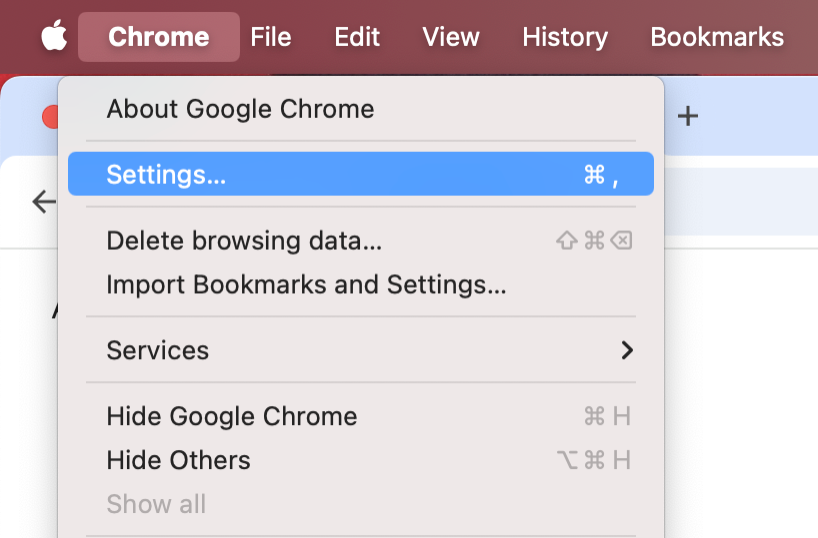
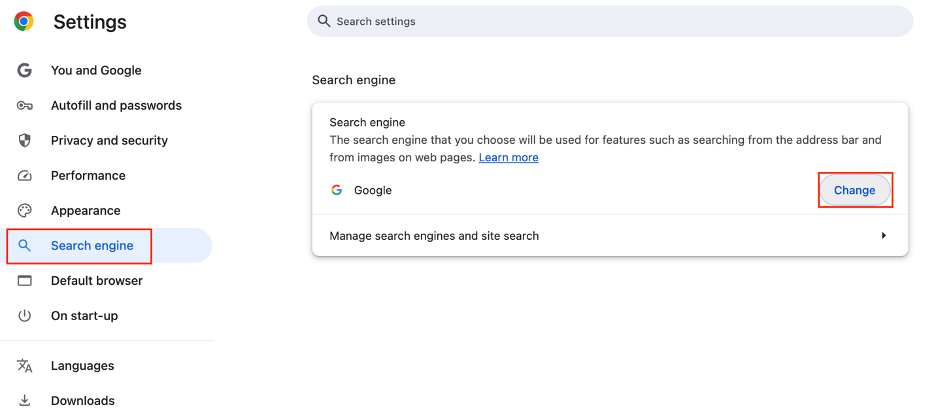
- Launch the Google Chrome app.
- Click on Chrome from the menu bar, then select Settings.
- Choose Search engine from the left-side menu.
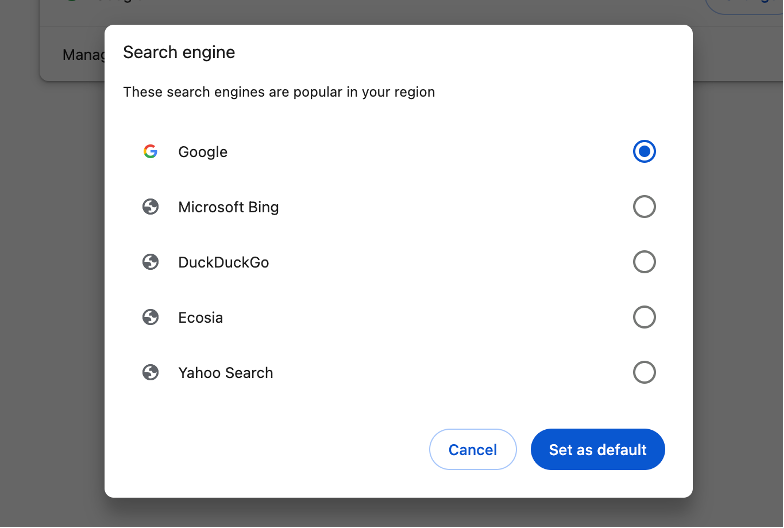
- Click the Change button, then select a search engine from the list.
- Hit Set as default to save your new configuration.
3. Switch search engine in Firefox
In our experience, configuring your search engine is just as easy if you’re using Firefox on your Mac. This allows you to enjoy all the benefits of other search engines like Google while still using your preferred browser.
We suggest you follow this simple process:
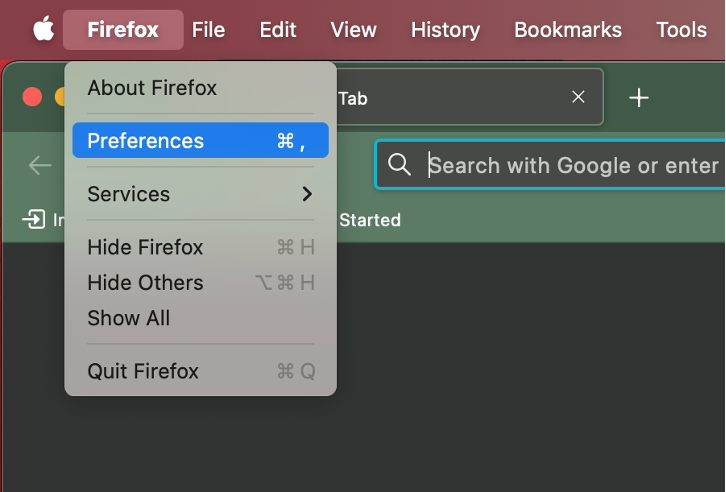
- Launch Firefox on your device.
- Go to the Firefox tab in the menu bar and select Settings.
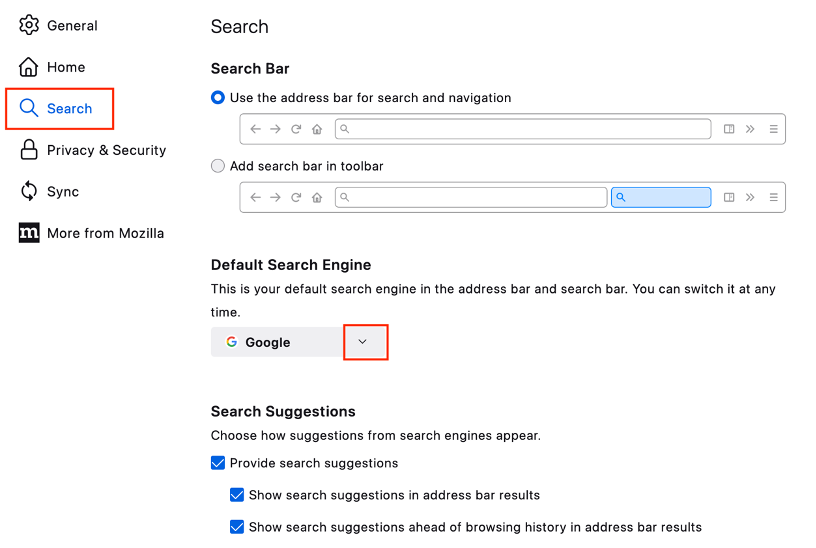
- Choose Search from the left sidebar.
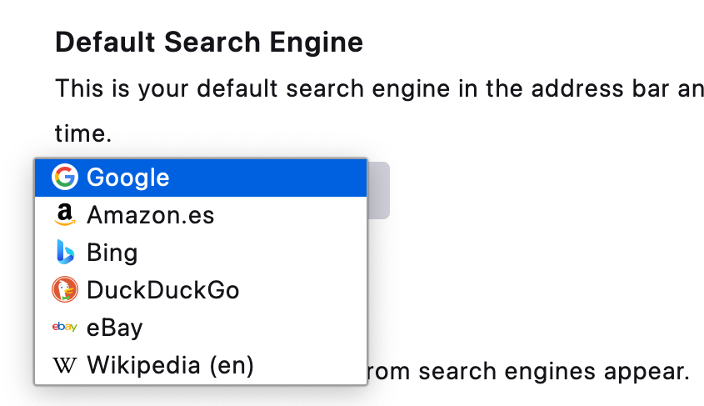
- Under Default Search Engine, use the dropdown menu to select your favorite search engine.
4. Change Opera search engine on Mac
If you want a private and secure browsing experience, we recommend using Opera on your Mac. You can also change your search engine to one that meets your needs.
Here are the steps to configure the search engine in Opera:
- Open the Opera browser on your Apple computer.
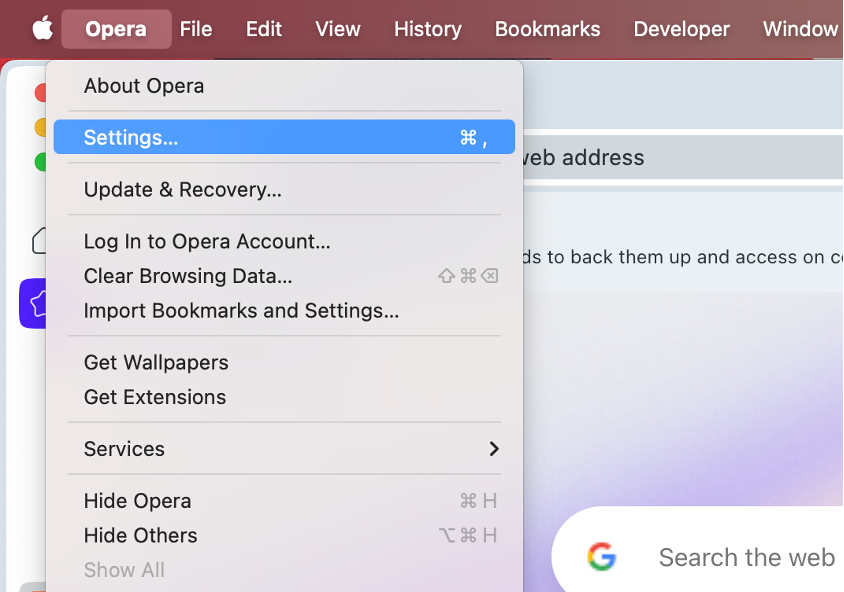
- Choose Opera from the menu bar. Then, select Settings.
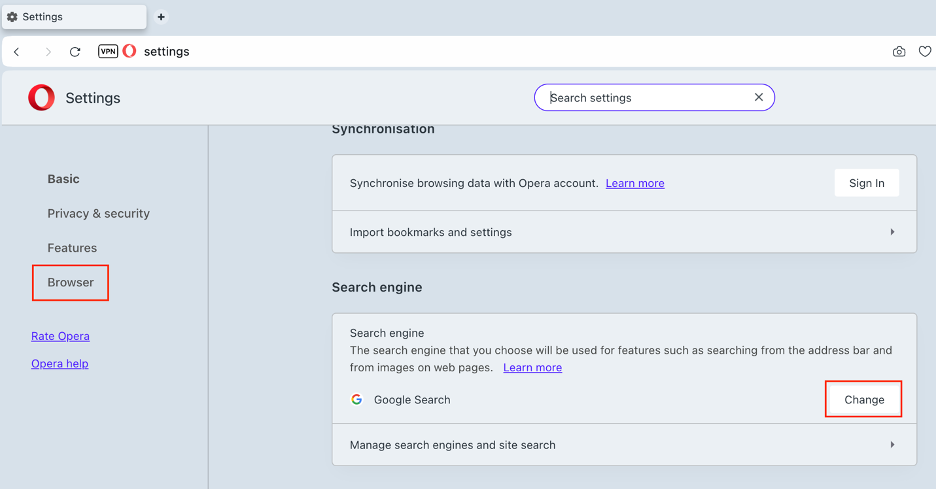
- From the sidebar, choose Browser.
- Scroll down until you find the Search engine section.
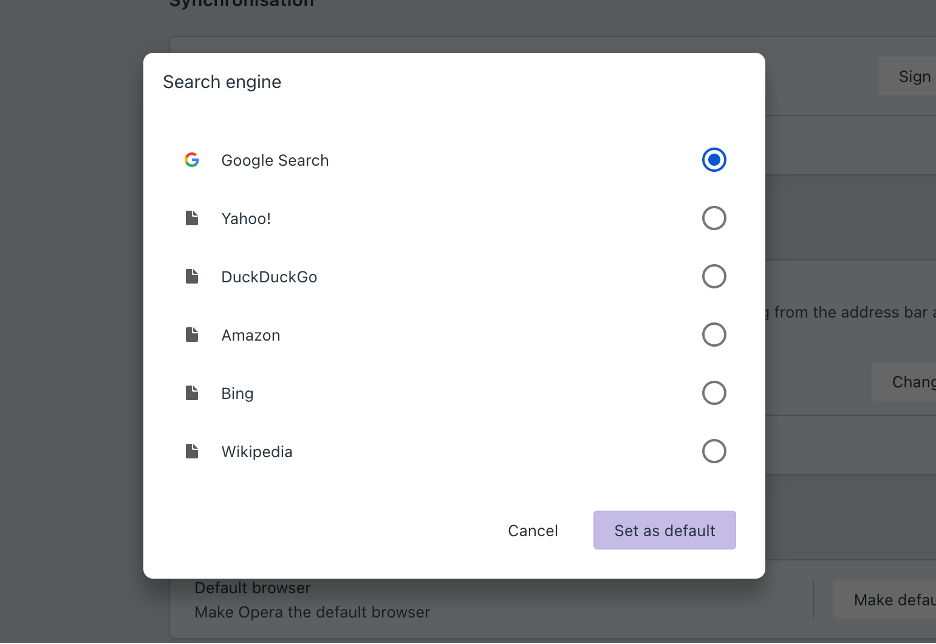
- Click the Change button, select a search engine from the list, and click Set as default.
This is how to set a default search engine on Mac
There are several reasons to switch search engines. One common reason is to remove annoying adware installed on your Mac. You may also simply be tired of your current search engine and want to explore new options. Another important reason is to find a search engine that ensures your privacy and security while browsing.
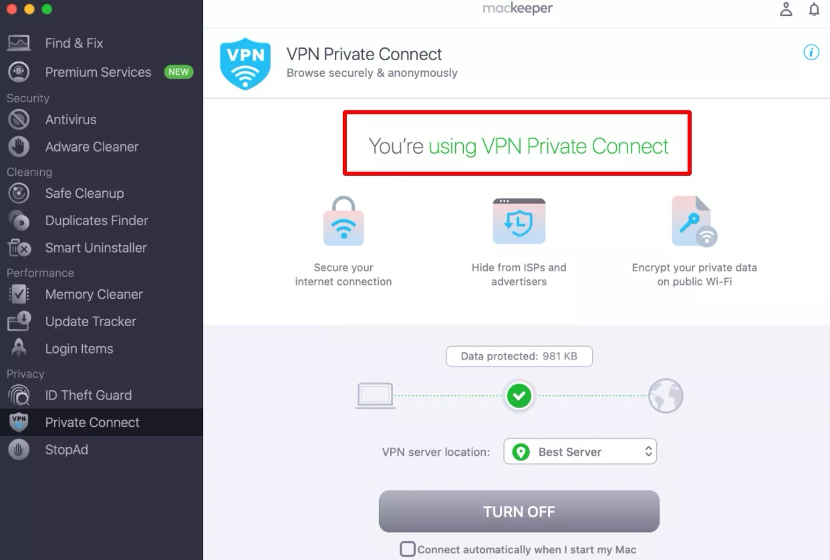
For enhanced privacy, we recommend using MacKeeper’s VPN Private Connect tool. This tool will provide you with the privacy you desire, regardless of the browser you use or the search engine you’ve set as your default.
Follow our simple instructions:
- Download and launch MacKeeper on your Mac or MacBook.
- From the left sidebar, choose Private Connect under Privacy.
- Click the Open button.
- Use the arrows to select your VPN server location.
- Hit the Turn On button.
- Once the connection is successful, you’ll see the “You’re using VPN Private Connect” on your screen.
Changing the default search engine on a Mac is a straightforward process and can be done even by those who aren’t very tech-savvy. Don’t hesitate to make the switch and enjoy the benefits offered by your favorite search engine.


