In this article you will find the following:
A SMART hard disk error isn’t something any of us wants to see on a Mac. Long story short, they can indicate a computer failing and on the road to a major crash. And yes, that’s bad. But they can also sometimes be false alarms.
If you’re currently facing this status of error on your MacBook Pro or Air, don’t worry too much, because we can walk you through the steps to repair or to bypass the issue. And we can help you avoid SMART errors in the future. But first, what is a SMART error, anyway?
SMART—and note it’s also often written as S.M.A.R.T.—is an acronym for “Self Monitoring Analysis and Reporting Technology System.” It's a native mechanism Macs use to monitor hard drive status and to find and report operational failures and errors.
Because a hard disk failure can lead to a loss of critical and irreplaceable data, it’s always best to treat a SMART error seriously and to know how to repair SMART errors on Mac. Once you have a better handle on your system, then you can consider learning instead how to bypass SMART errors on Macs.
Before we begin
Before we talk about fixing SMART errors on Mac, let’s talk about how to minimize the chance of all errors on your computer. One way is to use an external hard drive that provides added processing speed and power. Also make sure to use MacKeeper’s Antivirus to keep your system safe:
- If you haven’t already, download and install MacKeeper on your Mac
- Launch MacKeeper by clicking the icon at the top toolbar on your screen
- Click Antivirus on the left hand column on MacKeeper
- Click NEXT on the next window to enable MacKeeper antivirus software, then click OPEN PREFERENCES on the window that pops up
- In Preferences, click ALLOW to let the MacKeeper extension to run.
What is SMART?
As noted, SMART errors mean that system is there to tell you if your Mac is facing damage from sources like:
- Water or excessive humidity
- Electrical surge or battery failure
- Internal mechanical parts failing
- Internal or external heat damage
- Physical shock (impact of an object hitting the Mac or a drop, e.g.).
Your Mac’s SMART system doesn’t prevent damage, but it does tell you of potential impending issues caused by damage. Think of it like a smoke alarm: the smoke alarm doesn’t stop the fire, but it warns you about it so you can stop the fire yourself. Or, in this case, so you can fix the errors or at least backup your data.
Troubleshooting SMART hard drive errors 101
So you have gotten a SMART error on your Mac—what do you do next? You backup your data first, of course. And then you go through a course of repairs that can have your computer working properly again, and often in very little time.
Those steps include:
- Performing routine maintenance
- Clearing viruses and malware off your Mac
- Running “First Aid” via the Disk Utility tool
- Backup and erase your hard disk.
Perform routine maintenance on your Mac
An overworked and under-maintained Mac is always at greater risk for SMART errors. If it has been a while since you performed these steps, do them all now. And do them all weekly or at least monthly, too.
1. Shut down your computer fully and let it cool, then restart
2. Empty the trash and close all unnecessary programs and windows
3. Use MacKeeper’s Safe Cleanup tool to clean your computer
4. Backup your Mac to the cloud or to a hard drive.
Check your computer for a viruses
Once you have performed routine maintenance on your Mac, it’s a good idea to make sure there’s no malicious software lurking about on your system. That’s because on a Mac, some viruses can mimic the effects of a drive that’s breaking down on you.
You can find and remove malware on a Mac using MacKeeper’s Antivirus tool, and once you know it’s virus free, you can address any actual problems your system may have.
Use your Mac’s Disk Utility Tool
A Mac’s Disk Utility tool is there to help repair issues before they become problems. It’s like responding to that little off sound in your car’s engine before the actual warning lights go on.
When you use the Disk Utility First Aid function, you can potentially ward off serious problems and can extend the operational life of your Mac, while also, of course, parenting a loss of data. To use the First Aid tool, follow these steps:
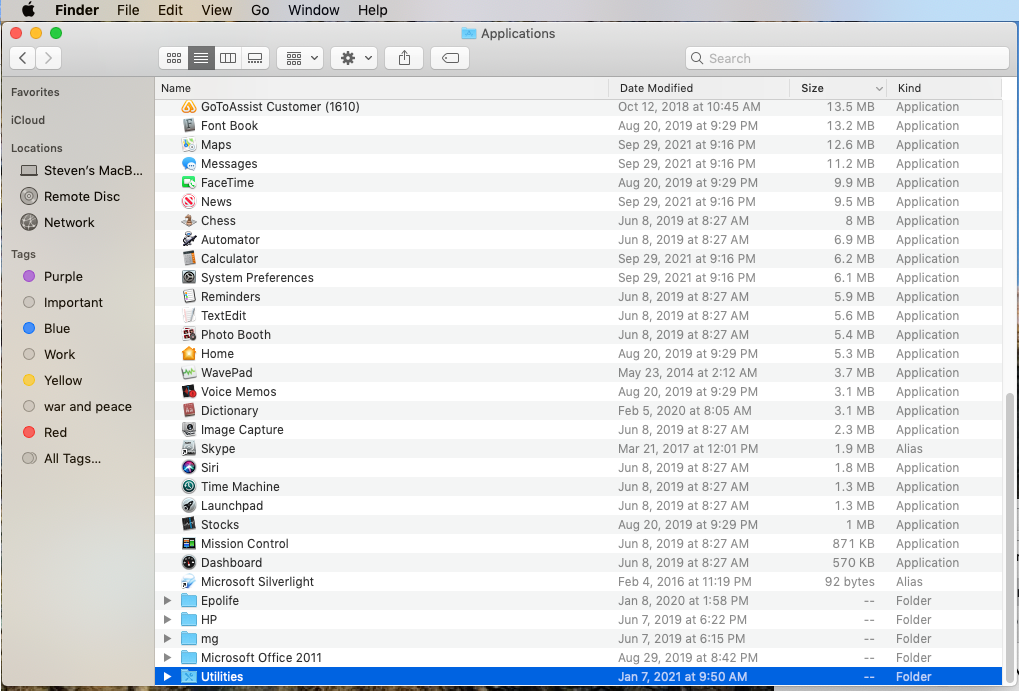
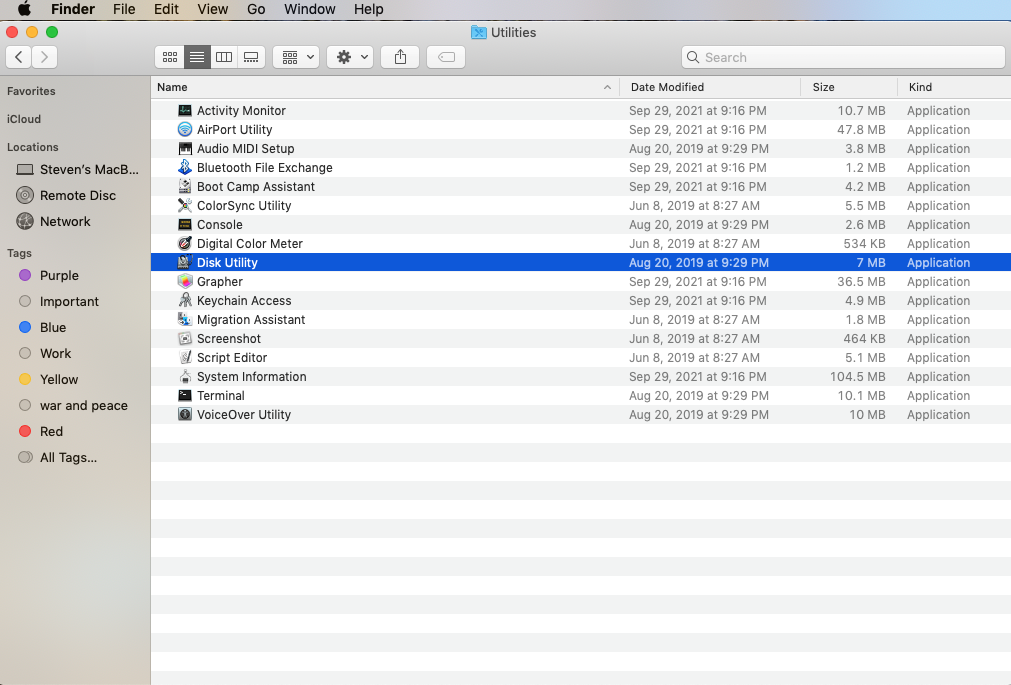
1. Under Finder’s Go tab click Applications
2. Click Utilities then select Disk Utilities
3. Click First Aid at the top of the window the pops up
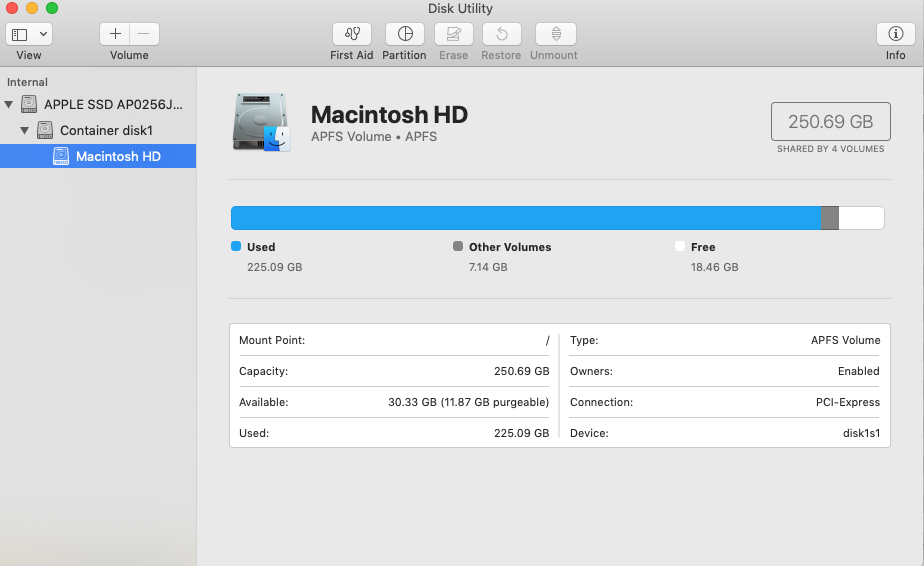
4. A window will pop up reading in part “First Aid will check the volume for errors. It’ll then repair the volume if necessary”—click Run on that window, then Continue on the net
5. Follow the prompts to run the program.
How to check SMART status on your Mac
OK, so you’ve done all the steps and, in theory, your Mac should be in good shape again, right? Well, let’s check it out using these simple steps.
1. Open Finder and under Go click Applications
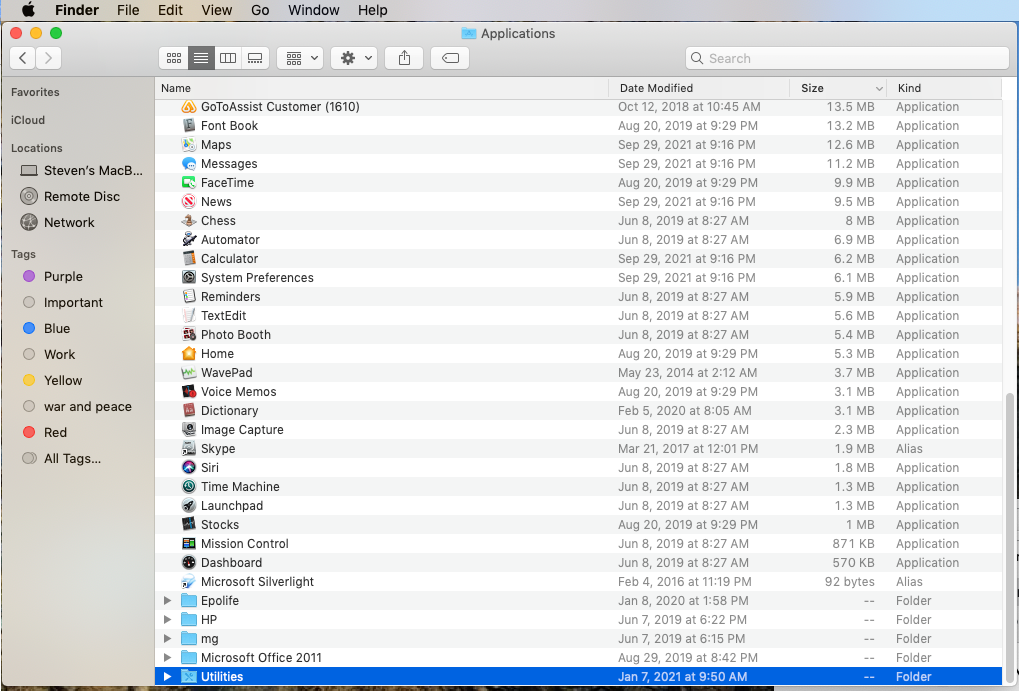
2. Click Utilities and then hit Disk Utility
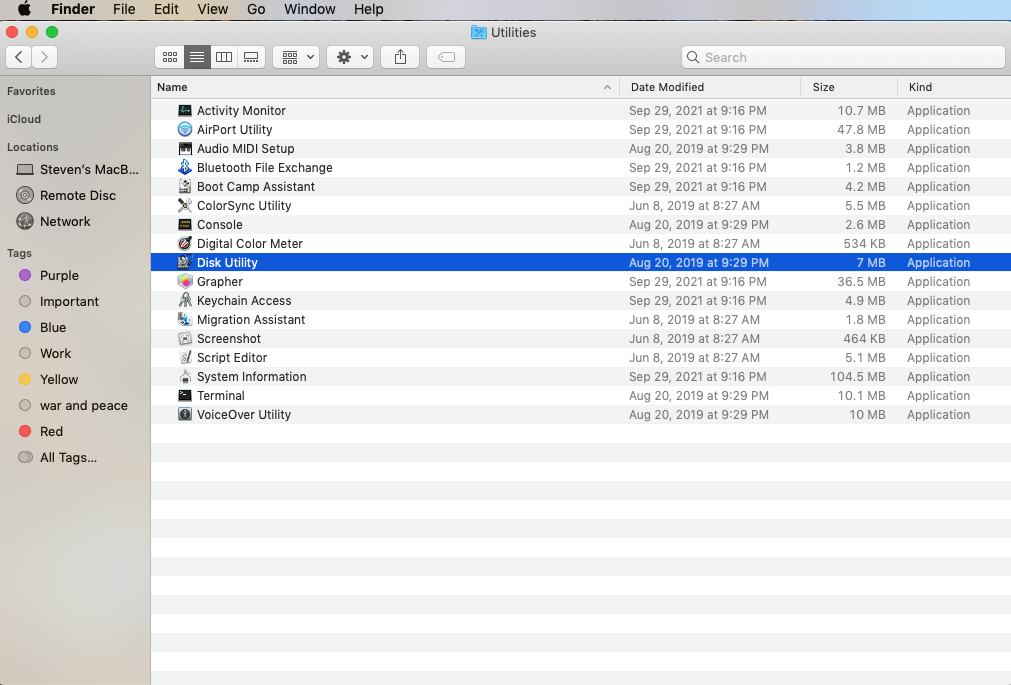
3. Click “primary disk” on the left side of the window
4. Check the S.M.A.R.T. status.
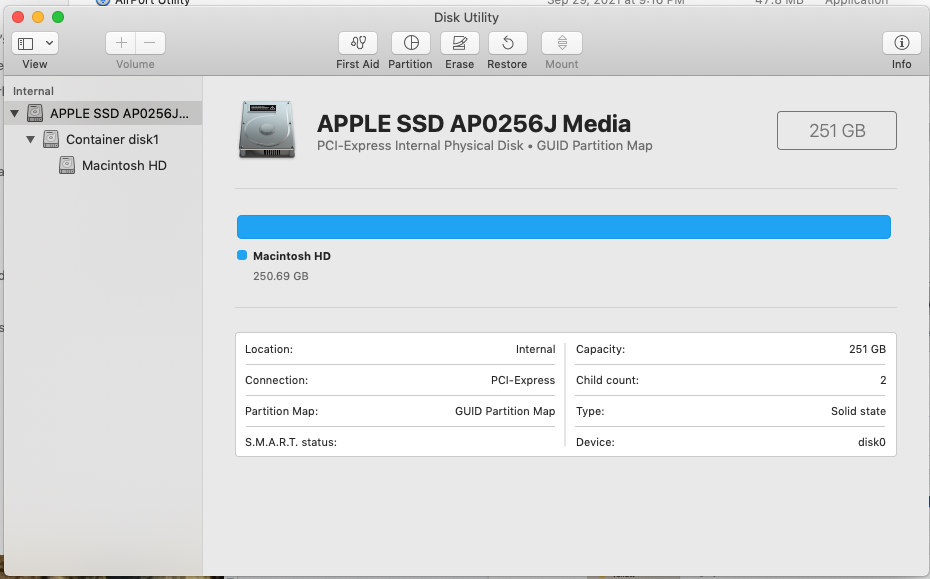
If the status reads “Verified,” then you’re all good to go. If it says “Failing,” or any other negative wording, you need to try the SMART error repair steps again and/or get your computer to a professional repair shop. Or you may need a new drive, if not a new Mac, we’re sorry to say!
How to prevent SMART disk error on Mac
If you have reason to believe you may be headed for a SMART error, you may be able to stave off the issue. Watch out for:
- Frequent overheating
- A revving fan
- Program freeze ups and software failures
- Unexplained shutdowns.
Regularly using an application like MacKeeper to cleanup your Mac is the best thing you can do. Not only can it reduce the strain placed on your system by clearing clutter and repairing many errors, but it can also keep you apprised of any potential coming problems.
In conclusion…
Now we know that a SMART error may not indicate the “death” of your Mac; not if you move fast to fix the problems plaguing the computer. But we also know that SMART errors may well be the sign of a hard drive’s impending failure, so always make your first step the backup of your system.
If you can backup a Mac to the cloud, that’s always a fine approach, but knowing how to find an external hard drive and backing up there is a good move, too. That means you can always access your data even when you’re not online, and with MacKeeper’s Antivirus, you can rest assured your data is safe whenever you’re.


