In this article you will find the following:
As the world becomes more digital, some hardware is becoming a thing of the past. But USBs are still a thing. Many people keep a few around as a backup measure. Maybe you’ve never used a USB before or need a refresher course on how to format it. You’ve come to the right place.
Before we begin
We do so much on our desktops on any given day. Between downloading photos, email attachments, and more, we’ve clogged up our devices before we even know it! And most of the time, we don’t realize this is the case until our laptops start running slowly or doing weird things like crashing and glitching.
Often, you’ll find you have tons of duplicate files taking up space on your computer. Finding and deleting them manually would be a mission. MacKeeper’s Duplicates Finder takes care of this task for you. It scans your Mac for duplicate files and images and removes them at the click of a button. This frees up space on your Mac, which allows it to breathe. Why not try it and see for yourself?
- Download MacKeeper on your Mac
- Click on Duplicates Finder in the left pane
- Now click the Start Scan button and wait a few moments as MacKeeper sorts through your Mac
- Once this is done, MacKeeper will show you all the duplicates it found. Make sure all the duplicates you want to remove are selected, or click the Check All button
- Finally, click the Remove Selected button to start the process.
In this article, we’ll show you how to format your USB, so you can continue to use it to save important files.
How to choose a file system
The first decision you’ll have to make before cleaning or formatting a USB is choosing a file system.
File systems are responsible for deciding how data should be stored on a device. Factors to consider when choosing an appropriate file system include:
- The size or capacity of the USB stick
- The size of the files you want to store on the USB stick.
That’s because different file systems have different limitations, as you’ll see below. There are a handful of file systems available, but below is a list of the ones relevant to Mac (MacBook Pro, etc.). We’ve excluded NTFS, which is for Windows.
- HFS+ or macOS Extended (journaled). Best suited for large capacity USB sticks, up to 2 TB for data and 2 TB for files
- HFS+ or macOS Extended (case-sensitive and journaled). Similar to the file system above, with the addition of the ability to distinguish between upper and lower case. For example, it can differentiate between image.jpg and Image.jpg. It also supports up to 2 TB for data and 2 TB for files
- APFS. This is one of the more modern file systems. It was created by Apple and is often used with Apple gadgets
- FAT or FAT32. Developed by Microsoft, this file system supports both macOS (previously OS X) and Linux devices. The file size is capped at 32 GB in version FAT32, but it can take up to 2 TB. It allows a maximum file storage of 4 GB
- ExFAT. This is an enhanced version of FAT, but it’s not supported by many older systems. ExFAT allows 128 PB data storage and 16 EB for files.
How to back up before formatting a USB drive
It’s important to back up the data on your USB before formatting it, especially if you can’t afford to lose it. The backup method you choose will depend on how large the files are and the amount of space available on each platform.
Back up to the internal drive
This is the easiest option if you want to back up small files and your internal drive has enough space to accommodate them. Connect your USB device to your Mac, then copy the files from your USB to the new folder you’ve just created using the copy-and-paste method
Back up to another USB device
Use another USB port to connect your additional USB stick, then follow the same method above to back up your personal information
Back up to iCloud
Select the files you want to back up in your USB and drag and drop them to the iCloud folder in Finder. From there, you can organize them according to your preferences.
Unable to install macOS? Create a bootable USB on Mac to help.
How to reformat your USB on Mac
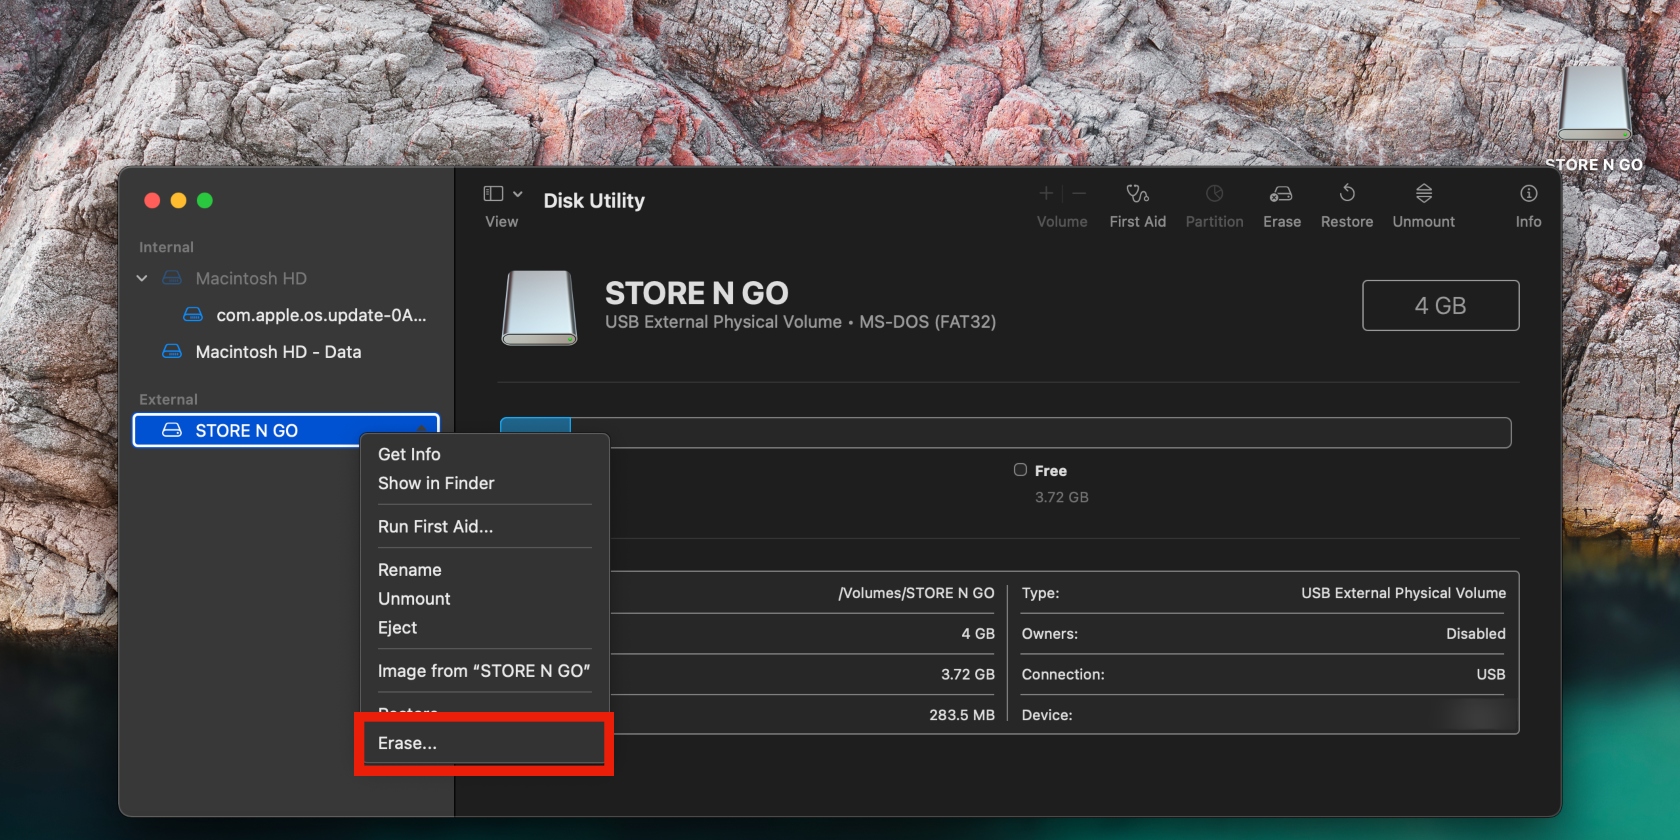
Instead of Settings, Disk Utility is where external storage is managed on Mac, so that’s where you’ll be formatting your USB. Follow the steps below to reset your USB on Mac:
- Hit the Cmd + Space bar keys, type “Disk Utility” in the search bar, and press Enter
- Double-click on the USB name on the left and select Erase to start erasing the flash drive on Mac

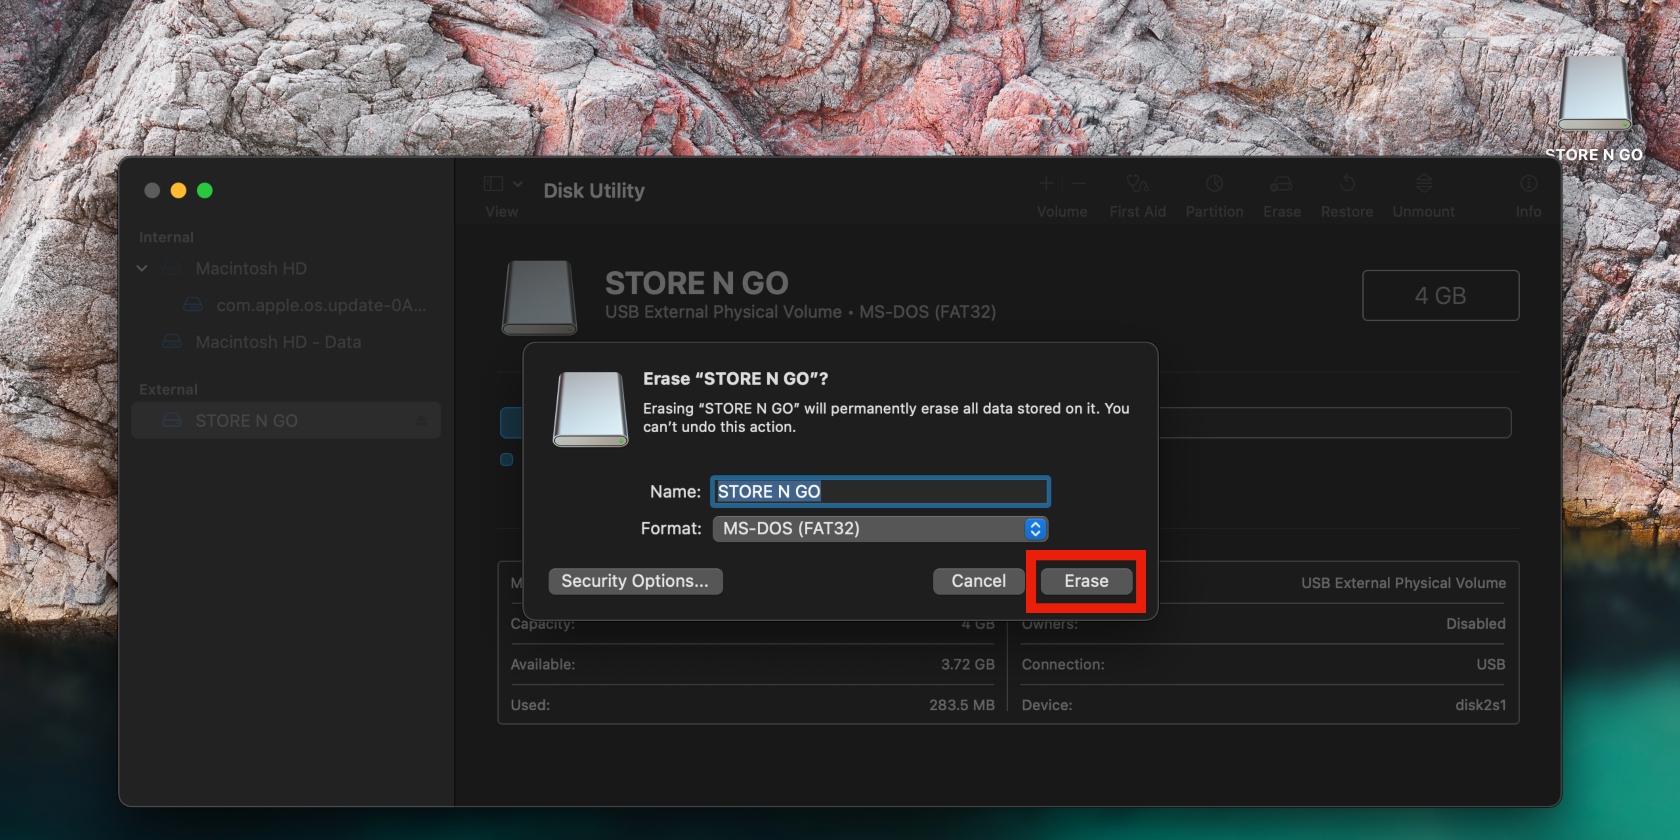
3. The next window will preview the USB name and a pre-selected file system, which you can change by clicking on the blue arrows
4. Once you’re happy, click the Erase button. This will clear your flash drive on Mac.

As a bonus, learn how to reset USB ports on Mac.
How to recover lost data from a formatted USB drive on Mac
If you realize that you’ve wiped data you had not backed up, there are a few options to get it back after reformatting: via the Trash can (provided you haven’t emptied it) and recovery software.
Recover lost data from the Trash can
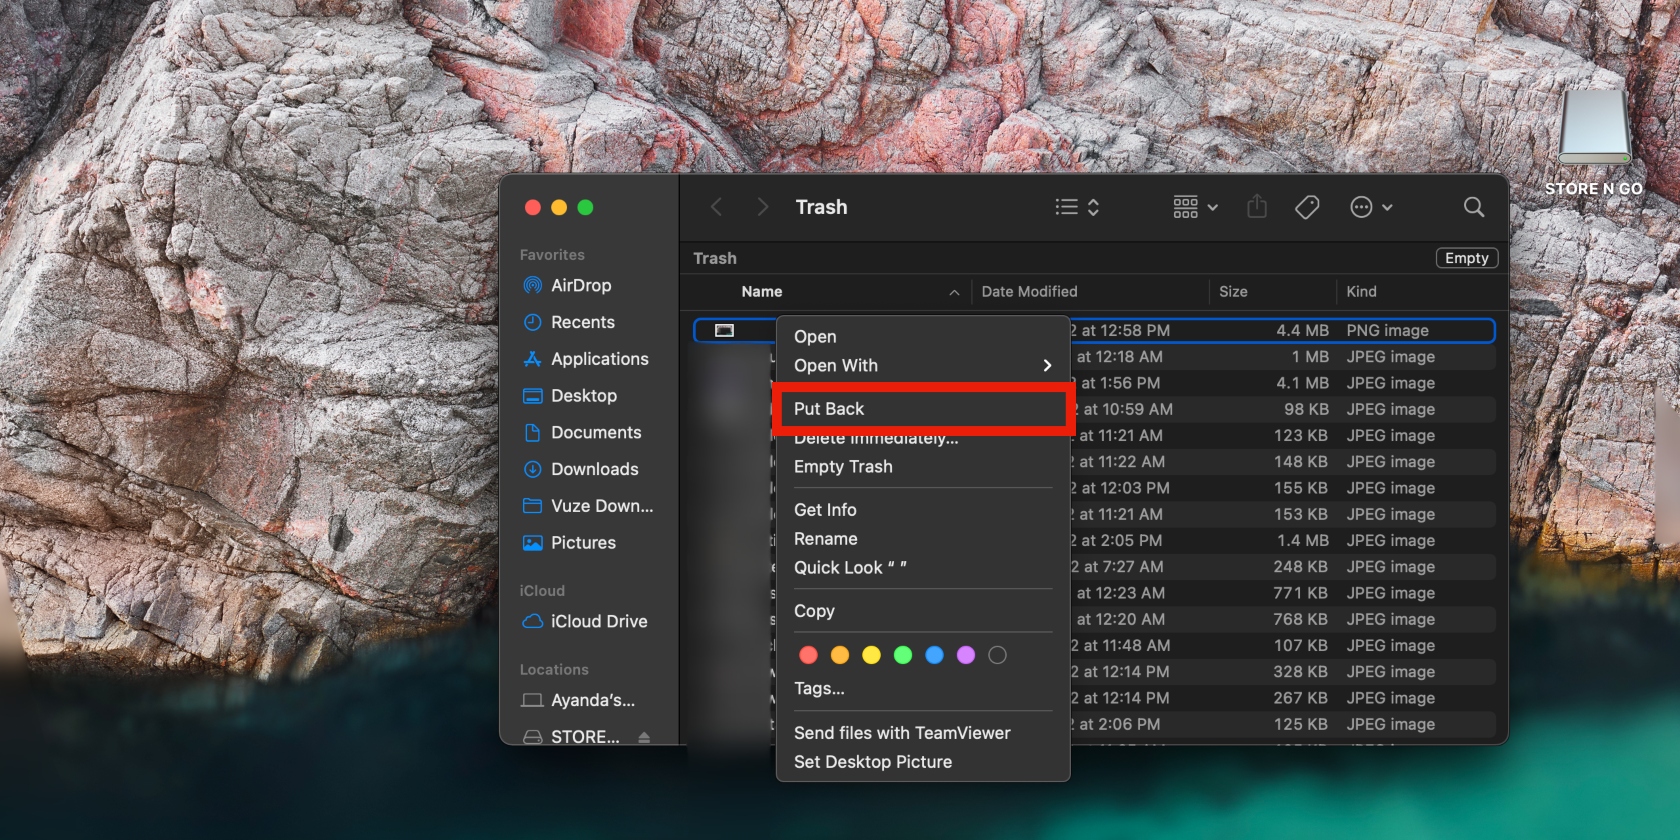
Find the items you’re looking for in the Trash can in the Dock, then double-click on them and select Put Back.

Sometimes, external drives have their own Trash folders. To access them, press Alt + cmd + . (period) and look for a file named .Trashes. Open the file to explore your lost files.
Recover lost data using a recovery software
As you may have figured already, technology has a fix or program for nearly everything out there, including recovering lost data.
Here are some examples of some worth trying:
Remember to do your research to find a suitable recovery software.
Manage and format your USB safely
Few people have well-organized USB sticks. The rest of us throw everything in there and organize our files once in a blue moon. This means we often overload our USB sticks with duplicates that clog up the memory.
Use MacKeeper’s Duplicates Finder to quickly and safely find and remove duplicates of files and photos, so your USB can breathe. This simple action will make backing up and formatting it a breeze.


