In this article you will find the following:
In September 2022, American rapper PnB Rock was killed in a Los Angeles waffle house shortly after his girlfriend posted a photo along with their location online. The incident raised awareness of the dangers of making your location public.
Removing your location from photos on iPhone and Mac is one of the key ways to keep your whereabouts private. Your iPhone records the GPS location where you took a picture, so it can quickly identify and organize it in your phone’s Photos folder. The location is shown at the top of the image and is carried over when you share it with another iPhone user.
Before you begin
If you take photos and screenshots often, chances are you have duplicates that could be clogging up your computer. MacKeeper’s Duplicates Finder is the solution you need to safely and quickly remove duplicate photos from your Mac, so you can free up some much-needed space. Try it and see for yourself.
- Download MacKeeper on your Mac
- Select Duplicates Finder on the left pane
- MacKeeper will now show you the number of duplicate photos it found. Click on Remove Selected.
That’s it, you’ve now gotten rid of unnecessary copies. This article will show you all the ways to remove the GPS location information from your photos on iPhone and Mac, so you can stay safe. Let’s get started.
How to remove geotags from iPhone photos
It’s important that you learn how to remove your information from the internet and, as we’ve mentioned, location information in photos is no exception.
Fortunately, the process of removing geotags from your iPhone photos is straightforward. Just keep in mind that you can’t remove geotags in bulk, so you’ll have to do this manually for each photo. It may sound tedious, but it’s worth taking the time to do.
Follow the steps below to delete location data from photos on iPhone using the Photos app:
- Open the Photos app on your phone and select the photo whose location information you want to remove
- Tap the photo to reveal the Information icon and tap it. Alternatively, swipe up the photo to reveal its data
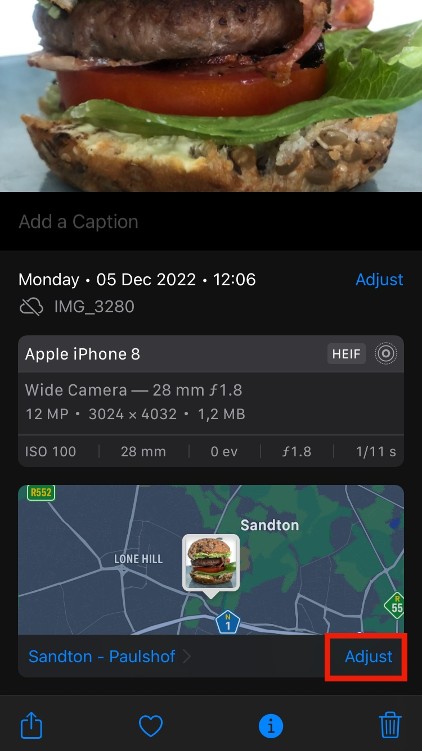
3. Now tap Adjust in the bottom-right corner of the map (you’ll find it at the bottom of the screen)
4. Select No Location on the window that pops up. It should be directly below the location information.
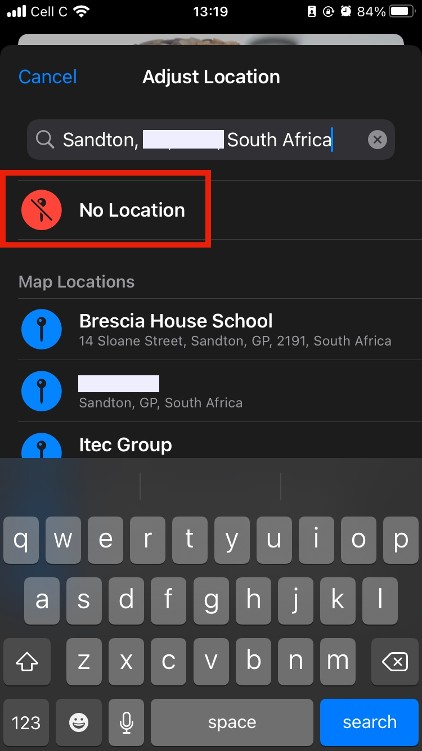
That’s it, your photo will no longer show location information.
Please note: The method for deleting photo location data is the same for both iPhone and iPad. So, you can follow the same steps on your iPad device.
Remove location while sharing photos on iPhone
You’ve been talking to a new Tinder connection for a few weeks, and they finally ask for a new photo of you, but you haven’t removed the location data. No worries — you can quickly remove it while you send the photo.
Below are the steps you should follow to remove GPS location data from photos on iPhone when sharing them:
- Open the Photos app on your iPhone
- Select the image you want to remove location data from and tap the Share button (it’s the one with an arrow pointing upwards)
- Tap Options at the top of the sharing screen

4. Now toggle Location off. At this point, you can choose to exclude all the metadata available for this photo by toggling All Photos Data off and click Done.
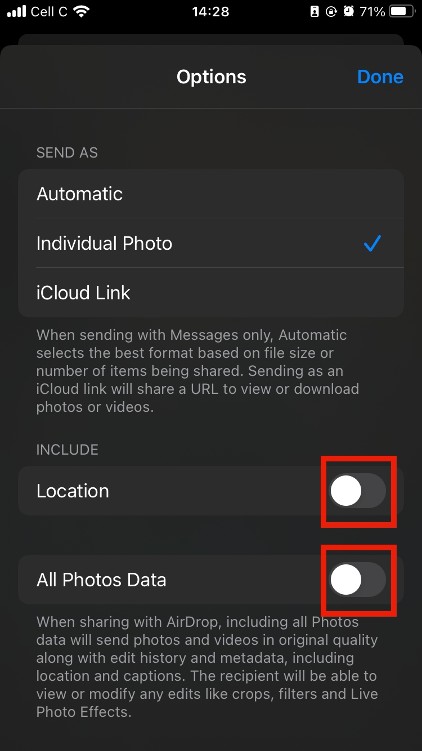
Need to move your iPhone photos to your computer? Learn how to transfer photos from iPhone to Mac.
How to remove location information from photos on Mac
Removing photo location metadata isn’t just limited to the iPhone. You can do the same on a Mac. We’ve included various methods to achieve that.
Using Preview
The process of removing a photo’s location information on Mac is slightly different, although just as simple. For this process, we use the Preview app instead of the Photos app.
Follow the steps below to remove GPS location data from photos on Mac with the Preview app:
- Go to Finder > Applications > Preview on your Mac
- Click on the folder with the photo you want to remove location metadata from and open the photo
- Press the Command-I keys and click on the More info tab (it’s the circle with the letter “i” in it)

4. Now click the GPS tab > Remove Location Info.
Please note that if you don’t see a GPS tab, it means that your photo doesn’t have location information recorded.
Using Photos
Of course, you can also remove a photo’s GPS location data directly in the Photos app on Mac as on iPhone. Below is the process to follow to remove GPS location data from photos on Mac with the Photos app.
- Go to Finder > Applications > Photos on your Mac
- Find your photo and open it
- Click the Image tab at the top of the screen (on the Photos menu), then click Location
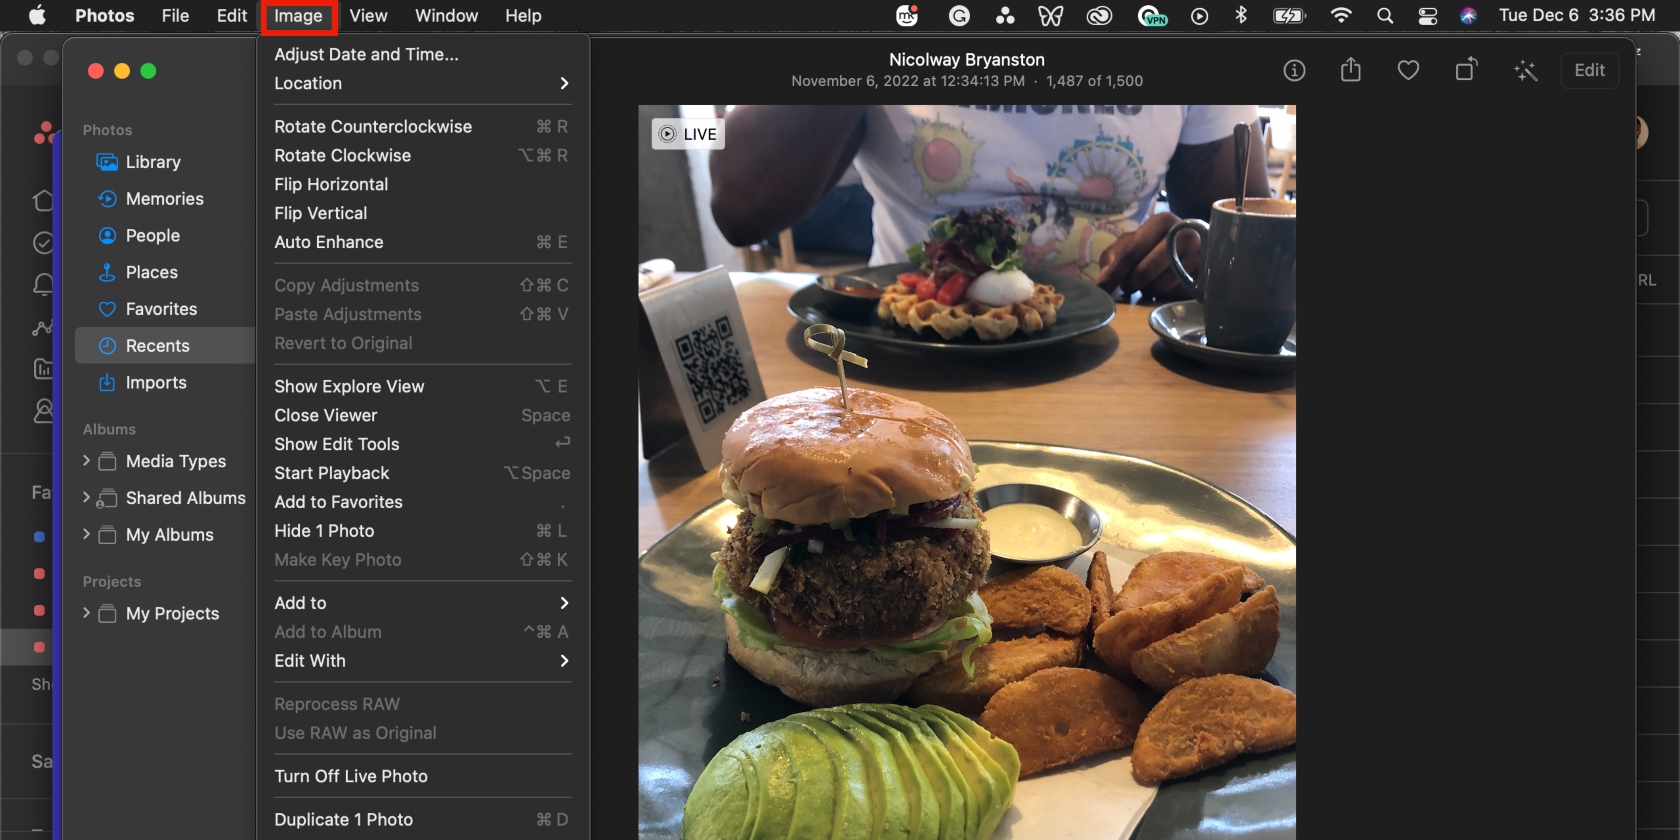
4. Select Hide Location from the options that appear. If you had manually added location information, you can select Revert to Original Location instead.
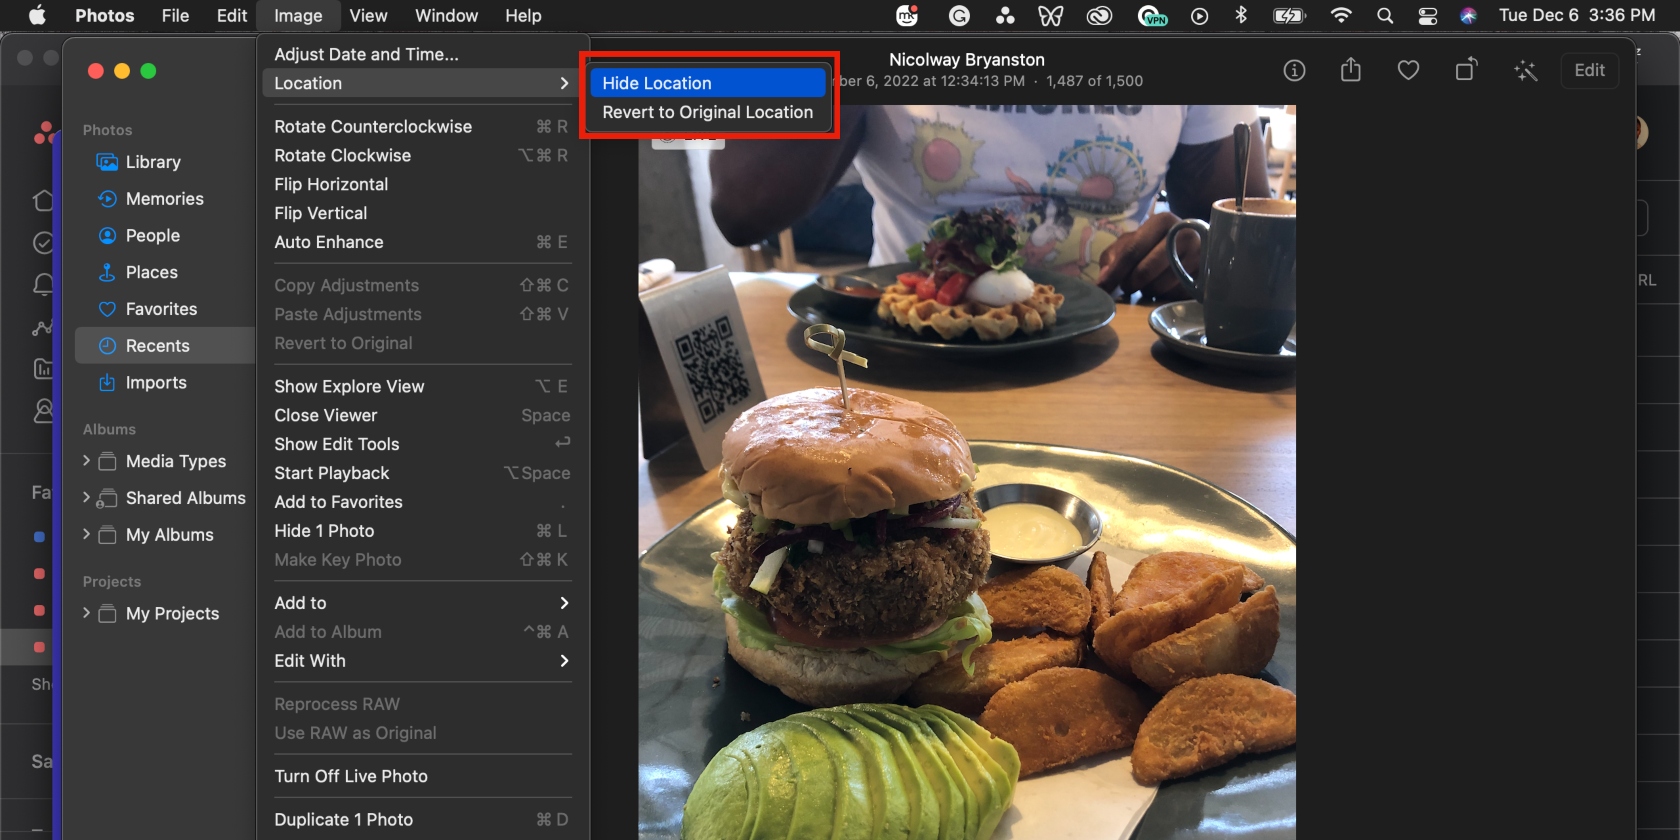
Note: The Photos app also has an option to export photos without location data included.
Conclusion
As you’ve seen, removing location data from photos on your iPhone and Mac isn’t difficult. Prioritize this step if you want to stay safe and protect personal information, like where you stay or where you were when you took a picture. Especially if you share it before switching locations.
Before we conclude, have you ever considered how many duplicates you have of your photos on your Mac? It’s common because we usually download a picture again when we need it instead of taking the time to look for it in our files. For example, you’d do this when looking for a photo to quickly include with your job application. But this clogs up your Mac.
MacKeeper’s Duplicates Finder is an easy and effective way to get rid of duplicate photos on your Mac. This helps you save more storage space and organize your device better. Why not try it and see for yourself — download MacKeeper and start getting rid of unnecessary photocopies with Duplicates Finder today.


