Setting up a virtual private network (VPN) on your Mac will give you anonymity and privacy online. And as well as preventing third parties from spying on you, a VPN can also help you to get around location-based restrictions on online content. For example, you may be able to watch Netflix content that’s meant for a different country. That’s because VPNs hide your IP address, which gives away your location.
If you decide to use a VPN for your Mac, you’ll be putting yourself in control of your connection and your data — you’ll just need to set it up first. If you’re unsure how to set up a VPN on Mac, follow these steps.
Before we start
If you want to set up secure, anonymous browsing, you’ll need a VPN client for your Mac. You can use MacKeeper’s own VPN Private Connect tool for this, allowing you to reroute your internet data through one of hundreds of servers across the planet.
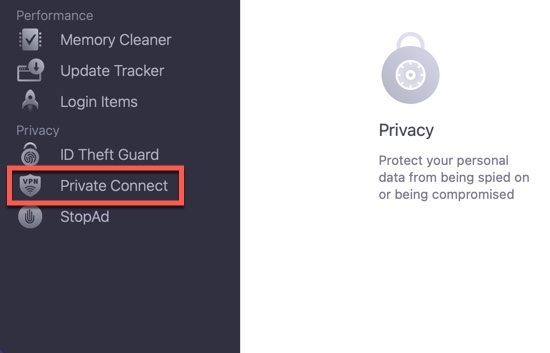
- Open MacKeeper and press Private Connect
- Click Open
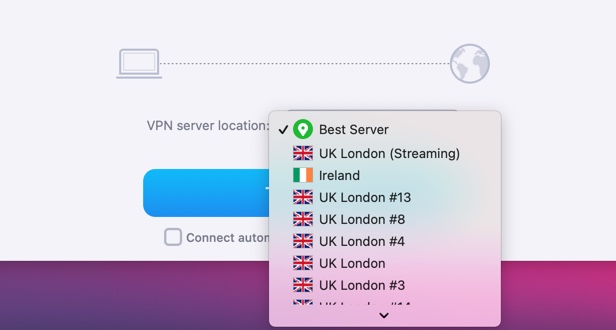
- Select your preferred server location
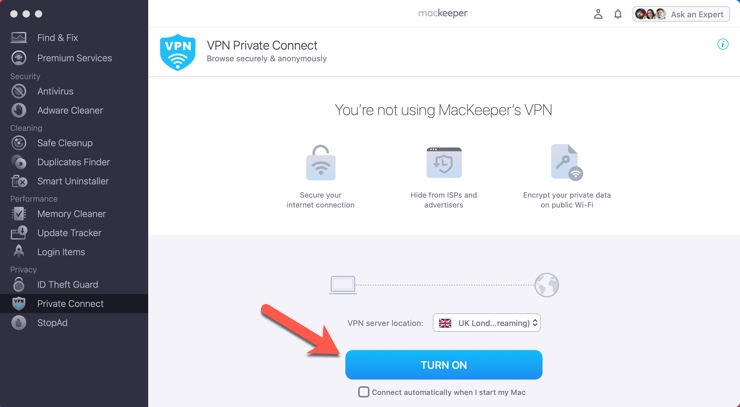
- Click Turn On to connect
VPN Private Connect is just one of several tools that make MacKeeper one of the best security suites for your Mac. If you want to give it a try, download MacKeeper today.
In this article you will find the following:
How to set up a VPN connection on a Mac
While it’s usually preferred, you don’t need to use a VPN provider’s own client to set up a VPN on a Mac. You can use macOS’s built-in VPN client to connect to a third-party provider, although you’ll need the information from your provider (such as server IP addresses and configuration details) to be able to do this.
You can import this information using a VPN configuration file, or you can input the information from your provider manually in your Mac VPN settings menu.
Here’s how to configure VPN on your Mac:
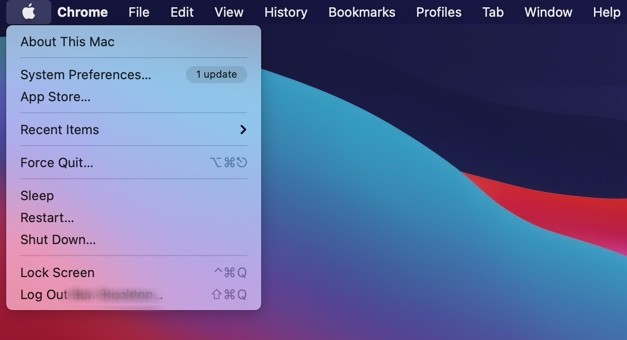
- Click the Apple logo in the top-left, then select System Preferences
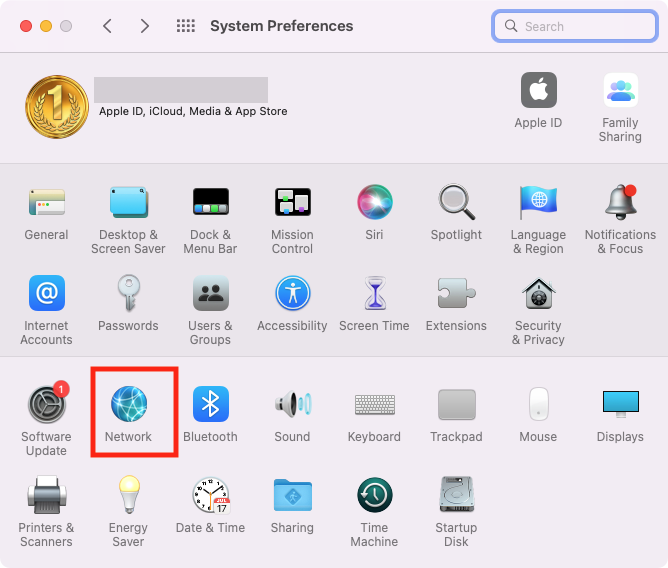
- In System Preferences, click Network
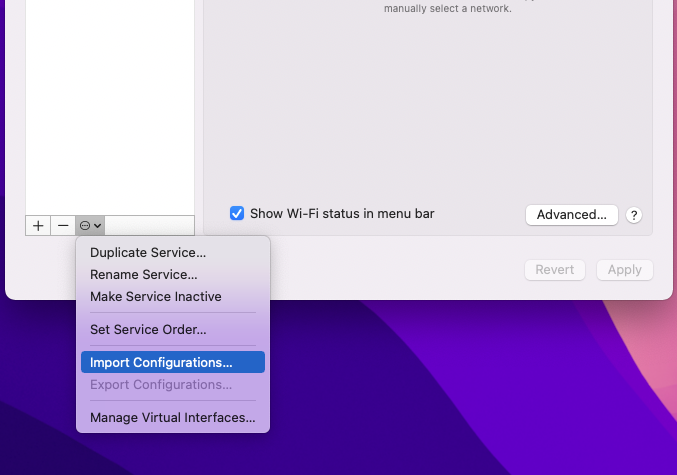
- To import a VPN configuration file, press the three-dots button in the bottom-left, then select Import Configurations
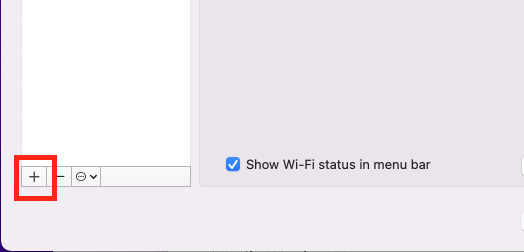
- Otherwise, press the Add button in the bottom left to begin manually adding your VPN settings
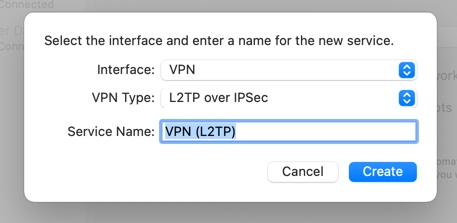
- Select VPN from the Interface drop-down menu
- Choose a suitable VPN connection type from the drop-down menu (you’ll need to confirm this with your VPN provider first)
- Type a memorable name, then press Create
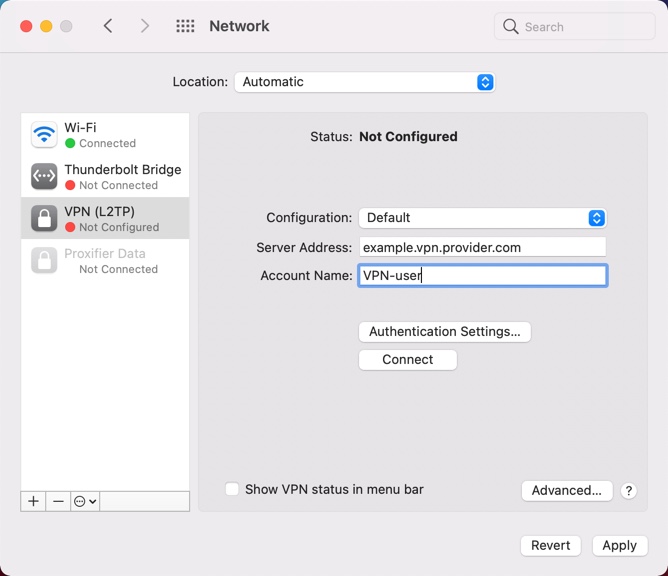
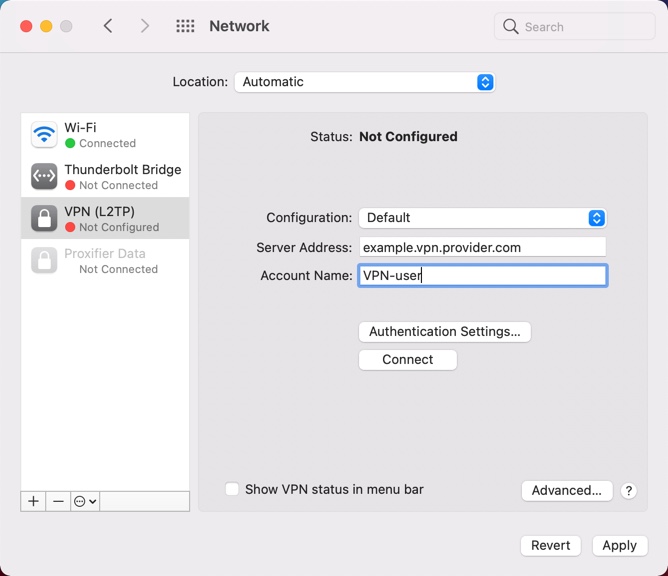
- Enter the server address and account name for the VPN provider on the right
- Press Authentication Settings, then type in your account details for your VPN service before pressing OK
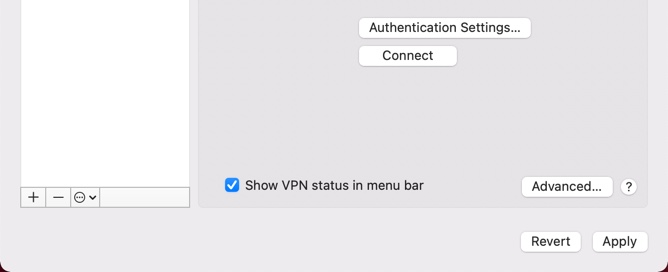
- Click the Show VPN status in menu bar checkbox — this will allow you to quickly connect or disconnect using an icon on the top menu bar
- When you’re ready, press Apply to save your settings, then press Connect to connect to the VPN service
How to set up a VPN on Mac using MacKeeper
If you’re using MacKeeper, you can quickly set up a secure VPN connection using the built-in Private Connect tool. It allows you to tunnel your internet traffic through 296 different locations in 50 different countries using military-grade, AES-256 encryption.
Setting up MacKeeper’s VPN client on your Mac is easy:
- Open MacKeeper, and press the Private Connect option on the left
- Next, select the server location you’d prefer. To change country and connection, use the VPN server location drop-down menu
- To enable the VPN connection, select Turn On
- macOS may ask you to confirm that you want to install the MacKeeper VPN component the first time you connect. When prompted, insert your Mac username and password, then press Install Helper
- If you want MacKeeper to connect to this VPN server automatically in the future, select the Connect automatically when I start my Mac checkbox
- If you want to disconnect at any point, press Turn Off
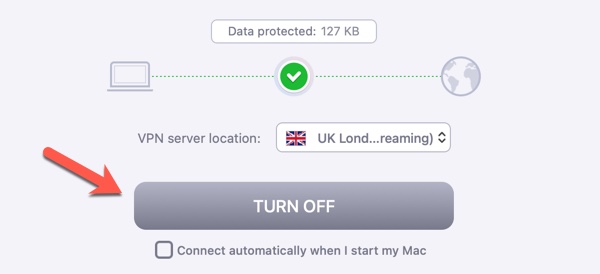
If all goes well, your connection should be active when you press the Turn On button. You should see this confirmed in the menu, with your current data usage visible in the Data protected box.
How to quickly turn on VPN on Mac with MacKeeper
You can also quickly switch your MacKeeper VPN on or off using the drop-down MacKeeper menu on the menu bar.
You use MacKeeper to quickly access VPN on your Mac:
- Click the MacKeeper logo in the menu bar (top-right)
- Next to the VPN Private Connect option, press the Turn On button
- To disable the Mac VPN, press Turn Off instead
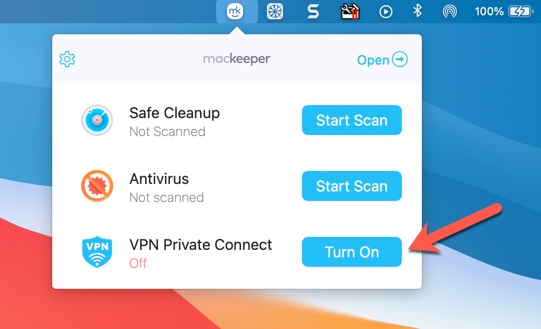
This will connect you to the VPN location you’ve previously selected in the Private Connect settings menu in the MacKeeper app.
How to choose a VPN client for Mac
It can be tricky to choose a VPN for a Mac. When looking for the best VPN software, you’ll need to consider these four crucial points — security, privacy, speed, and functionality.
Make sure you’re able to securely connect with military grade encryption — this prevents snoopers from monitoring your connection without you knowing. The provider you’re using should protect your data, ensuring it doesn’t leak the information you’re sending as you browse the internet.
While your internet connection usually won’t be as fast using a VPN on your Mac, a good VPN should offer near-native speeds. Finally, make sure you get as much functionality as possible out of your VPN, whether it’s the ability to unblock streaming services in your country or to stop an ISP from throttling your connection.
Next Steps
If you’re worried about your privacy online, using a VPN for your Mac is the best way to protect yourself. There are plenty of VPNs out there, but if you want a security suite that does it all, download MacKeeper and give VPN Private Connect a try.
Just make sure you’re using a strong enough connection first. We’d recommend a minimum download speed of 1Mbps for basic internet browsing over a VPN, but you’ll need a higher speed for more intensive usage, such as gaming or streaming.
Read more:


