In this article you will find the following:
Want to prevent others from digging through your digital trash? The Secure Empty Trash feature on older Macs was designed for just that. Unfortunately, for Mac High Sierra or later, the feature has since been removed. But don’t fret! You have newer (and better) ways to keep your deleted items secure.
Before we start
If you’re cleaning your Mac, a dedicated cleanup tool is the fastest and easiest way. With a few clicks, MacKeeper’s Safe Cleanup feature will deep scan your Mac for unneeded files—it then takes special care to ensure nothing important is deleted.
Here’s how to use MacKeeper’s Safe Cleanup:
- Download MacKeeper and install the app.
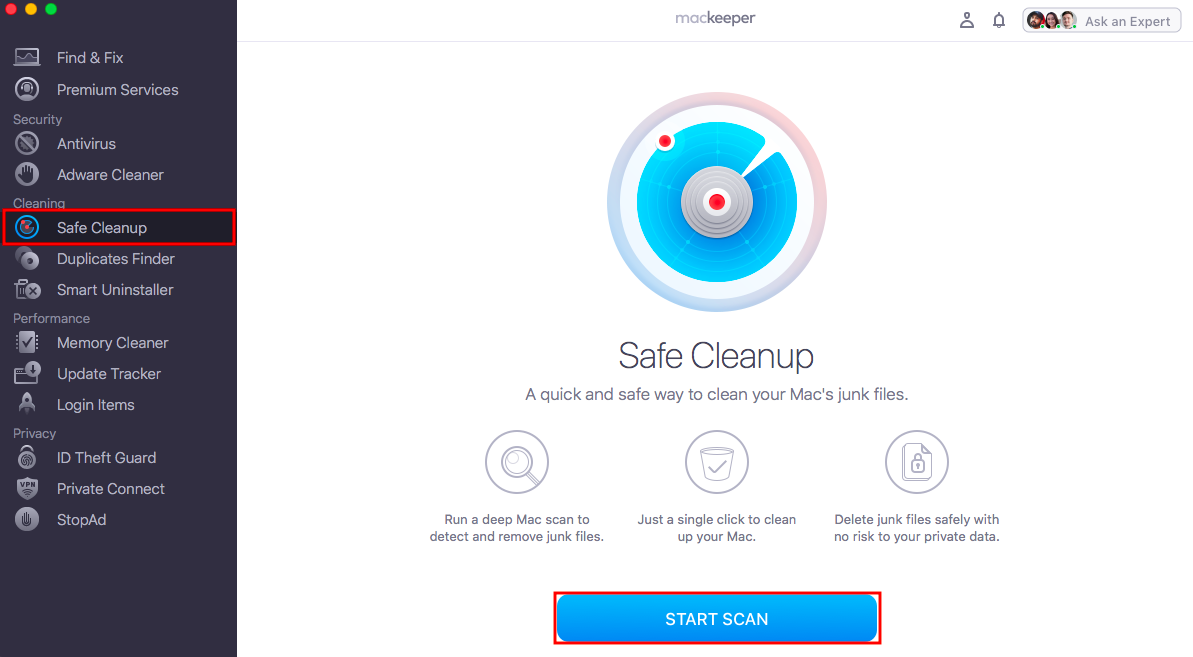
- Open the app and select the Safe Cleanup tool.
- Click Start Scan to target all junk files on your Mac.
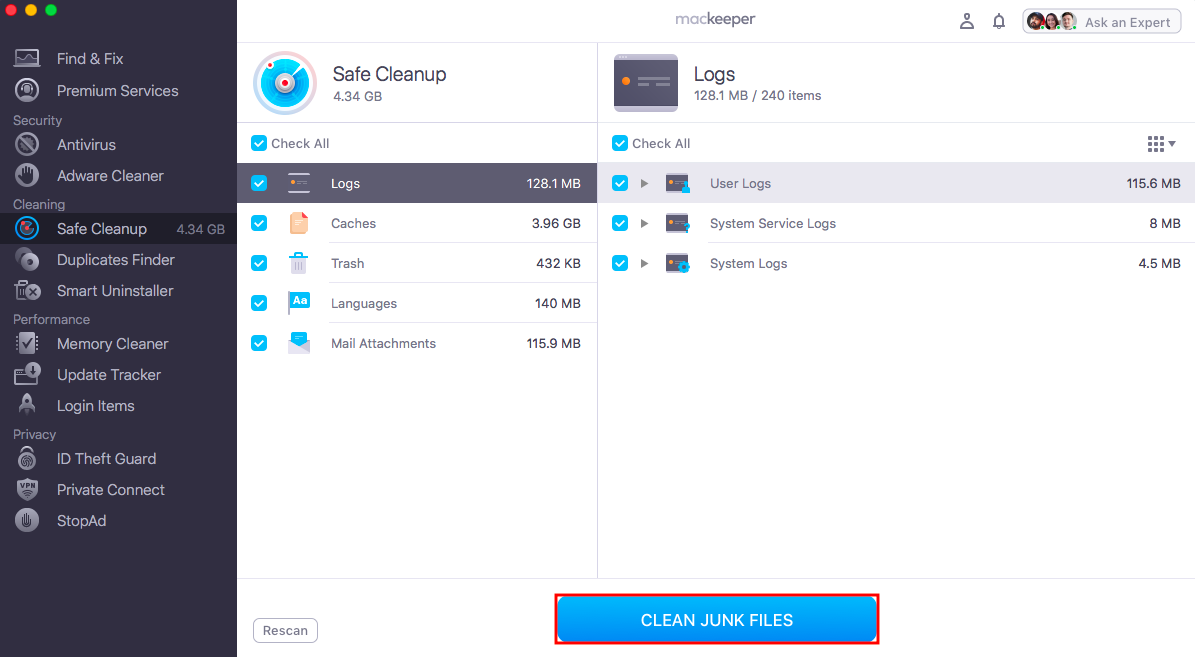
- Select the files you want to remove, then click Clean Junk Files.
What is Secure Empty Trash on Mac
Secure Empty Trash on Mac was a macOS feature designed to securely erase items by overwriting them with new data, making it difficult to recover them with data recovery tools. The Secure Empty Trash feature was available on earlier Macs but was ultimately removed in macOS El Capitan (10.11).
What’s the difference between Secure Empty Trash and just emptying your Trash? The main difference is the deletion methods and the level of security applied to these methods:
- Empty Trash: When you empty Trash, your OS (operating system) removes references to these files from the file system, but the actual data remains on your drive until new data overwrites it. So, until it’s overwritten, the “deleted” data can potentially be recovered using recovery software.
- Secure Empty Trash: This feature goes a step further than the basic Empty Trash feature by overwriting the deleted data with random data. So, while the “deleted” data is waiting to be overwritten, it’s much more difficult to recover.
It’s worth noting that advancements in storage tech and new Mac features have made the Secure Empty Trash feature obsolete.
Is the Secure Empty Trash option available on macOS High Sierra
No, the Secure Empty Trash option is not available on macOS High Sierra. The feature was removed in macOS El Capitan (10.11), partly due to security reasons. The Secure Empty Trash feature improperly deleted Trash files, potentially allowing local users to obtain sensitive information by reading storage media, like a flash drive.
Another likely reason for the removal of Secure Empty Trash was the advancement of storage technology. With modern solid-state drives (SSDs), securely erasing files by overwriting them multiple times is less effective and necessary than with older spinning hard drives.
Ways to securely delete files on macOS High Sierra
Although secure delete on Mac Sierra is a thing of the past, you can still safely delete files on macOS High Sierra and newer Macs. If you’re looking to free up disk space or just get your Mac organized, deleting files is essential for maintaining your Mac.
Here’s how to securely delete files on macOS High Sierra:
1. Encrypt your disk with FileVault
FileVault is a standard feature on macOS High Sierra that will fully encrypt your storage drive. Filevault’s encryption protects the contents of your data from unauthorized access. Even if someone gains physical access to your Mac, they will still need an encryption key to access your data.
By encrypting your disk with FileVault, you can securely delete your files on High Sierra without the fear of having your deleted files recovered. Here’s how:
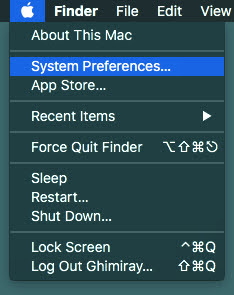
- Click the Apple logo > System Preferences.
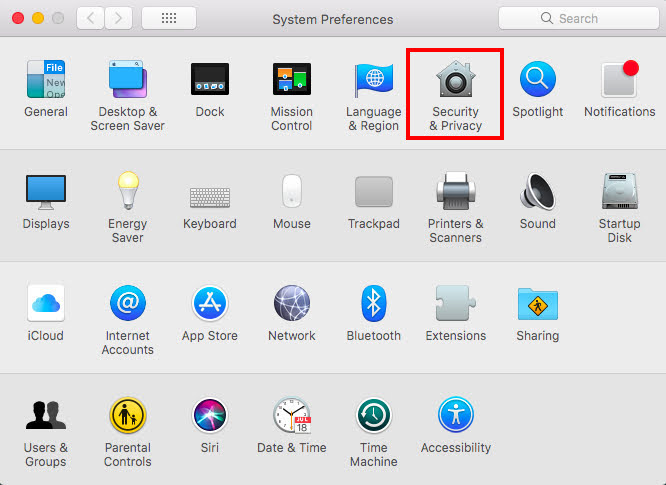
- Click Security & Privacy from the System Preferences window.
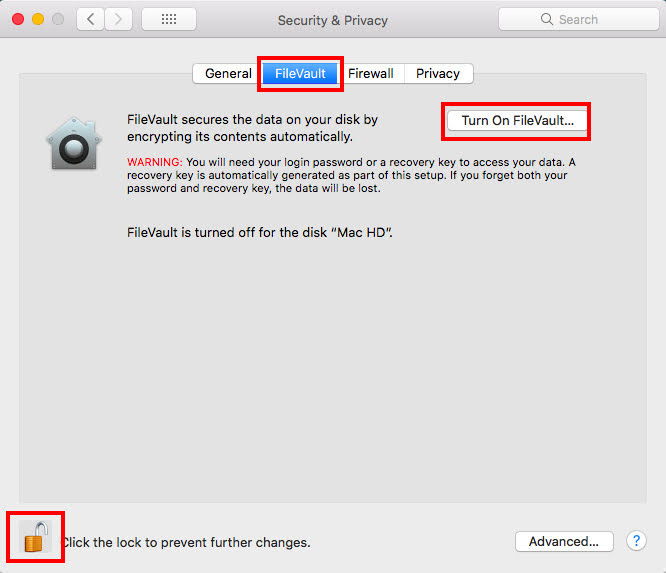
- Click the FileVault tab in the Security & Privacy window.
- Click the Lock icon in the bottom-left of the FileVault window. Enter your admin username and password when prompted.
- Click Turn on FileVault.
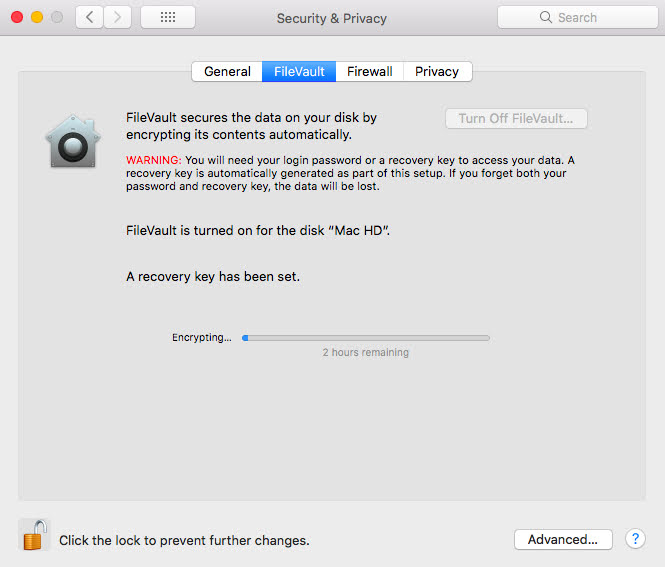
- Choose how you want to unlock your Mac after restarting. You can use your iCloud account or create a new encryption key.
- Once the encryption process is complete, restart your Mac.

2. Use the Terminal command
For more advanced users, you can use the Terminal command to delete files. The ‘rm’ command (stands for “remove”) in macOS Terminal permanently removes files from your system and typically cannot be recovered.
Here’s how to use the Terminal command to securely delete files:
- Open Finder > Application > Utilities > Terminal.
- In Terminal, use a ‘cd’ command to navigate to the directory where the file you want to delete is located. For example, if you want to navigate to your desktop, type ‘cd ~/Desktop.’
- Once in the correct directory, use the ‘rm’ command followed by the file you want to delete. For example, ‘rm example.txt.’
- Press Enter to run the command.
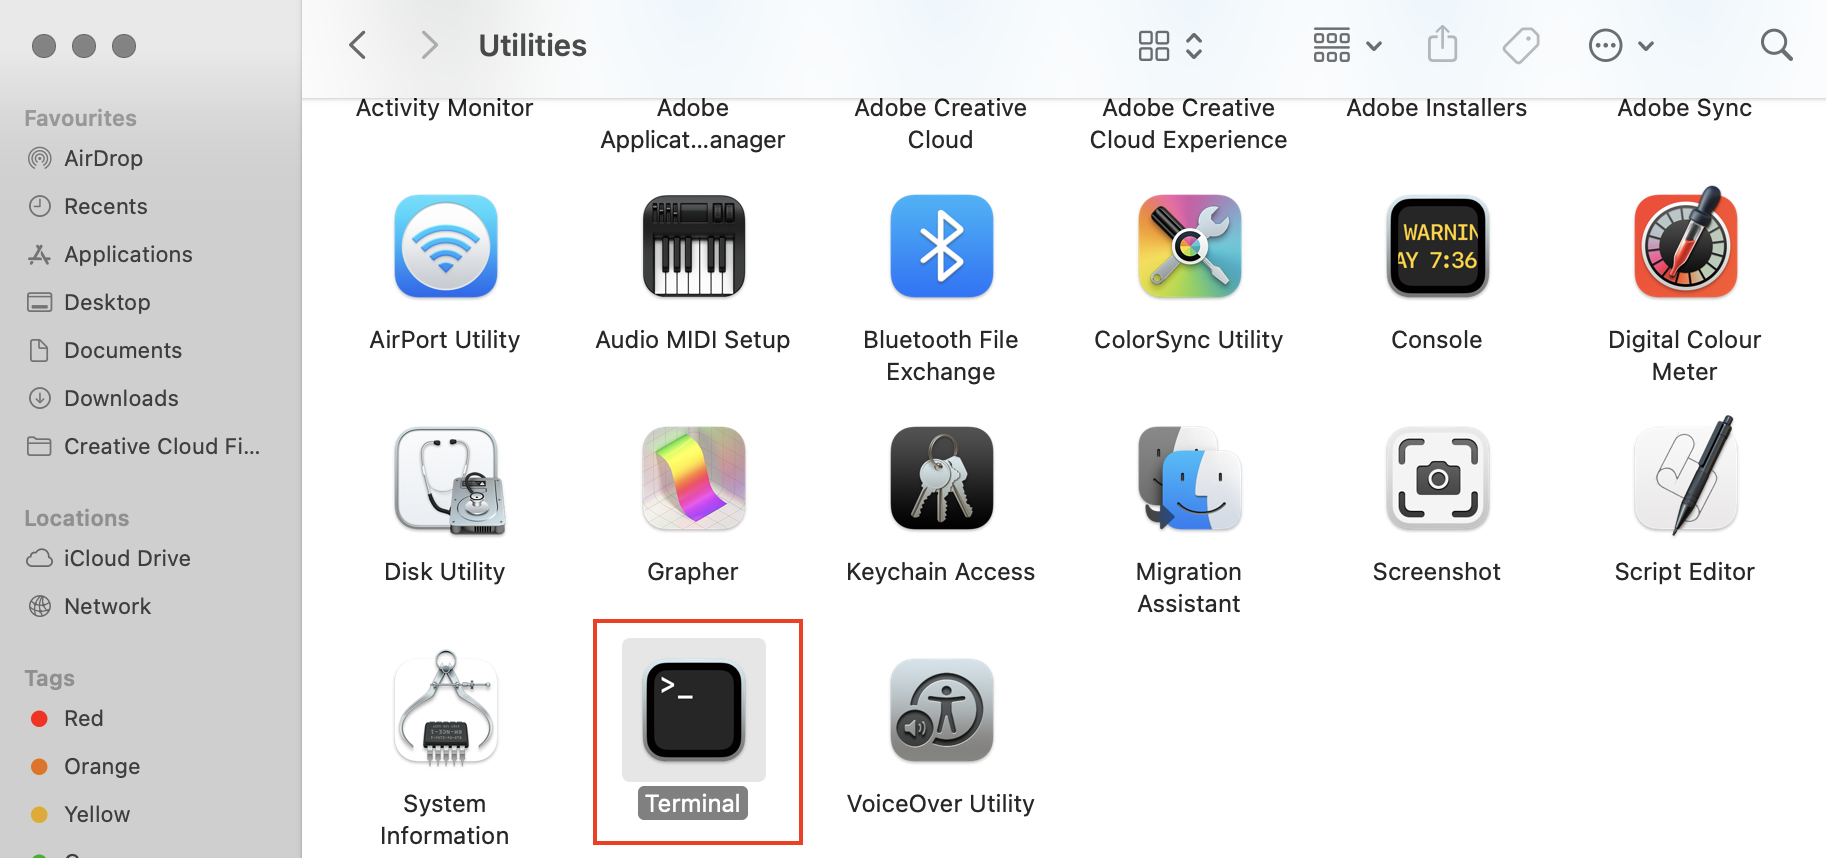

Once you click Enter, the file will either go ‘Poof!’ or the Terminal will prompt you on the next steps.
3. Use a cleaner app
If you want to delete files quickly and safely, use MacKeeper’s Safe Cleanup feature. When deleting files on your Mac, you always risk removing something that’s needed. Safe Cleanup will automatically clear out unnecessary files without putting anything important at risk.
Here’s how to safely delete files with MacKeeper’s Safe Cleanup:
- Open MacKeeper.
- Select the Safe Cleanup tool and click Start Scan to identify the junk files on your Mac.
- Select the files you want to delete, then click Clean Junk Files.
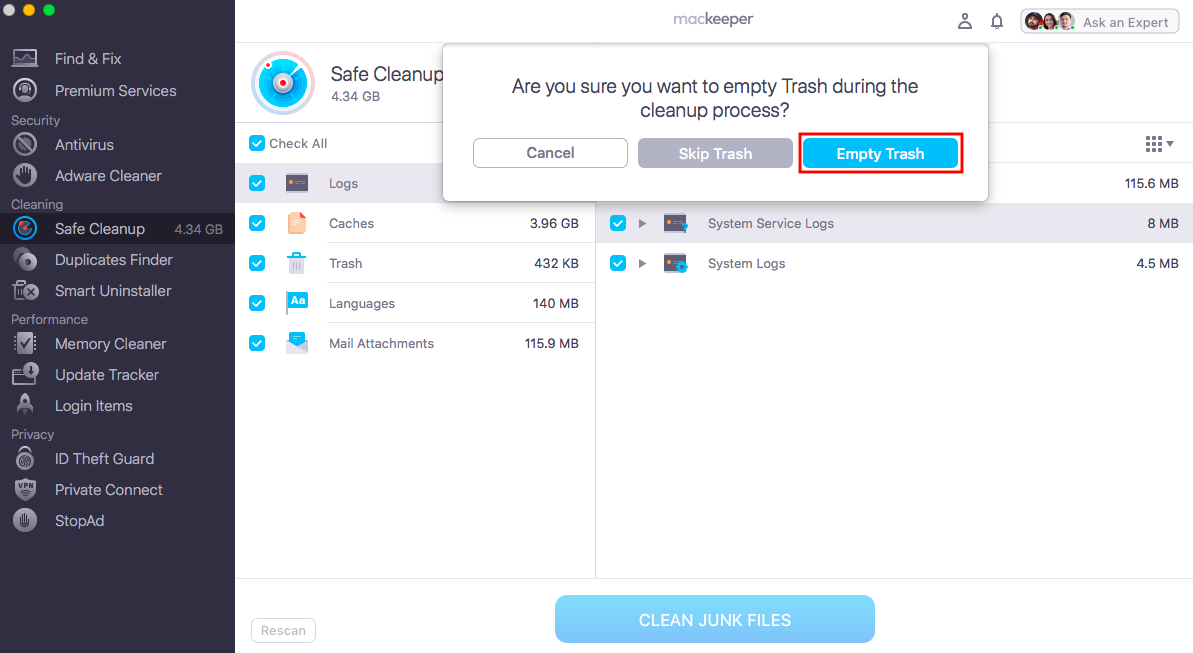
- Click Empty Trash to automatically empty your trash during the cleanup.
Conclusion
Although Secure Empty Trash on Mac High Sierra doesn’t exist, you don’t need it! Advancements in storage technology and inherent security flaws with the feature have made it obsolete. Luckily, macOS now offers more secure ways to delete files—coupled with MacKeeper’s Safe Cleanup, you can optimize file deletion.
MacKeeper’s Safe Cleanup scans your Mac to delete junk—and more. It’ll check all your files before deleting anything important and remind you when it’s time to clean again. Securely deleting files doesn’t have to be a hassle. Use MacKeeper to keep your Mac clean and running smoothly.


