In this article you will find the following:
Like most online accounts, your Apple ID can be completely erased any time you choose. Maybe you don’t want an account to be linked to your identity any more. Or maybe you set up an account and never used it.
Whatever the reason, you can permanently close your account, but you need to be absolutely sure about it as your Apple ID is linked to all the services you buy from Apple. iTunes purchases, iMessage, iCloud, Apple Pay, and so on—they’re all part of your Apple ID, and you’ll lose access to everything in the process.
If you’re sure you want to go ahead with deleting your Apple ID, this guide will show you the way.
You have to sign into your account before you can delete it, so you’ll need your Apple ID login details. If you don’t know what these are, check out our guides on how to find your Apple ID password and how to reset an Apple ID password.
Before we start
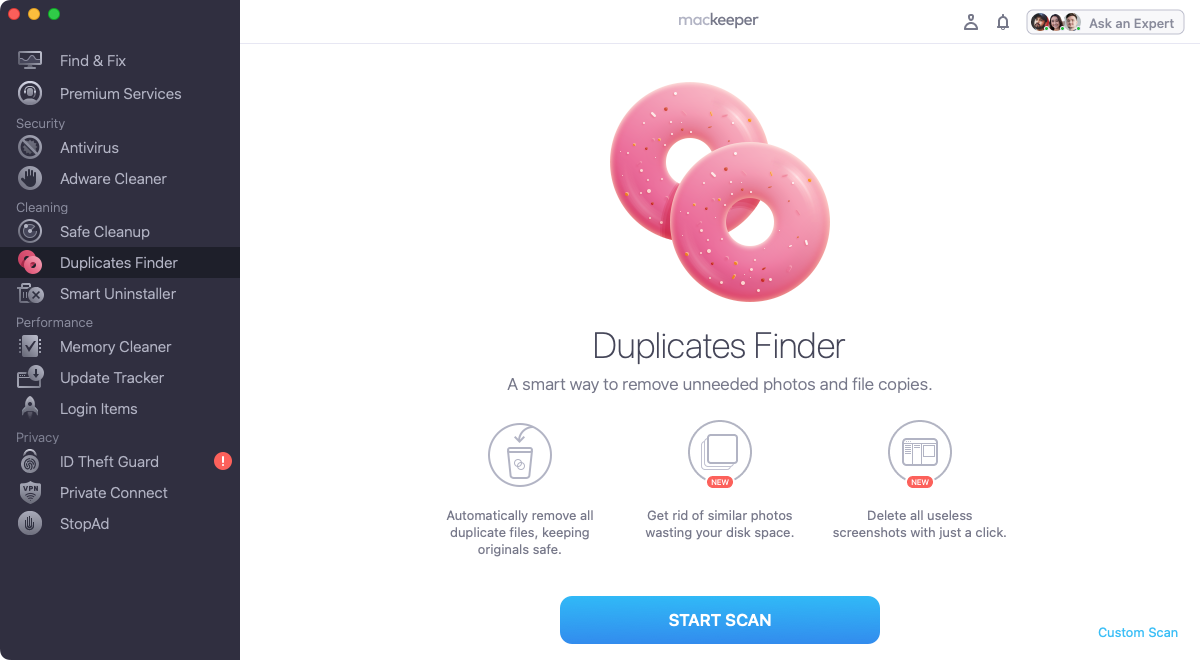
If you’ve taken the decision to shut down your Apple ID account, back up anything you’ve stored in iCloud. You don’t, however, want to archive duplicate files, because they waste time and will make backups take longer. With MacKeeper’s Duplicates Finder, you can quickly scan for and remove unneeded copies of files. You can even search for images that look similar.
- Open MacKeeper, and select Duplicates Finder from the sidebar
- Click Start scan
- Once the scan has finished, review the results and select anything you want to delete
- Click Remove Selected, then Remove to confirm.
It’s as simple as that. Try it for yourself, and see how easy it is to keep macOS free of duplicates.
What happens if you delete an Apple ID?
Whether you have a MacBook Air, MacBook Pro, iMac, iPhone, or iPad, your Apple ID is an integral part of the experience. Yes, you can remove it from the equation, but it’ll have a significant impact on how you use your device.
- Anything you’ve stored in iCloud will be deleted, including photos, videos, documents, and anything else
- You’ll lose access to iMessage, FaceTime, and iCloud
- You won’t be able to use Apple Pay any more
- You can’t locate your phone with Find My iPhone
- Although you won’t be able to access services like iTunes and Apple Books, you’ll still be able to use any content you have stored on your devices—as long as it isn’t protected by Digital Rights Management (DRM)
- Any Apple Store appointments and AppleCare support cases will be canceled.
It’s vital to note that this is permanent. Your access to the deleted Apple ID will be gone forever. You can still set up a new Apple ID at any time or continue to use another existing one, but it’s not possible to restore a deleted account.
So before you go ahead and follow the steps below, take a minute and think the consequences through.
Before removing your Apple ID
If you’re still sure you want to delete your Apple ID, there are a few things you should do before you start the process.
- Back up anything you have stored in iCloud. Save these locally to your Mac, iOS devices, another desktop computer or laptop, or an external hard drive. Anywhere that doesn’t rely on your Apple ID for access
- Download any content that you want to keep. Whether it’s apps, games, music, films, TV programs, books, or audiobooks, store them somewhere you’ll be able to access them again
- Check your active subscriptions. These will all be canceled at the end of their billing cycle, after you’ve deleted your account
- Make sure to save copies. Think of any Apple-related information you might need later and keep it for further usage
- Sign out of all devices that use your Apple ID or iCloud. You won’t be able to sign out of iCloud or turn off Find My iPhone’s Activation Lock feature afterward. It’s also possible that you won’t be able to use your device after you’ve deleted your account.
Once you’ve gone through all these steps, you should be fully prepared to delete your Apple ID user account.
How to erase an Apple ID
1. On any device, open up Safari or whichever browser you normally use, then head to privacy.apple.com
2. Log in using the Apple ID you want to delete
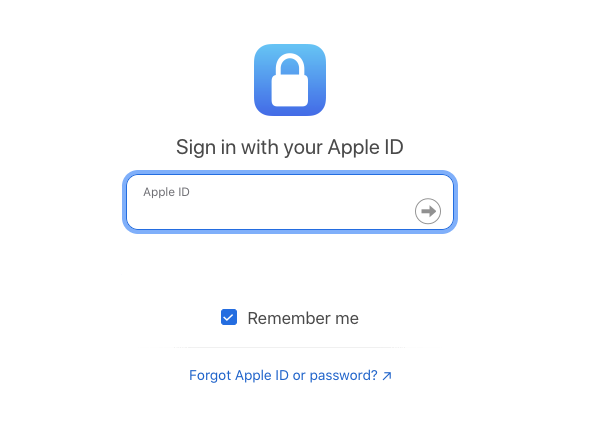
3. Select Request to delete your account

4. On the next page, go to the bottom, and select a reason for deleting your account, then click Continue
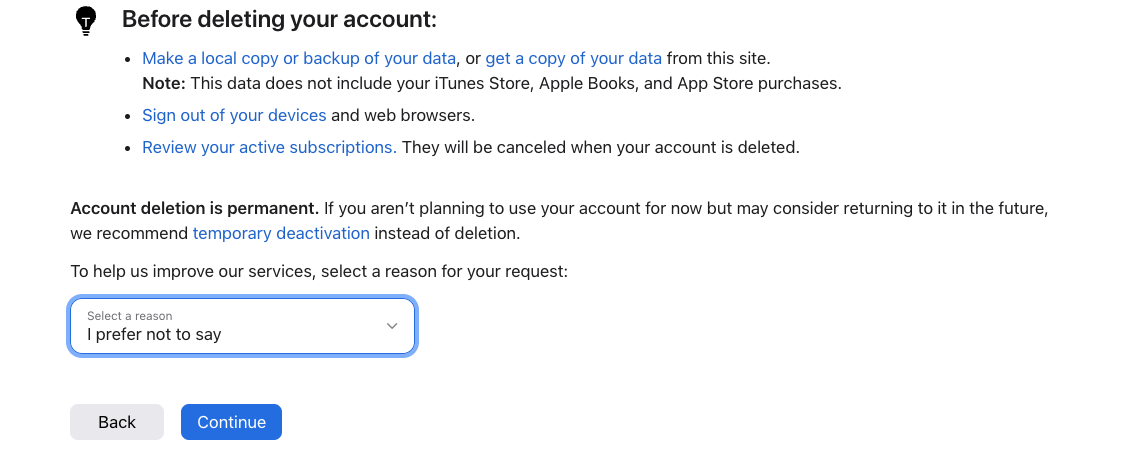
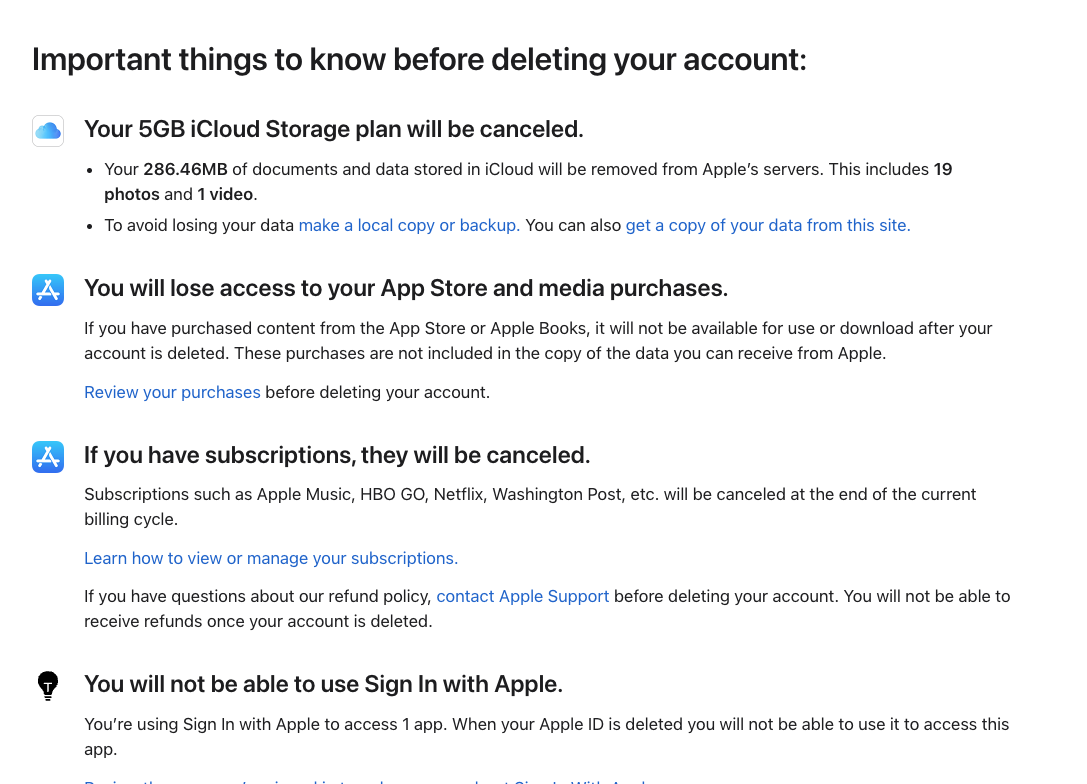
5. The next page reminds you of the consequences of deleting your account. Click Continue at the bottom
6. Finally, you’ll be presented with terms and conditions, which you’ll need to accept. Then you can confirm your request.
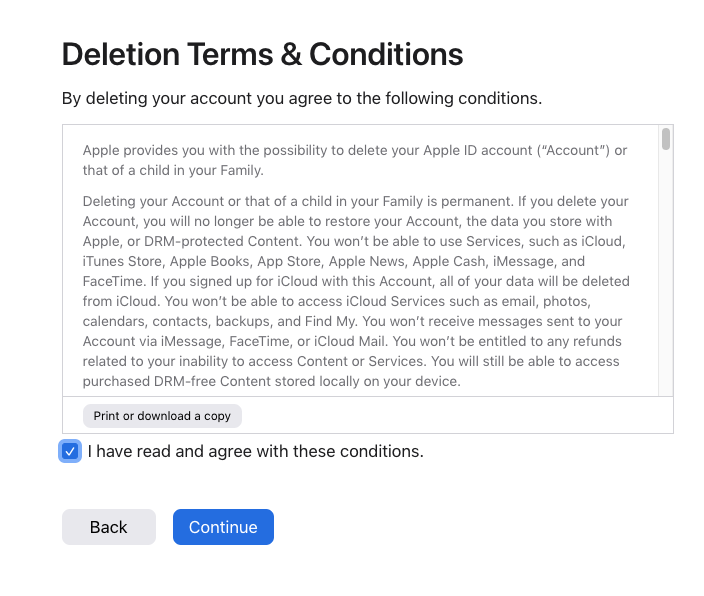
After you put in an Apple ID deletion request, you’ll be given a unique alphanumeric code. Keep this, because for a short period of time, you’ll be able to reverse your request. Just contact Apple Support, give them the code, and they’ll cancel the request, so you can carry on using your Apple ID.
You won’t have that long, though. Once Apple verifies a deletion request, it’s normally done within seven days. Apple may still retain certain information about your account for legal or financial reporting purposes, but it’ll delete as much of your data as possible.
An alternative solution—deactivate your Apple ID instead
Unless you’re really 100% sure you want to lose access to your Apple ID, there’s a better way. Instead of deleting your account, you can deactivate it.
Deactivating your Apple ID is almost identical to deleting it but with one major difference—you can get it back again at a later date.
Follow these steps to deactivate your Apple ID:
1. In your web browser, head to privacy.apple.com
2. Under Temporarily deactivate your account, click Request to deactivate your account

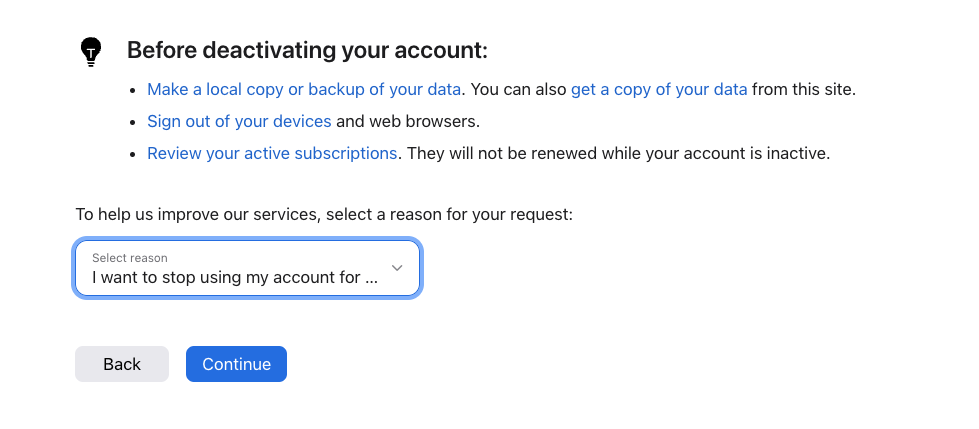
3. Select a reason for deactivating your account, and click Continue
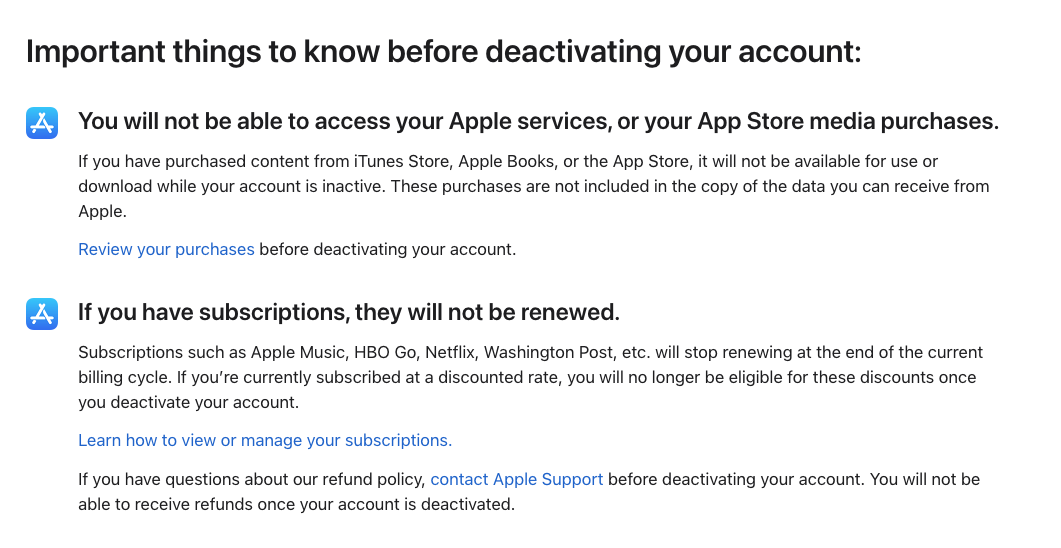
4. Read through the next page, and click Continue
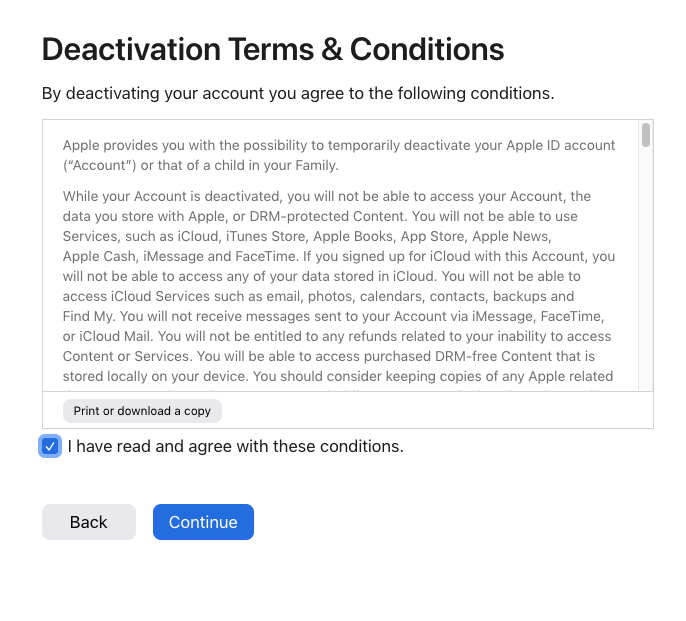
5. Confirm you’ve read the term and conditions, and click Continue
Following your request, you’ll receive a unique code. Don’t lose it. You’ll need this code to reactivate your Apple ID and get back into your account.
Final thoughts
As you’ve seen, the process of deleting an Apple ID is pretty straightforward—and very, very permanent. If you’re eager to leave an old account in the past, then it might be the best option for you. But unless you’re absolutely certain you’ll never want to access the account again, it makes more sense to deactivate your Apple ID instead.
Whichever option you choose, make sure to back up any data from your iCloud. And, of course, get rid of any duplicate files first using MacKeeper’s Duplicates Finder. That way, you won’t be wasting storage space, and your backups will be quicker.


