If you use Apple products, you have probably heard about the company’s own file transfer service, AirDrop—one of Mac’s most notable and helpful features you can expect to find in any MacBook tutorial. It works only between Apple devices and doesn’t cause unnecessary trouble, like requiring file hosting services, cloud storage, mailing apps, or other tools that move files between devices by downloading them.
Much like the ability to sync contacts from iPhone to Mac, AirDrop gave Apple users the ability to send data from iPhone to MacBook: images, music and video recordings, text notes, and more. The only condition is for the two connecting devices to be in proximity to each other and have their Bluetooth on.
Before we start:
Unless you’re extremely meticulous, regularly transferring files between devices can lead to you unknowingly keeping duplicate files on your MacBook. This can unnecessarily lead to storage problems, redundancy, and slower performance. To prevent this from happening, we recommend getting rid of duplicates with a trusted utility like MacKeeper’s Duplicates Finder.
Duplicates Finder is MacKeeper’s answer to helping you manage your files and device storage efficiently. It empowers you to optimize your laptop by automating the process of isolating and removing duplicates.
Here’s how to do it on your MacBook Pro, Air, Mac mini, or iMac running High Sierra or other macOS:
- Download MacKeeper and select Duplicates Finder from the sidebar.
- Click the Start Scan button to allow MacKeeper to look for similar files.
- Review the results and press the Remove Selected button when you’re ready to proceed. MacKeeper will permanently delete the files you’ve selected.
In this article you will find the following:
Can you AirDrop from iPhone to Mac?
Yes, Apple allows you to AirDrop between iPhone and Mac devices, including from iPhone to MacBook. However, this only works if your Mac is within range.
Let’s take a closer look at how to AirDrop from iPhone to Mac.
Preparing for AirDrop
While the process of wirelessly sending files and media between devices is straightforward, certain measures must be in place first to ensure it’s seamless. The guide below helps you prepare your iPhone and MacBook to send files and make it easier to connect iPhone to Mac for AirDrop purposes.
1. Enable Wi-Fi and Bluetooth on iPhone and Mac
It’s recommended that users switch on Wi-Fi and Bluetooth to send items via AirDrop, as this helps your iPhone and Mac find each other. Additionally, it makes it easier and more efficient to transfer files from iPhone to Mac using AirDrop.
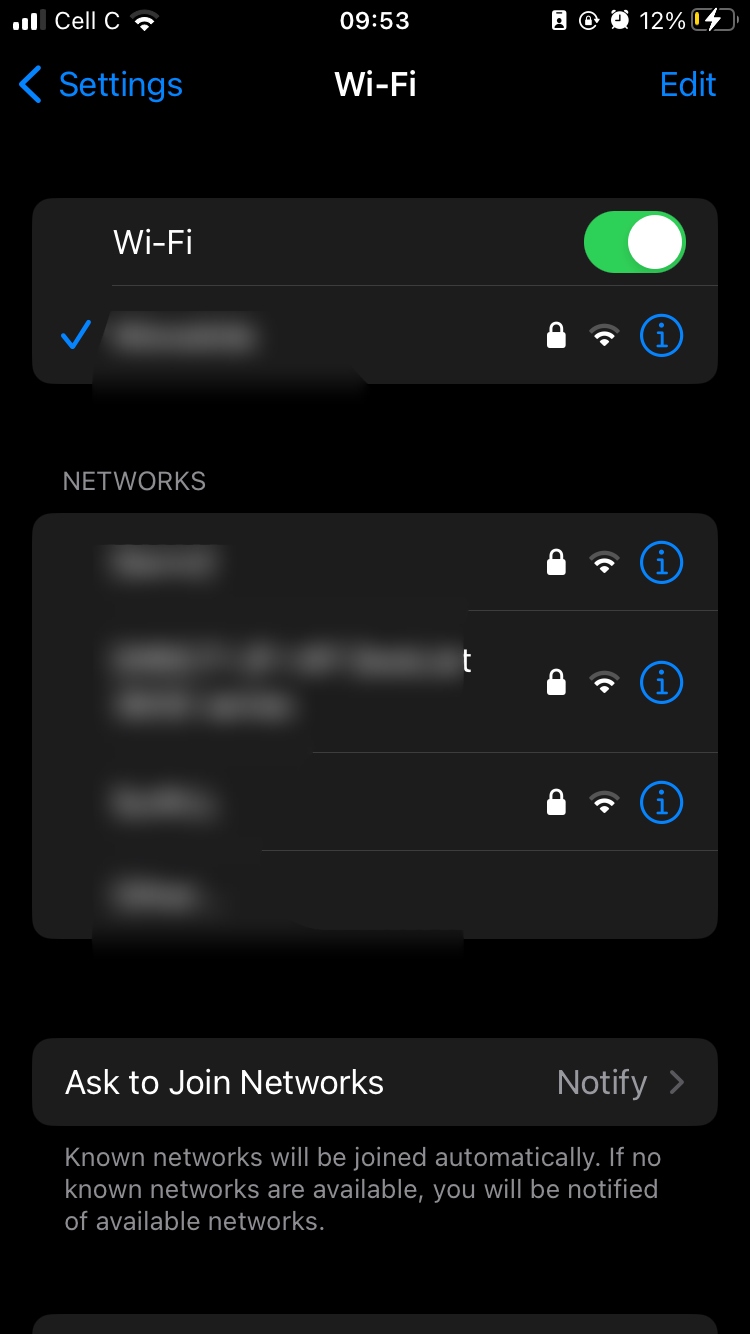
Here’s how to enable Wi-Fi:
- On an iPhone: Open the Settings app, select Wi-Fi, and switch the toggle on.
- On a Mac: click on the Wi-Fi module in the menu bar and switch the toggle on.

To enable Bluetooth, follow these steps:
- On iOS: In the Settings app, tap Bluetooth and enable the setting.
- On a MacBook: Click on the Bluetooth module in the Dock and switch on the feature.


2. Turn on AirDrop on an iPhone
The most straightforward way of turning on your AirDrop is through your iPhone settings. Here’s how:
- Open Settings.
- Swipe down to General.
- Tap on AirDrop.
You’ll be presented with the options to completely stop receiving files, be available only for contacts, or open your iPhone to everyone. Choose whichever one suits your purposes most.
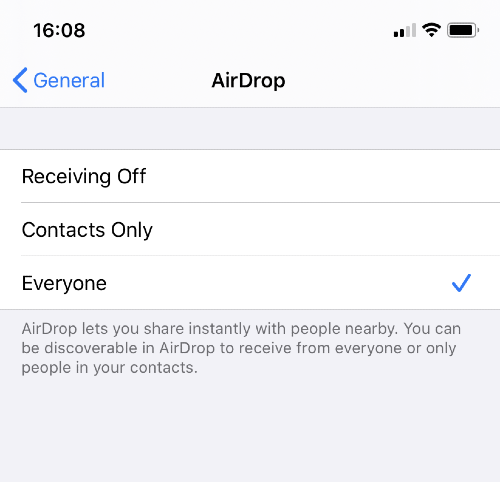
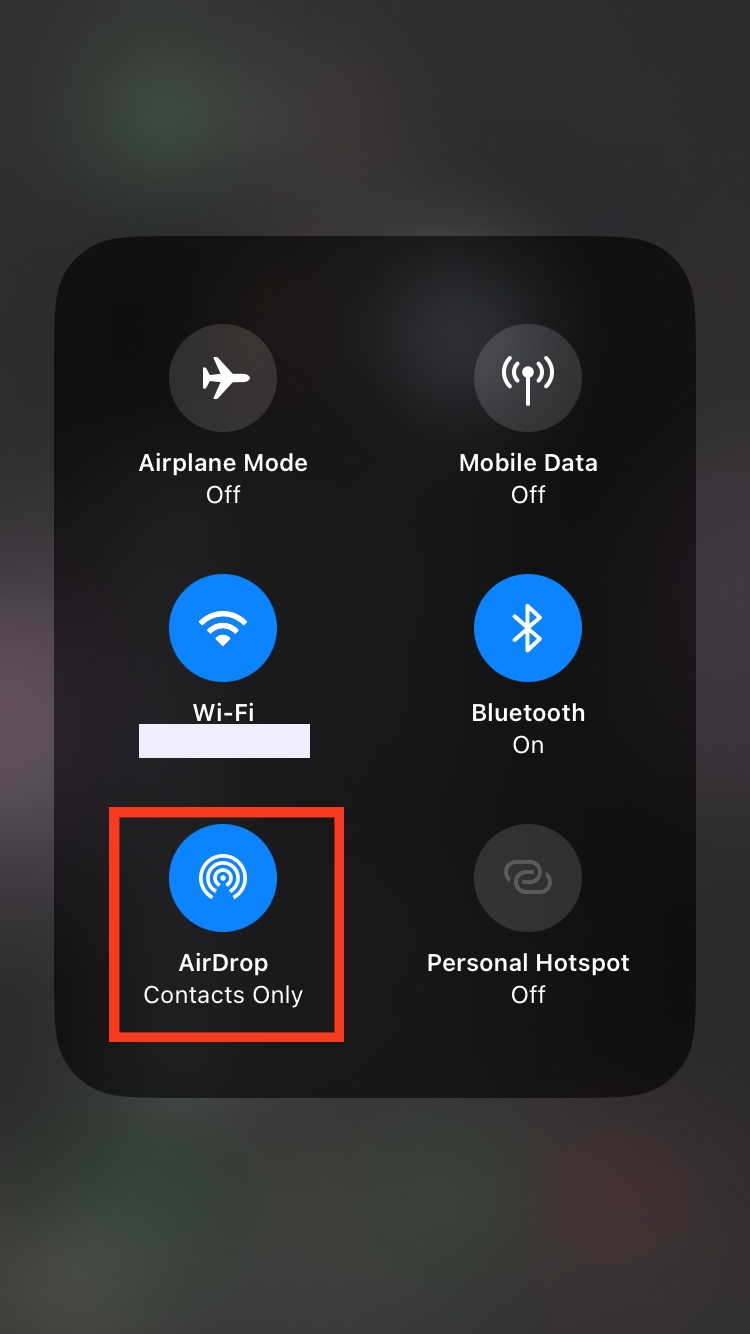
Alternatively, change your AirDrop settings through the Control Centre:
- Open Control Centre. On iPhone X or later or on iPad with iOS 12 or later, place your finger in the top right corner of the screen and swipe down. On iPhone 8 or earlier, swipe up from the bottom of the screen.
- Touch and hold the network settings square in the top left corner of the Control Centre.
- Touch and hold the AirDrop button to open the settings. Choose from the selection described earlier.
If you can’t turn receiving on, go to Settings and tap on Screen Time. Go to Content & Privacy Restrictions → Allowed Apps. Make sure that the slide bar next to AirDrop is green.
A hint from our team:
Are you encountering issues switching AirDrop on? Learn what to do when AirDrop isn’t working on your Mac.
3. Enable AirDrop On a Mac
You can activate AirDrop on any of the Macs introduced in 2012 or later (except for the 2012 Mac Pro) if you’re running OS X Yosemite or newer.
Here’s what to do:
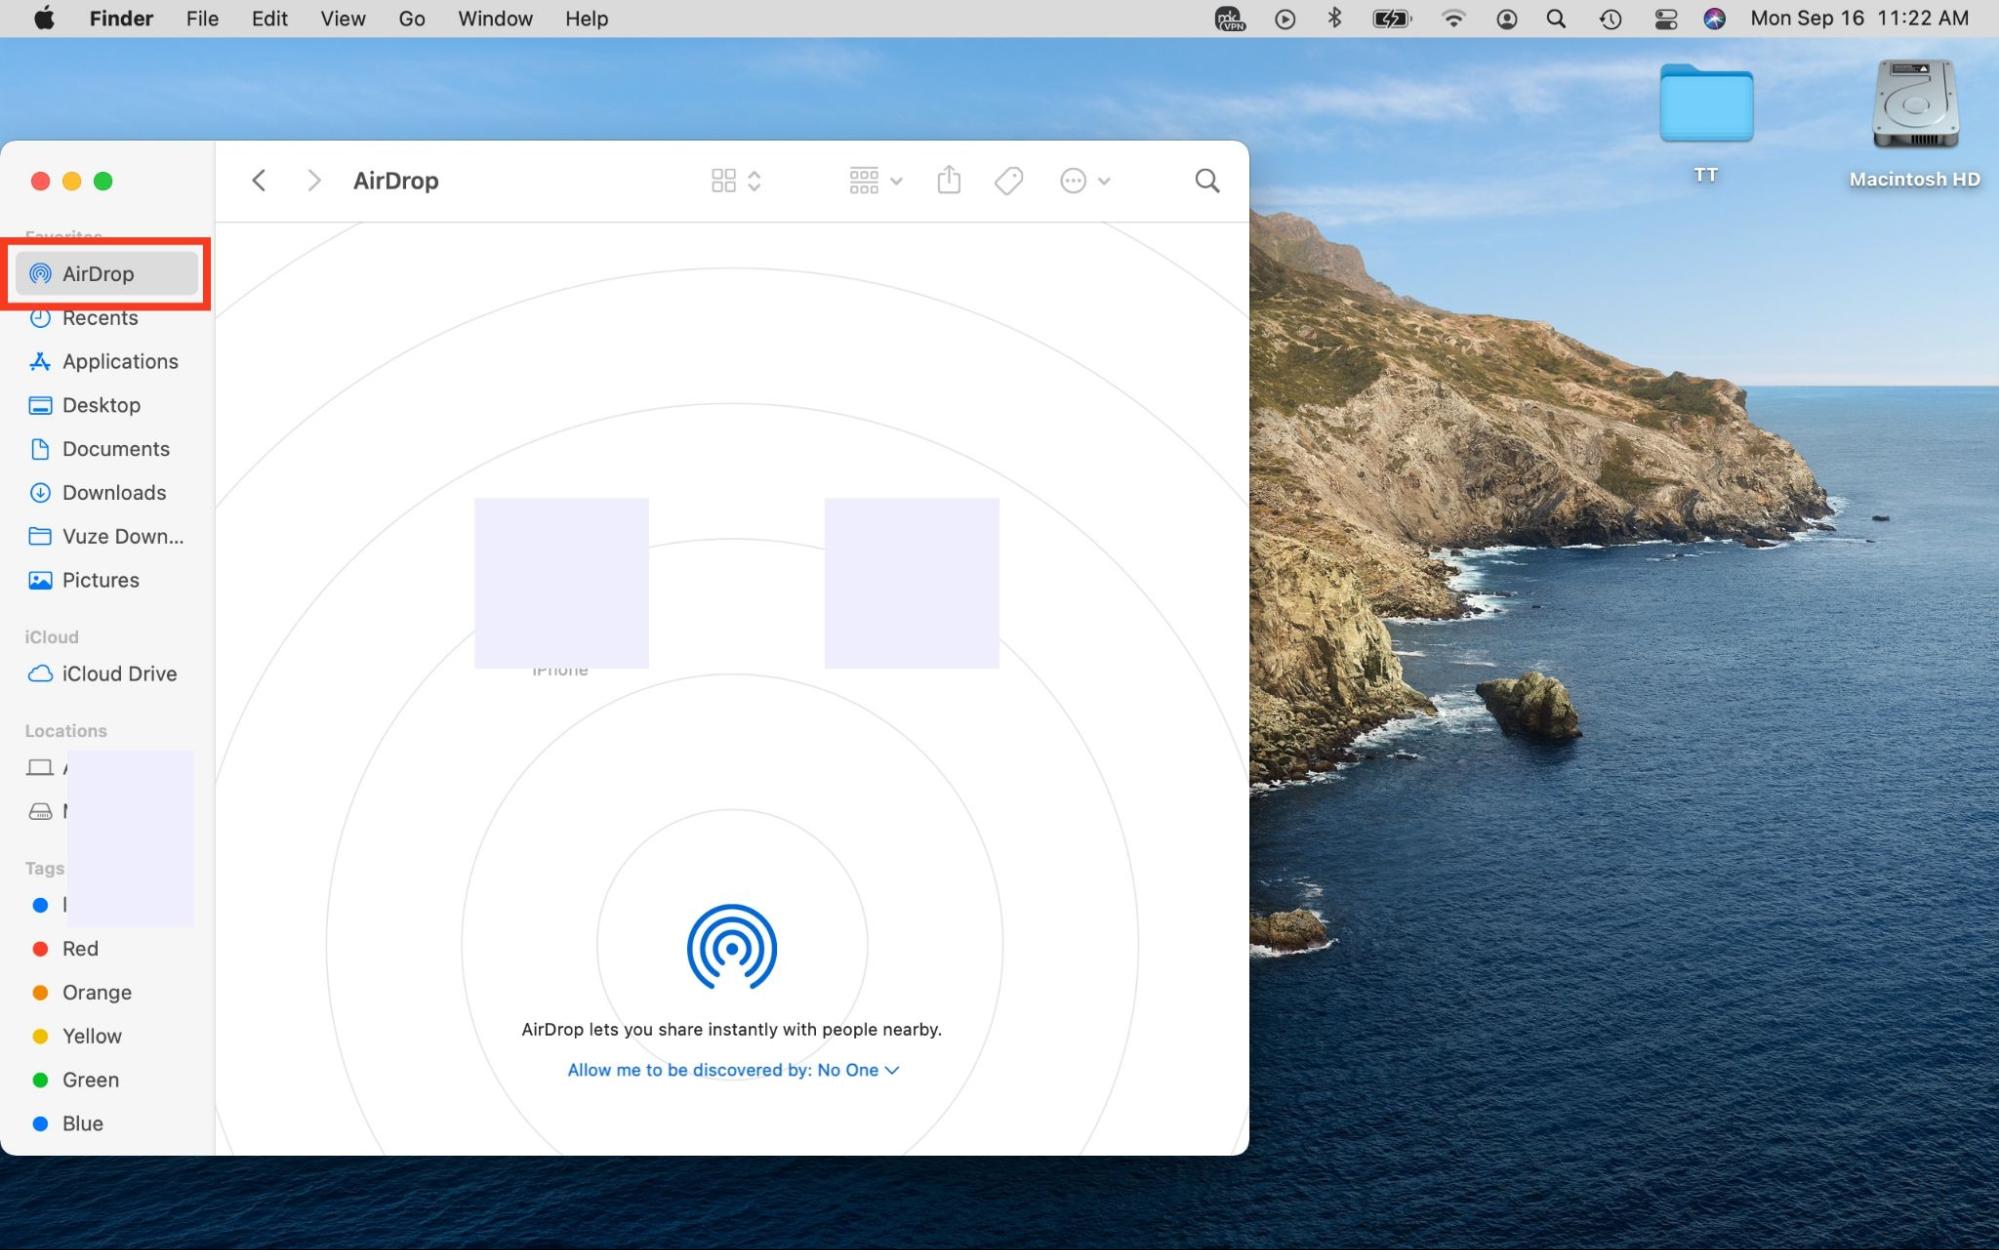
- Open Finder and click on the AirDrop heading on the left side panel.
- Turn on Bluetooth in the AirDrop tab or do it by using the top menu bar.
- At the bottom left of the screen, you can change your AirDrop reception settings.

How to AirDrop photos from Mac to iPhone
Most users know you can AirDrop something from iPhone to Mac, but few are aware you can do the same from Mac to iOS. Not only that but did you know you can also send screenshots from Mac to iPhone? Learn how to screenshot on a Mac, so you can seamlessly AirDrop it to your mobile phone along with other media.
Follow this approach to AirDrop photos from Mac to iPhone:
- Open Finder and select AirDrop.
- Drag and drop files onto the recipient you want to send them to, and the file will instantly be sent to them.
How many photos can you AirDrop from iPhone to Mac?
The limit for sending photos from iPhone to Mac via AirDrop is unknown, therefore you can transfer as many images as you like. Additionally, you can AirDrop multiple (more than 25) pictures at a time.
How to transfer files from iPhone to Mac using AirDrop
To share content with AirDrop from an iPhone, make sure that both devices have their Bluetooth and Wi-Fi on and that they’re no more than nine meters apart. Also, thinking of how to import photos from an iPhone to a Mac, take note that your Mac must be made in 2012 or later running Yosemite OS or newer and your iPhone must have iOS 7 or later with Personal Hotspot turned off.
Now, transfer a photo or AirDrop from iPhone to Mac:
- Find the picture that you want to AirDrop on your iPhone. You can also move other types of files.
- Tap on the Share button and then on the AirDrop button in the menu that appears.
- Wait for a few seconds until your iPhone recognizes all the devices located close enough to initiate file transfer and select the device that you want to send the photo to.
- If this is the first time you’re connecting these two devices, there will be a pop-up notification on the receiving Mac saying “iPhone (device name) wants to send a file.” To confirm the action, click on Accept.
- If the two devices have been connected with AirDrop before, you’ll only see a small notification in the top-right corner of the screen. The files will be accepted automatically.
- When the file transfer is complete, there’ll be another push-notification “Download complete” in the top-right corner of the screen.



Where do AirDrop files and photos go from iPhone to Mac?
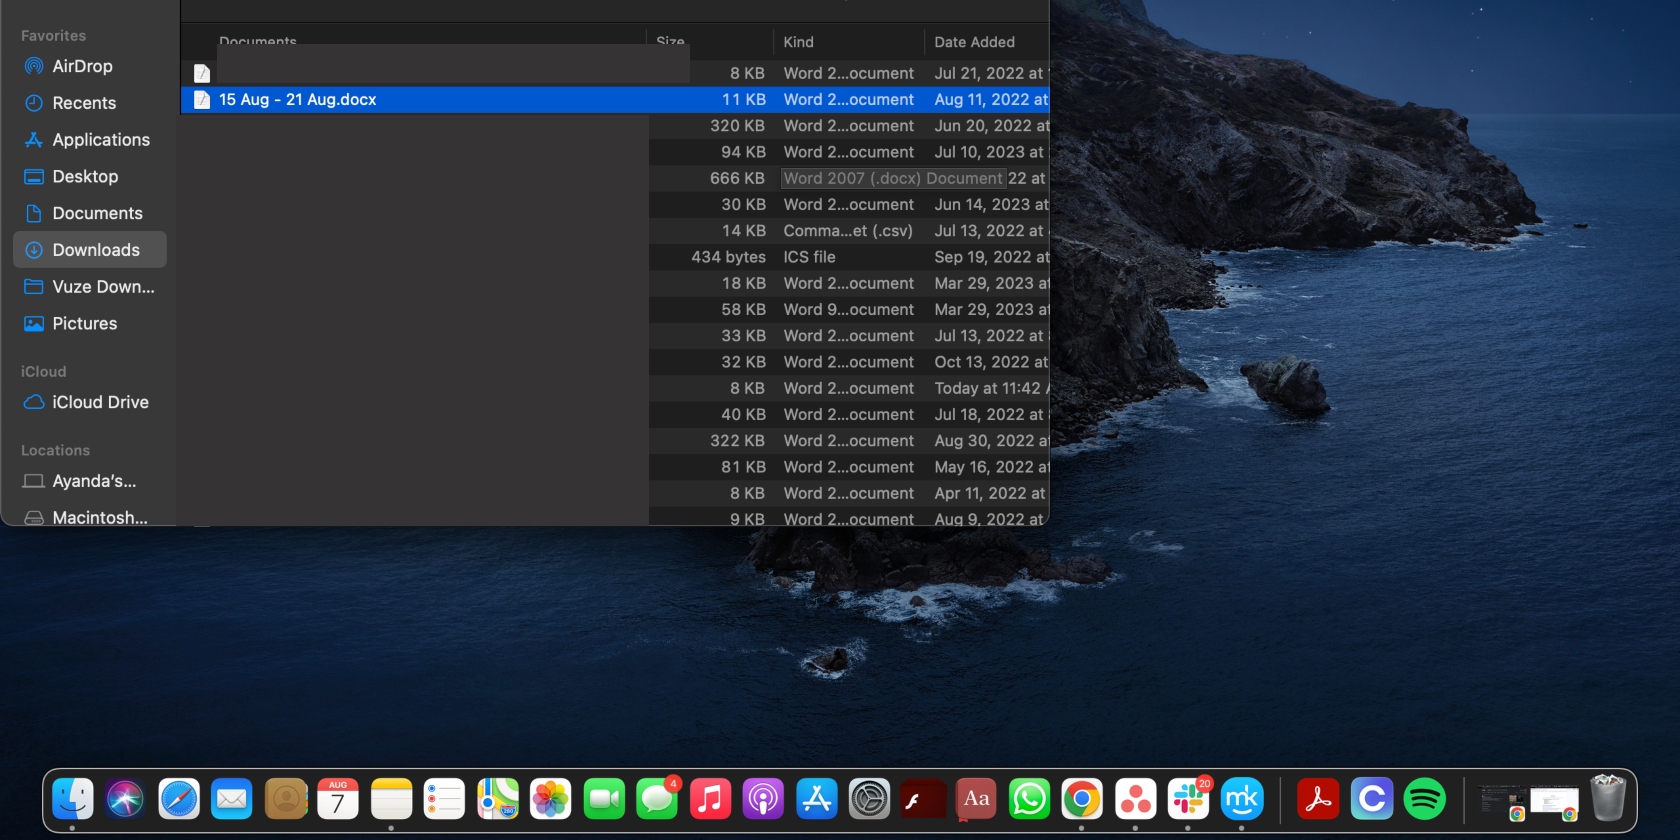
When you transfer files and photos from your iPhone to your MacBook, they’re saved in your Mac’s Downloads folder. Files received via AirDrop on your Mac device can be found by opening the Downloads folder in Finder and browsing recently added files. Just click to open them.
A note from us:
If you’re upgrading to a new MacBook device, consider moving your files to avoid losing them. Learn how to move your content to a new Mac from an old one.
Save space on your Mac by transferring important files
Transferring important files between devices comes in handy in various situations. With AirDrop, you can do this easily and quickly. Apart from AirDropping from iPhone to Mac, another essential step in managing your files and images (whether JPEG, HEIC converted to JPEG, or another file type) is removing duplicates. This can help reduce the clutter on your computer, save time, avoid your Mac getting stuck, and optimize it.
MacKeeper’s Duplicates Finder simplifies this process by automating it. Use it to manage similar copies of files effectively on Mac by simply following the prompts in the MacKeeper app.


