In this article you will find the following:
For everyday purposes, the internal SSD in your Mac may be plenty, but if you store lots of videos, photos, music, or large documents, you’ll notice that space runs out pretty quickly. That’s why it’s important, no matter how much storage you have, to check available space on Mac and manage it properly.
Apple has gotten a little better at giving us more storage with each Mac model as standard, but since it switched from HDD to SSD drives, it has been incredibly expensive to upgrade beyond the basic 128GB or 256GB option. This means that optimizing your free space on Mac is vital for long-term use.
Here, we’ll look at all the ways you can check storage on Mac for both internal and external drives.
Before we start:
If your Mac has started to perform poorly, you may find that a lack of free memory (RAM) as well as not enough free storage space is the problem. Fortunately, you can quickly and safely clean and free up memory on your Mac using Memory Cleaner built into MacKeeper.
Here’s how:
- Download and install MacKeeeper.
- Select Memory Cleaner from the MacKeeper sidebar, then click Open.
- Click the Clean Memory button to free up RAM space.
What is storage on Mac?
If you’re looking to figure out storage on Mac, you’ll be pleased to learn it’s pretty simple. Storage is essentially a place where your Mac can save any data that you’ll want to access later. This includes everything from important documents and treasured photos to essential apps and your favorite games.
Storage also holds onto temporary data that the macOS operating system and your programs need to function correctly. No matter what you might use your machine for, information is constantly being saved to and pulled from storage—that’s why not having enough free space can greatly slow down your iMac.
So, if you want your M1, M2, or Intel Macintosh to be at its best, read on to learn how to find what’s taking up space on Mac, and how to manage your storage effectively.
How to check disk space on Mac
There are several quick and easy ways to check disk space on Mac, including:
- View the System Information
- See the section About This Mac and System Preferences
- Use Get Info in Finder
- Via Disk Utility
- Use Quick Look on the desktop
- Via Terminal
- Review the information using a Mac cleanup program
1. View the System Information
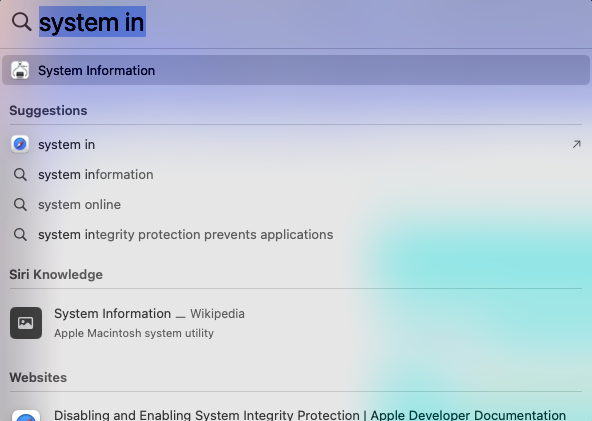
The System Information program built into macOS tells you everything you need to know about your laptop, including your Mac storage size. Here’s how to use it:
- Press Command + Space on your keyboard to open Spotlight search, then start typing System Information.
- When System Information appears, press enter on your keyboard to open it.
- Click Storage in the sidebar, then check the Free and Capacity information on the right.
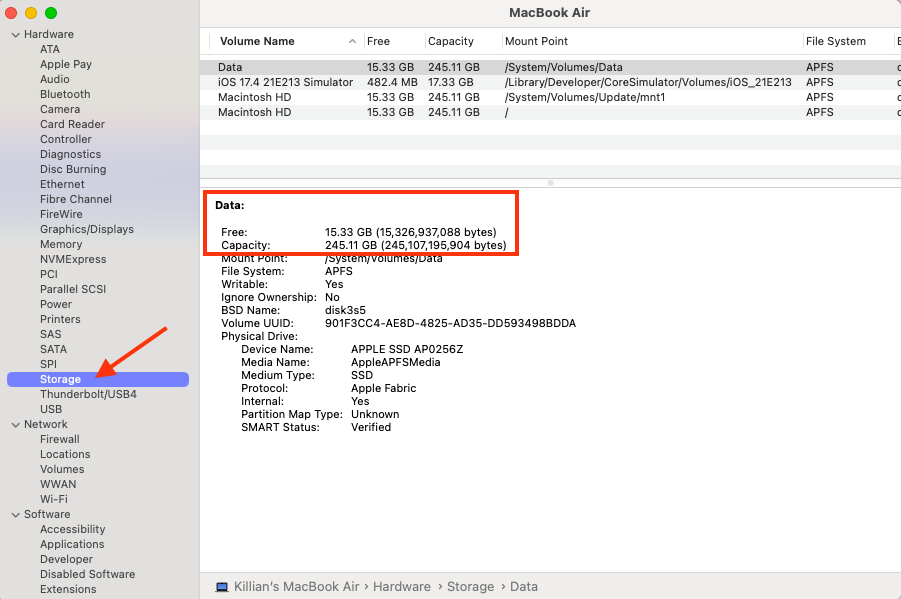
Important:
Bear in mind that the information you see here can be a little outdated. If your Mac says there’s not enough disk space, but there is, try restarting your machine to clear temporary files.
2. See the section About This Mac and System Preferences
In some versions of macOS, you can see storage on Mac in the About This Mac window, like so:
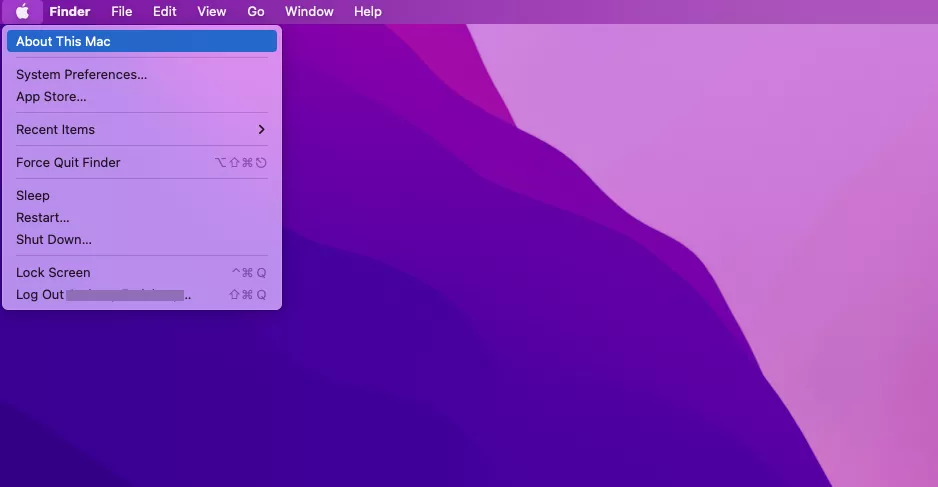
- Click on the Apple icon in the top left and select About This Mac.
- Click on the Storage tab to see total drive capacity and how much space is being used.
- View storage information.
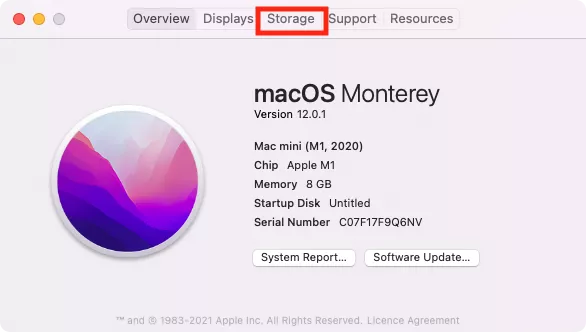

You can hover over the storage bar to see an overview of usage categories. This includes Apps, Bin, Documents and Others, macOS and System Data. The white part of the bar is the remaining space.
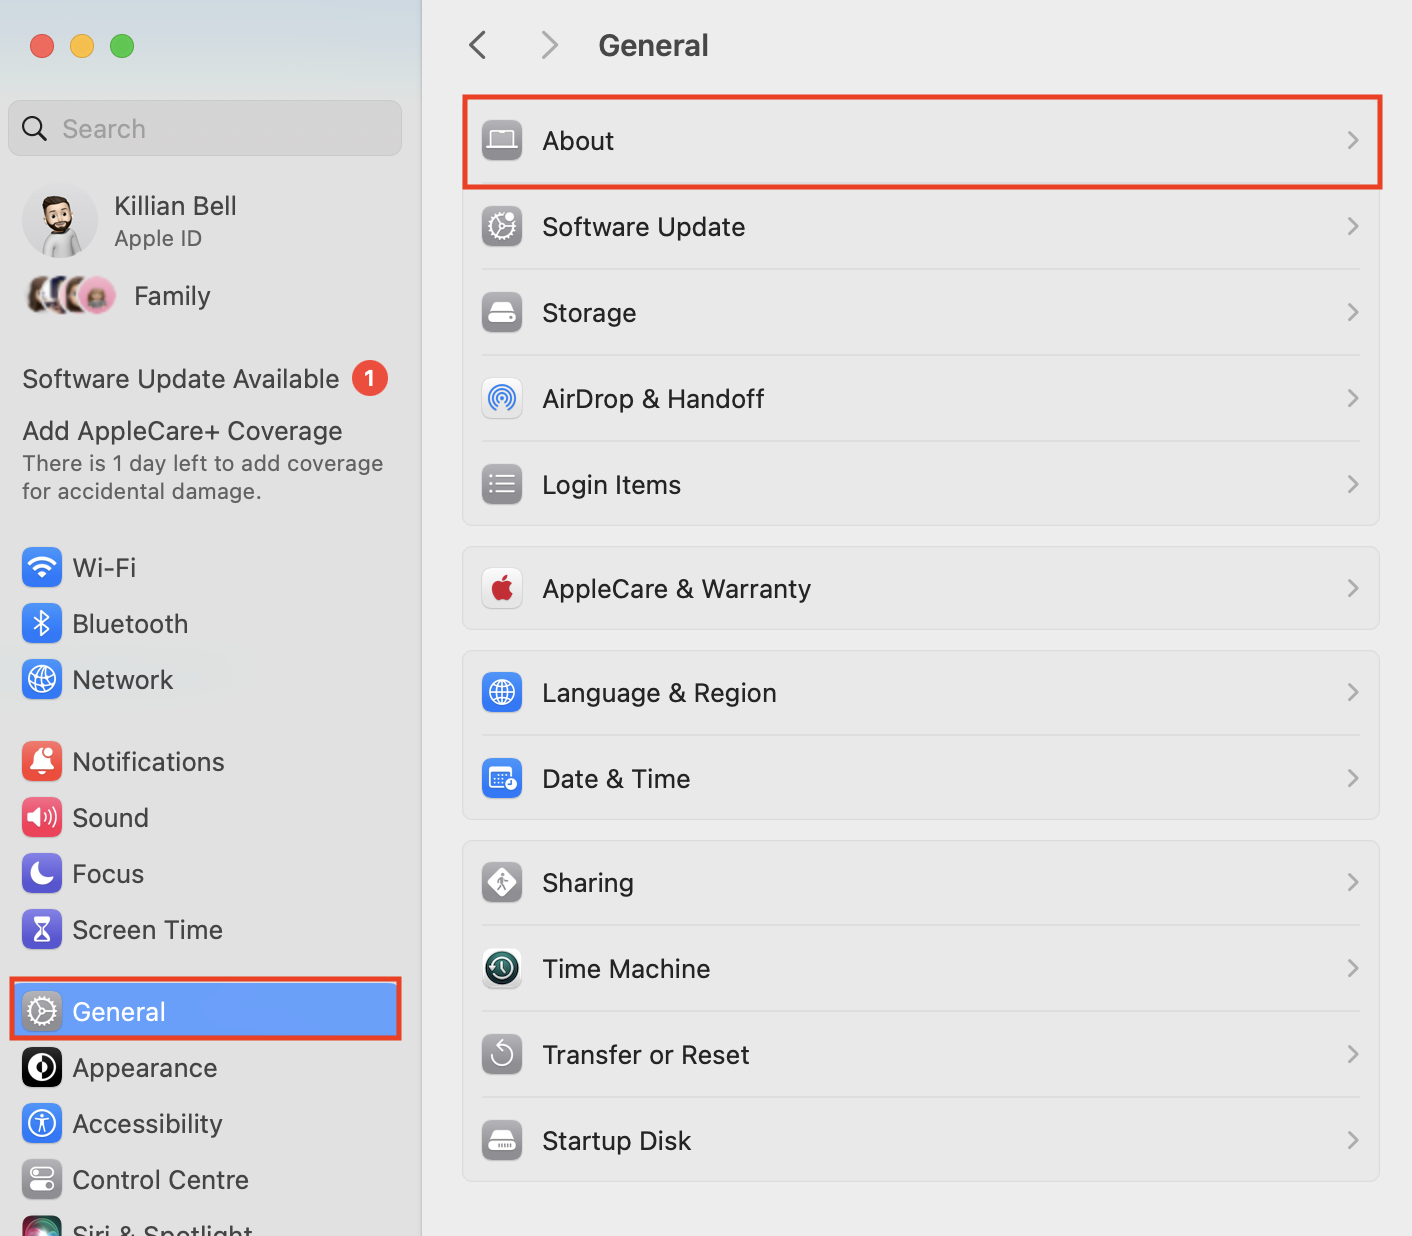
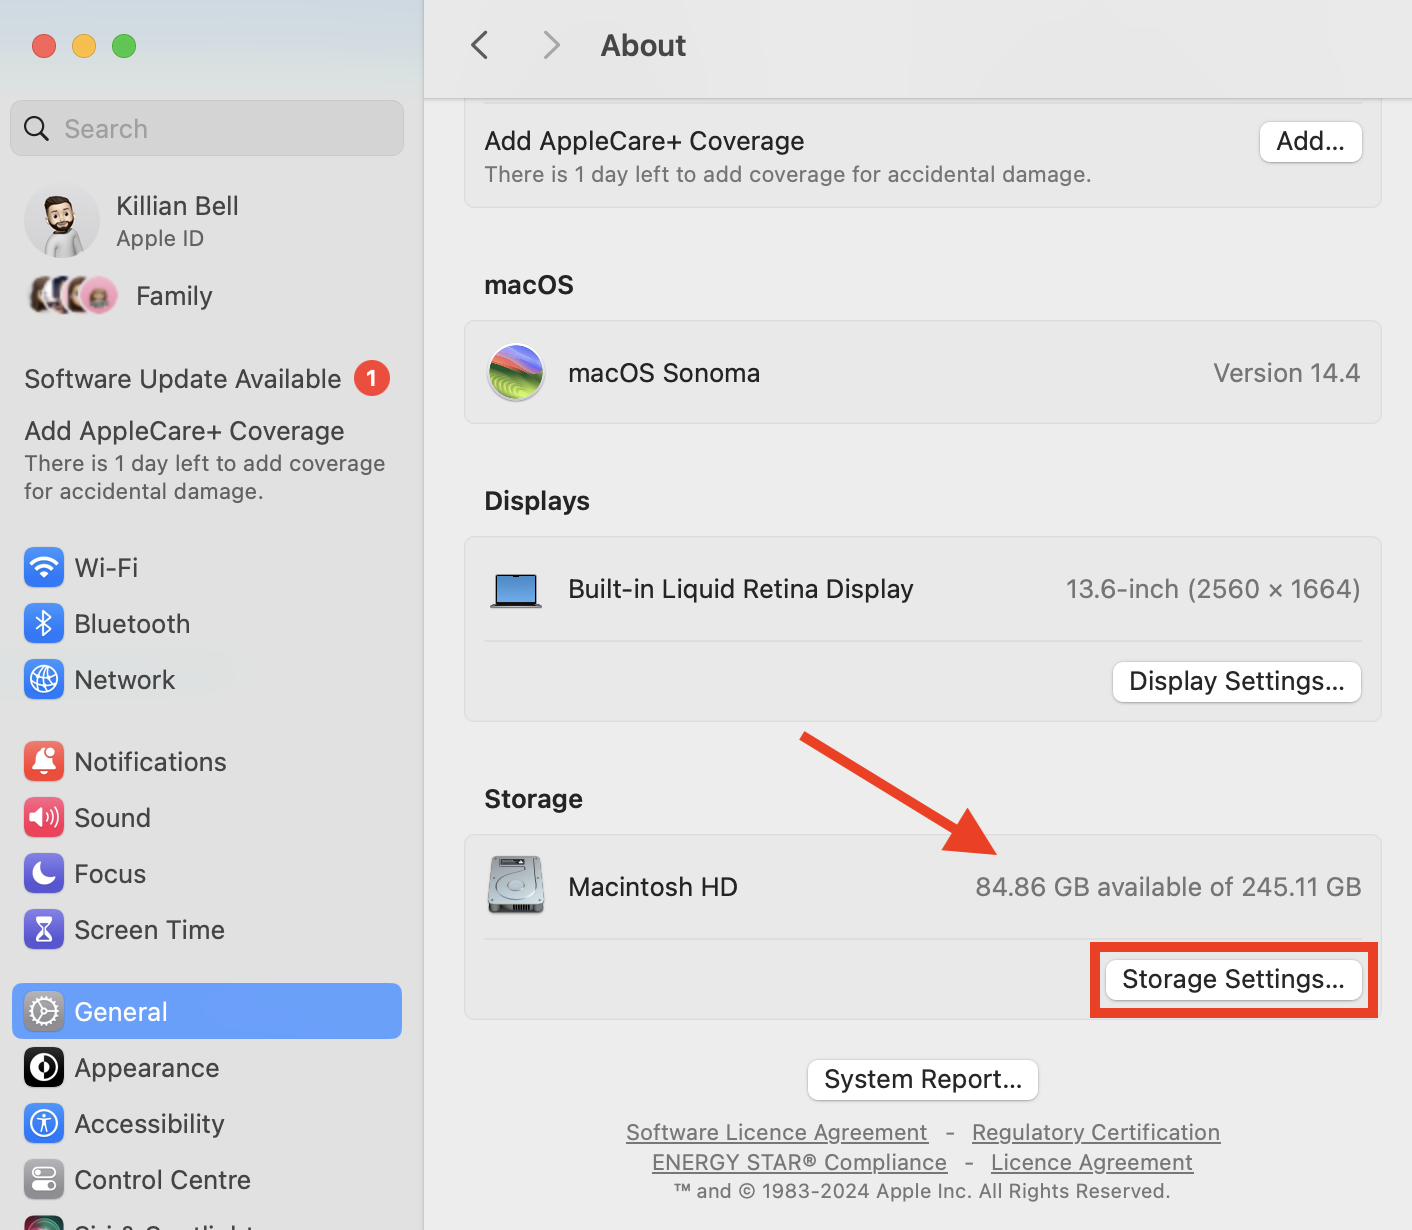
Unfortunately, in more recent versions of OSX, Apple has removed the Storage menu from the About This Mac window. Instead, you can use System Preferences or System Settings to view storage on Mac:
- Open the System Settings app.
- Click General in the sidebar, then select About.
- Scroll down to view the Storage section, and click Storage Settings for more information.
3. Use Get Info in Finder
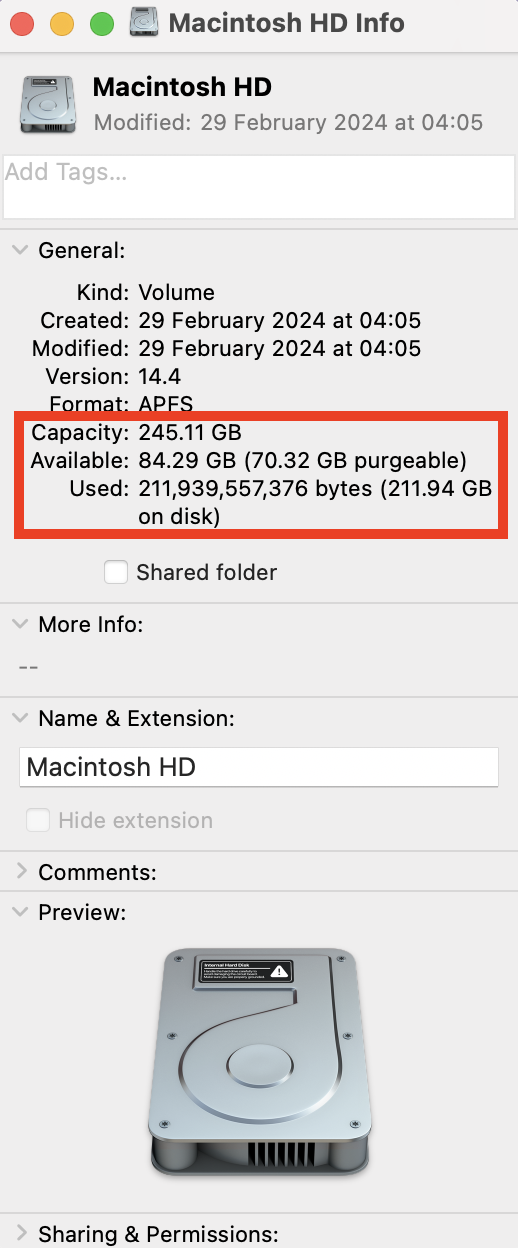
The Get Info window on Mac is a quick way to view important information about any type of file, folder, or storage drive. Here’s how to use it:
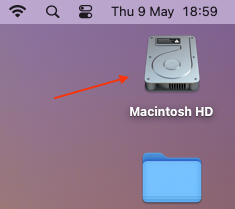
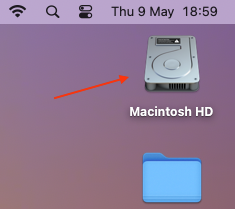
- Click your Mac’s storage drive on your desktop to select it. It’s usually called Macintosh HD.
- On your keyboard, hold down the Command key, then press i to open the Get Info window.
- Look for the Capacity, Available, and Used information about your storage disk.
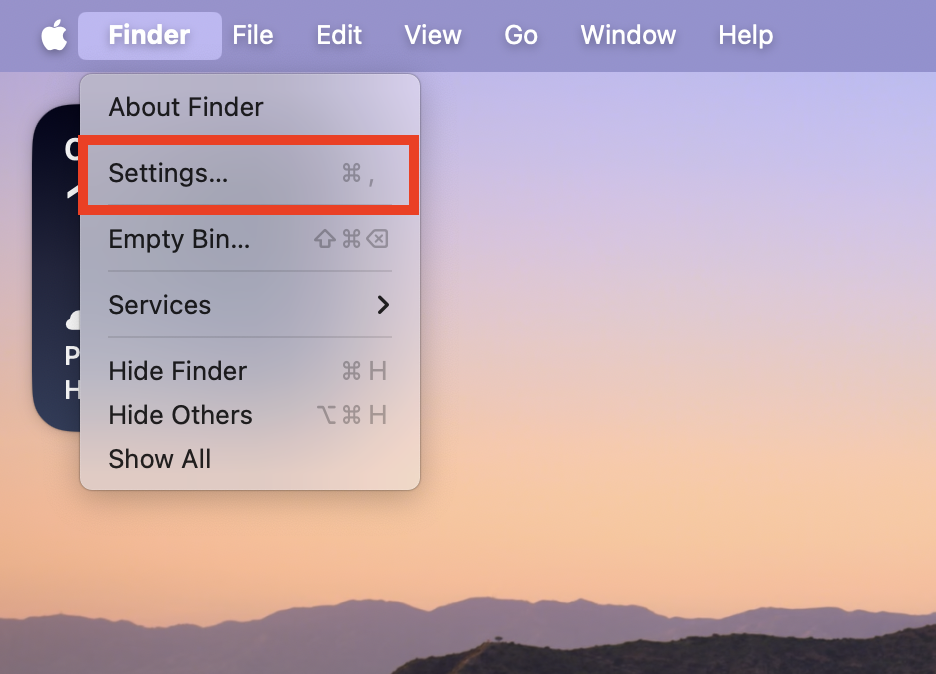
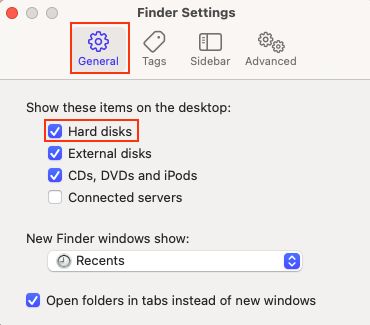
If you don’t see your Mac’s startup disk on your desktop, you can change that within the Finder preferences menu:
- Open Finder, then select Finder > Settings in the menu bar.
- Under General, check the Hard disks option.
- Your Mac’s HDD or SSD will now appear on the desktop. Follow the steps outlined above to select it and open the Get Info window.
4. Via Disk Utility
Disk Utility is a macOS program that’s built specially for disk management. You can use it to erase, format, partition, and recover all kinds of drives. It also tells you all you need to know about your Mac’s storage disks. Simply follow these steps:
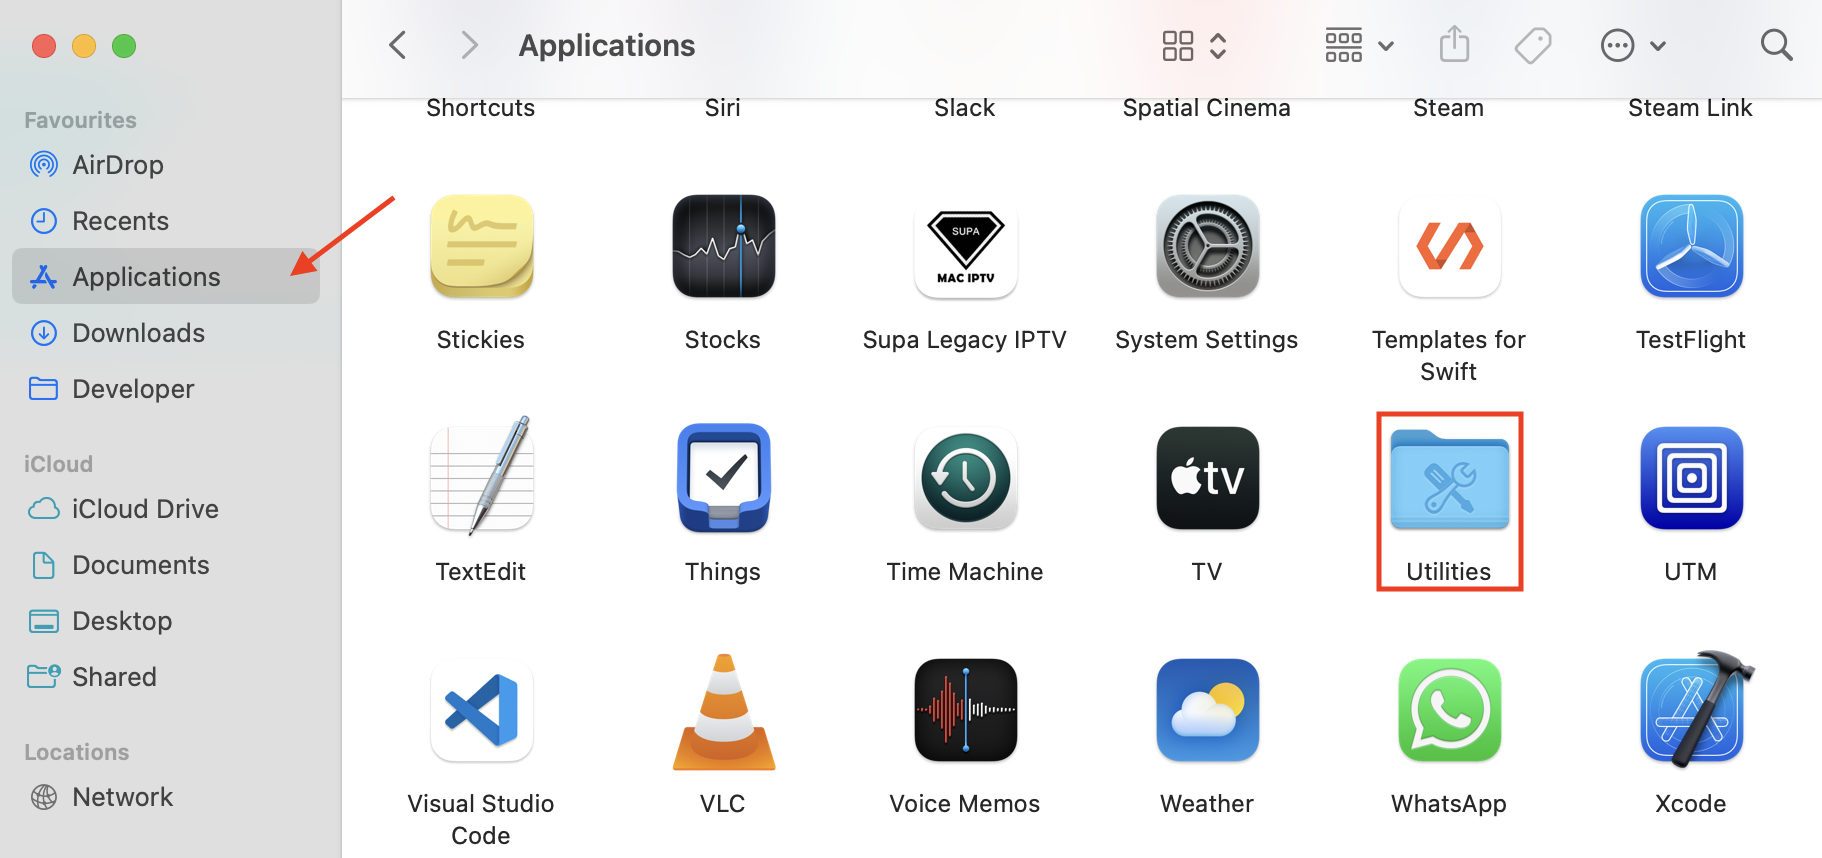
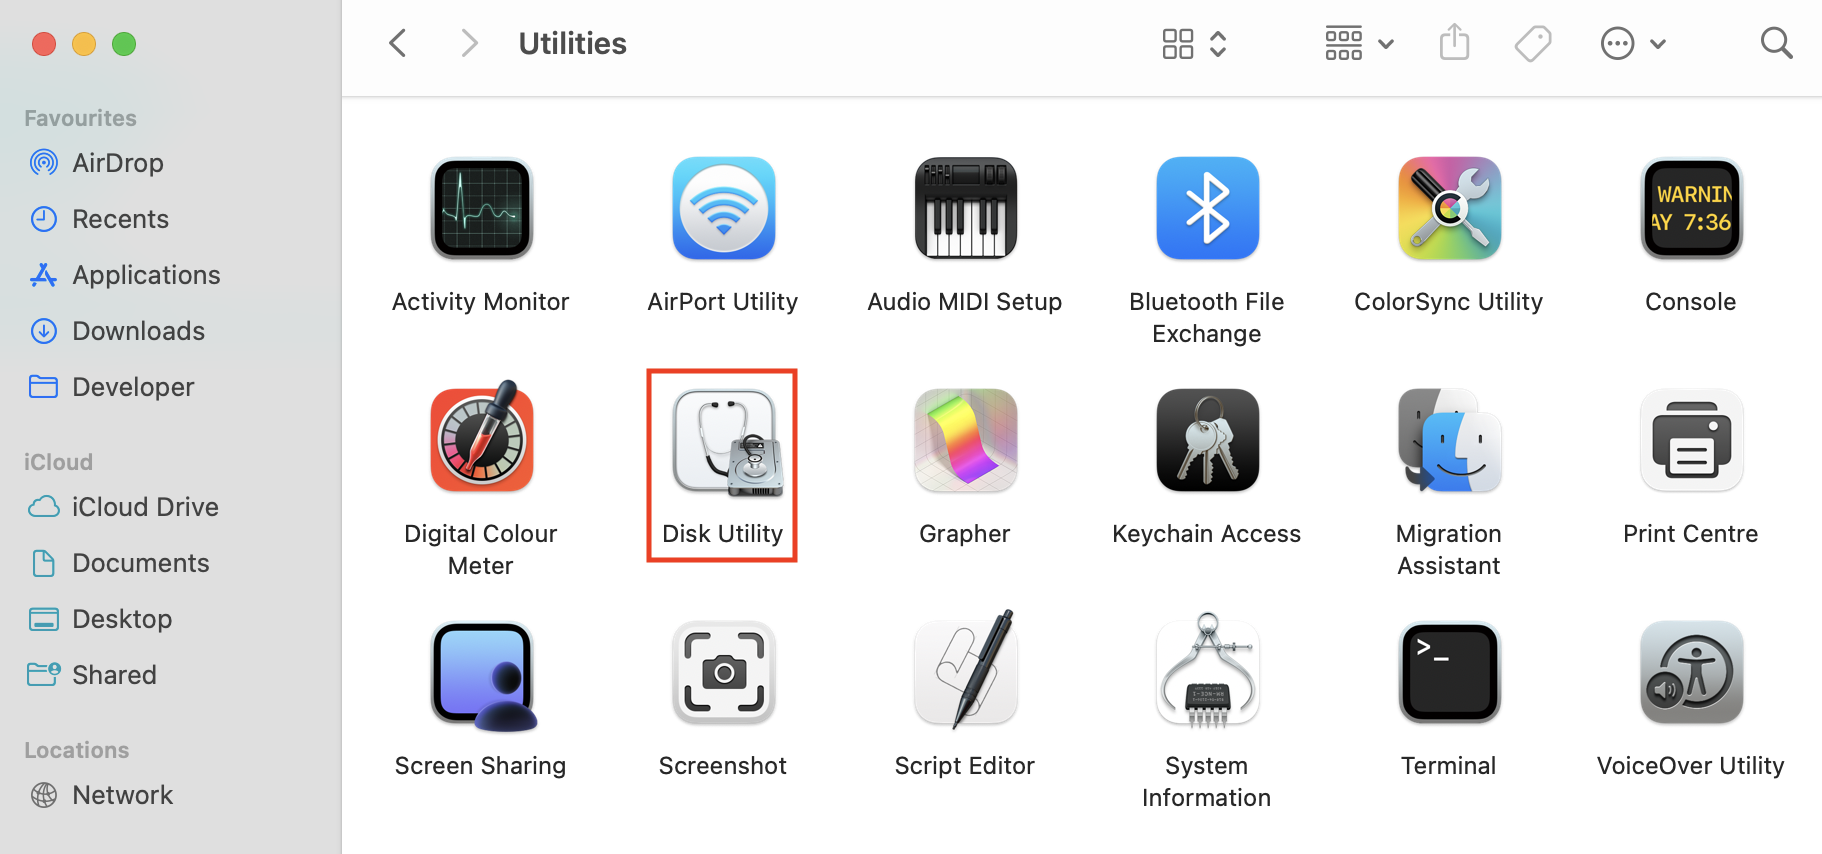
- Open Finder, then go to Applications > Utilities.
- Double-click Disk Utility to launch it.
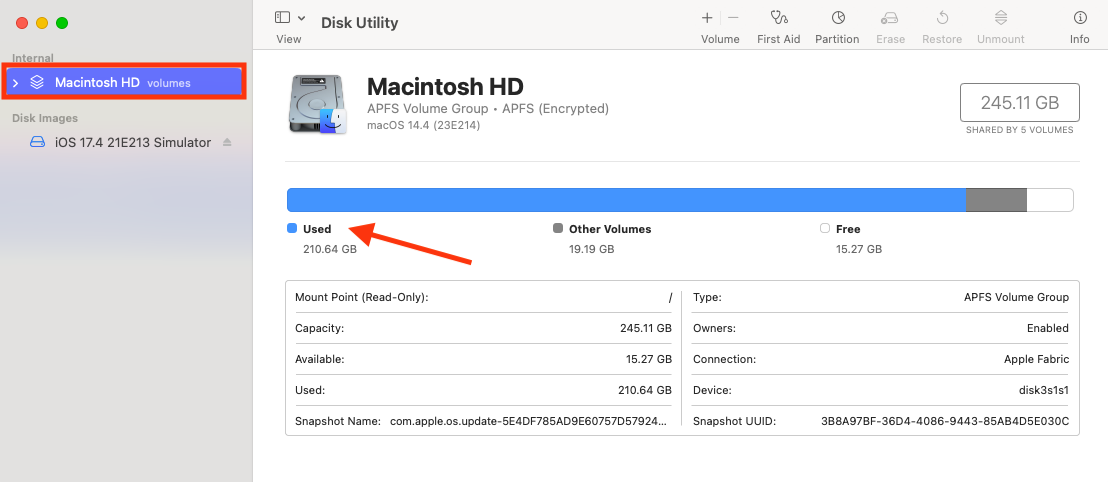
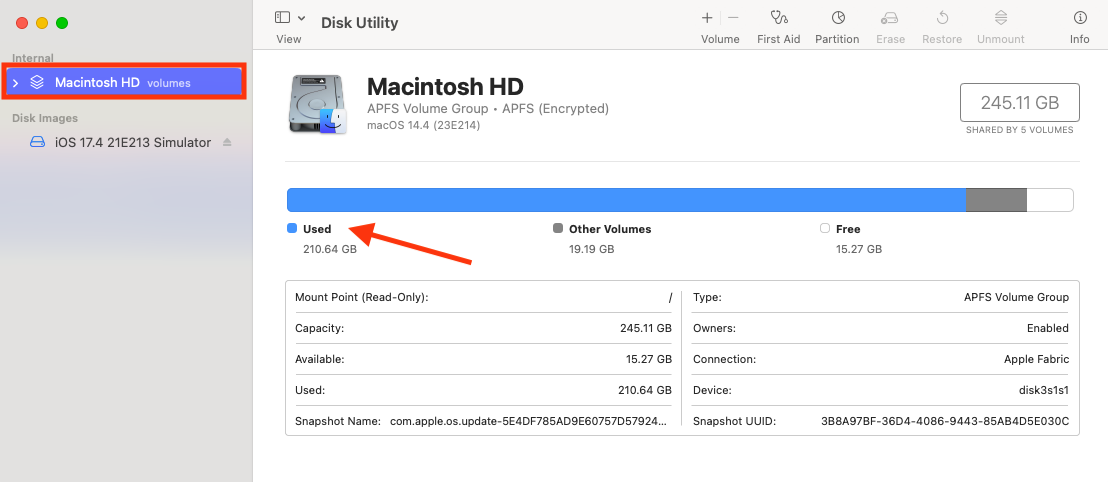
- Select your Mac’s startup disk, usually named Macintosh HD, in the sidebar. You’ll see its capacity, how much data is being used, and how much space is free on the right.
5. Use Quick Look on the desktop
One of the fastest ways to determine how much storage your Mac has is with Quick Look from the desktop, which requires only one key press. Try this:
- Select your Mac’s startup disk, which should be called Macintosh HD if you haven’t changed it, on the desktop.
- Press the spacebar on your keyboard.
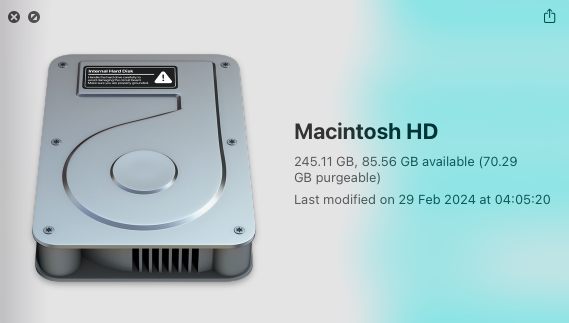
The Quick Look window will appear, showing your drive’s capacity and available space. If you don’t see the Macintosh HD on the desktop, follow the steps above to reveal it.
6. Via Terminal
If you’re the type of person who likes to get things done using the command line, you can view storage on Mac via Terminal like this:
- Double-click Terminal in Applications > Utilities to launch it.
- Type df -h, then press enter.
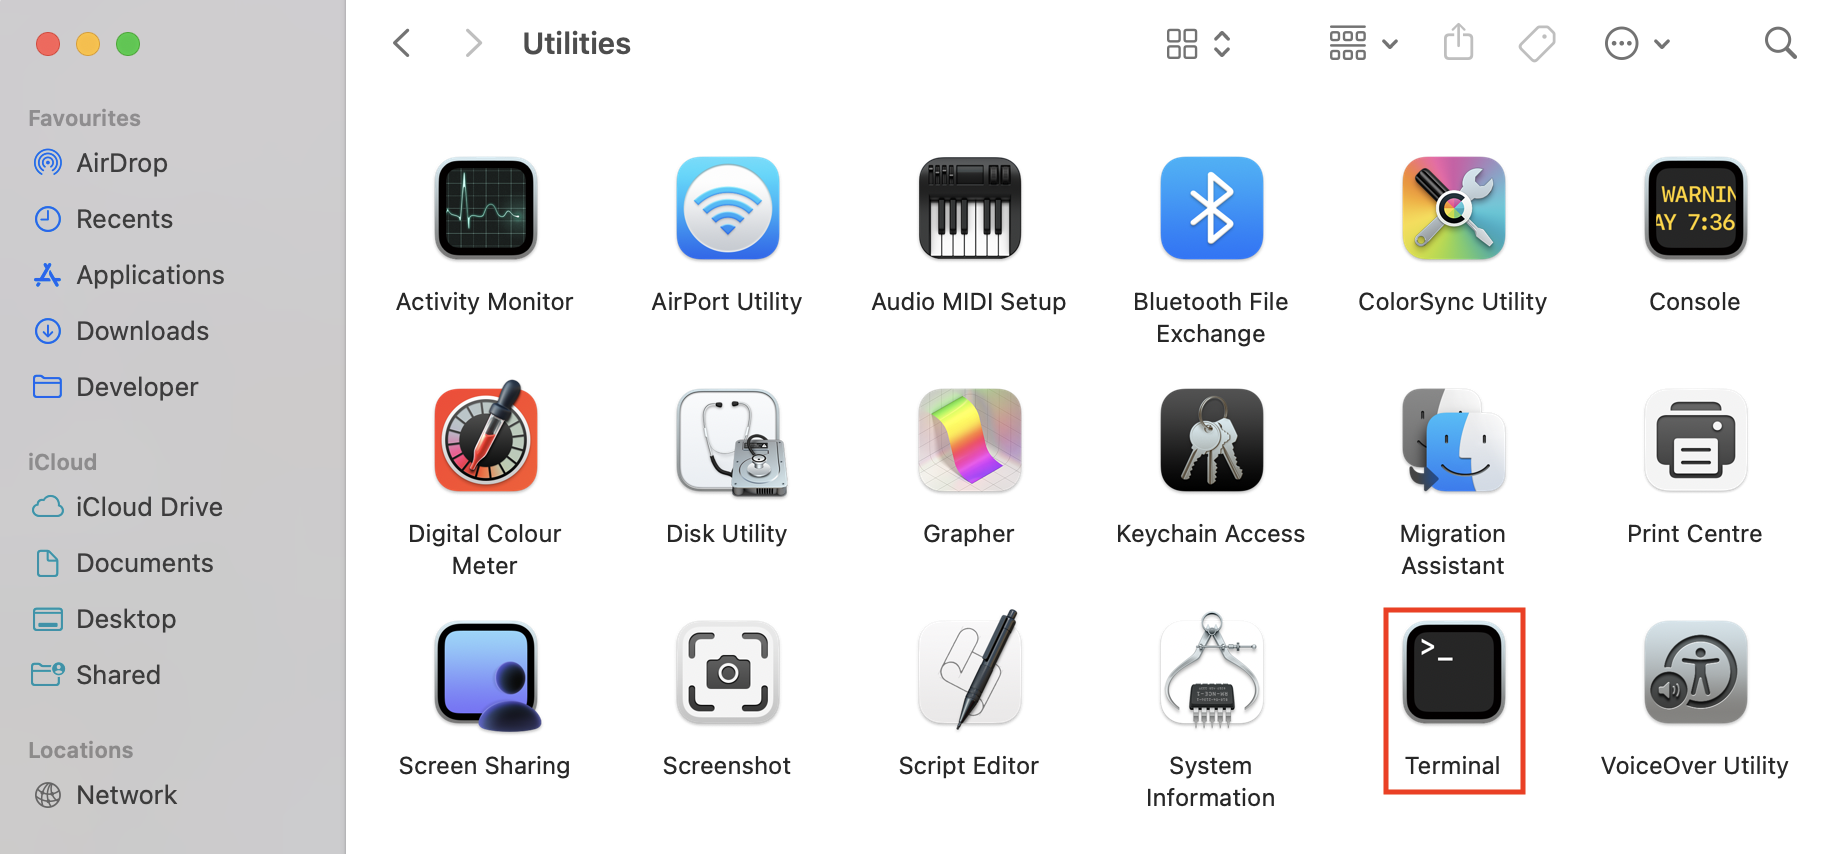
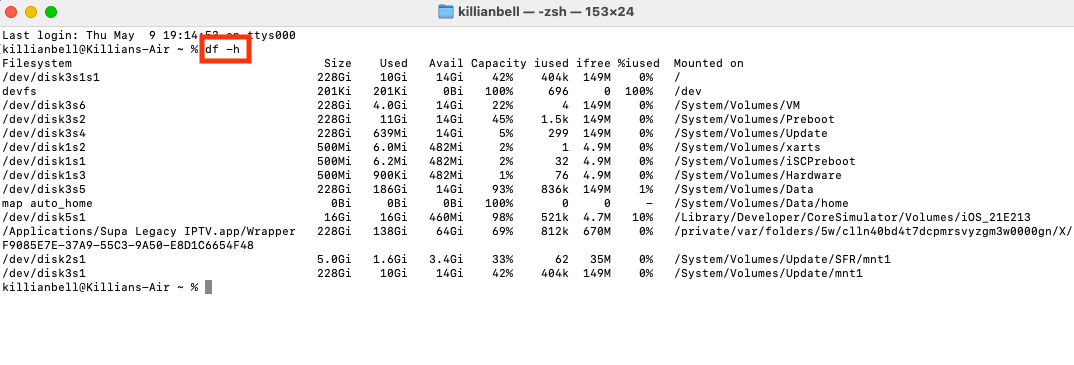
Terminal will now display a list of all disks and the volumes within them. Each one will be displayed with its size, the amount of data used, and the amount of data that’s free.
7. Review the information using a Mac cleanup program
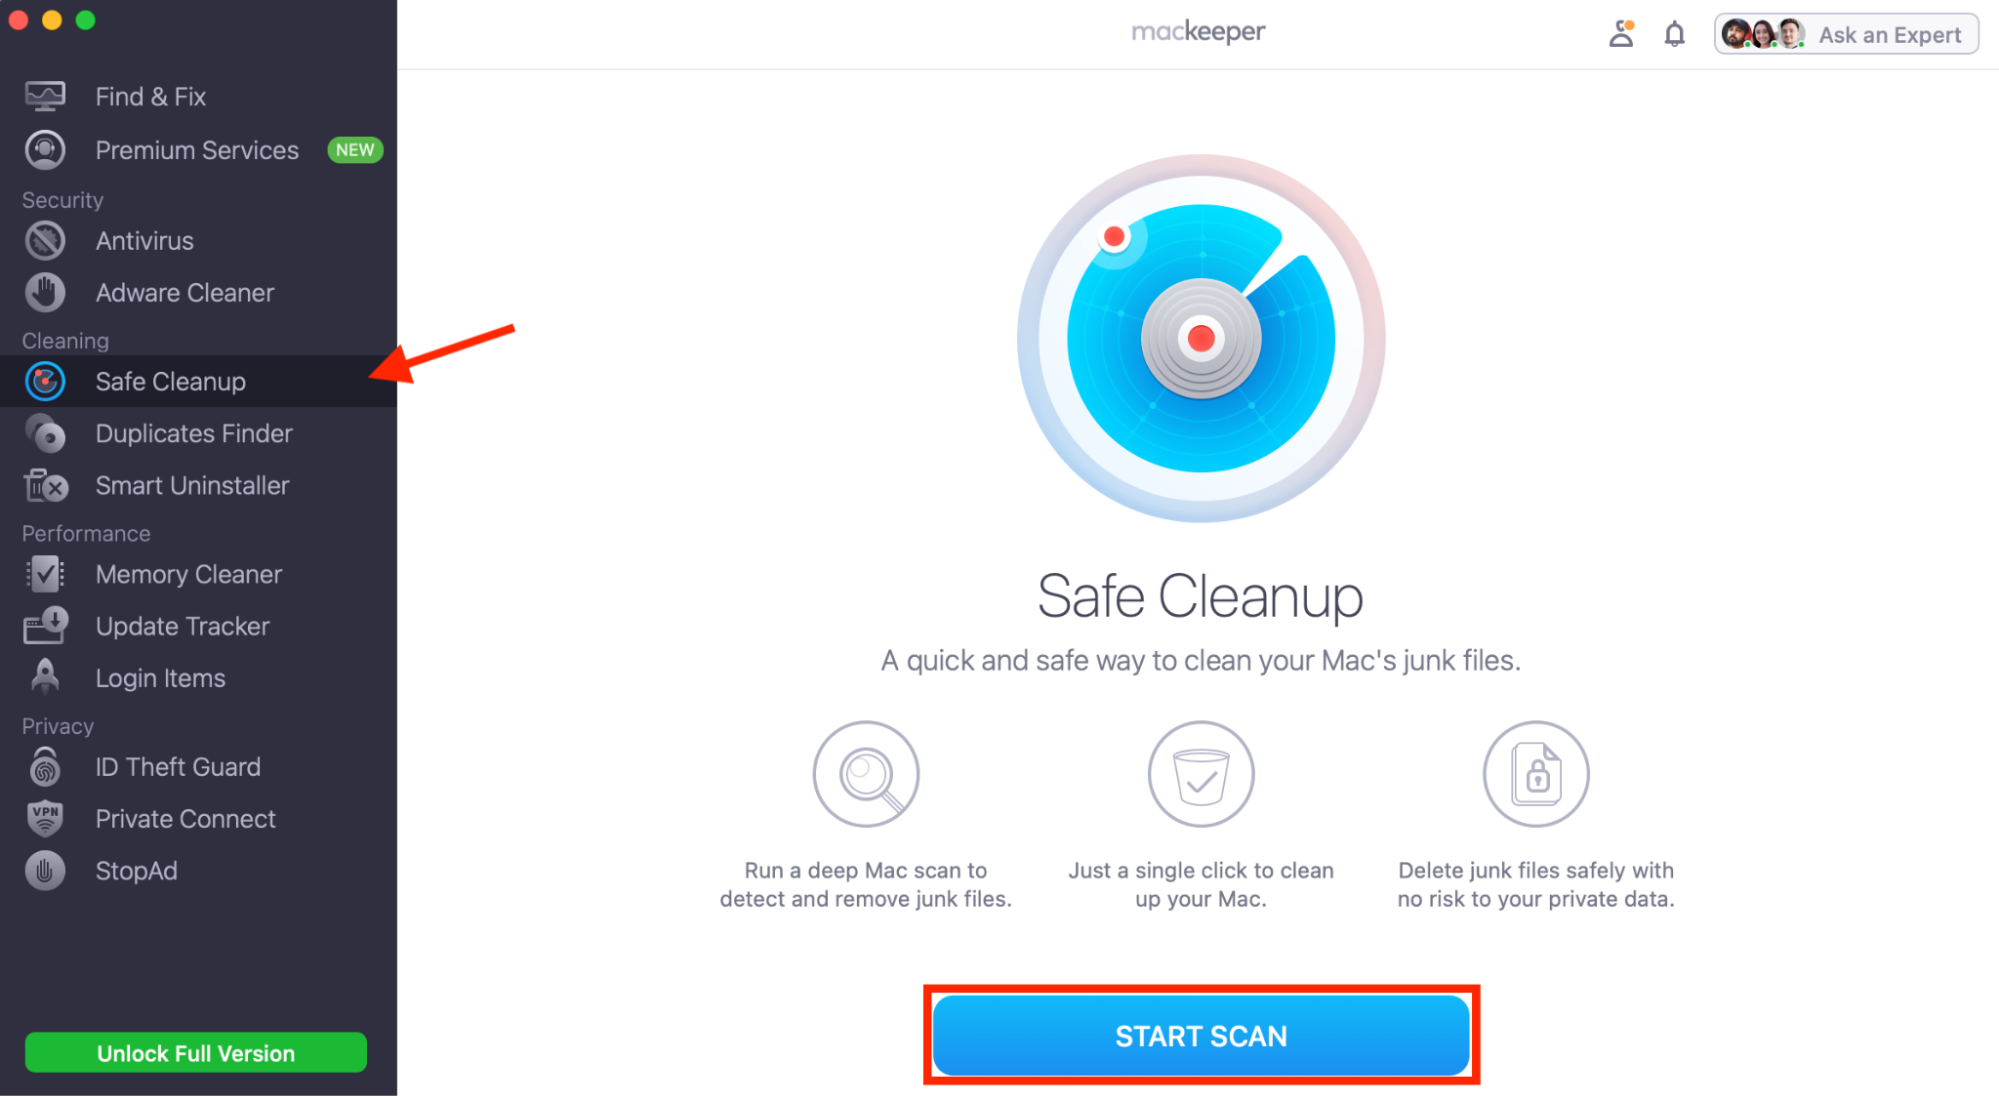
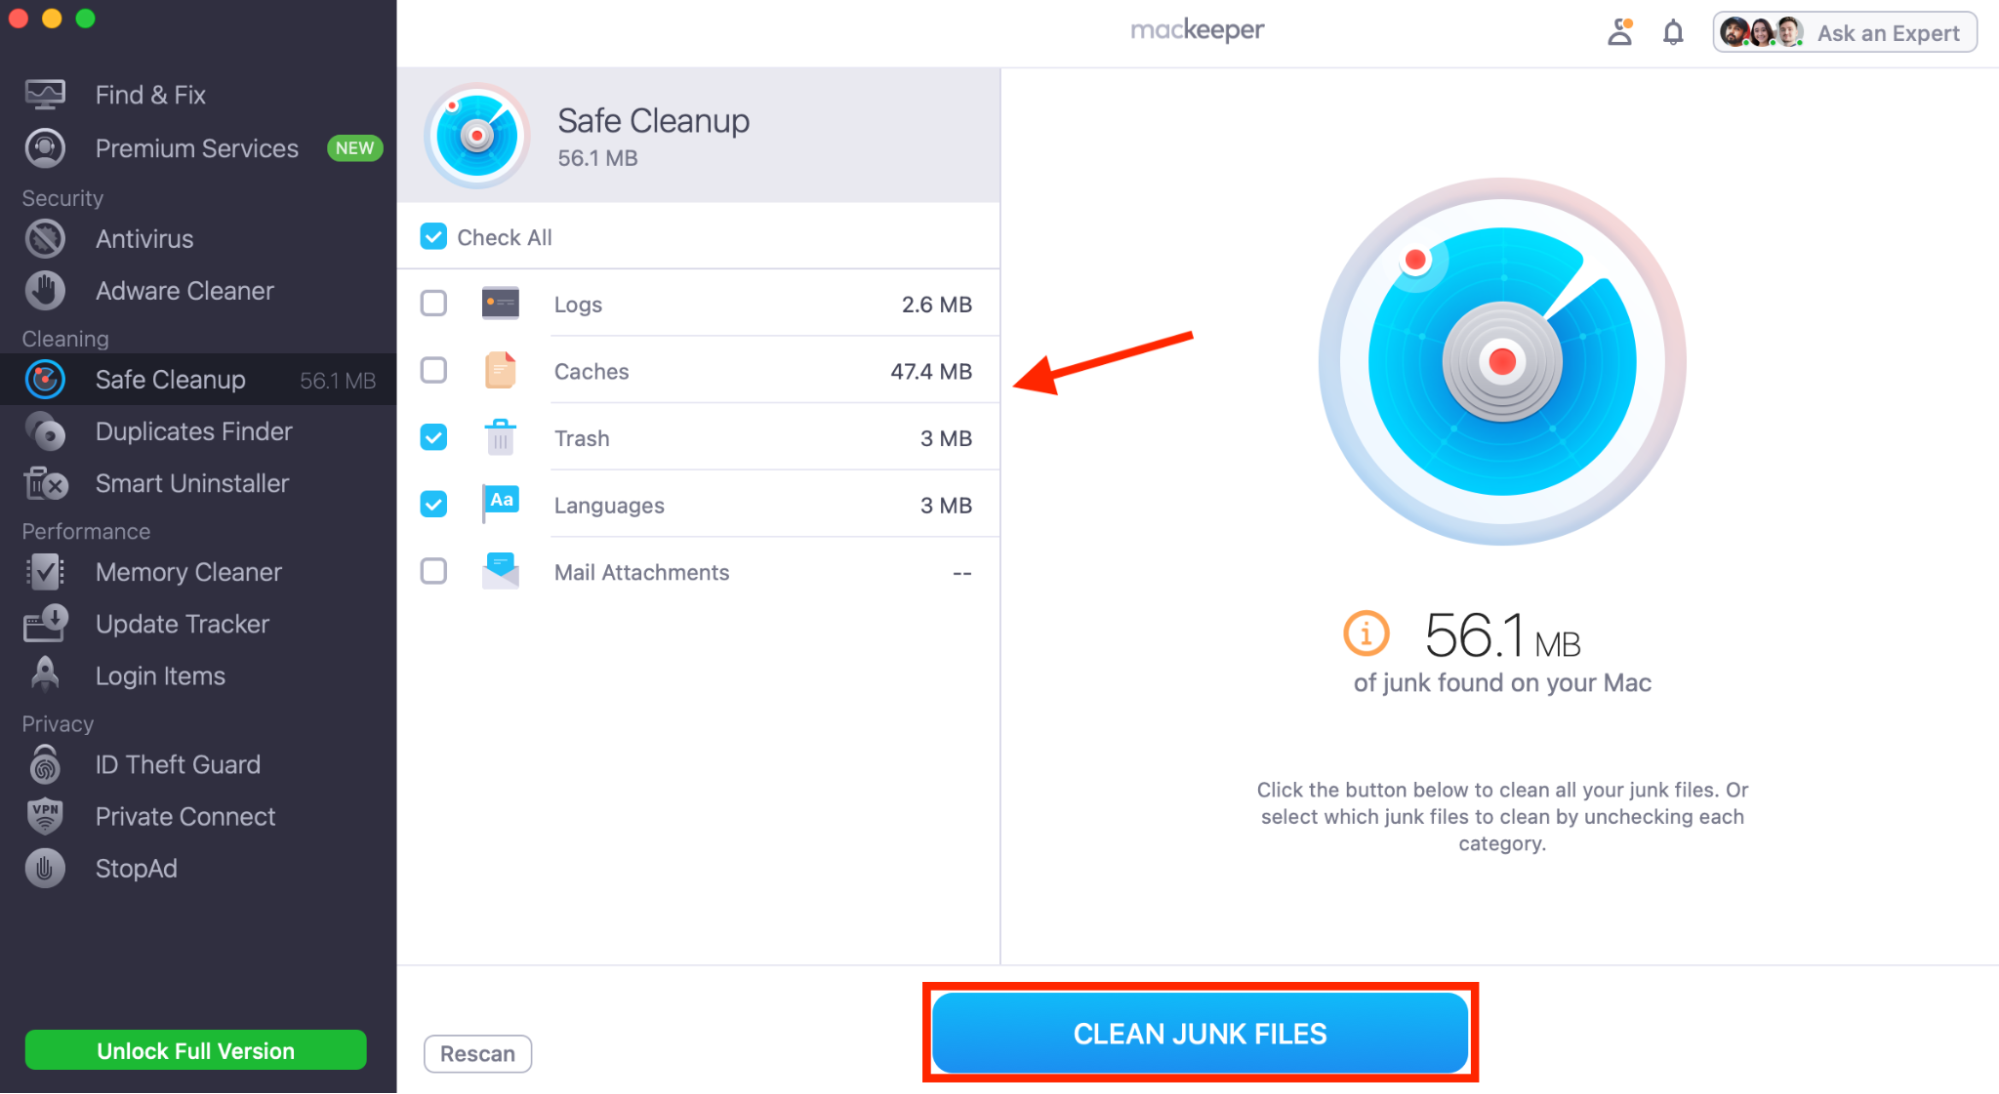
If you need to check and free up storage space at the same time, the best way to do that is with a dedicated Mac cleanup program. MacKeeper can tell you how much space is available, and locate and remove all hidden junk on your system to give you room to work with. Here’s how:
- Open MacKeeper, then select Safe Cleanup.
- Click the Start Scan button.
- Select the junk you want to delete, then click Clean Junk Files.
Note from our team:
MacKeeper doesn’t just clear unnecessary system junk—you can also use its Duplicates Finder and Smart Uninstaller to remove unwanted files and applications and free up space. If you find your startup disk full on Mac, this is one of the fastest ways to fix that problem.
How to see how much storage is left on an external hard drive on Mac
Many of the methods we’ve outlined above will allow you to see how much storage is left on an external hard drive, as well as your Mac’s internal disk. If you want fast starts, try the Get Info or Quick Look methods. If you want more detailed information, try using Disk Utility instead.
We recommend using Disk Utility whenever you need to manage external drives. Here’s how to select them and find the information you need:
- Open Disk Utility on your Mac.
- Select your external hard drive in the Disk Utility sidebar. If you haven’t renamed it, it will likely use the name of its manufacturer, such as Samsung, Kingston, or SanDisk.
- With the drive selected, you’ll see information about its capacity, used space, and free space on the right. You can use the First Aid button to fix any issues, the Partition button to add or remove partitions, and the Erase button to wipe and format your external disk.
How to manage storage on Mac
If you find you’re running out of space, you have a few options. You can use MacKeeper to quickly free up space, as we explained above, or you can remove unwanted files and apps manually. Also, you can transfer large files to an external drive. Alternatively, ask iCloud to optimize your storage for you, like so:
- Open System Settings on your Mac, then select your name at the top of the sidebar.
- Ensure the Optimize Mac Storage option is enabled.
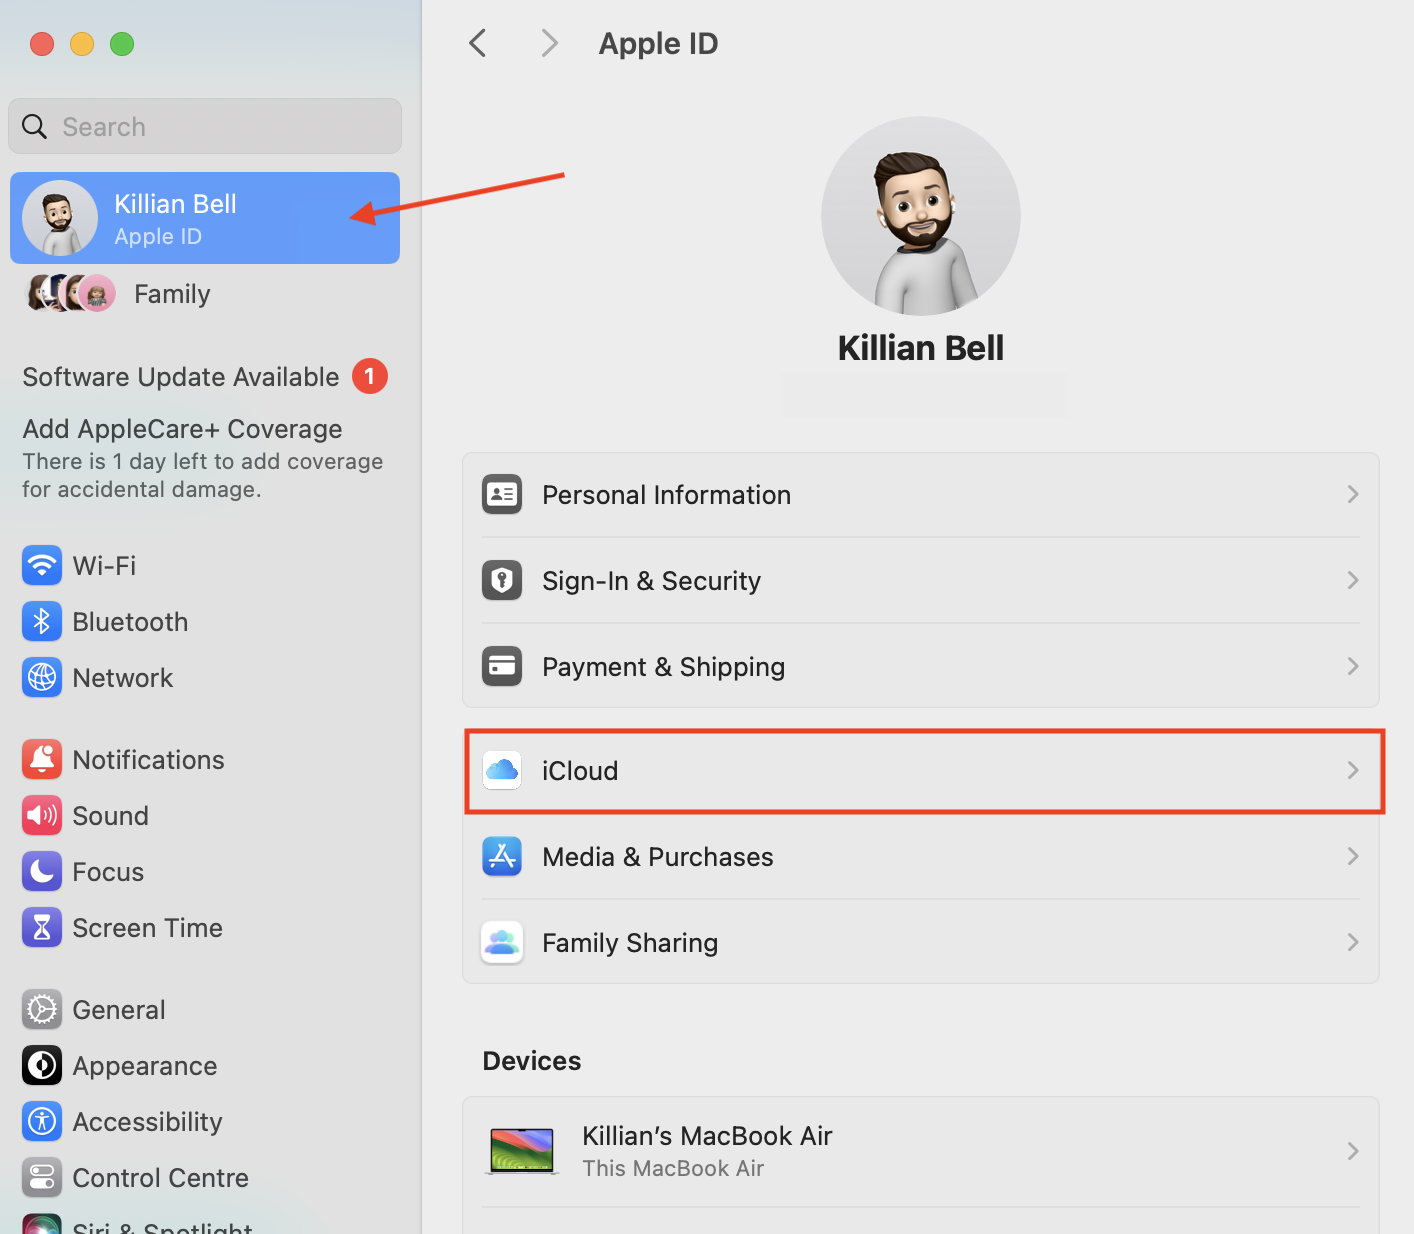
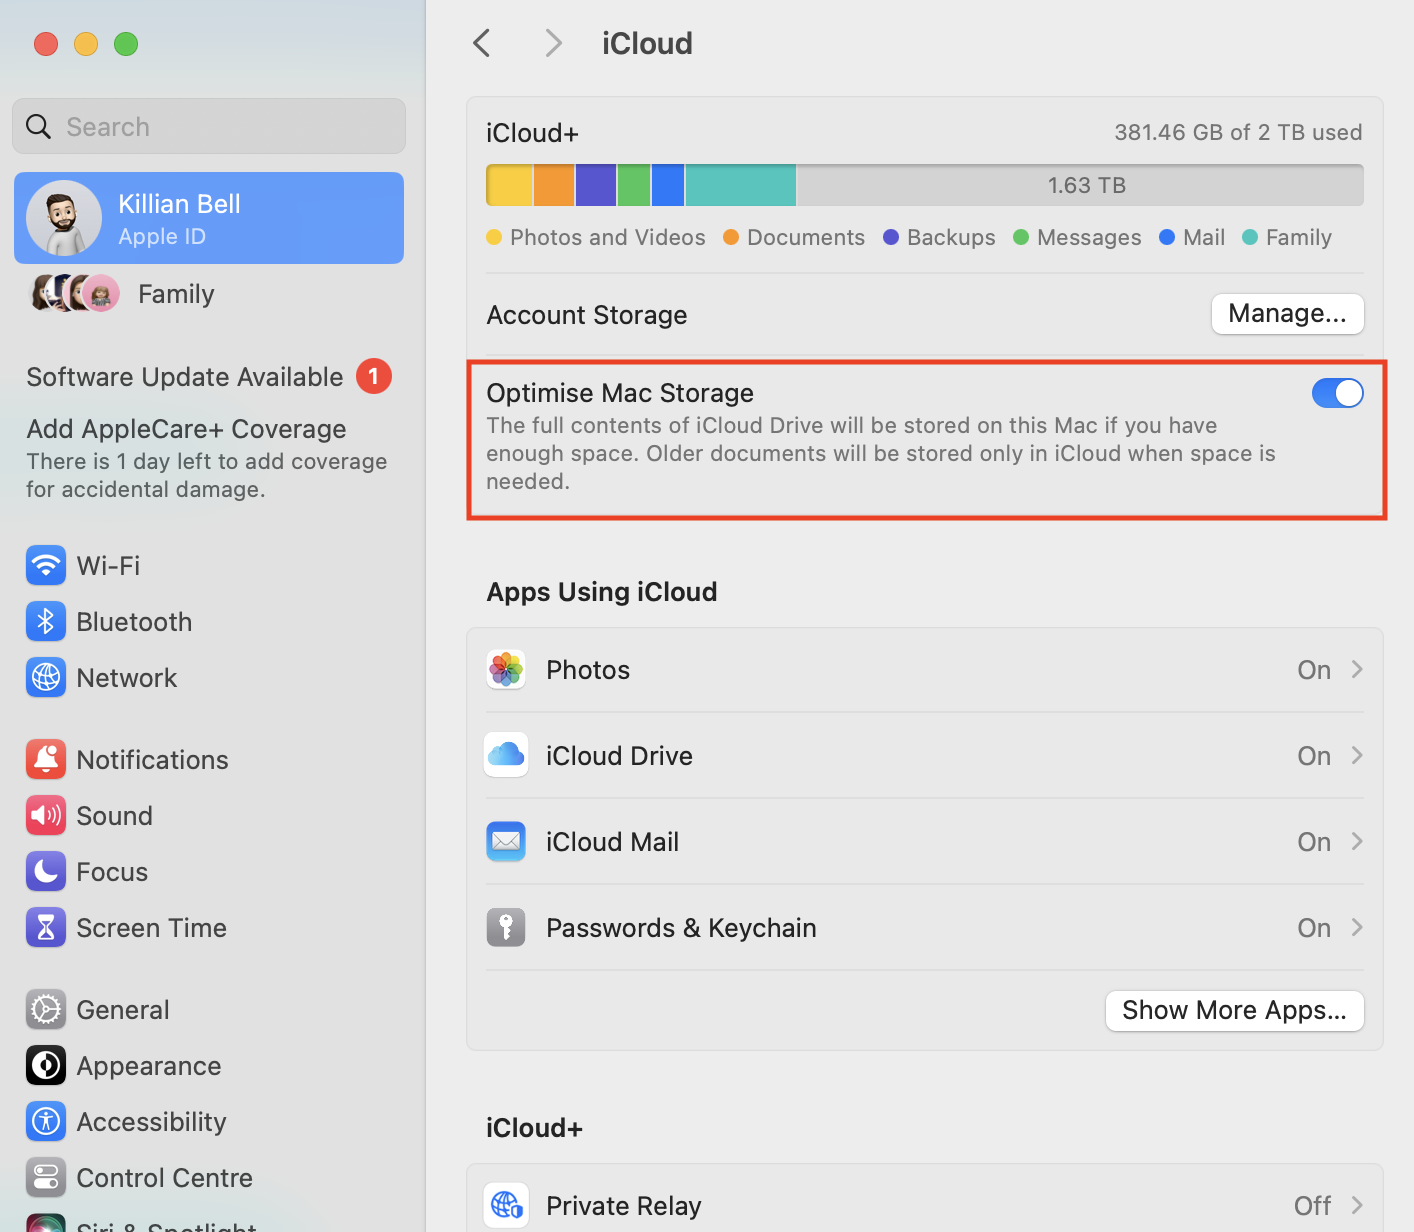
This will send older documents you haven’t opened in a while to iCloud Drive when your Mac starts getting low on storage space. Our experts also recommend that you ensure that iCloud syncing is enabled for Photos, which will store all your photos and videos in the cloud, freeing up a lot of room.
Conclusion
There are plenty of easy ways to check and manage the storage on your Mac and any external drives you rely on. Some of these, like Quick Look, are fast and simple, while others, like Disk Utility, give you detailed information about your disks and let you perform all kinds of management tasks.
If you’re not comfortable freeing up space on your Mac manually, you can use MacKeeper. Our tool will identify and remove all the hidden and unnecessary junk on your system, uninstall any unwanted apps, find duplicate files that are taking up space, and free up system RAM for greater performance.
FAQ about Mac storage
1. Which built-in macOS application can be used to view volumes and available storage space?
Disk Utility is a program built into macOS that lets you see all the disks and volumes connected to your system, as well as a summary of how much free space each one has.
2. Can I add more storage to my MacBook?
Yes, the easiest way to add more storage to your MacBook is with an external disk or USB flash drive. On some older models, it’s possible to upgrade the internal HDD or SSD, but on more recent MacBook models, the storage is soldered in and non-upgradeable.
3. How much disk space does a MacBook Air have?
There have been countless configurations of MacBook Air over the years, so not all have the same amount of disk space. To see how much your Mac has, go to System Settings > General > Storage.
4. How to see what takes up space on my Mac
You can see what’s taking up space on your Mac within System Settings. Select General in the sidebar, then scroll down and click the Storage Settings button.


