Before solid-state drives (SSDs) became the norm, there was less need to optimize your Mac’s storage. But SSDs are more expensive than regular hard drives, and overall storage space has fallen in Macs in the past few years. To help with this situation, Apple introduced the Optimized Storage feature, starting from macOS Sierra in 2016.
This set of tools lets you manage the disk space on your Mac. As well as helping you to find and delete unneeded files, it can automatically optimize storage using iCloud and by removing video content you’ve already watched.
In this guide, we’ll look at how to use these tools, as well as how it compares to third-party Mac hard drive optimizers.
Before we start
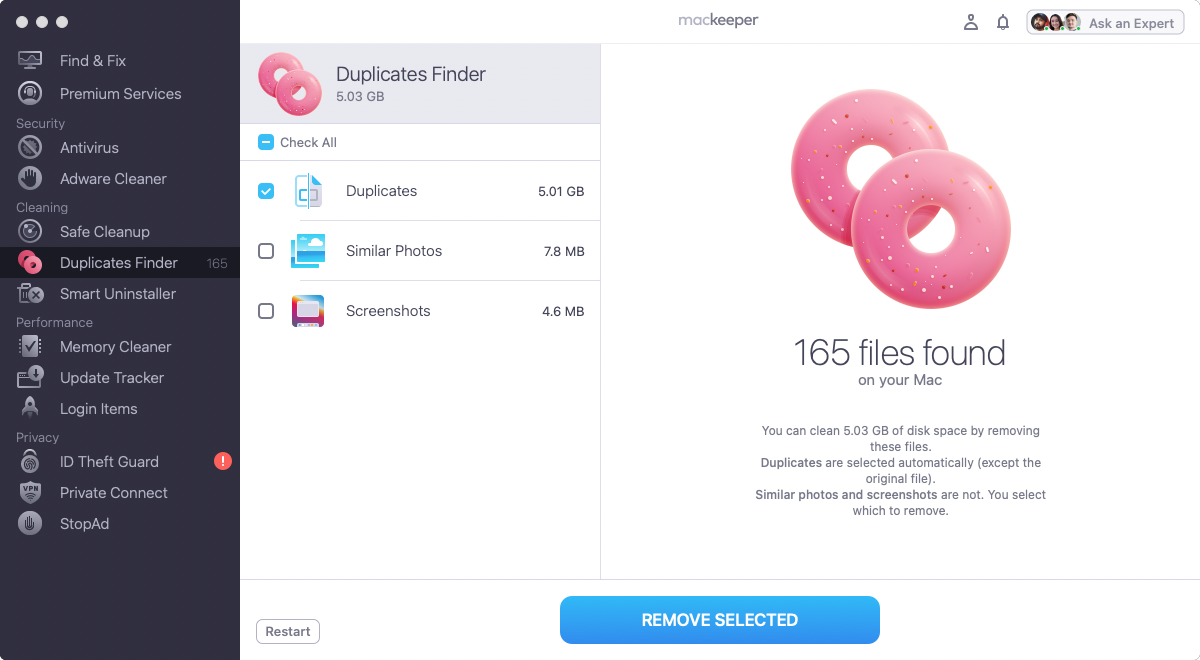
One tool the macOS Optimized Storage feature doesn’t have is a duplicate file finder. Having multiple, unwanted copies of data obviously wastes disk space. Using MacKeeper, you can quickly and easily find duplicates and delete them.
- In MacKeeper, select Duplicates Finder from the sidebar
- Click Start scan
- When the scan is finished, select any duplicates you don’t want, and click Remove duplicates
MacKeeper also lets you find and remove junk files. Plus it includes real-time antivirus, a VPN client and more. Try it out now to see for yourself. You get one free fix for each tool, so you can test it properly.
Using Optimized Storage on your Mac
macOS offers many ways to manage the disk space on your Mac. Let’s look at how to use them.
How to open the macOS disk optimization tools
Your Mac’s storage optimization tools aren’t in the Applications folder or even system preferences. Instead, you have to access them from the About This Mac menu.
Here’s how to open storage optimization on your Mac:
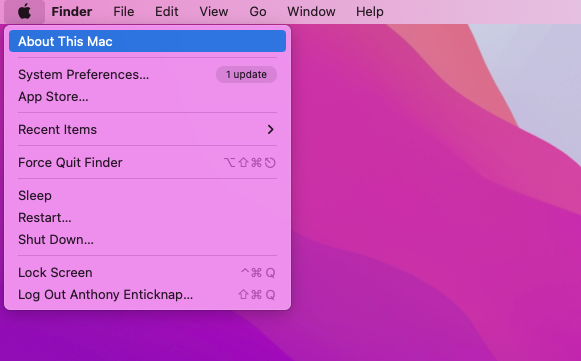
1. Click on the Apple icon in the top left of your screen, in the menu bar, and select About This Mac
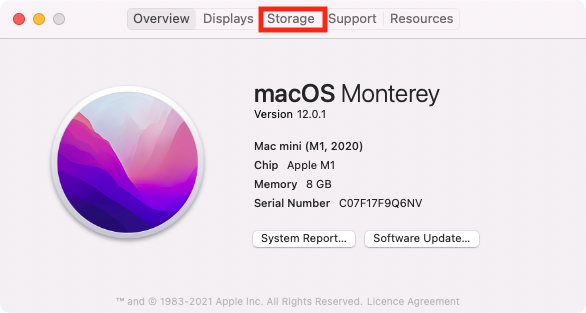
2. Now select the Storage tab
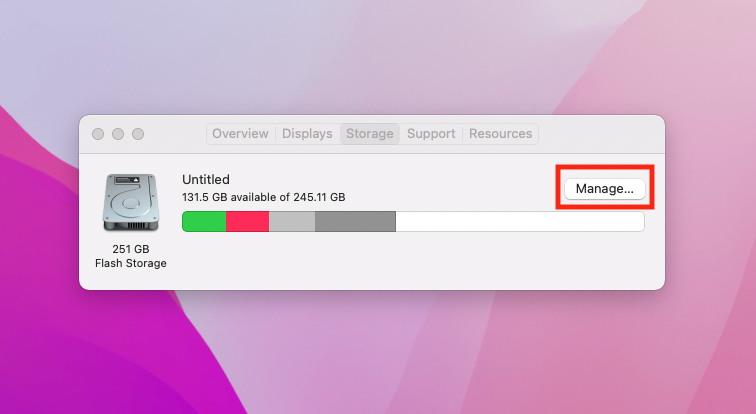
3. Click the Manage button
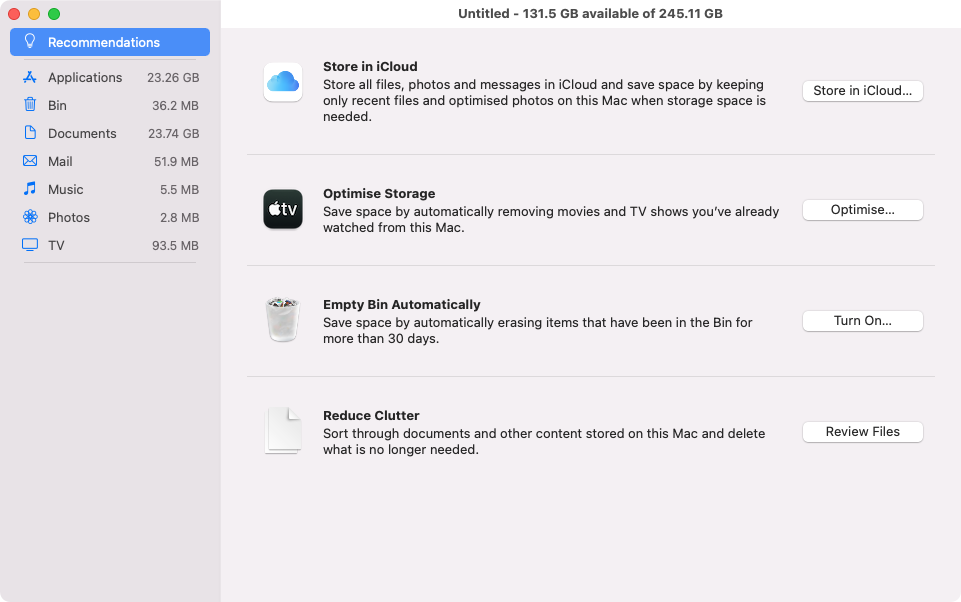
4. You’ll now see a list of recommendations
Storing files in iCloud
Cloud storage has become an increasingly important way to optimize your Mac’s hard drive. And macOS can automatically store files in Apple’s cloud service, iCloud. As well as files from your Desktop and Documents folder, you can automatically save photos and messages to iCloud. If you use this feature, though, you might want to buy more iCloud storage.
Setting up iCloud storage to optimize your disk space is easy:
1. Click the Apple icon in your menu bar, and select About This Mac
2. Select the Storage tab
3. Click Manage
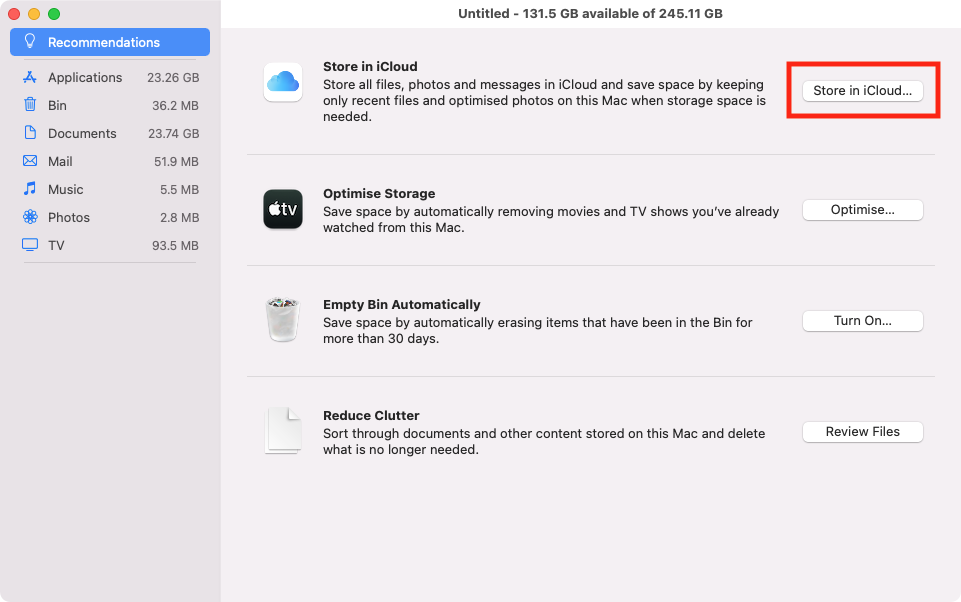
4. Under Recommendations, click the Store in iCloud button
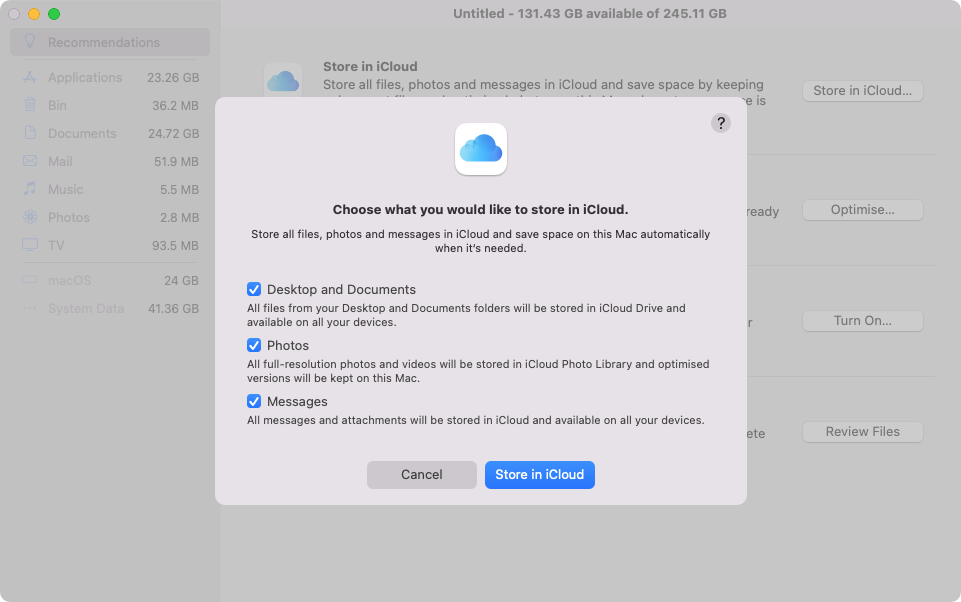
5. Tick everything you want to store in iCloud, and click Store in iCloud
Delete old email attachments and videos you’ve watched
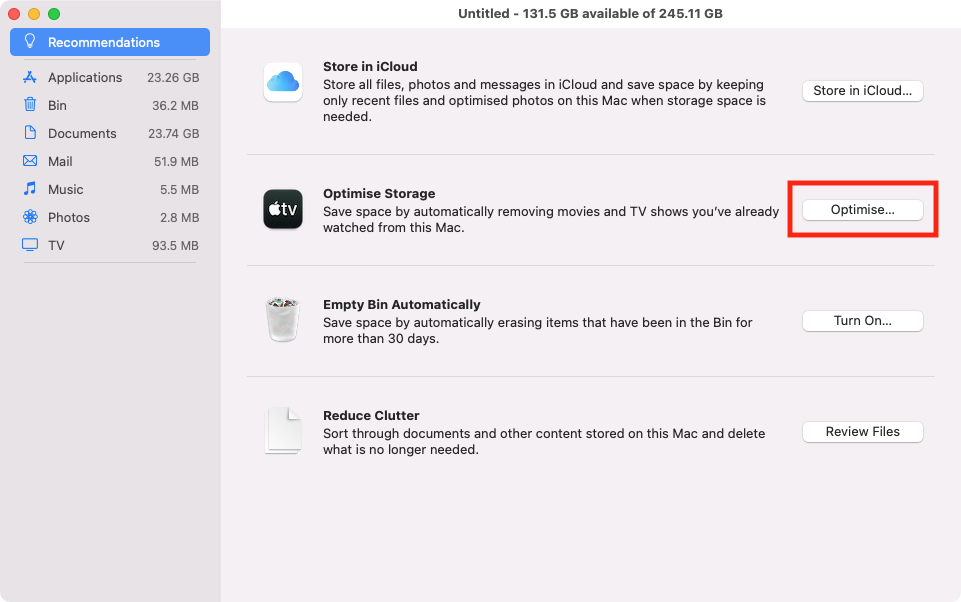
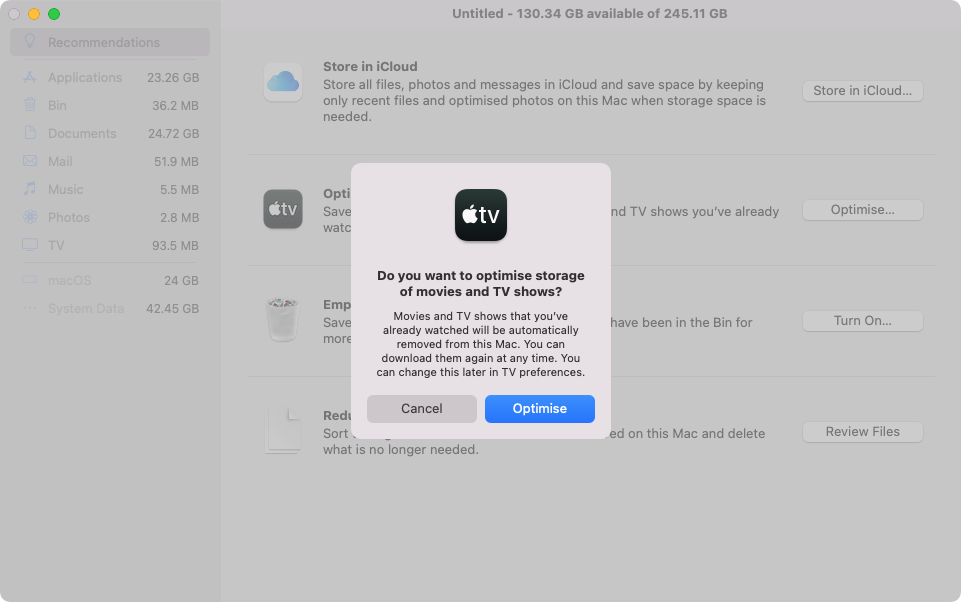
Video files take up a lot of space, but macOS can automatically delete content you’ve watched, if you bought it from Apple. And it can delete all but your most recent email attachments. These are both achieved with the same tool — Optimize Storage.
Here’s how to use the Optimize Storage tool on your Mac:
1. Open About This Mac from the Apple menu
2. Select Storage, and click the Manage button
3. Under Recommendations, click the Optimize button
4. Click Optimize
Automatically empty your Trash
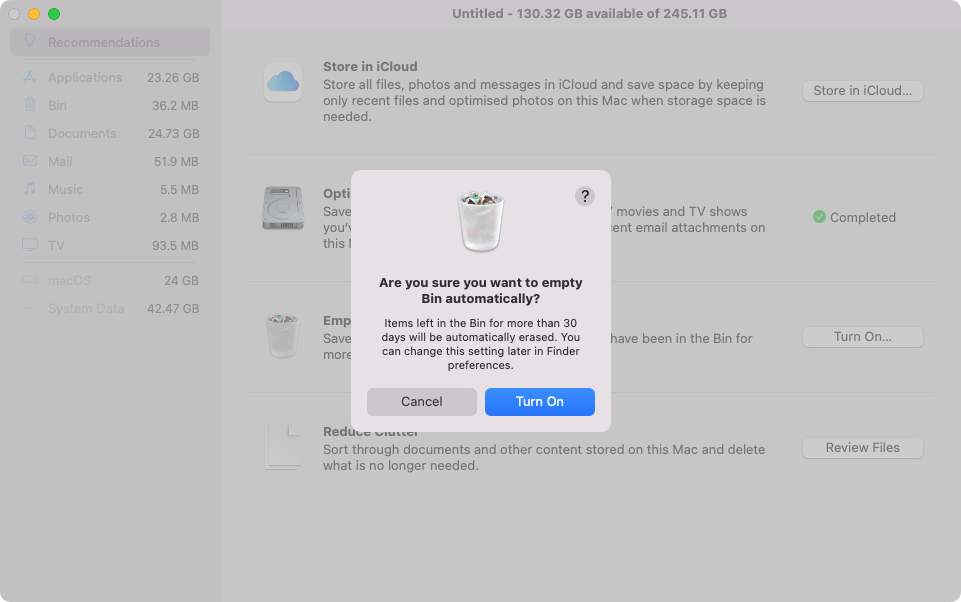
It’s easy to delete things and then forget they’re still in your Trash Bin. Before you know it, there are gigabytes of unwanted files clogging up your Mac. You can optimize your Mac’s storage by setting it to automatically delete any files in your trash that have storage been there for more than 30 days.
Here’s how to empty your Mac’s Trash Bin automatically:
1. Select Apple > About This Mac from the menu bar
2. Go to the Storage tab, and select Manage
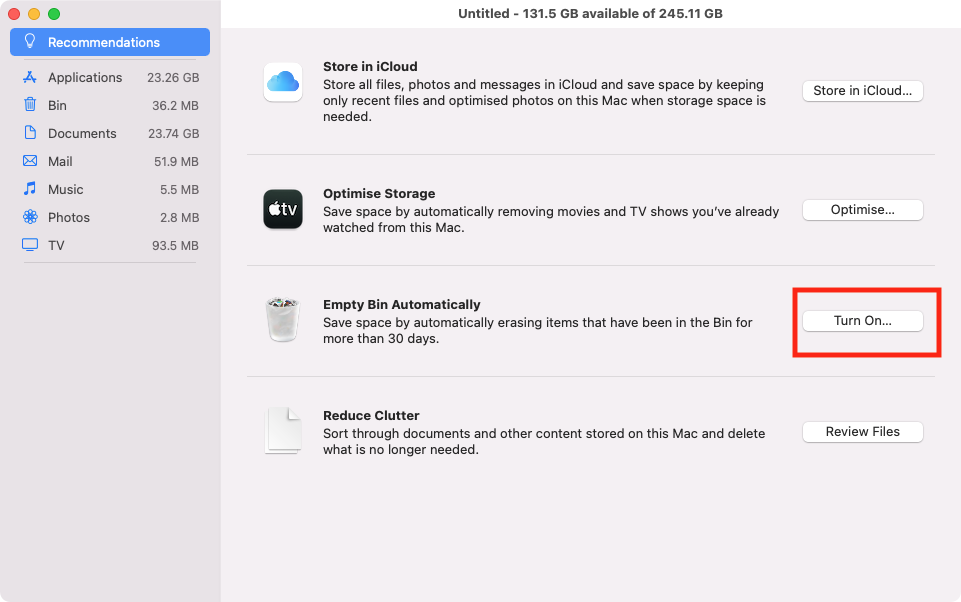
3. Next to Empty Bin Automatically, click Turn On
4. Click Turn On
Removing large files from your Mac
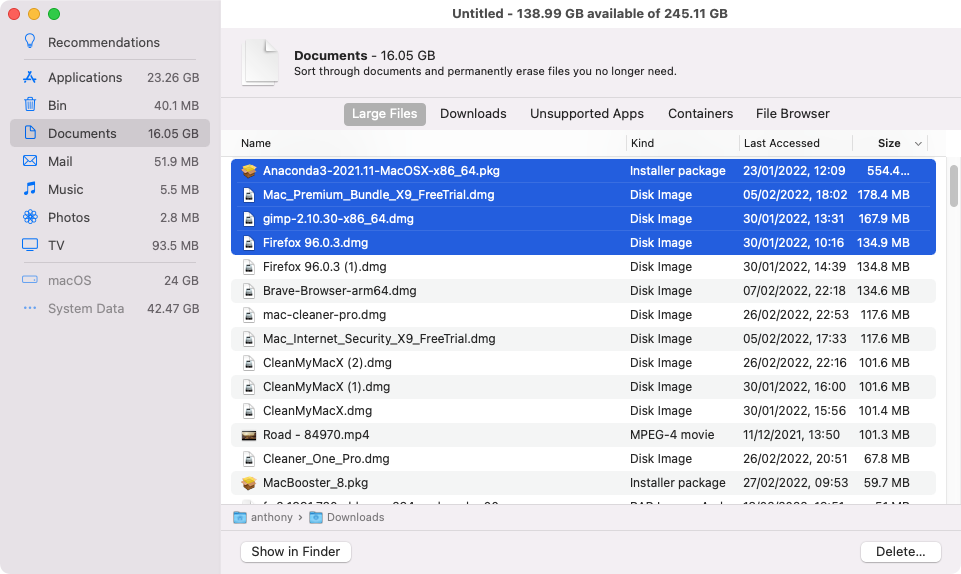
To help you optimize your Mac’s disk space, macOS gives you a way to quickly and easily find large files, so you can delete them.
Here’s how to use the Large Files finder on your Mac:
1. Open About This Mac from the Apple menu in your menu bar
2. Click Storage then Manage
3. From the sidebar, select Documents
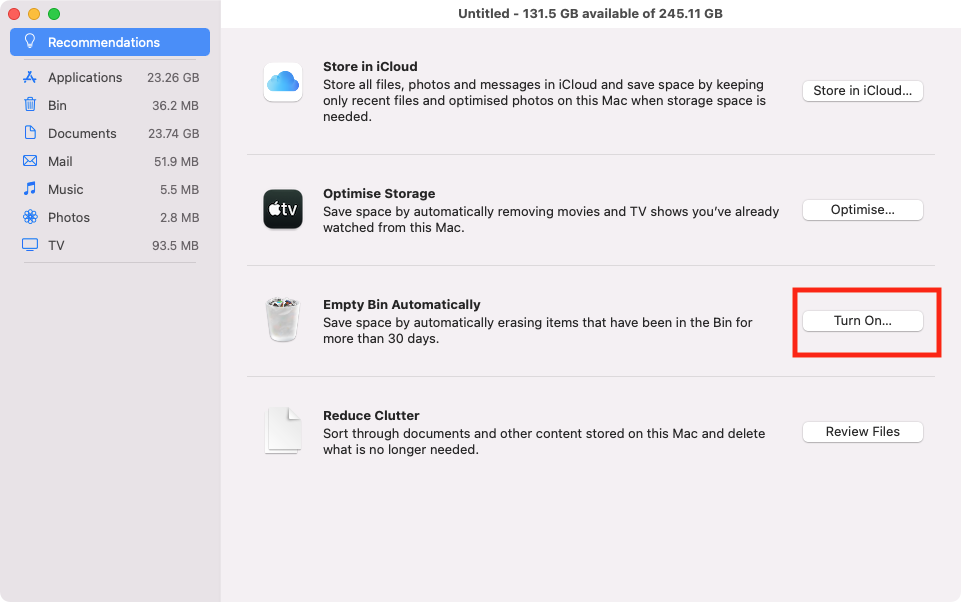
4. Select the Large Files tab if it’s not already open
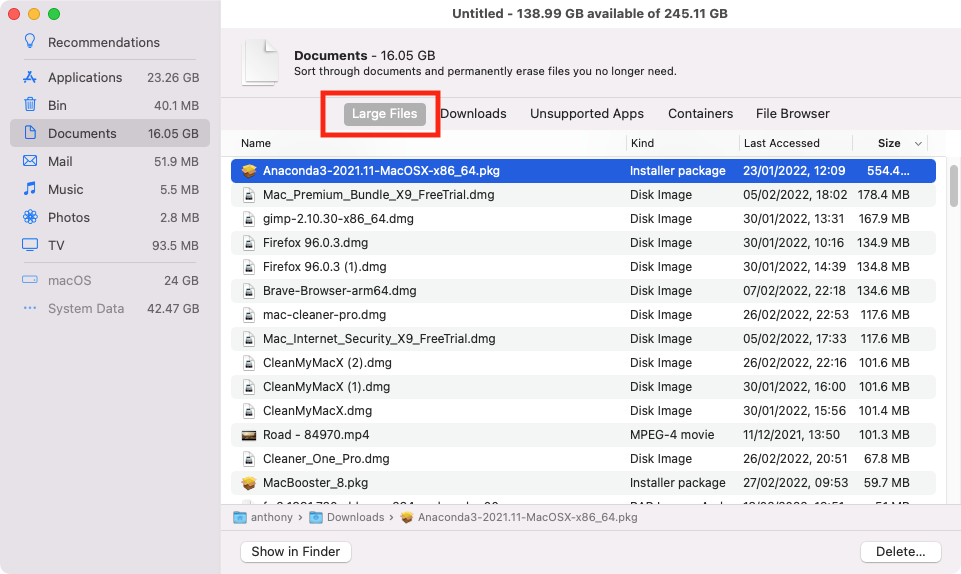
5. Select what you want to delete, and click Delete
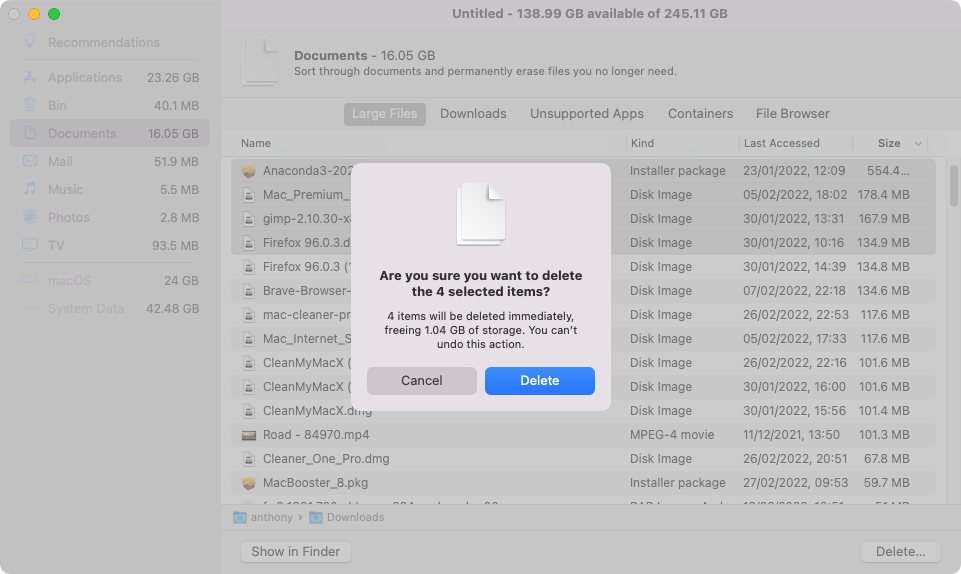
6. Click the Delete button
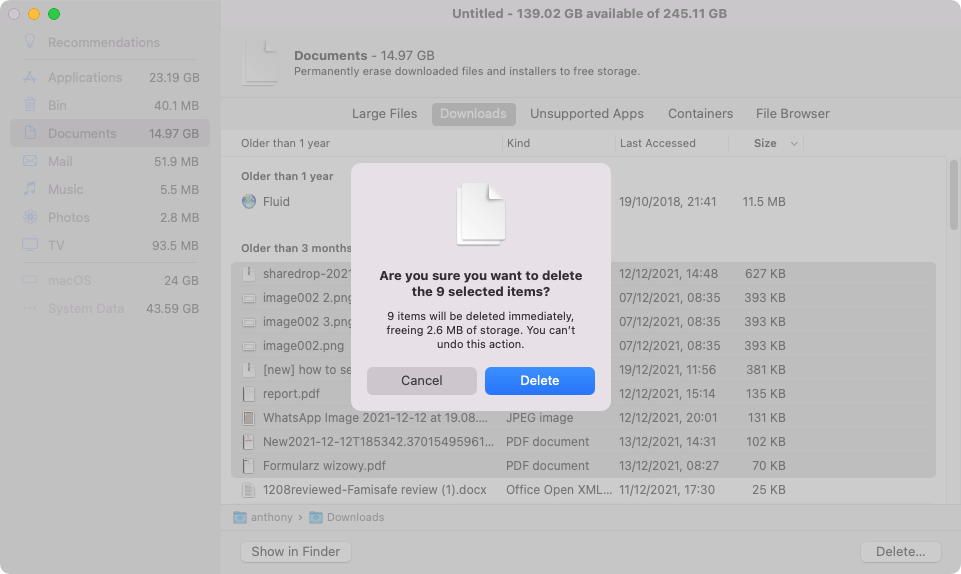
Delete unwanted downloads
You can also remove any downloaded files you no longer need or want. You can sort them by type, date last accessed and size. That way, you can easily remove older files that you haven’t used for a long time.
Follow these steps to manage your downloads in macOS:
1. Click the Apple icon in your menu bar, and select About This Mac
2. Select Storage > Manage
3. Go to Documents, and open the Downloads tab
4. Click the top of each column to sort the entries
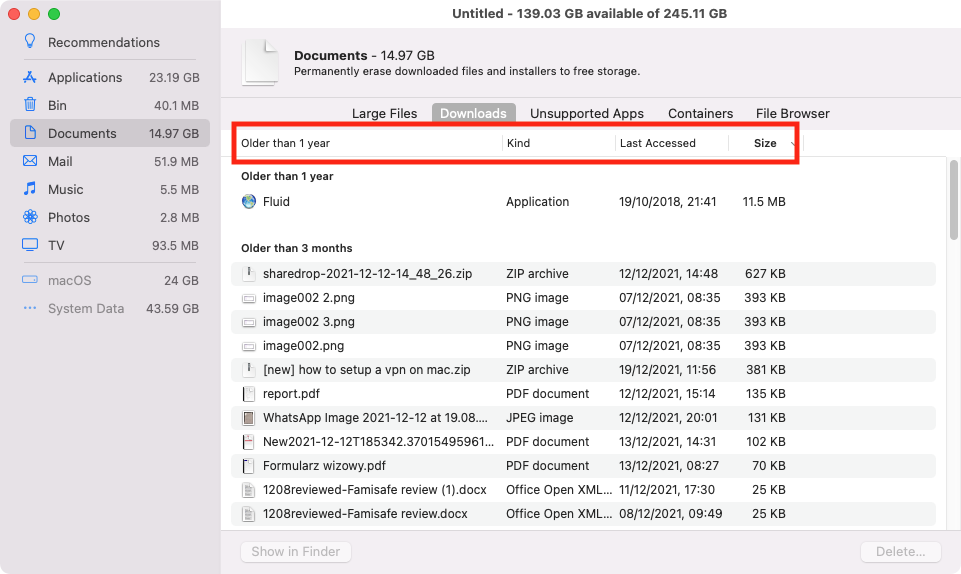
5. Select what you want to delete, and click Delete
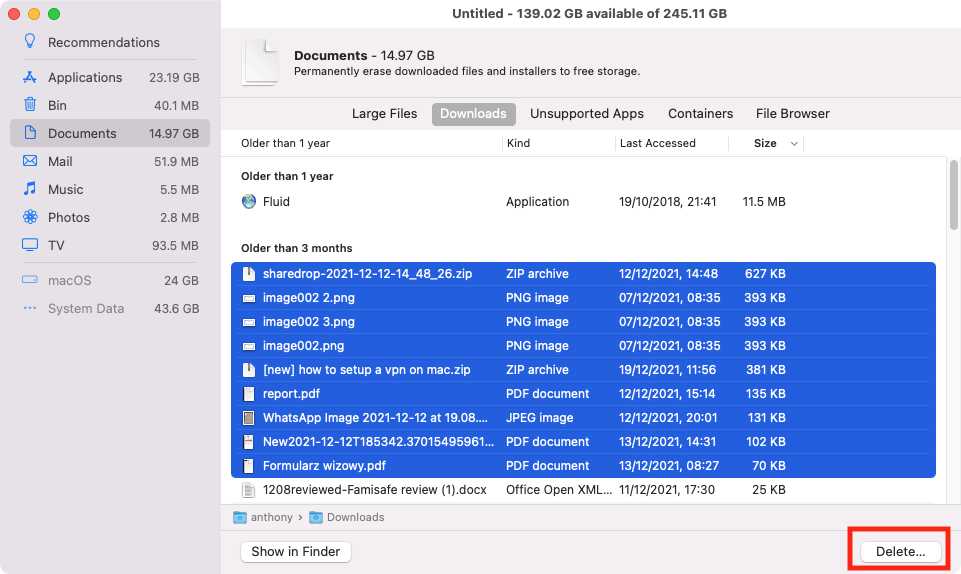
6. Click Delete
Optimizing Mac storage using the File Browser
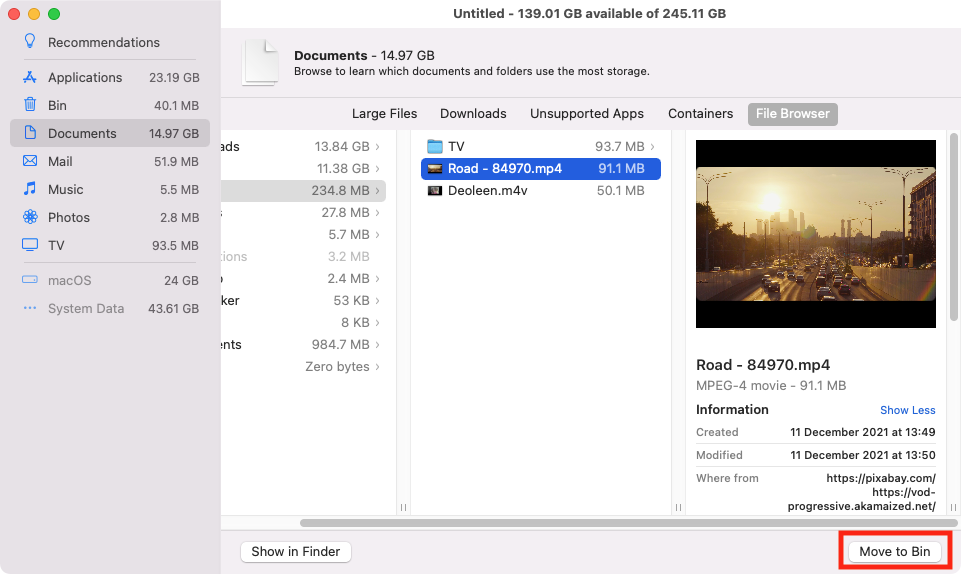
A particular useful storage optimization tool is the File Browser. This lets you see the total amount of data in folders, sorted by size. You can then drill down into subfolders and see how much data they contain too. This can be enormously helpful when you’re trying to work out what’s taking up all your disk space.
How to use the File Browser on your Mac:
- Go to Apple > About This Mac > Storage > Manage
- In Documents, select File Browser
- Drill down through the folders to find content you want to delete
- Select it, and click Move to Bin
Manage files manually
If you want to, you can go through all your files manually and decide what you want to delete. You can do this using the Optimized Storage panel.
How to manage files manually on your Mac:
1. Open About This Mac from the Apple menu, and select Storage > Manage
2. Now, click Applications
3. Select and delete anything you don’t want
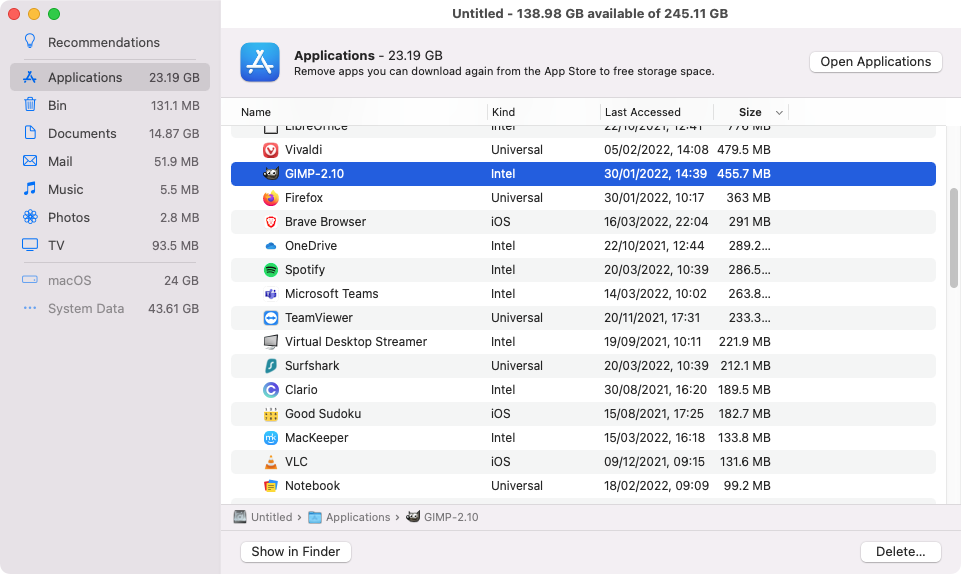
4. Now do the same for Bin, Mail, Music and TV
Optimizing your Mac storage with third-party tools
The macOS Optimized Storage features offer several useful ways to manage your Mac’s storage space. But there are a few useful features it lacks, which you can find in third-party software.
For example, with MacKeeper, you get a Duplicates Finder. This scans your Mac for duplicates of files, so you can remove unwanted copies. It will even find images that are similar but not identical.
MacKeeper offers Safe Cleanup, which finds and safely removes junk files from your Mac. You could do this manually, but it would take much longer. And you would risk potentially deleting the wrong thing, which could damage your Mac.
Other third-party tools also offer tools that visualize your disk space. This is like the File Browser function, but bigger files are represented by bigger icons, so you can more quickly see what’s using up your storage.
On top of these features, apps like MacKeeper also offer many extras, such as antivirus, VPN and memory cleaning.
Optimized Storage versus third-party tools
Ultimately, both macOS’s built-in tool and third-party solutions do a good job of helping you manage and optimize your Mac’s hard drive space. But third-party apps tend to extend what you can do, offering other features you might also want.
In the end, the best option is probably to use both. Built-in tools like iCloud storage are useful, but so are the kind of features you’ll find in third-party software.
In any case, if you’re running out of storage on your Mac, hopefully the advice in this guide will help you to get some space back.
Read more:


