In this article you will find the following:
Do you want to hook up AirPods to MacBook?
It’s easy to link AirPods to Mac—you just need to follow a few simple steps:
- Turn on Bluetooth.
- Put your AirPods in their case, and press the setup button.
- Connect your AirPods.
In this article, we’ll explain how to add AirPods to your MacBook for the first time, how to sync them if you’re already using them on your phone, and how to switch AirPods between devices.
If you need to connect another type of headphones, check out our article on how to pair Bluetooth headphones with a Mac.
A note from our experts:
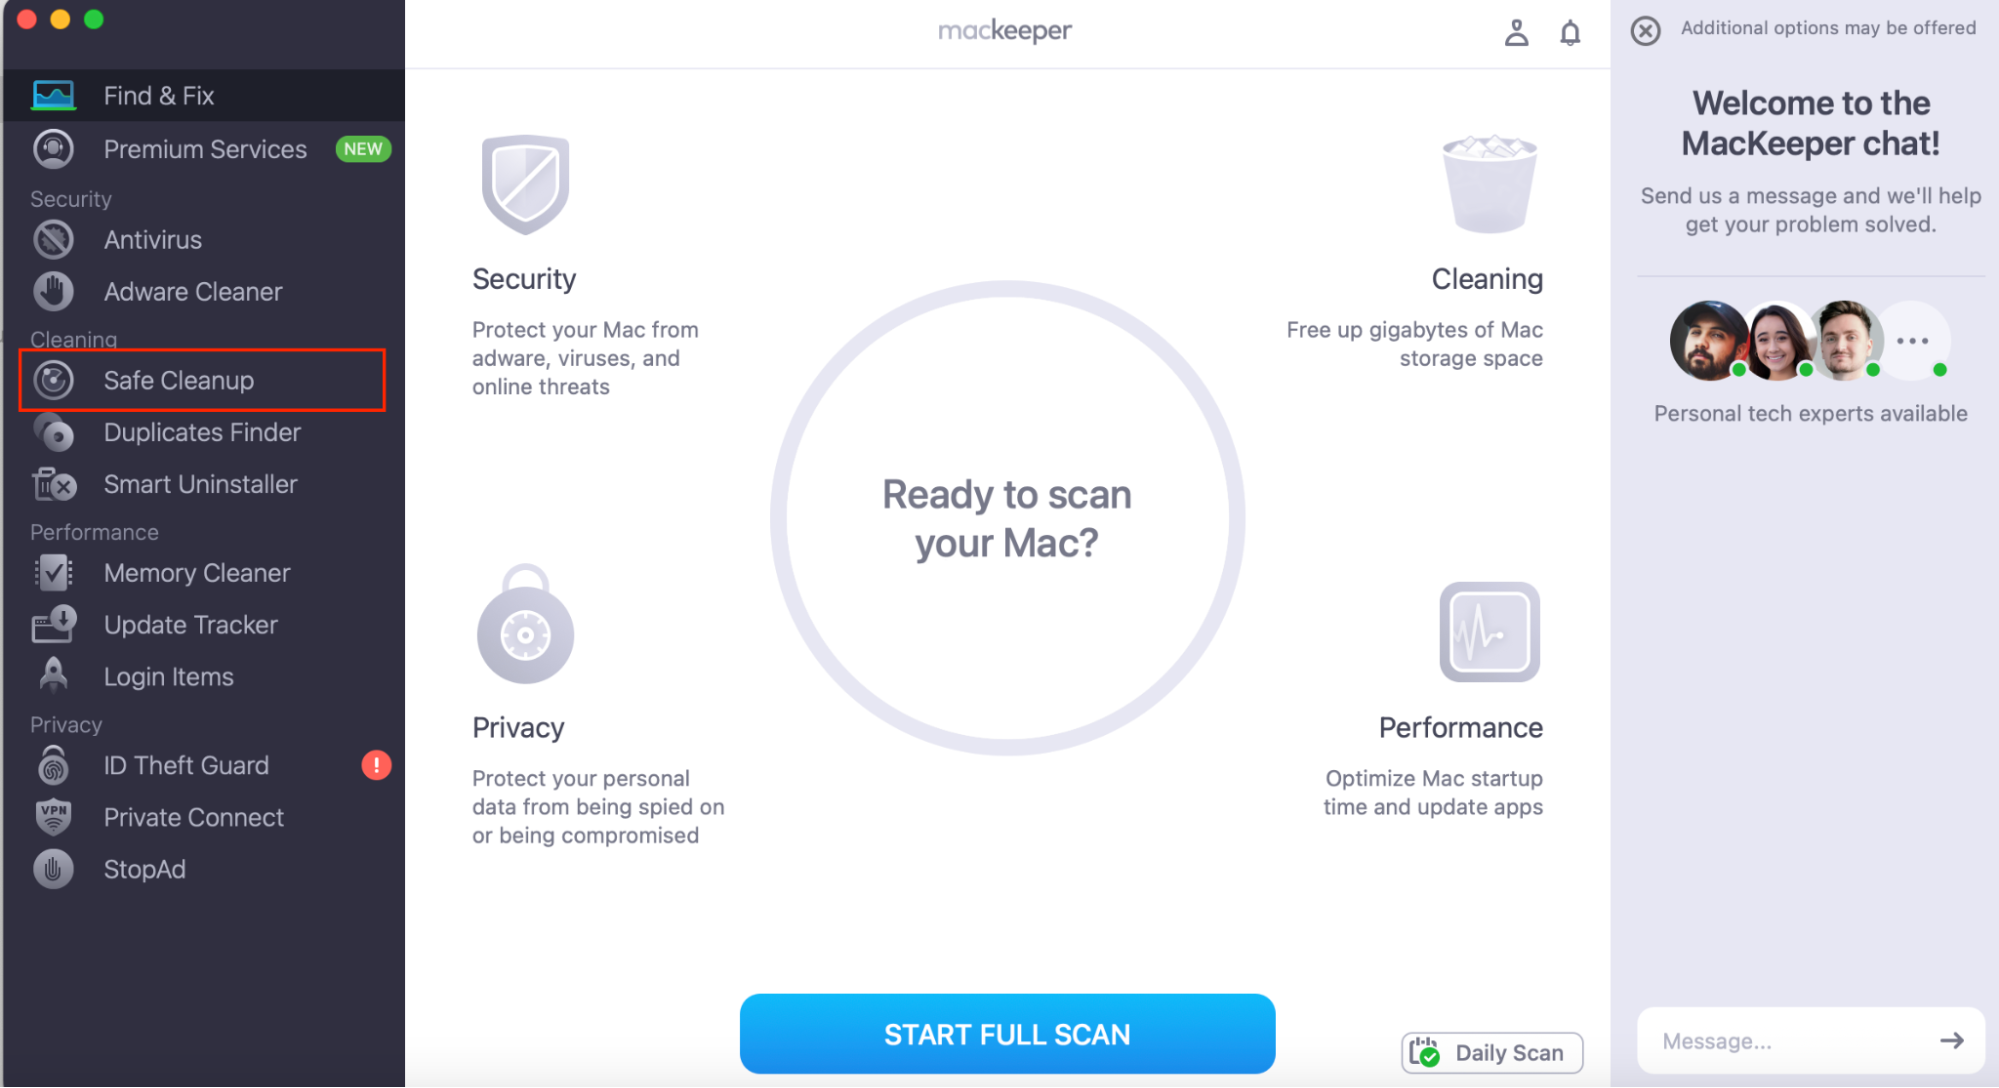
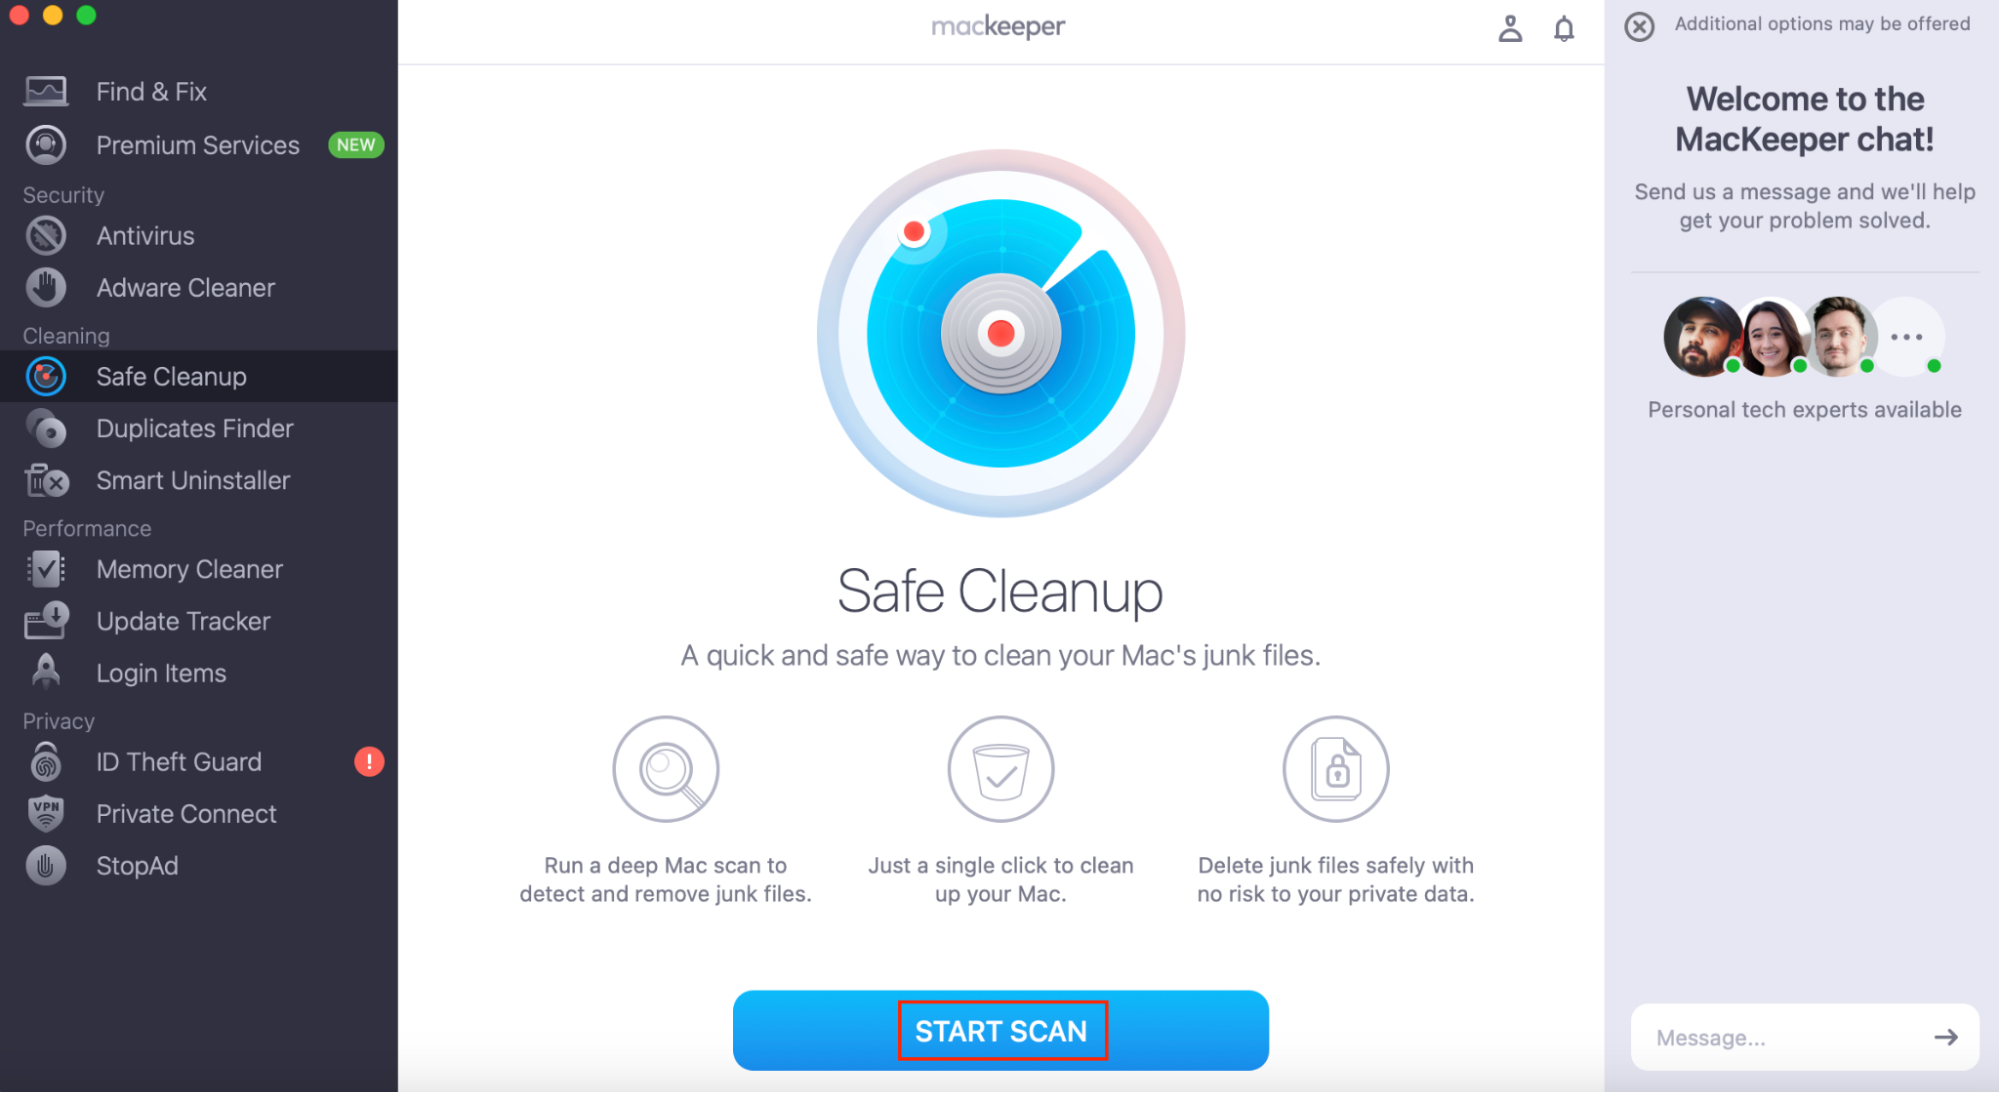
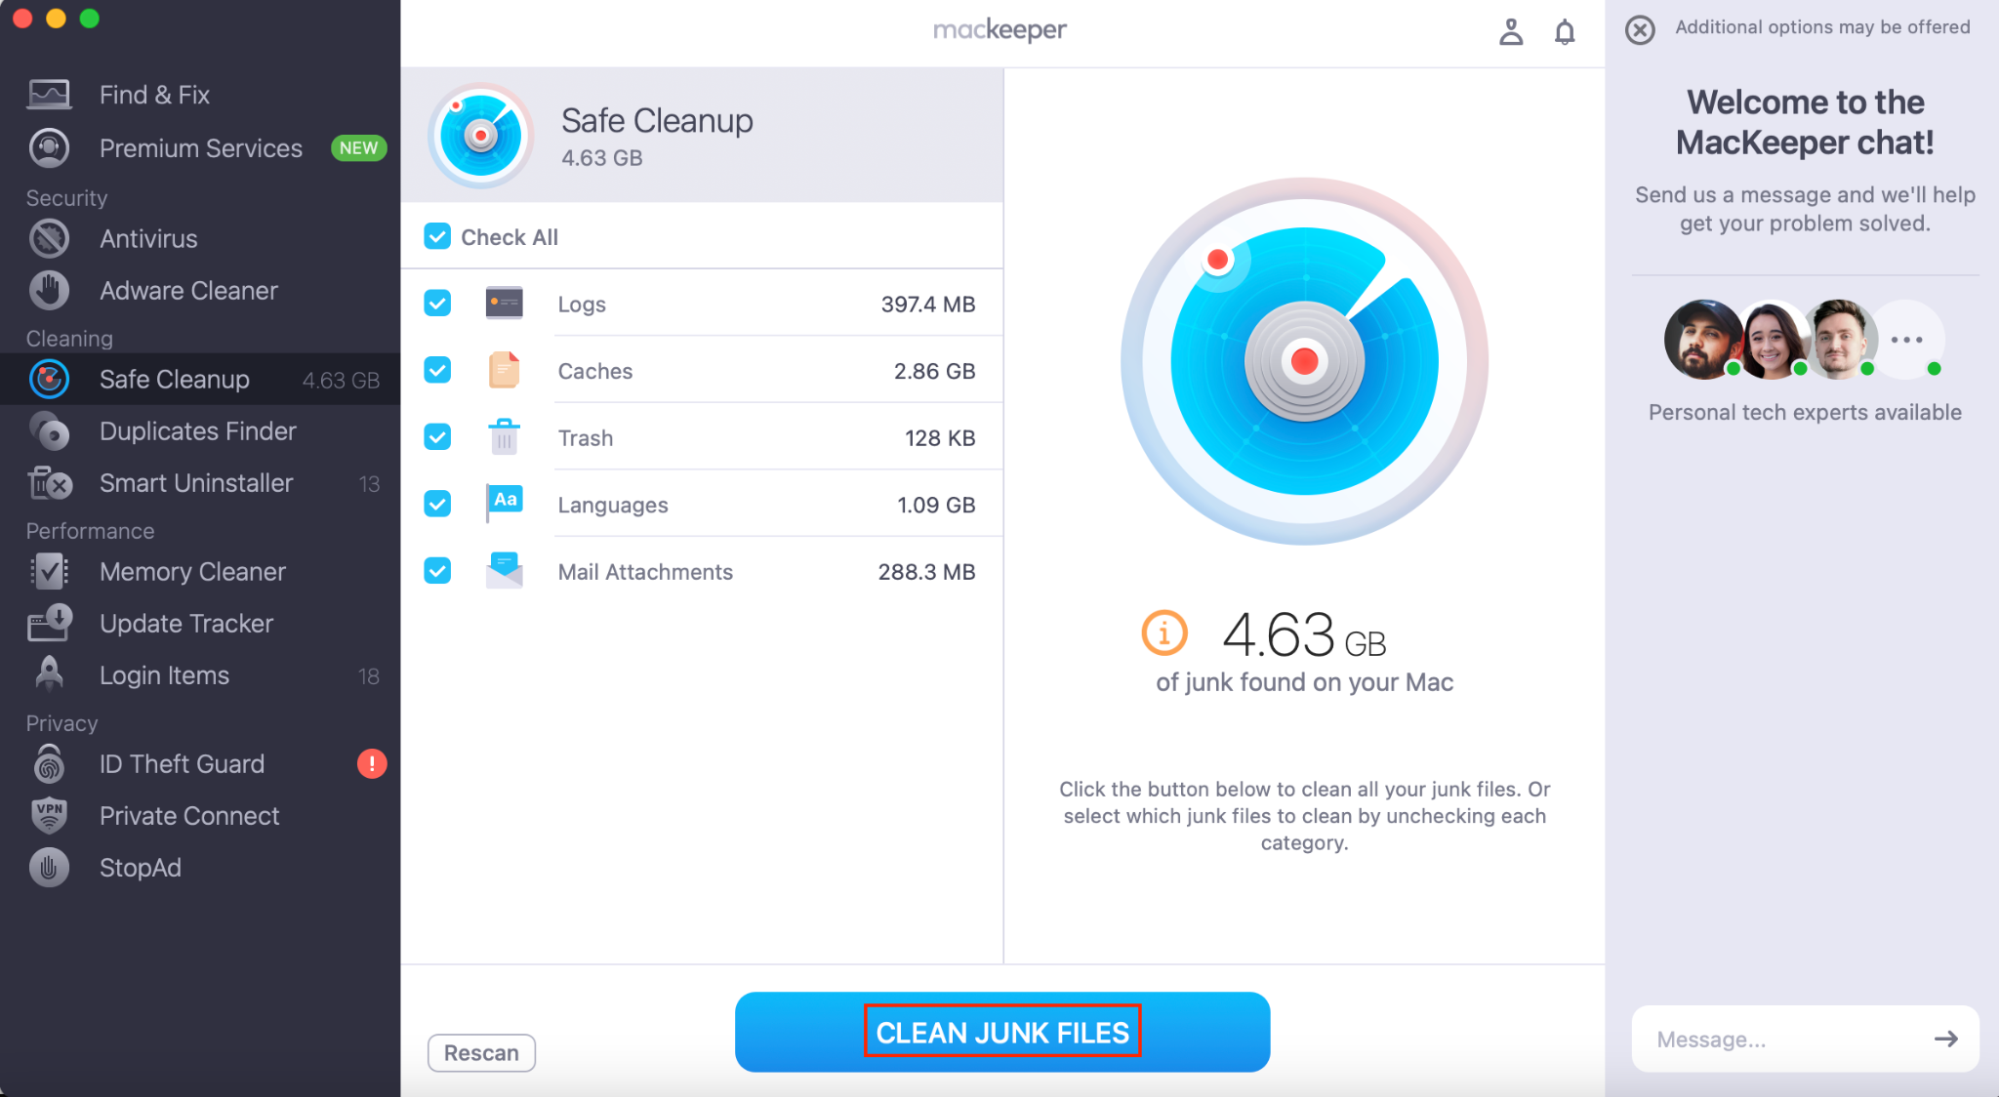
How to use MacKeeper’s Safe Cleanup:
- Download MacKeeper and follow the instructions on the screen to install it.
- Open MacKeeper and choose Safe Cleanup from the sidebar.
- Click Start Scan.
- Select the files you want to delete, and choose Clean Junk Files.
How to pair AirPods to Mac for the first time
So, you’ve just bought some of the most aesthetic Apple products, a new pair of AirPods. But now, what do you do?
Our expert’s tip:
You’ll need Bluetooth for these steps. If you’re having any trouble with connectivity, such as your MacBook Bluetooth not working, I suggest you look into those issues first.
First of all, make sure that your AirPods are in their case, with the lid open.
How to link AirPods to Mac for the first time:
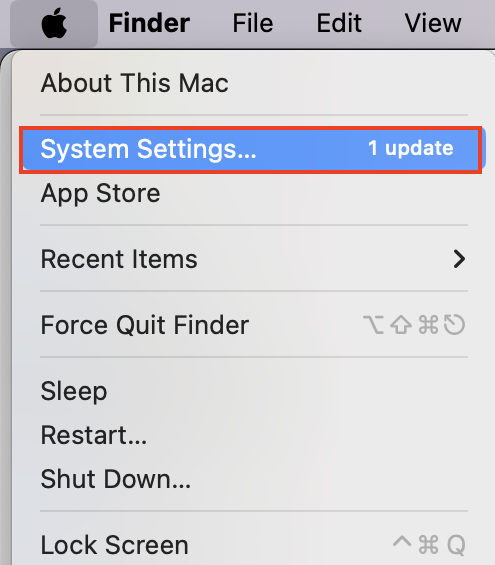
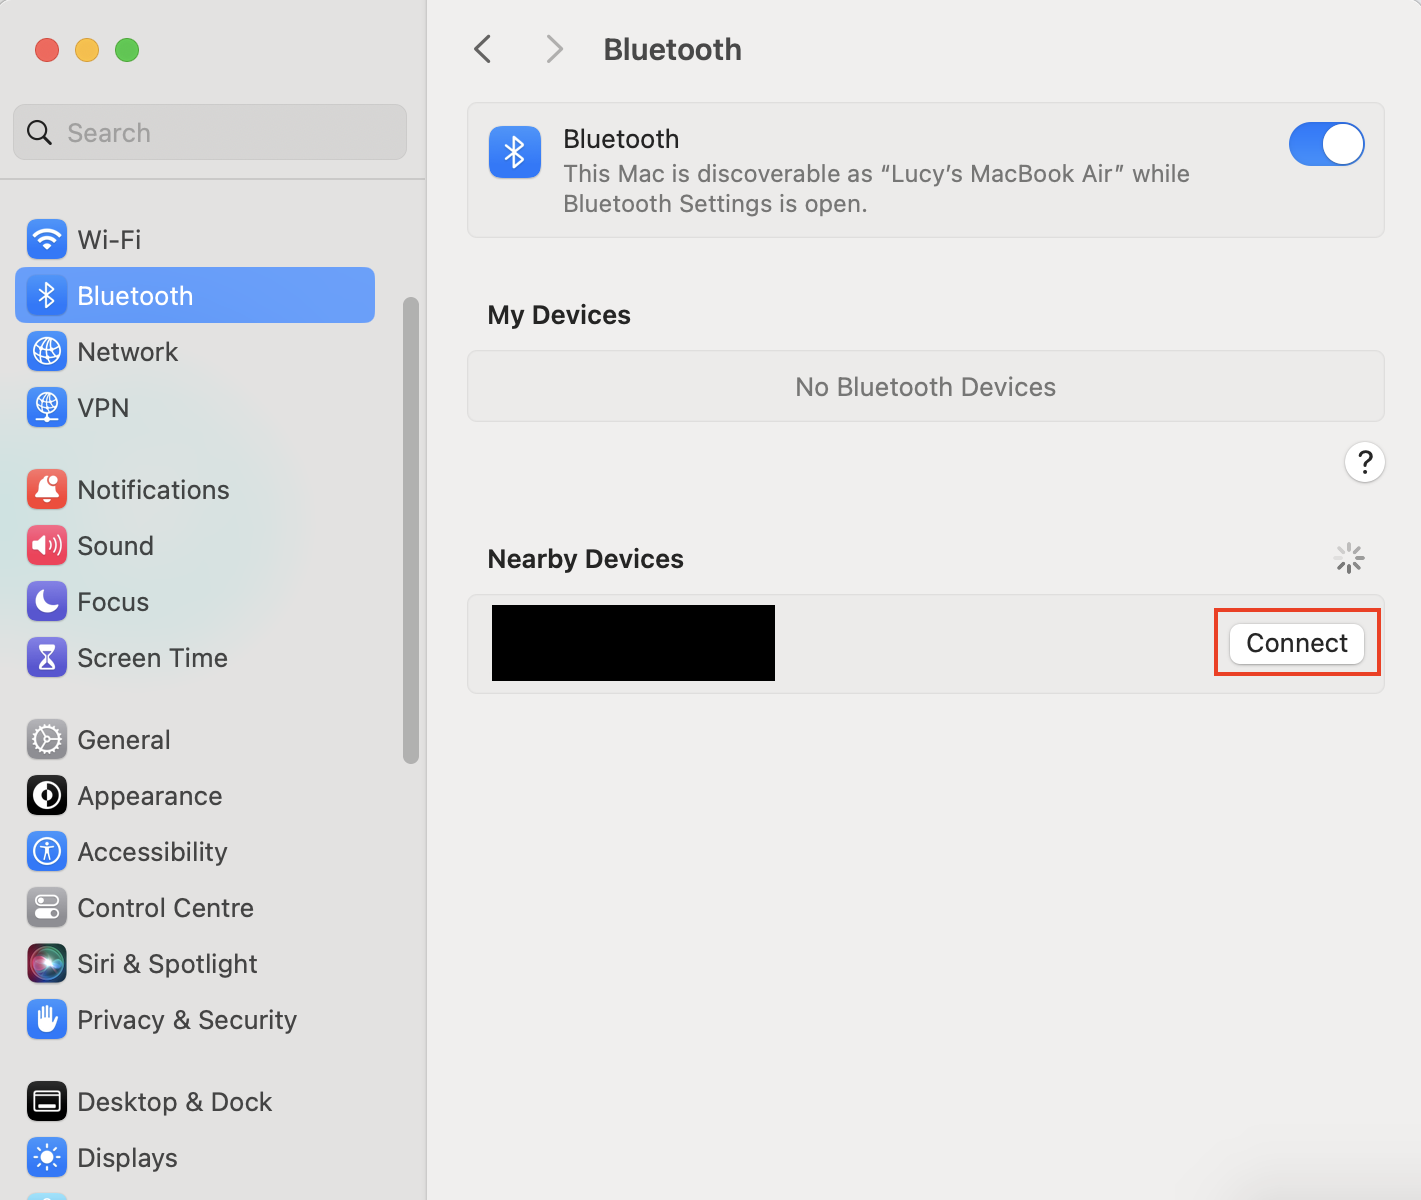
- Go to Apple menu > System Settings.
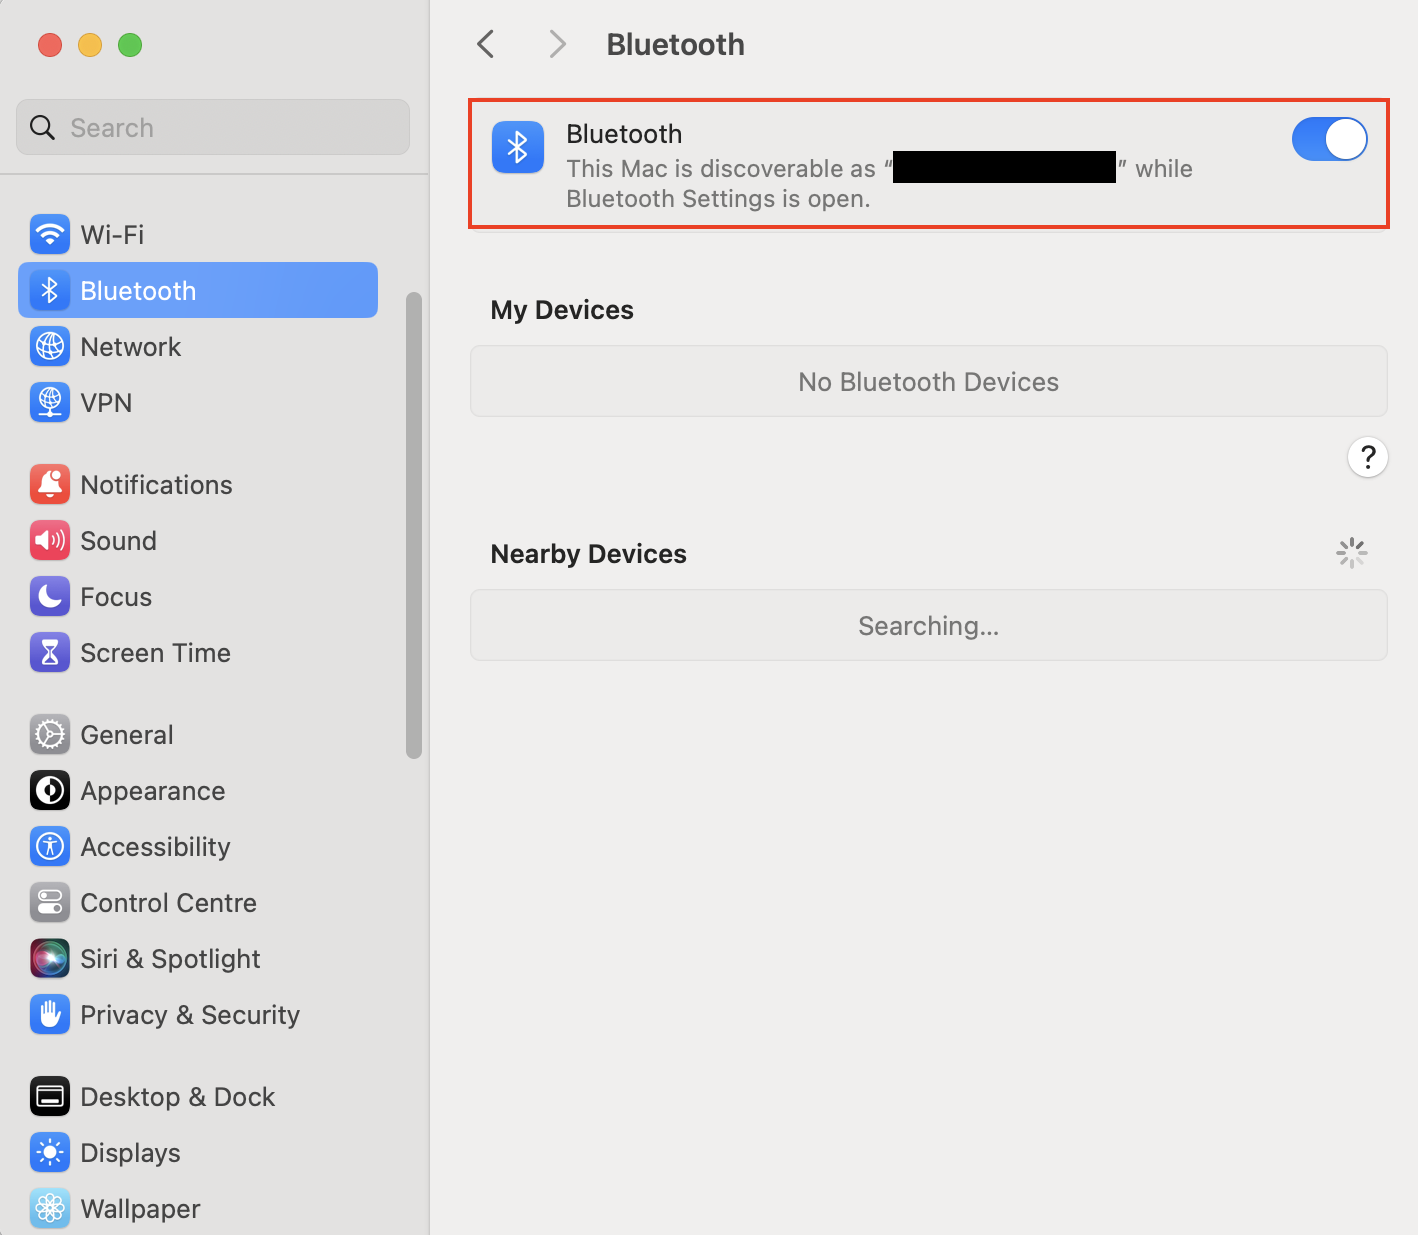
- Choose Bluetooth from the sidebar, and make sure that Bluetooth is turned on—this will make your Mac discoverable. Press the button on the back of your AirPod case until the front light flashes white.
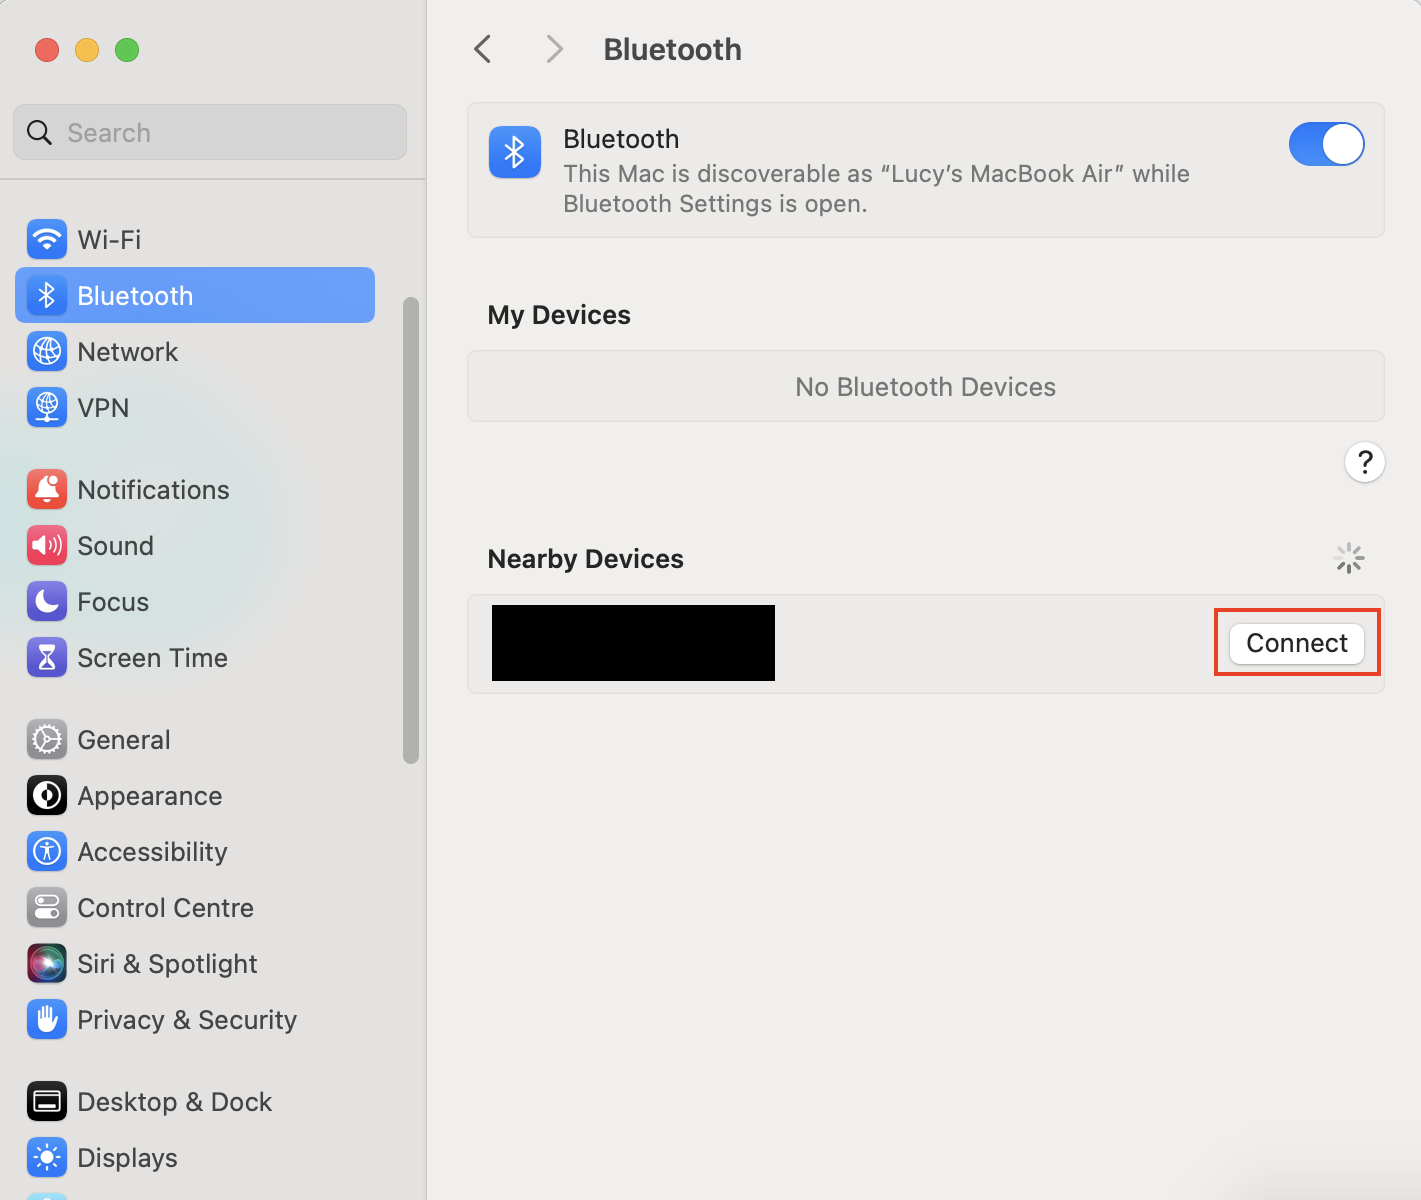
- When your AirPods are listed under Nearby Devices, move your cursor over the entry and click the Connect button next to your AirPods.
Now that your AirPods are connected, you’ll want to ensure you have enough storage space on your MacBook. If you’re struggling to find extra space, MacKeeper’s Safe Cleanup can help.
How to use MacKeeper’s Safe Cleanup to clear junk files from your MacBook:
- Open MacKeeper and choose Safe Cleanup.
- Click Start Scan.
- After the scan is complete, select the files you want to delete, and choose Clean Junk Files.
How to sync AirPods to MacBook if you're already using them on your iPhone
Heads up from us:
If your iPhone and MacBook use the same Apple ID account and are compatible with Apple’s Handoff feature, you may find that your MacBook automatically connects to your AirPods.
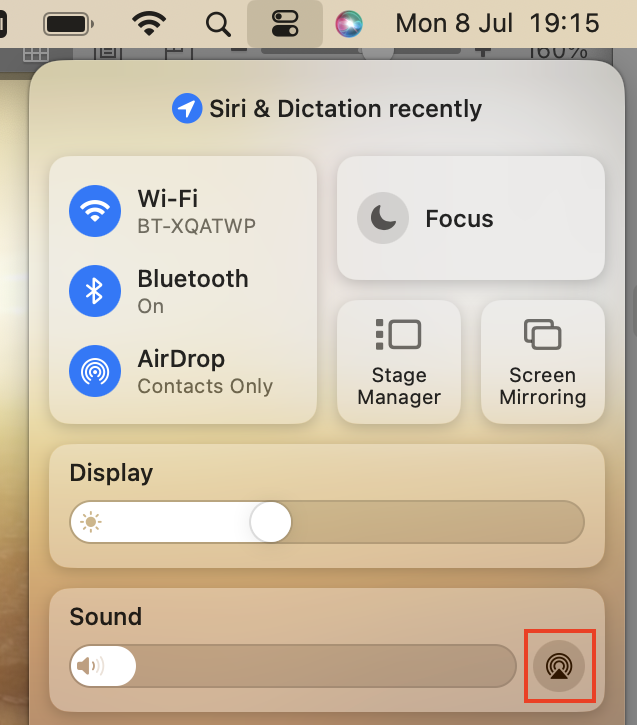
If it doesn’t, here’s how to connect AirPods to MacBook when you use them with your iPhone:
- Click on the Control Center on the top menu bar of your Mac.
- Choose the Sound section.
- Select your AirPods from the list of audio output options.

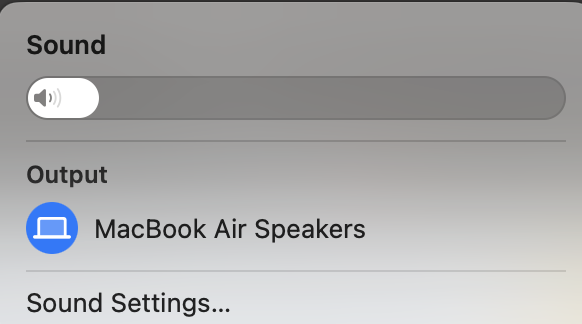
Hint from our team: If your MacBook is having trouble recognizing your AirPods, make sure that your AirPod case is open.
How to switch AirPods between devices
You can switch AirPods between devices by disconnecting them from one Mac before connecting them to another. It should only take a few seconds each time.
How to switch AirPods between devices:
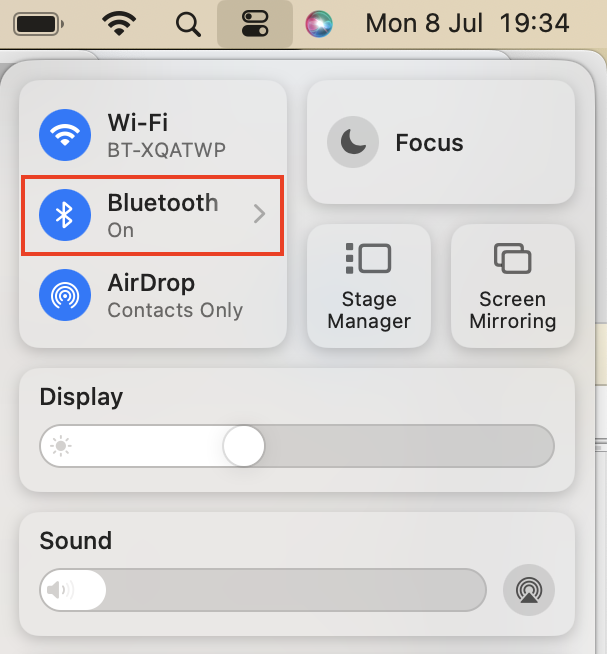
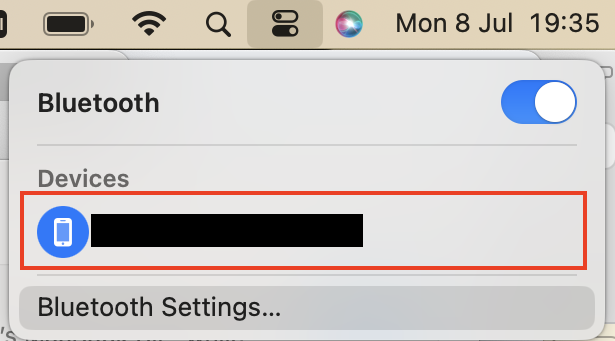
- Using the device where your AirPods are currently connected, open the Control Center and click on Bluetooth.
- Look for your AirPods and click on them. This should disconnect them.
- On your second device, follow the instructions for pairing AirPods for the first time—or, if you’ve already paired your AirPods to the second device, simply open the Control Center, click on Bluetooth, and click on your AirPods.
Conclusion
As you can see, it’s simple to link AirPods to Mac devices–whether you use a MacBook Air, Pro, iMac, or other Apple computer, you should be able to do it easily.
If you’ve followed all of the advice in this article and are still having trouble, take a look at our article about AirPods not connecting to Mac.
Once you’ve synced your AirPods to your MacBook, it’s important to ensure that you have enough storage space available to enjoy media on a Mac that runs smoothly. Fortunately, MacKeeper’s Safe Cleanup can help by removing junk files safely and quickly.
