Is your Google Drive overflowing with outdated documents, but you don’t want to waste time searching through multiple folders and deleting each file individually? In this guide, I’ll show you how to delete more than one Google Doc at a time. For an additional benefit, you’ll discover how MacKeeper’s Duplicates Finder can help you identify unnecessary copies and free up storage space on your Mac.
Though Google Docs can’t offer a built-in bulk deletion feature, deleting docs one by one isn’t your only option. There are several ways to remove multiple Google Docs at once, and I’m going to share them with you.
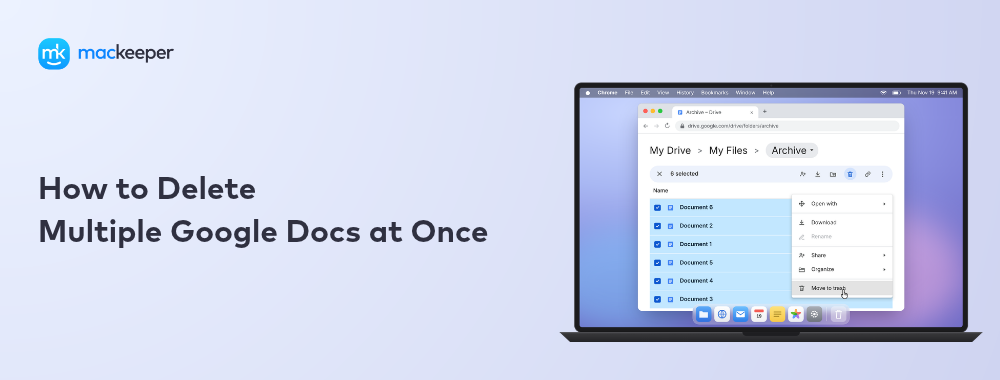
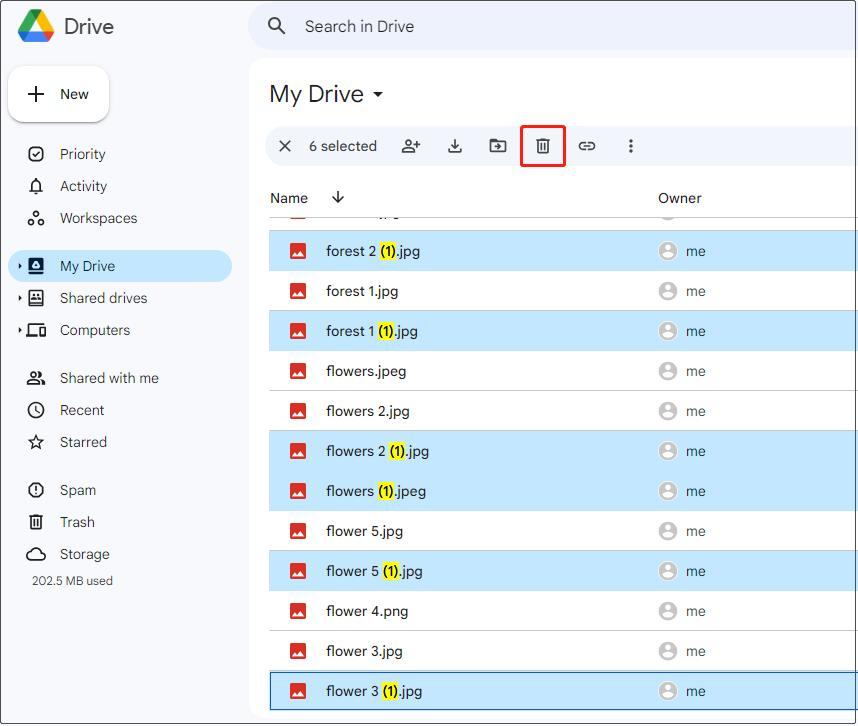
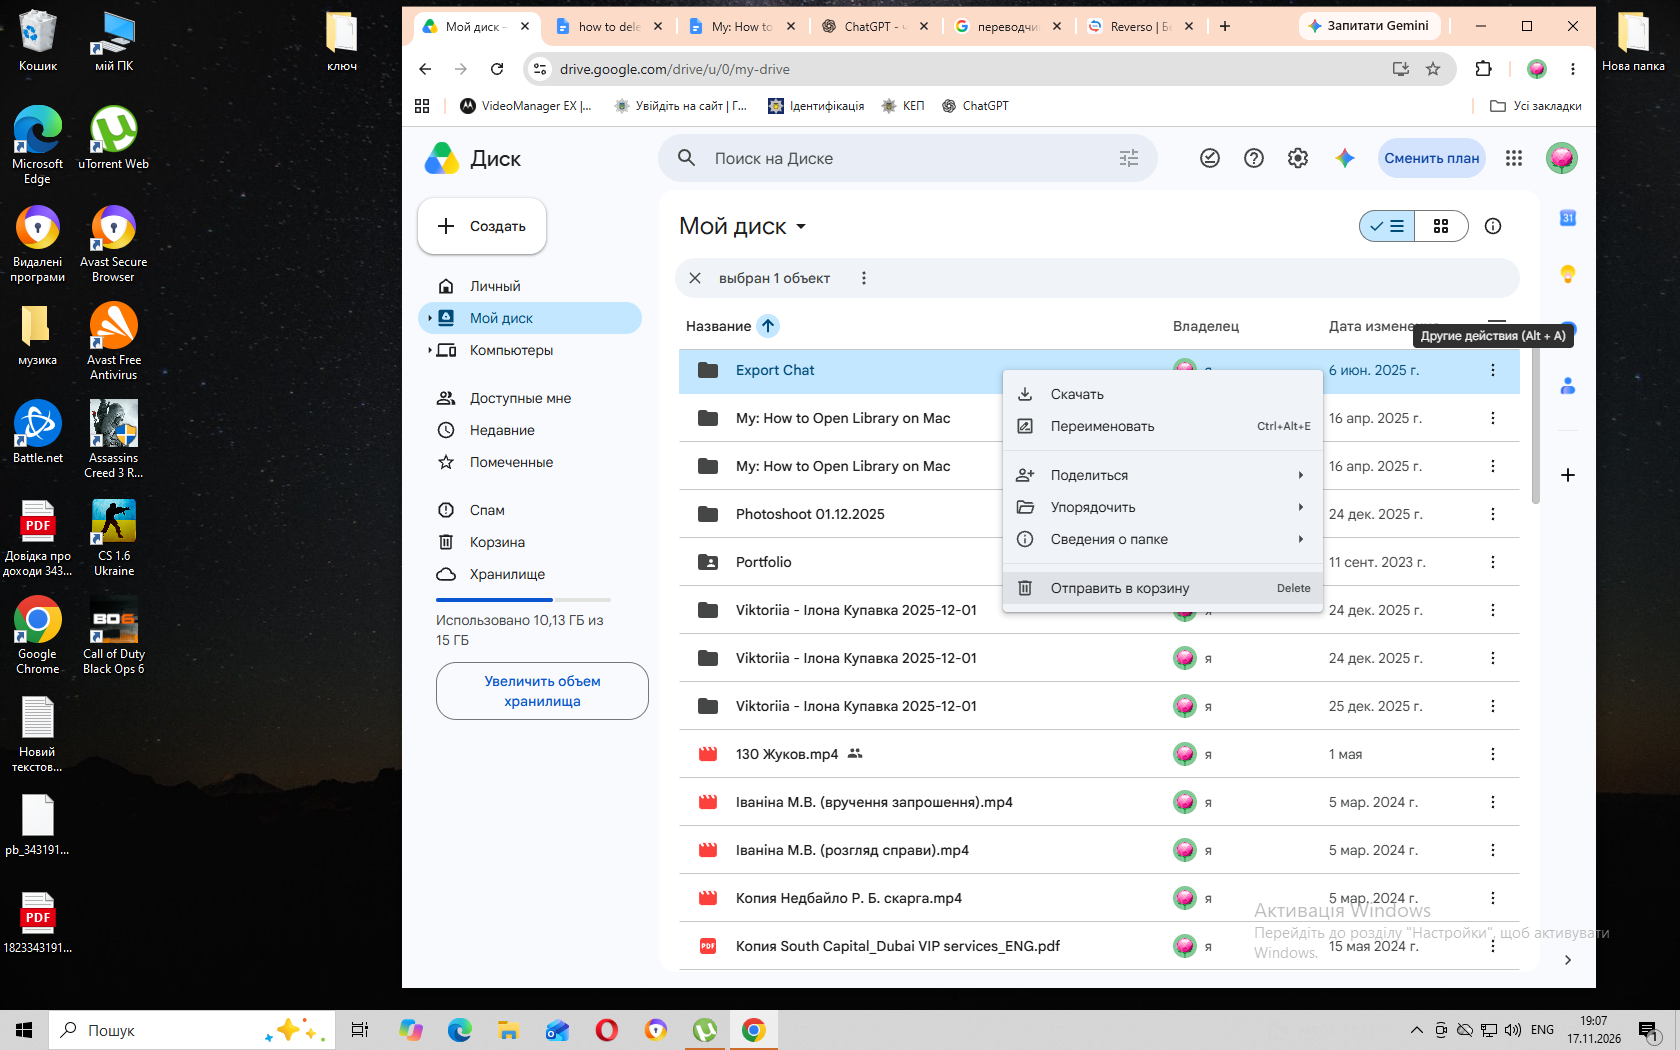
One of the easiest ways to clean up multiple Google Docs at once is to manage them through Google Drive. If you’re using Google Drive in a web browser, open your documents folder → hold down Command while clicking the documents you want to delete. If your unnecessary files are listed next to each other, you may hold Shift and select them all at once, then make the right click and choose the Move to Trash option.
If you’re using Google Drive on Desktop and your docs are synced with your Mac, open the folder in Finder → select multiple docs → move them to the Trash.
In mobile apps, you need to open Google Drive → touch and hold one document → select the other files you want to delete → tap the Trash icon to remove them at once.
Keep in mind that moving your documents to the Trash doesn't remove them permanently immediately. Google Drive keeps deleted files for 30 days, so you can restore them if you removed something by mistake.
If you’re organizing your digital workspace, pay attention to your storage space. Old documents aren’t the only things consuming valuable storage. Check our equally helpful guide about applications taking up space to find out which apps you don’t need anymore.
Before you begin deleting multiple Google Docs
If you’re going to delete a lot of Google Docs at once, take a few minutes to review your files first. It’s especially useful if your Google Drive contains years of old projects, reports, photos, and other files. However, before removing all of them to Trash, check how it may affect your Google Drive to prevent accidental data loss or disruption to collaborators.
Here are the most important things to check before deleting multiple Google Docs:
Identify file ownership vs shared permissions.
Verify account synchronization status.
If you’re also trying to free up some more storage space, don’t forget to clear Google Drive cache to remove unnecessary temporary data.
A note from our experts:
Mass-deleting Google Docs is an important step to organize your storage and help your Mac perform smoothly, but don’t forget the files you have downloaded twice or more over the years without even noticing. These duplicates take up storage with no benefits. Instead of searching through all your folders manually, I recommend using MacKeeper’s Duplicates Finder to identify all unnecessary copies on your Mac. You can also review all selected duplicates before removing them permanently.
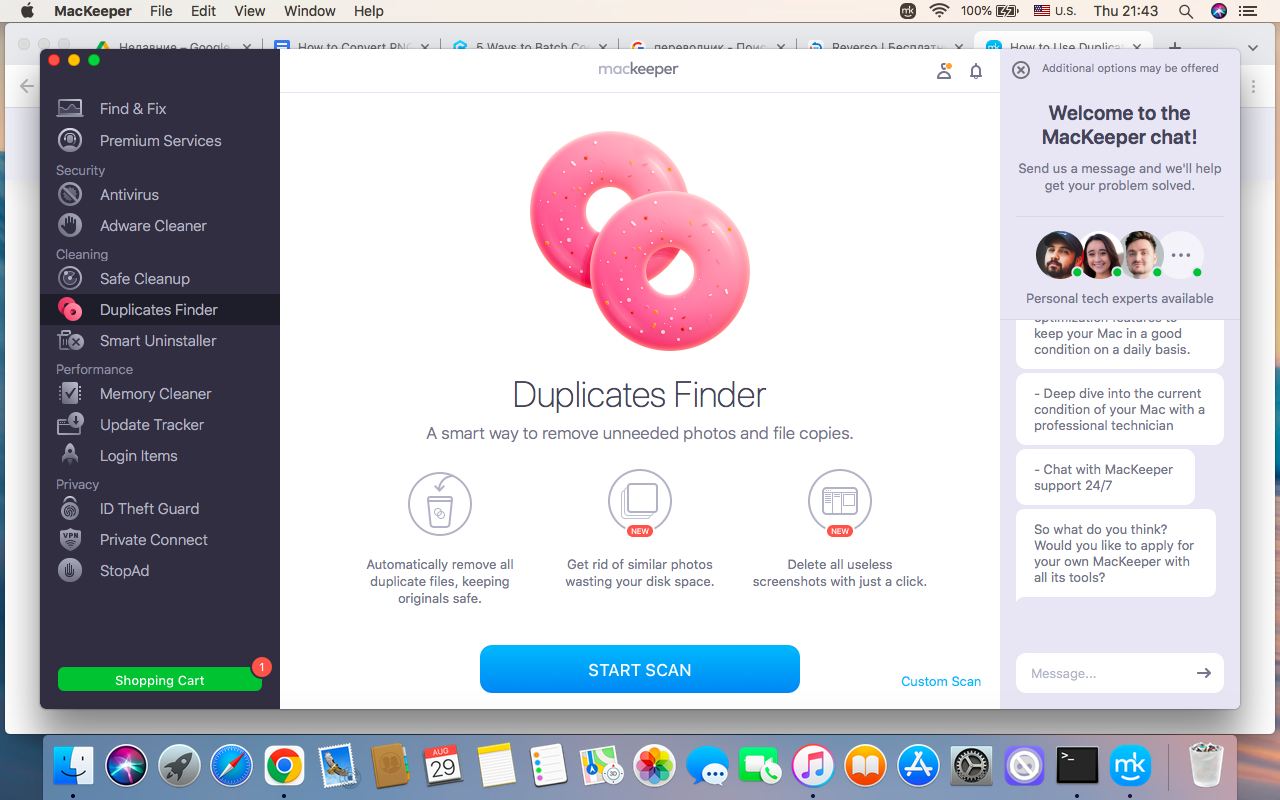
Here are instructions on how to remove duplicates with MacKeeper’s Duplicates Finder:
Select the Duplicates Finder feature on the left sidebar.
Click the Start Scan button to identify the duplicates on your Mac.
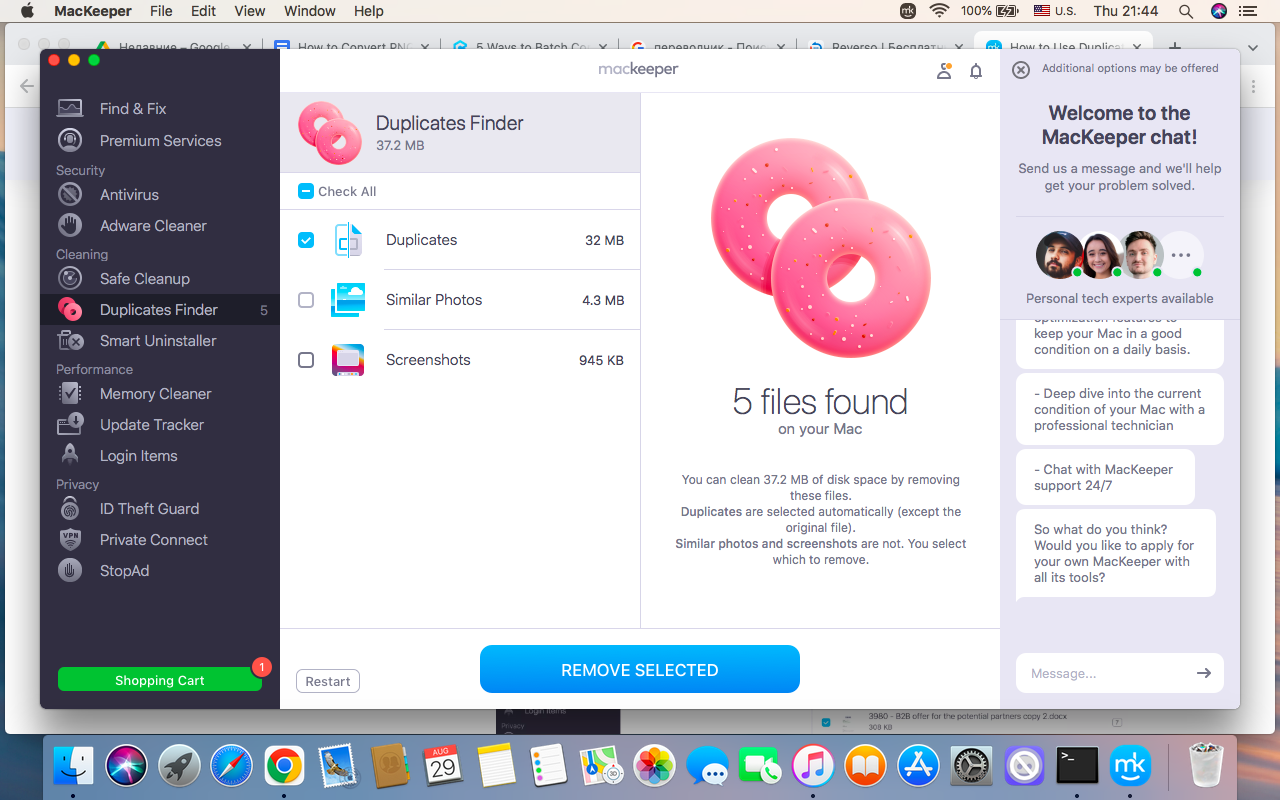
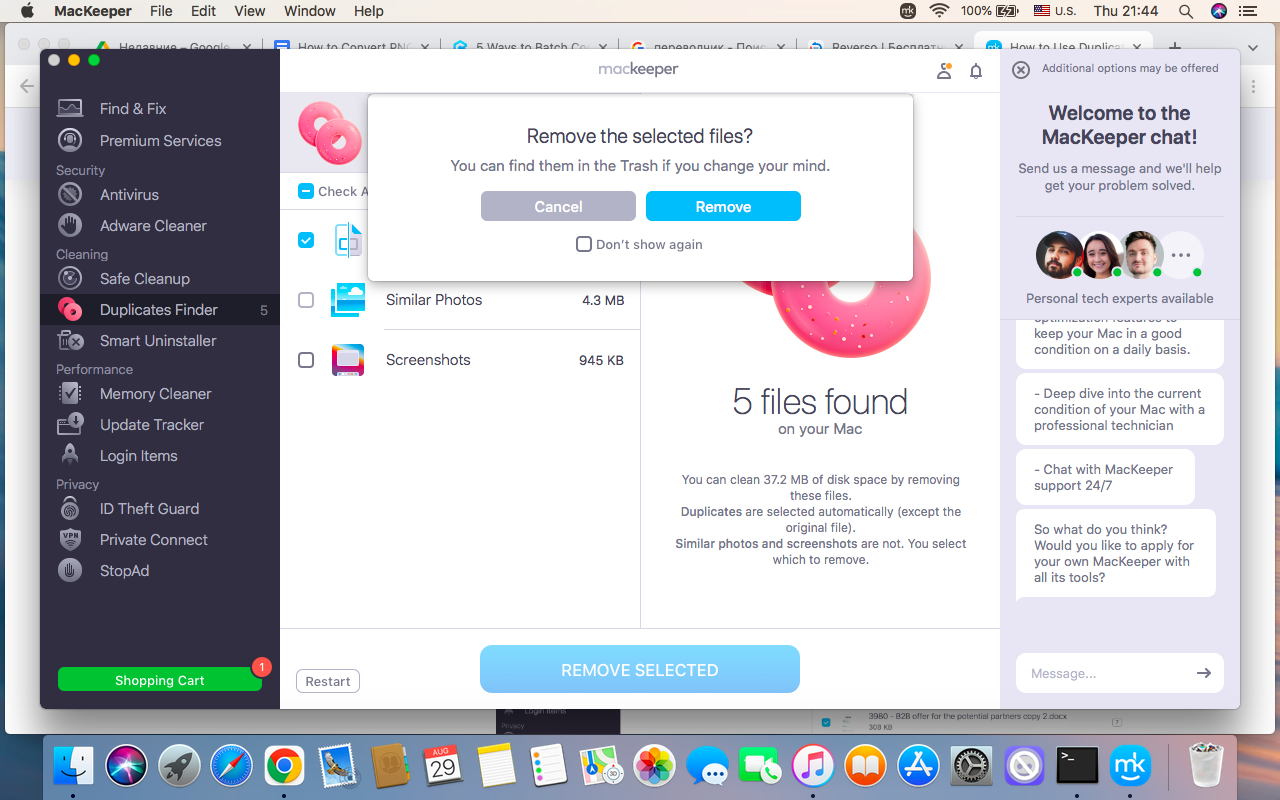
Wait for the results ➙ click the Remove Selected button to remove duplicates ➙ confirm deletion.
Step 1. MacKeeper app > Duplicates Finder > Start ScanStep 2. Select categories > Remove SelectedStep 3. Delete the unnecessary duplicates with Remove Selected
1. Identify file ownership vs shared permissions
Before to select multiple files in Google Drive to delete, take a few moments to distinguish between the documents of your own and files with shared permissions. This small detail matters, especially if you share files with colleagues, clients, or friends.
If you’re the owner of a shared document, deleting it can affect all users who have access to it. When you move the document to Trash, all the other users can lose access to it. Once it’s permanently removed, they won’t be able to see the original document. Before deleting, consider transferring ownership or creating a backup.
Do the following to check ownership before removing the Google Doc:
Find the document you want to delete.
Right-click this document ➙ check the File owner.
Right-click the document > View the file owner
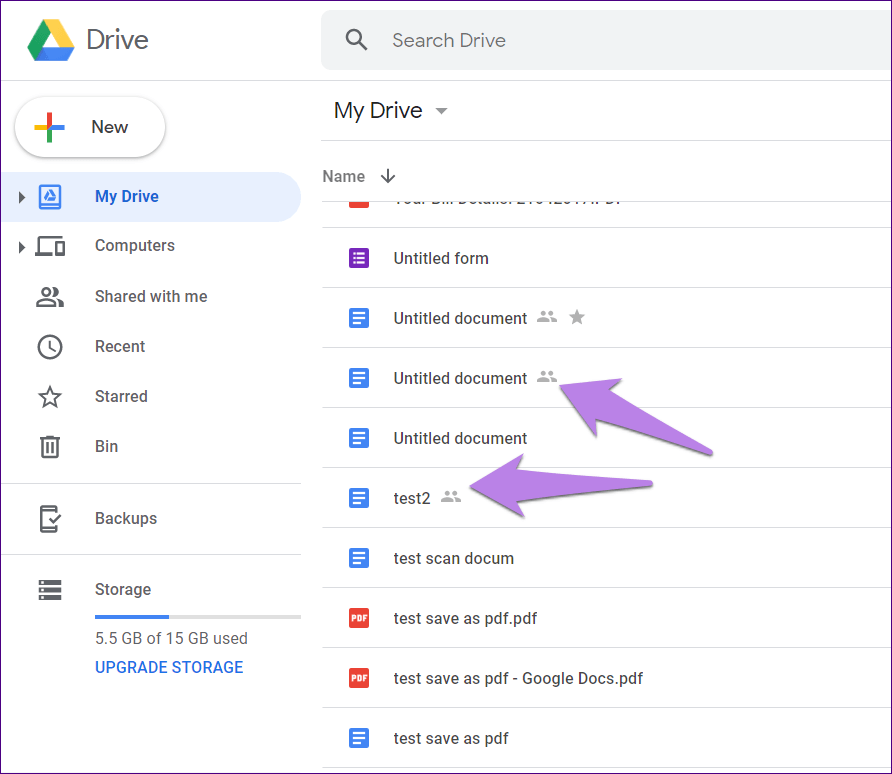
Also, you can check file ownership in your Google Drive by the shared icon visible next to all docs.
Google Drive > Check shared icons
2. Verify account synchronization status
If you use Google Drive across multiple devices, there is one more important thing to check before deleting documents: their synchronization status. Remember that changes made on one device may need some time to appear on others. Removing files before synchronization is complete may cause accidental data loss.
Imagine you have edited your Google Doc on Mac, but these changes haven’t been synchronized to Google Drive yet. If you delete this file on your Mac, you may not see the latest version on other devices.
To avoid accidental loss of data, verify the file’s synchronization status before proceeding:
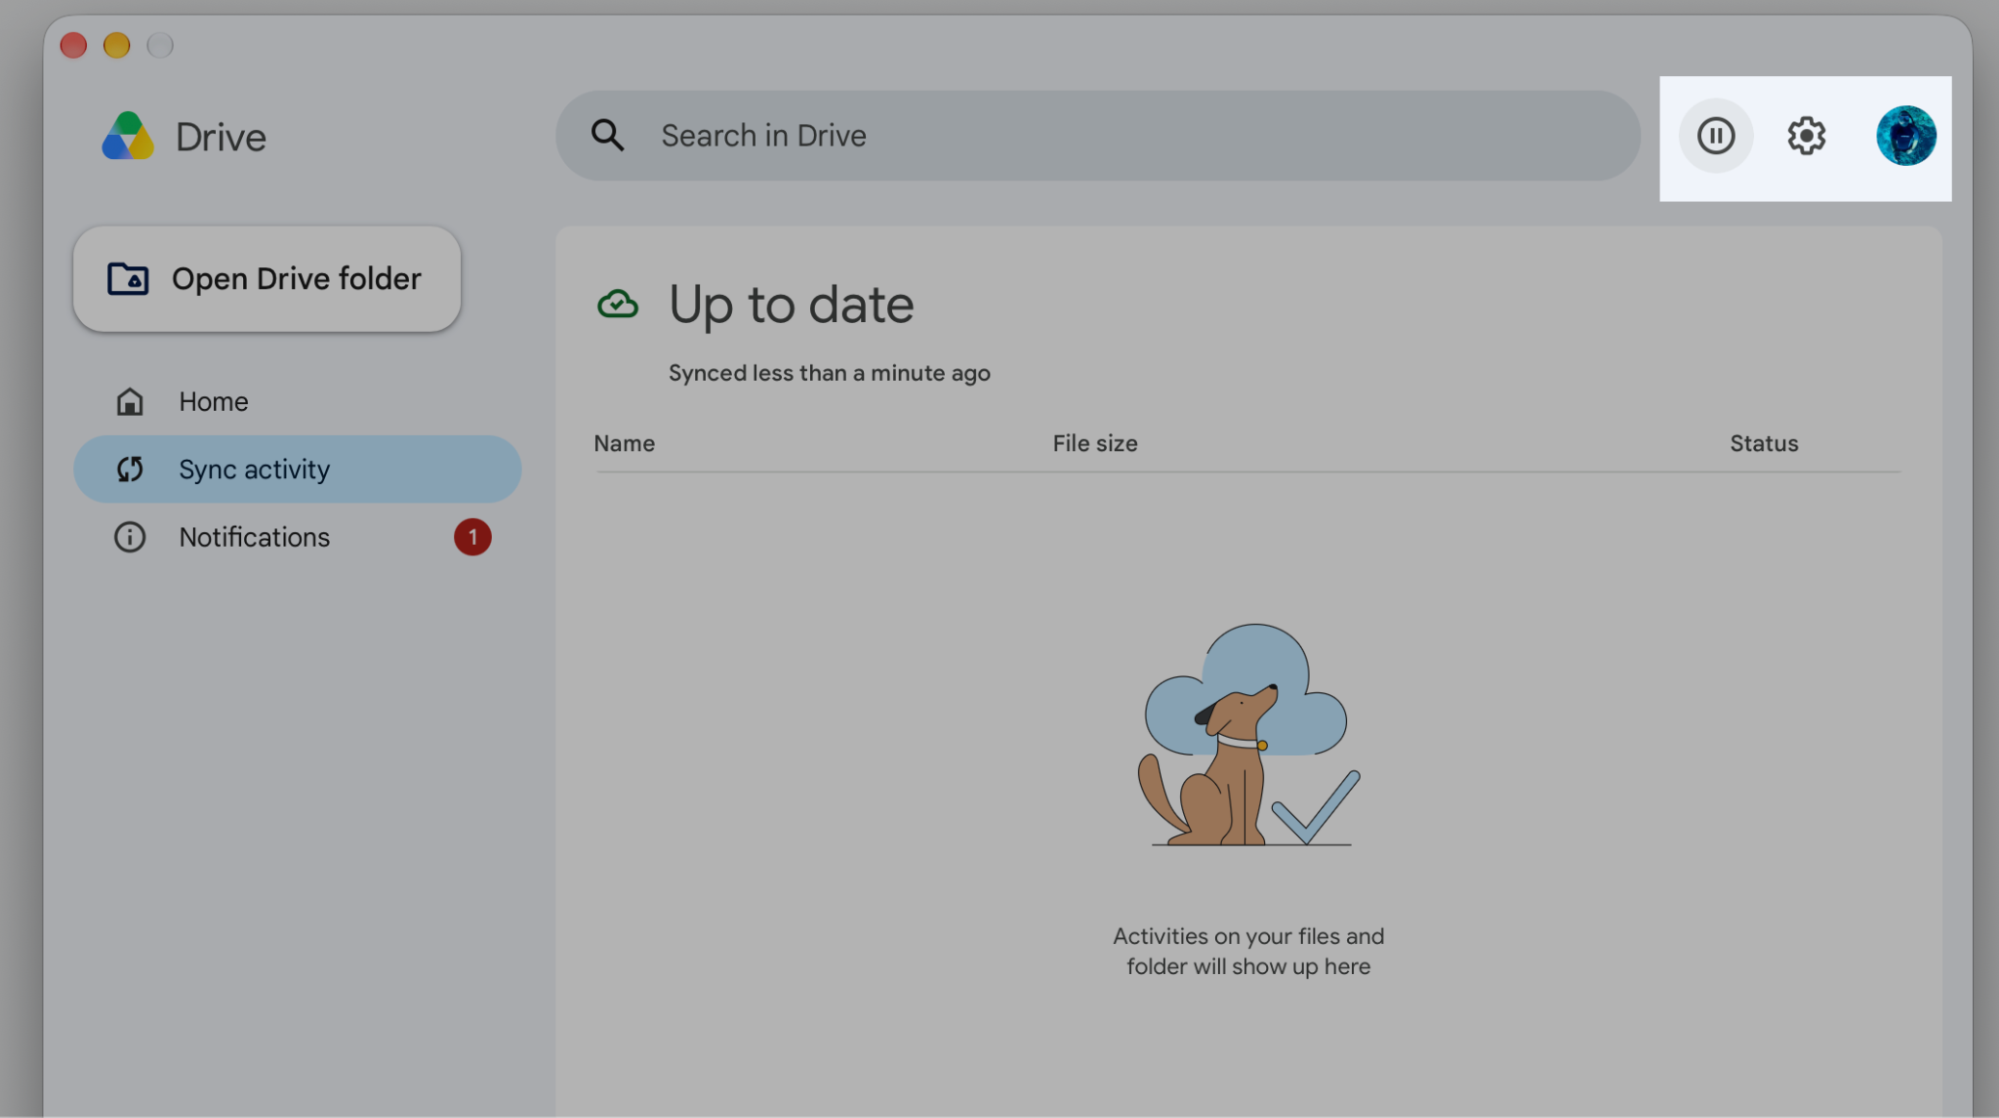
Open Google Drive ➙ find Sync activity.
Check if the synchronization is complete.
Google Drive > Sync Activity > Check synchronization status
How to delete more than one Google Doc at time?
I’ll be honest with you: whenever I start cleaning up my Google Drive, I end up spending hours searching through files. There are always more than just a couple of documents to deal with. I always come across lots of outdated drafts, duplicates, and forgotten notes across different folders. Believe me, deleting each file separately is extremely time-consuming and quite an annoying activity.
Let’s look at some practical ways to clean up your Google Drive without wasting hours:
Bulk file deletion via web browser.
Deleting multiple files using Mac Finder.
Multiple file removal on mobile devices.
Deleting an entire containing folder.
For additional storage management, choose the best cloud storage service that best meets all your needs and requirements.
Bulk file deletion via web browser
I decided to start with the web browser method, as it’s the direct way to manage multiple Google Docs without installing additional software or apps.
Follow these steps to delete Google Docs using a web browser:
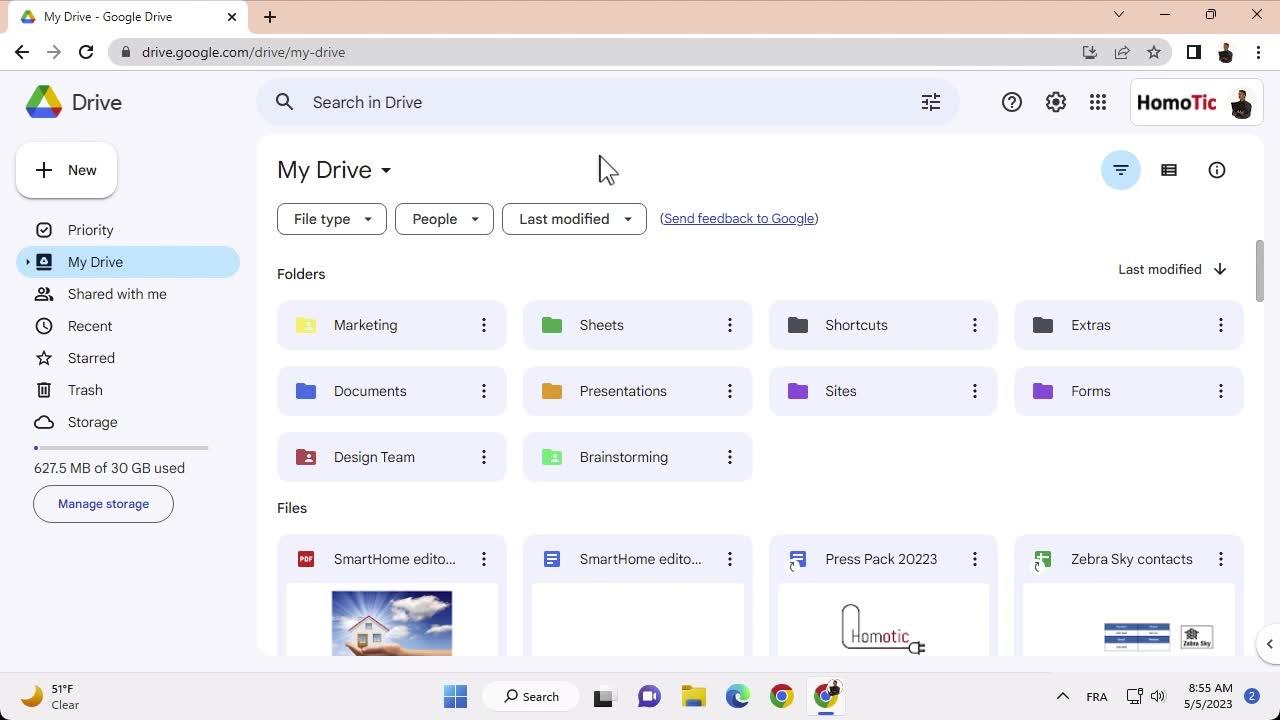
Open your Google Drive in a web browser ➙ go to the folder containing the files you want to remove.
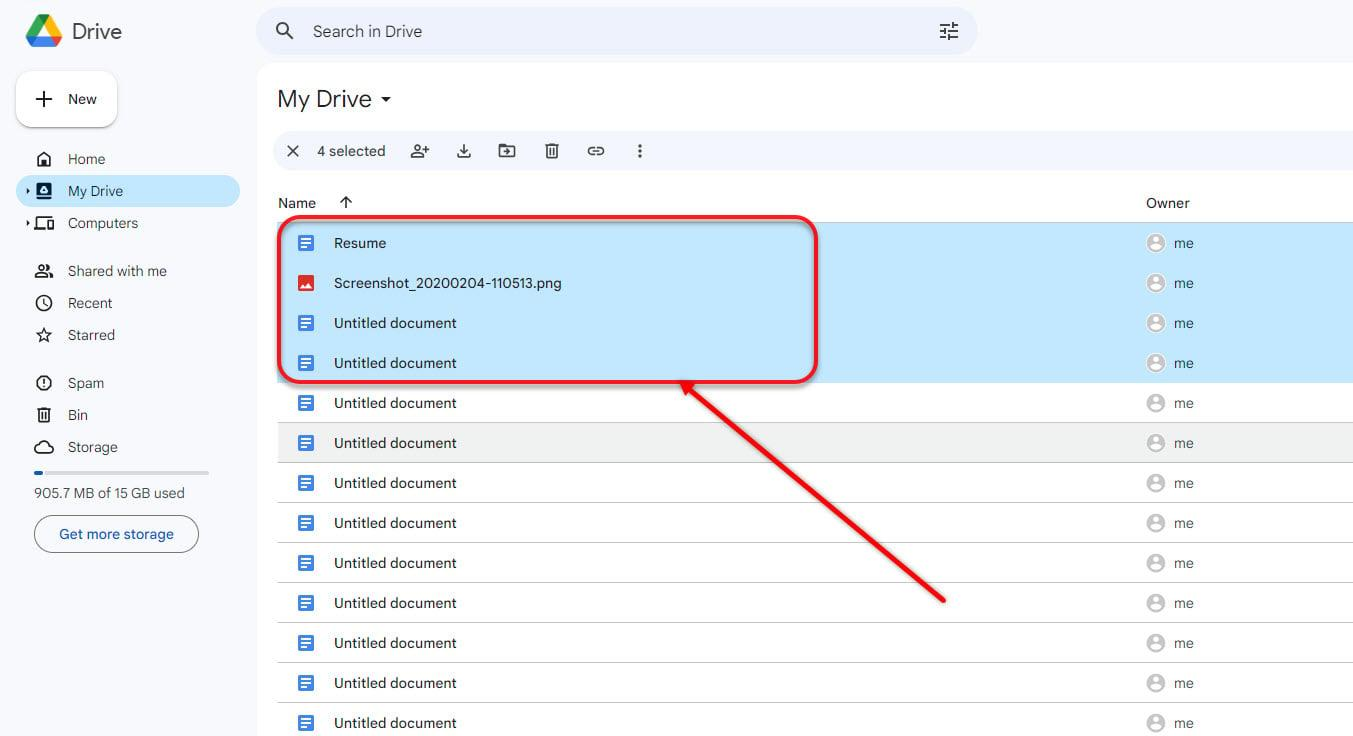
Select the files you want to delete ➙ move them to Trash.
Step 1. Google Drive > Folder with the files for deletionStep 2. Select the files to deleteStep 3. Delete the selected files
A few things to keep in mind:
If the documents you want to delete are listed next to each other: click the first one ➙ press and hold Shift ➙ click the last file in the range.
If the documents are located in different positions in the folder: hold down Command ➙ click each file you want to select.
After deletion, go to Trash to check that you haven’t accidentally removed important files. Remember, you can still restore files while they are in Trash.
Deleting multiple files using Mac Finder
Another way to delete more than one Google Doc at a time is via your synchronized Drive folders directly through Mac Finder.
First, make sure Google Drive for desktop is installed and connected to your Google account. You can find how to add Google Drive to Finder here.
Here are instructions on deleting multiple files via Mac Finder:
Open your Google Drive directory ➙ select the files you want to remove.
Move them to Trash.
I suggest you use familiar Mac keyboard shortcuts from the above section to select several documents at once, no matter if they are listed next to each other or in different positions.
Multiple file removal on mobile devices
If you often work with Google Docs on your smartphone or tablet, you don’t need to switch to your Mac to delete several files at once. This method is especially convenient when you are traveling or far away from your Mac, but need to organize your Google Drive immediately.
Take the following steps to delete multiple Google Docs on your smartphone or tablet:
Open the Google Drive app ➙ select the files you want to get rid of. Touch and hold the document you’re going to delete ➙ tap the other files for removal.
Click the three-dot sign at the top of the screen ➙ choose Delete.
Google Drive > select the files > three-dot sign > Delete
Deleting an entire containing folder
When there are dozens of Google Docs you no longer need, one of the easiest solutions is to place all of them in a single folder and delete the entire folder in a few clicks. This solution is particularly useful if you haven’t cleaned up your Google Drive for a long time and have accumulated old projects, notes, reports, and other files you don’t plan to use again.
Here’s how to remove the entire folder in one step:
Open Google Drive in your browser ➙ create a new folder ➙ select the files you want to delete and move them to a new folder.
Return to Google Drive ➙ right-click the new folder ➙ choose Move to Trash.
Google Drive > create a new folder > move files to the new folder > delete the new folder
A helpful suggestion from us: After placing the documents you want to delete into one folder, open this folder to review its content to make sure you haven’t removed anything important.
Conclusion
Keeping your Google Drive organized is simple, especially if you know how to delete multiple Google Docs at once. All you need to do is choose the method that works best for you from the ones described above, then double-check the selected files, and make sure your important documents are safe.
Besides outdated documents, duplicate files also consume a lot of valuable storage space on your Mac. If you don’t want to waste time searching through folders comparing identical files manually, MacKeeper’s Duplicates Finder can help. It scans all your folders for duplicates, making it easier to decide which copies you no longer need. Try it today!
We respect your privacy and
use cookies
for the best site experience.
Privacy Preferences Center
We use cookies along with other tools to give you the best possible experience while using the
MacKeeper website. Cookies are small text files that help the website load faster. The cookies we
use don’t contain any type of personal data meaning they never store information such as your
location, email address, or IP address.
Help us improve how you interact with our website by accepting the use of cookies. You can change
your privacy settings whenever you like.
Manage consent
All cookies
These cookies are strictly necessary for enabling basic website functionality (including page
navigation, form submission, language detection, post commenting), downloading and purchasing
software. The website might malfunction without these cookies.