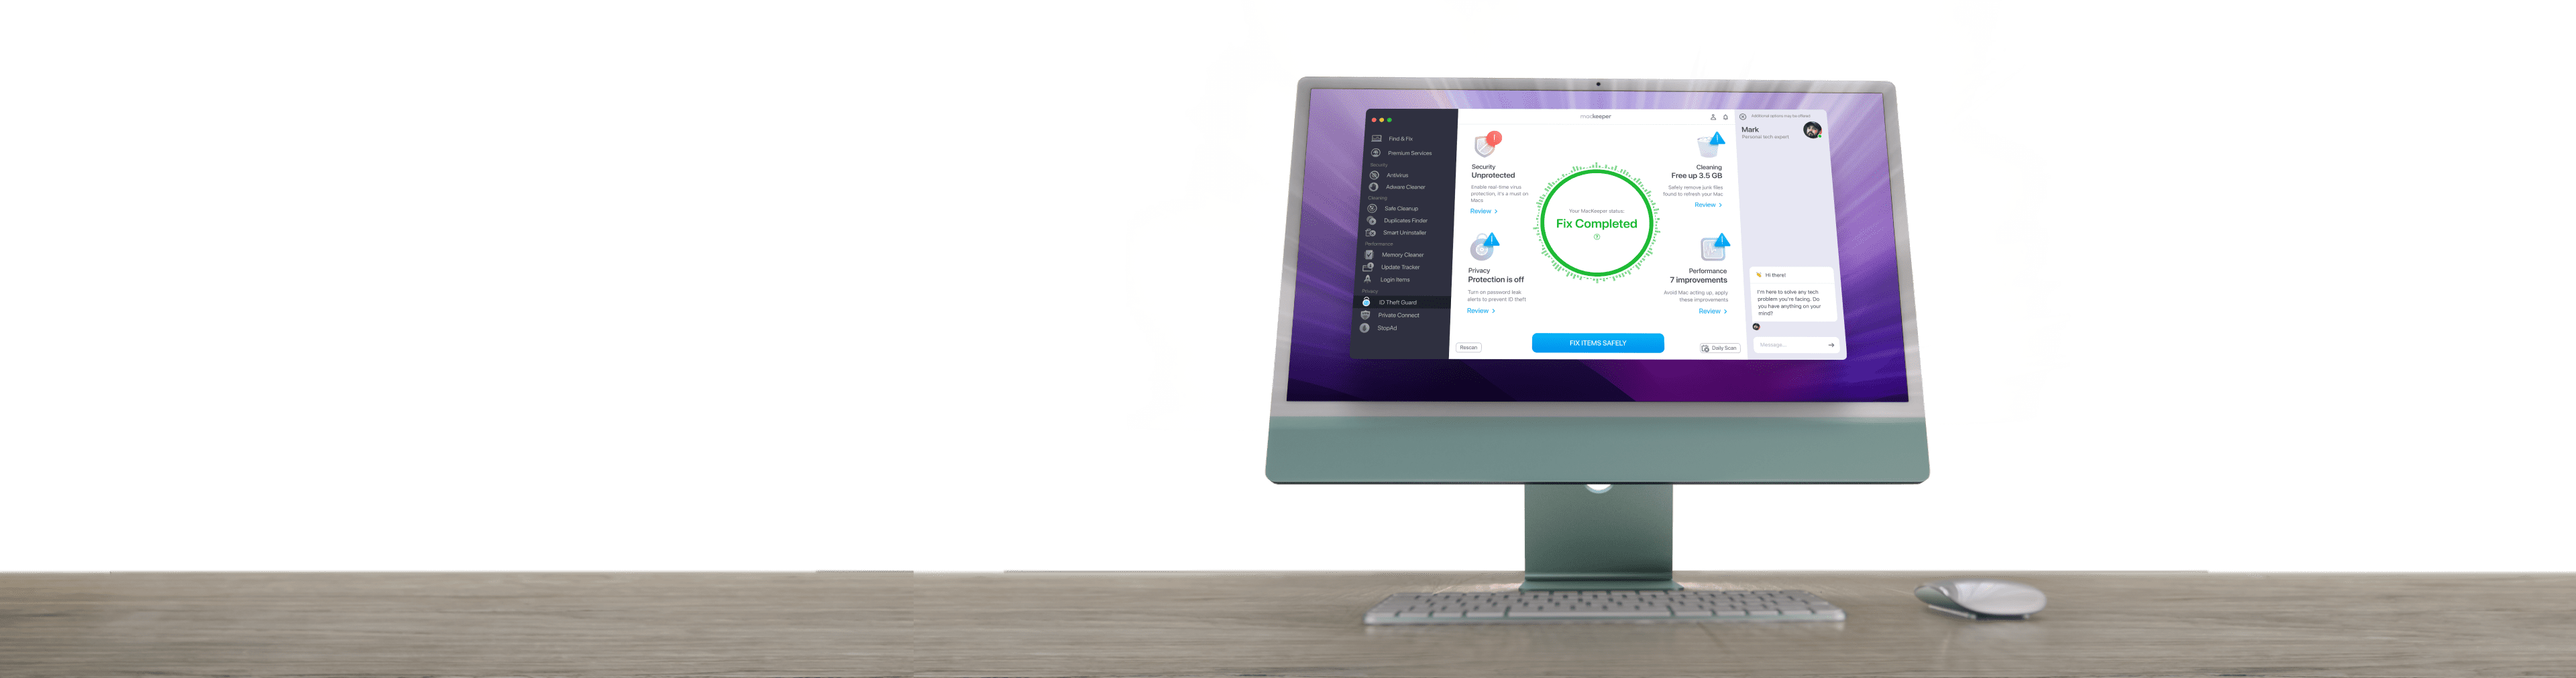
Planning a Catalina downgrade to High Sierra? Before you roll things back, it helps to clear out the clutter first. MacKeeper’s Safe Cleanup removes caches, logs, and junk files in one click, freeing up storage space without touching your personal files. It’s a simple, safe way to begin your downgrade with a tidy Mac.
Catalina dropped support for 32-bit apps, so if a favorite older app suddenly stopped opening, that’s often the reason. Rolling back to High Sierra can bring that compatibility back and settle a few other headaches too.
Plenty of people notice their Mac so slow after the jump to Catalina, especially on older machines. Here are the common reasons people choose to revert to the previous version:
32-bit apps and games that no longer launch on Catalina
Performance slowdowns on older Mac hardware
Software bugs that showed up right after the update
Legacy peripherals like scanners or printers that lost driver support
A note from our experts:
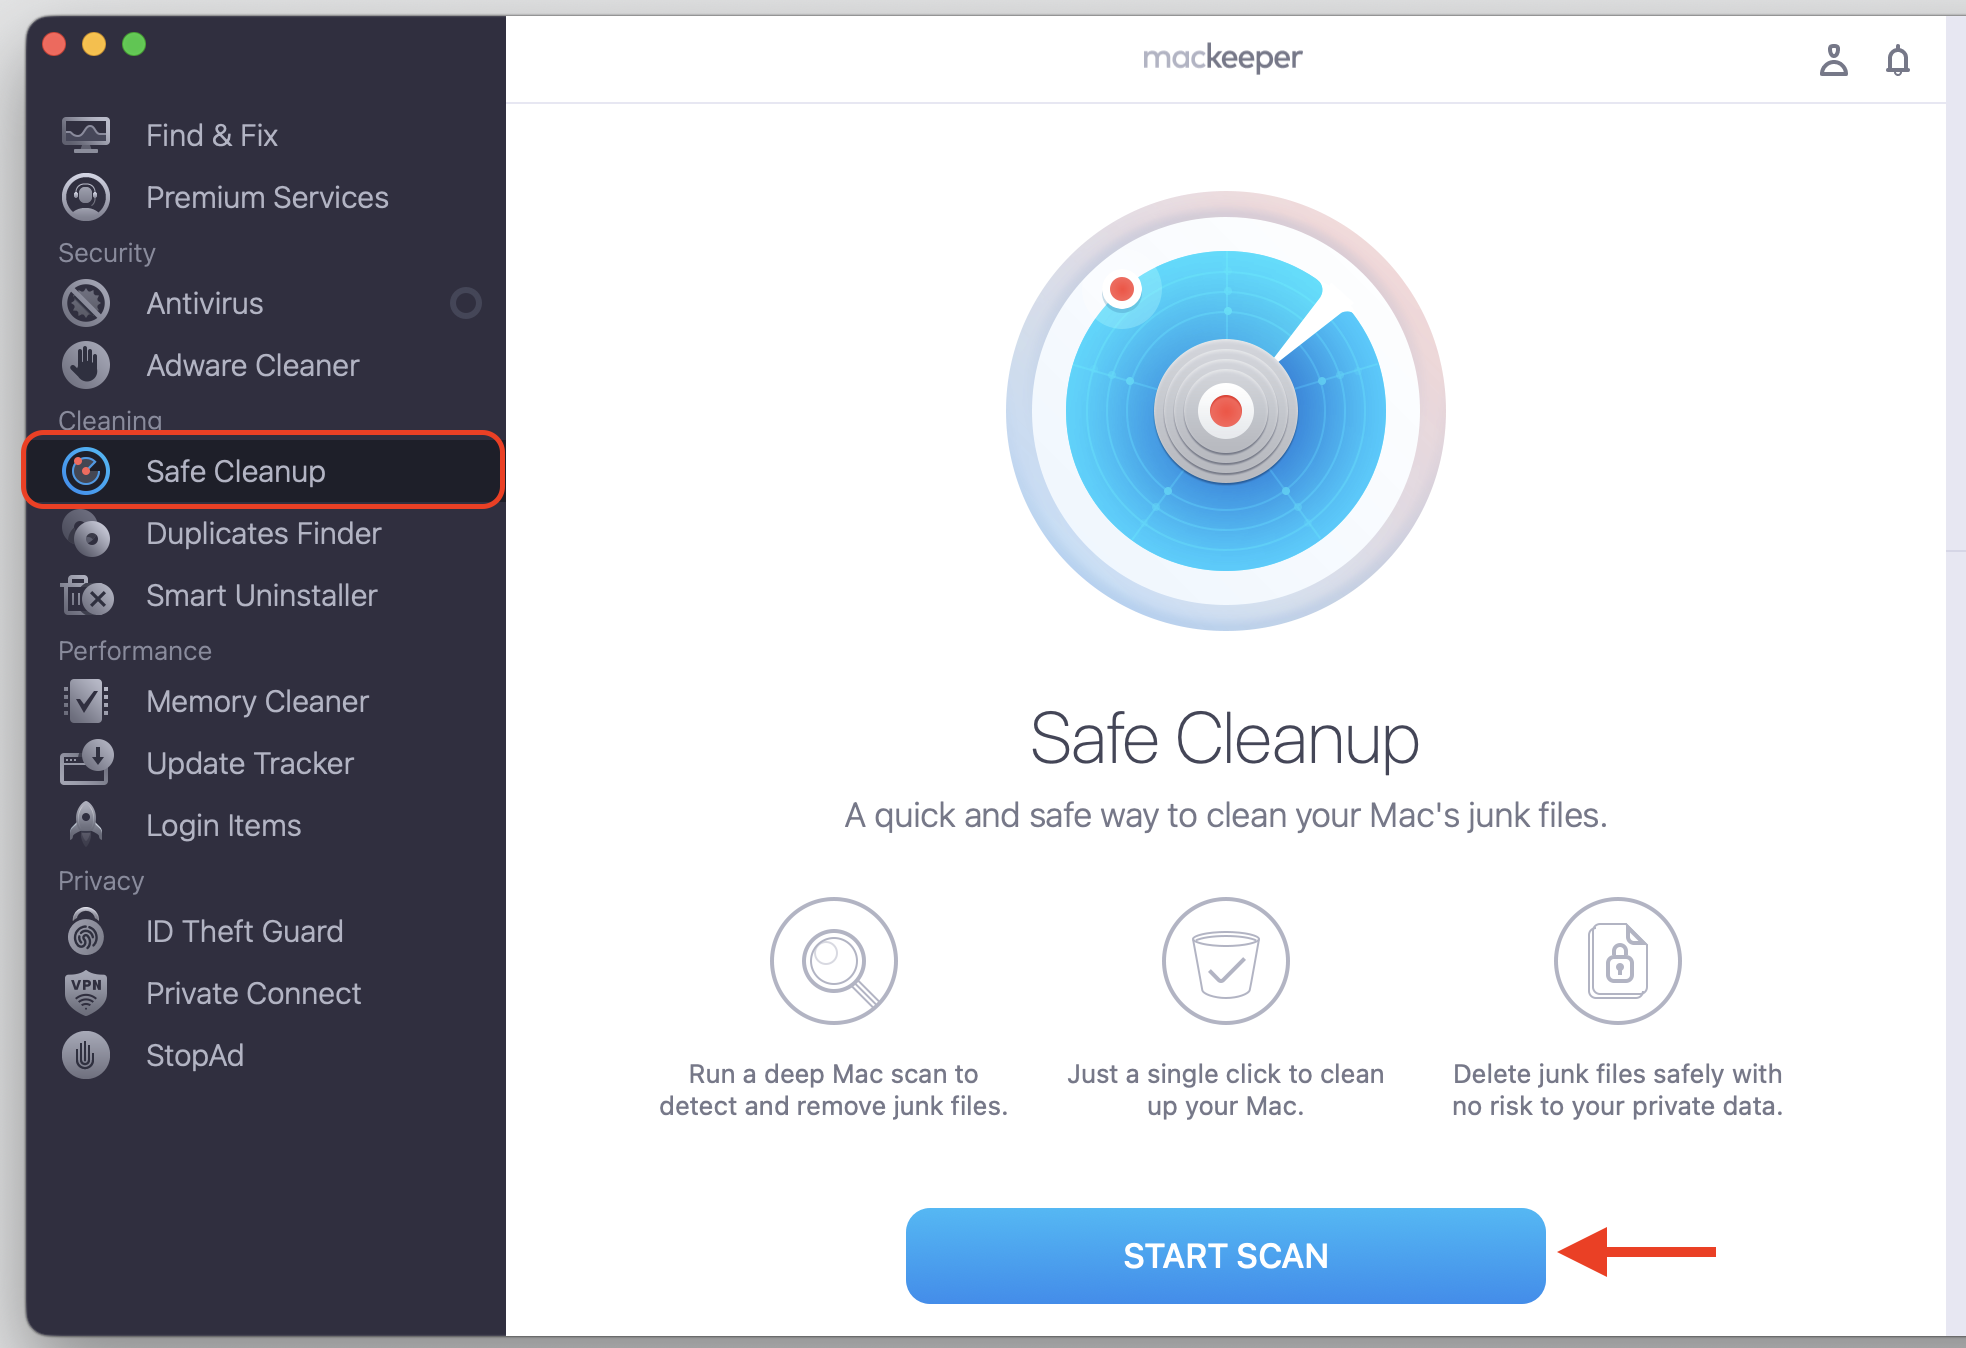
Downgrading macOS versions requires some preparation. The first step is removing unnecessary files from your Mac to simplify and speed up the next steps. MacKeeper’s Safe Cleanup was created exactly for this purpose. It removes digital junk and keeps your personal files safe in a few clicks.
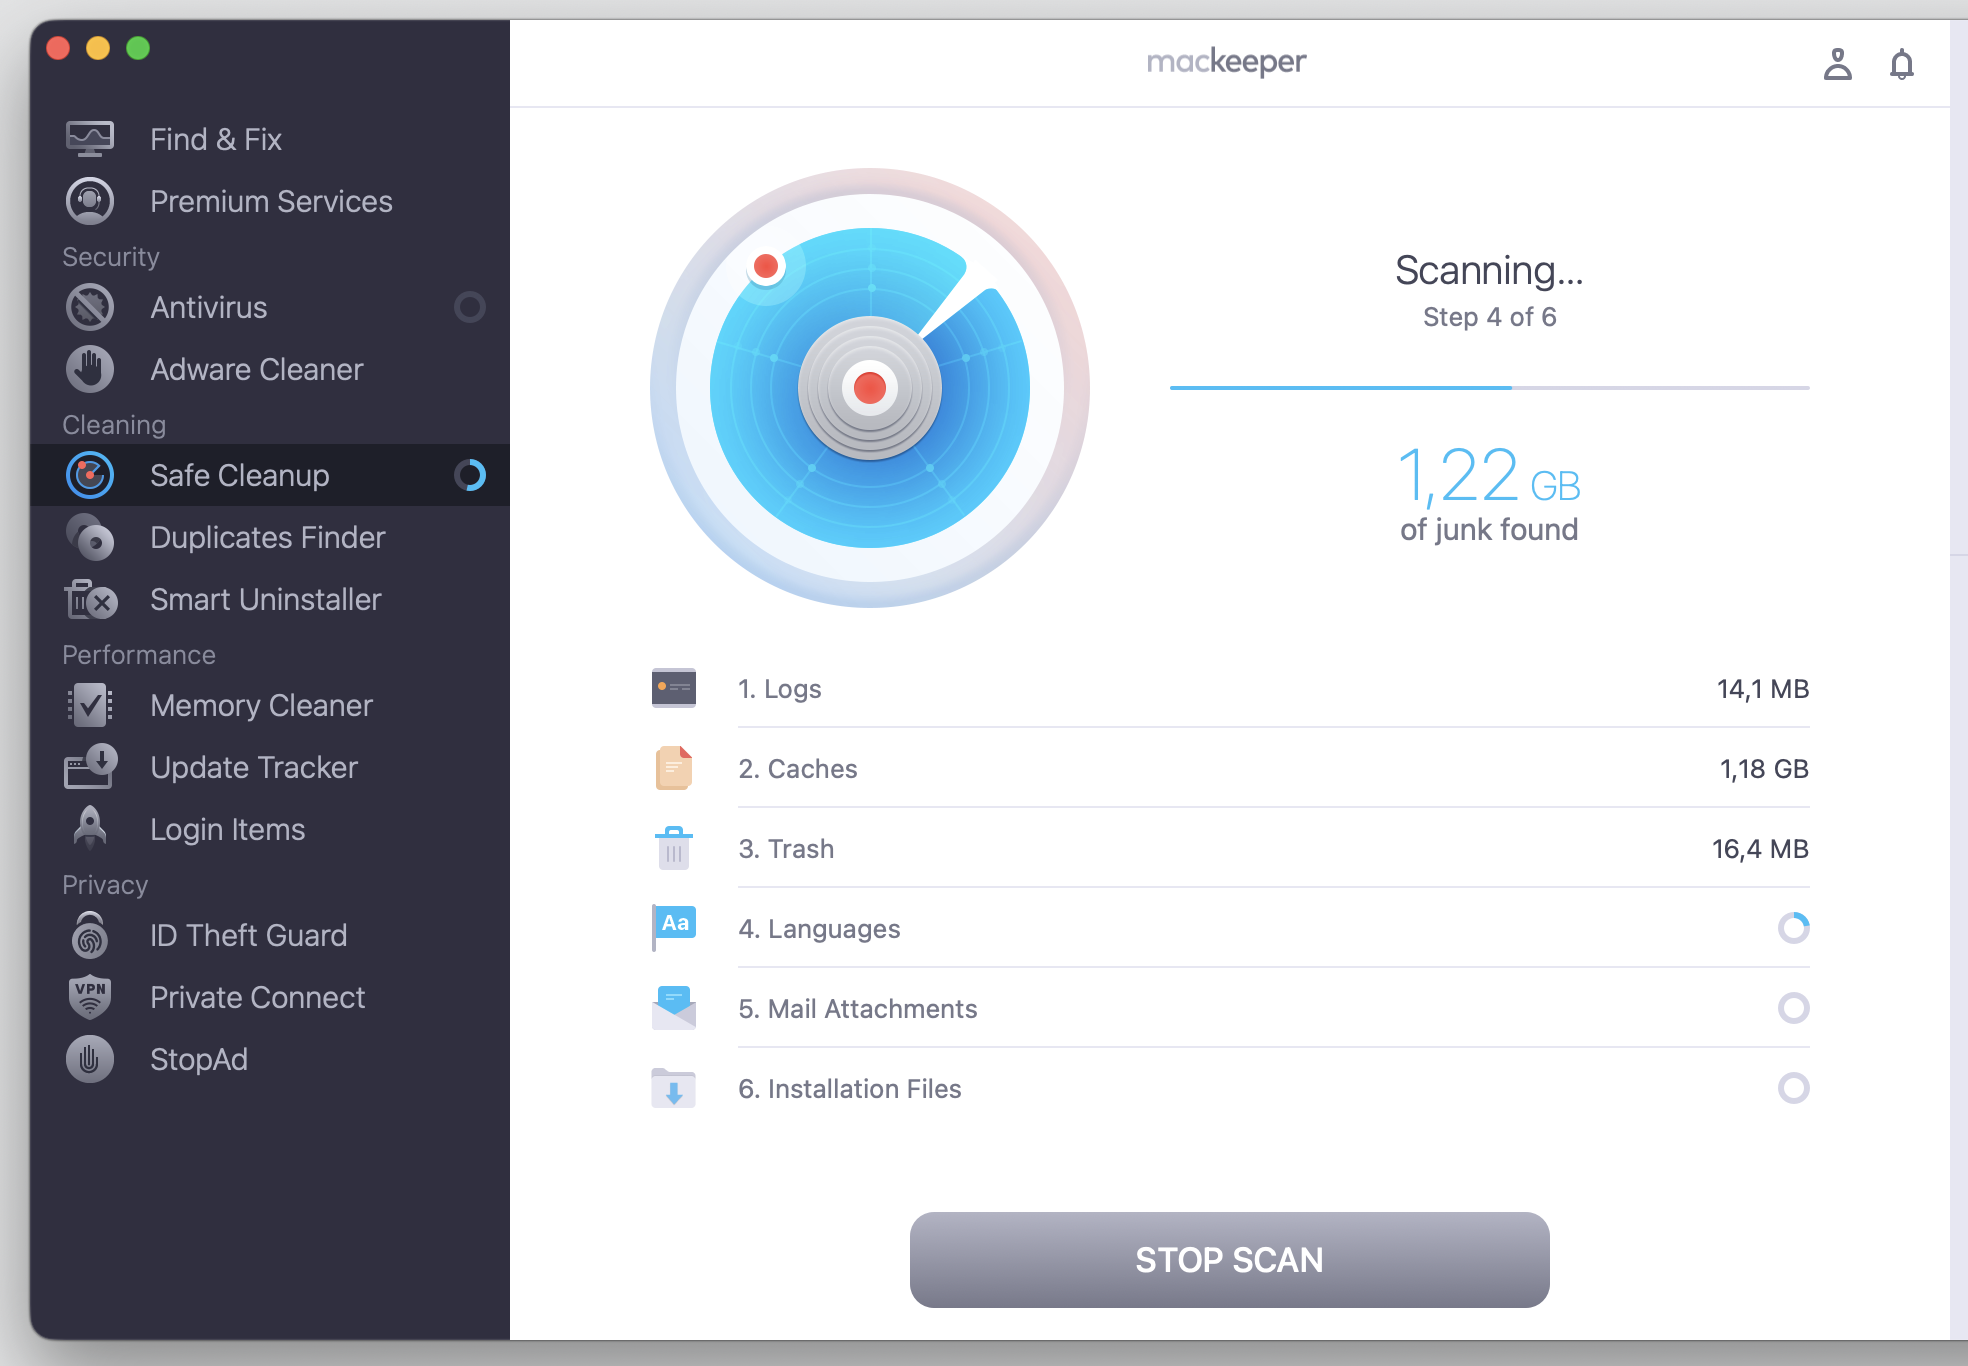
Review the results and select the files to remove.
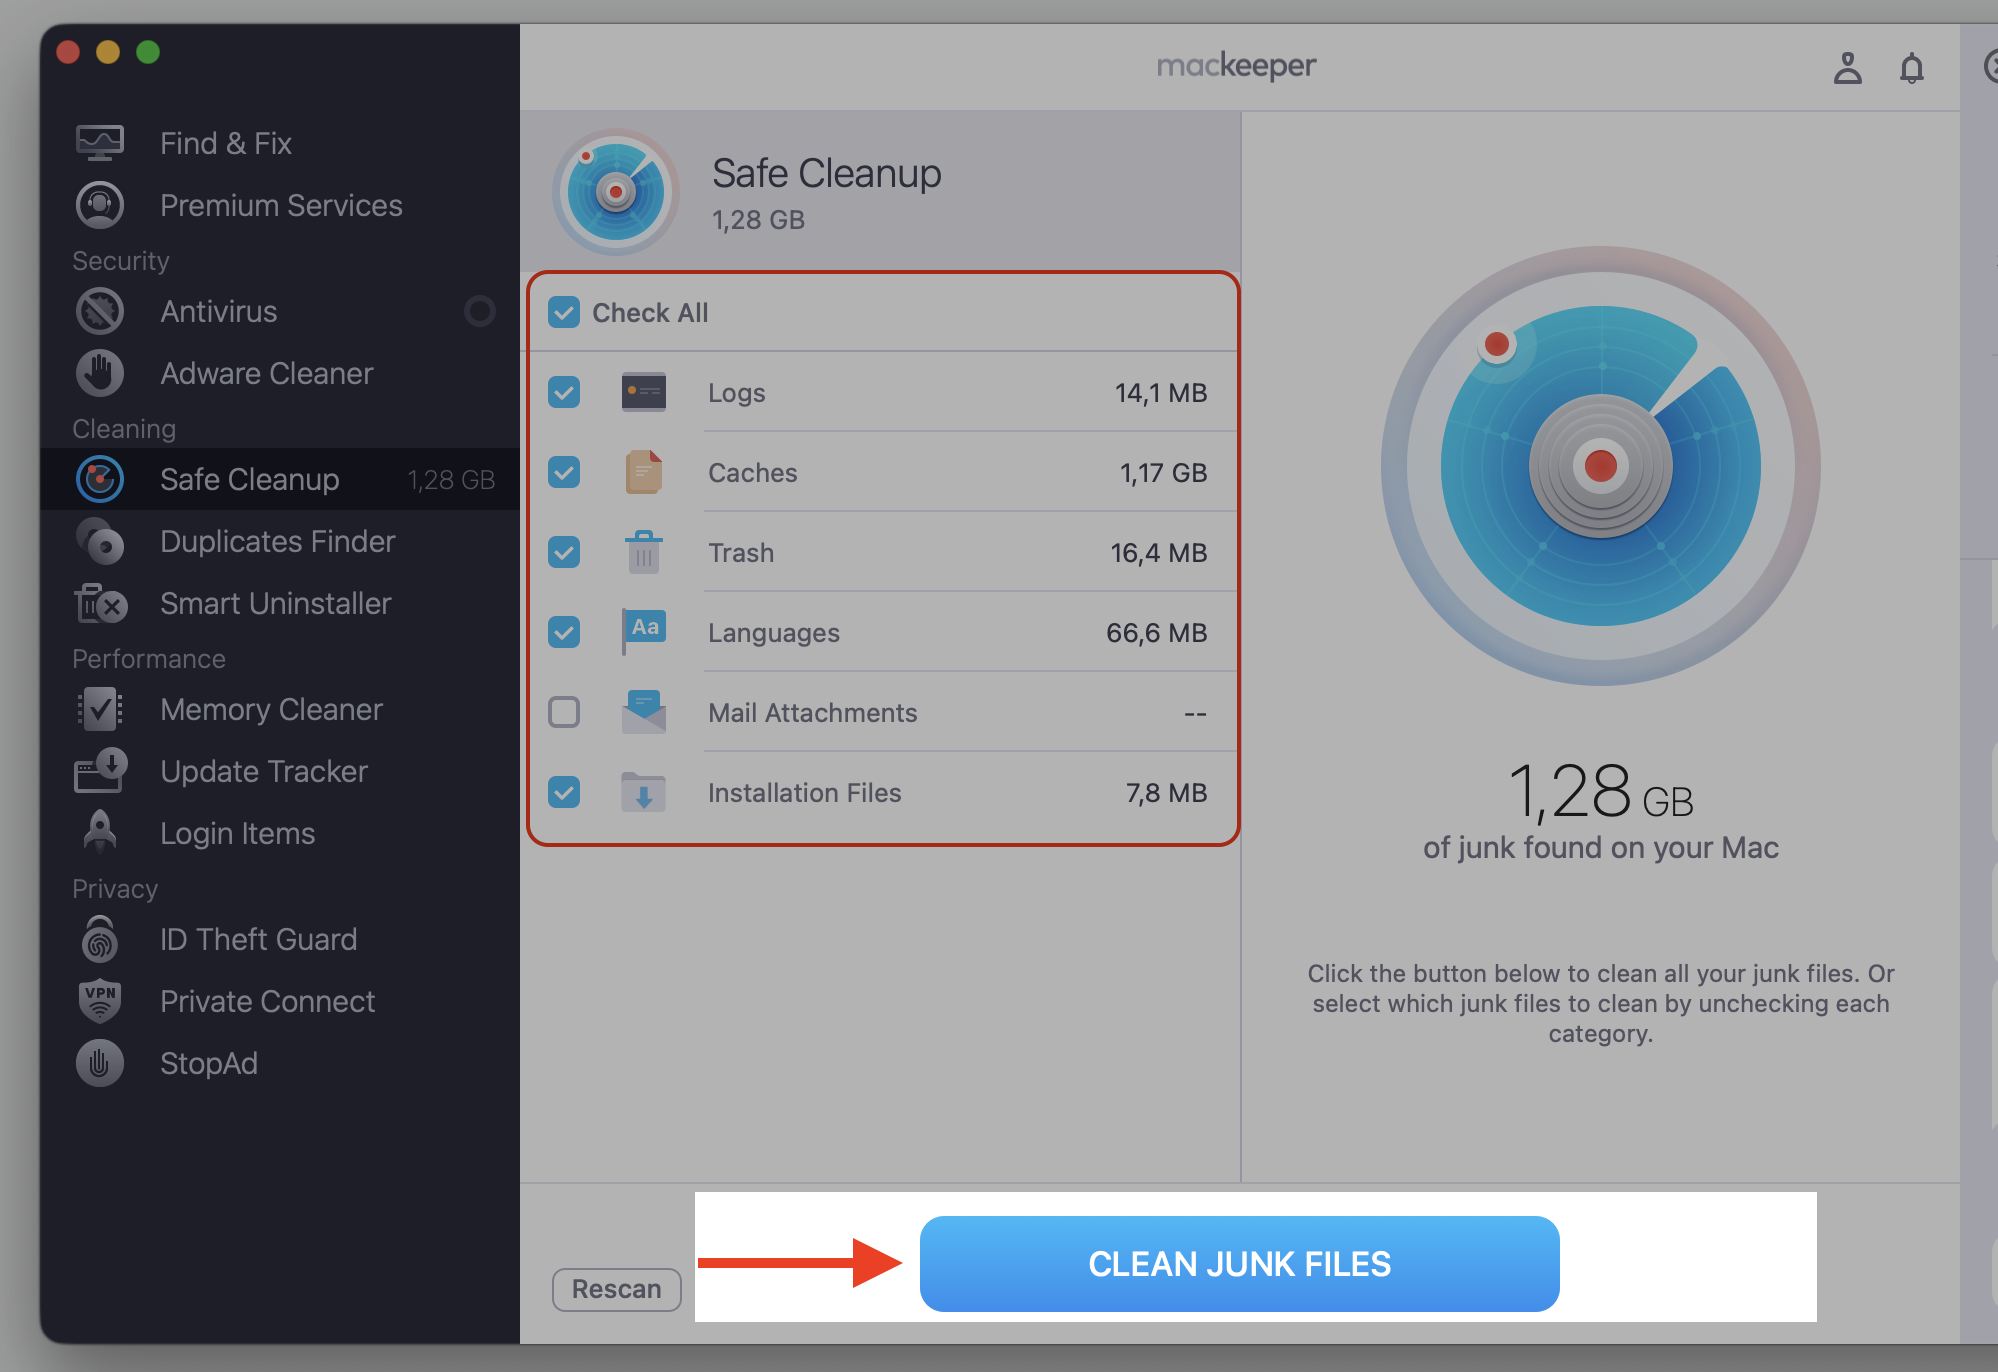
Click Clean Junk Files to finish the cleanup process.
Step 1. Go to MacKeeper > Safe Cleanup > Start ScanStep 2. Wait until the scan is finishedStep 3. Check the boxes and proceed with Clean Junk Files
What to do before downgrading macOS 10.15 to 10.13?
A downgrade wipes your startup drive completely, so a little prep saves you from losing anything important. Since you’ll install older macOS from scratch, everything on the current drive gets erased. Let’s run through everything we recommend sorting out below before you begin your downgrade.
1. Back up all essential files and documents
A backup is your safety net here. One thing to keep in mind — a full Time Machine backup made on Catalina can’t be restored directly onto High Sierra, so we recommend copying your files by hand instead. Here’s what we suggest:
Connect an external drive with enough free space for your files.
Copy your documents, photos, and downloads to a safe location on that drive.
Upload anything extra to cloud storage like iCloud Drive, Dropbox, or Google Drive.
Double-check that every important folder made it across before moving on.
2. Save passwords, software licenses, and settings
When the drive is erased, your saved logins and app keys go with it. A password manager keeps everything safe and easy to find afterward. Take a moment to do this:
Store your account passwords and card details in a trusted password manager.
Write down or export your software product keys and license codes.
Export your browser bookmarks so you don’t lose your saved sites.
Note any custom preferences you’ll want to set up again later.
3. Check Mac hardware compatibility
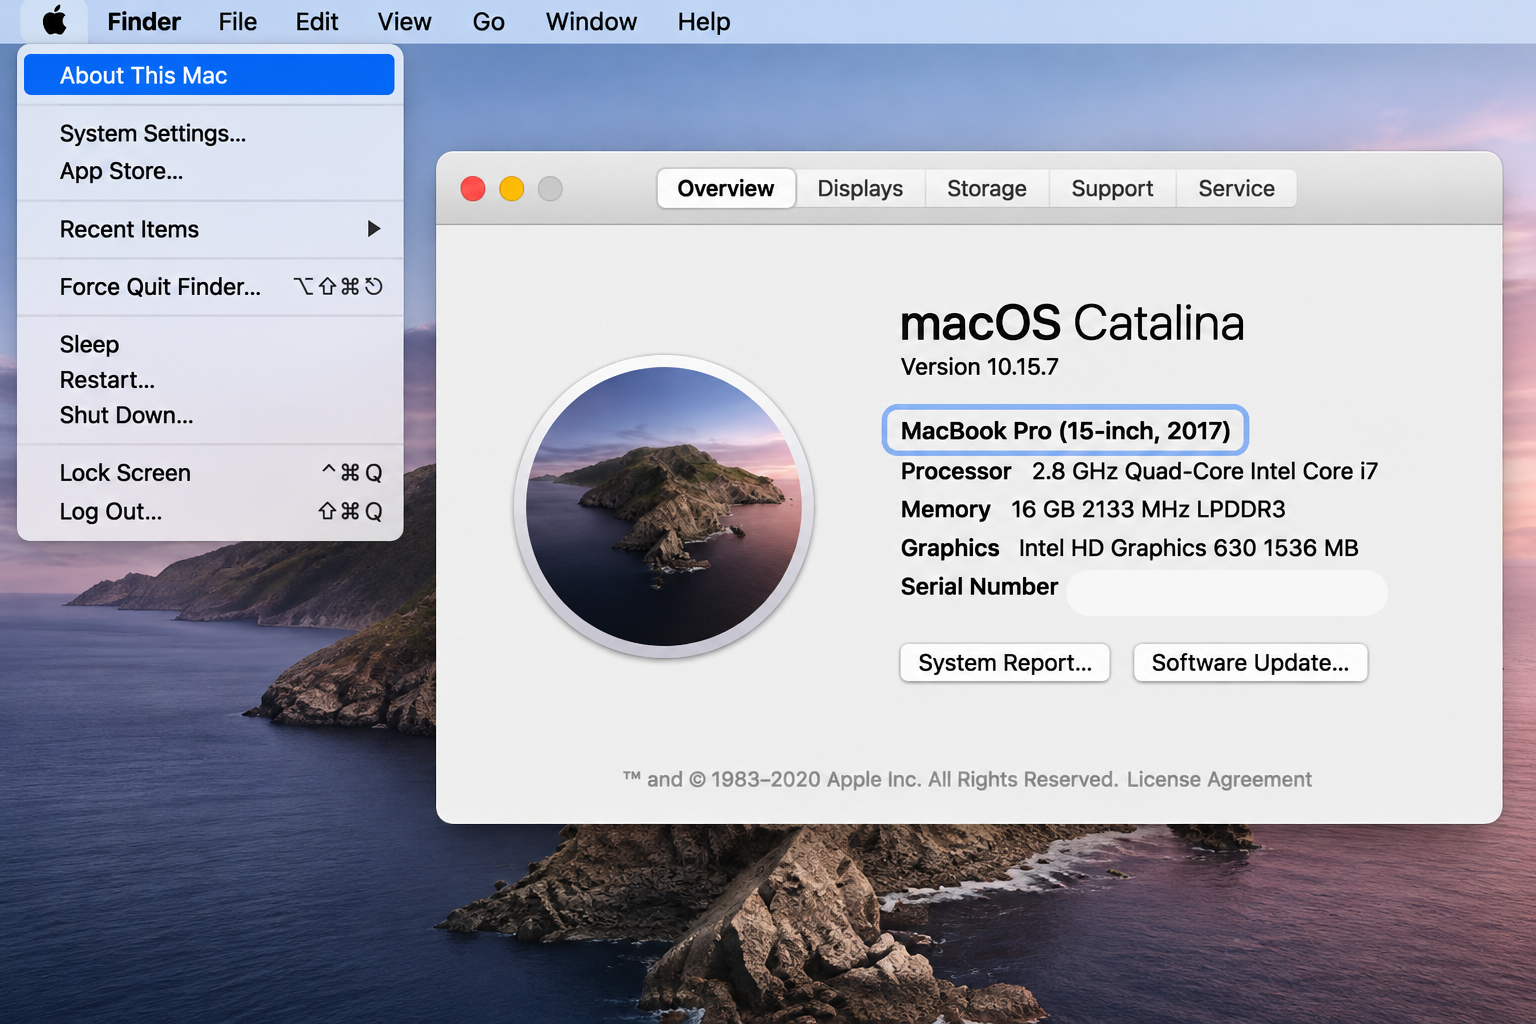
Not every Mac can run High Sierra, so it’s worth a quick check before we go any further. Whether you’re on a MacBook, an iMac, or another Macintosh model, only machines from 2017 or earlier are compatible with this version. Confirm your model like so:
Click the Apple menu in the top-left corner, then choose About This Mac.
Look at the model name and year listed in the window.
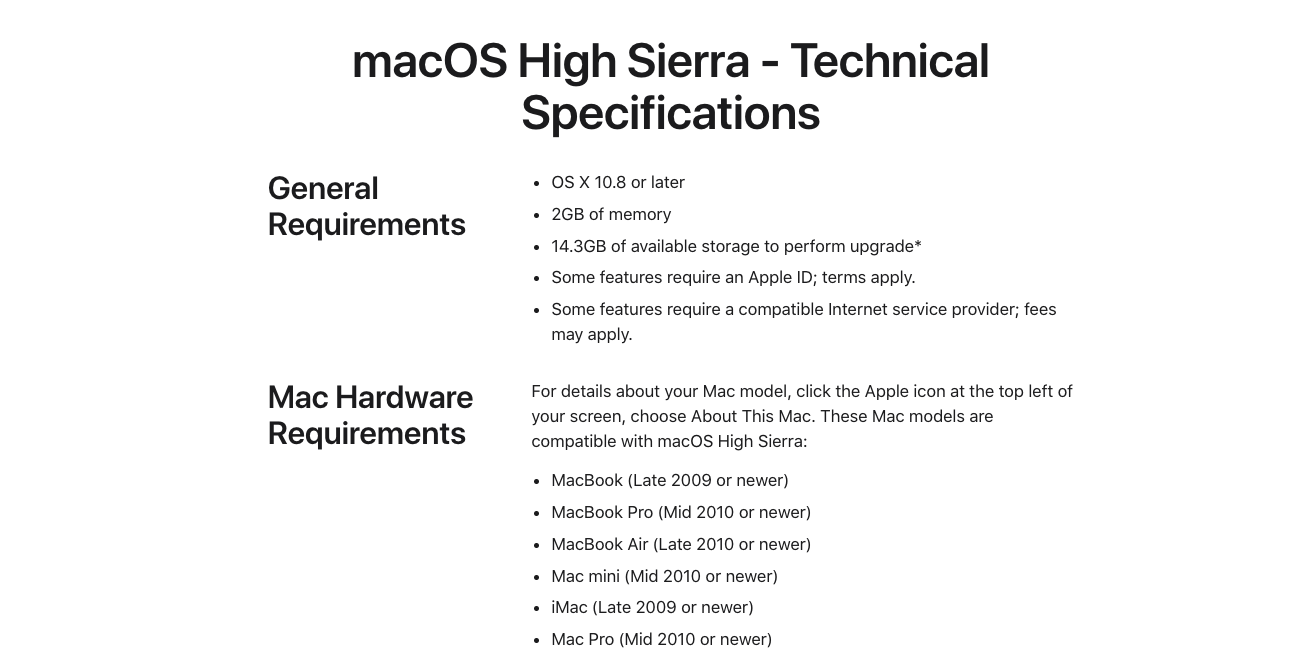
Compare it against Apple’s list of High Sierra-compatible Macs.
Move ahead only if your Mac shipped in 2017 or earlier.
Step 1. Go to Apple Menu> About This Mac > Сheck model name and year listed in the windowStep 2. Check the Official Apple macOS High Sierra Specifications
4. Create a bootable High Sierra USB installer
You’ll need a bootable installer to put High Sierra back on your Mac. It’s simpler than it sounds, and to create a bootable USB drive, we only need a spare drive and a few minutes. Set yours up like this:
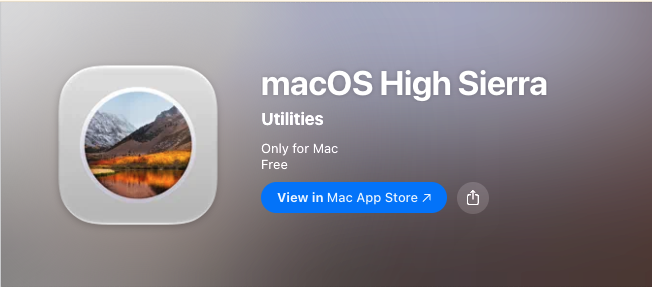
Download the macOS High Sierra installer from the App Store or Apple’s support site.
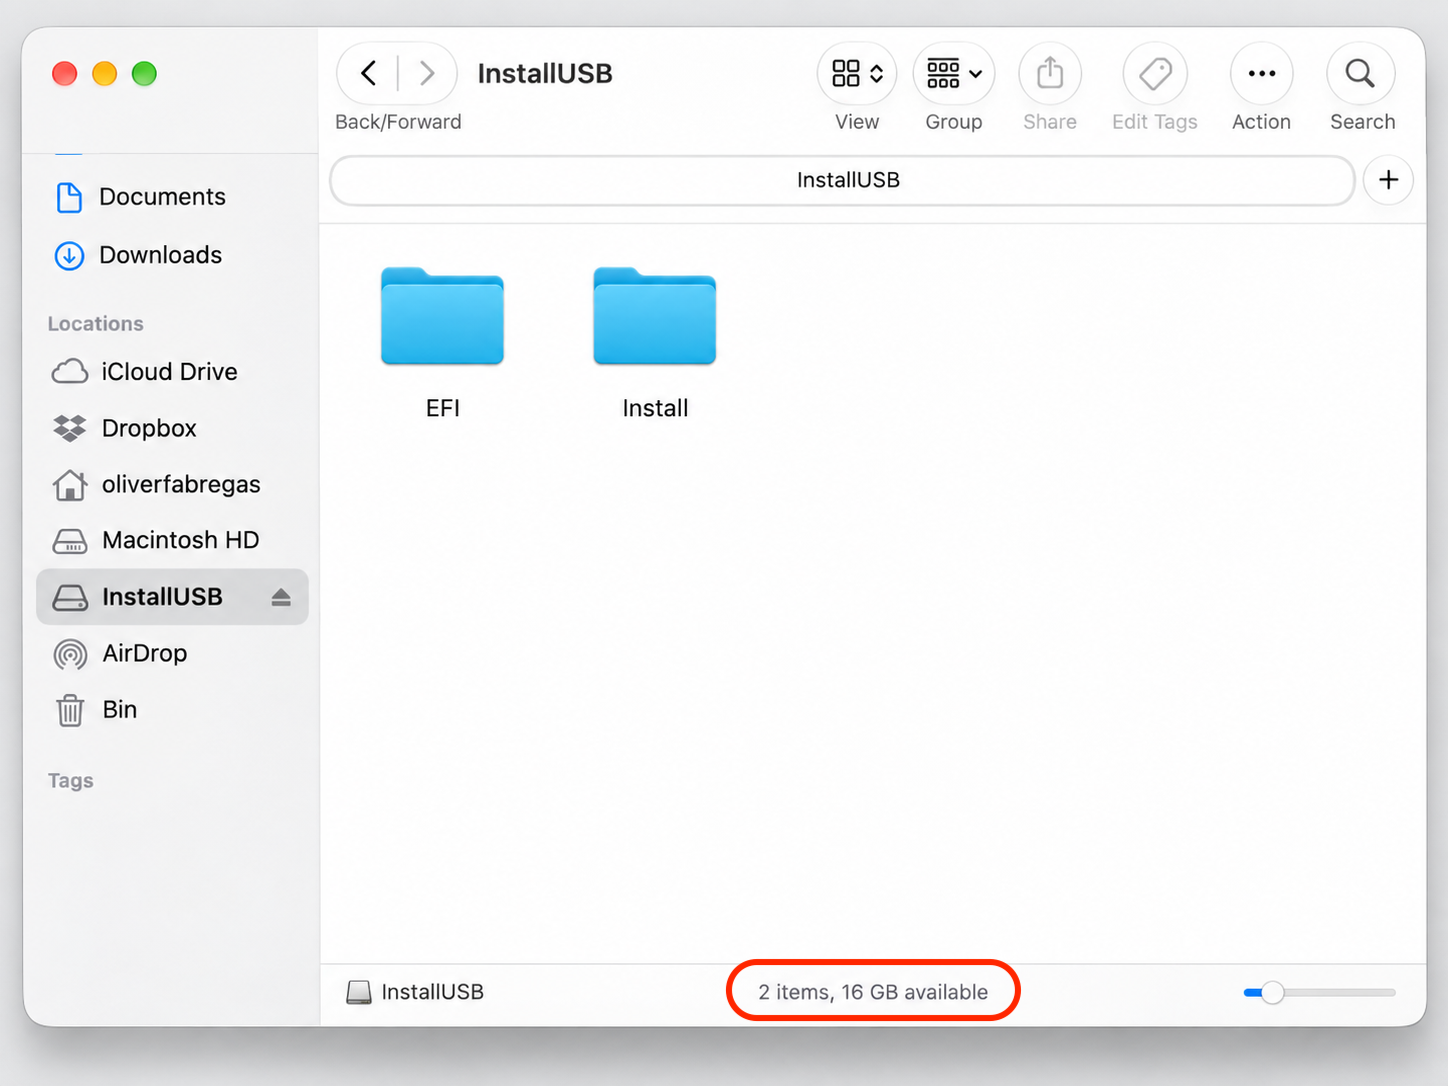
Plug in a USB drive with at least 16GB of space.
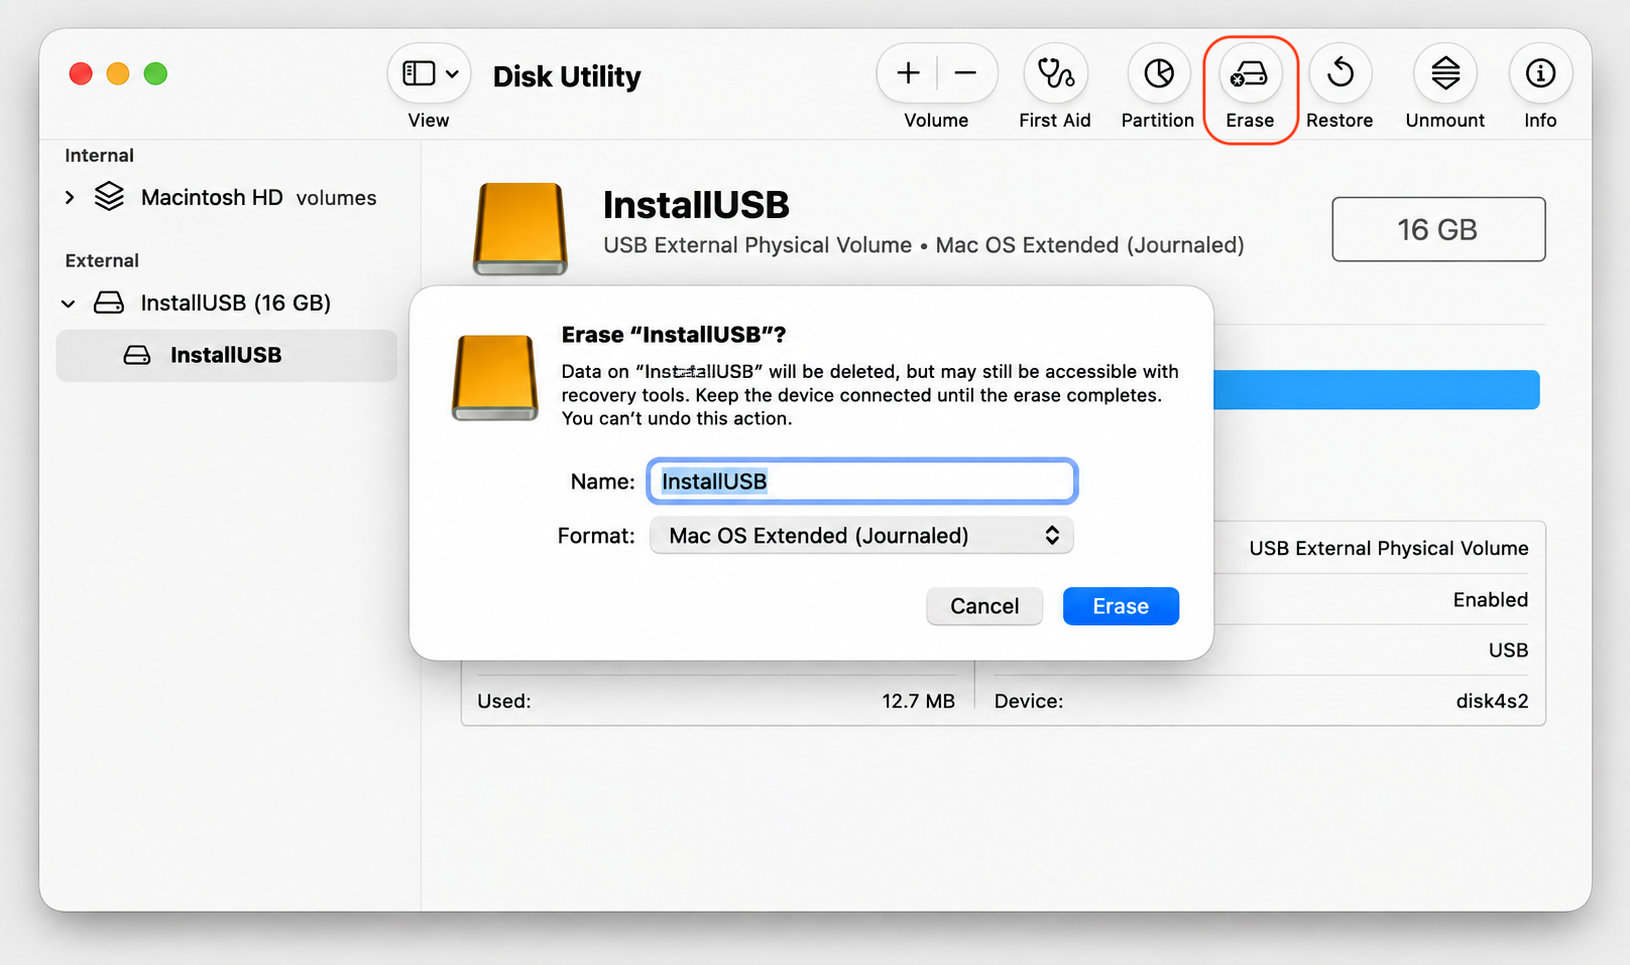
Open Disk Utility, then format the drive as Mac OS Extended (Journaled).
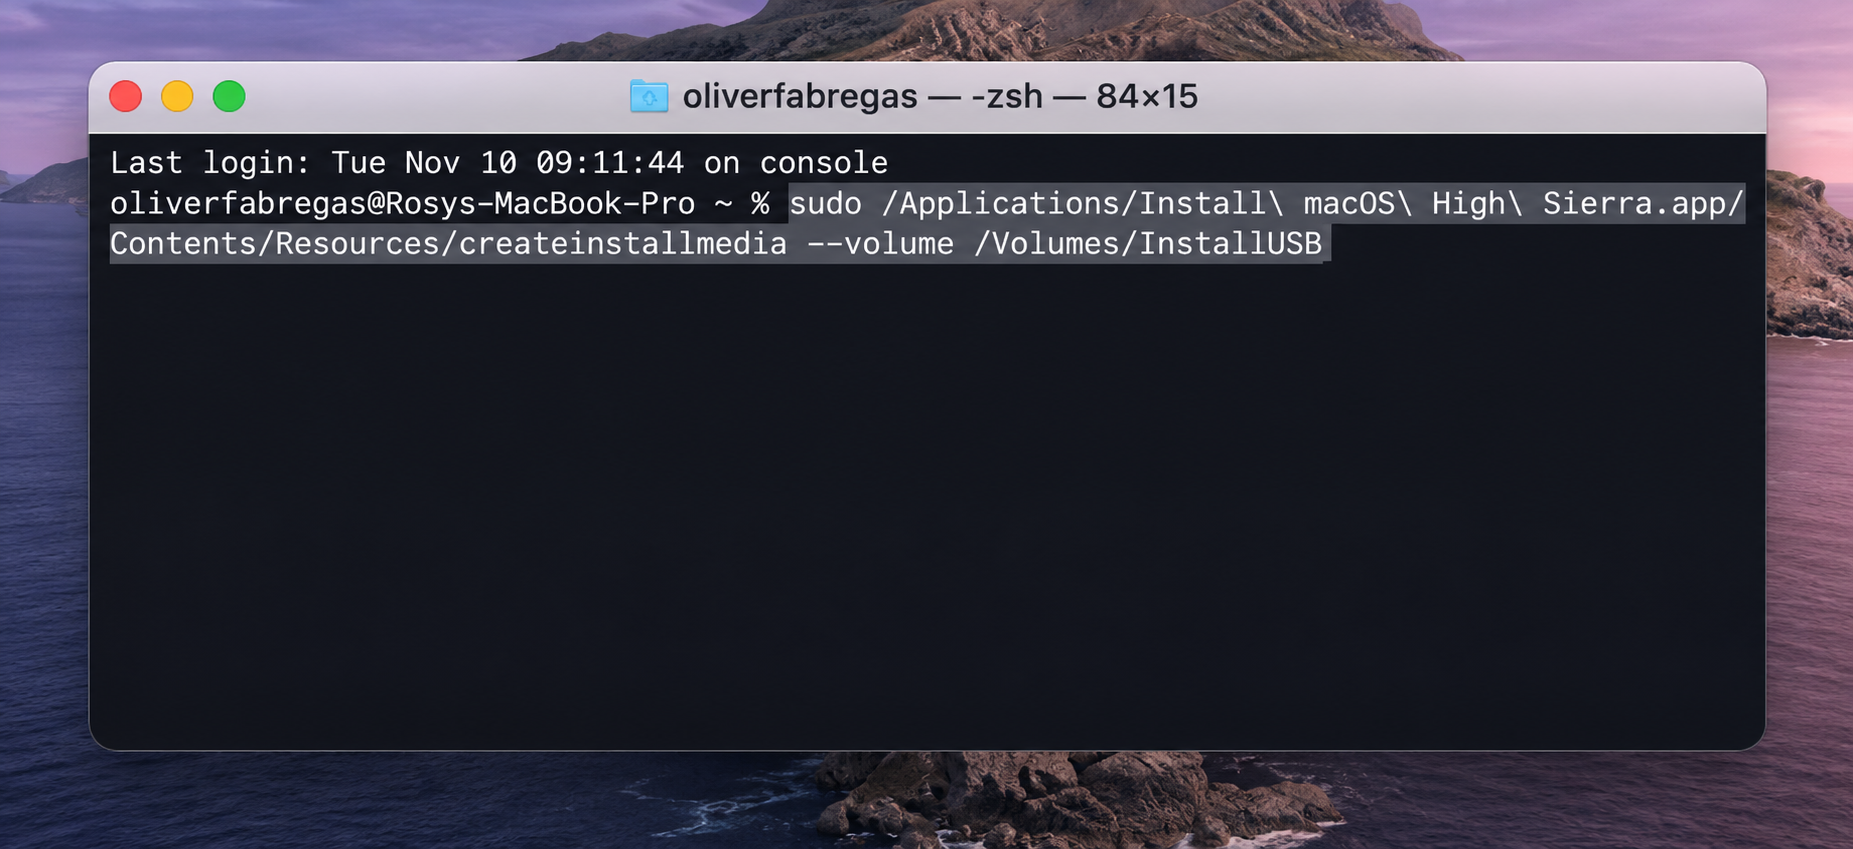
Launch Terminal and run the createinstallmedia command to build the installer.
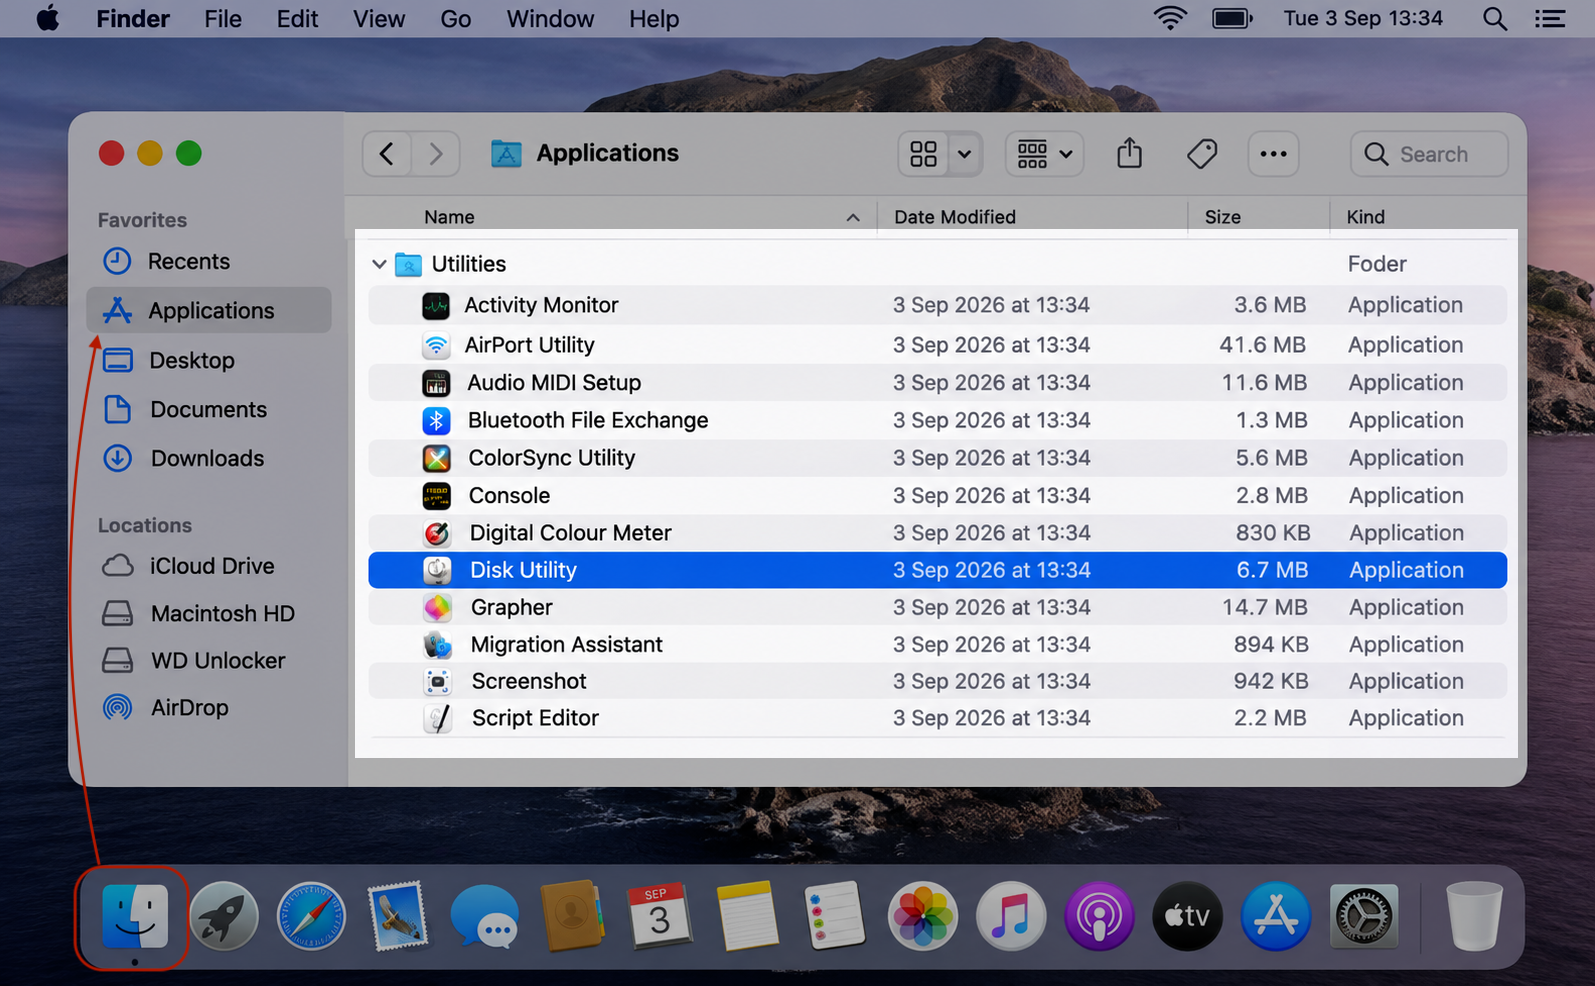
Step 1. Download the macOS High Sierra installer from the App Store Step 2. Plug in a USB drive with at least 16GB of spaceStep 3. Open Disk Utility App from Finder > Applications > UtilitiesStep 4. Select Your Bootable USB Drive and Format It as Mac OS Extended (Journaled)Step 5. Launch Terminal and run the createinstallmedia command to build the installer
5. Adjust Startup Security Utility on T2 Macs
Got a newer Mac with a T2 security chip? By default, it won’t boot from external media, so we need to adjust one setting first. Here’s what to change:
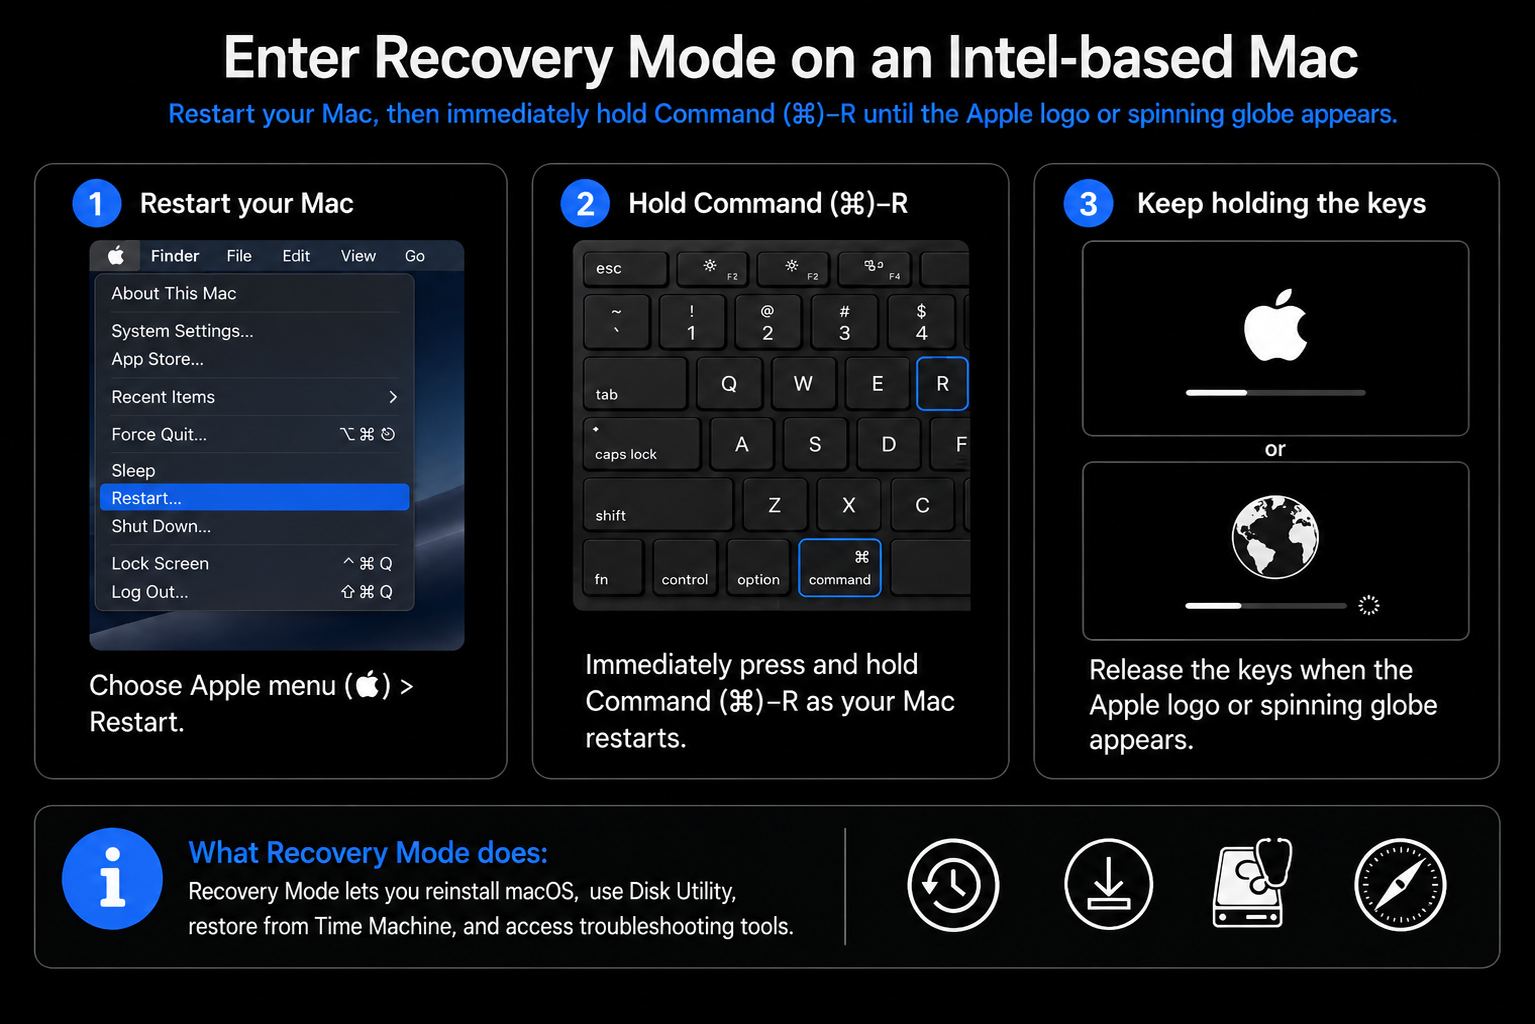
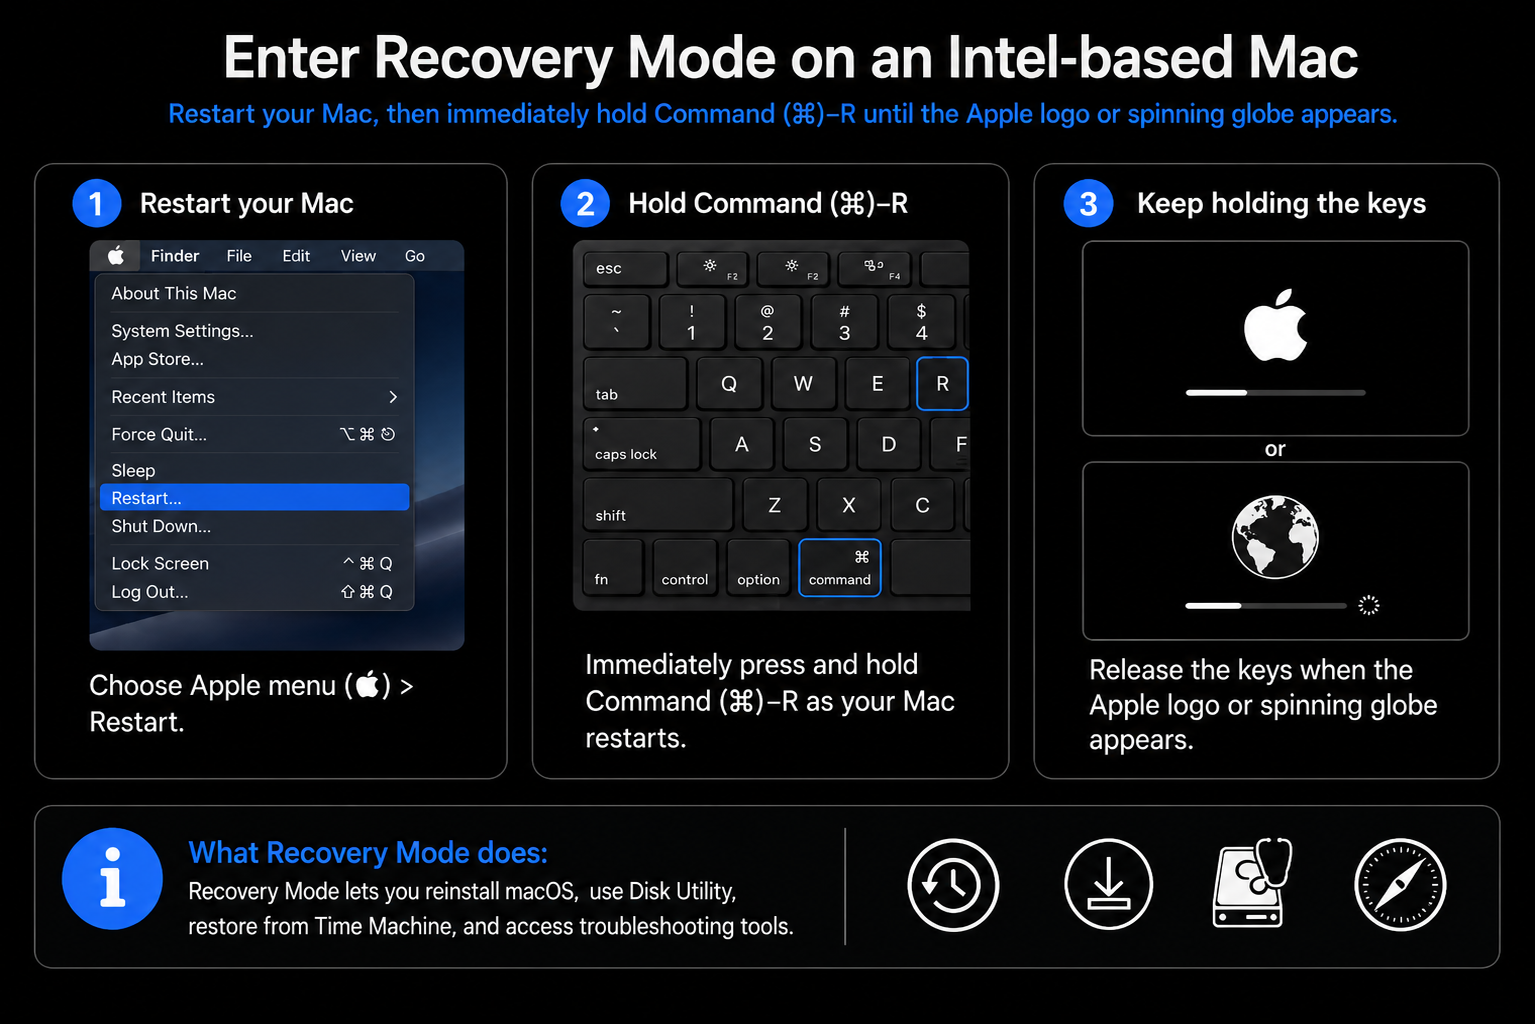
Restart your Mac and hold Command + R to enter Recovery Mode.
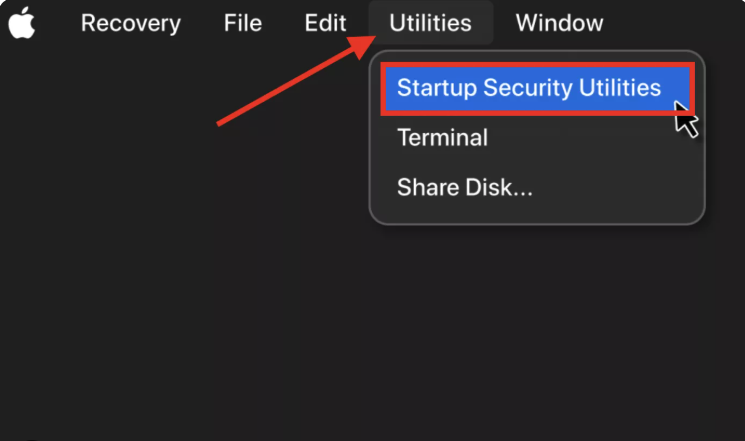
From the menu bar, open Utilities, then choose Startup Security Utility.
Enter your administrator password when asked.
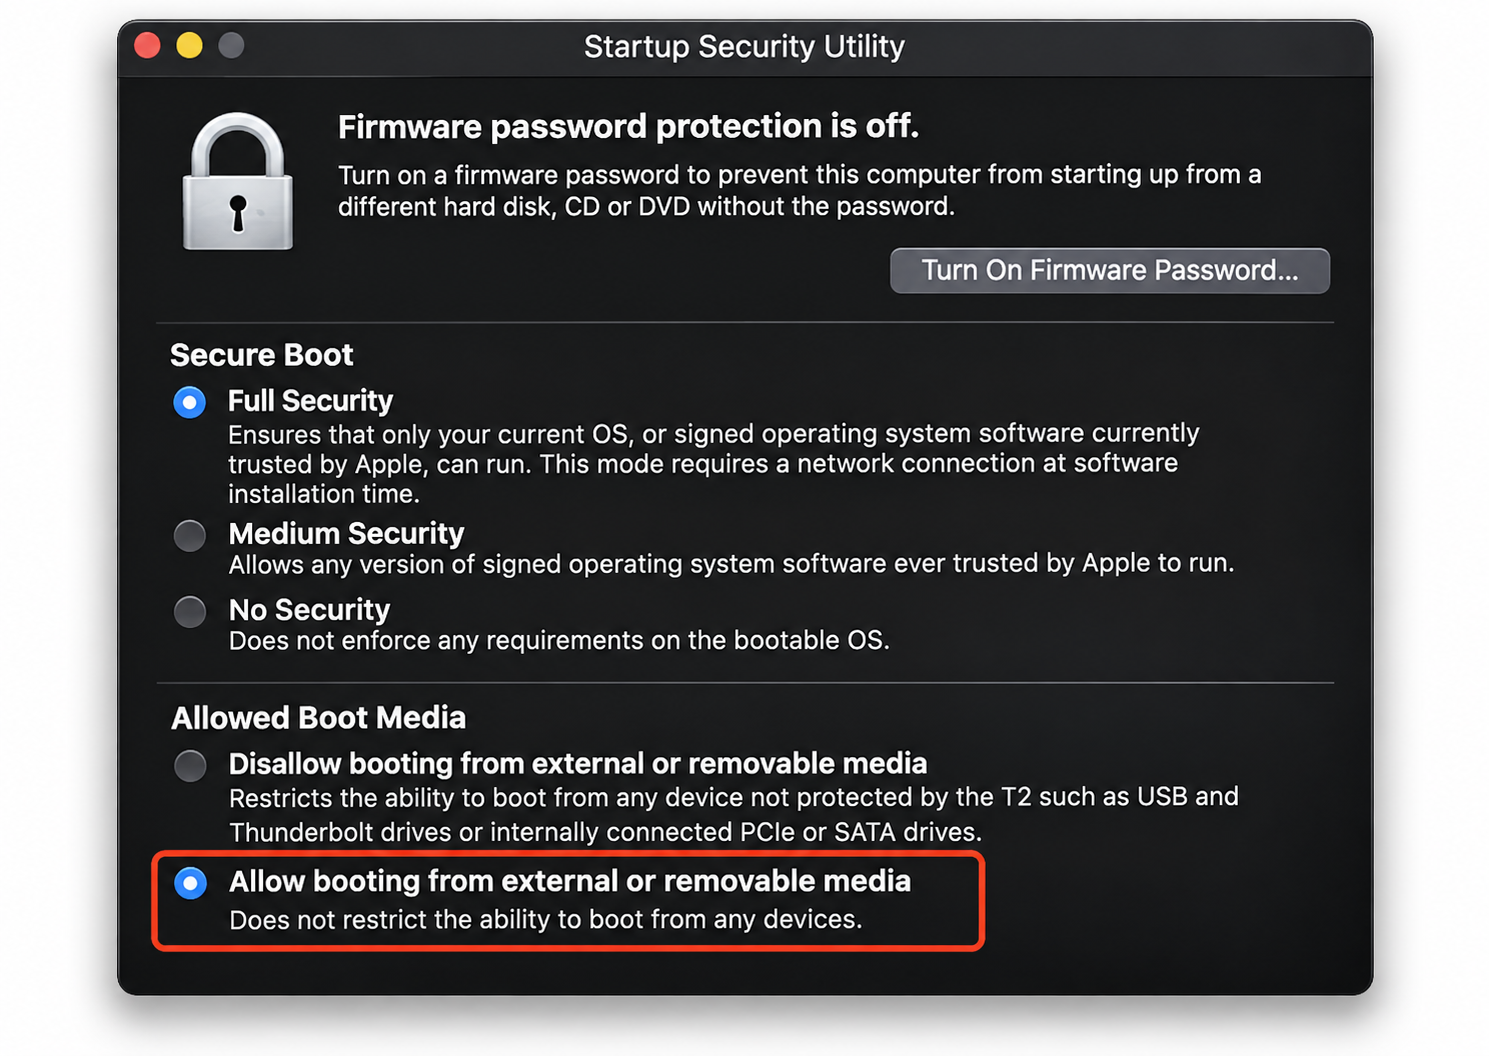
Select Allow booting from external or removable media.
Step 1. Boot in Recovery mode by holding down Command +RStep 2. From the menu bar, open Utilities, then choose Startup Security UtilityStep 3. Select Allow booting from external or removable media
How to downgrade macOS from Catalina to High Sierra?
Now for the main event. There’s more than one way to downgrade to macOS High Sierra from Catalina, and the right choice depends on what you prepared earlier. Each method to downgrade Mac system software has its strengths, so let’s compare them before you dive in.
Every route starts by clearing the drive, so we’ll begin there and then look at each method in turn.
1. Erase startup disk
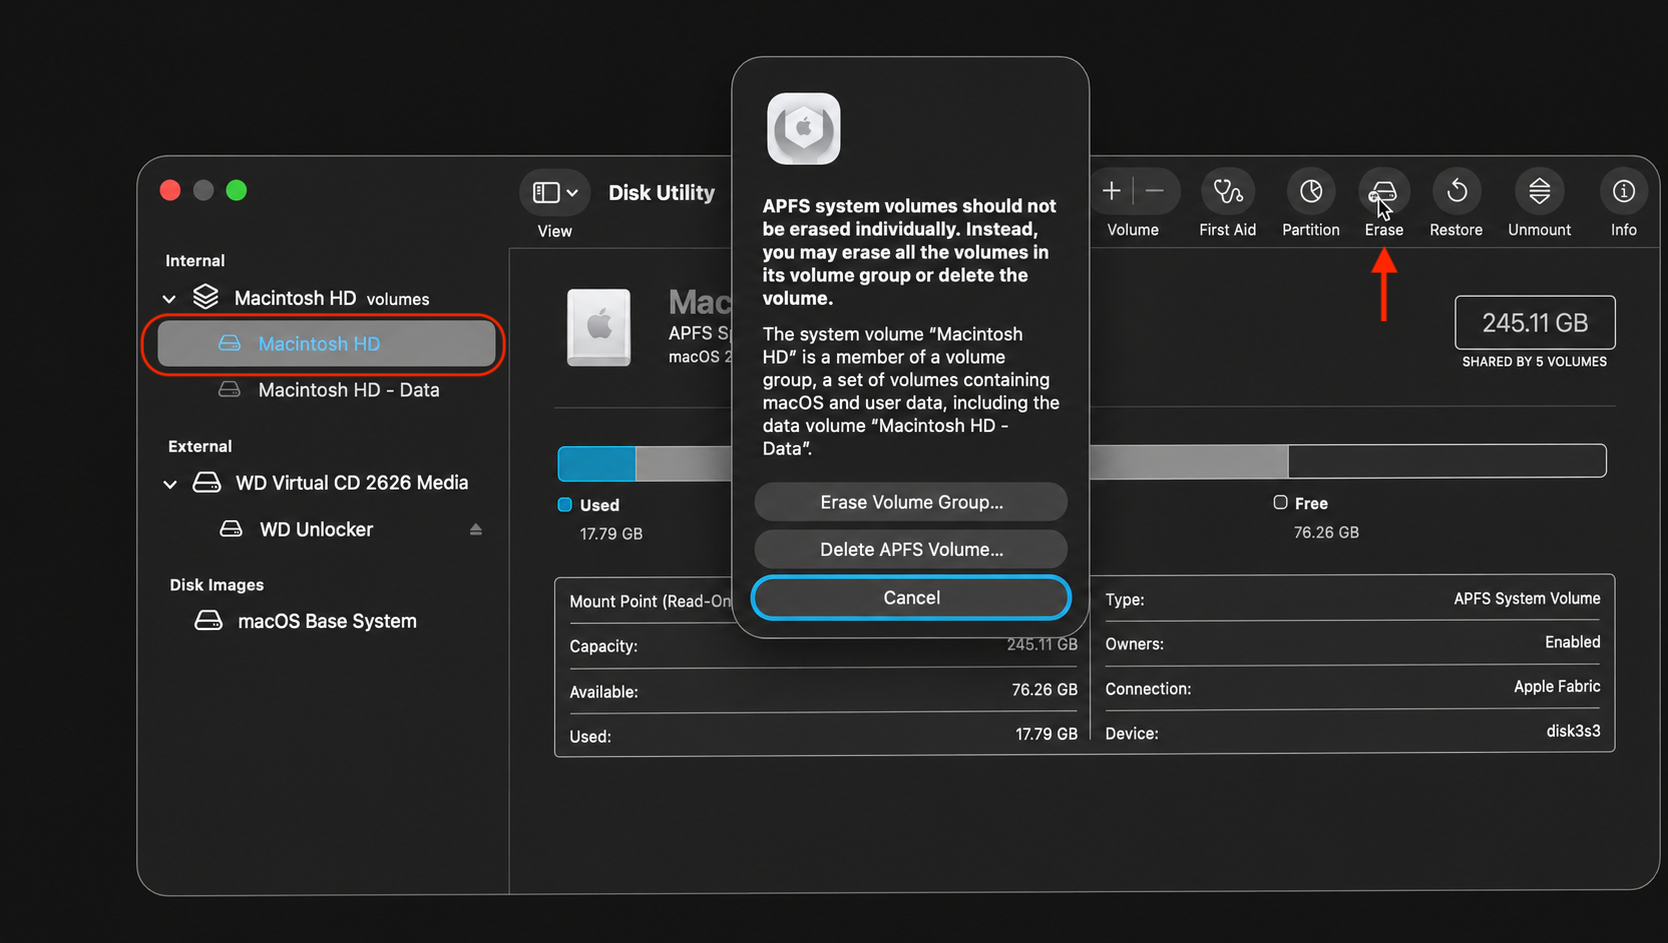
Every downgrade begins with a clean drive. You’ll open Disk Utility from Recovery Mode to wipe Catalina’s system and data volumes. We recommend doing the following to erase your startup disk:
Restart and hold Command + R to boot into macOS Recovery.
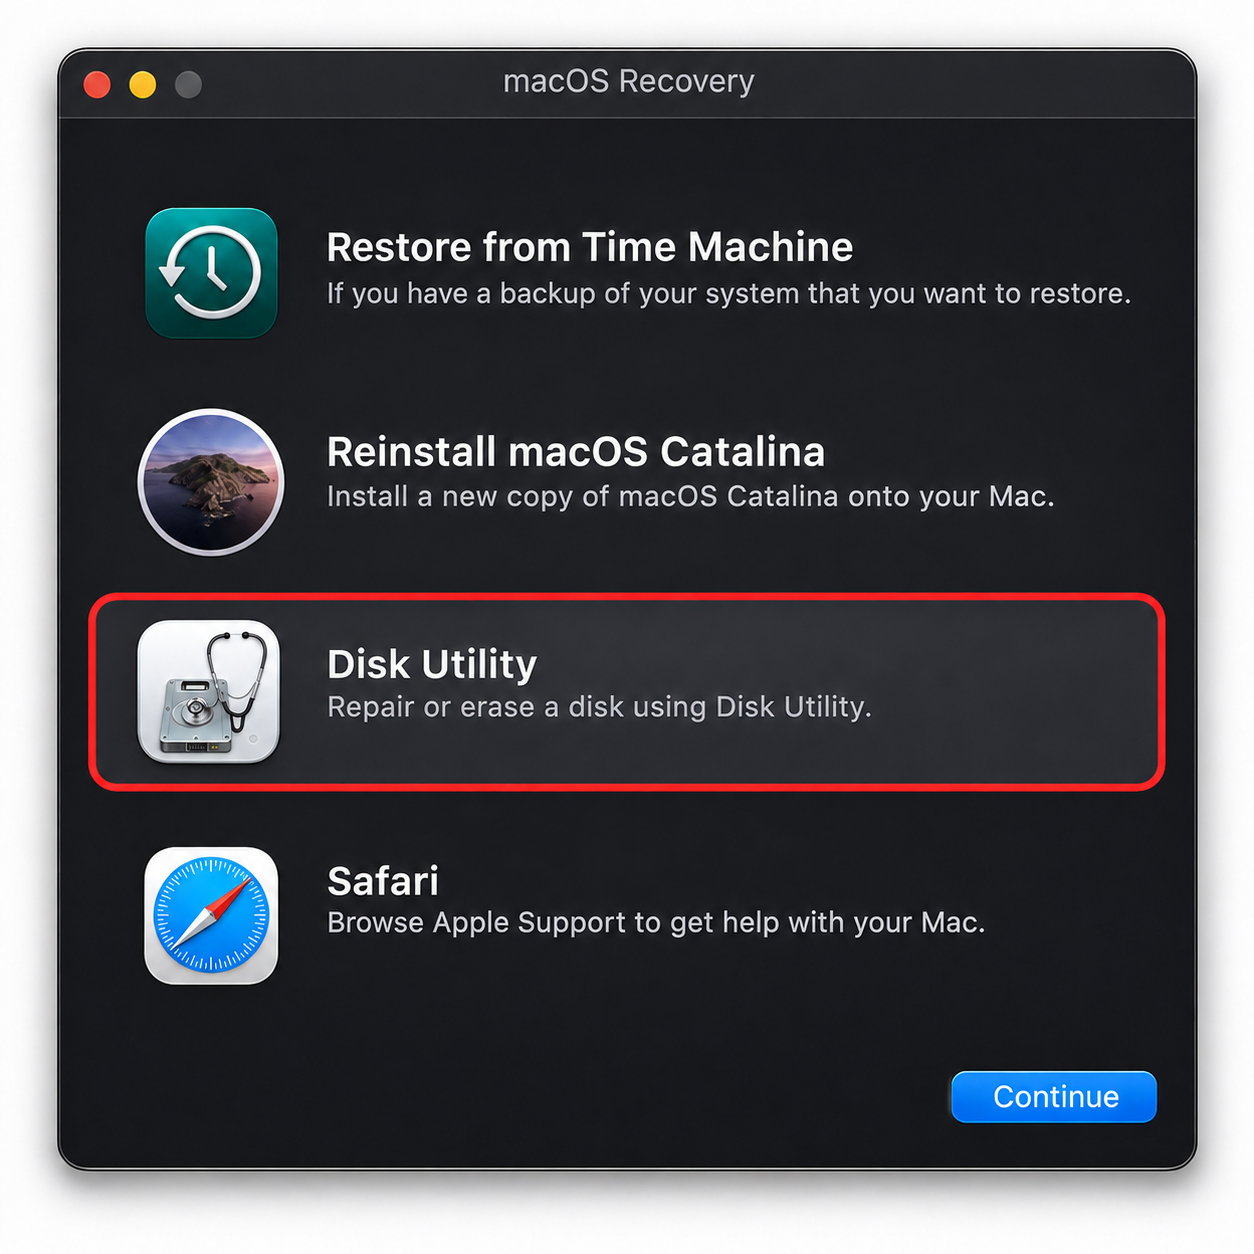
After rebooting, select Disk Utility from the macOS Utilities window, then click Continue.
Choose your startup drive, then click Erase.
Format the drive as Mac OS Extended (Journaled) or APFS, then confirm.
Step 1. Boot into Recovery mode by holding down Command +RStep 2. Select Disk Utility from the macOS Utilities windowStep 3. Choose your startup drive, then click Erase
2. Downgrade using a previous Time Machine backup
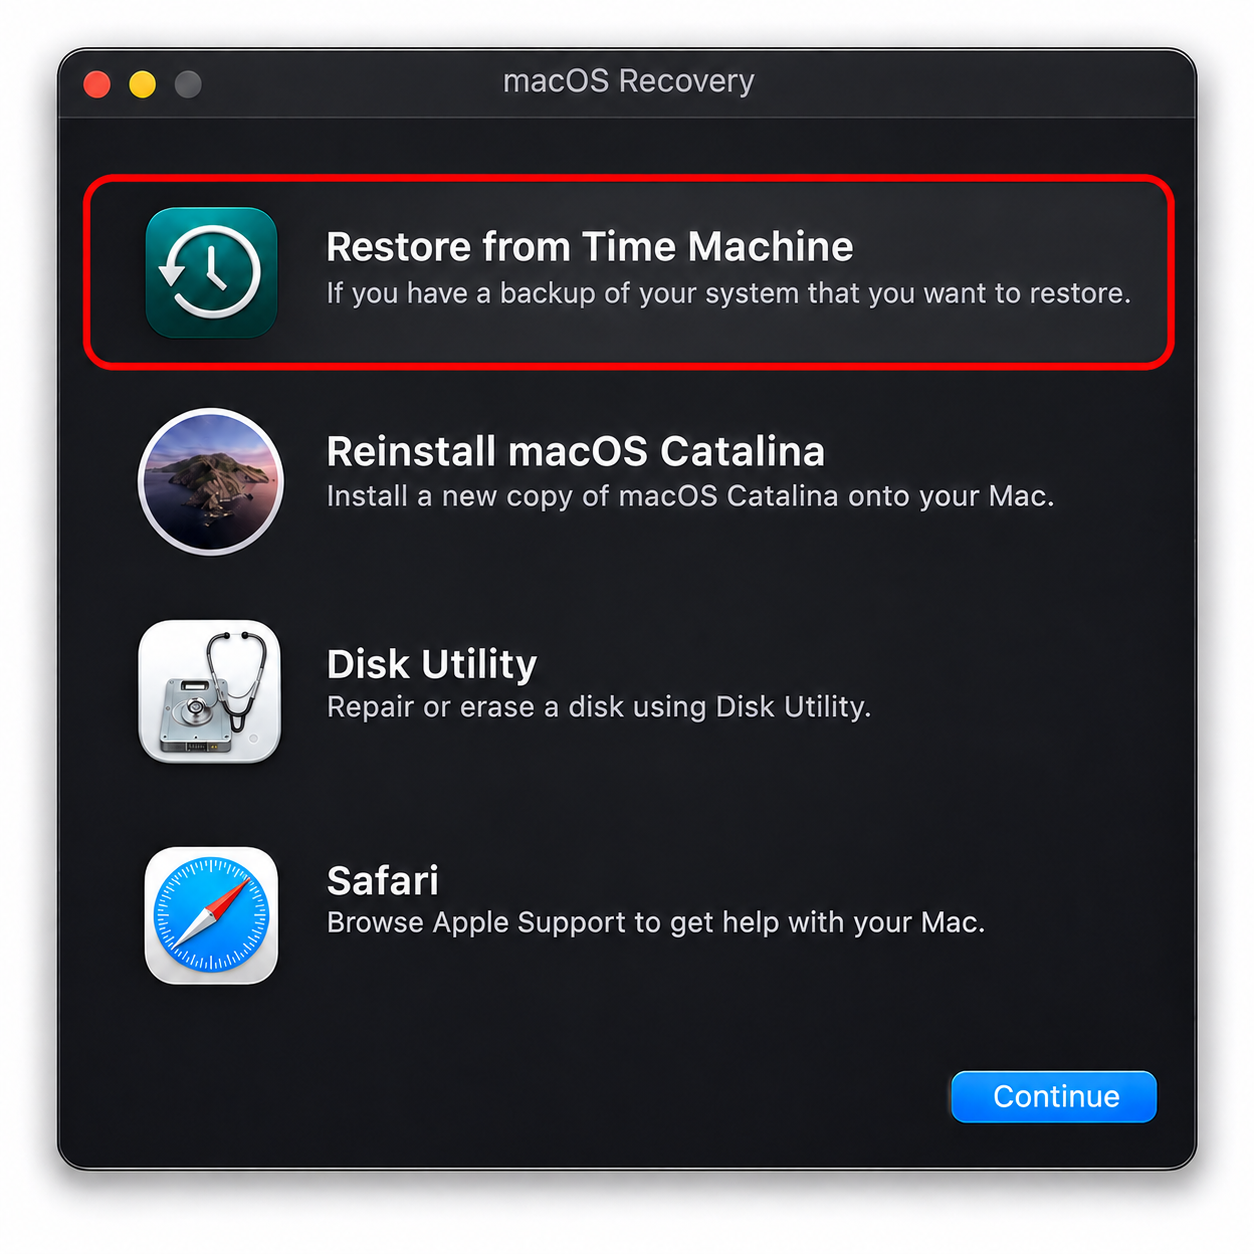
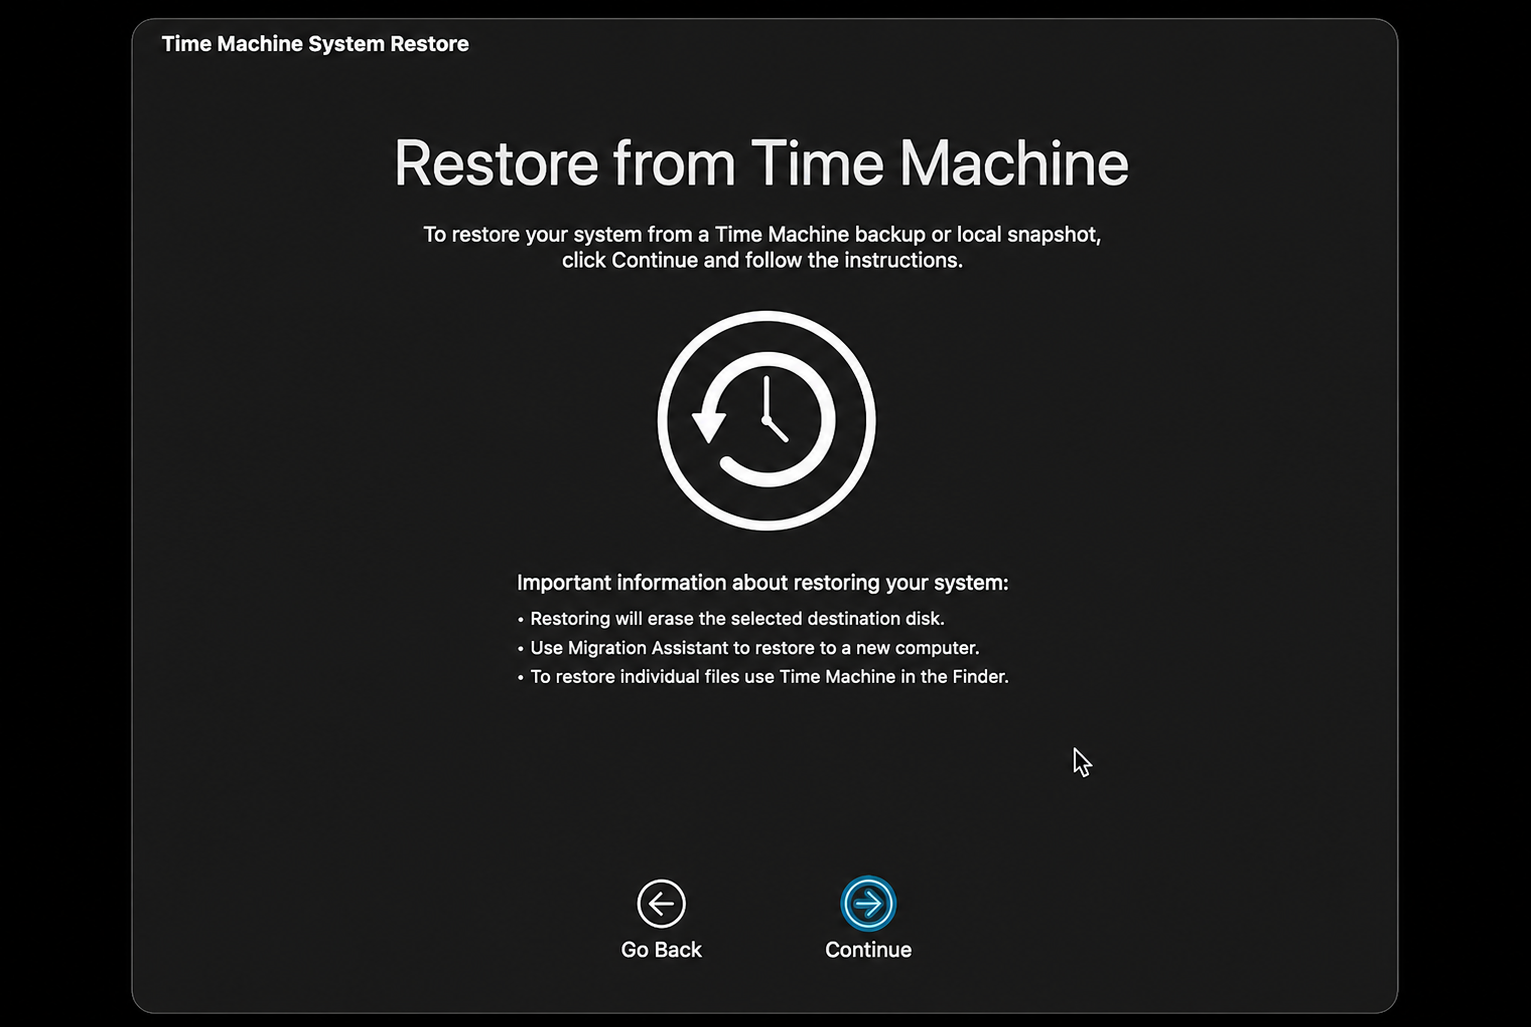
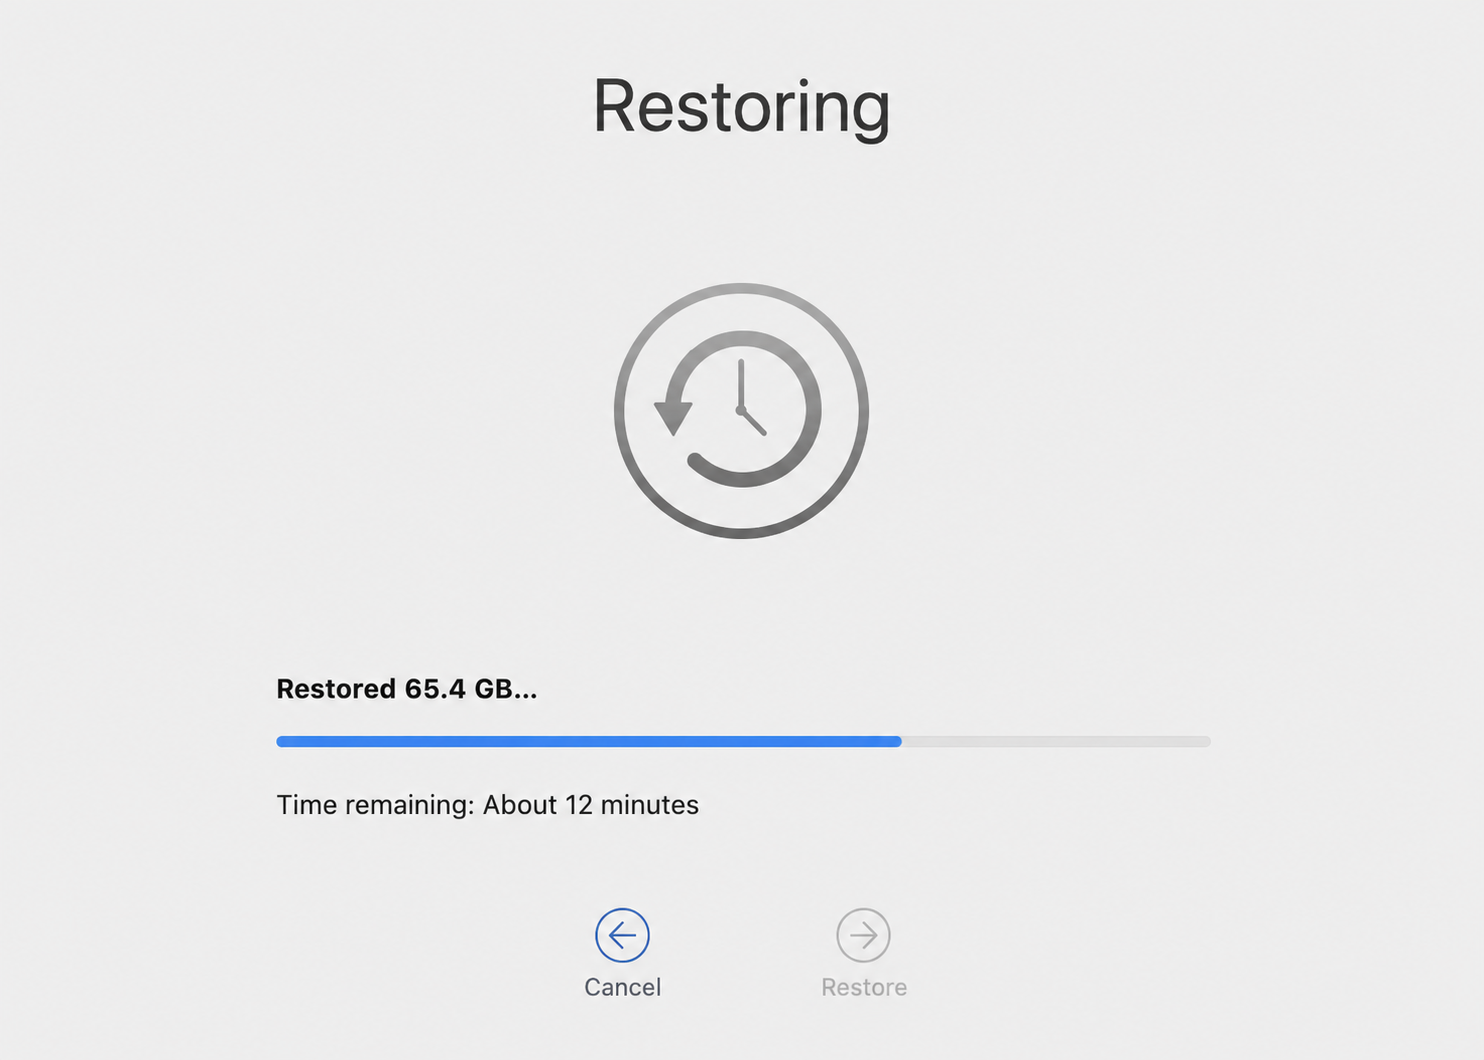
If you have a Time Machine backup made while your Mac was still running High Sierra, this is the smoothest route, and it’s the one we’d reach for first. It lets you restore Mac to previous date settings, apps, and files in one go. This method works like this:
Connect the external drive holding your High Sierra Time Machine backup.
Restart and hold Command + R to enter macOS Recovery.
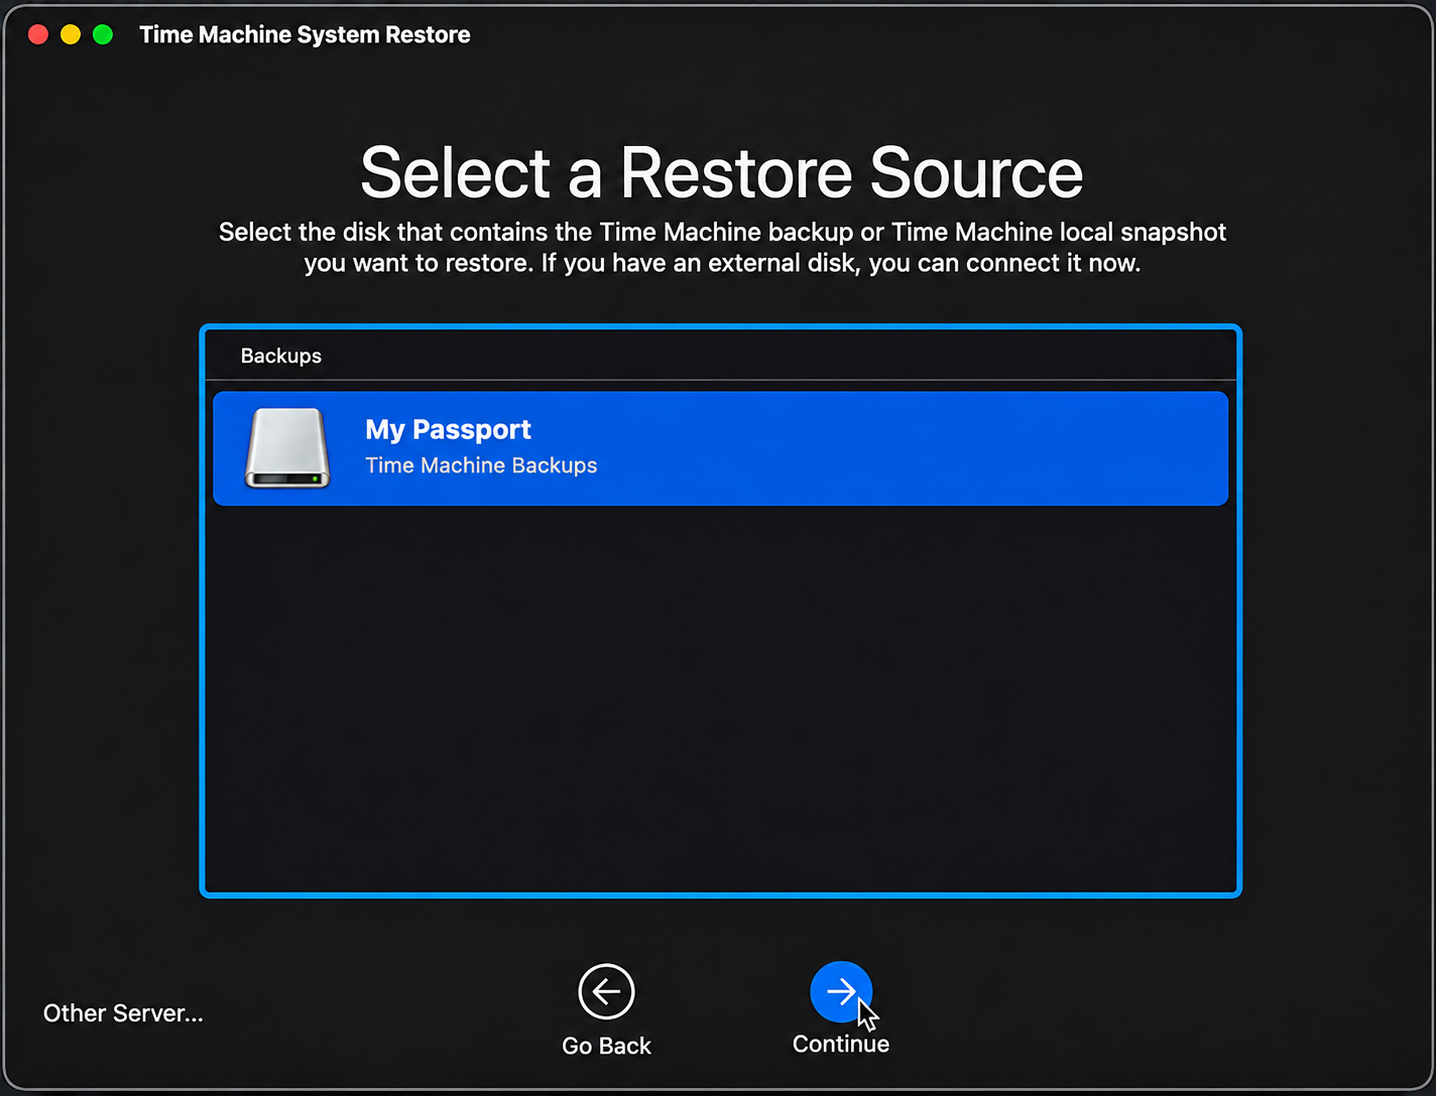
Choose Restore From Time Machine Backup, then pick your High Sierra backup.
Step 1. Select Restore from Time Machine in Mac OS Recovery ModeStep 2. Confirm the action by clicking ContinueStep 3. Select Restore Source and choose the High Sierra backupStep 4. Continue with the Restore process
3. Downgrade via bootable USB installer
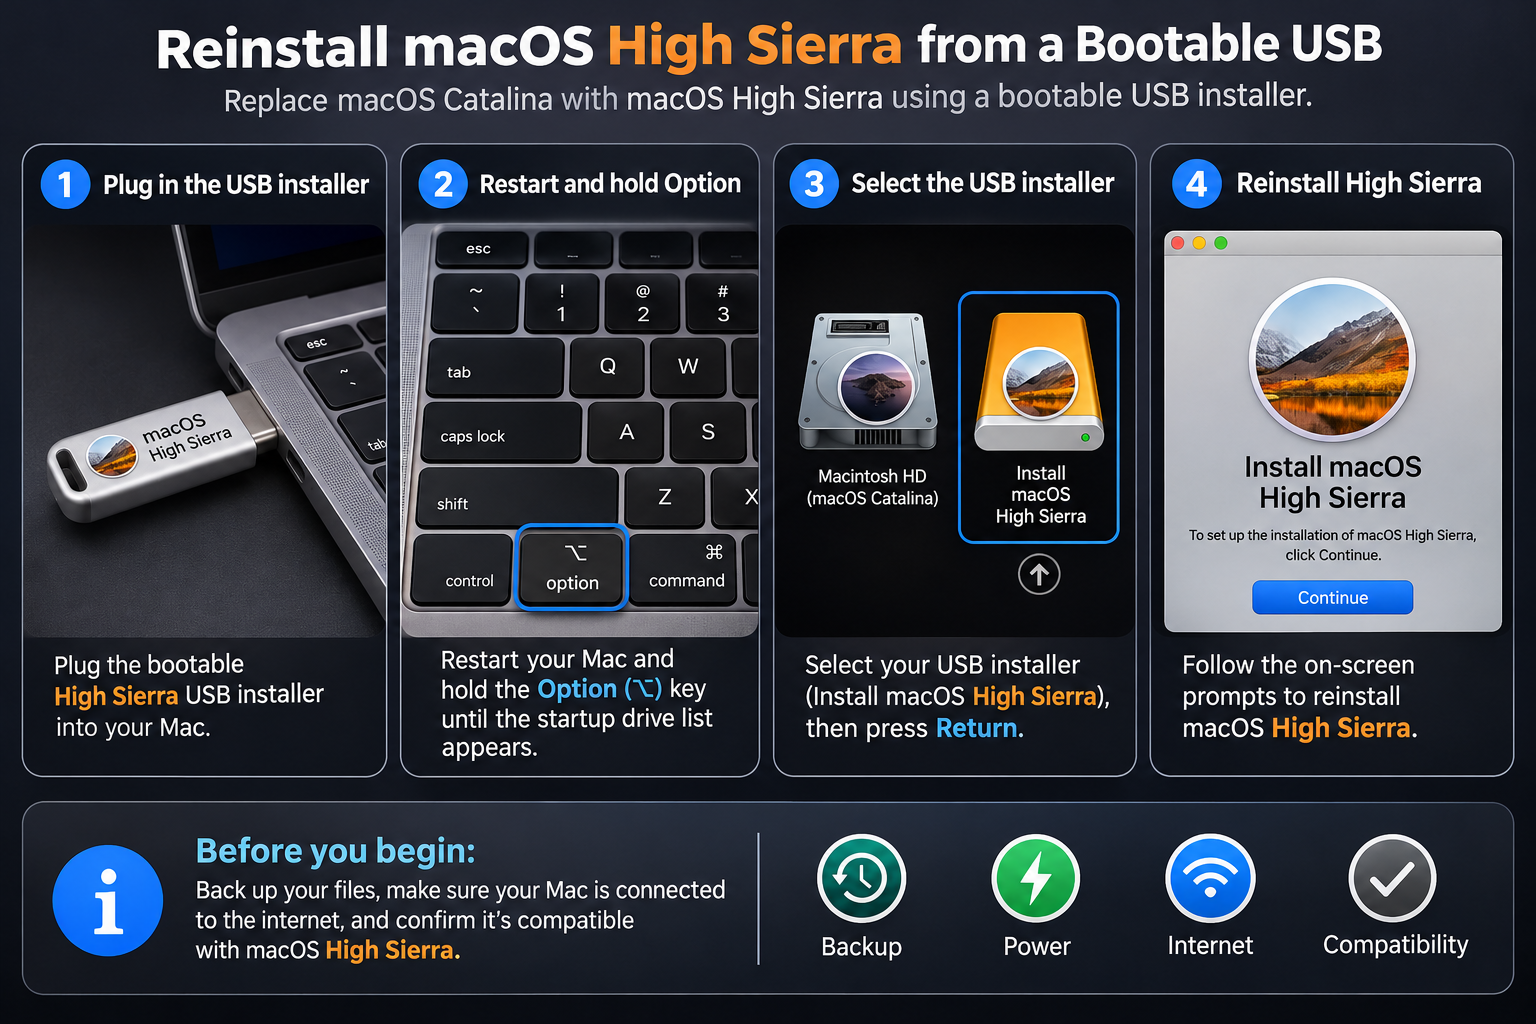
No Time Machine backup? The bootable USB installer you made earlier has you covered. This method installs a fresh copy of High Sierra straight from your drive. Boot from your USB this way:
Plug the bootable High Sierra USB installer into your Mac.
Restart and hold Option until the startup drive list appears.
Select your USB installer, then press Return.
Follow the on-screen prompts to reinstall High Sierra.
Boot from your external hard drive with High Sierra by pressing the Option key
4. Downgrade using Internet Recovery
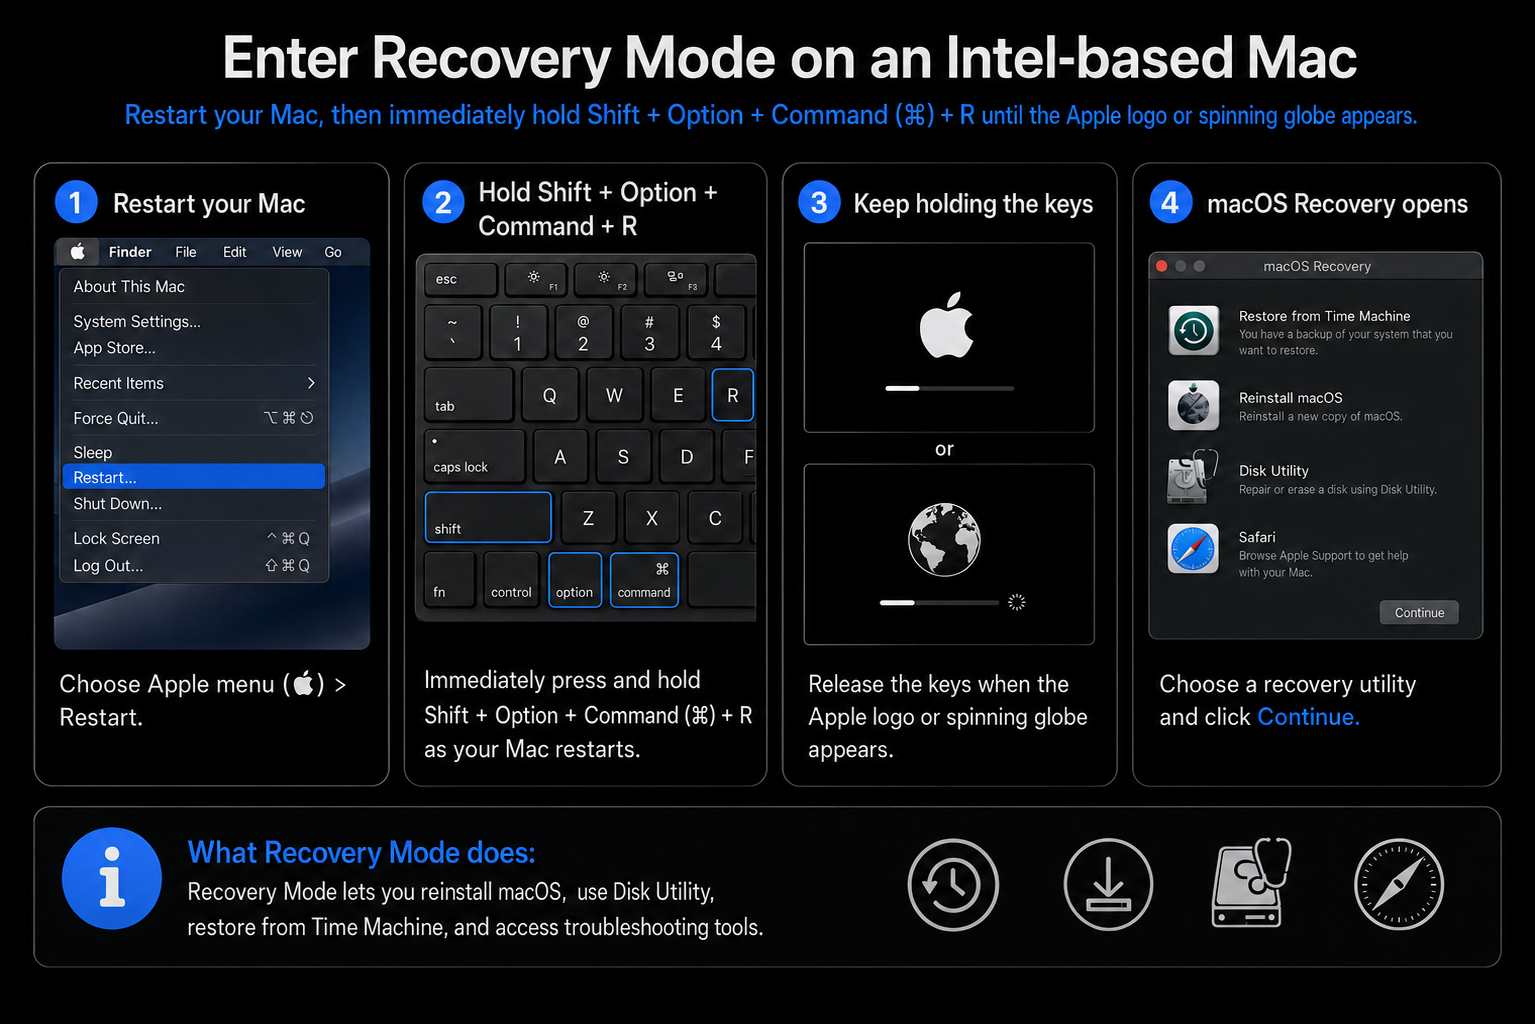
If your Mac originally shipped with High Sierra, Internet Recovery mode can reinstall it without any USB drive at all. It pulls the original macOS version straight from Apple’s servers. Try our approach:
Connect to a reliable Wi-Fi network.
Restart and hold Shift + Option + Command + R together.
Wait for your Mac to load the recovery tools over the internet.
Select Reinstall macOS, then follow the prompts to install High Sierra.
Launch Internet Recovery Using Shift + Option + Command + R to Restore the Original macOS Version
5. Complete setup and restore personal data
Once High Sierra is installed, the Setup Assistant walks you through the basics. From there, you can bring your data back and pick up where you left off. Wrap things up this way:
Follow the Setup Assistant to choose your region, network, and Apple ID.
Copy your personal files back from your external drive or cloud storage.
Use Migration Assistant if you want to transfer data from another Mac or backup.
Reinstall your apps and enter your saved license keys.
Conclusion
Going back to High Sierra takes a few careful steps, but it’s doable when you prepare well. Whether you choose a Time Machine backup, a bootable USB, or Internet Recovery, the macOS downgrade from Catalina to High Sierra always starts with a solid backup — so save your files before you erase anything.
Once you’re settled back on High Sierra, a little upkeep keeps things running smoothly. Old caches, logs, and junk files build up over time and quietly eat into your storage, which is the very issue that leaves many older Macs feeling sluggish. MacKeeper’s Safe Cleanup clears them out in one click, without touching your personal files — a quick, user-friendly way to keep an older macOS version clean and responsive. Give our app a try and keep your Mac tidy for the long run.
We respect your privacy and
use cookies
for the best site experience.
Privacy Preferences Center
We use cookies along with other tools to give you the best possible experience while using the
MacKeeper website. Cookies are small text files that help the website load faster. The cookies we
use don’t contain any type of personal data meaning they never store information such as your
location, email address, or IP address.
Help us improve how you interact with our website by accepting the use of cookies. You can change
your privacy settings whenever you like.
Manage consent
All cookies
These cookies are strictly necessary for enabling basic website functionality (including page
navigation, form submission, language detection, post commenting), downloading and purchasing
software. The website might malfunction without these cookies.