If you're trying to make Word light mode on Mac, Microsoft Word may sometimes stay in dark mode even when your macOS appearance is light, making documents harder to work with. Still, you can easily switch to light mode by changing your theme or display settings. While you’re changing settings, use MacKeeper’s Login Items feature to check startup apps and reduce processes slowing down your Mac.
Yes, you can easily change Word to light mode on Mac in Microsoft Word on various Mac devices, including MacBook Air and Pro. Microsoft Word supports both light and dark colour preferences, allowing you to choose the view of your documents. Whether your MacOS settings are set to light or dark mode, you can still customize Word’s appearance to better suit your writing and editing needs.
A note from our experts:
When you adjust your Microsoft Office settings or decide to change light or dark mode on your Mac, it’s also worth checking your other apps and their settings–we especially recommend checking to see which apps are running in the background, as too many open programs launching at startup can affect your MacBook’s performance significantly. So if you notice your Mac's responsiveness is slowing, we encourage you to run MacKeeper’s Login Items feature. It’ll help you manage your startup apps by filtering which programs automatically open when you turn on your Mac, giving you better control over your device.
Here’s how to use MacKeeper’s Login Items feature:
Review your Login Items, select any you don’t need, and press Remove Selected Items.
Step 1. Open the MacKeeper app, go to Login Items, and press the Start Scan buttonStep 2. After your scan, review your Login Items to remove any you no longer need
How to change Word to light mode on Mac?
The process of being able to put Word in light mode on Mac is very simple and only takes a few steps. Below we’ll walk you through just how easy it can be to change the Office window colors from dark to light. Here are the methods we recommend you follow:
Switch Word to light mode with Options
Make Word light mode via View Menu
Turn on light mode on Word with System Settings
Change light mode on Word for single document
1. Switch Word to light mode with Word Options
The first method we recommend in order to switch Word to light mode on Mac is by using Options. Not only is this way quick, but it also lets you change many display and settings from one menu panel.
Here’s how to enable Microsoft Word’s built-in Options function to adjust screen colours:
Open Microsoft Word on your Mac.
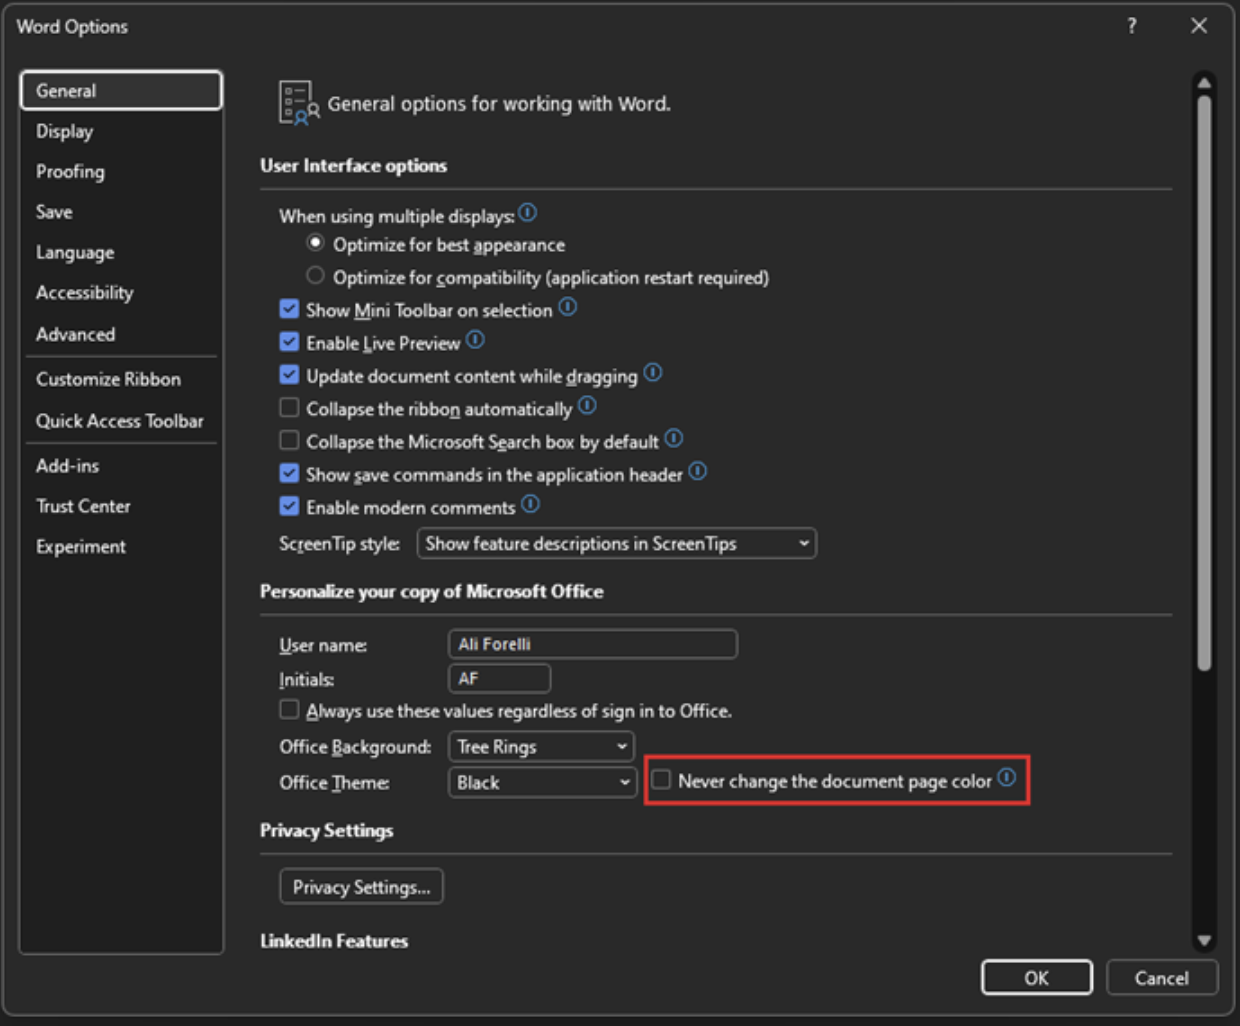
Click Word in the top menu and select Word Options.
Choose General.
Find the Personalize section to enable Light theme and turn off Dark Mode options.
Close the window and check your document view.
Open Microsoft Word, click on Word Options to bring up Display settings, and change Office mode to light
2. Make Word light mode via View Menu
Alternatively, you can also turn Word into light mode on Mac via the View Menu. This method is useful if you want to adjust the current viewing experience of Word quickly.
Here’s how to make Word light mode via the View Menu:
Open your Word document.
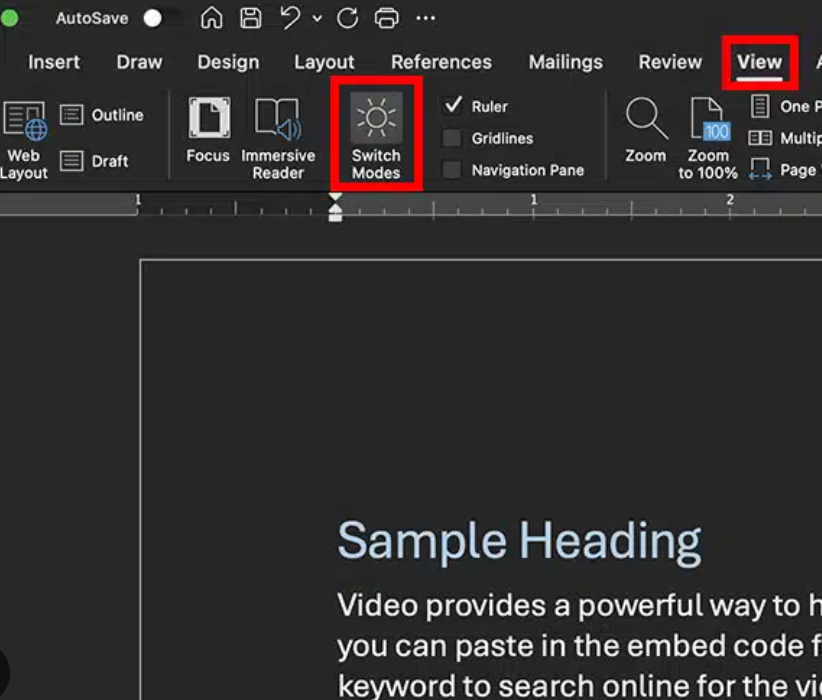
Select the View tab from the top menu.
Press Switch Mode.
Choose the light view option to brighten your workspace.
Continue editing your work file with the updated display.
To change the view of your current document to light mode, click on View > Switch Modes
3. Turn on light mode on Word with System Settings
You can also try turning on Microsoft Word light mode on Mac by altering your built-in System Settings, as this could help you quickly change your entire screen’s colour view in just a few clicks.
Let us show you how:
Click on the Apple Logo.
Press System Settings.
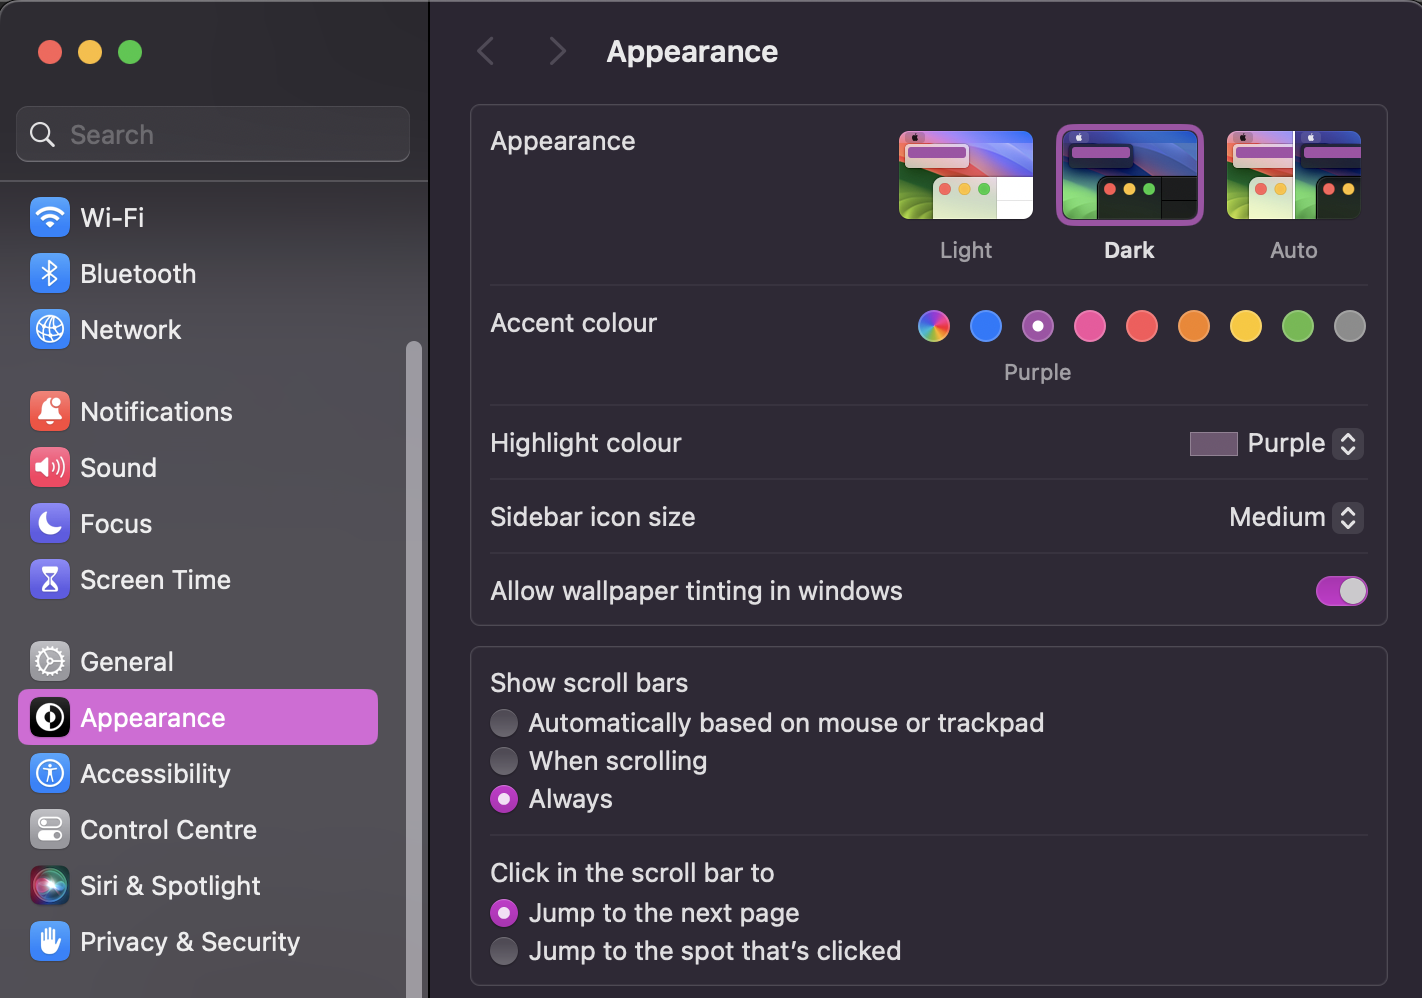
Go to the Appearance tab.
Alter your colour view to Light.
Restart Word to apply settings.
In System Settings, go to Appearance and alter your screen colour view to Light
4. Change light mode on Word for a single document
If you prefer working in Microsoft Word’s dark mode but need to change one specific document to light view for easier editing or exporting, we recommend reading back through our steps on how to use the View Menu. This method allows you to simply switch the view mode for just one file. This is the easiest way to take Word out of dark mode for a single document, but it’ll only work when you’re already using the dark view display.
Enable Word to light mode on Mac with ease
Now you know how to get Word into light mode on Mac; you’ll have more control over your Microsoft experience. You’ll be able to confidently choose your preferred colorful theme using Preferences Options or by pressing Switch Modes in your open document.
To help ensure your Apple Mac stays running smoothly while using apps like Word, MacKeeper’s Login Items feature is a useful tool for managing startup programs. It allows you to review and control which apps open when your computer starts, helping you reduce unnecessary background activity and maintain a faster workflow.
We respect your privacy and
use cookies
for the best site experience.
Privacy Preferences Center
We use cookies along with other tools to give you the best possible experience while using the
MacKeeper website. Cookies are small text files that help the website load faster. The cookies we
use don’t contain any type of personal data meaning they never store information such as your
location, email address, or IP address.
Help us improve how you interact with our website by accepting the use of cookies. You can change
your privacy settings whenever you like.
Manage consent
All cookies
These cookies are strictly necessary for enabling basic website functionality (including page
navigation, form submission, language detection, post commenting), downloading and purchasing
software. The website might malfunction without these cookies.