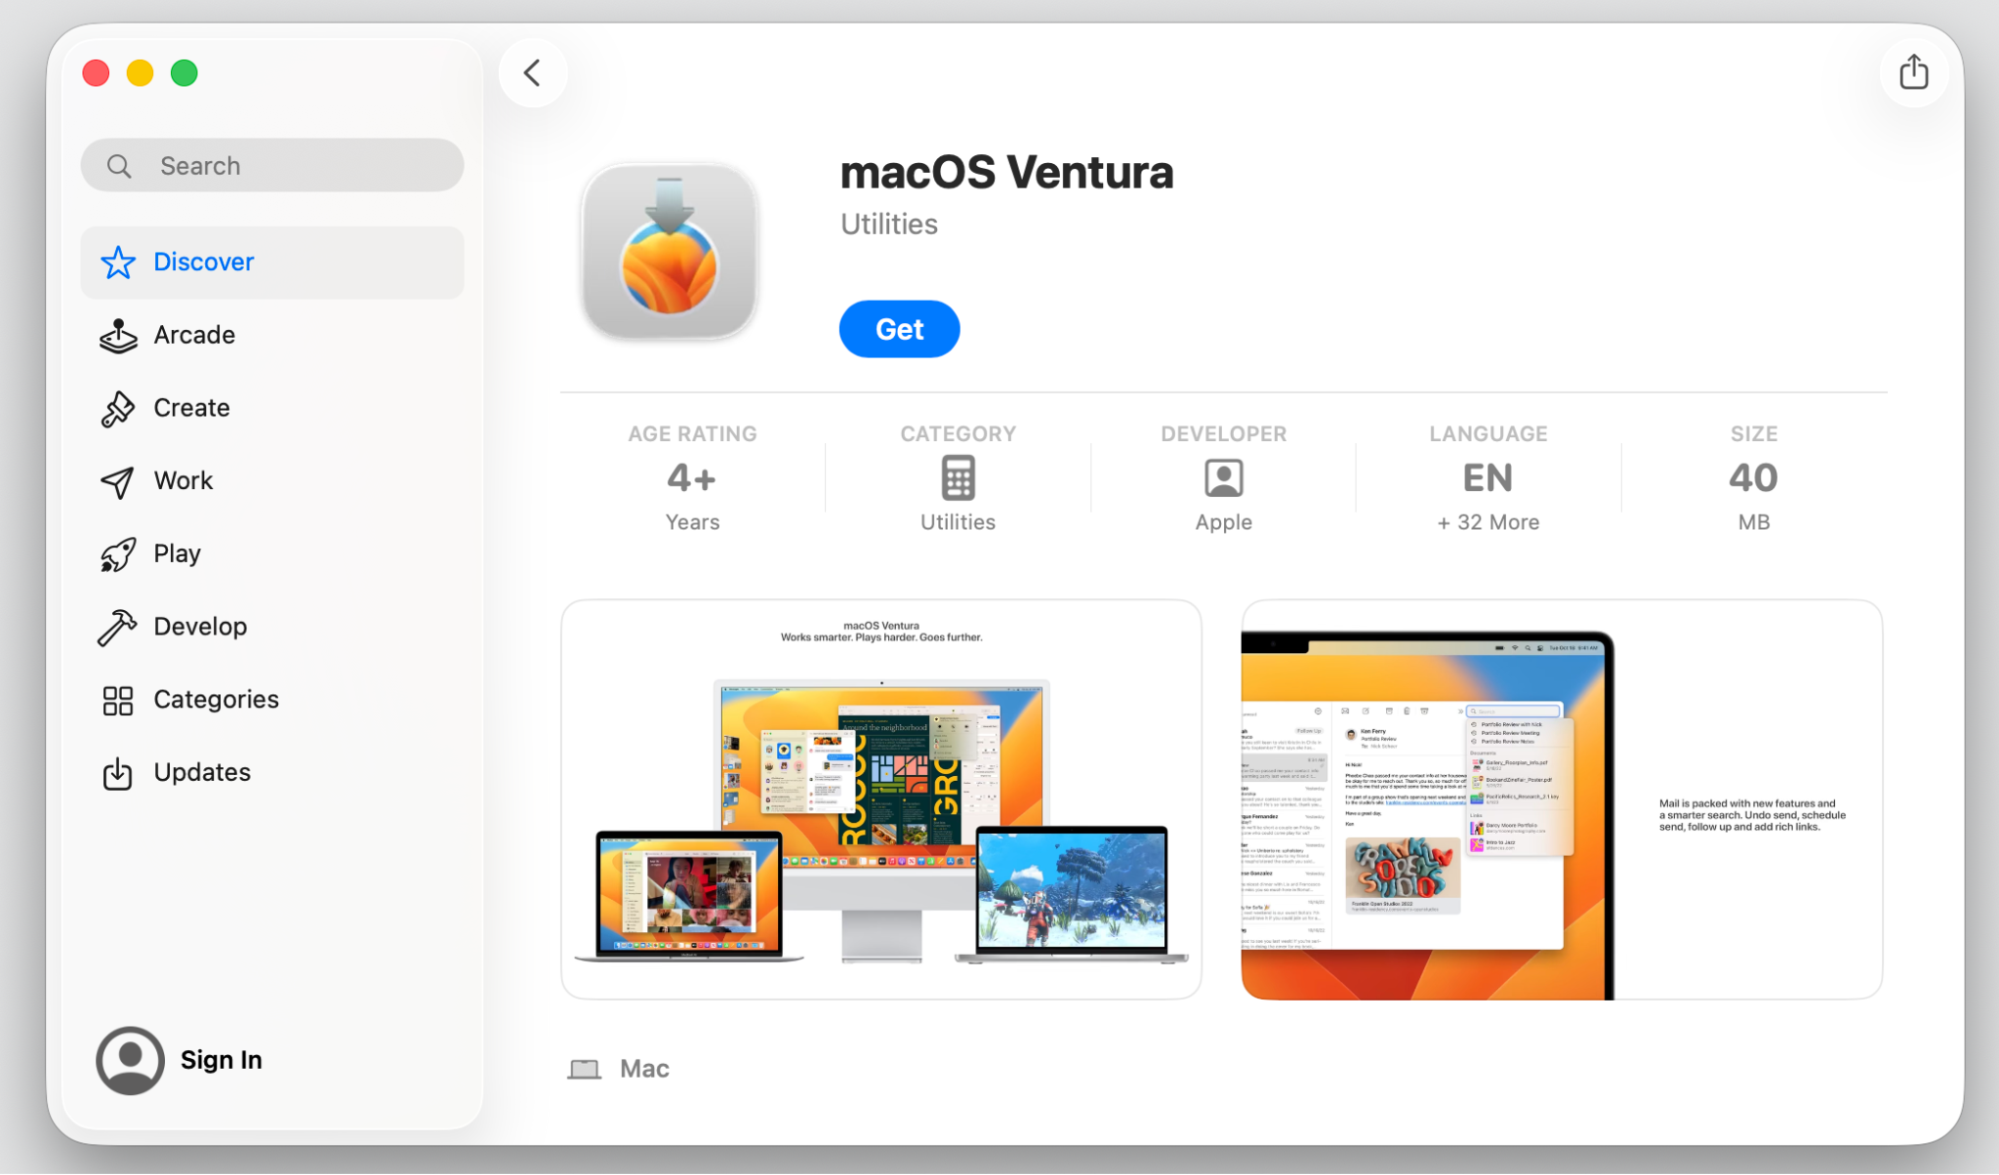
Ever updated to macOS Ventura and felt like your Mac just isn’t the same? Maybe a favorite app stopped working, performance feels sluggish, or the new design isn’t your style. Whatever the reason, you can roll back. With MacKeeper’s Premium Services, you’ll get expert help to downgrade Mac from Ventura without the guesswork. Download MacKeeper to get started.
Downgrading isn’t as simple as clicking an update button in reverse. In most cases, you’ll need to erase your startup disk, reinstall an older macOS, and then bring your files back from a backup. That’s because Apple doesn’t offer a direct rollback path — once Ventura is installed, the system treats it as the current version.
A note from our experts:
Skipping the prep step is the most common reason downgrades go sideways. So, before you do anything connected to the macOS downgrade, we suggest you to back up your data, confirm which macOS your Mac originally shipped with, and make sure you have a stable internet connection. However, if your desire to know the available rollback path—whatever the reason for it is— feel free to contact MacKeeper’s Premium Services and get the assisted support for all your Mac Ventura issues.
Take a few minutes up front, and you’ll save yourself hours of stress later:
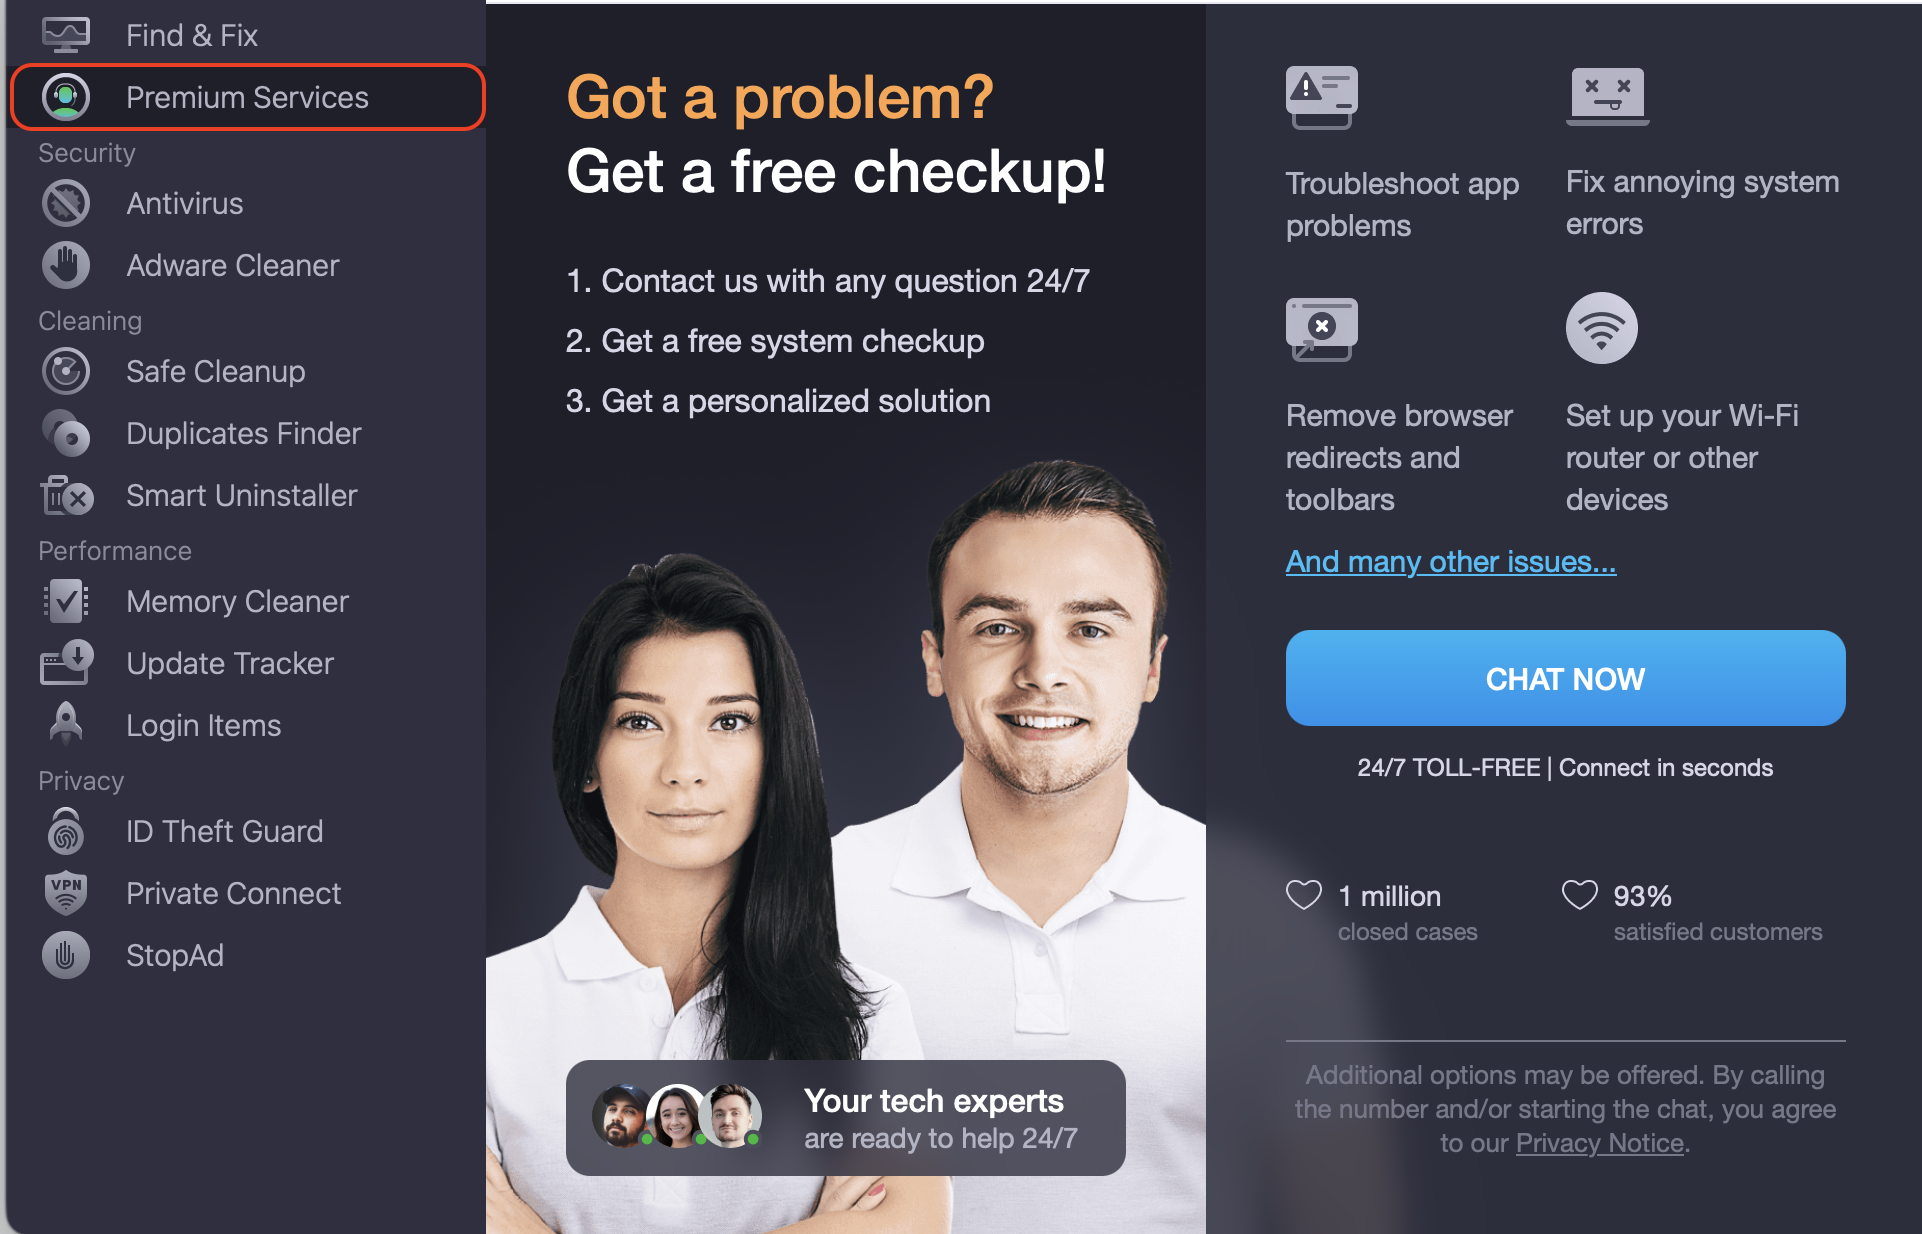
Find and choose Premium Services, then click Chat Now.
Describe your concern and get the solution that suits you the best.
Also, we’d like to remind you that newer machines can only run macOS releases that match their hardware, so it helps to know how to get old versions of macOS that your specific Mac actually supports.
How Intel and Apple silicon Macs handle downgrades differently?
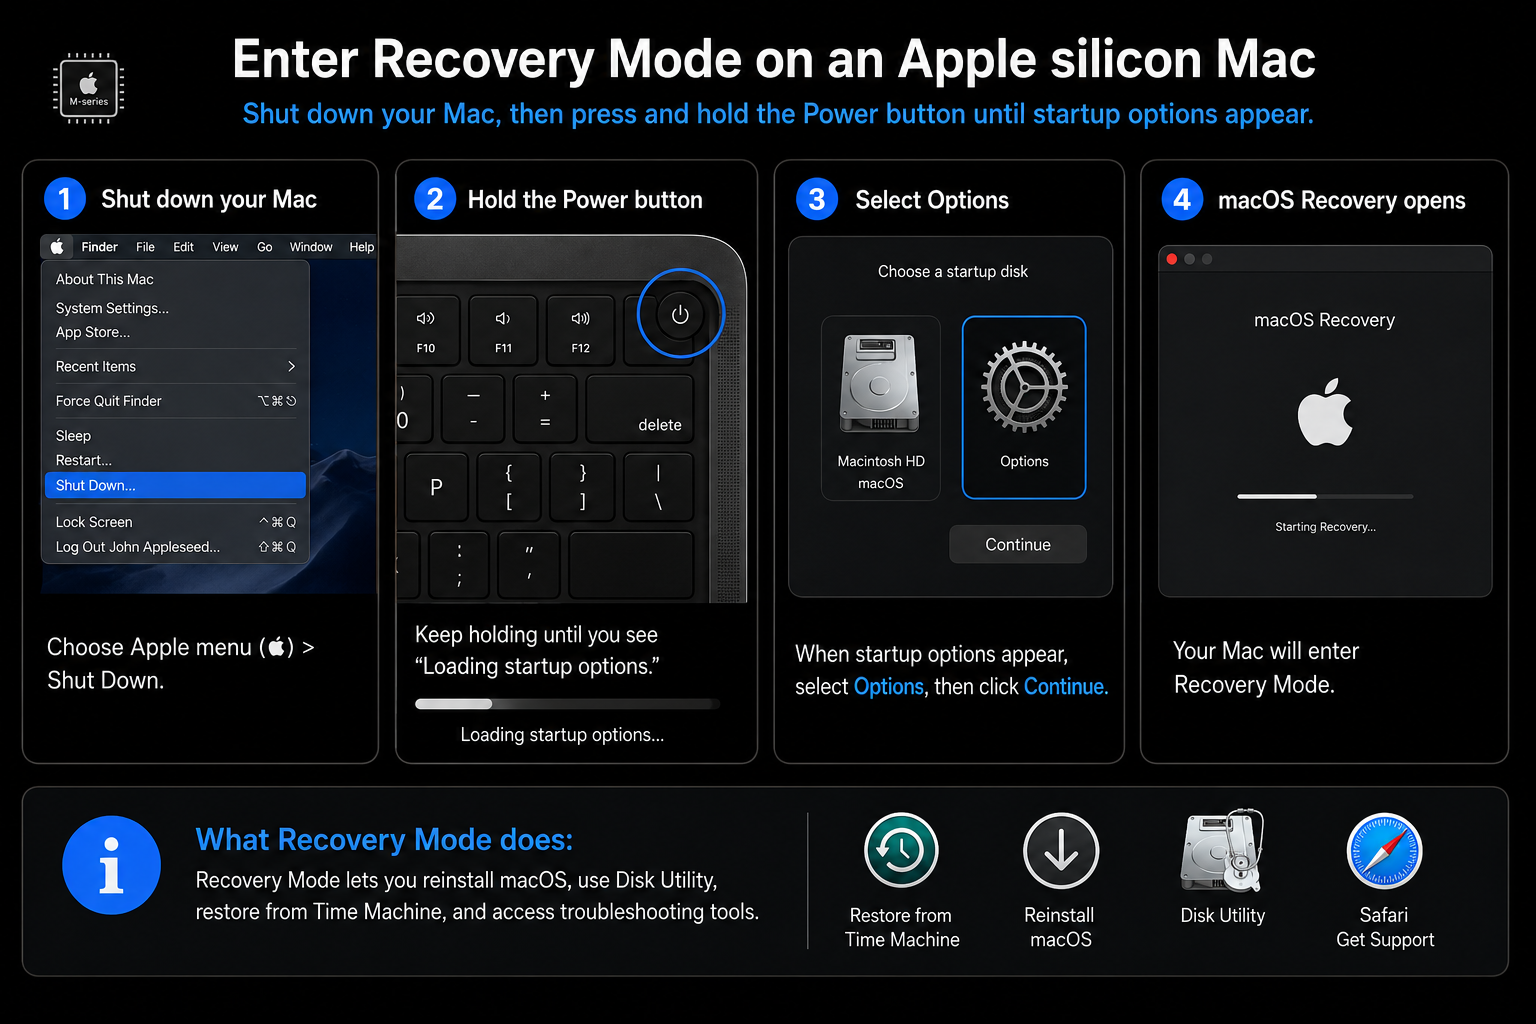
Not every Mac downgrades the same way. Intel-based Macs and Apple silicon Macs (M1, M2, M3, and newer) use different startup shortcuts, recovery flows, and security settings. For example, Intel Macs use the Command + R keyboard combo to enter Recovery Mode, while Apple silicon Macs use the Power button.
There’s also a difference in how each handles bootable installers. Apple Silicon Macs need a signed user account to authorize external boot media, and Intel Macs with a T2 chip require you to enable booting from external drives in Startup Security Utility. The first step in any downgrade is to know if your Mac is Intel or Apple Silicon, since every step that follows depends on it.
Feature
Intel Mac
Apple Silicon Mac
Recovery Mode shortcut
Command + R
Hold Power button
Boot from USB
Hold Option key
Hold Power button
External boot setup
Startup Security Utility
Authorize with admin account
Internet Recovery
Launched through Option–Command–R
The separate Internet Recovery mode isn’t available
Can you downgrade from Ventura without losing data?
Yes — but only in specific scenarios. We’d say that this is a rollback in time, so the data will be restored to the state it was in at that moment with that OS. In other words, you’ll lose some data, and you’ll need to manually restore the more recent information from wherever you saved it—by manually accessing Time Machine, from iCloud, or from a flash drive.
If you made a Time Machine backup of macOS Monterey (or whichever version you want to return to) before upgrading to Ventura, you can restore it and keep your files intact. That’s why backups matter so much. Even if you’re sure you have one, double-check before you start.
In addition, we’ll supply you with a few quick safety habits to follow:
Save Ventura files to an external drive or cloud storage.
Confirm your Time Machine backup is complete and not corrupted.
Keep a separate copy of important documents, photos, and project files.
Note down the apps you’ve installed since upgrading so you can reinstall them later.
How to prepare your Mac before downgrading from Ventura?
Preparation is what separates a smooth downgrade from a stressful one. Each step below reduces the risk of installation hiccups, missing files, or wasted time. Don’t rush this part — it’s the foundation everything else rests on.
1. Decide whether downgrading is really necessary
Sometimes what feels like a Ventura problem is actually a cluttered system, an outdated app, or a memory drain you can sort out without rolling back. Before you commit to a full downgrade, try lighter fixes first. Many users find that they can speed up macOS Ventura with a quick cleanup and a few app tweaks, which solves the issue without reinstalling anything.
Run through this short checklist before deciding:
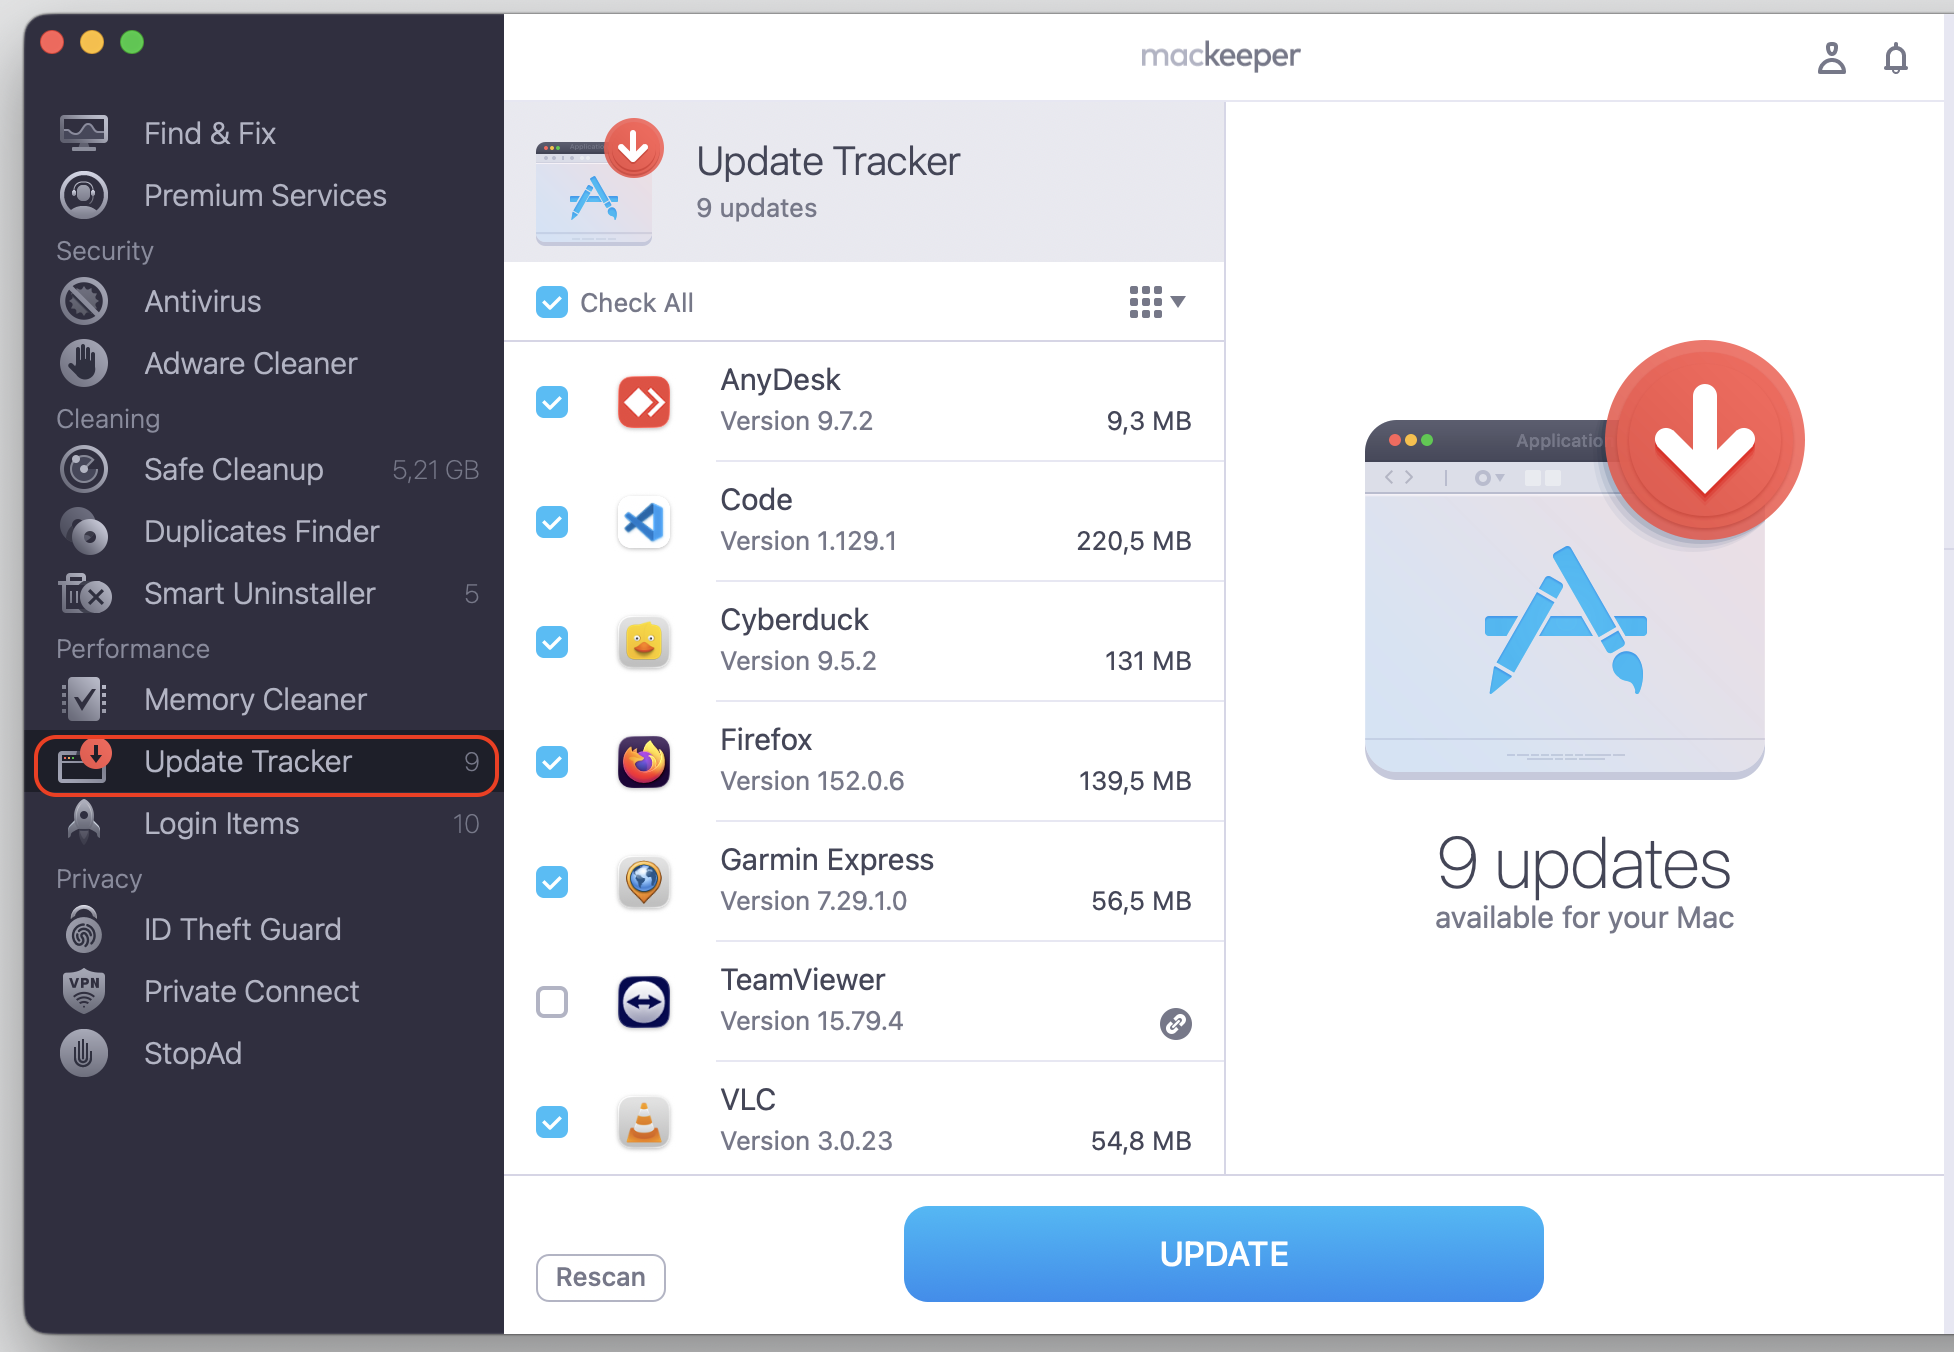
Update all your apps to their newest versions—many Ventura issues are caused by outdated software.
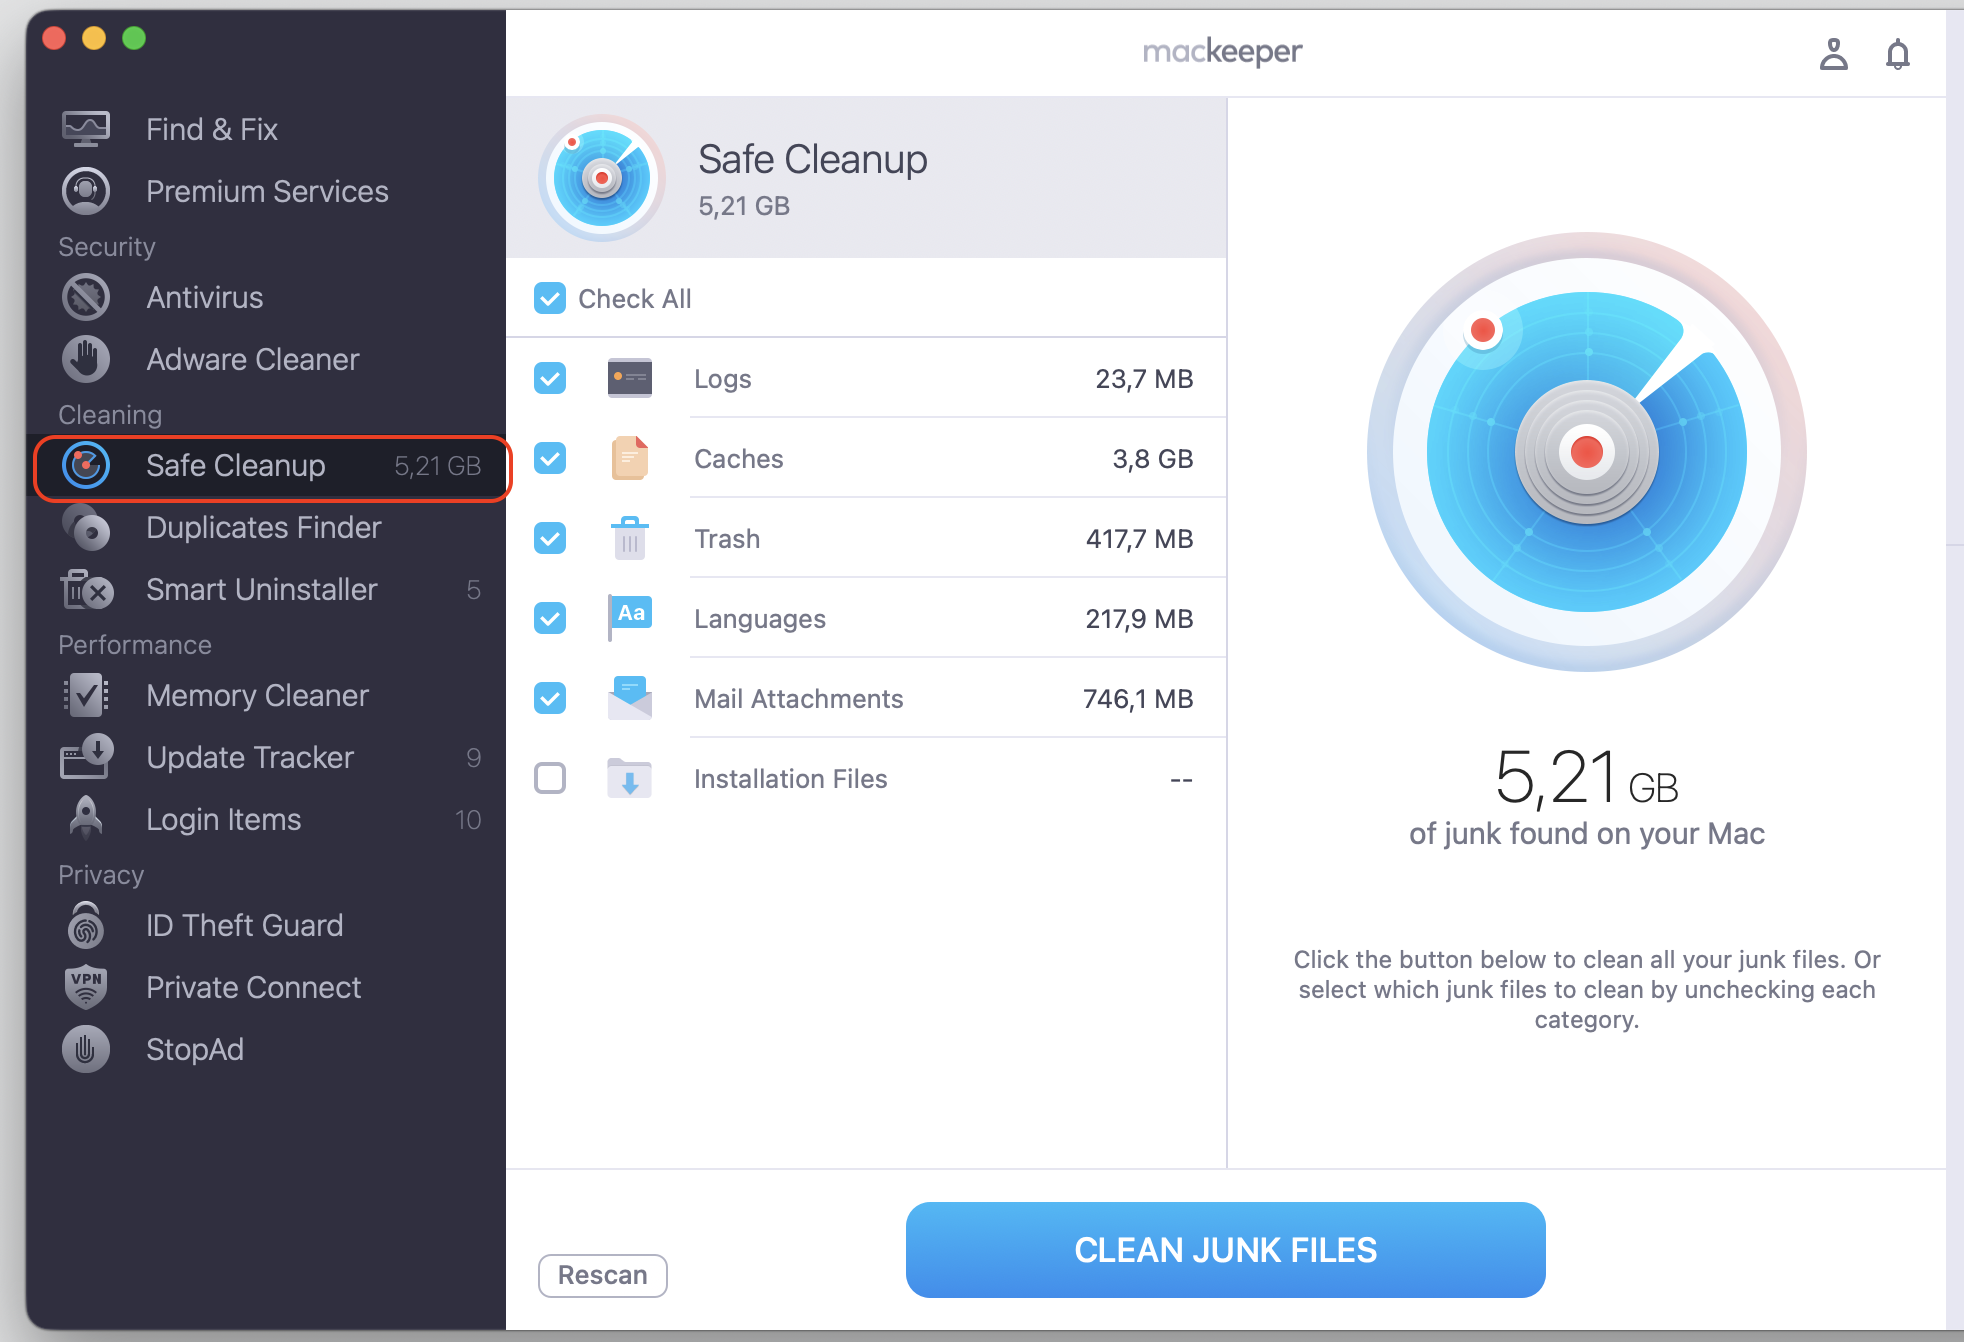
Clear out caches, logs, and junk files to free up space.
Disconnect external accessories one at a time to see if any are causing slowdowns.
Restart your Mac and see if the issue persists after a fresh boot.
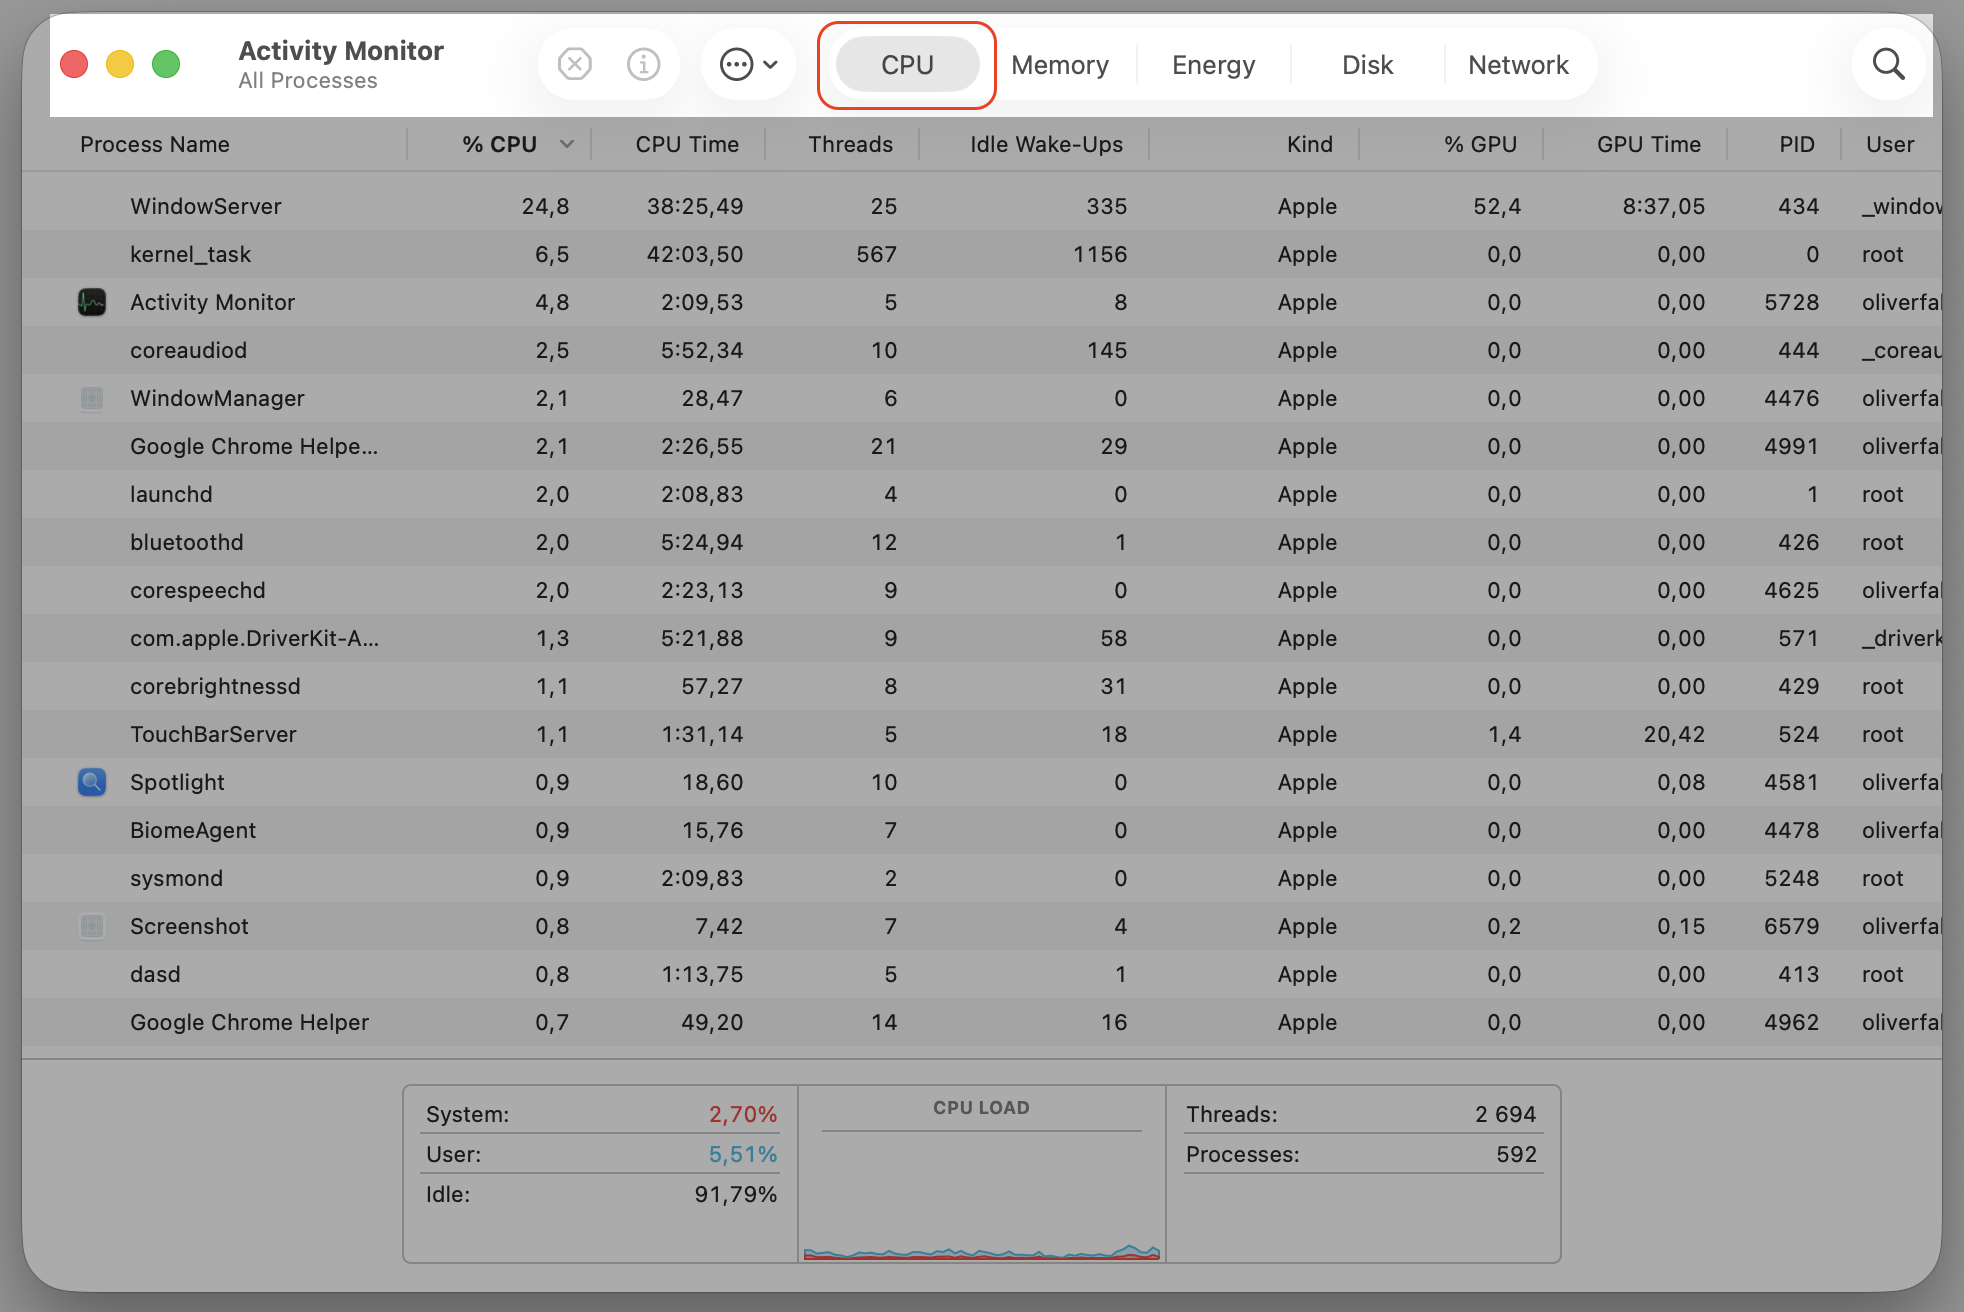
Check Activity Monitor for processes or apps using too much memory or CPU.
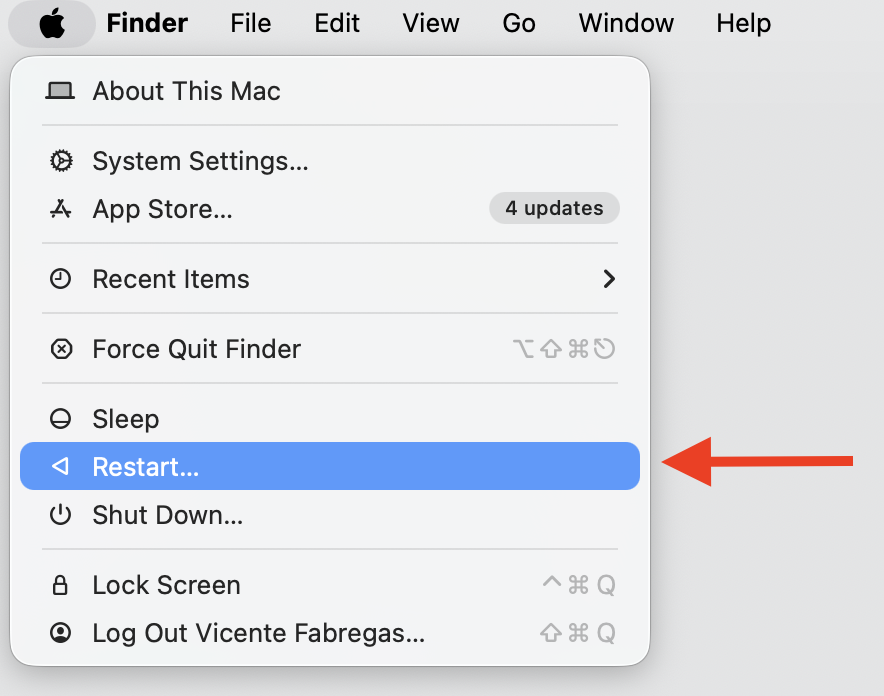
Step 1. Update all your apps to newest versionsStep 2. Clear out caches, logs, and junk files to free up spaceStep 3. Disconnect external accessoriesStep 4. Restart your Mac from Apple menuStep 5. Open Activity Monitor’s CPU tab to see the most RAM-consuming processes
A warning from our team: Only move forward with the downgrade if the above-mentioned steps didn’t resolve the issue.
2. Back up important files
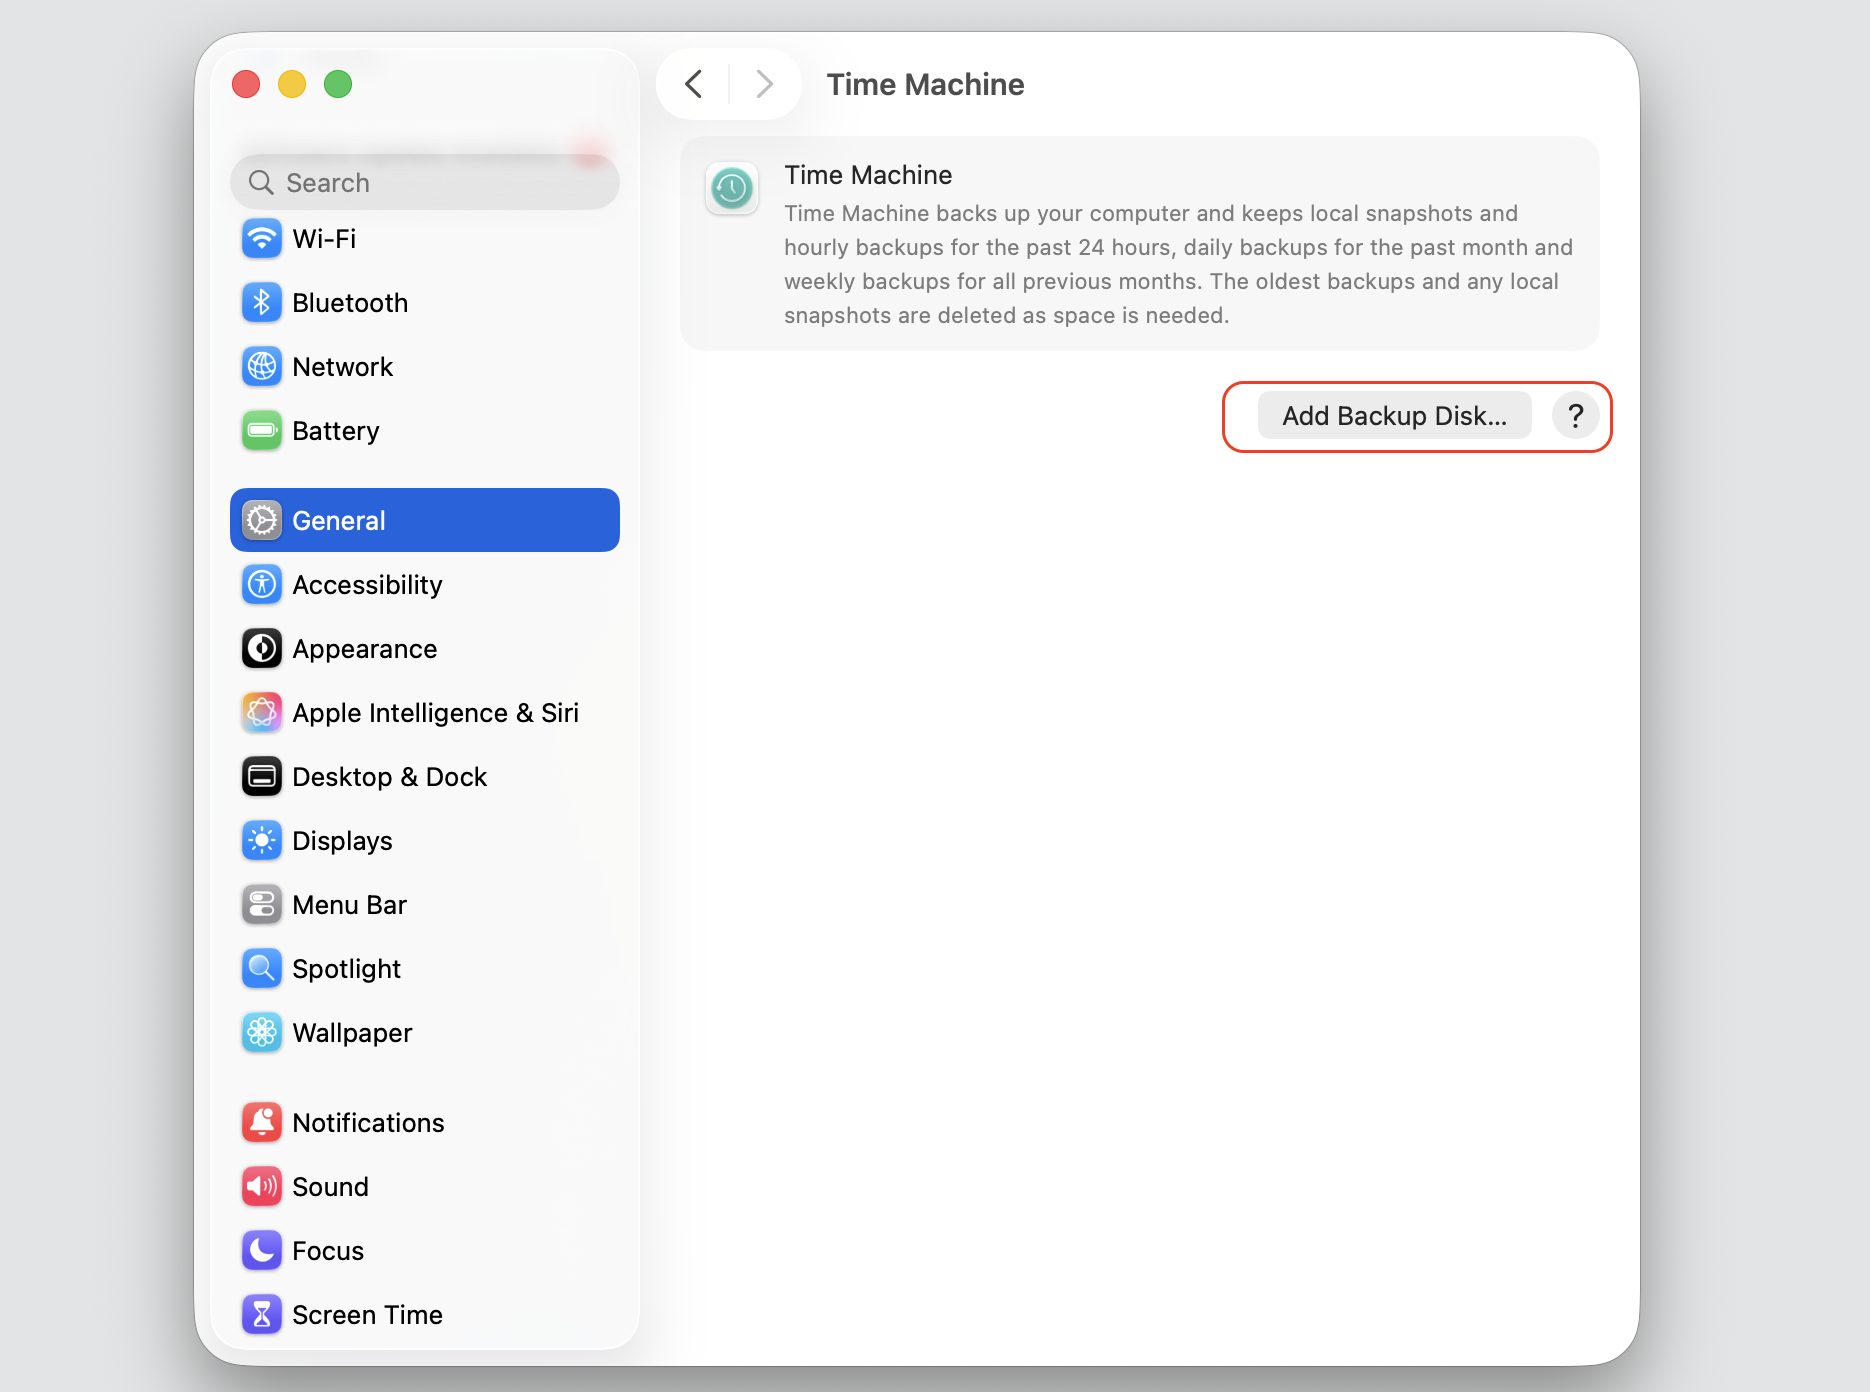
Anything you’ve created or edited in Ventura—documents, photos, downloads, emails—needs to be saved somewhere safe before you reinstall macOS. Once the startup disk is erased, those files are gone unless you’ve copied them elsewhere. Apple’s built-in backup tool is the simplest way to handle this, and setting up a Time Machine backup takes just a few minutes.
Here’s how to back up your Mac with Time Machine:
Connect an external drive with enough space to hold your data.
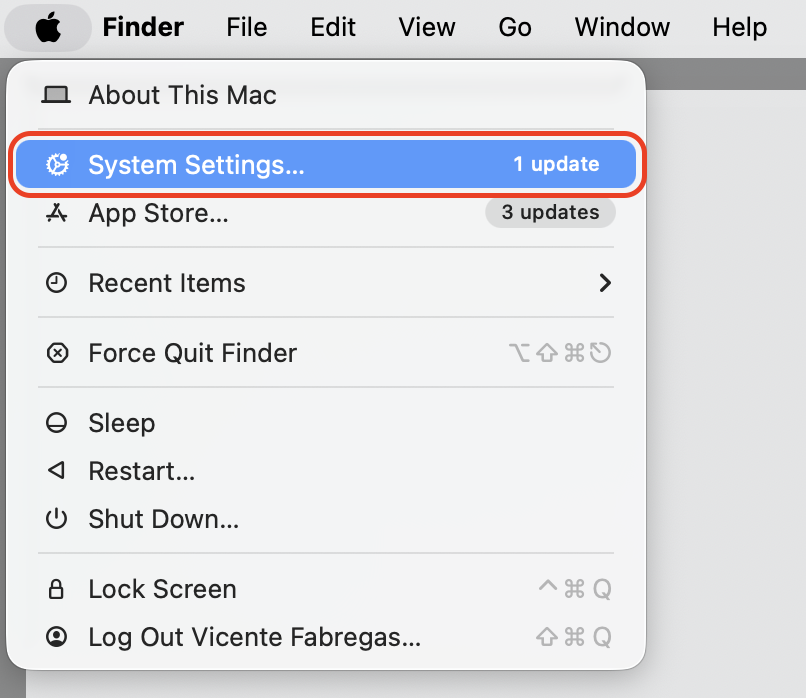
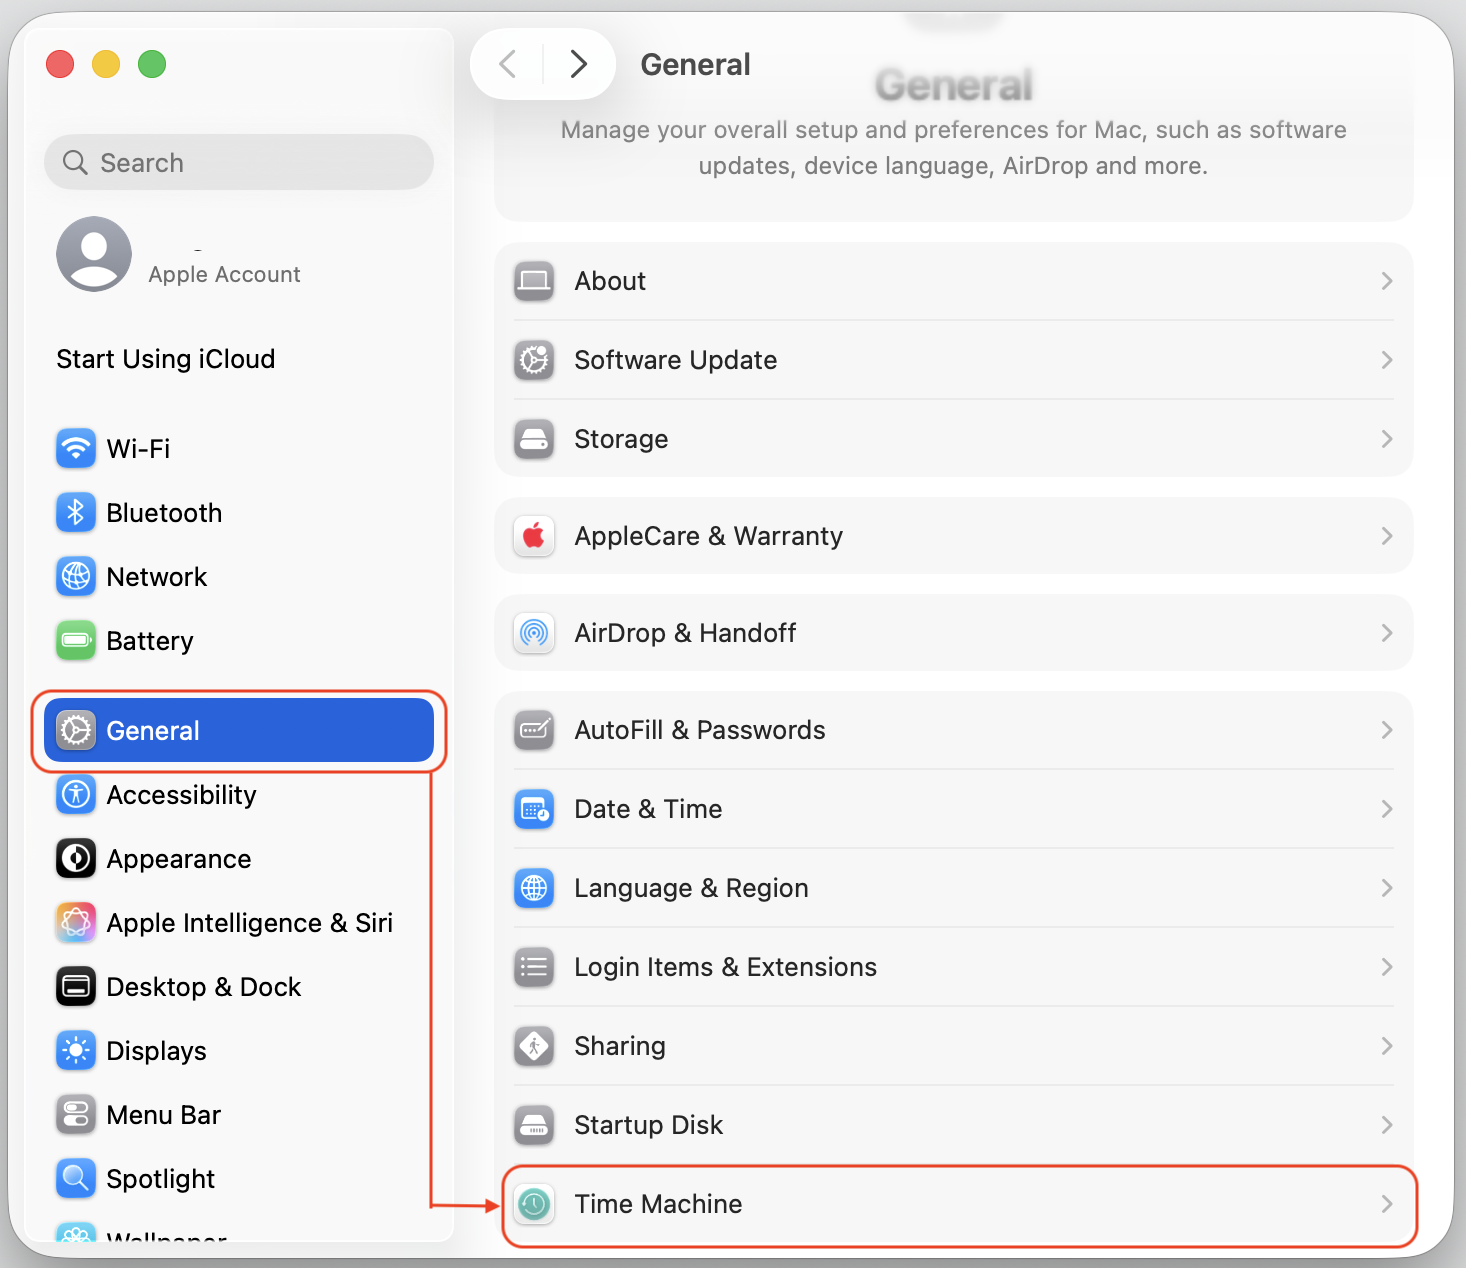
Open System Settings and go to General > Time Machine.
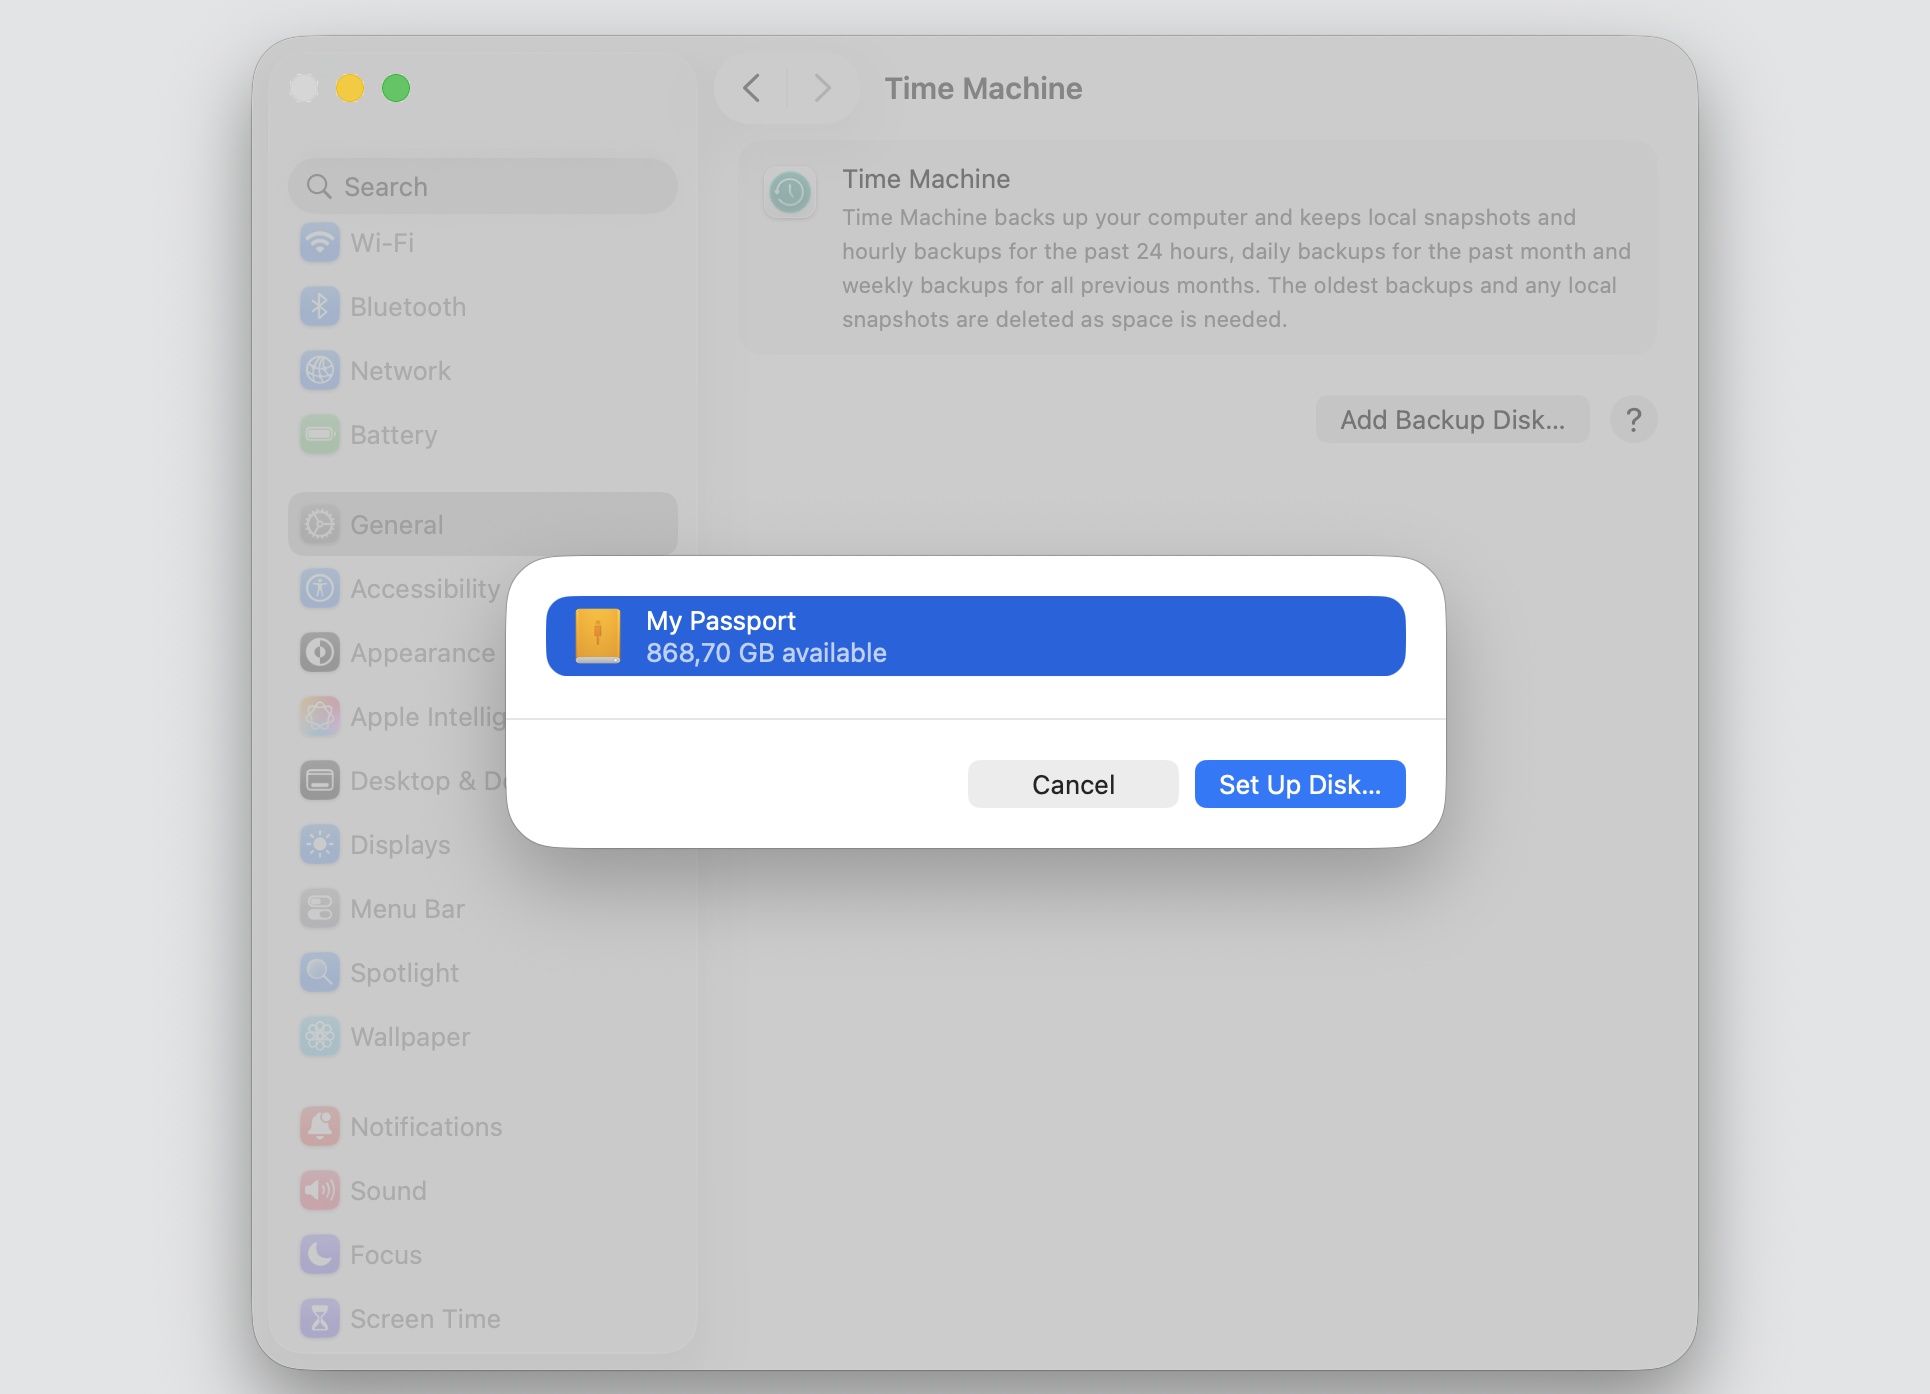
Click Add Backup Disk and select your external drive.
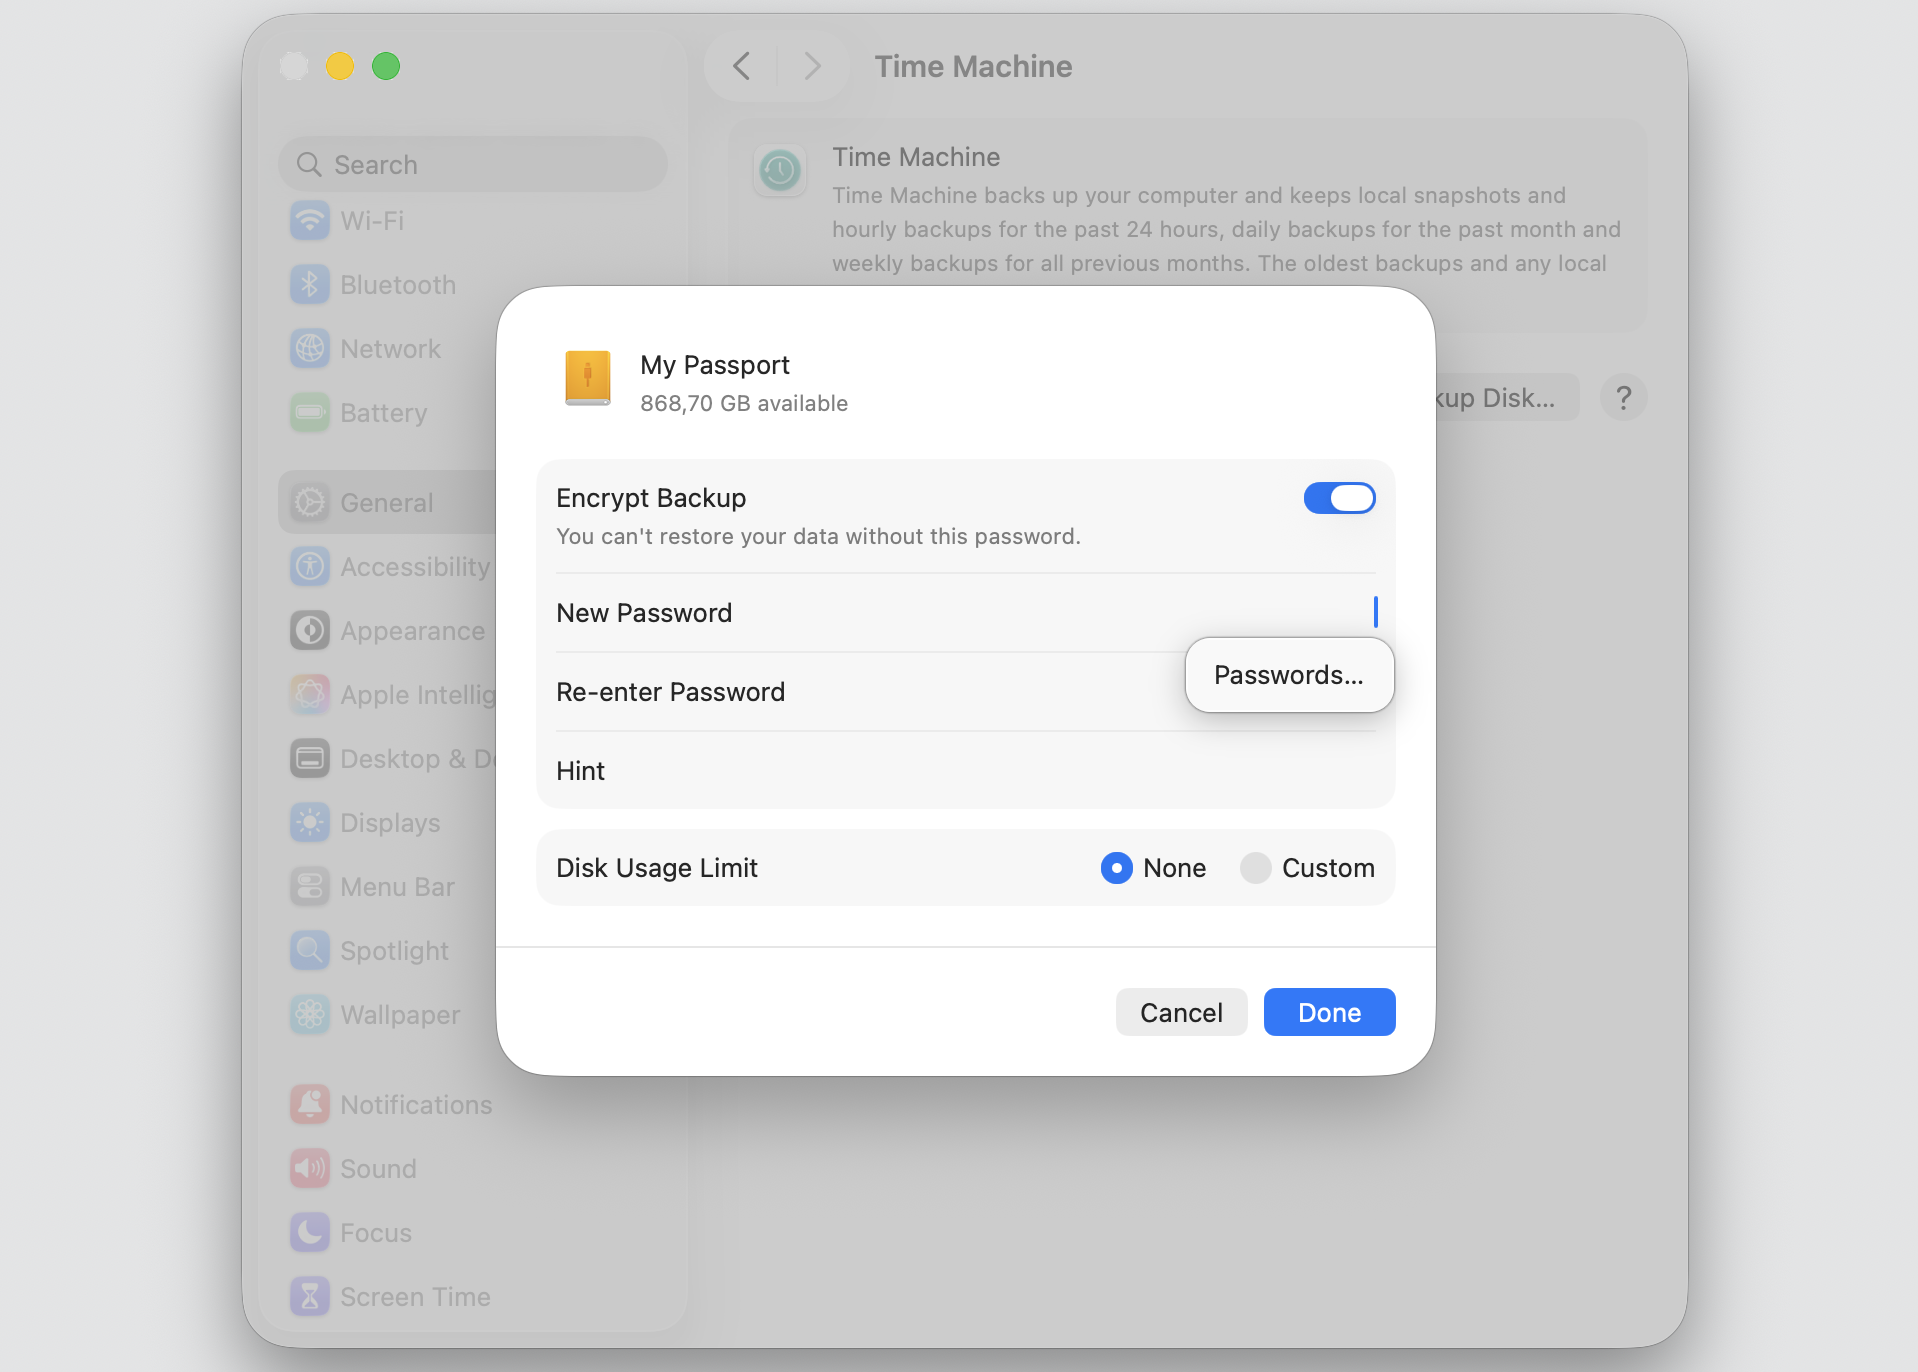
Choose whether to encrypt the backup, then click Set Up Disk.
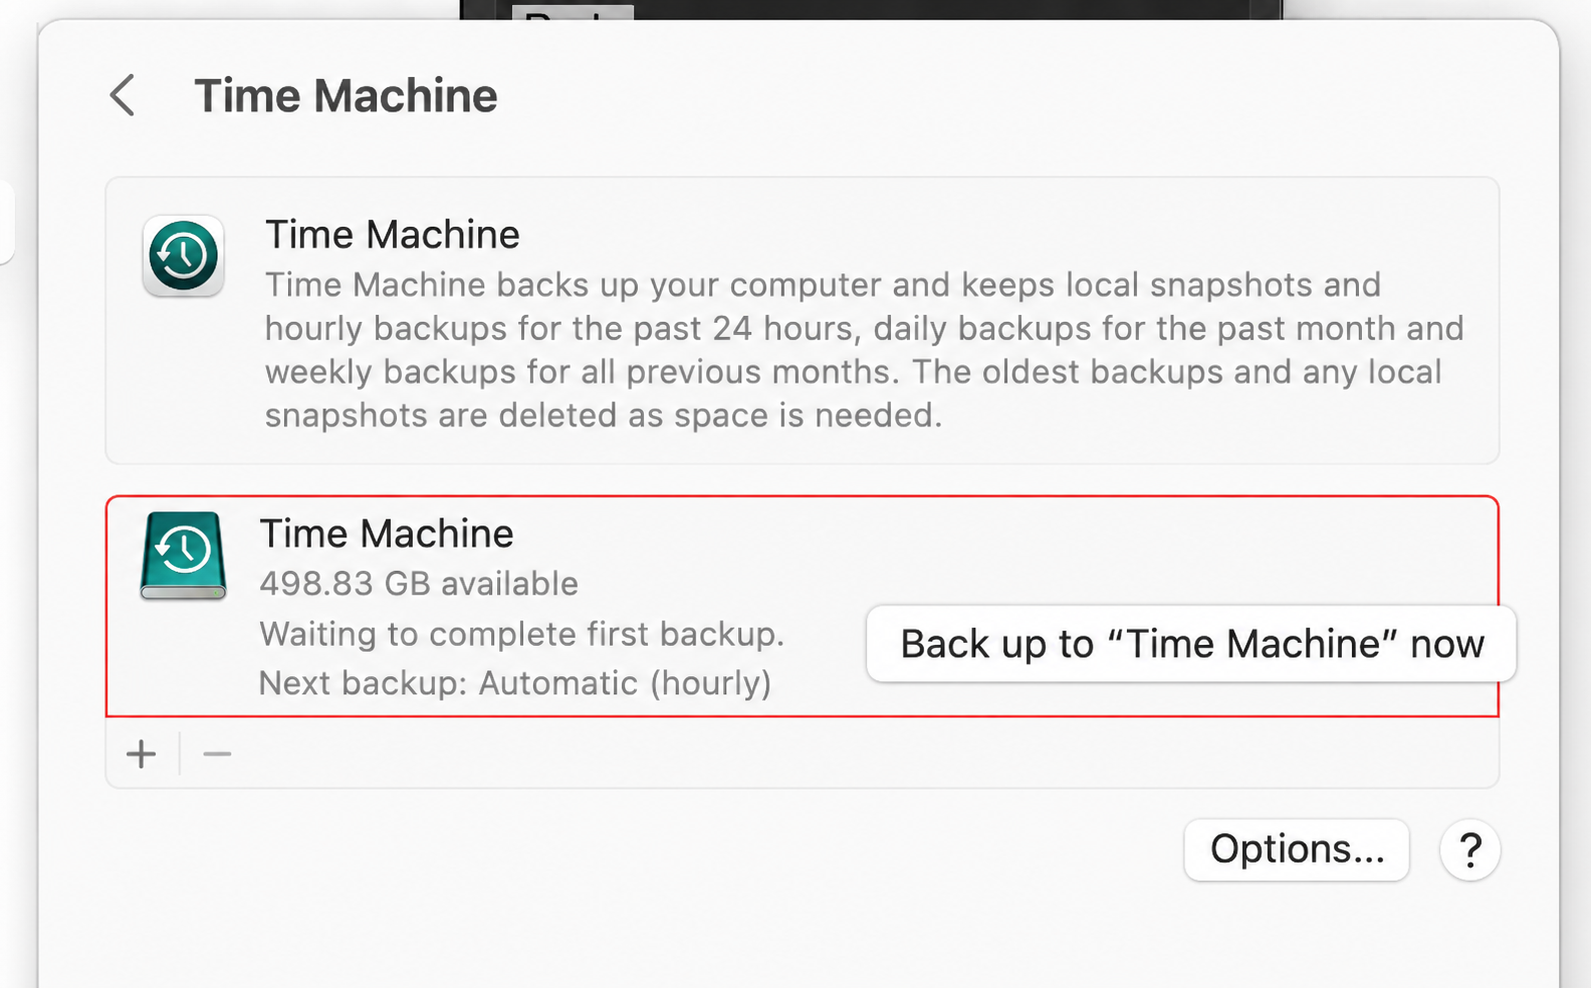
Wait for the first backup to finish—this can take a while on the initial run.
Confirm the backup completed by checking the date and time in the Time Machine menu.
Step 1. Go to Apple menu > System SettingsStep 2. Select General > Time MachineStep 3. Click Add Backup DiskStep 4. Select Set Up DiskStep 5. Choose the preferable encrypt options and click DoneStep 4. Wait for the first backup to finish
3. Confirm which older macOS versions your Mac can run
Your Mac can only run macOS versions that match its hardware. A 2023 MacBook, for example, won’t accept Big Sur or earlier — Apple won’t let it install. The older the system you want, the more likely you’re to hit a compatibility wall, so it’s worth taking a moment to check macOS compatibility for your specific model.
Follow these steps to find out which macOS releases your Mac supports:
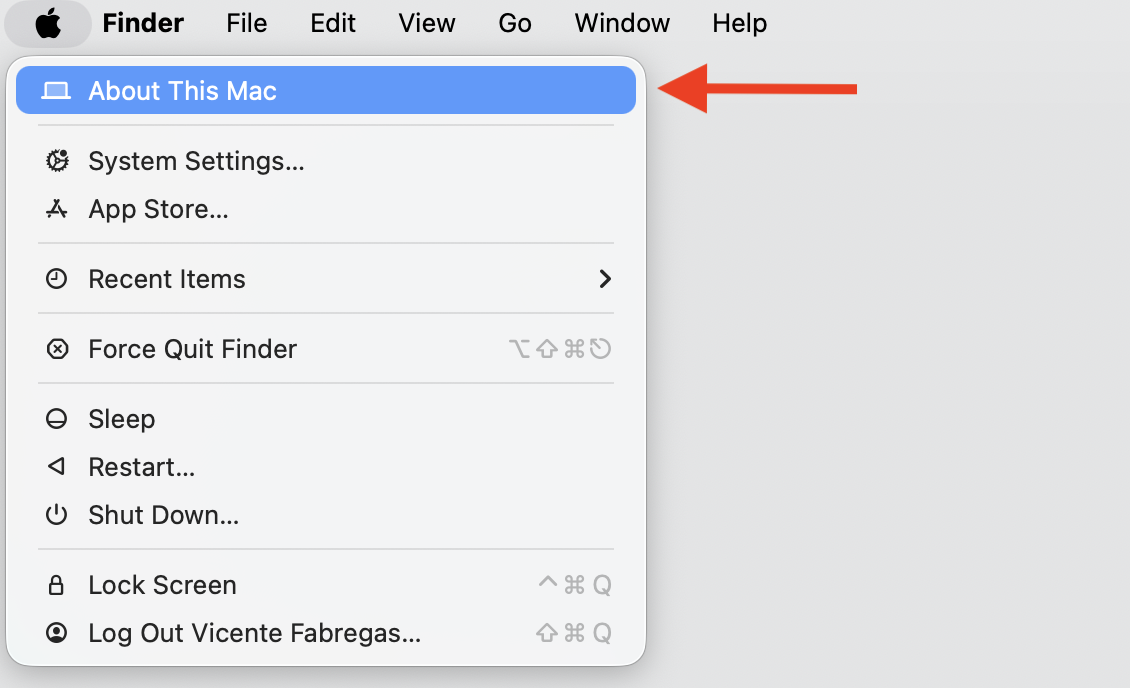
Click the Apple menu in the top-left corner of your screen and select About This Mac.
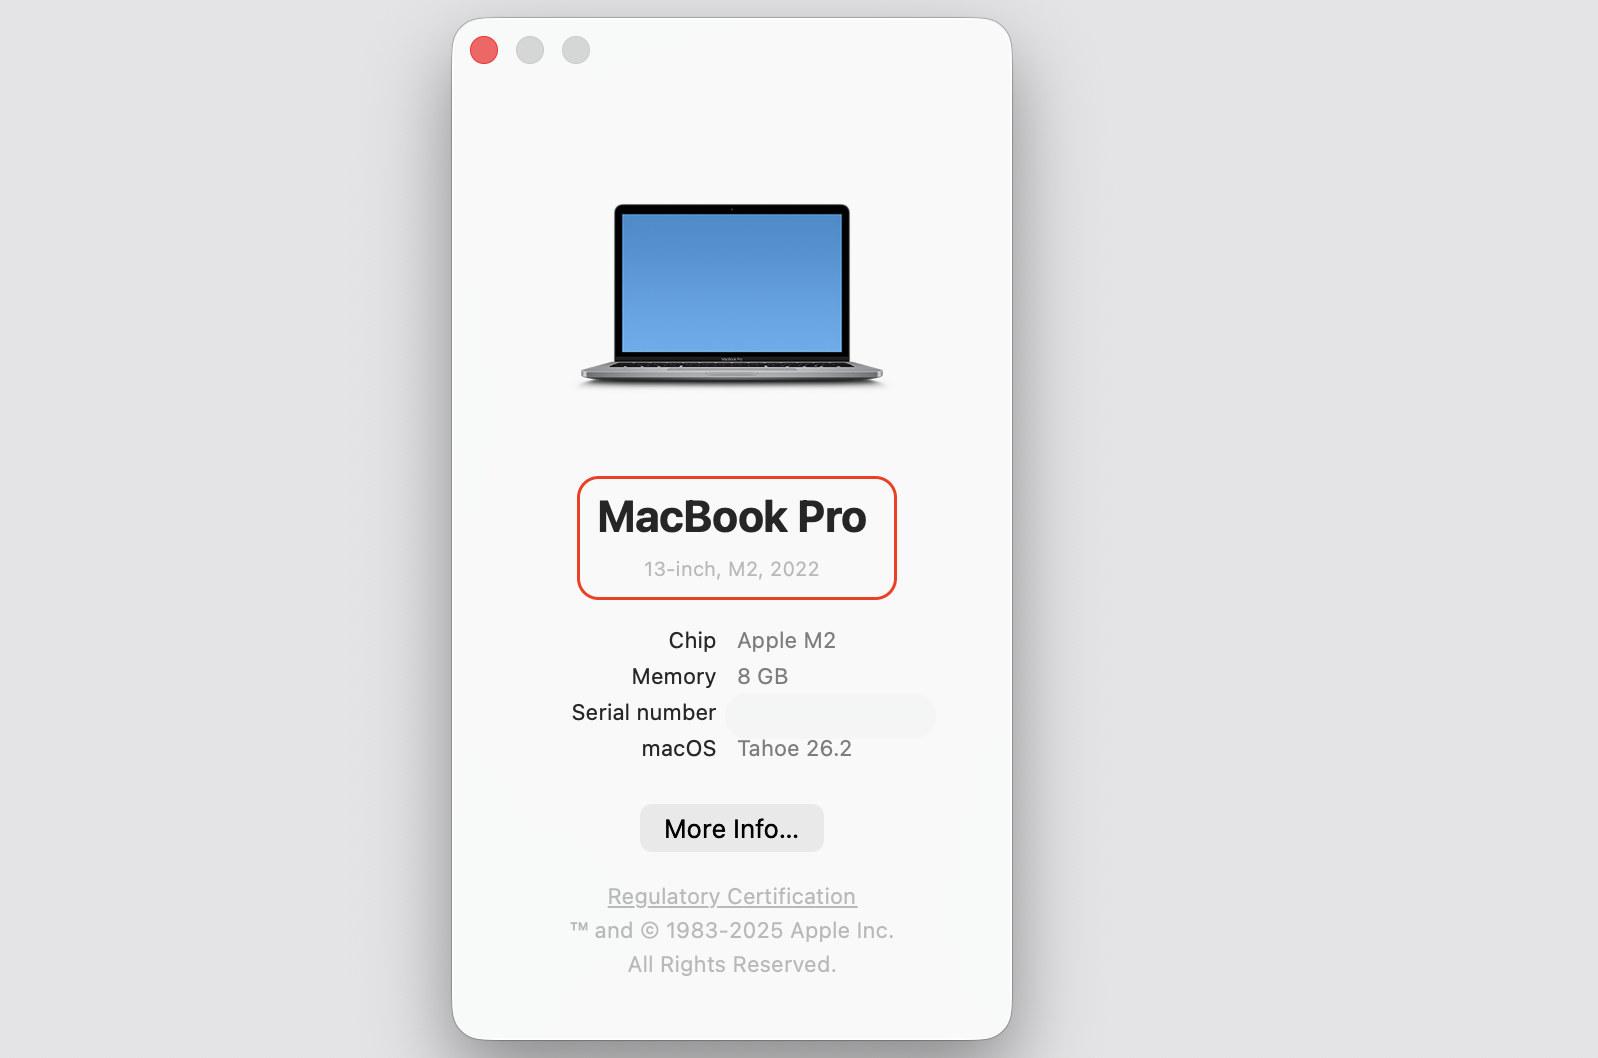
Note your Mac model and the year it was released.
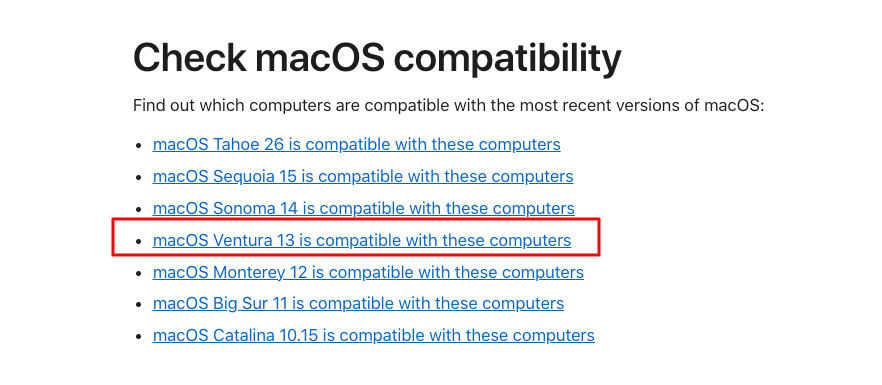
Look up which macOS versions are officially supported on that model.
Pick the oldest compatible version that fits your needs.
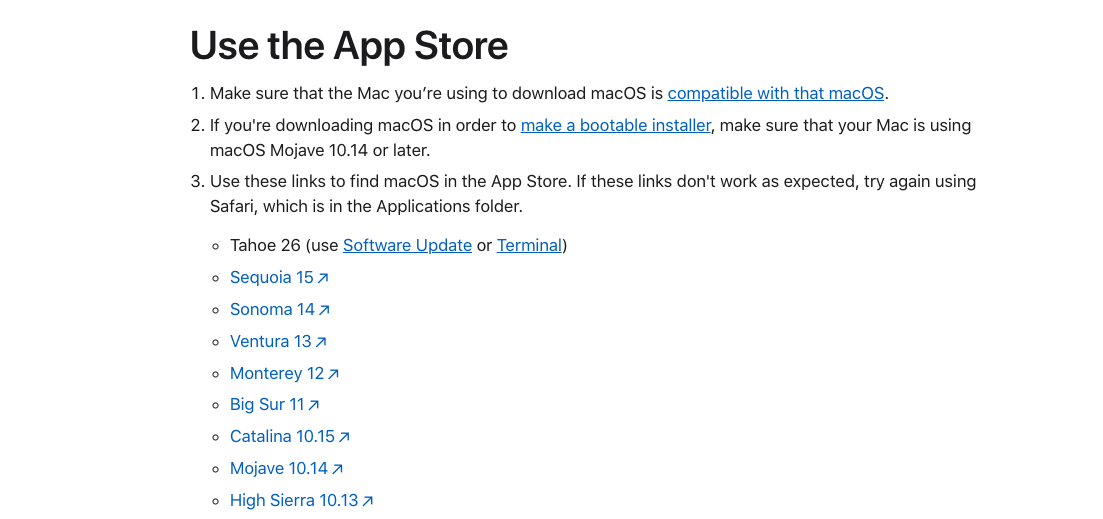
Make sure you can still download the installer for that version from the App Store or Apple’s archive.
Step 1. Go to Apple logo > About This MacStep 2. Note your Mac model and the year it was released.Step 3. Look up which macOS versions are officially supported on that modelStep 4. Follow the link from official Apple siteStep 5. Download older version of macOS
4. Check your connection before reinstalling macOS
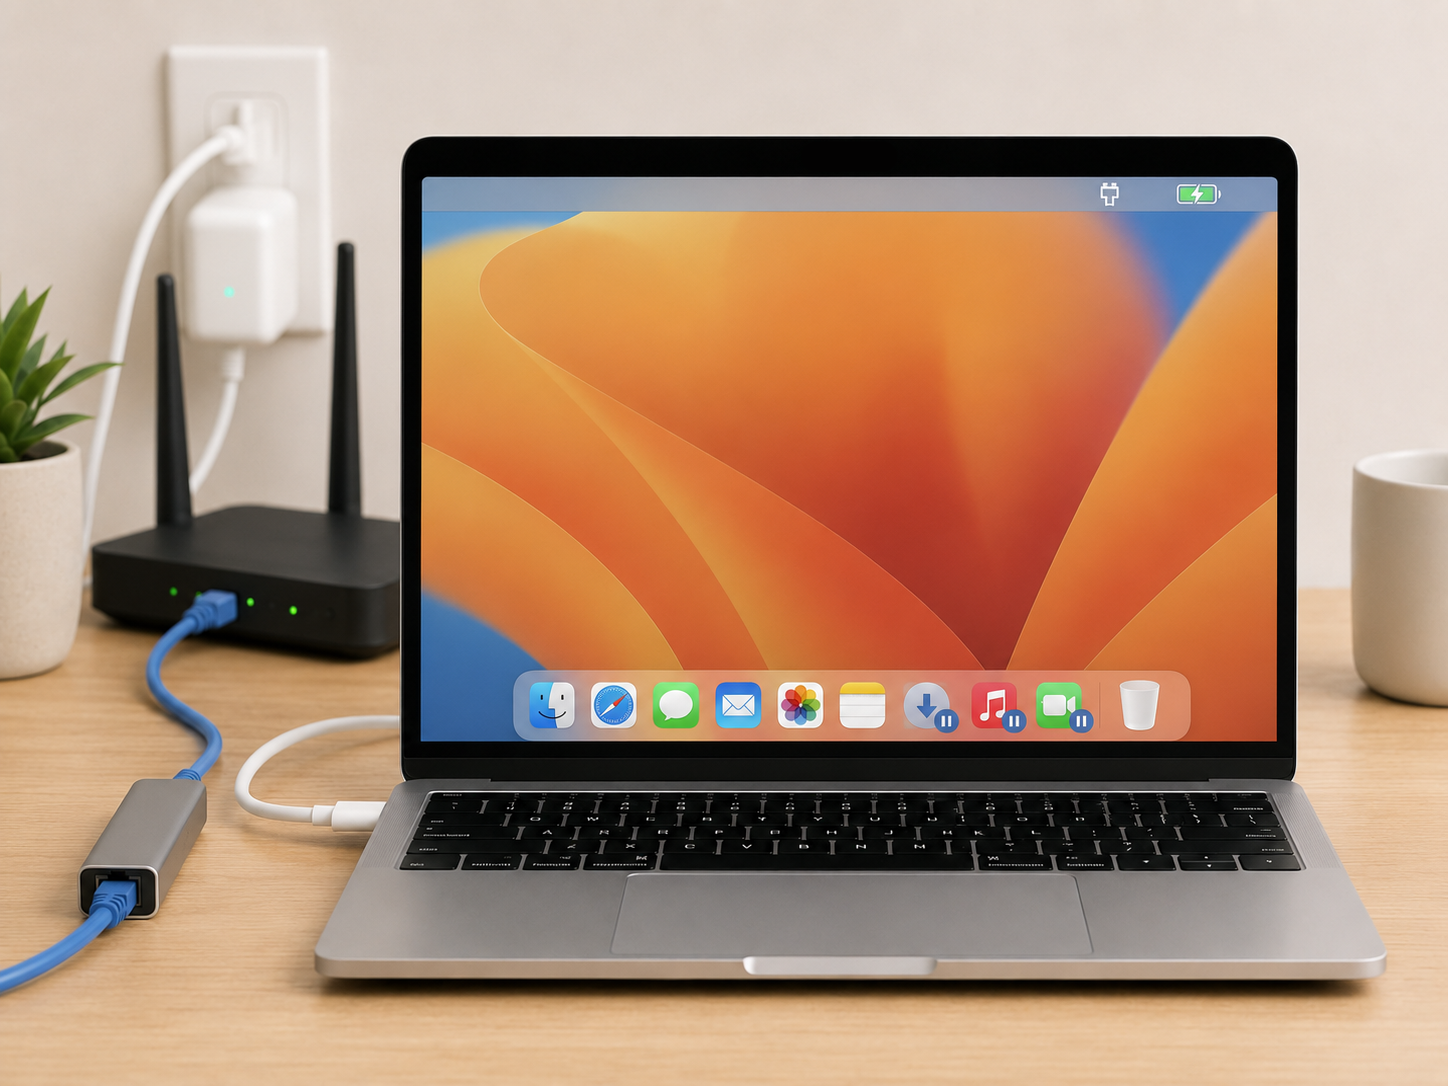
Recovery Mode pulls the macOS installer from Apple’s servers, and that download can be several gigabytes. A dropped connection mid-install can corrupt the process and leave your Mac in an unusable state, so do the following to feel more secure:
Use a wired Ethernet connection if you can.
If you’re on Wi-Fi, sit close to the router.
Pause other downloads, streaming, or video calls on your network.
Plug your Mac into power—never run a downgrade on battery alone.
5. Get external drives or USB storage ready
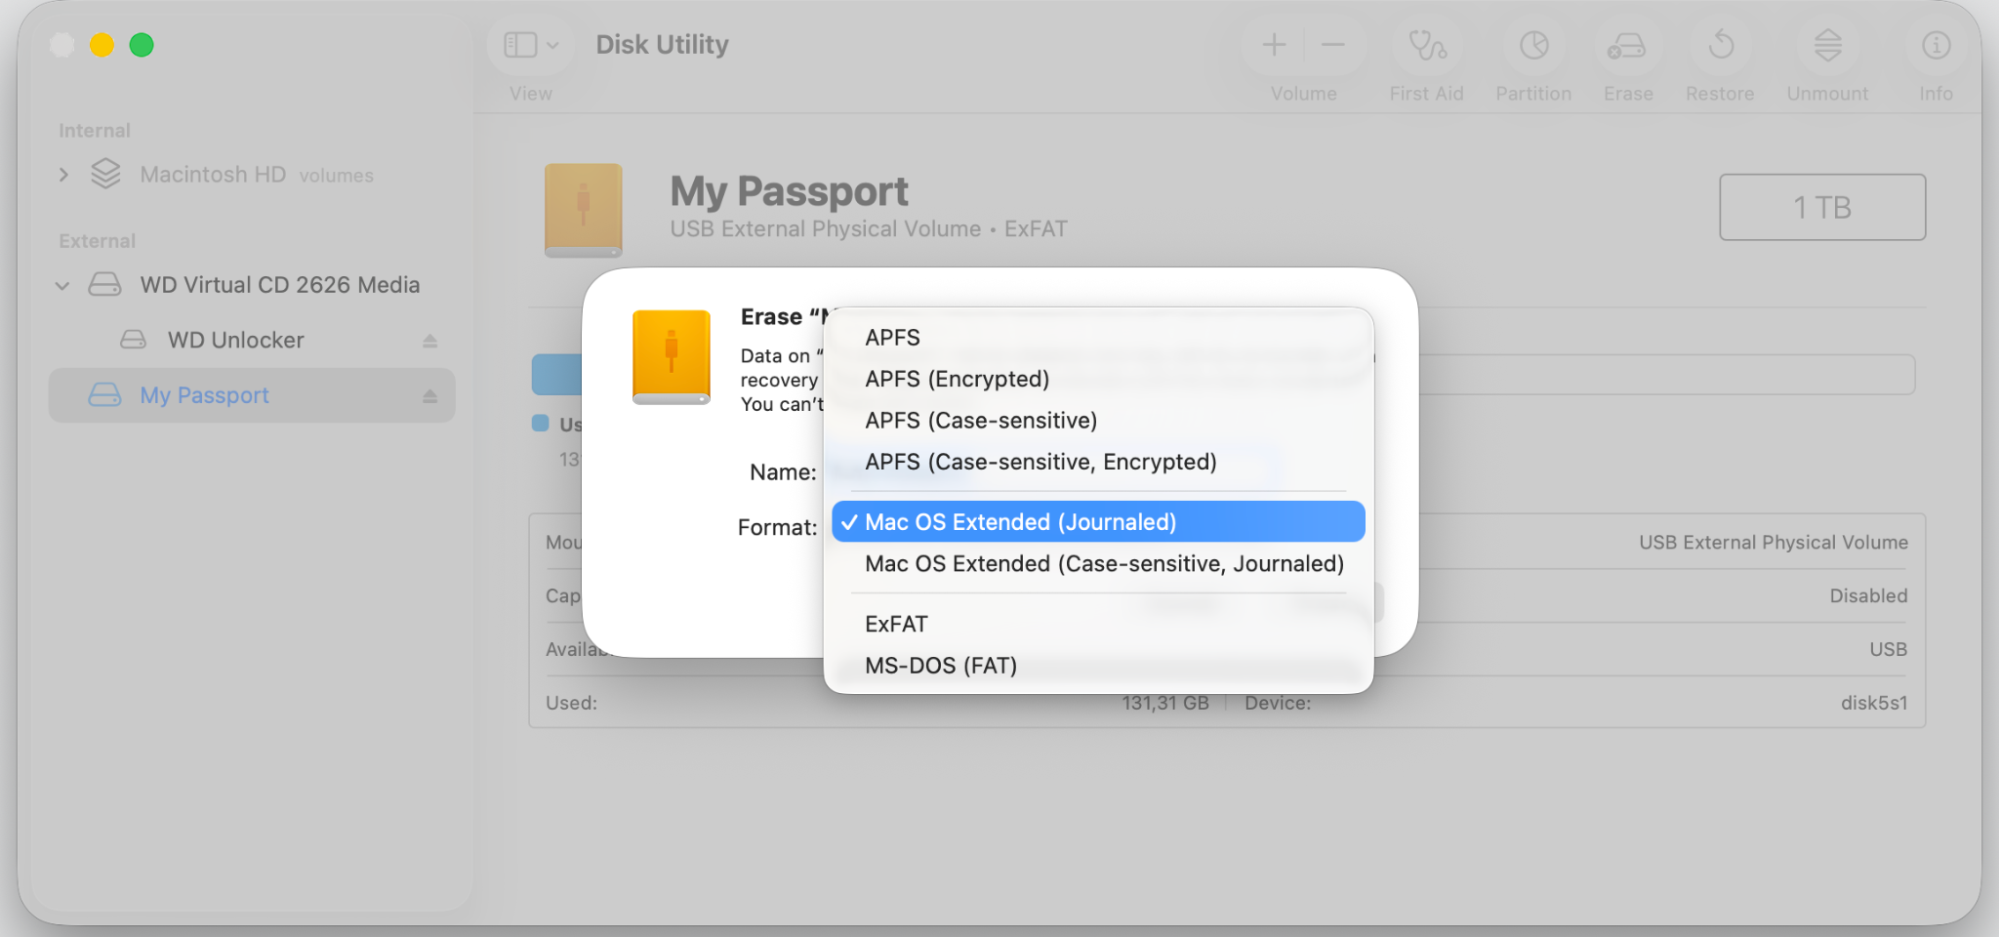
You’ll likely need an external drive for at least one of two things — storing your Time Machine backup or holding a bootable macOS installer. A USB stick of 16GB or more works for the installer, and a larger external drive is ideal for backups. Most new drives come pre-formatted for Windows, which macOS won’t accept, so you may need to format external hard drive before using it.
To prep your drive for Mac use:
Connect the drive to your Mac via USB.
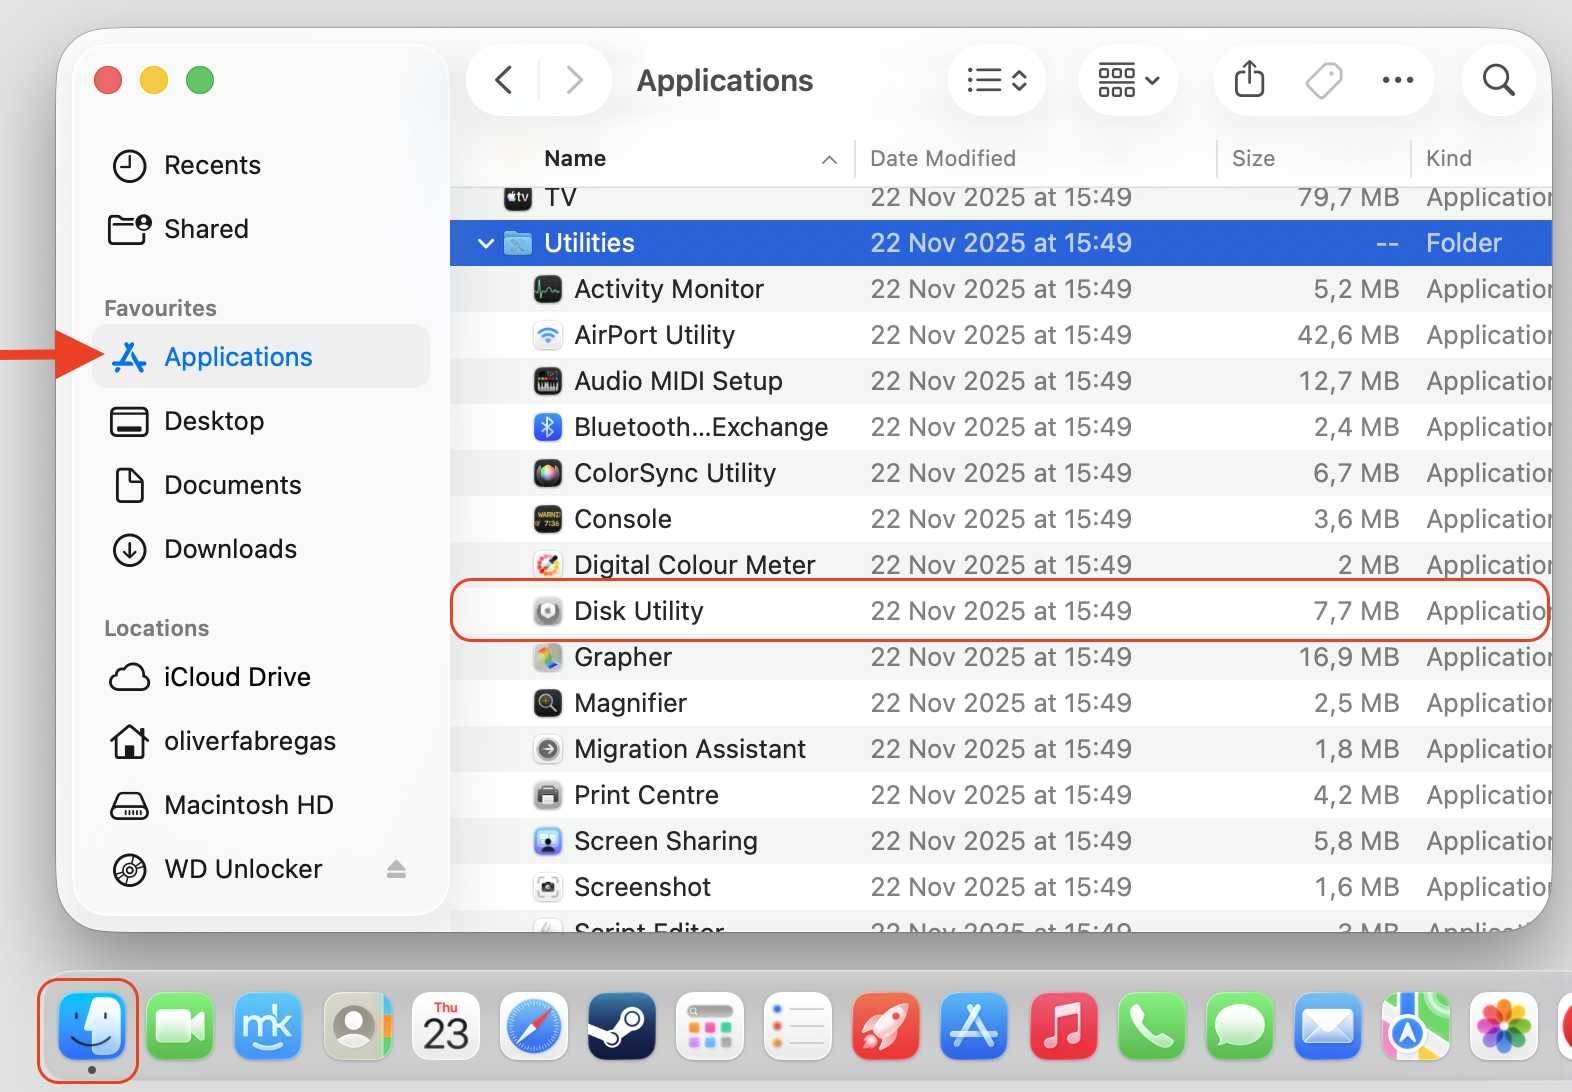
Open Disk Utility from Applications > Utilities.
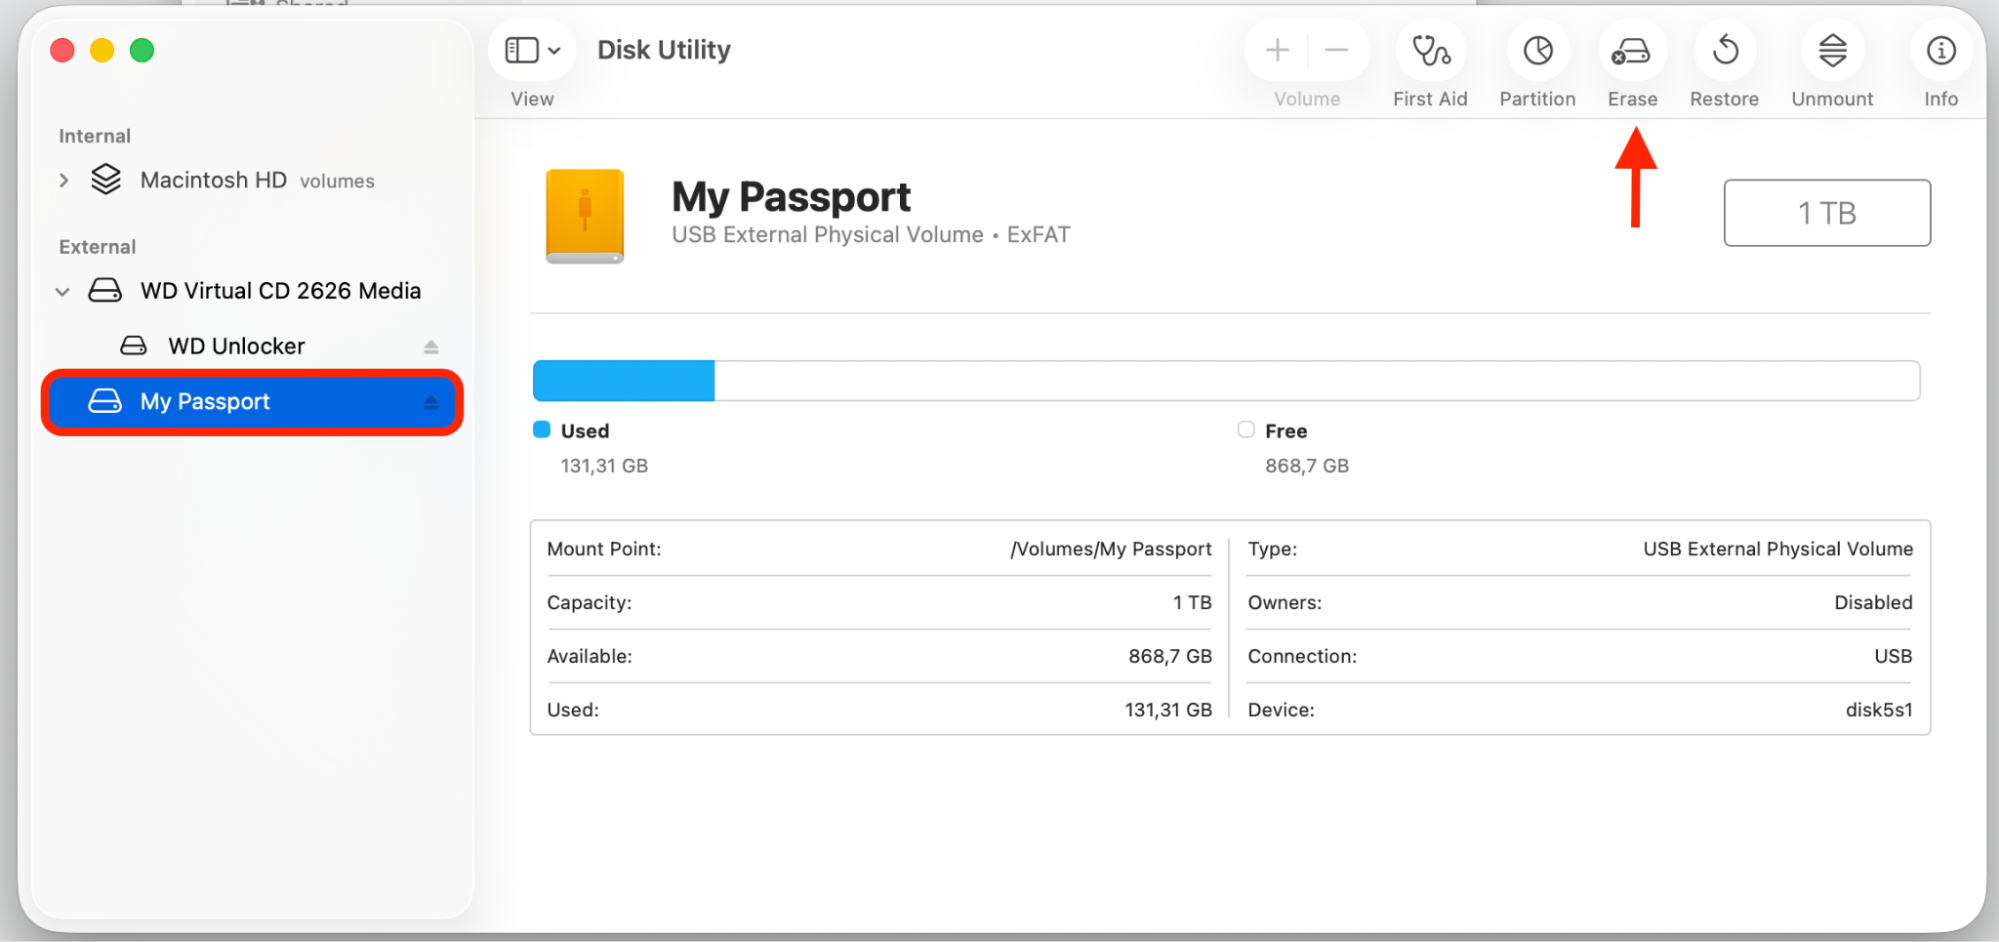
Select the external drive in the sidebar.
Click Erase at the top of the window.
Choose APFS or Mac OS Extended (Journaled) as the format.
Set GUID Partition Map as the scheme.
Click Erase to format the drive.
Step 1. Connect the drive and go to Finder > Applications > Utilities> Disk UtilityStep 2. Select your drive and click EraseStep 3. Select required format and proceed with disk erase
How to downgrade macOS from Ventura?
There’s no single way to downgrade — the right method depends on what you have on hand. If you backed up before upgrading, Time Machine is the easiest path. If not, Recovery Mode or a bootable installer will get the job done. Each method has its own quirks, and picking the right one for your situation is half the battle when you downgrade MacBook from a newer macOS.
Below, we’ll leave the three most reliable methods for a macOS downgrade from Ventura, each with clear steps. Pick the one that fits your situation.
1. With Time Machine backup
This is the easiest method, and it works only if you made a Time Machine backup while running an earlier macOS like Monterey. Restoring that backup brings your Mac — files, apps, settings, and all—back to exactly how it was before you upgraded. Here’s how:
Connect the external drive containing your Time Machine backup to your Mac.
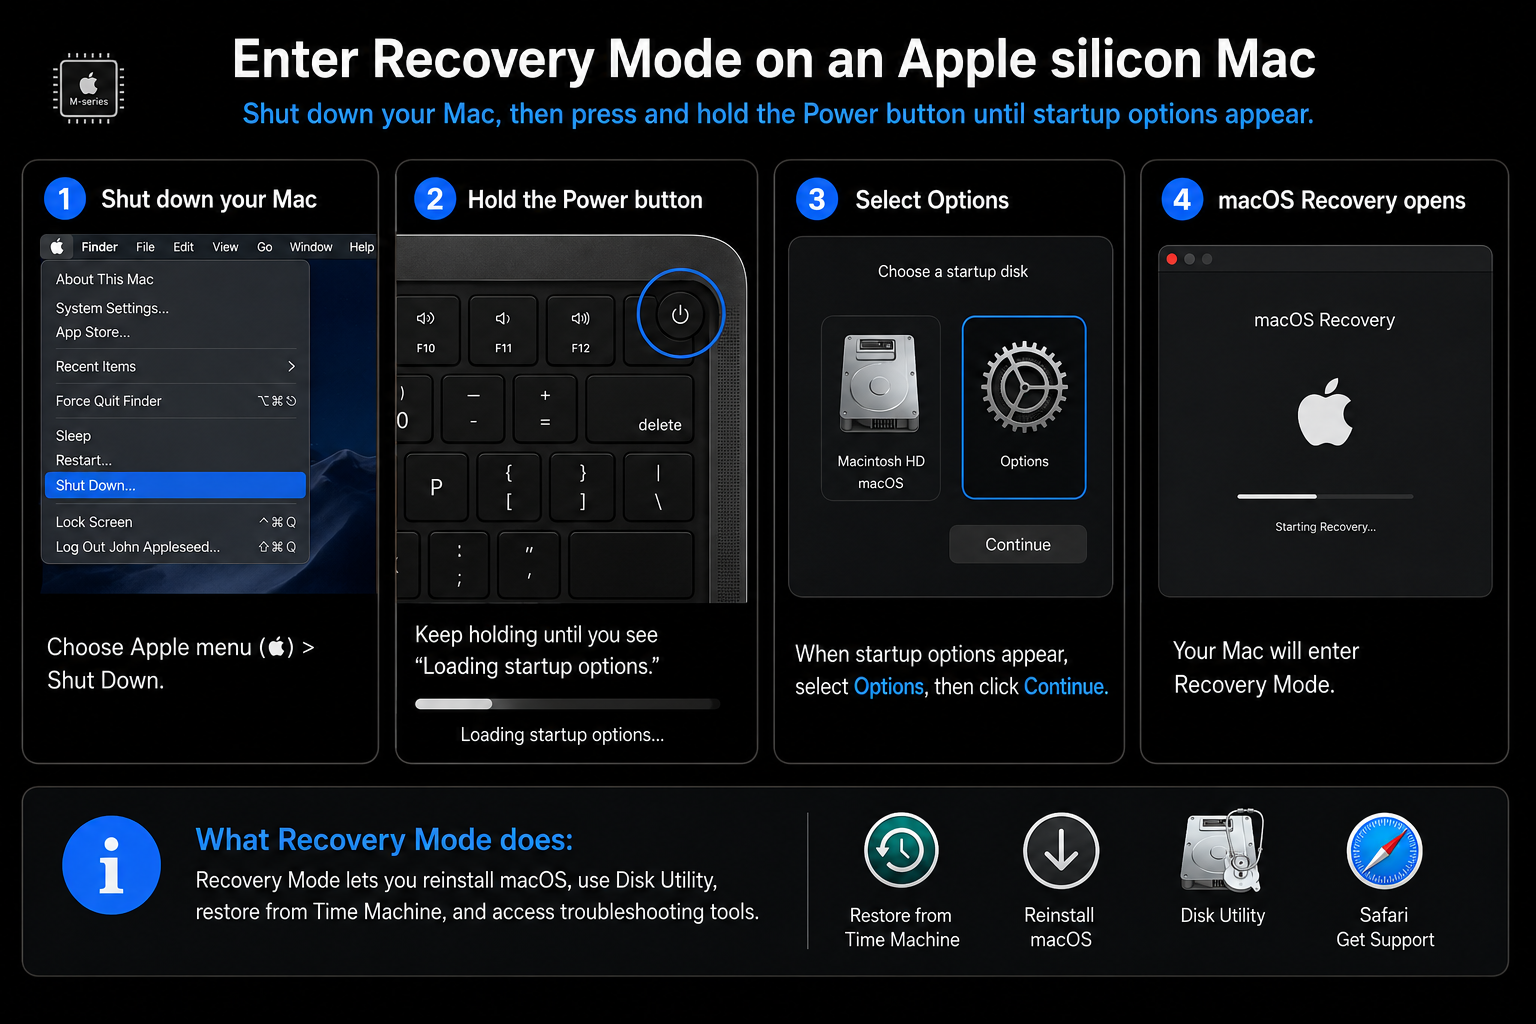
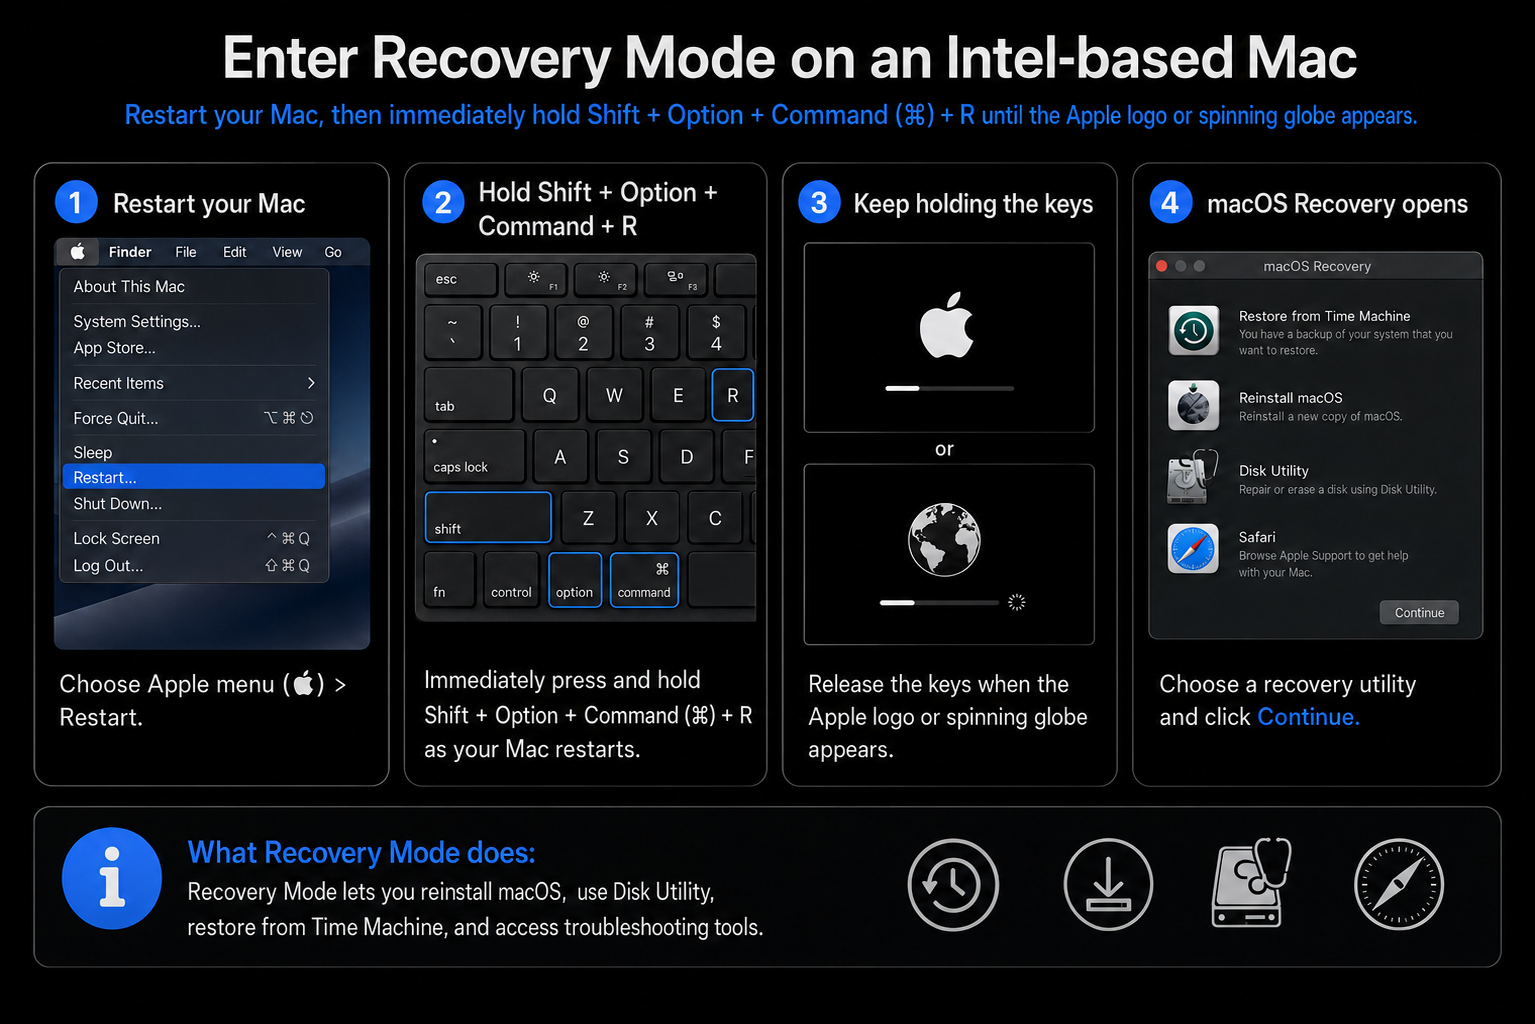
Restart your Mac and enter Recovery Mode. On Intel Macs, hold Command + R. On Apple Silicon Macs, hold the Power button until startup options appear, then select Options and click Continue.
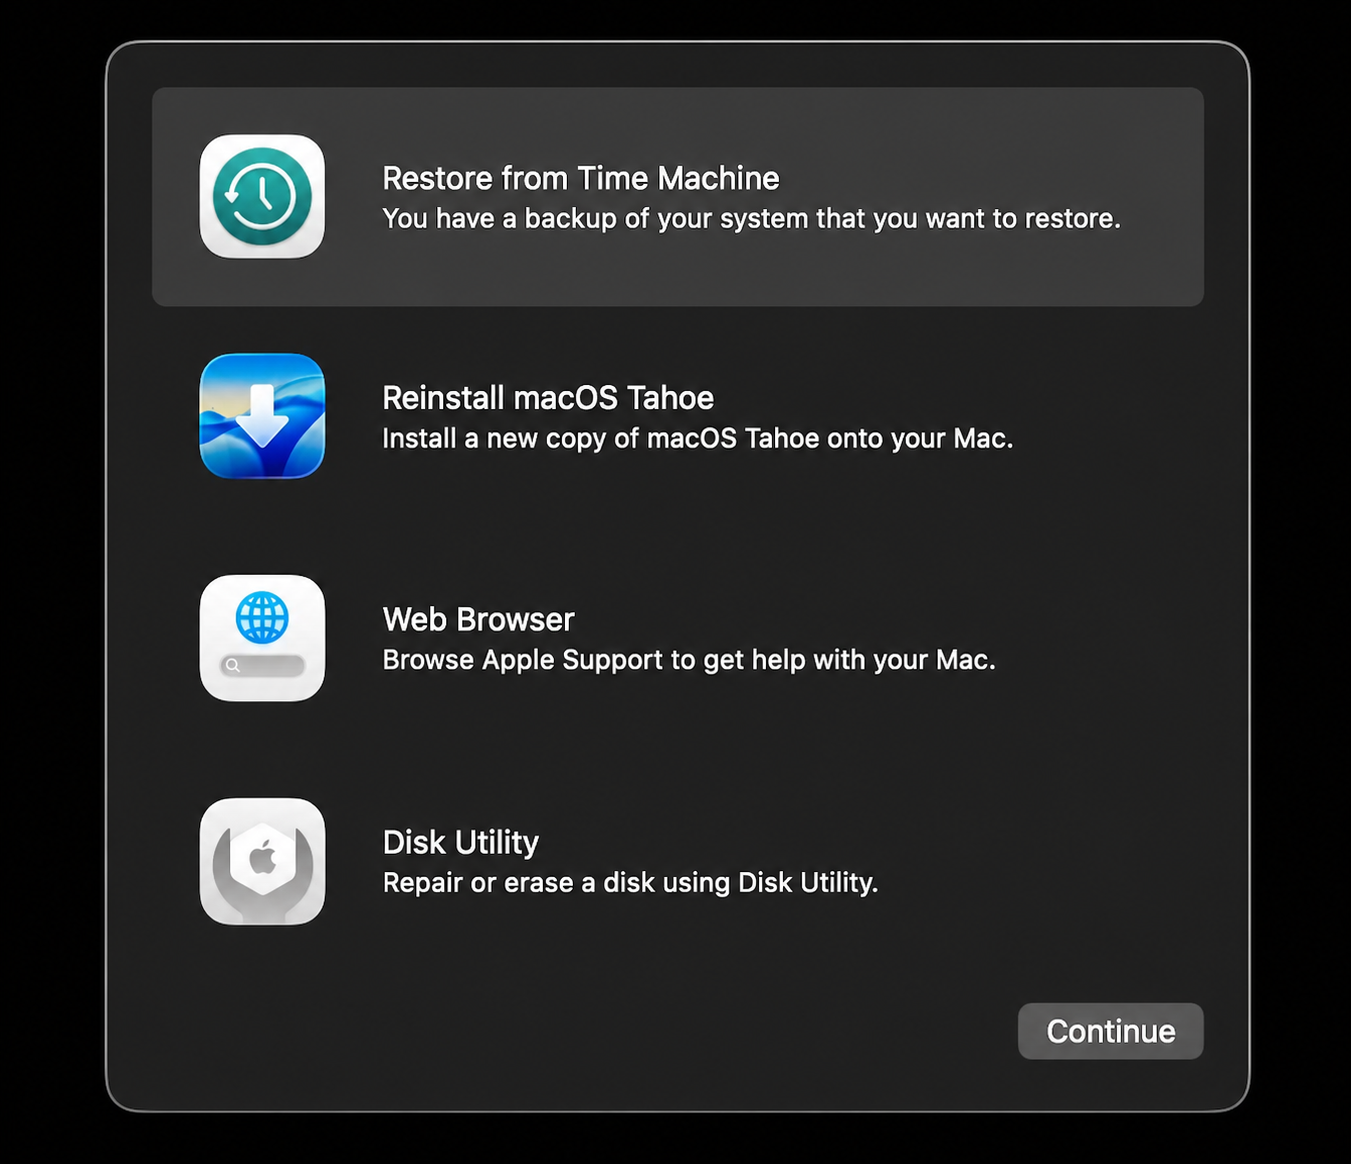
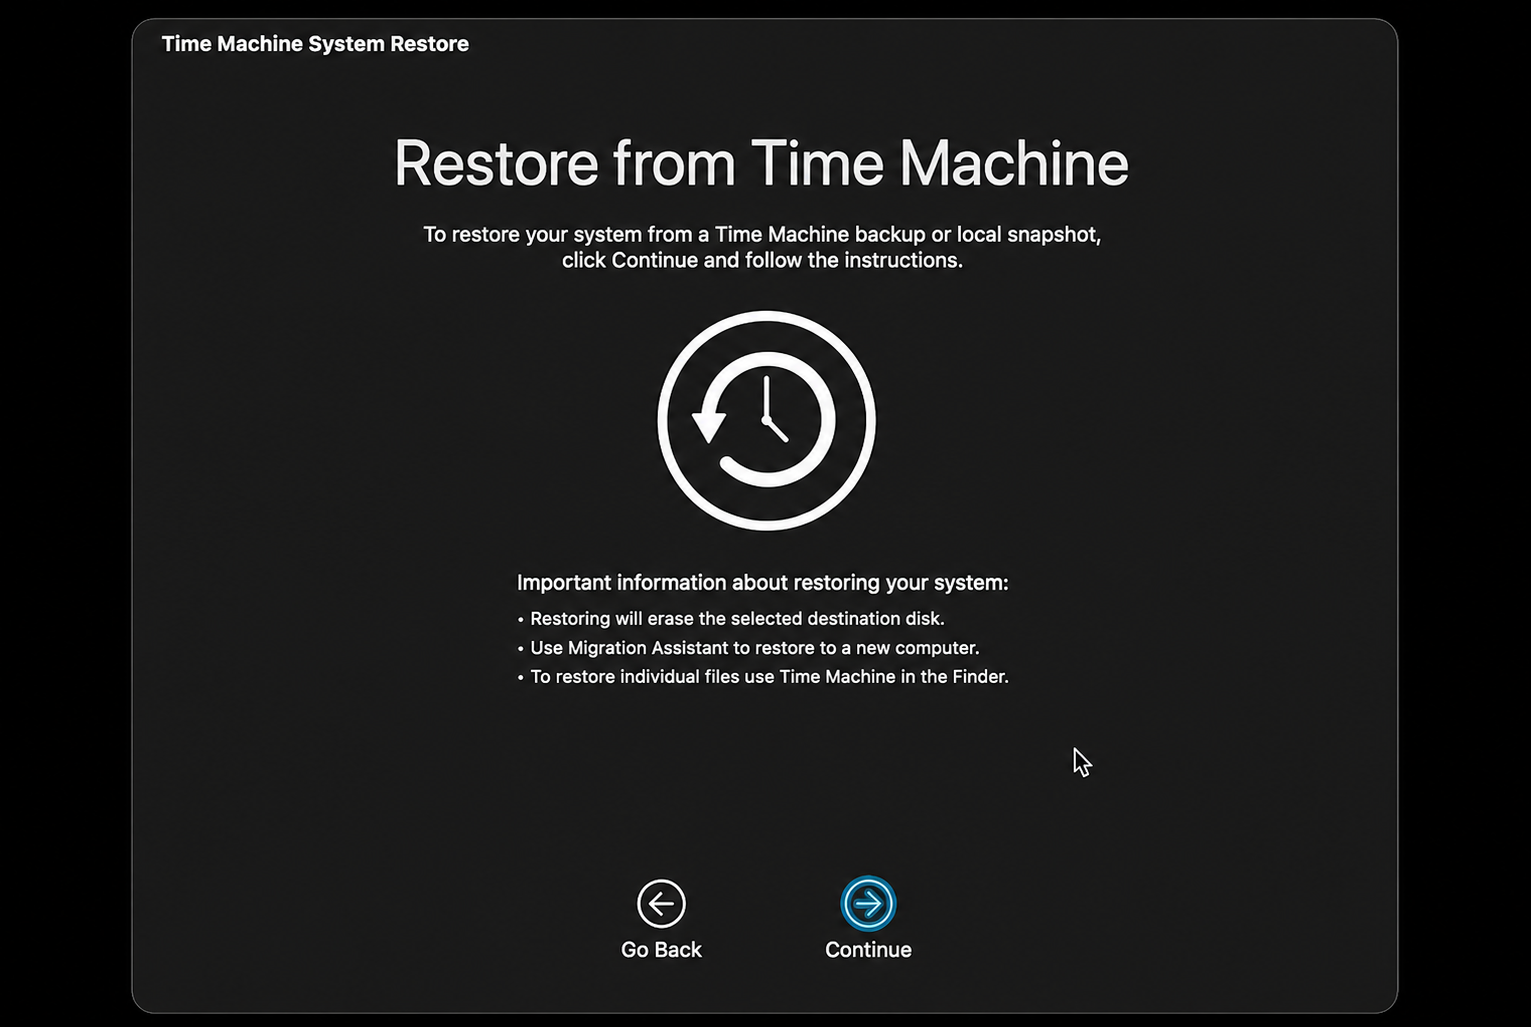
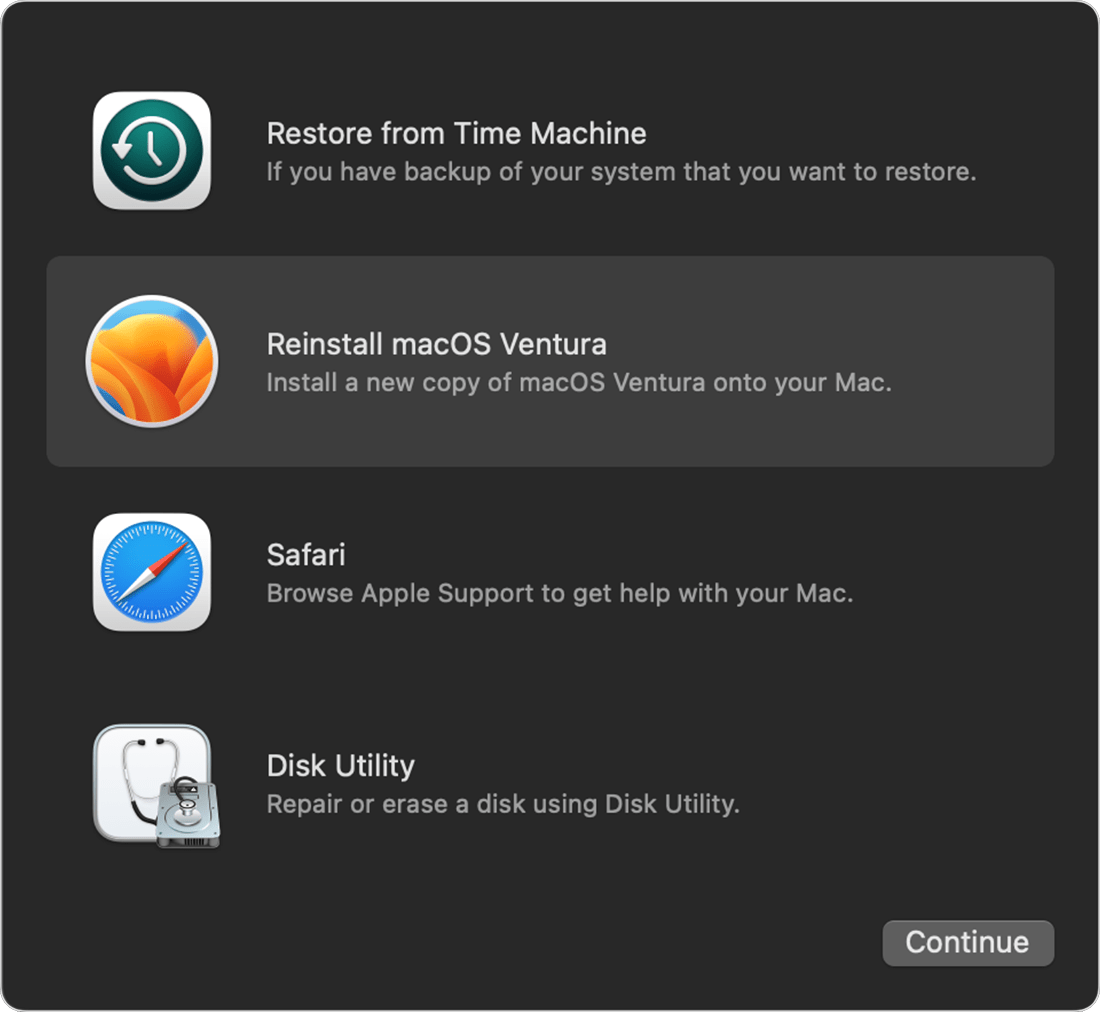
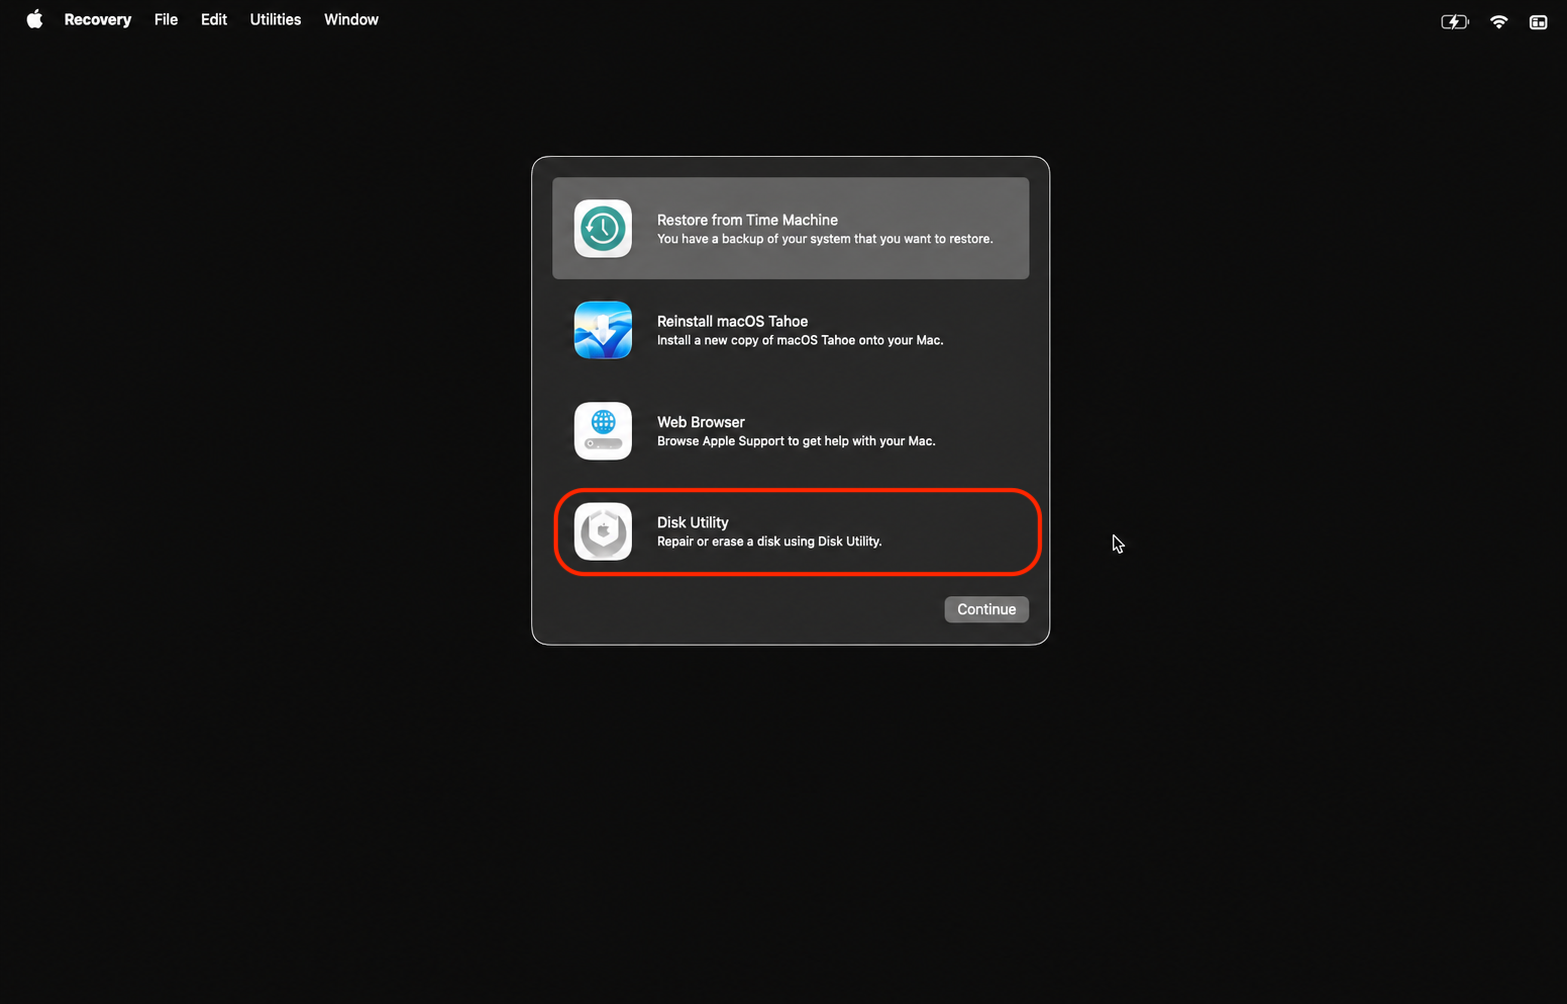
From the macOS Utilities menu, select Restore From Time Machine Backup, then click Continue.
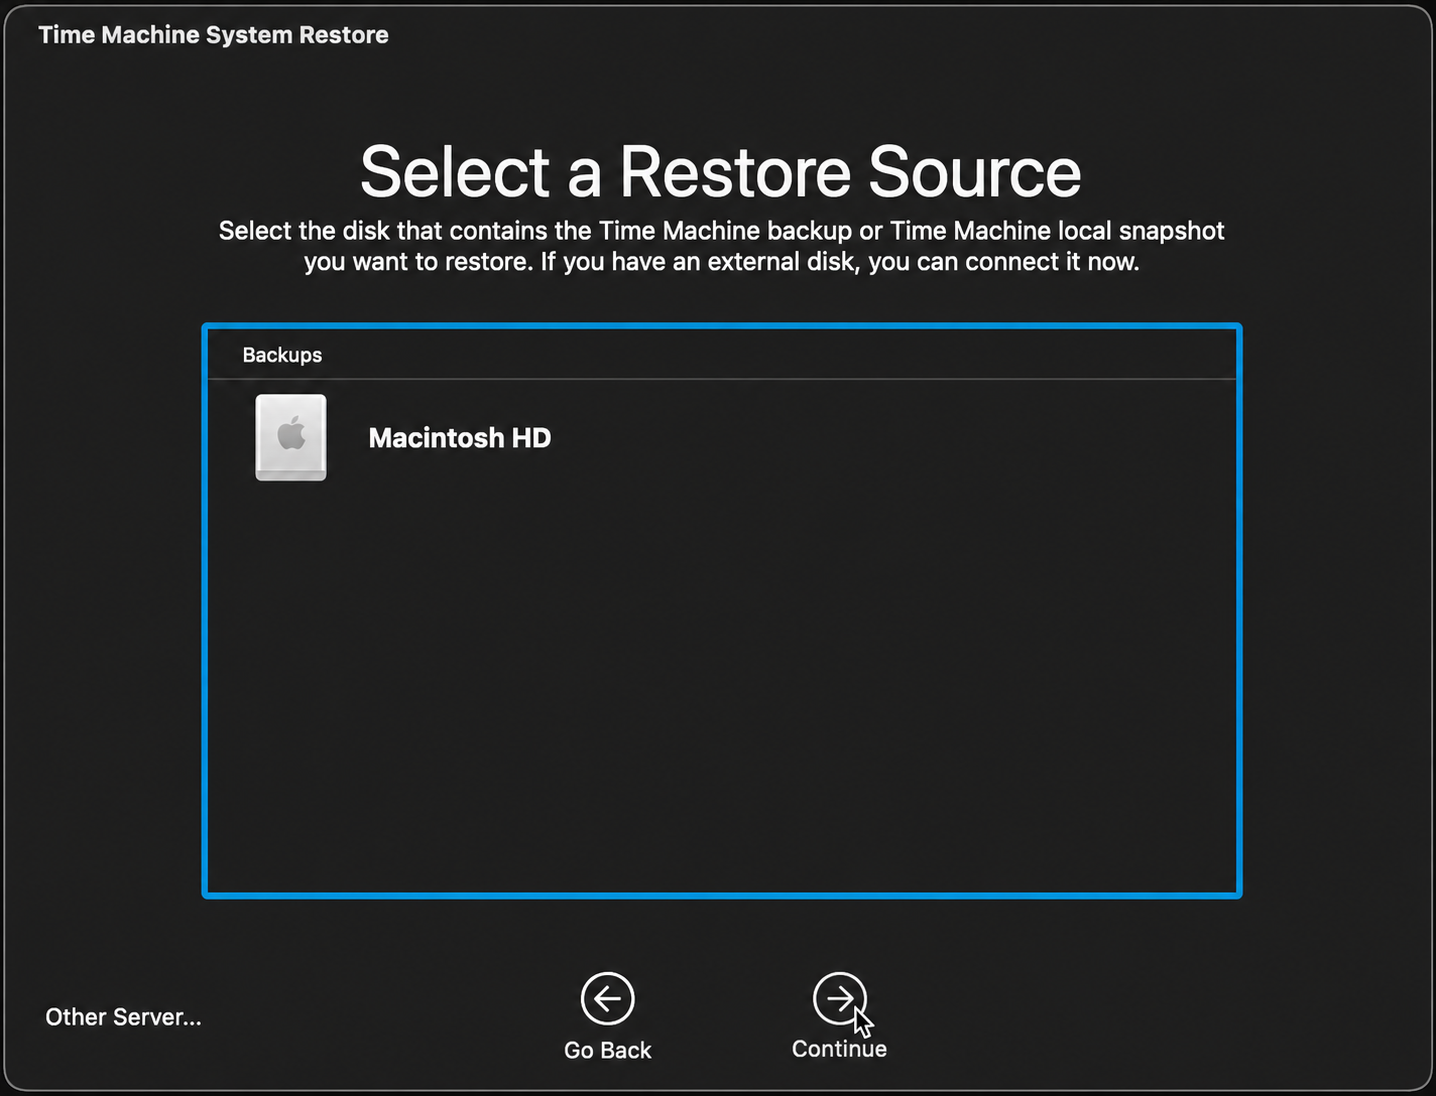
Pick your backup drive as the Restore Source and click Continue.
Select the most recent backup made before you upgraded to Ventura.
Confirm the destination disk and start the restore.
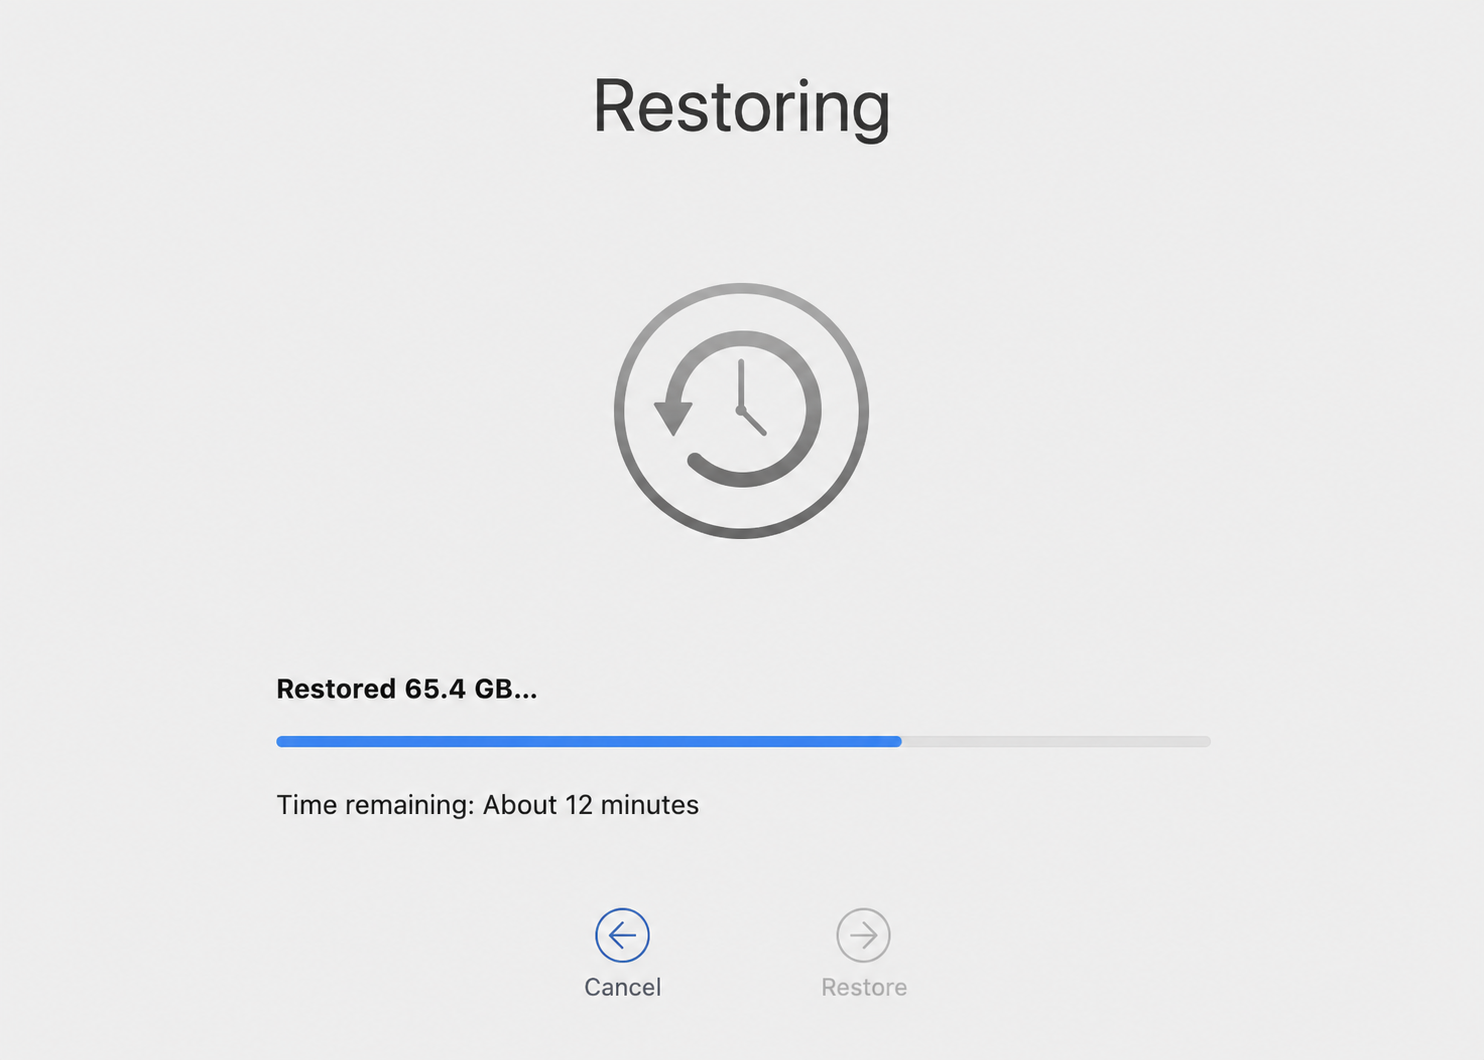
Wait for the process to finish—it can take an hour or more depending on the backup size. Your Mac will restart on the older macOS once it’s done.
Step 1. Enter Recovery ModeStep 2. Select Restore from Time MachineStep 3. Confirm Action by Continue optionStep 4. Pick your backup drive and follow the instructionsStep 5. Wait for the process to finish
2. Using macOS Recovery
If you don’t have a Time Machine backup but your Mac originally shipped with an older macOS, Recovery mode can reinstall that version directly from Apple’s servers. In our opinion, this is the cleanest method when no backup exists. Follow our steps below:
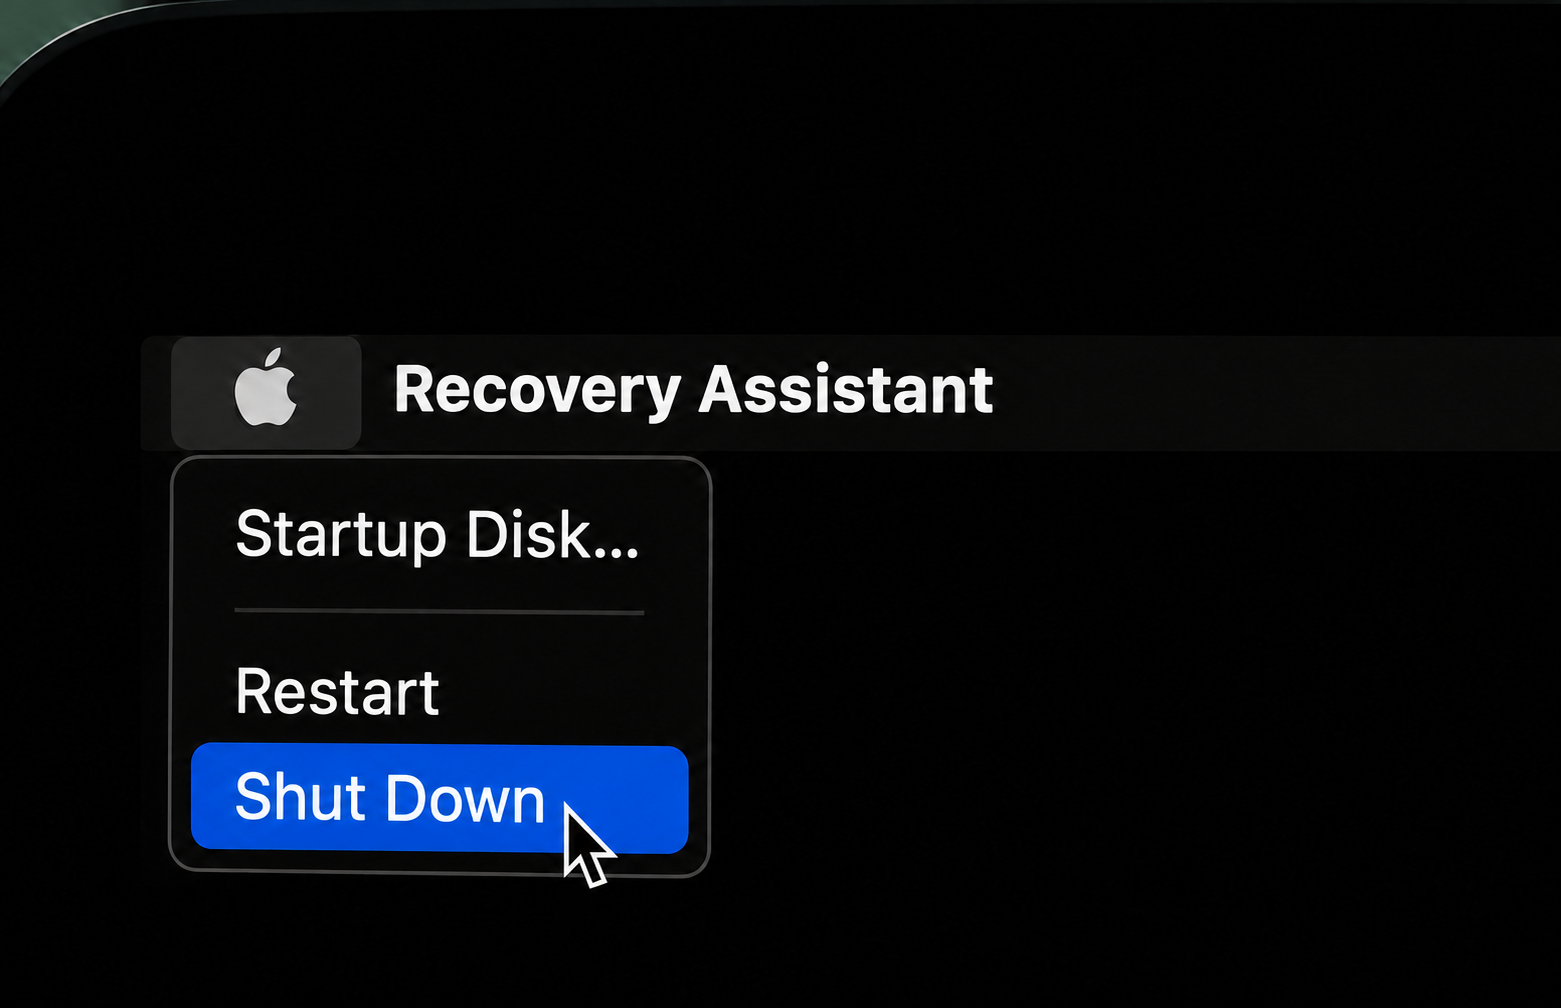
Shut down your Mac fully.
Enter Recovery Mode. Press the Power button, then immediately hold Shift + Option + Command+ R—this installs the macOS that originally came with your Mac.
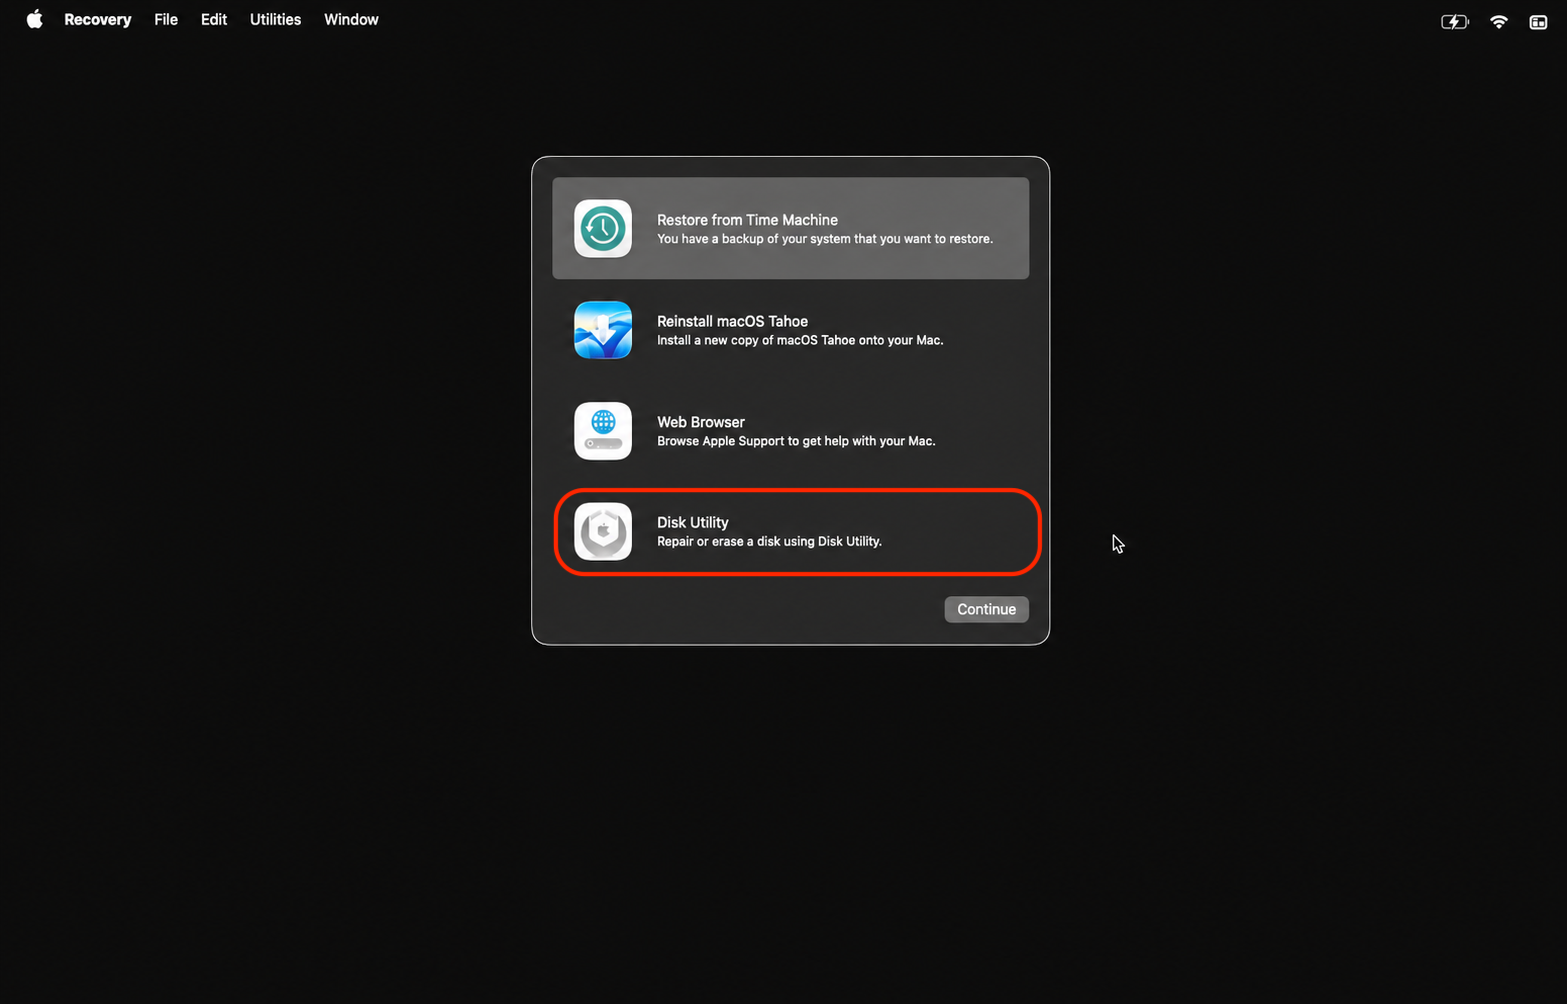
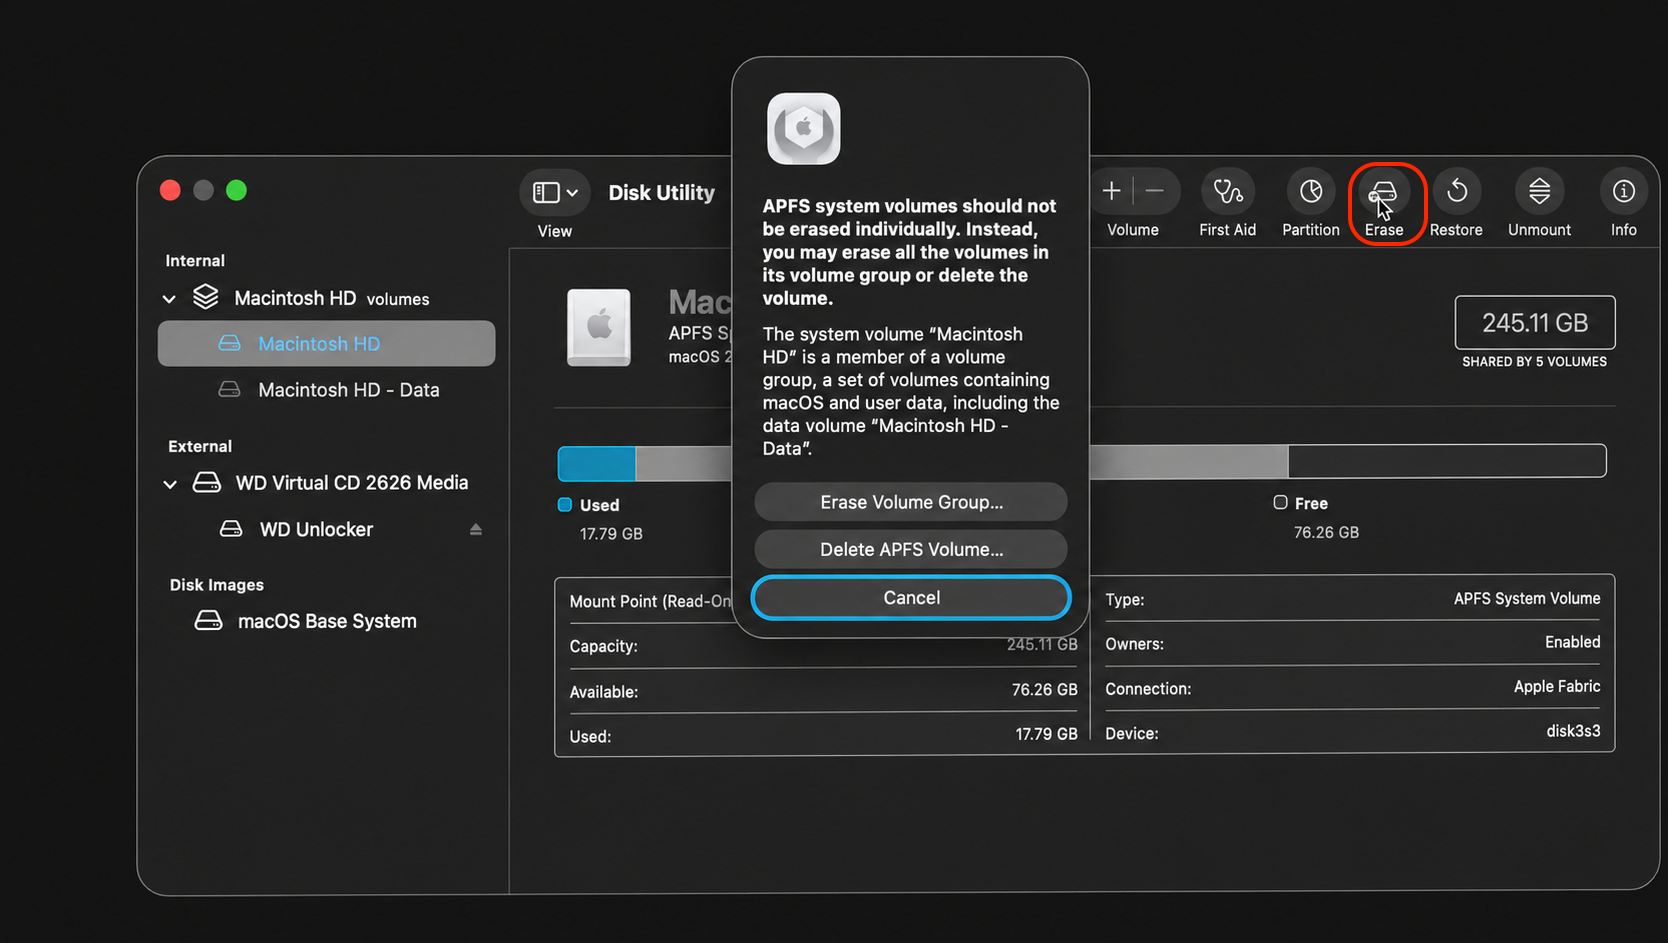
From the macOS Utilities window, select Disk Utility and click Continue.
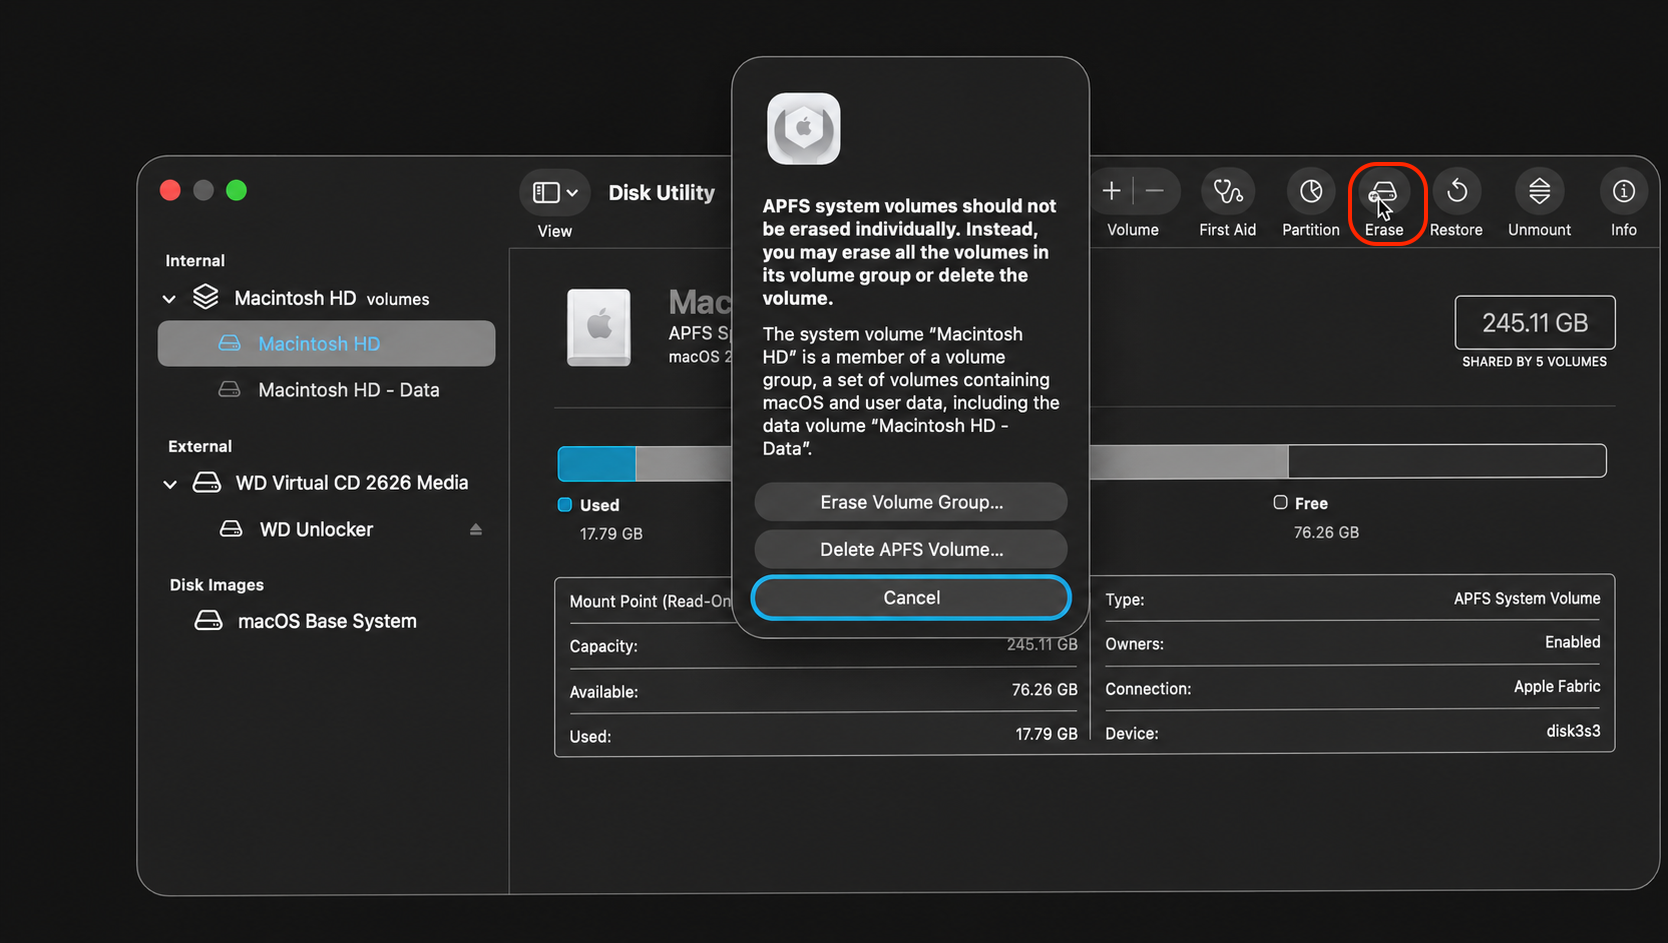
Choose your startup disk (usually named Macintosh HD), click Erase, set the format to APFS, and confirm.
Quit Disk Utility once erasing is complete.
Back in macOS Utilities, select Reinstall macOS and click Continue.
Follow the on-screen prompts. Your Mac will download and install the older macOS version automatically.
Step 1. Enter Recovery Mode by pressing Shift + Option + Command + RStep 2. Select Disc UtilityStep 3. Choose your startup disk and click EraseStep 4. Go back to macOS Utilities and select Reinstall macOS
3. Via bootable installer
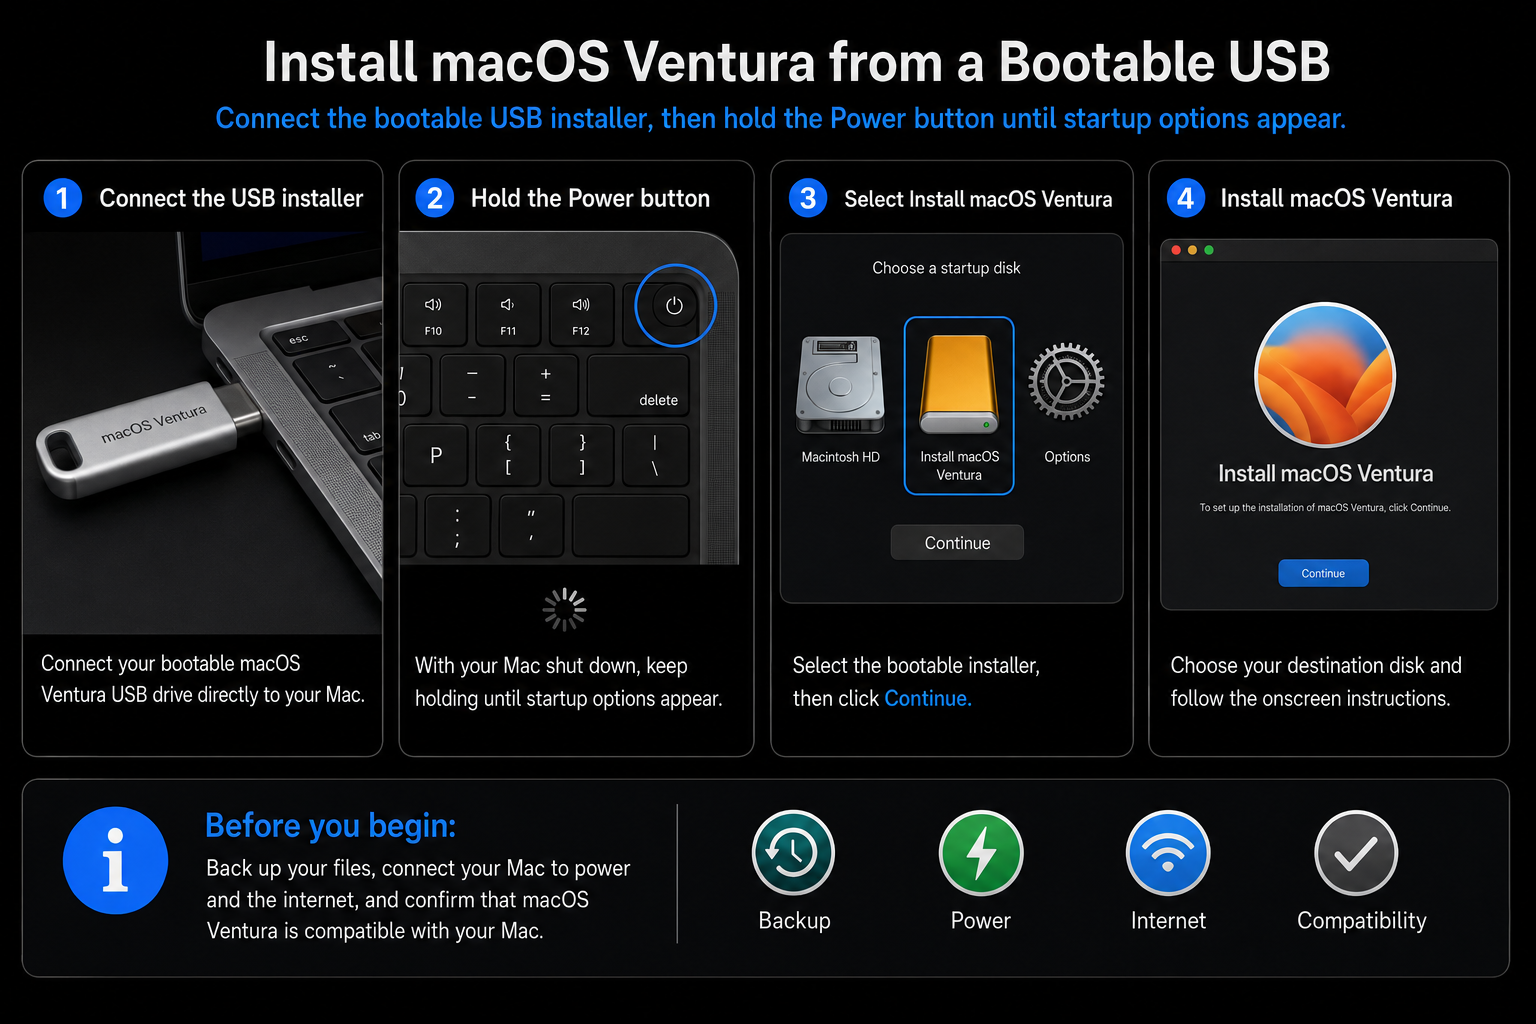
A bootable installer gives you the most control and is ideal if your Mac didn’t ship with the macOS version you want, or if Recovery Mode isn’t cooperating. You’ll need a USB drive with at least 16GB of free space and a copy of the older macOS installer downloaded from the App Store, which you’ll then use to create bootable installer for macOS on your USB stick. Try this:
Connect your bootable USB installer to your Mac.
Shut down your Mac.
Boot from the USB drive by holding the Power button (or the Option key for an Intel Mac) until startup options appear.
Select your USB installer from the list of bootable drives and click Continue.
Open Disk Utility from the macOS Utilities menu, then erase your startup disk using the APFS format.
Quit Disk Utility and select Install macOS to begin the installation.
Pick your erased startup disk as the destination and follow the on-screen steps.
After installation finishes, restore your files from your backup if you have one.
Step 1. Boot in Recovery ModeStep 2. Select Disk UtilityStep 3. Choose your startup disk (usually named Macintosh HD), click EraseStep 4. Exit from Disk Utility and Shut Down your MacStep 4. Enter Boot Mode and select Install macOS from your external drive
Conclusion
A MacBook downgrade from Ventura takes a little patience, but it’s straightforward once you’ve picked the right method for your setup. The support team gathered under MacKeeper’s Premium Services can guide you through backups, cleanup, and recovery so you don’t have to figure it out alone. Try our tech assistance today!
We respect your privacy and
use cookies
for the best site experience.
Privacy Preferences Center
We use cookies along with other tools to give you the best possible experience while using the
MacKeeper website. Cookies are small text files that help the website load faster. The cookies we
use don’t contain any type of personal data meaning they never store information such as your
location, email address, or IP address.
Help us improve how you interact with our website by accepting the use of cookies. You can change
your privacy settings whenever you like.
Manage consent
All cookies
These cookies are strictly necessary for enabling basic website functionality (including page
navigation, form submission, language detection, post commenting), downloading and purchasing
software. The website might malfunction without these cookies.