In this article you will find the following:
You might want to record sound on a Mac for many reasons: from documenting your thoughts to creating music to live streaming. Although the uses for a Mac as an audio recording device are as numerous as they are varied, the built-in tools at your disposal are scarce: Voice Memos and QuickTime Player.
Of course, you can record audio on a Mac using a third-party utility, but that’s the subject of another article. Here, we will focus on voice recording with your Mac’s native tools.
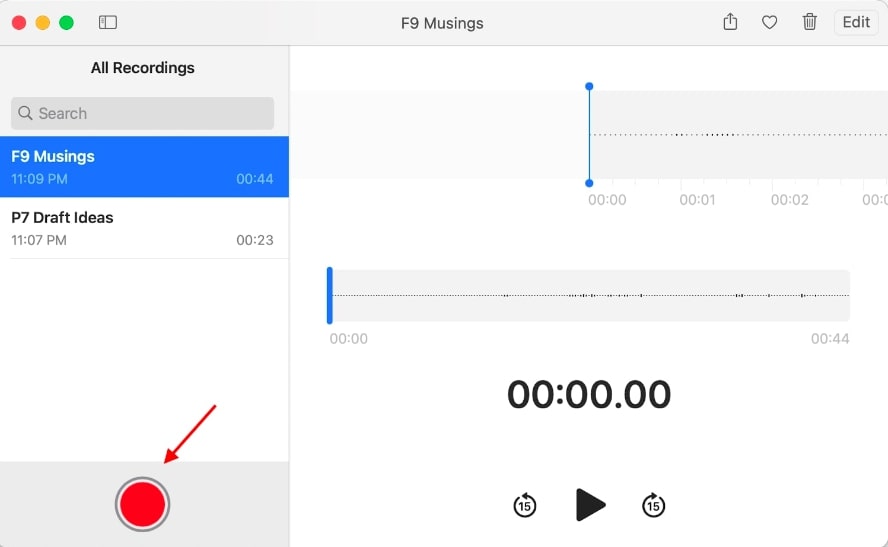
How to record audio on a Mac using Voice Memos
The Voice Memos app allows you to record voices on a Mac using the built-in mic, a headset, or an external microphone. The subsequent M4A file can then be synchronized across your Apple devices.
Here’s how to use Voice Memos:
- In the Applications folder, open Voice Memos
- When prompted, enable or disable iCloud syncing
- To start creating an audio file, click the Record button
- During the recording process, you have the options to pause or continue recording using the Pause button
- To complete the recording, click the Done button in the bottom-right corner

That’s it. You’ve just created a voice recording on a Mac. Click the Trash icon to delete the file or the Share icon to spread your message.
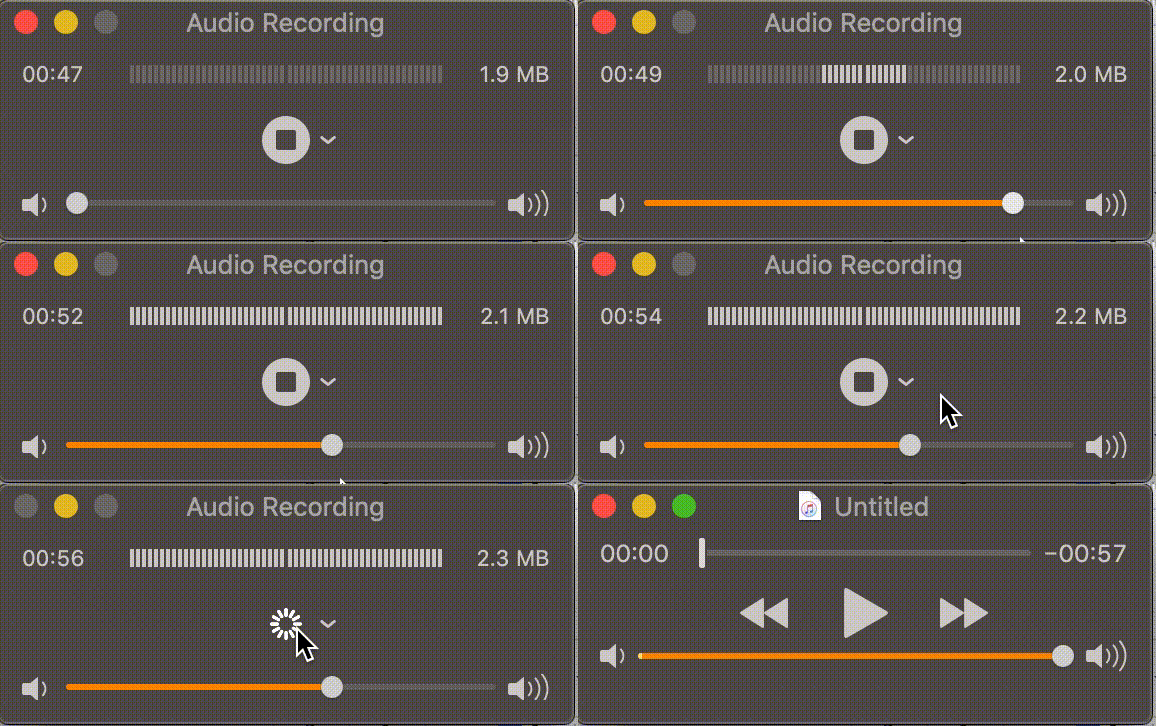
How to record audio on a Mac using QuickTime Player
Designed for playing and editing video, QuickTime Player also allows you to record audio. It can be done using the built-in mic or an external headset.
Follow these steps to record audio with QuickTime Player:
- In the Applications folder, open QuickTime Player
- In the File menu at the top of your screen, select New Audio Recording
- Select the arrow next to the Record button to configure the audio. Choose the microphone that will be used and the recording quality
- Click the Record/Stop button to start recording. If necessary, control the sound in the process using the volume sliders
- To stop recording, click the Record/Stop button again

Now you know how to record voices on a Mac.
Let’s see how to edit your audio:
- Click the Pause button to stop the recording
- In the Edit menu at the top of your screen, select an editing option. For example, Trim
- Drag the yellow sliders to select the part of the recording you want to leave
- Click Trim to cut the recording
- In the File section at the top of your screen, select Save to save your recording in M4A audio format

Summary
To record voices on a Mac, use its native apps: Voice Memos and QuickTime Player. Both apps work perfectly well with the Mac’s built-in microphone. The only thing that’s missing to start a recording is a smidgen of inspiration. Hopefully, our blog can help you with that.
Read more:


