In this article you will find the following:
Here’s how to restore emptied trash on Mac:
- Download, install, and open Disk Drill on your Mac.
- Choose the disk where the Trash is located and click Search for lost data.
- Select the files you want to recover, click the Recover button, and choose a location to store them (not the original location).
- Click Next.
You’ve subconsciously emptied the Trash folder after deleting a few items or cleaning your Mac. It’s something you do routinely. However, this time around, you’ve mistakenly deleted important files you need urgently. Is there a way to recover emptied Trash on Mac?
Before we start
Deleting items and emptying the Trash means you take care of your Mac. It’s a maintenance practice that keeps it working smoothly and frees up much-needed space. But while it’s commendable that you clean your device in the first place, there’s an even better way to go about it—MacKeeper’s Safe Cleanup.
It automates the cleaning process, keeping your Mac uncluttered when you’re too busy to do it. Plus, the tool gets rid of exe. files that people forget to delete after installing apps on Mac. This saves you a lot of space and brings order to the files remaining on your MacBook.
Use MacKeeper’s Safe Cleanup tool to keep trash and junk files at bay:
- Download MacKeeper and select Safe Cleanup in the sidebar.
- Click Start Scan and wait a few moments while the tool scans your device.
- Choose Clean Junk Files when the scan is completed, and voilà, your Mac is clean as a whistle!
If you mistakenly deleted important files, you’ll be glad to know that it’s not permanent. In this article, we’ll show you various ways to undo empty Trash on Mac.
Can you recover deleted trash on Mac?
Many people think emptying the Trash on a Mac is the end of the journey for their files on that device. However, that’s not the case. Fortunately, it’s possible to recover deleted files on Mac with and without software. That includes the instances when you’ve cleared your Mac’s trash.
How to recover deleted files on Mac without software
It’s possible to recover deleted files without special software. Here’s how:
- Undo deleted files by recovering them from emptied Trash using iCloud.
- Check for items you may have accidentally deleted in Mac’s Time Machine backup and recover them from there.
- Look for items you deleted less than 30 days ago in Mac’s Trash folder and restore them to their destination.
There are several methods to restore deleted items even after you’ve emptied the Trash folder. Follow the steps below to get started:
1. Undo files with iCloud
Here’s how to recover files using iCloud:
- In your iCloud, click on the Account icon > iCloud Settings > Data Recovery > Restore Files.
- Select the files or click Select All > Restore Files.
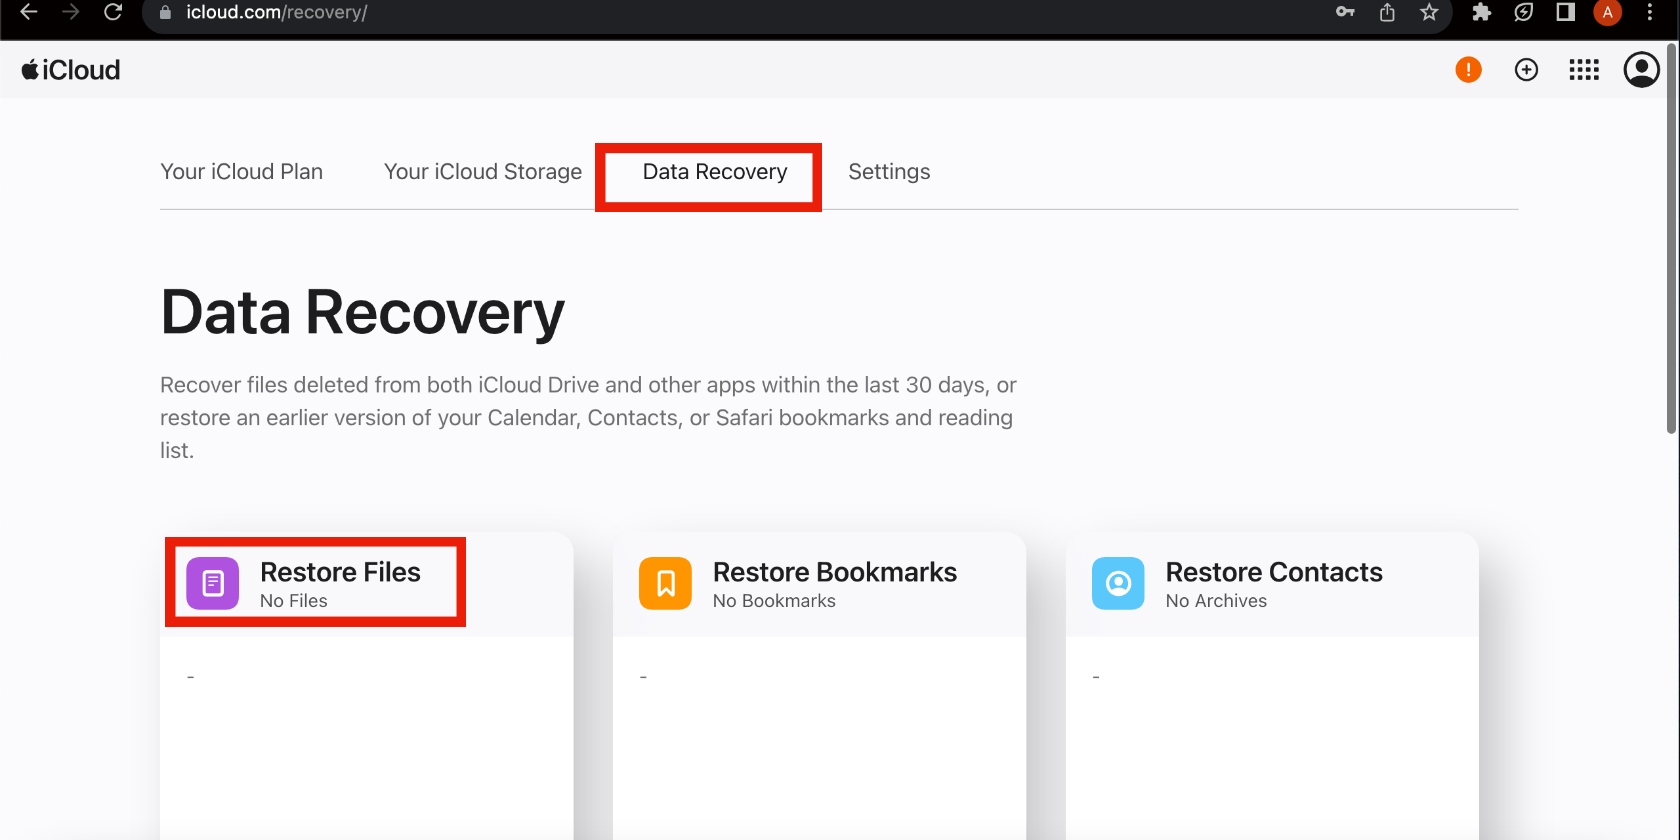
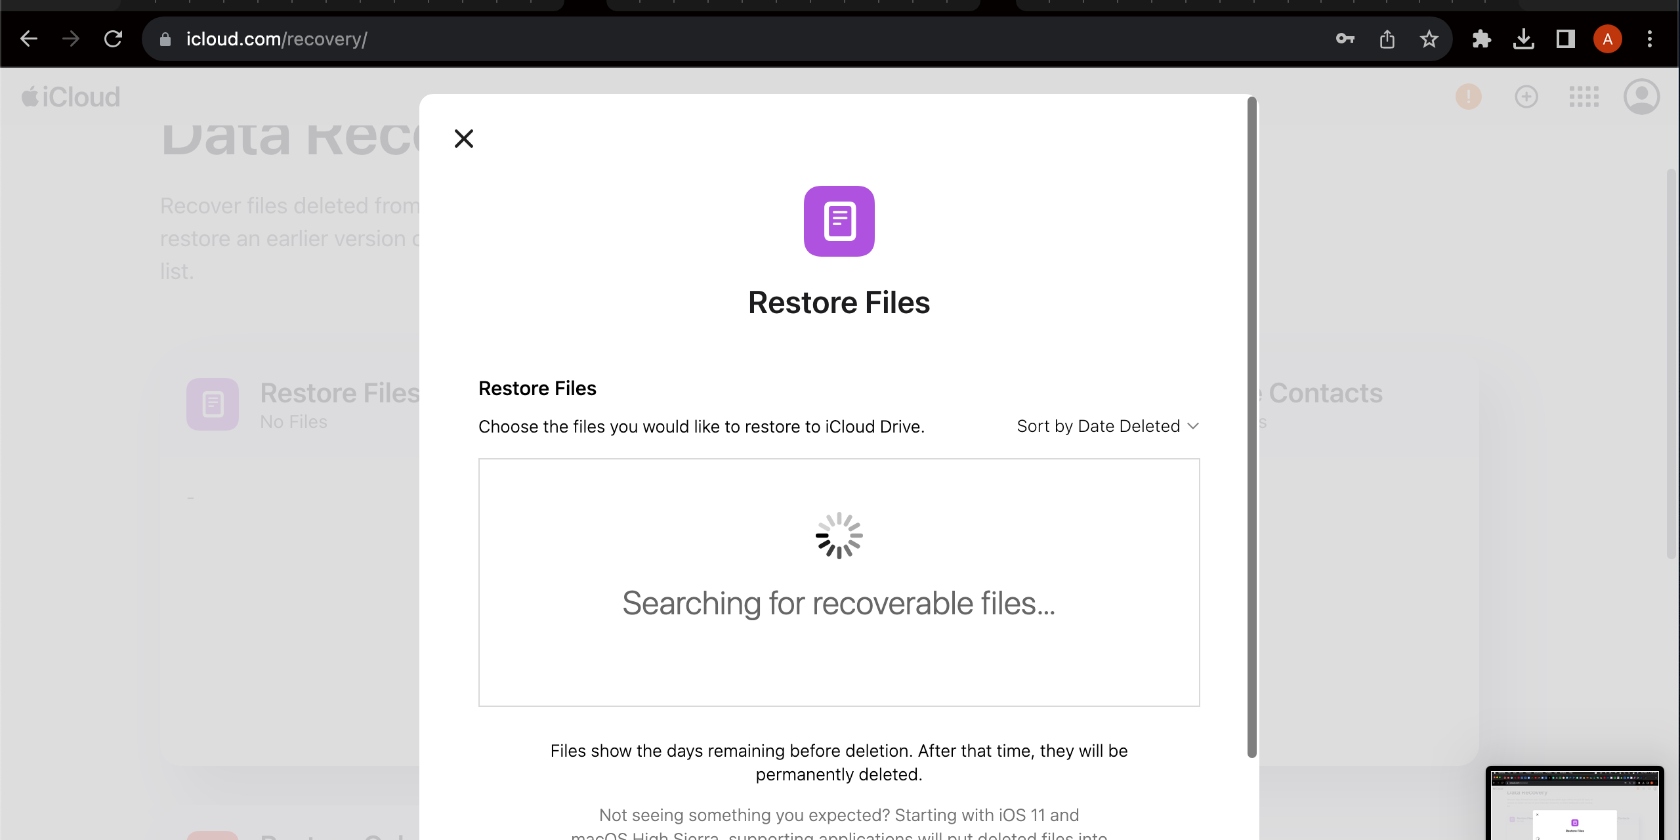
As you can see, iCloud is Apple’s virtual storage and backup solution for all your files, including photos, notes, and so much more. Many Apple users use iCloud because it’s free, easy to use, and easily accessible. One of the key benefits of using iCloud is the ability to store files from across your Apple devices, including your iPhone, iPad, and Mac.
2. Time Machine backup
Here’s how to use Time Machine backups to recover lost files:
- Connect the media you use to back up your Mac.
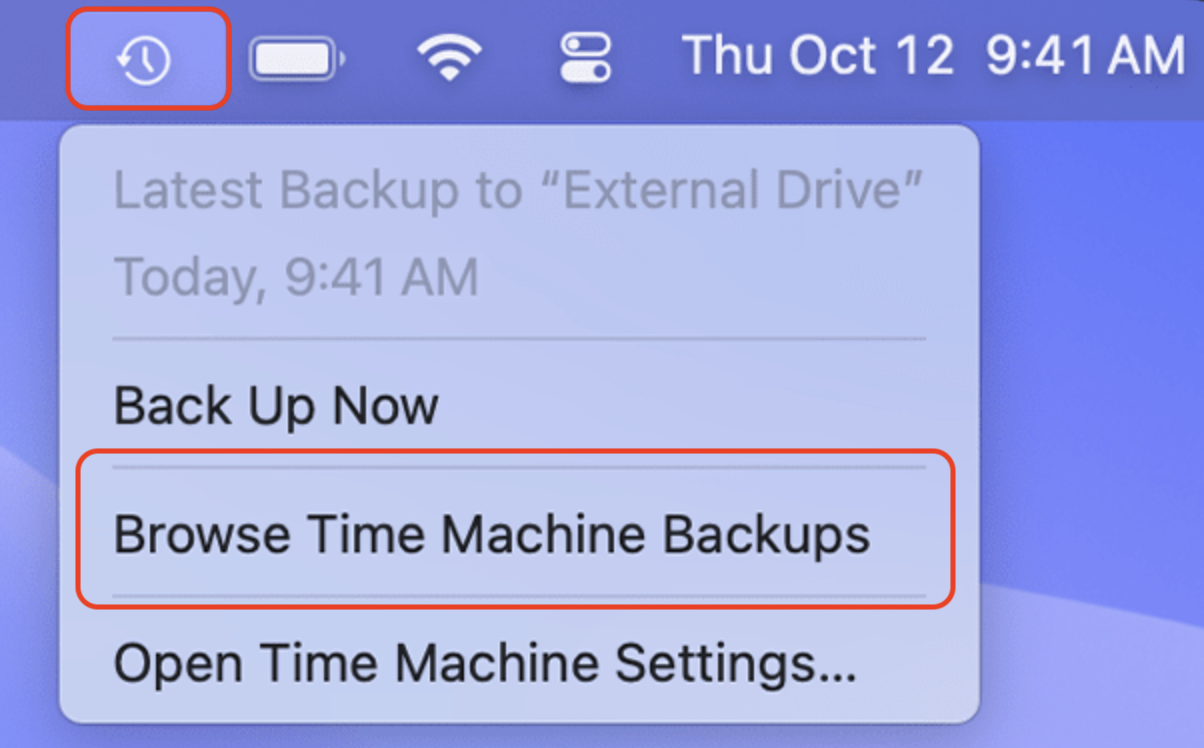
- Open Time Machine on your Mac by clicking the clock icon in the menu bar and Browse Time Machine Backups.
- Select the files in their original destination and click Restore.
Heads up from our experts:
The Browse Time Machine Backups option might not appear in the menu bar if you’ve never used Time Machine to back up your files. You must have used the tool to save files in the past to restore files from the emptied Trash (Recycle Bin on Windows).
Another nuance is where to back up your files. Time Machine works with network-attached devices and local storage devices, giving you more options. However, it’s often used with external disk drives connected using items like a Thunderbolt cable or USB. Consider taking advantage of Time Machine backups for times like these when you need to recover files you’ve removed from the Trash.
3. Recover trash on Mac manually
Manually recovering deleted items on a Mac works this way:
- Open the Trash app by clicking on the corresponding icon (trash can) in the Dock.
- Find the item or items you want to recover, right-click on them, and select Put Back. Note that the items may only appear here if it’s been less than 30 days since they were deleted.
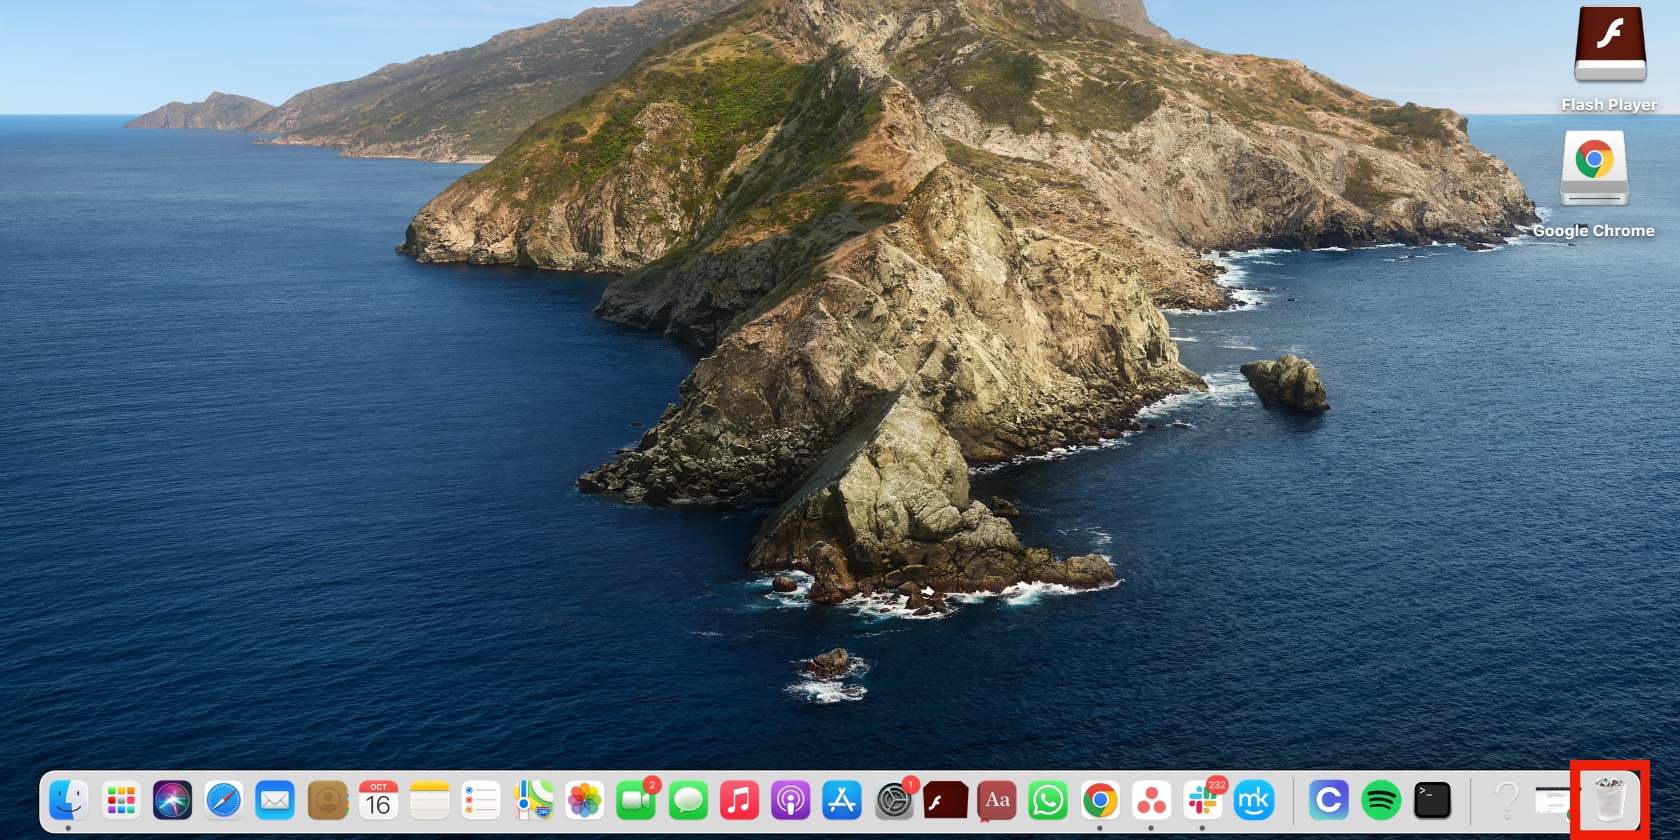
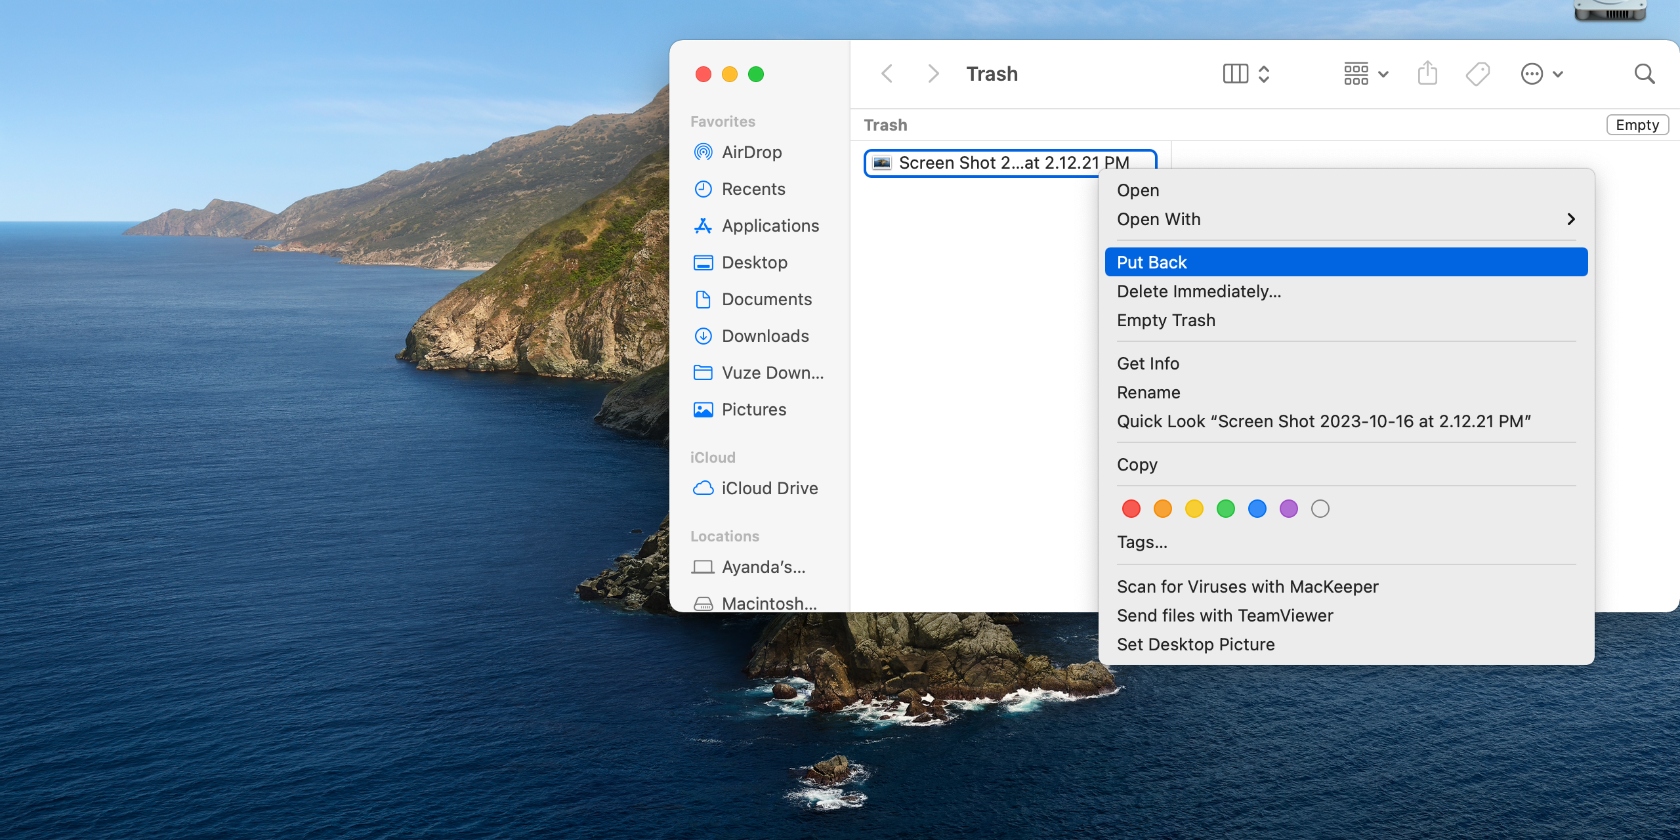
Recovering deleted items manually is a straightforward process because it’s a temporary measure for getting rid of files. If you didn’t select the Delete Immediately option in Finder or clear the Trash straight after cleaning up your Macintosh device, you can easily recover lost files.
And if you haven’t set your Mac to automatically clear the Trash folder after a month, you don’t have to worry about your files disappearing from it. This can help you reduce the chances of accidentally deleting files you need, unless you manually clear deleted files.
How to restore deleted files on Mac using software (Disk Drill)
Here’s how to use Disk Drill to recover files from emptied trash:
- Launch Disk Drill on your Mac, select the disk containing the item, and click Search for lost data.
- Select the file you want to restore, click the Recover button, choose a new location for it, and click Next.
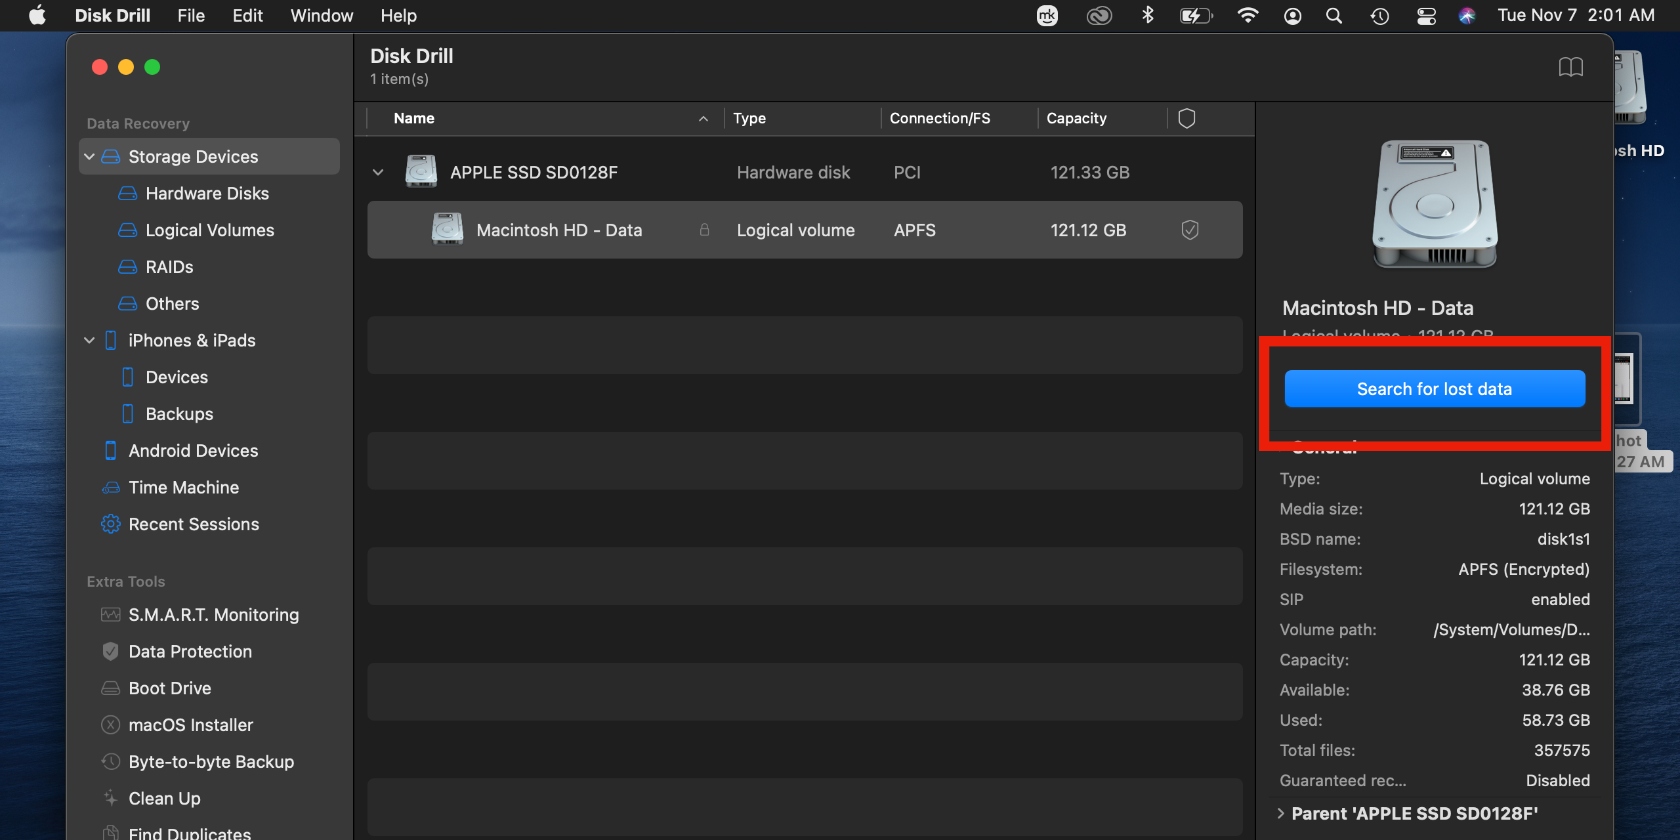
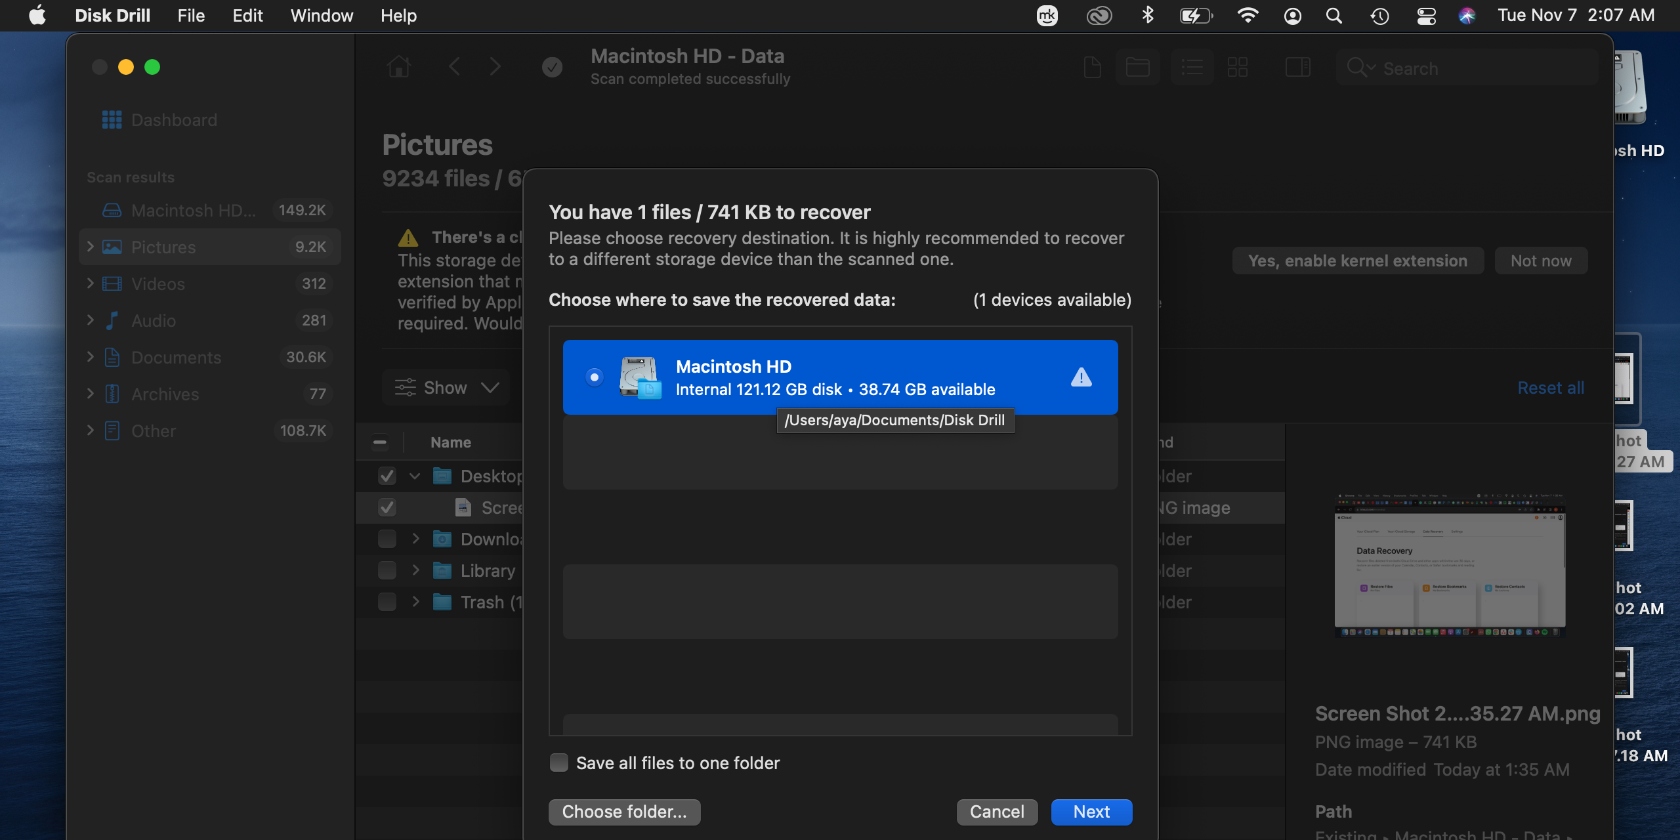
While deleted files may not be visible on the operating system (OS), they still exist on your Mac’s hard disk as long as they haven’t been overwritten. This makes them available for recovery using data recovery software. Disk Drill is one such program. It helps you restore lost files, including those that have been cleared from your Mac’s Trash. It’s an excellent tool when you’ve exhausted your options and are still stuck, needing to restore important items.
With Disk Drill, you can recover various files, including the following:
- Photos
- Documents
- Files lost through formatting files
- Files from media hardware, including USB flash disks and memory cards
Disk Drill offers a free option (Basic), and there are two paid plans: one for individuals and one for businesses. The free plan allows you to recover up to 500 MB of data.
Connect with data recovery experts
If nothing you’ve tried so far has worked, it may be worth roping in expert help. Data recovery software helps people like you recover data lost by emptying the trash, even when you think all hope is lost.
Below is a list of some of the best data recovery software on the market and their features.
| Name | Price for full version | macOS compatibility | Pros | Cons |
| Disk Drill | $89 | OS X 10.13 or later (macOS Ventura ready) | One-click scanning, free additional disk tools, user-friendly | Limited features available on the free version |
| R-Studio for Mac | $79.99 | OS X 10.9 or later | Works well for severely damaged file systems | Doesn’t support Android and iPhone data recovery |
| Data Rescue 6 | $79 | OS X 10.12 or later (only Intel devices) | Compatible with Time Machine, user-friendly | Limited functionality on the free version |
| DM Disk Editor and Recovery Software | $48 | OS X 10.5 or later | Supports multiple file formats, offers various free features | Not very user-friendly, prone to freezing |
| Cisdem Data Recovery for Mac | $69.95 | OS X 10.11 or later | Easy to use | May struggle with disks that contain bad sectors |
How to prevent accidentally emptying the trash on a Mac
Mac automatically empties the Trash after 30 days, so there’s no need to do it each time you delete files. Instead, learn how to delete files on Mac and leave them in the Trash.
That way, it’ll be easier to recover them within that period if they were deleted by accident. Additionally, avoid temporarily storing files in the trash to free up storage on your MacBook Pro or MacBook Air device. This will reduce the chances of permanently deleting important files by accidentally emptying the Trash.
From an emptied Trash to file recovery
As a Mac user, maintaining your device by deleting items comes with the territory. Usually, that means clearing out the Trash, too, especially if you need to free up more space and optimize your Mac. However, sometimes this results in accidentally deleting important files. Follow the tips in our article to recover files that were lost by emptying the Trash folder.
If you typically delete items and empty Trash on Mac as a means to free up memory, MacKeeper’s Safe Cleanup can help with the safe and automatic deleting of unwanted items, including junk files. In addition to freeing up space, it optimizes your device so that you enjoy it the way you were intended to.


