In this article you will find the following:
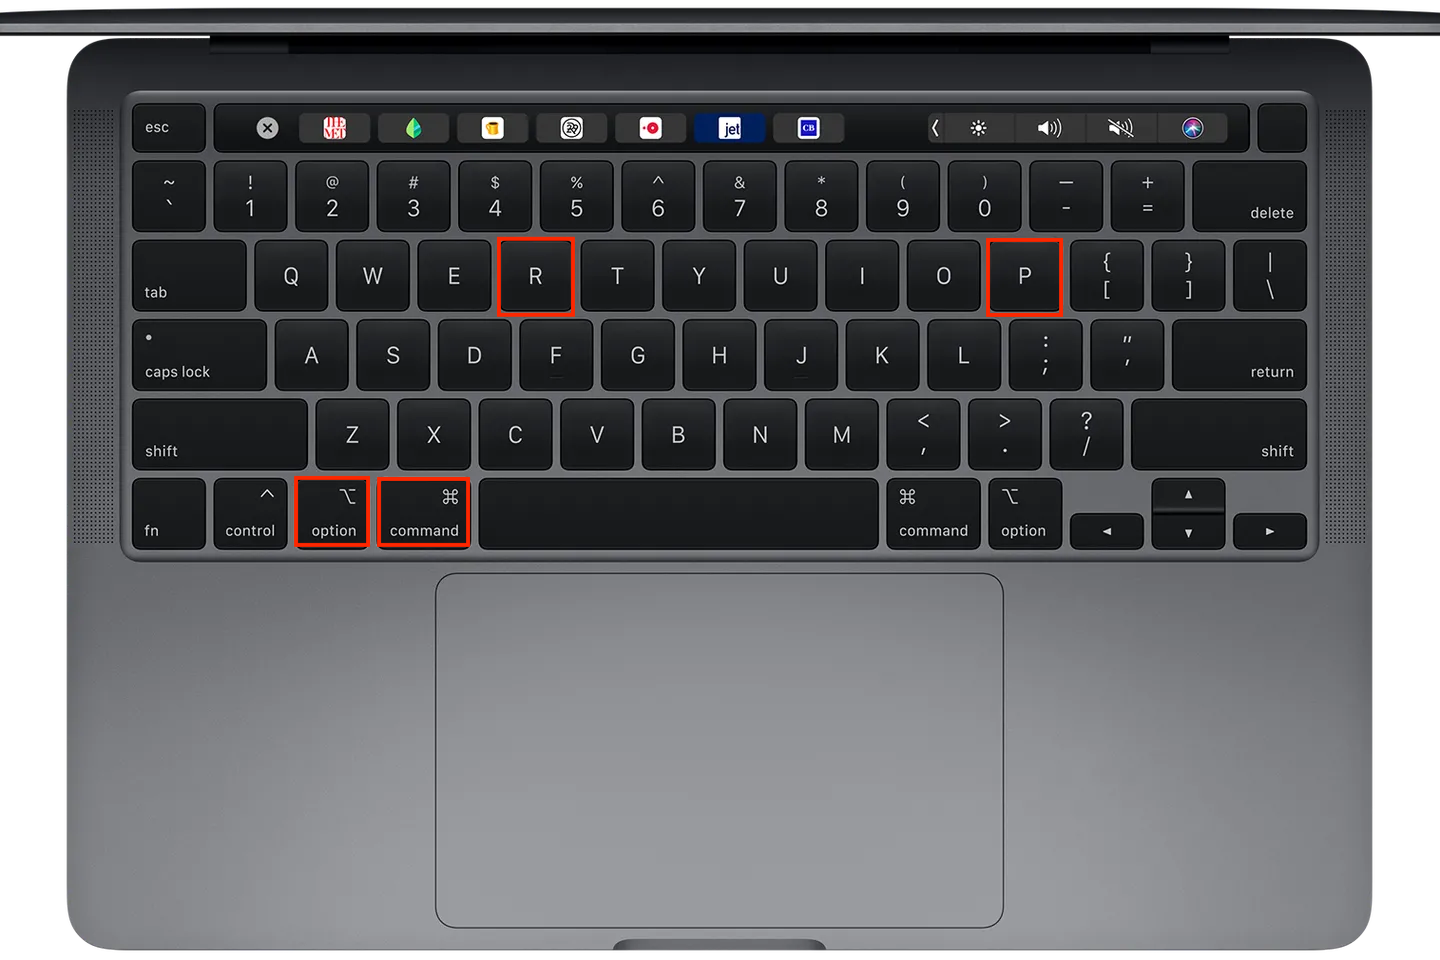
If your Mac’s screenshot feature isn’t working, reset the NVRAM. To do this, shut down your Mac, then restart it by simultaneously holding the Command + Option + P + R keys until you hear the startup sound again.
A screenshot is worth a thousand words, so it's understandable to feel panicked when this feature on your Mac isn’t working. Taking screenshots on a Mac is incredibly handy, especially when you want to take a snap of important information on your screen. While taking a screenshot on Mac is relatively easy, even sturdy Apple products can face system errors and bugs.
So at one point or another, you, as an Apple user, may find yourself puzzled by the question— why is a screenshot on Mac not working? When this happens, the list of our fixes below should help you sort things out.
Before we start
Finding the root cause of your Mac’s screenshot problems can be frustrating, especially if you’re not overly confident using iOS. To save yourself time, effort, and peace of mind, leave the troubleshooting to MacKeeper and its handy dandy Find & Fix tool. This nifty feature can quickly identify and resolve your Mac’s problems, all at once!
To make the most of MacKeeper's Find & Fix tool, follow these steps:
- Download MacKeeper and install the app on your Mac.
- Launch the application and select Find & Fix.
- Click Start Scan.
- Once your scan is done, go over the results and click Fix to resolve any issues.
With a few simple clicks, MacKeeper removes pesky bugs, clears out clutter eating up your storage space, and even optimizes your RAM, so your device is running in tip-top condition. So why wait? Give your Mac the TLC it deserves with MacKeeper.
Why won't your Mac take a screenshot
Your Mac not taking screenshots can be caused by many reasons: bugs, software glitches, insufficient storage, or your Mac keyboard not working. These are just some of the things that could contribute to this problem.
While it may be hard to pinpoint why it happened, fortunately, fixing it is easy—continue reading our guide.
How to take a screenshot on Mac
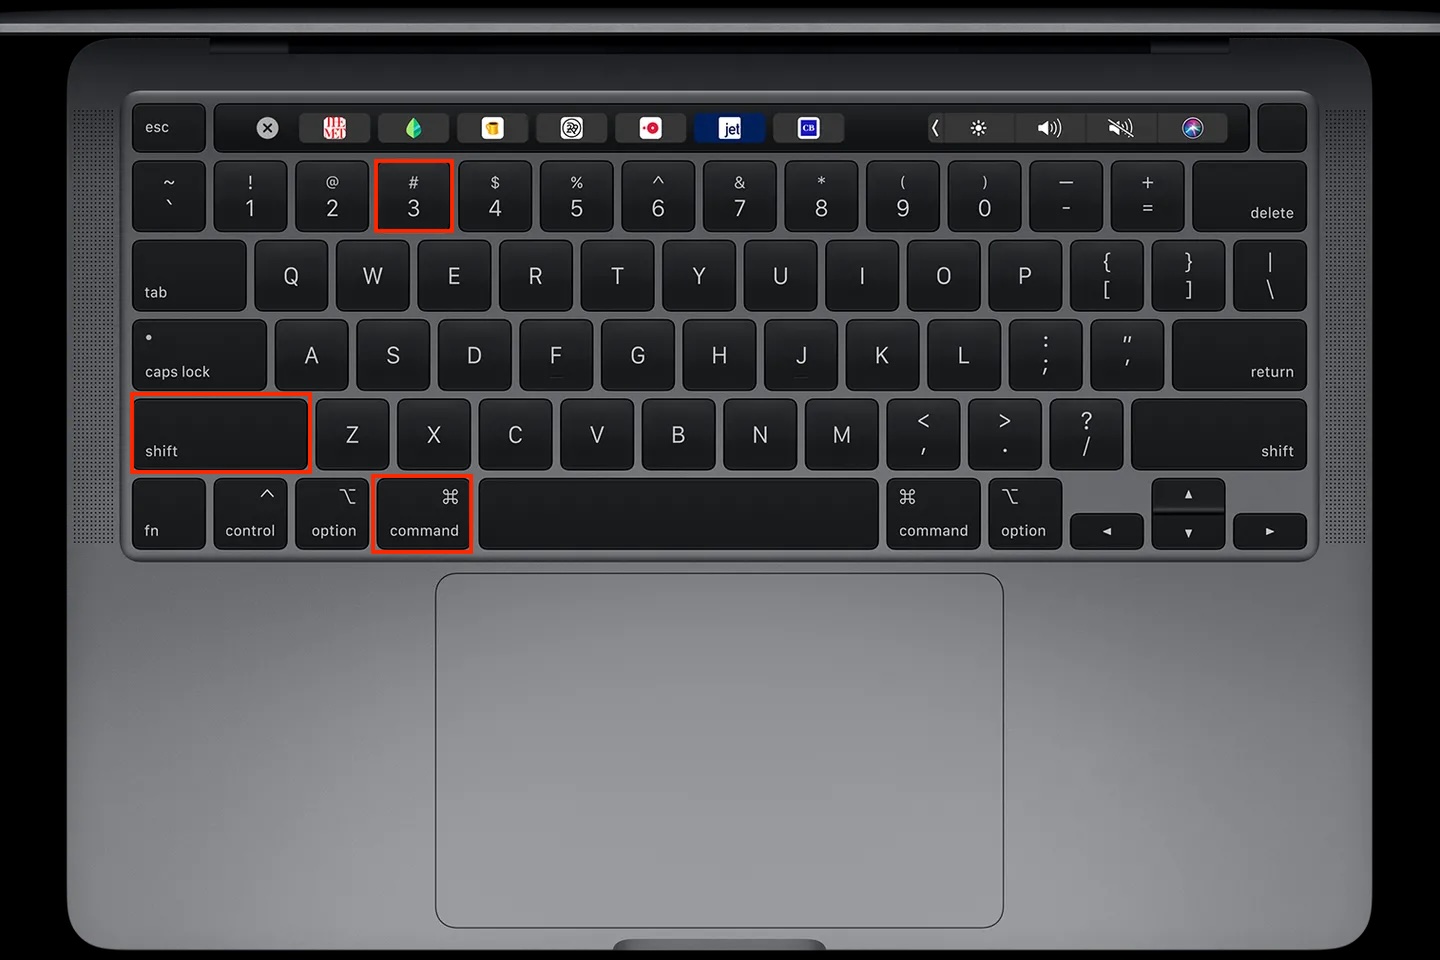
If you want to turn on the screenshot on Mac, do the following:
- Simply hold down the Shift, Command, and 3 keys at the same time.
- Find your screenshot on the Desktop.
Tip from our experts:
In addition, there are two other methods on how to screenshot on Mac:
- Press Command + Shift 4 to take a screenshot of a section of your screen.
- Hover over the area and use the keyboard shortcut Command + Shift + 4 + Spacebar for a specific window or menu to be shown on your screenshot.
Now that you’ve had a refresher on how to screenshot on Mac, let’s look into troubleshooting potential issues causing the screenshot feature to malfunction on your device.
How to fix screenshot not working on Mac
If you’re having trouble with your Mac screenshots, these quick and effective methods should help resolve your problem and get your screen-capturing functionality back on track:
- Restarting and updating your Mac
- Check your keyboard settings
- Resetting your NVRAM
- Check your system for updates
- Scan for malware and viruses
- Check the saving location of screenshots
- Move the preference file
- Check your Dropbox settings
- Use Grab to screenshot on Mac
- Use preview to screenshot on Mac
- Check your storage space
- Load into safe mode
1. Restart and update your Mac
If your Mac’s screenshot problems are caused by a system error, the quickest and easiest solution to fix screenshot on Mac is simply restarting and updating your device.
Here’s how to restart your Mac:
- Click the Apple icon found in the top left corner of your screen.
- When the drop-down menu opens, click Restart.
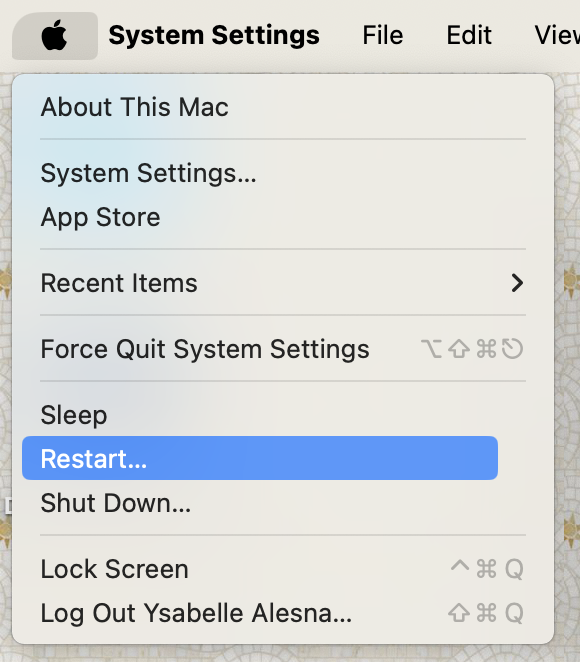
After your device restarts, try the keyboard shortcut Command + Shift + 3 to see if the screenshot function is working.
Hint from our team:
If your Mac is frozen, and you can’t restart your device by choosing Apple menu > Restart, you can try the force restart method.
To force restart your Mac:
- Press and hold down your device's power button until it switches off completely.
- Wait for a few seconds before pressing the same button again to turn your Mac back on.
Now that your Mac has restarted, it’s worth double-checking that its system is up-to-date. Sometimes, an updated system can cause benign system errors like screenshotting issues.
To check for software updates on Mac, simply:
- Click the Apple icon in the left corner of your screen.
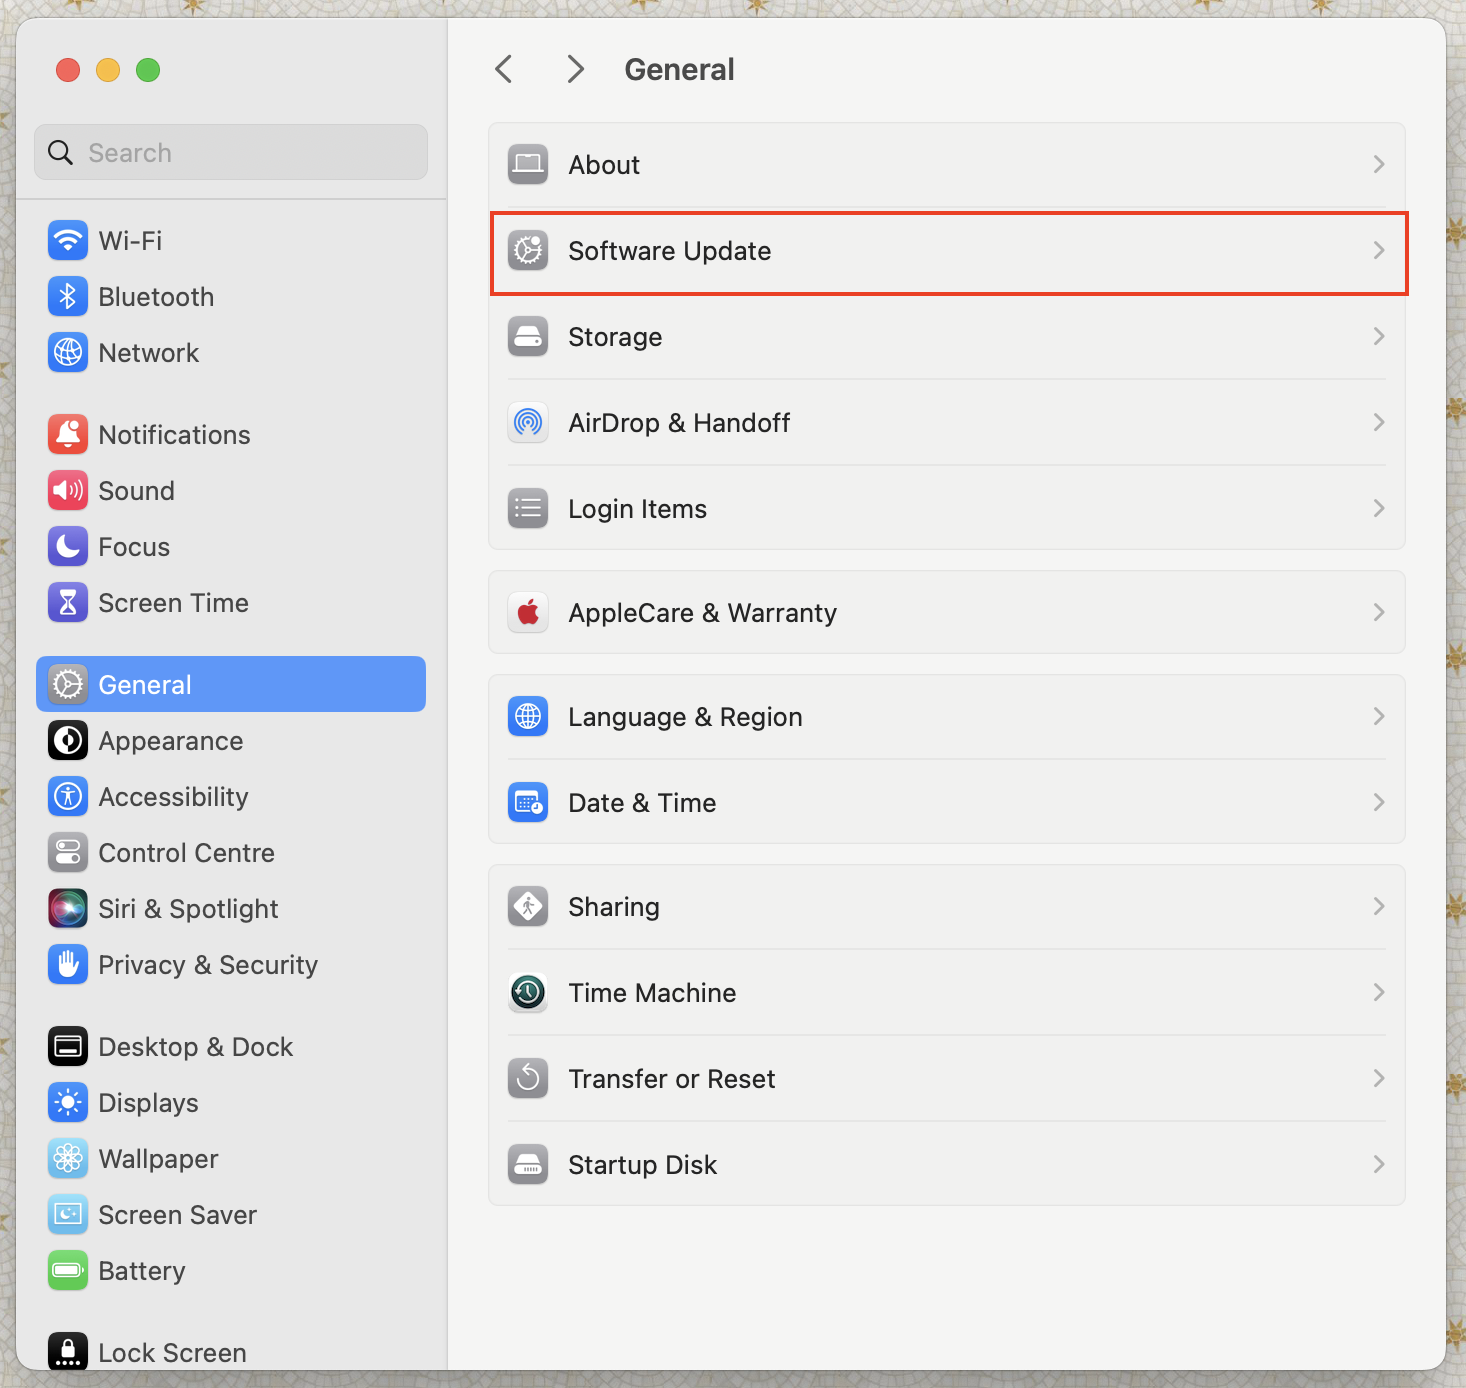
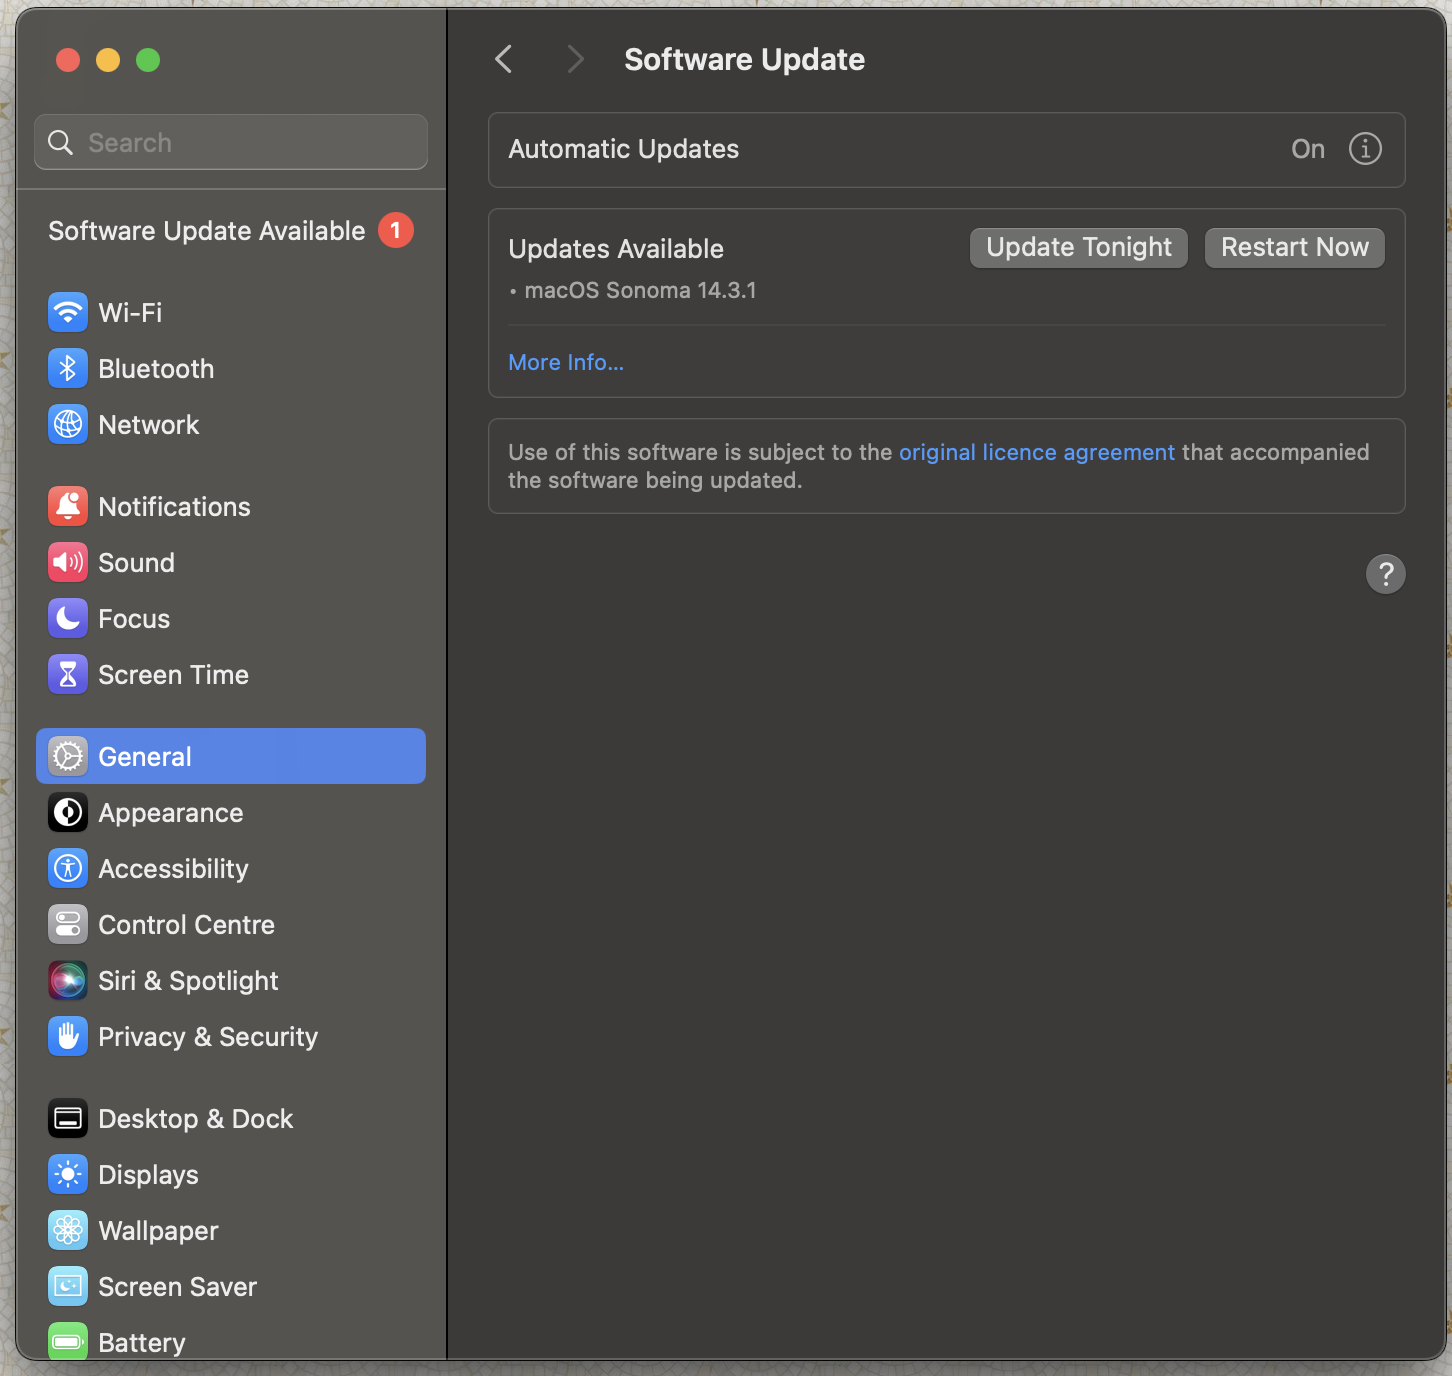
- Choose System Settings, then click General in the sidebar window.
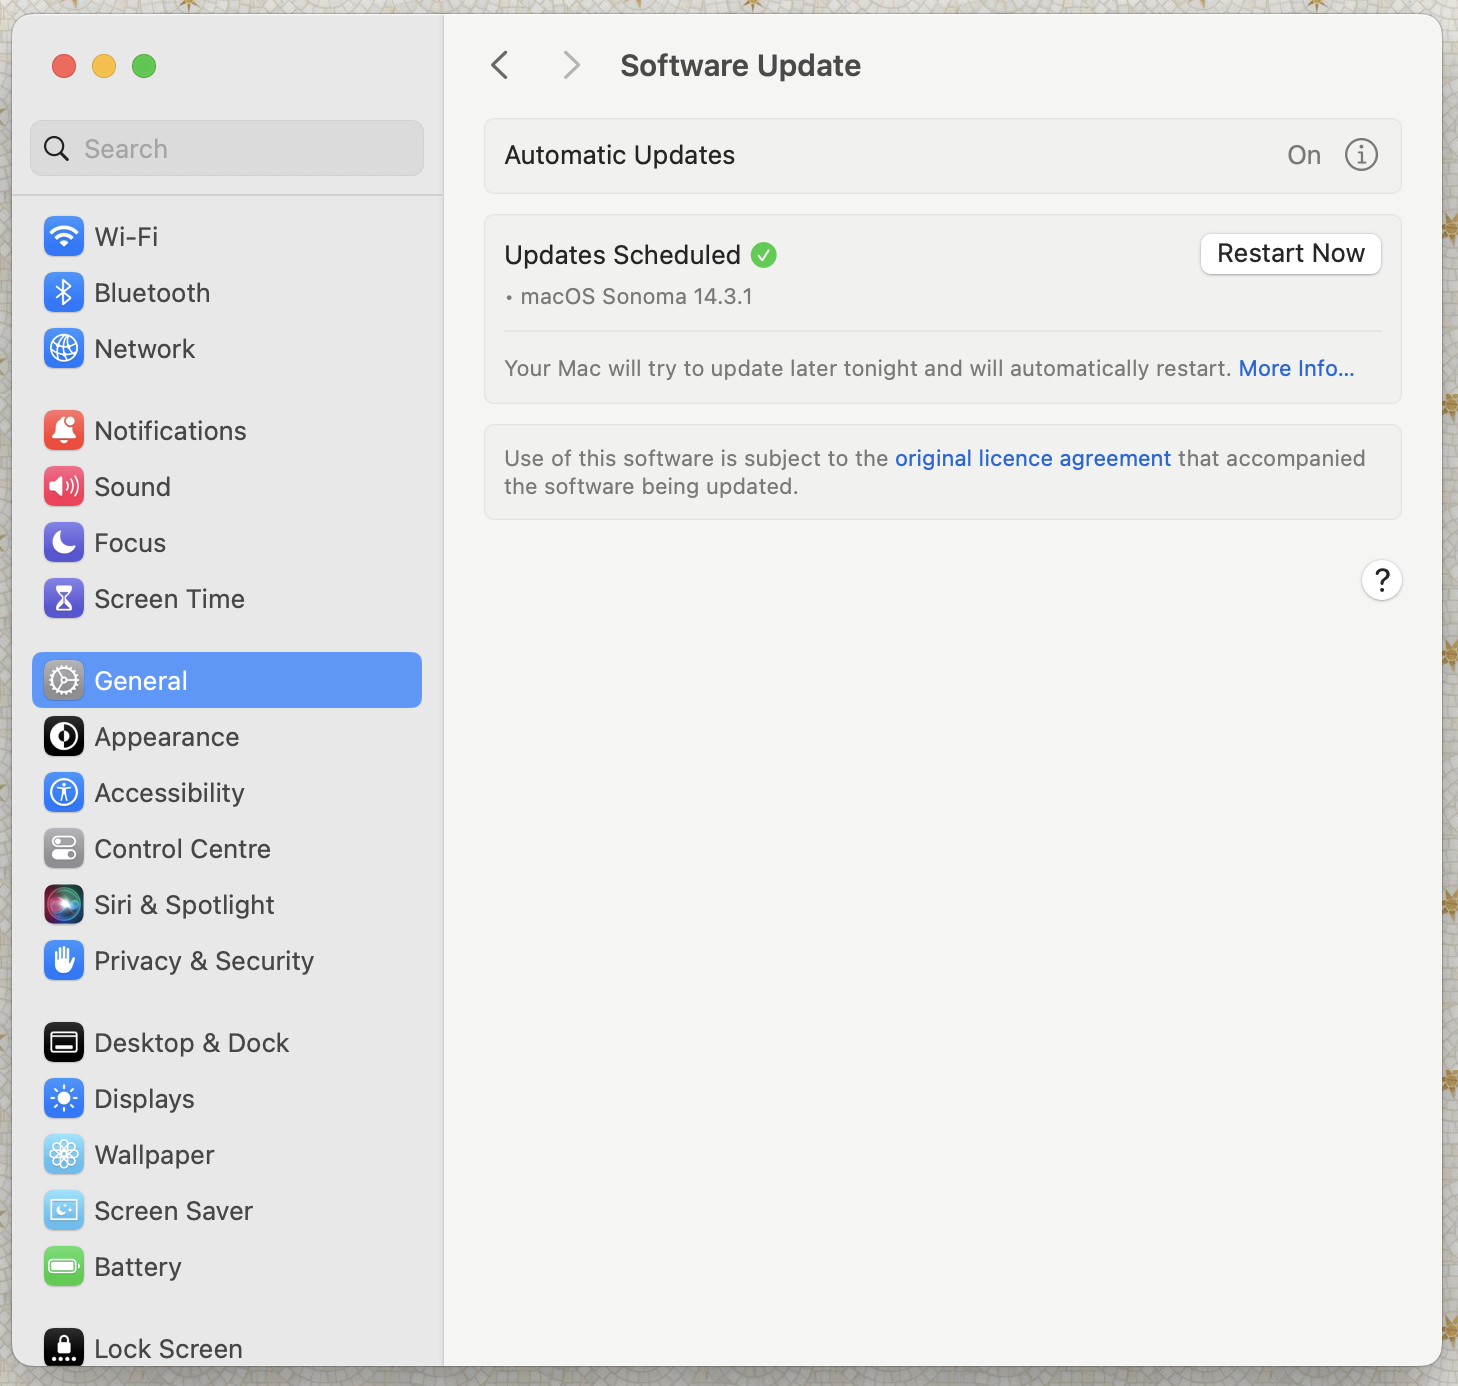
- Click Software Update. This should prompt your Mac to check for any updates.
- If there’s an update available, click Update Now to download and install the latest software. Once the download is complete, your Mac will automatically restart.
2. Check keyboard settings
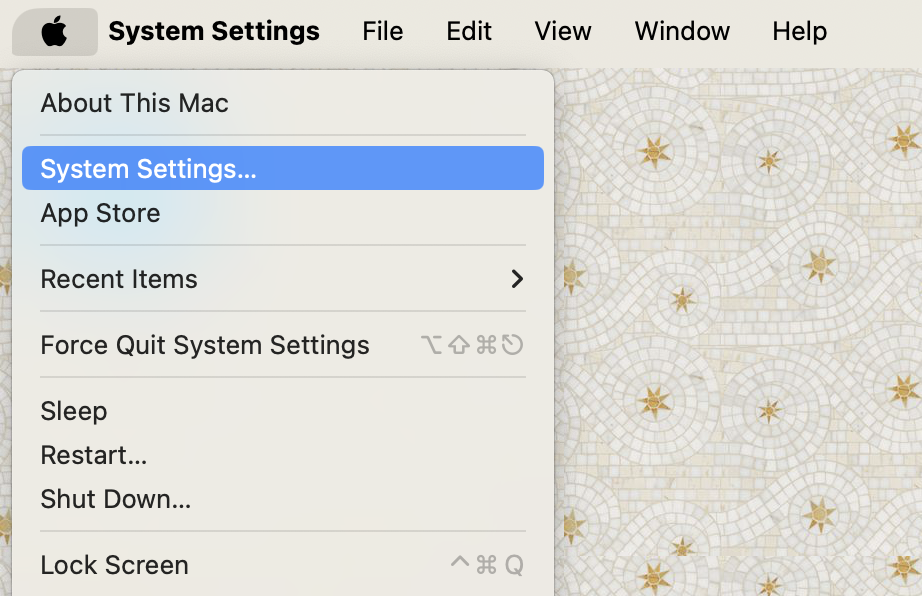
Checking your Mac’s keyboard settings is another solution for fixing screenshot problems on Macs. If your usual keyboard shortcuts aren’t working, they’ve likely been altered. Luckily, it’s super easy to check; here’s how:
- Click the main Apple menu found on the left corner of your screen, then select System Settings.
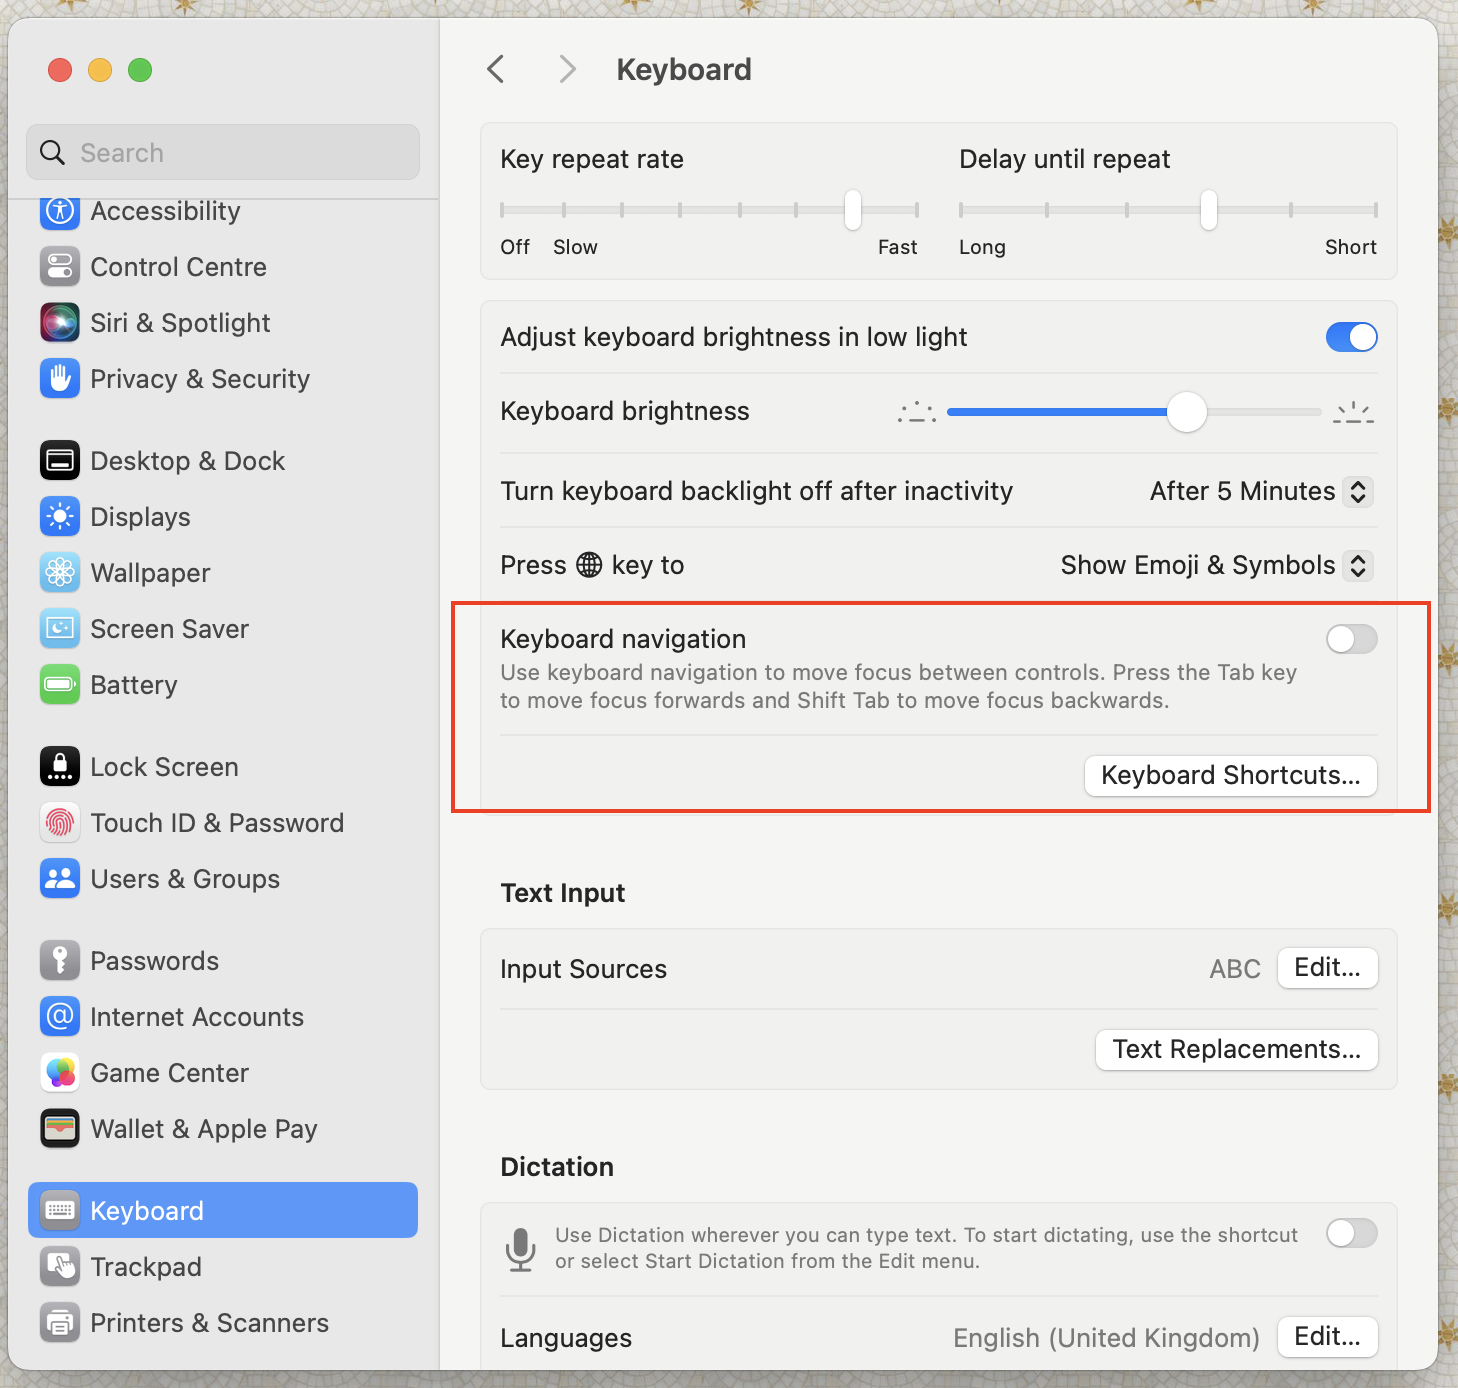
- Scroll down and click Keyboard, this should be the third to the last option on the left. Then Keyboard Shortcuts.
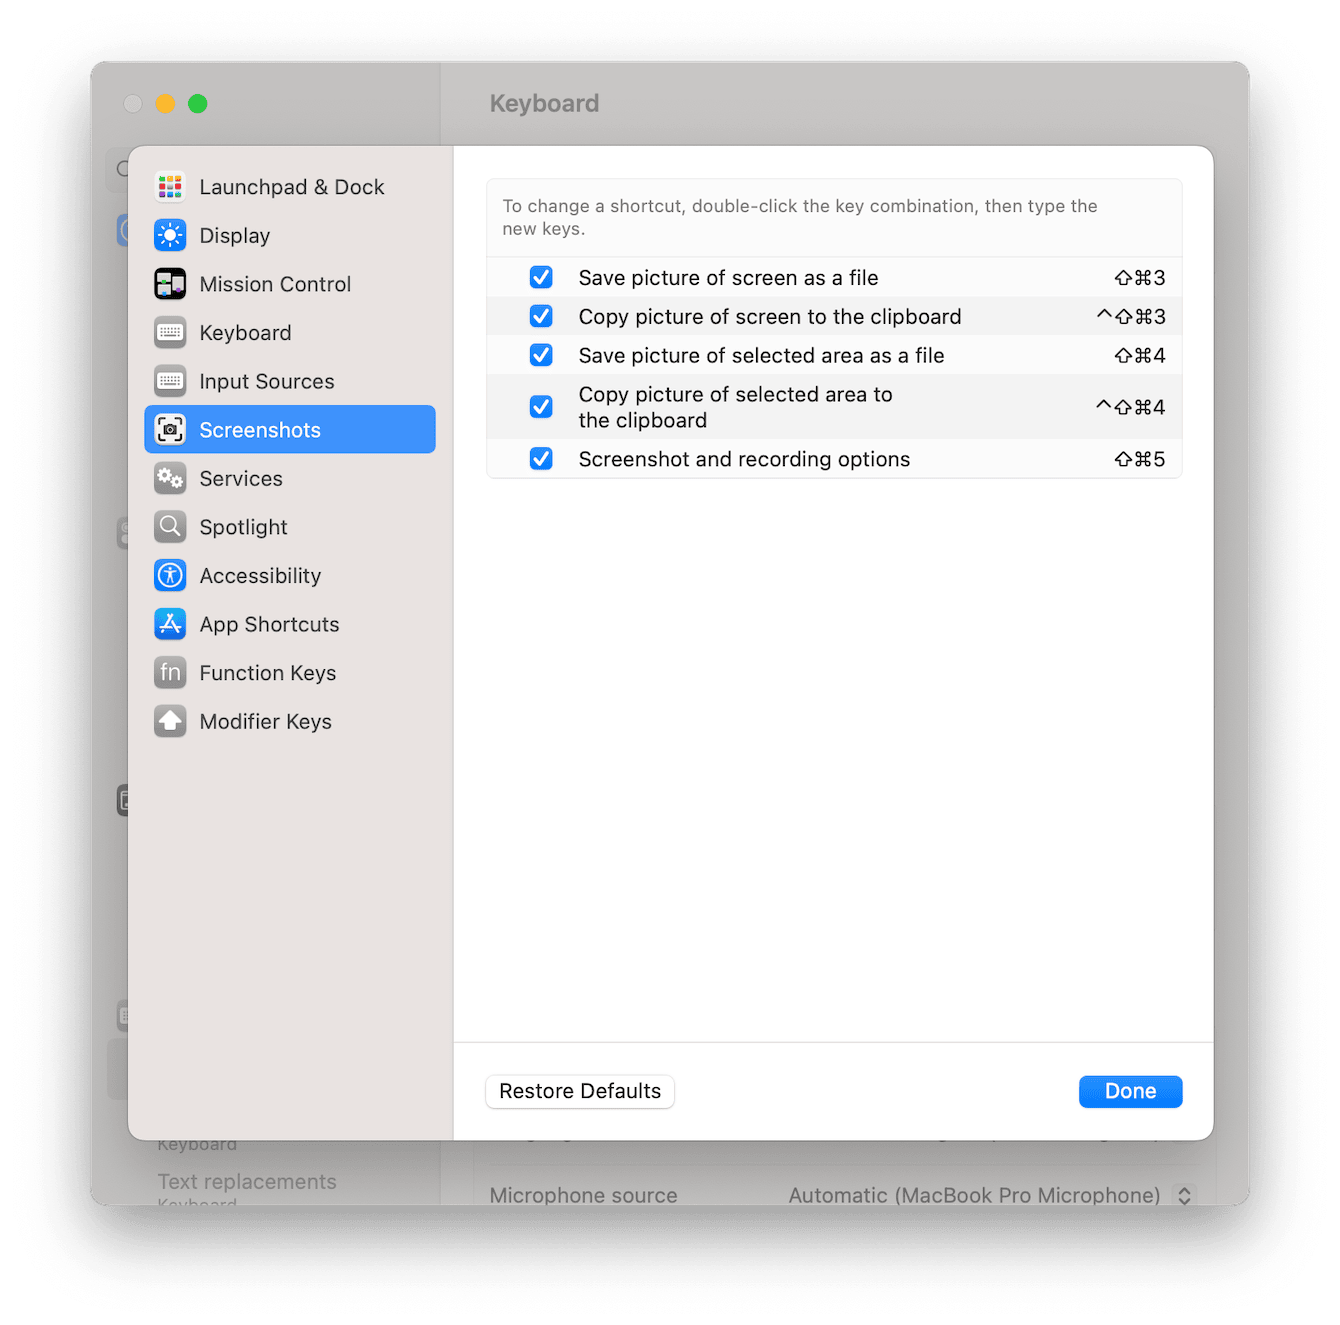
- Then select Screenshots. From here, you’ll be able to select screenshot options and see all the active shortcuts for taking screenshots on your Mac. Any empty box means the shortcut isn’t active.
3. Reset your NVRAM
The NVRAM is a special memory in your computer that keeps important details about your settings, such as sound level, time zone, and screen size, even before your Mac starts up. Resetting NVRAM can fix many problems, including issues like screenshots not working on your Mac.
Here’s how to reset NVRAM on Mac:
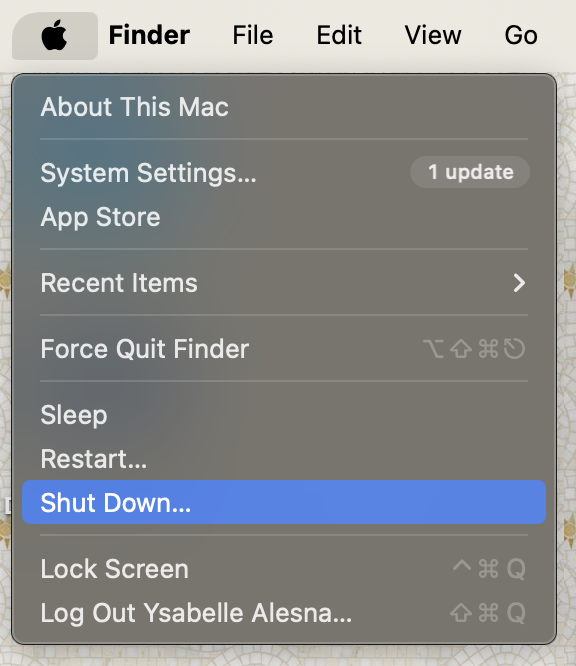
- Shut down your Mac.
- Then restart your device by pressing down the power button while simultaneously pressing Command + Option + P + R on your keyboard for 20 seconds.
4. Check for system updates
We’ve said it once, and we’ll say it again—check your Mac for system updates. A Mac running on an older version of macOS will do more harm than good. Older macOS versions may no longer support certain applications, and delaying major system updates can lead to system issues like not taking screenshots.
Here’s how to update software on Mac:
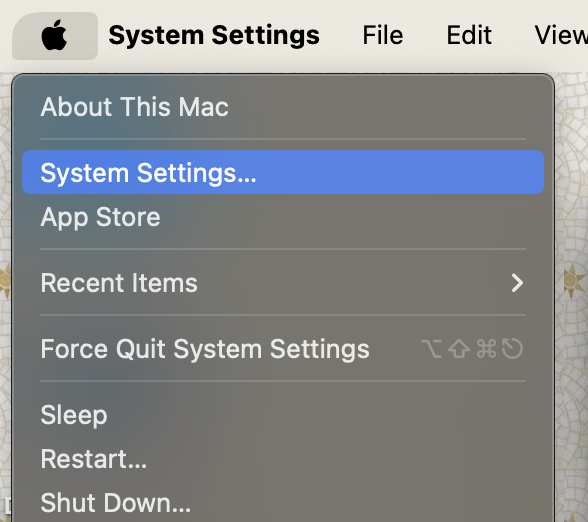
- Start by clicking on the Apple menu in the top left corner of your screen, then select System Preferences. From there, choose General, then Software Update on the right side.
- If you can't find System Preferences in the Apple menu, you can always select System Preferences directly. Once there, click on Software Update.
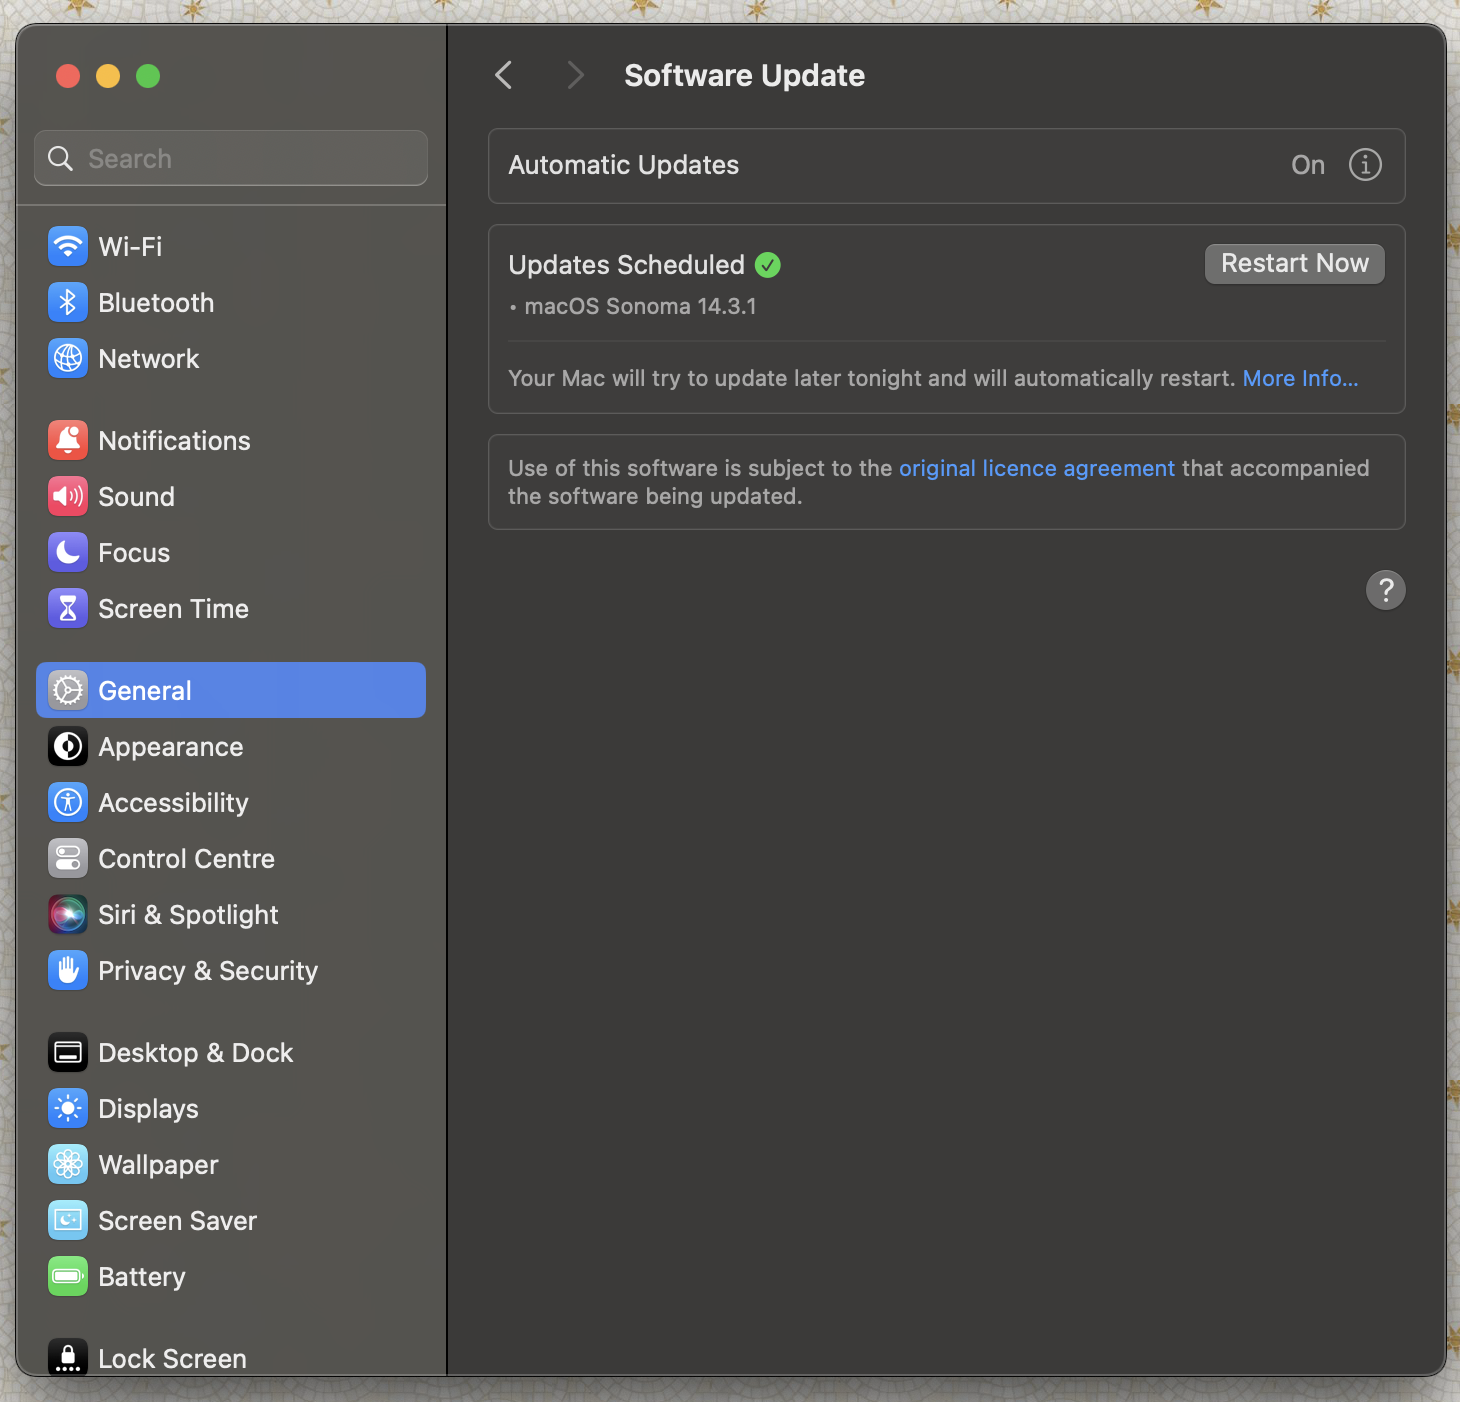
- If there are updates available, you'll see a button to either Update or Upgrade. Click on it to continue. If your Mac is already up-to-date, it’ll let you know.
- Before the updates start installing, you'll need to enter your password—the one you use to log in to your Mac.
- During the installation process, your Mac may restart a few times, showing a progress bar or a blank screen. This is normal, so don't worry. If the installation isn't successful, you’ll receive an error message telling you what went wrong.
5. Scan for malware and viruses
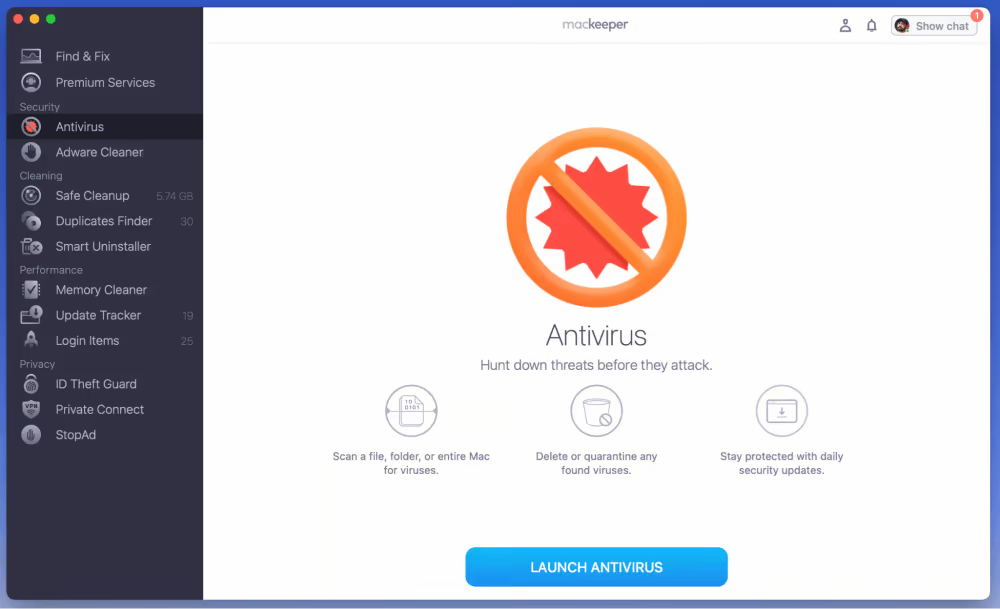
Though Macs are considerably less prone to malware and viruses compared to other systems, malware continues to get more sophisticated. Strange system hiccups could be a sign a virus has infected your Mac. This is where antivirus software like MacKeeper comes in handy:
- Download and launch MacKeeper.
- Click on Antivirus found on the menu on the left-hand side of the window.
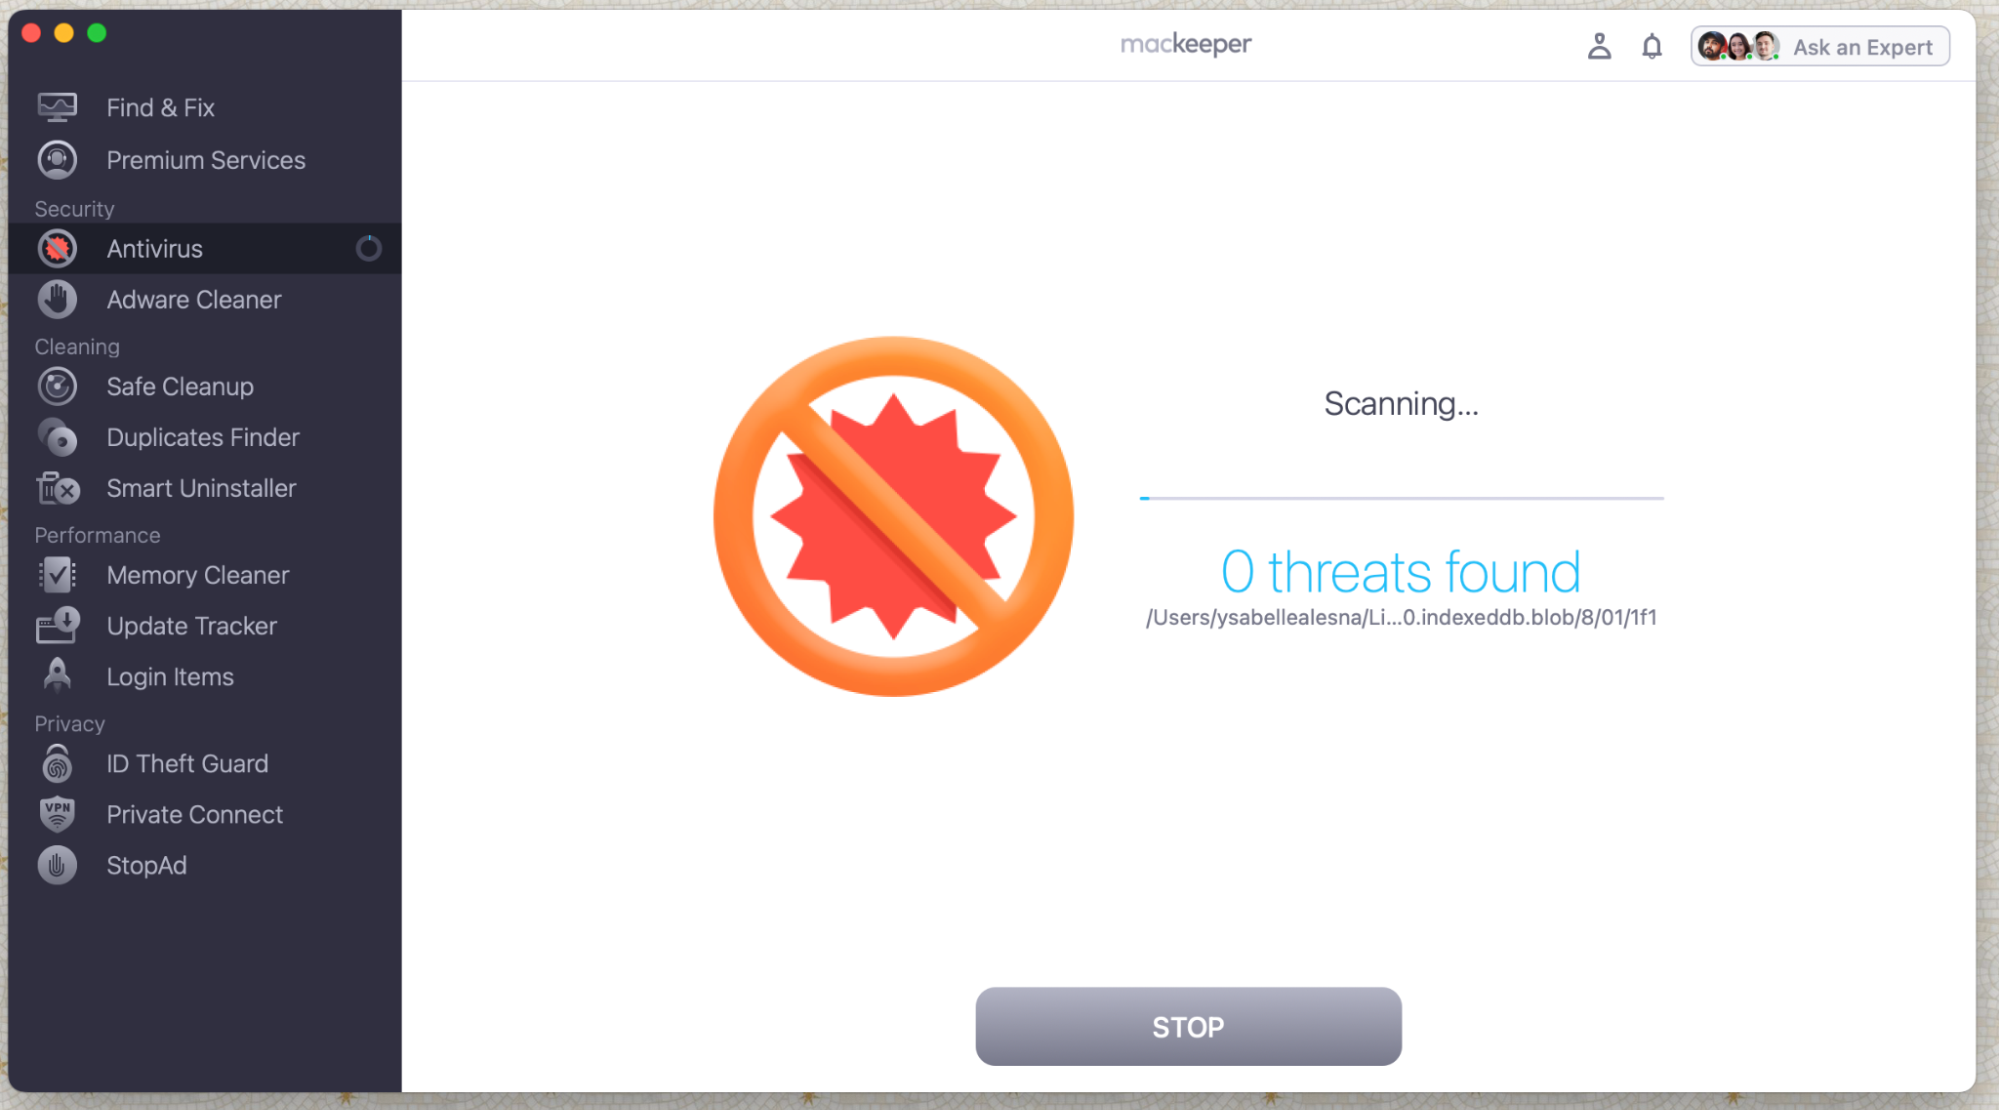
- Start MacKeeper’s antivirus scanner by clicking on the Launch Antivirus button.
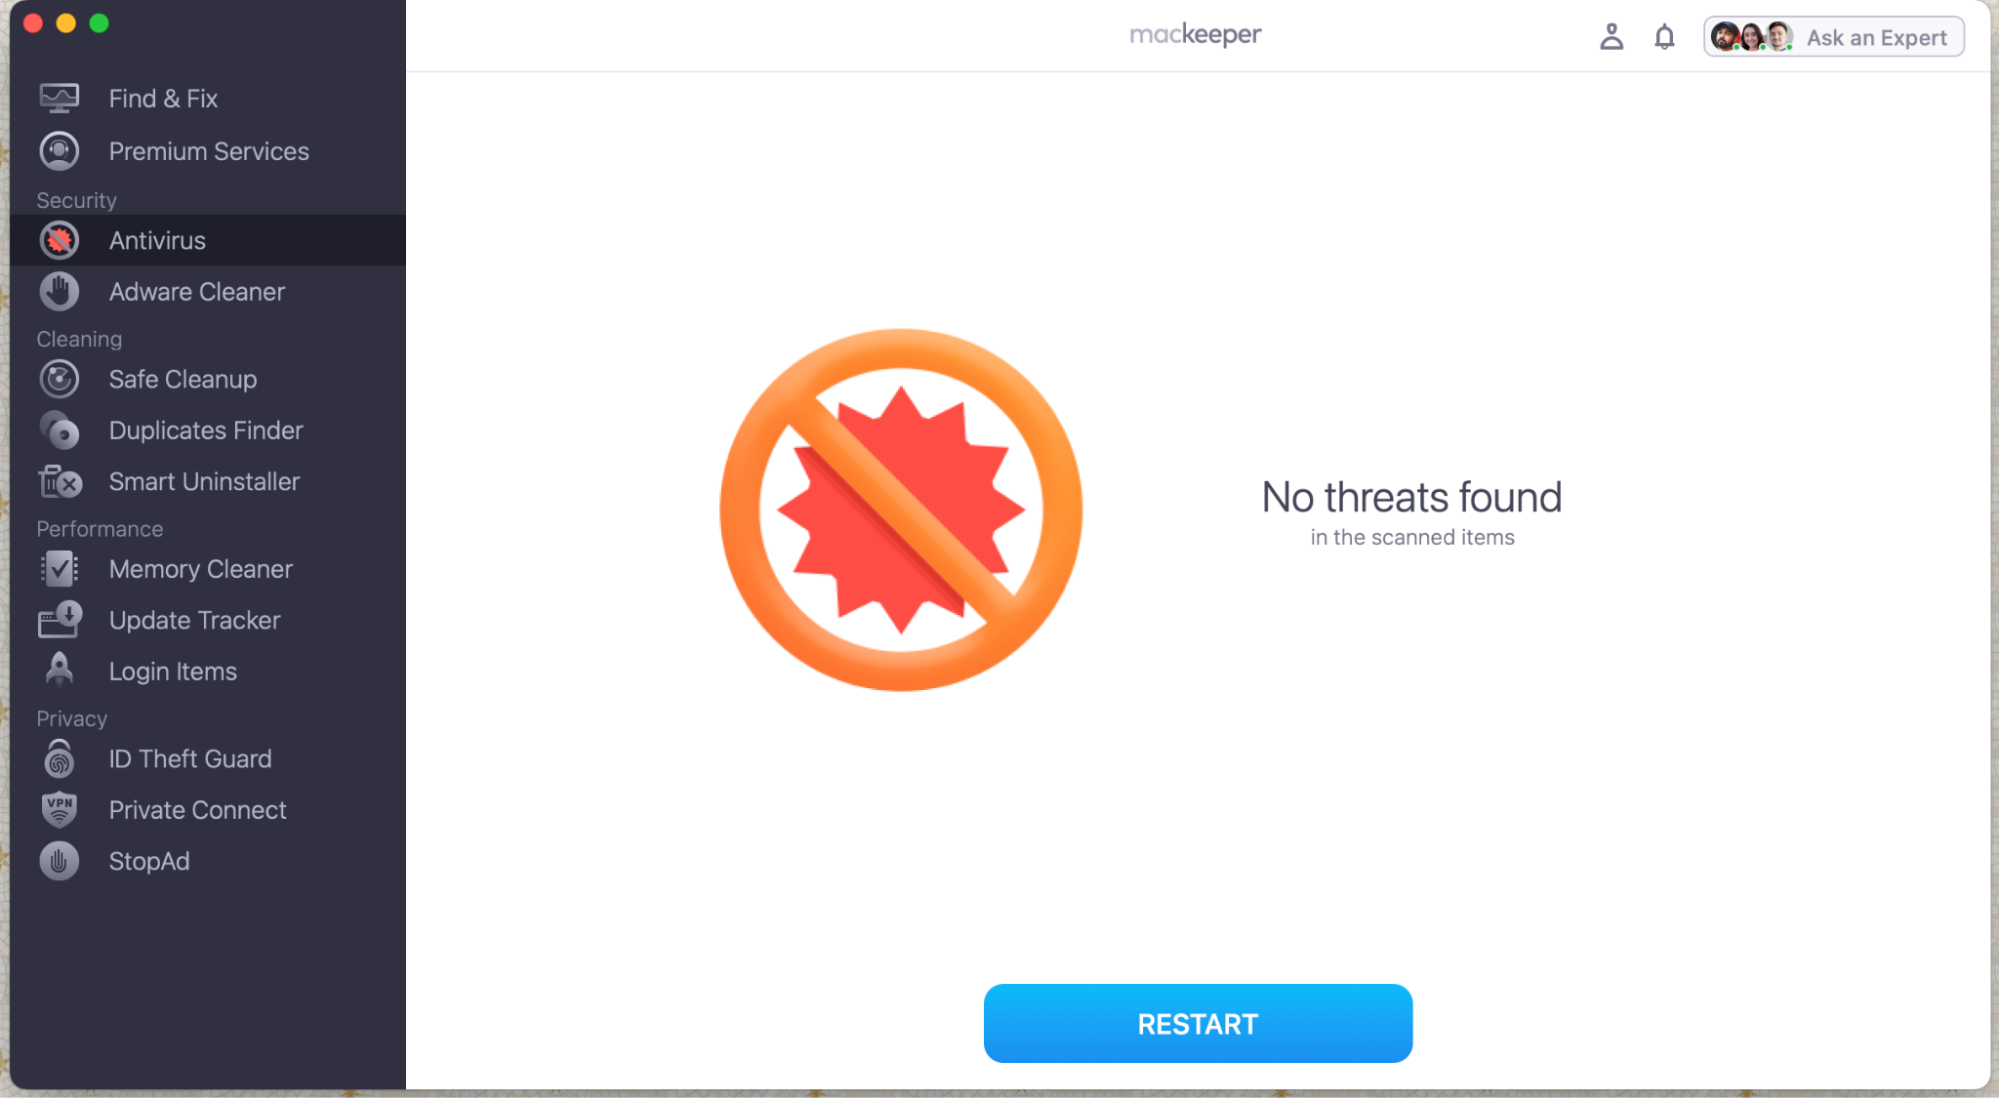
- Wait for the scan to complete and remove any threats found.
Important:
If you’re relying solely on Apple’s built-in antivirus to keep your device safe, you should know it might not give you total protection. Using a devoted third-party antivirus software like MacKeeper is an investment worth your peace of mind. Try it today and make a smart move to protect your Mac.
6. Check the saving location of screenshots
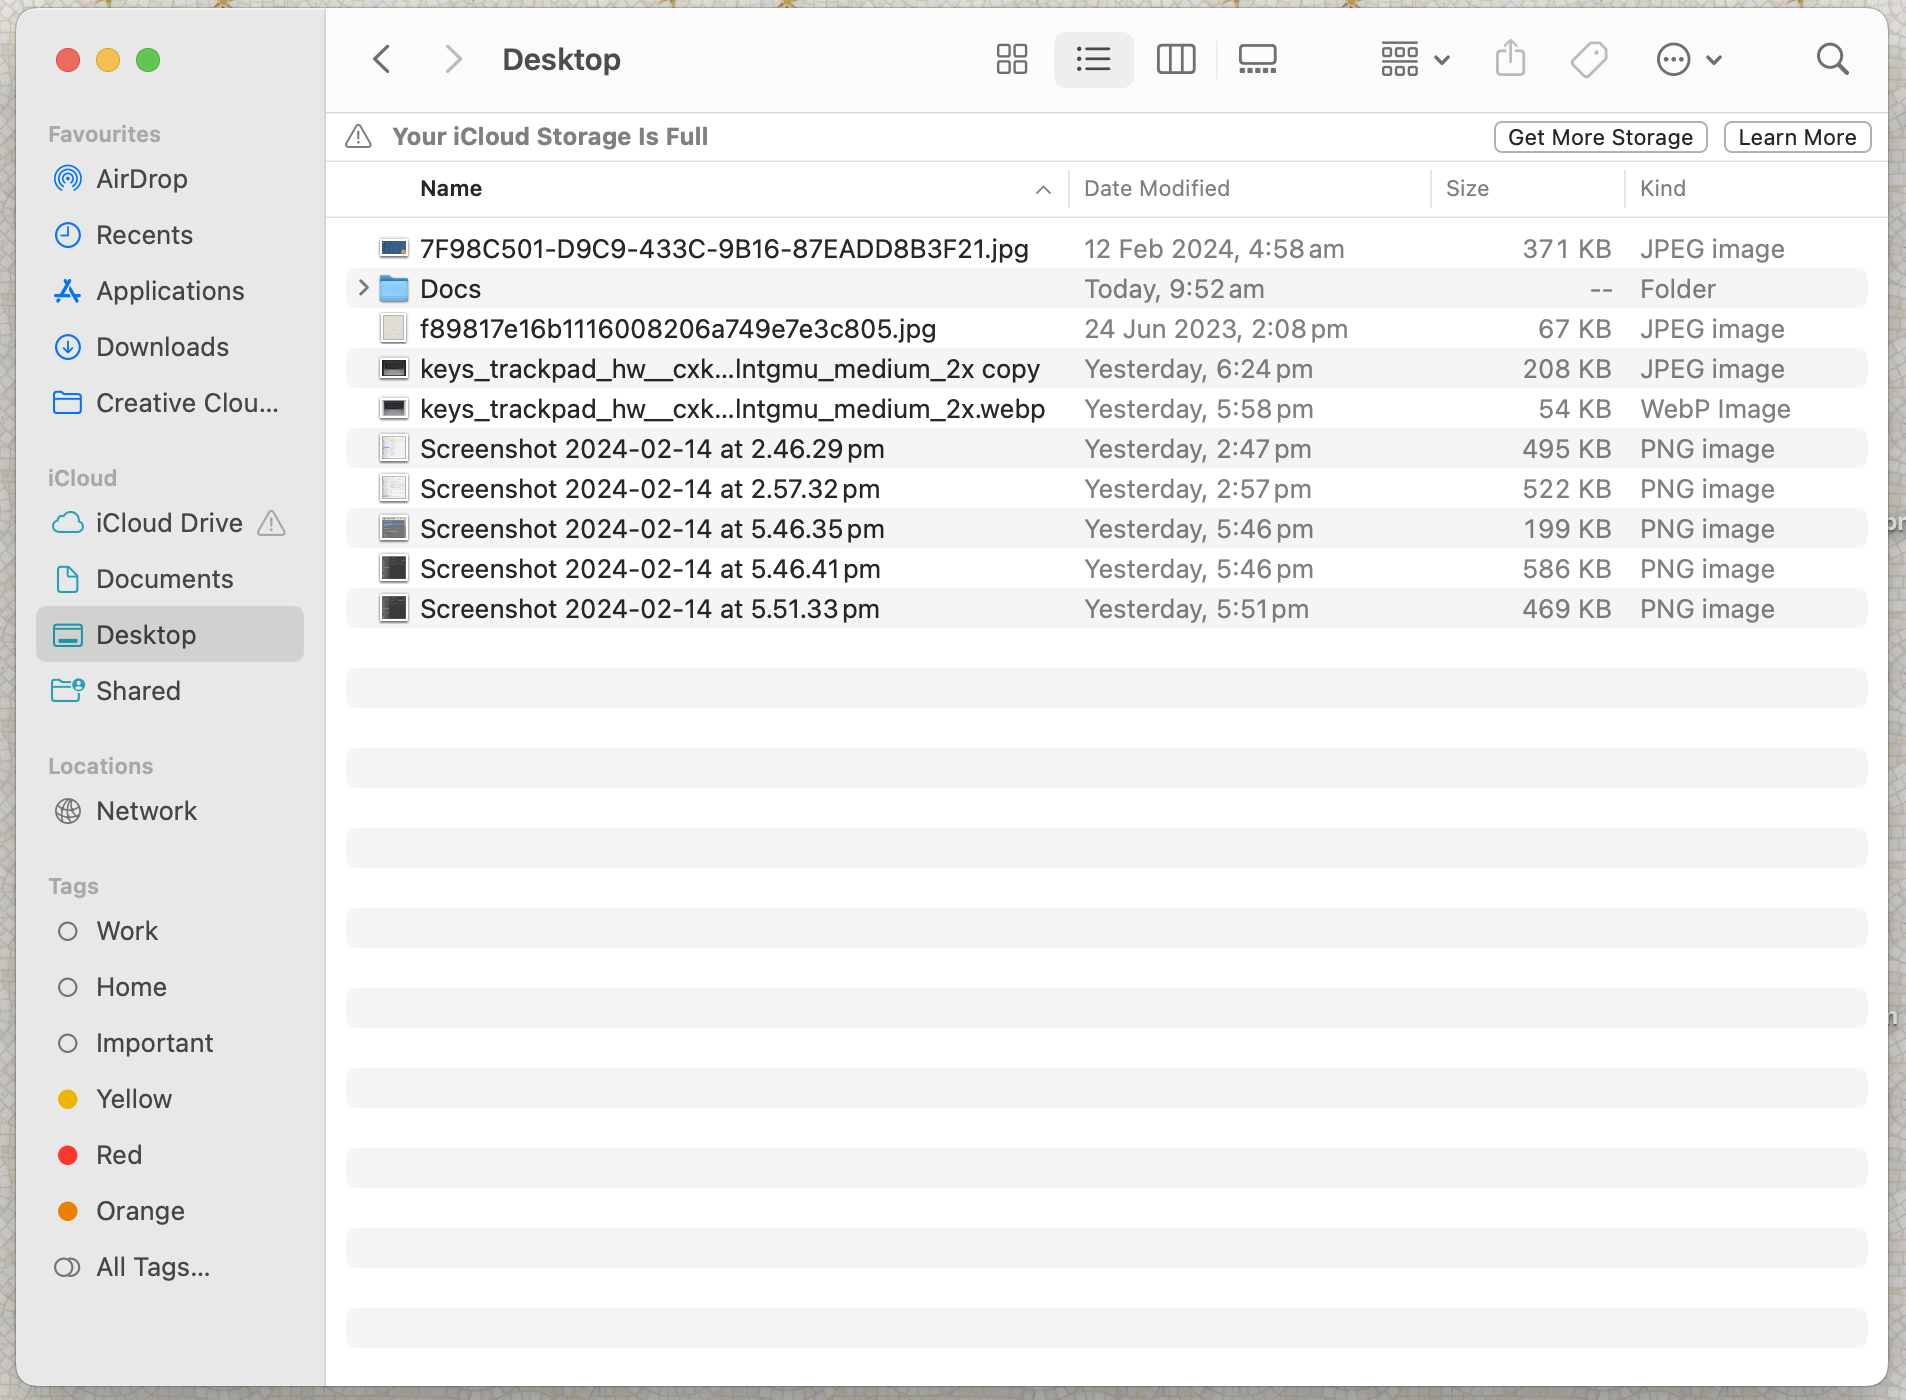
If your Mac is up-to-date, malware-free, and the keyboard shortcuts enabled, there’s a possibility the screenshots you’re taking are saved elsewhere on your Mac. By default, Mac screenshots are saved on your desktop, so you can easily find the file.
7. Move the preference file
If your screenshots aren’t appearing on your Desktop, you can check and change the locations by following these steps:
- Open your screenshot app by pressing Command + Shift + 5 at the same time.
- Click Options.
- From here, you can choose your preferred location.
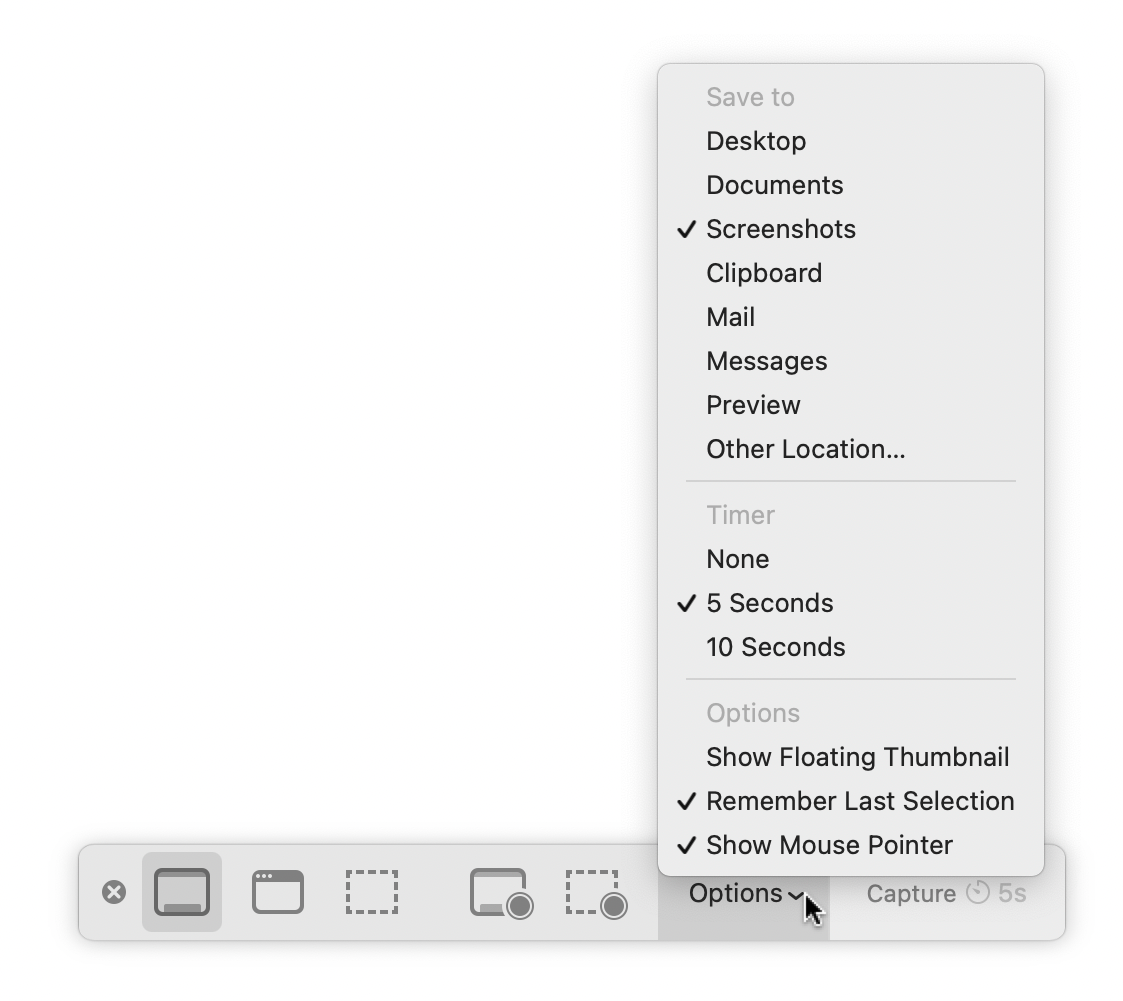
And that's it! Once you’ve changed your location settings, your new screenshots will be saved there.
8. Check your Dropbox settings
If you use Dropbox, it's likely that you have your preference settings set to save your screenshots to your Dropbox account automatically.
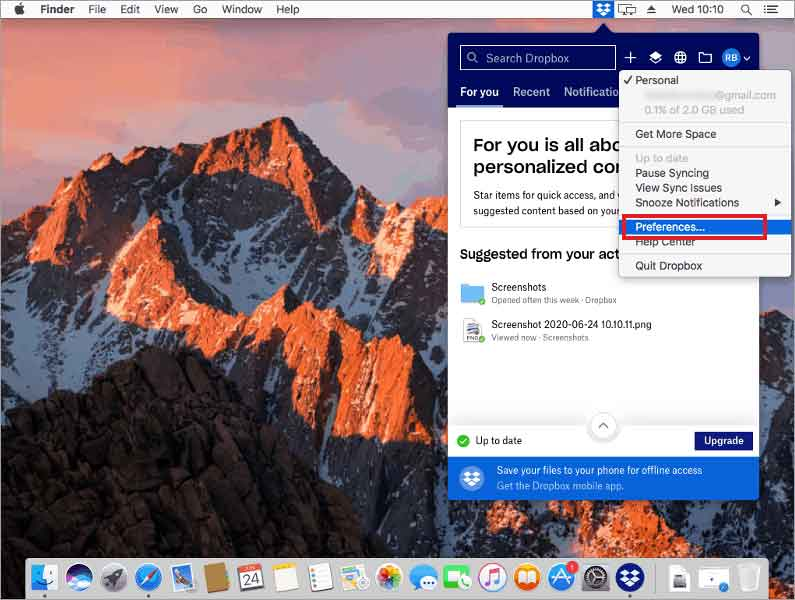
To stop your screenshots from saving on Dropbox:
- Click the Dropbox menu icon on your menu.
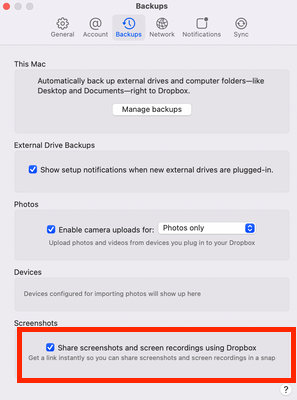
- Choose the gear icon > Settings > Preferences > Backups.
- Untick Share screenshots using Dropbox.
9. Use Grab to screenshot on Mac
If you’ve been using macOS for some time, you may be familiar with the Grab app, the preinstalled application that used to allow screenshots on Mac. Unfortunately, it’s no longer available. It came preinstalled on macOS until High Sierra (version 10.13), but it was replaced by the Screenshot tool in Mojave (version 10.14).
10. Use preview to screenshot on Mac
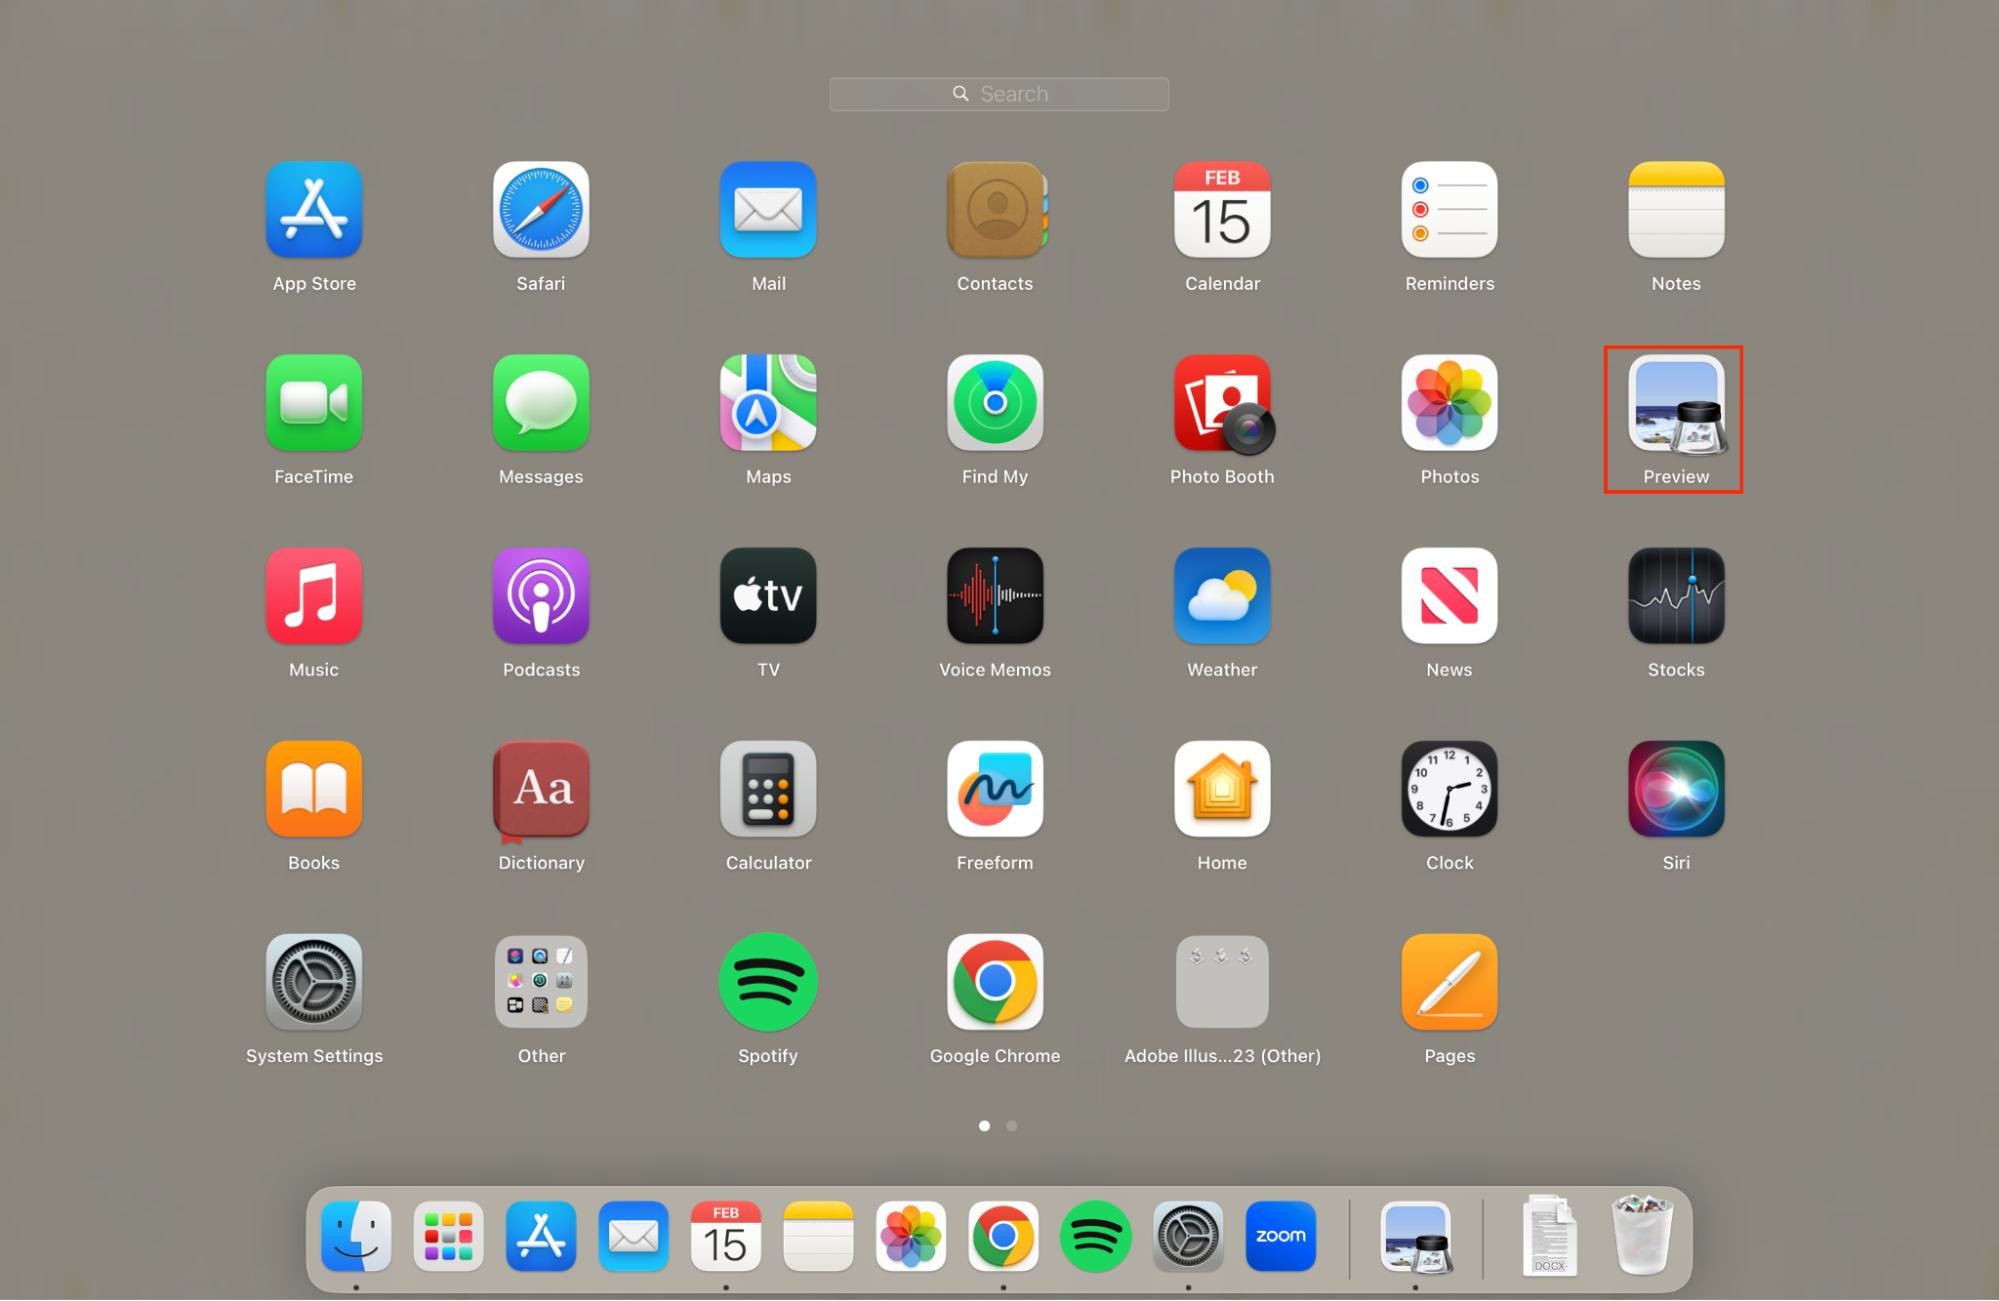
The Grab app may be gone, but Preview is another tool you can use if the screenshot feature on your Mac isn’t working:
- Open the Preview app.
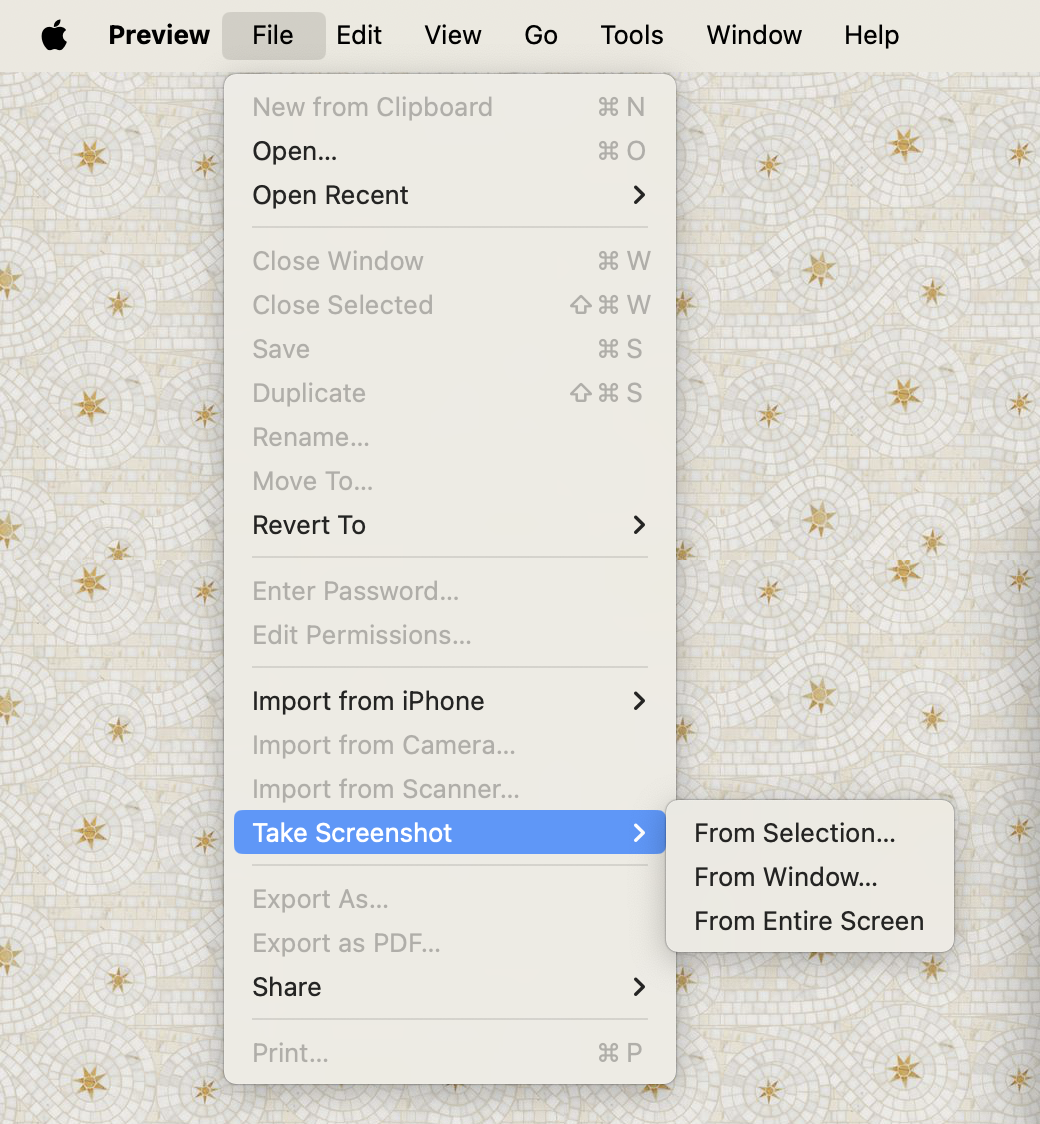
- Then go to File > Take Screenshot.
- Now, choose which type of screenshot you’d like to take.
11. Check your storage space
You might not realize it, but screenshots are an easy way to eat up your Mac's storage space. If your device is starting to feel a bit sluggish and having performance issues, it might be time to check how much free storage is left on your Mac:
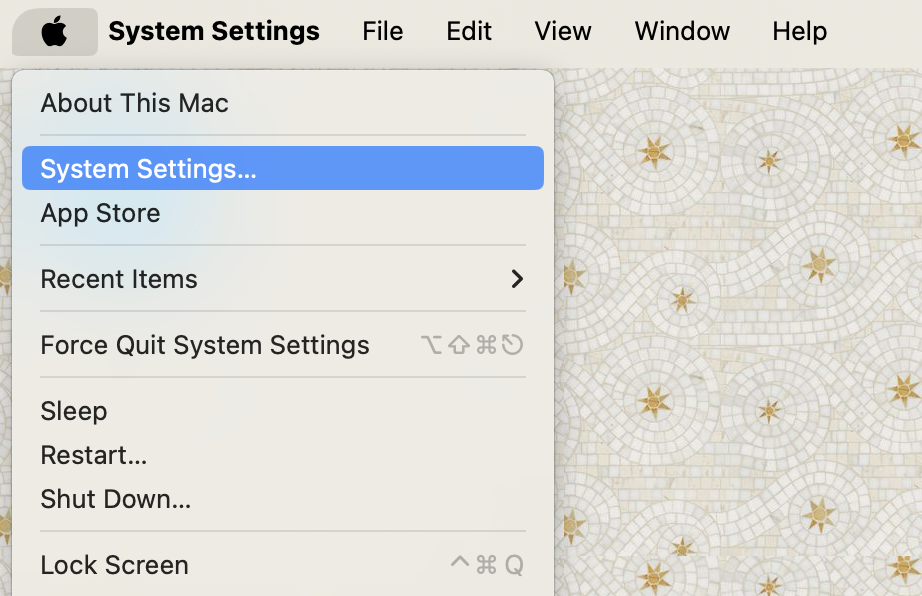
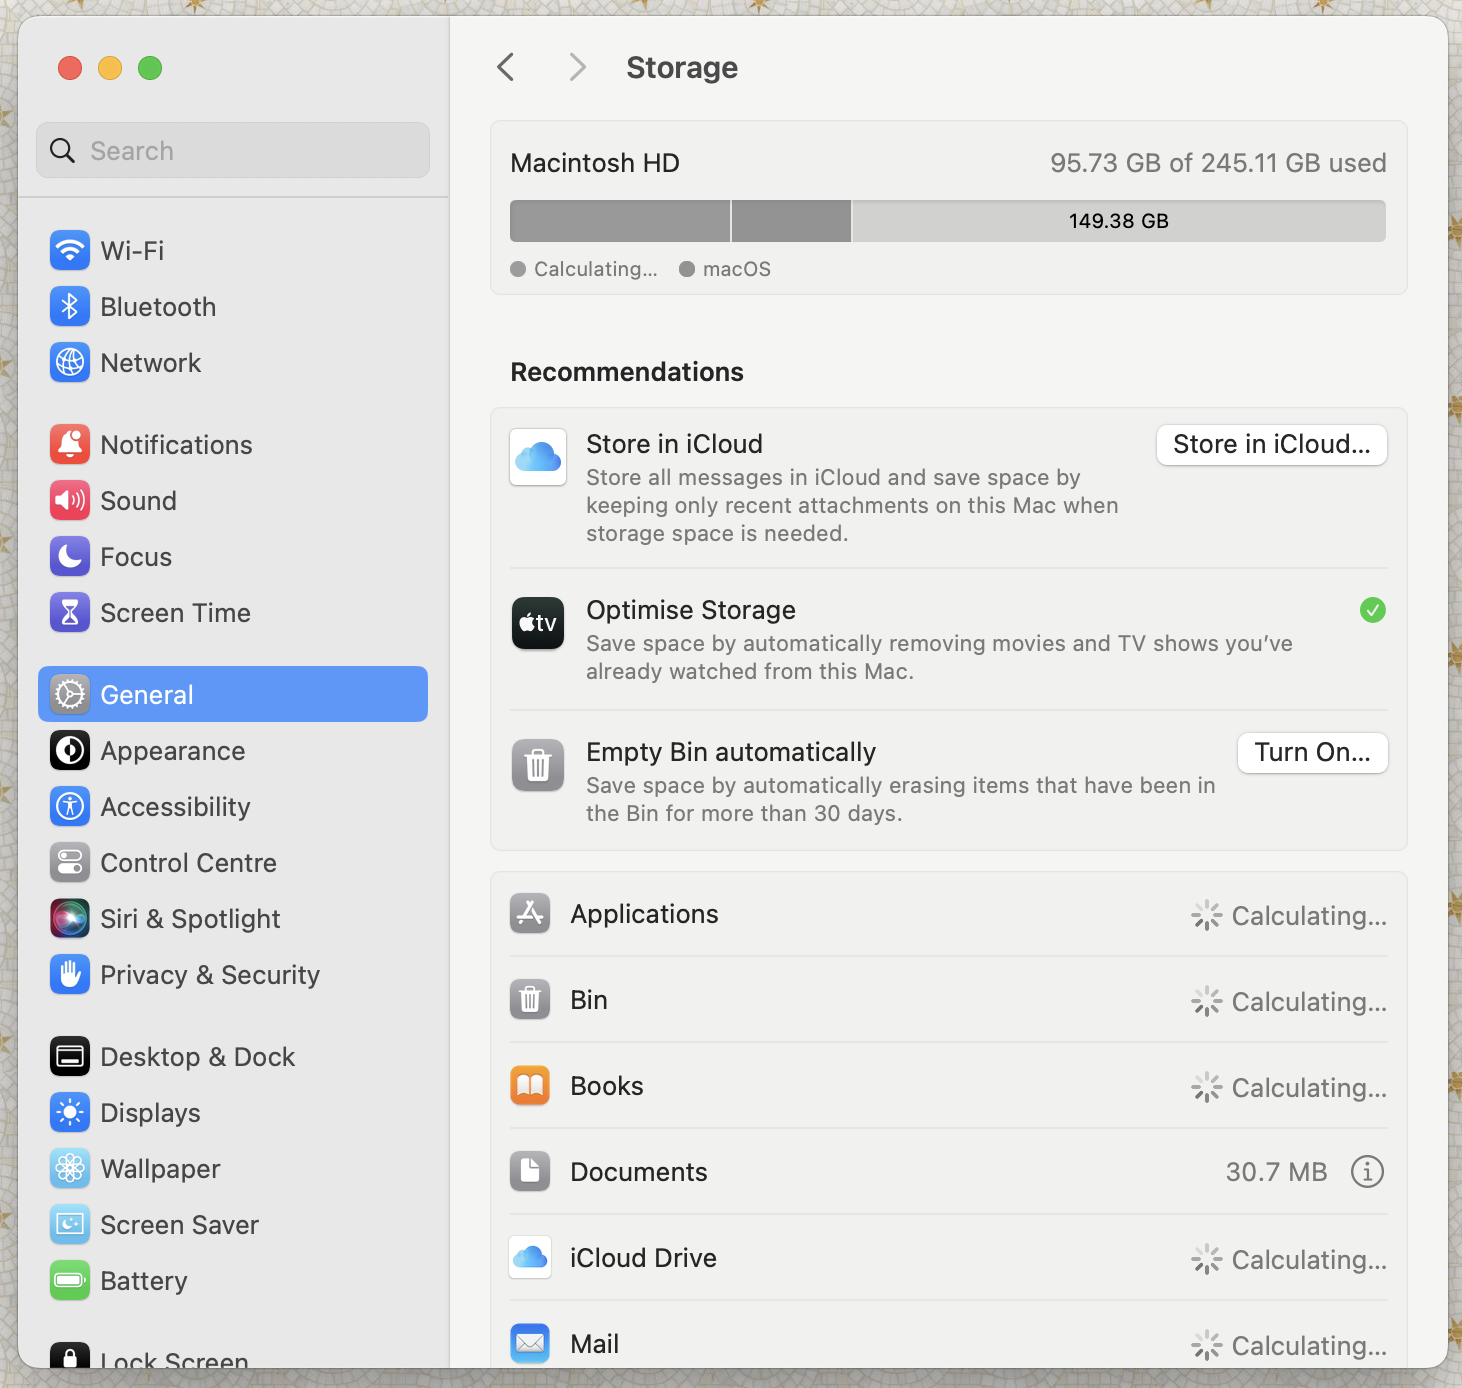
- Click the main Apple menu, then go to System Settings > General > Storage.
- Wait for your Mac to finish calculating the breakdown of your storage.
- Remove any unnecessary files and folders weighing down your Mac’s performance.
Cleaning up your MacBook’s storage can be a tedious task. The great way to speed up the process is by using a dedicated cleaner tool, our personal favorite is MacKeeper. Its Safe Cleanup tool is perfect for sorting out clutter.
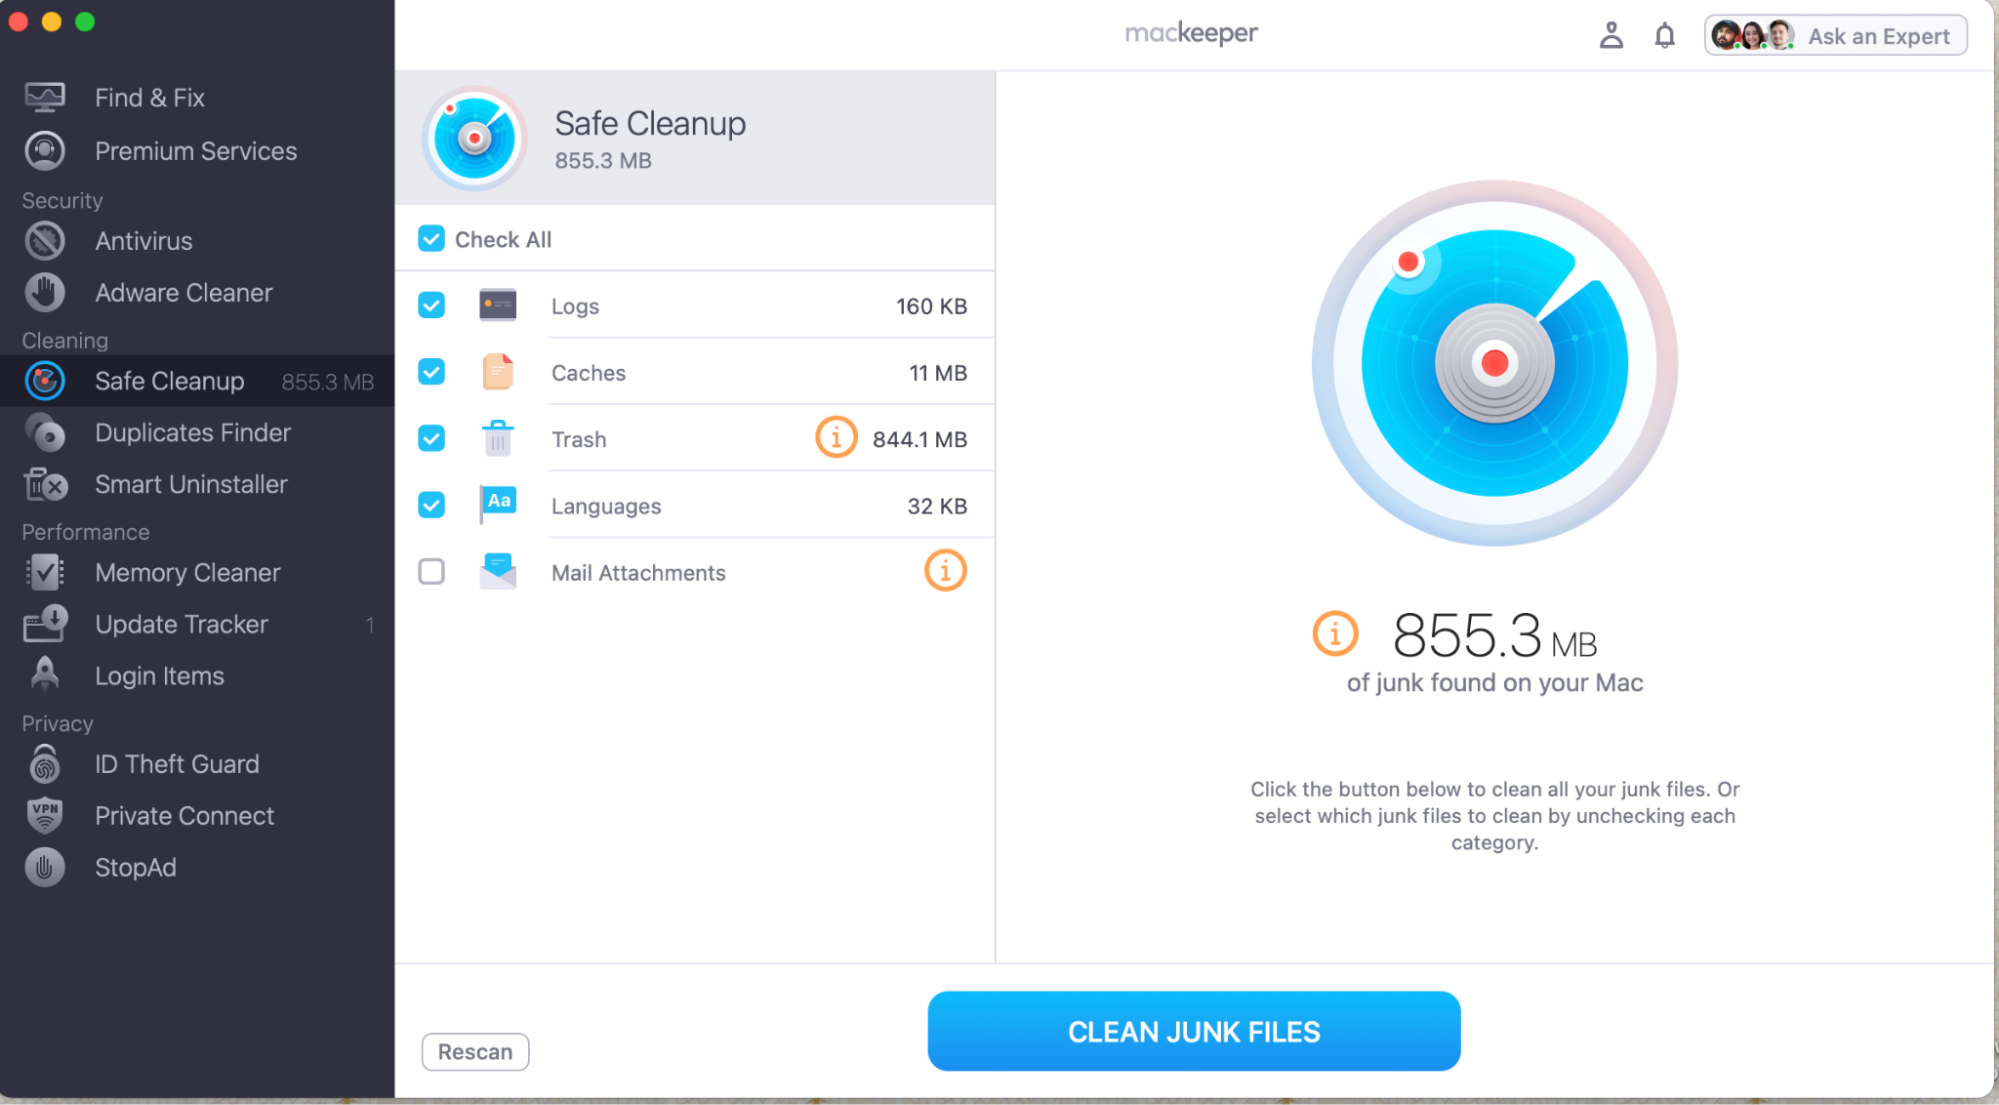
The app quickly and thoroughly scans your system, collecting all your junk files and folders into one spot so you can sort through forgotten files and remove any that are eating up space on your Mac.
12. Load into safe mode
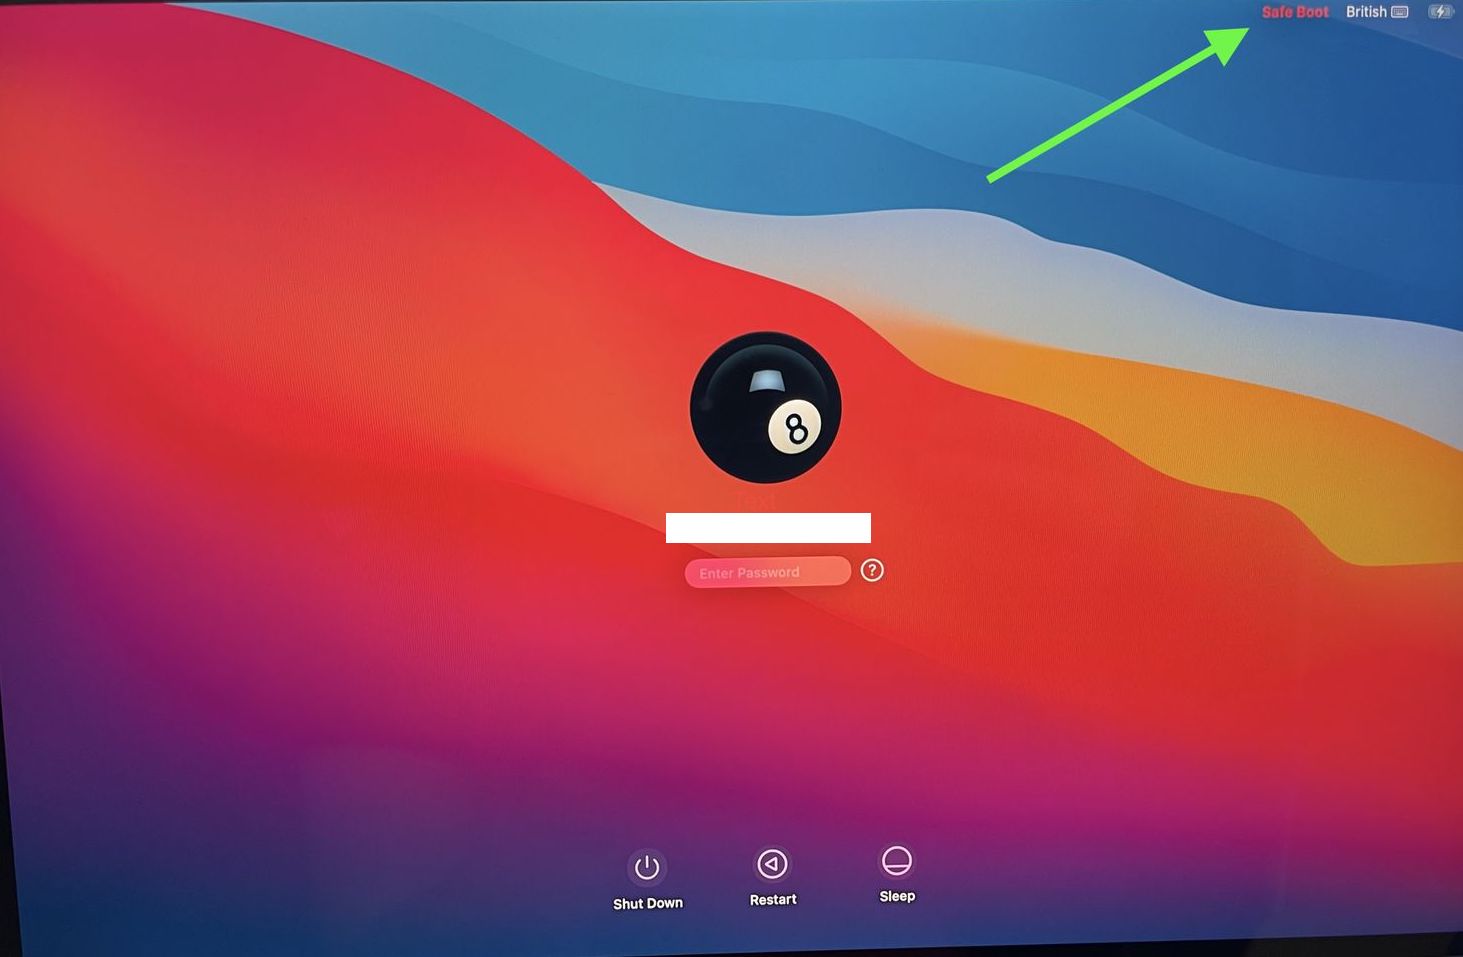
Turning on safe mode on your Mac helps determine if your screenshot problem is caused by software issues.
To load into safe mode on Macs, you need to:
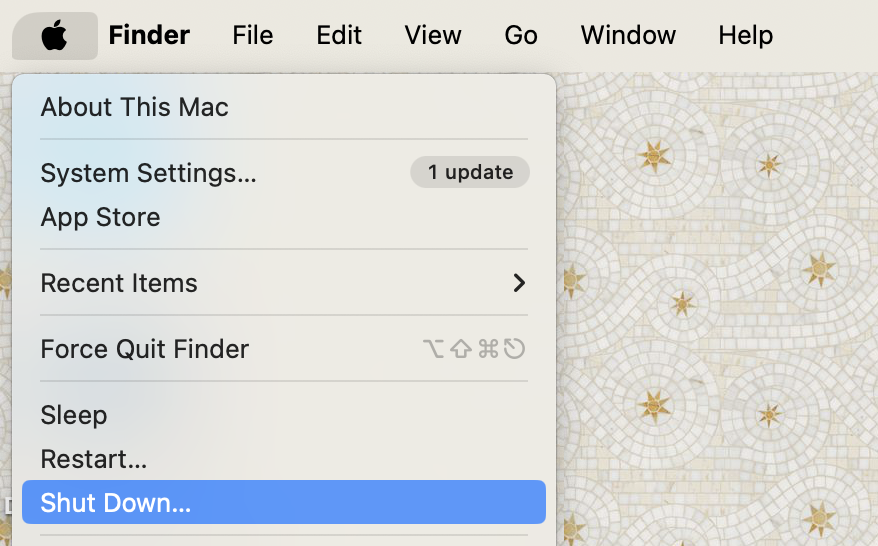
- Shut down your Mac by going to the main Apple then click Shut Down.
- Turn your Mac on again and continue to long-press the power button until the Loading Startup option message appears.
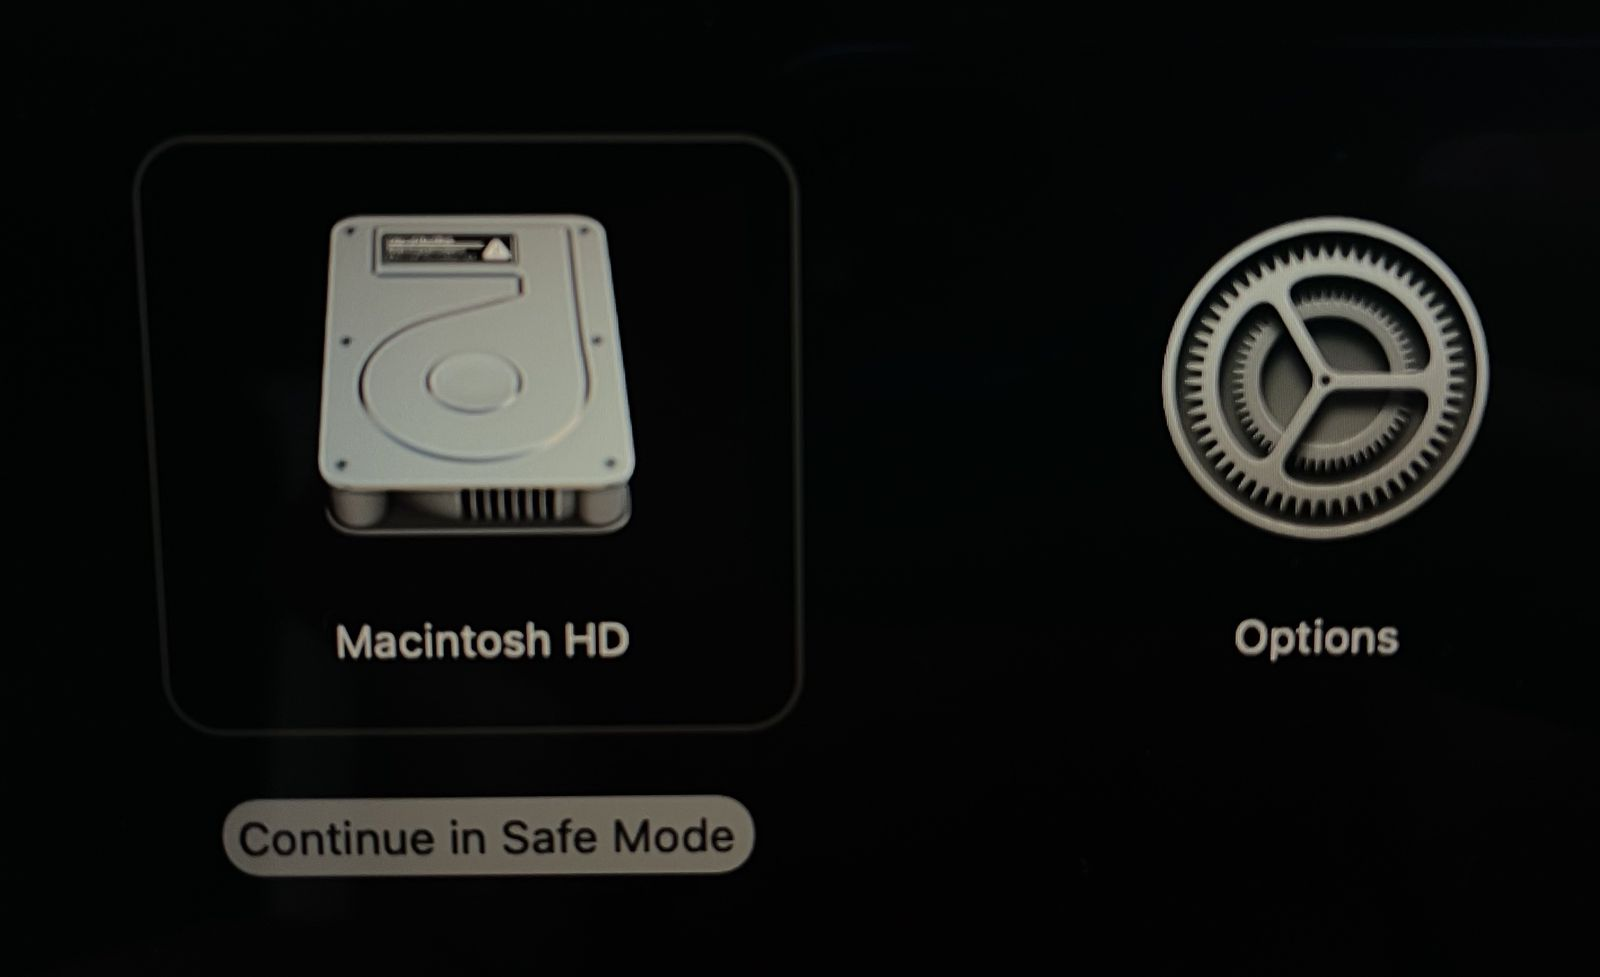
- You’ll have two options on the screen, select your startup disk.
- Press and hold your Shift key, then click Continue in Safe Mode.
How to recover lost screenshots on Mac
If your screenshot function is resolved, but you have now lost your screenshot file, there’s no need to panic. You can still recover lost screenshots by using Finder, Time Machine, iCloud, or by checking your Trash.
Recover from Finder
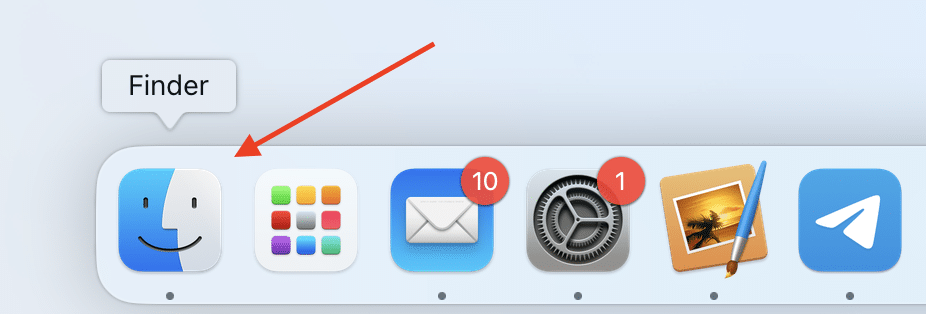
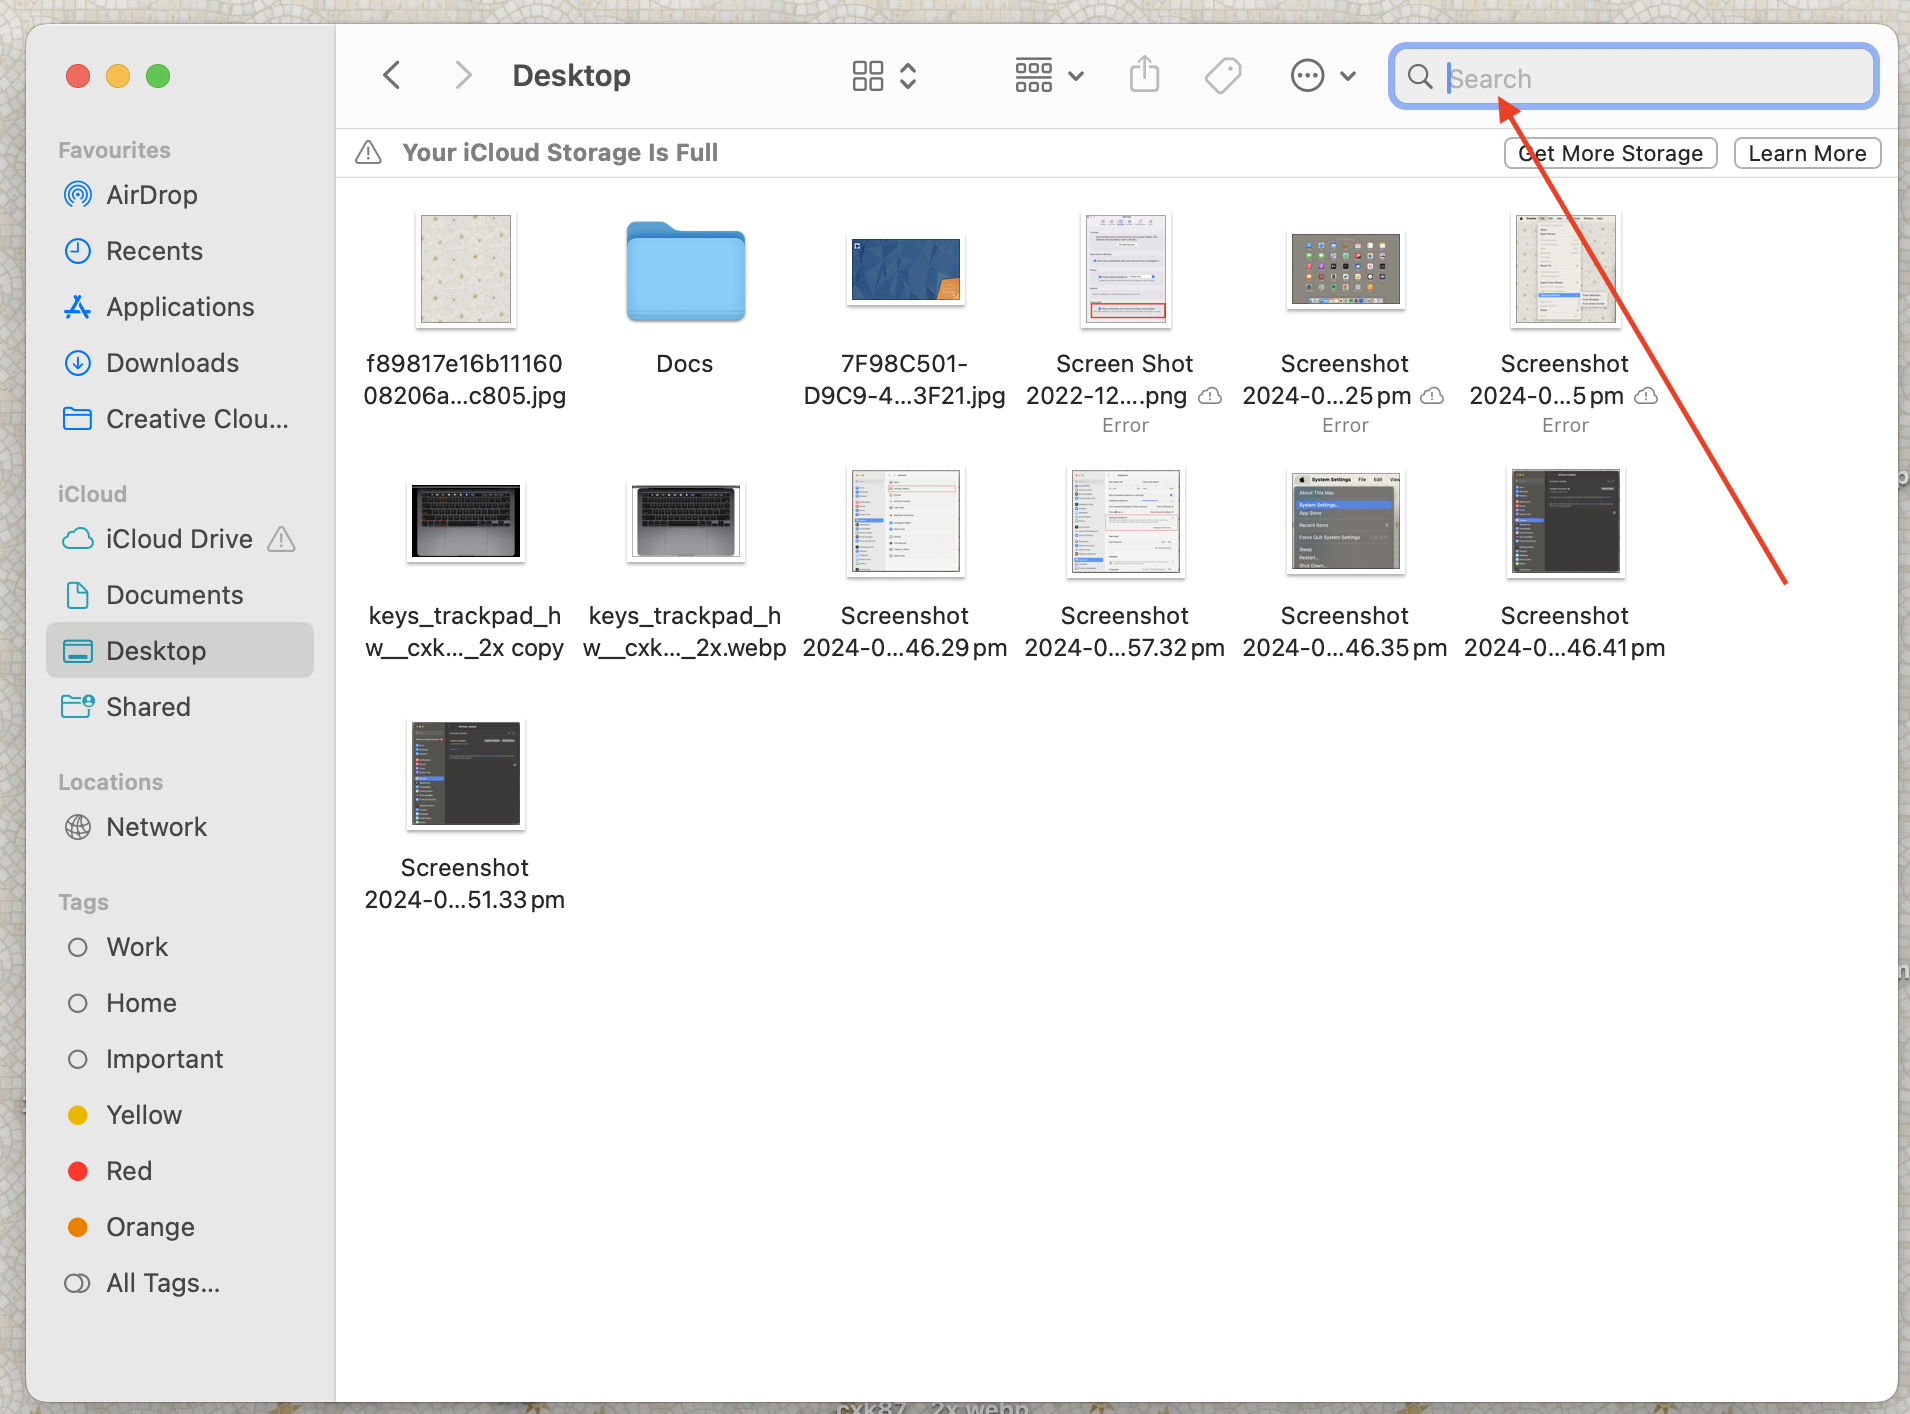
If you’ve likely moved your screenshots elsewhere, Finder can help you relocate them. Here’s how to do it:
- Launch Finder.
- Type screenshot in the search box in the top right corner.
- Check and see if your screenshot appears in the search results, move it to another location.
Recover from Time Machine
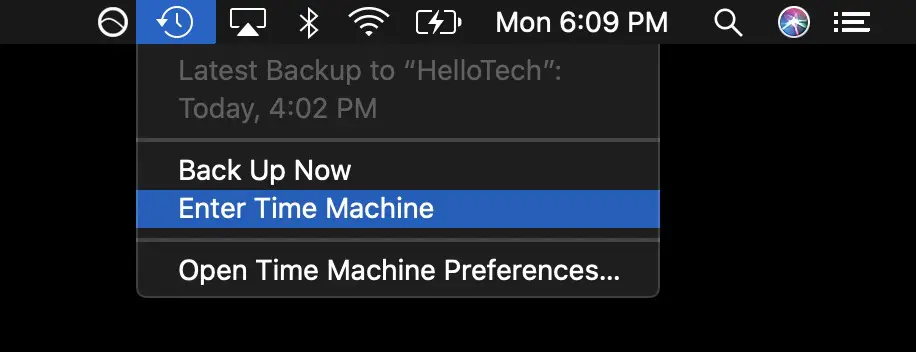
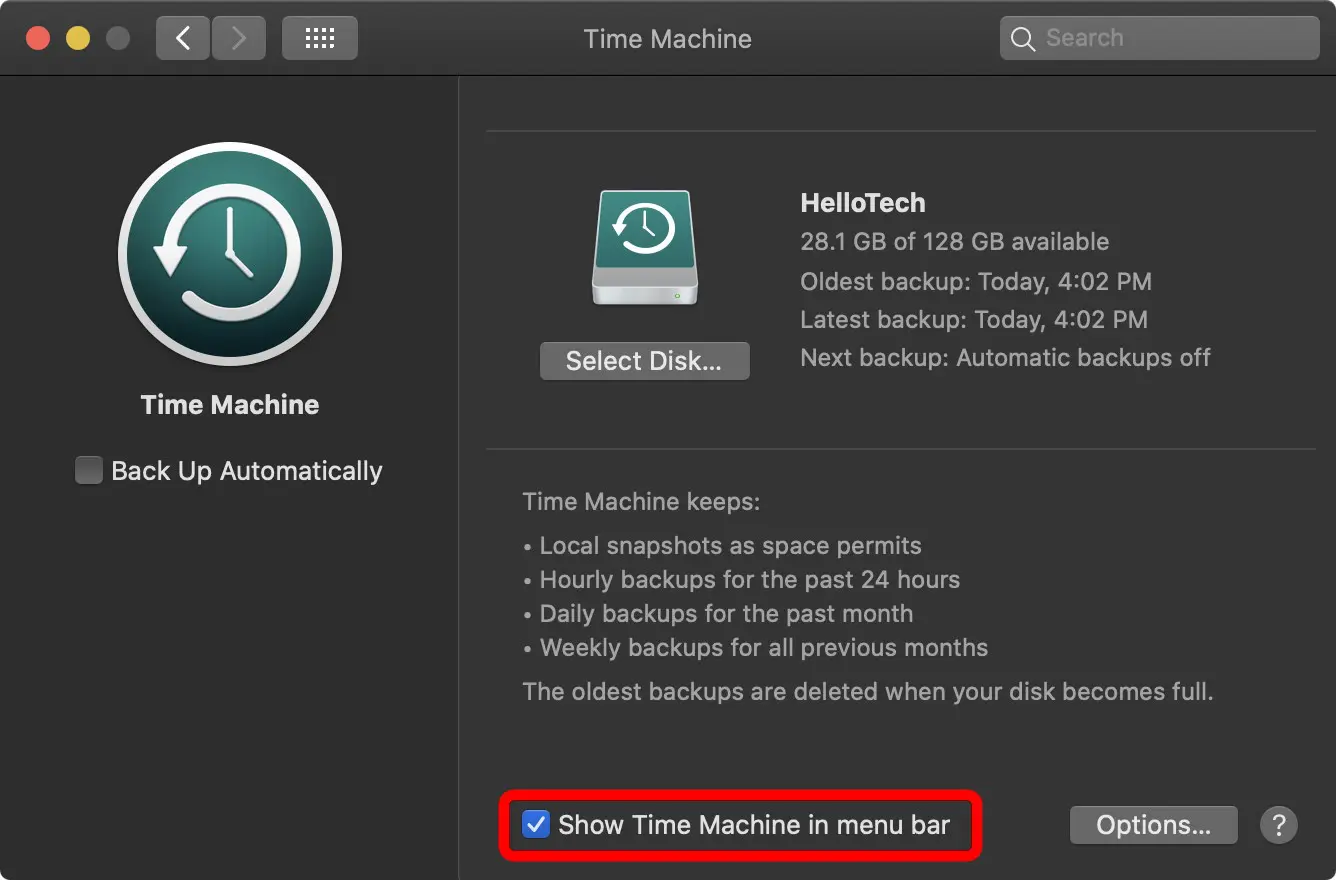
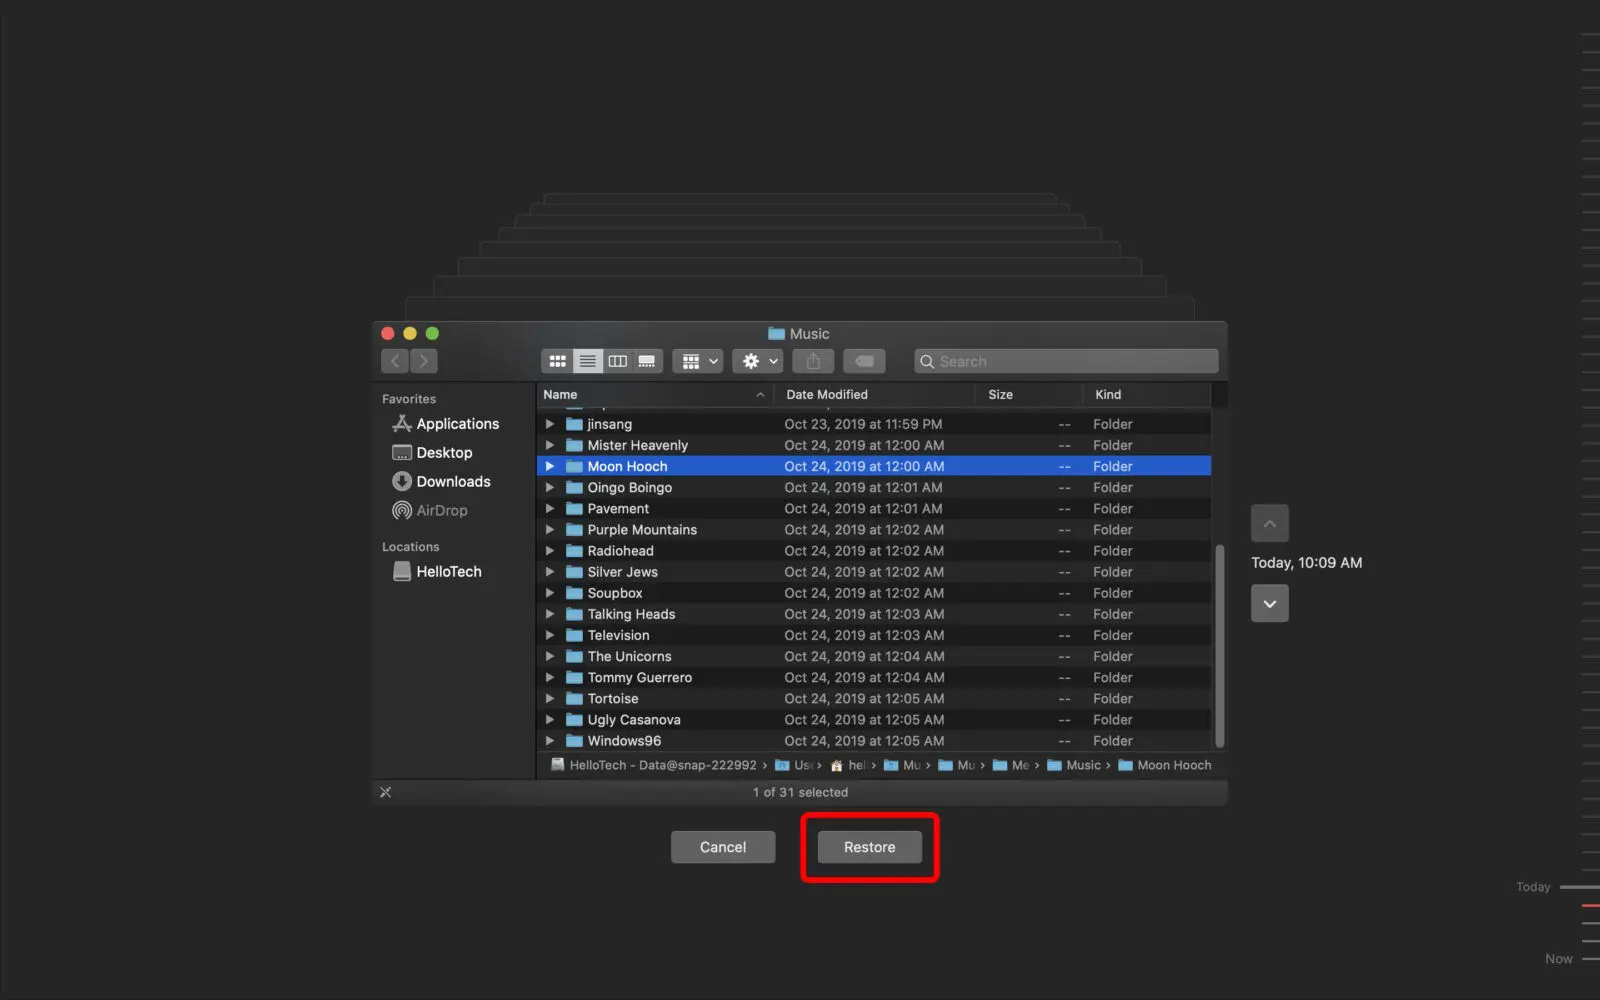
If you’re someone who periodically backups up their data, Time Machine will help you find any lost files. To recover data with Time Machine:
- Launch Time Machine by clicking the logo in the top right corner of your menu, or search Time Machine in Spotlight.
- Choose the drive you want to recover.
- Browse through the list of backups and look for the one that has the screenshot you want to recover.
- Click Restore.
Recover from iCloud
You can restore files you deleted from iCloud Drive or other apps on iCloud.com within the last 30 days. To retrieve files off iCloud, follow these steps:
- Go to iCloud.com.
- Log in to your iCloud account and click Account Settings.
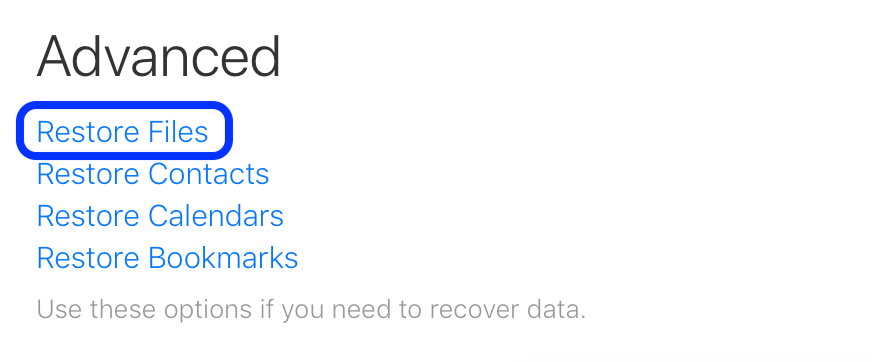
- Look for the Advance settings found in the bottom left corner, and click Restore Files.
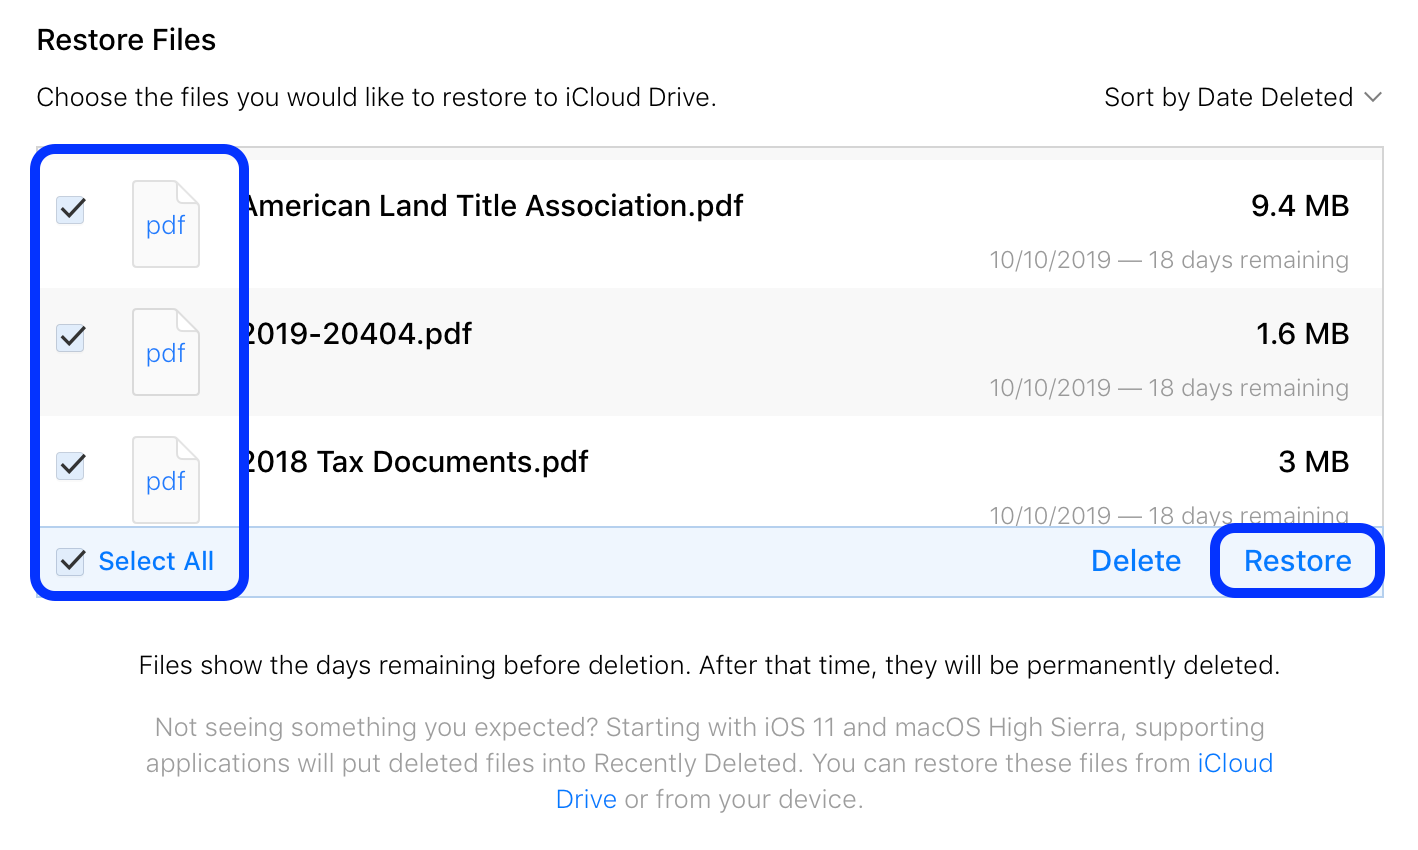
- Once files appear, either choose the individual files you want or use the Select All checkbox.
- Click Restore and Done. All restored files can now be found on your Mac’s desktop.
Recover from Trash
Your Mac has a built-in feature called Trash, where all deleted items are stored until you decide to permanently remove them. Here's how you can find recently deleted files:
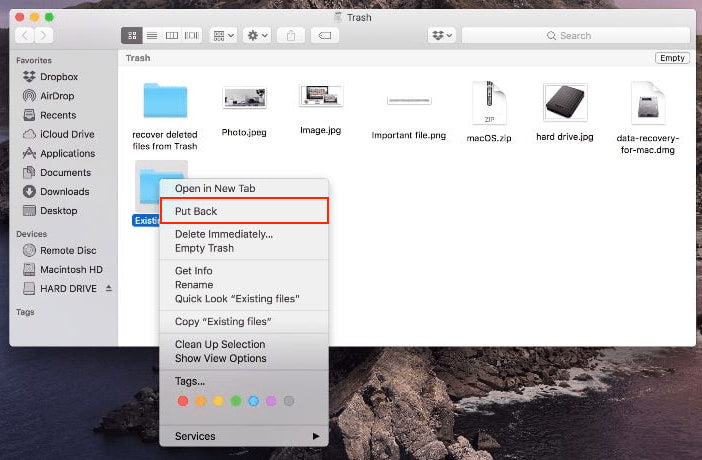
- Open Trash, typically located in the bottom right corner of your screen.
- Look for the item you recently deleted and select it.
- Right-click on the selected item and click Put Back. This will restore the file to its original location.
Say bye to Mac screenshot troubles once and for all
The screenshot not working can be incredibly frustrating when it stops working, but hopefully, with the solutions we’ve offered above, you shouldn’t be left wondering why your Mac won’t take a screenshot. Moreover, you now know how to fix your screenshot malfunctions on your Mac.
If you want to save time, let MacKeeper’s Find & Fix tool simplify the diagnosis for you. It’s designed to quickly identify and resolve any software issues or errors that could be affecting your Mac’s performance. Whether you want a quick checkup for your Mac or want a deeper look into specific issues, it’s your quick and easy solution.


