In this article you will find the following:
Is your MacBook screen flashing?
If there’s one thing that you don’t want to see when you’re using an expensive laptop, it’s a glitchy screen that flickers and flashes. Fortunately, some simple troubleshooting steps may be enough to cure the MacBook screen glitching problem.
If you’re seeing lines on Mac screen, your Mac screen blinking, or other screen flickering problems, this guide should be able to help.
Before we start
System maintenance on a Mac can be confusing. Before you take drastic steps, make sure your system is fully updated. Update your apps automatically using MacKeeper’s Update Tracker.
- Open MacKeeper and select Update Tracker.
- Click the Scan for Updates button to check your apps for updates.
- Select any of the available updates, then press Update.
If you’re worried about your Mac, give MacKeeper a try. It comes with one free fix, letting you see the results before you buy.
Why is your MacBook screen flickering
There could be several issues causing your MacBook screen glitching. Fortunately, you can repair many of these yourself.
Your MacBook screen flashing might be caused by software glitches, problems with your graphics card, or even your MacBook overheating.
It could be a hardware failure—a problem caused by a faulty connection, water damage, or other issue with your laptop. If your Mac screen is black, it could be an issue with your power supply, for example.
However, before worrying about hardware repairs, try our solutions to see if they help your MacBook screen glitching problems.
How to solve MacBook screen glitching problem
Rather than put up with a screen that flickers, you may be able to fix the problem yourself by trying the following methods:
- Restart your Mac
- Run Apple Diagnostics
- Check for the latest macOS updates
- Switch off automatic graphics switching
- Turn off the True Tone
- Disable Dark Mode
- Clean your drive of junk files and recent downloads
- Clear the cache on your MacBook
- Disable hardware acceleration for your browsers
- Reboot your macOS in safe mode
- Reset your System Management Controller
- Reinstall macOS
- Take service support in the Apple store
1. Restart your Mac
If you want to fix any unusual problem on your computer, start by rebooting your system.
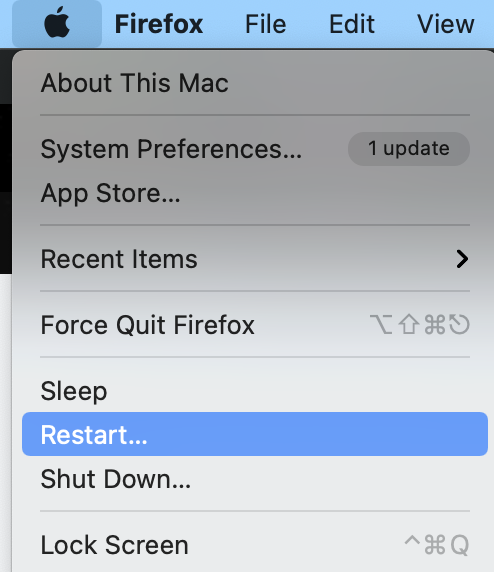
- Go to Apple menu > Restart.
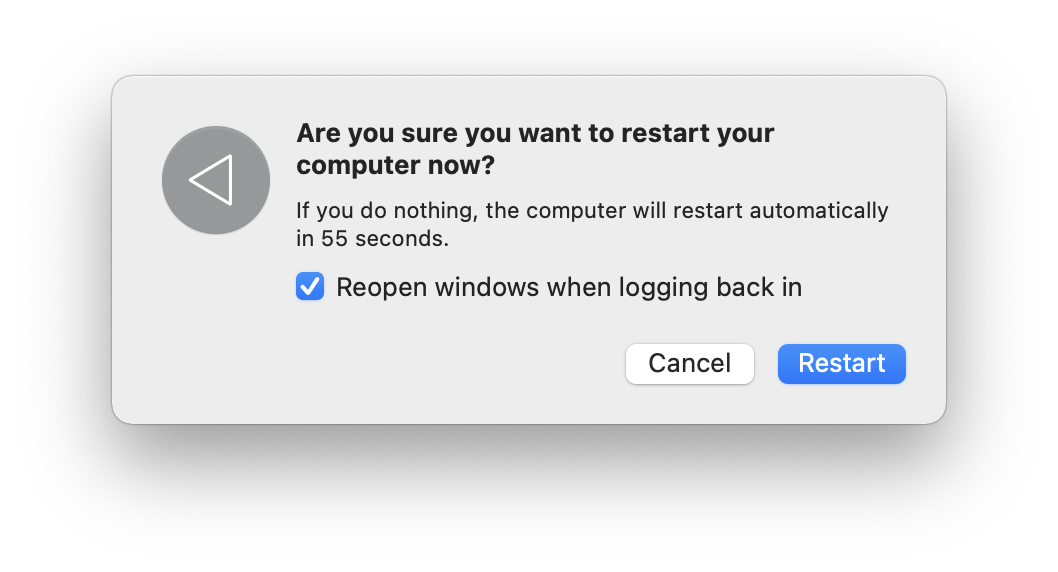
- If you want macOS to reopen your currently active windows when you restart, check Reopen windows when logging back in. Otherwise, just choose Restart.
2. Run Apple Diagnostics
Apple Diagnostics checks for hardware issues. This can help you rule out software problems and decide your next steps.
Before running Apple Diagnostics, turn off your laptop:
If your MacBook has an Apple silicon chip, launch Apple Diagnostics with these steps:
- Press and hold the Power button.
- Release the Power button when you see the startup options.
- Press and hold Command+D.
If your MacBook has an Intel Processor, launch Apple Diagnostics with these steps:
- Turn on your MacBook and immediately hold down the D key.
- Release the D key when you see a progress bar or a window asking you to choose a language.
Apple Diagnostics will display its results after a diagnostic scan. If your computer is connected to the internet, you can access support options immediately from the results screen.
3. Check for the latest macOS updates
Apple regularly releases system updates for macOS with important fixes. You should install any available macOS updates to help fix MacBook screen glitching issues.
Note:
Consider backing up your Mac using Time Machine before you begin.
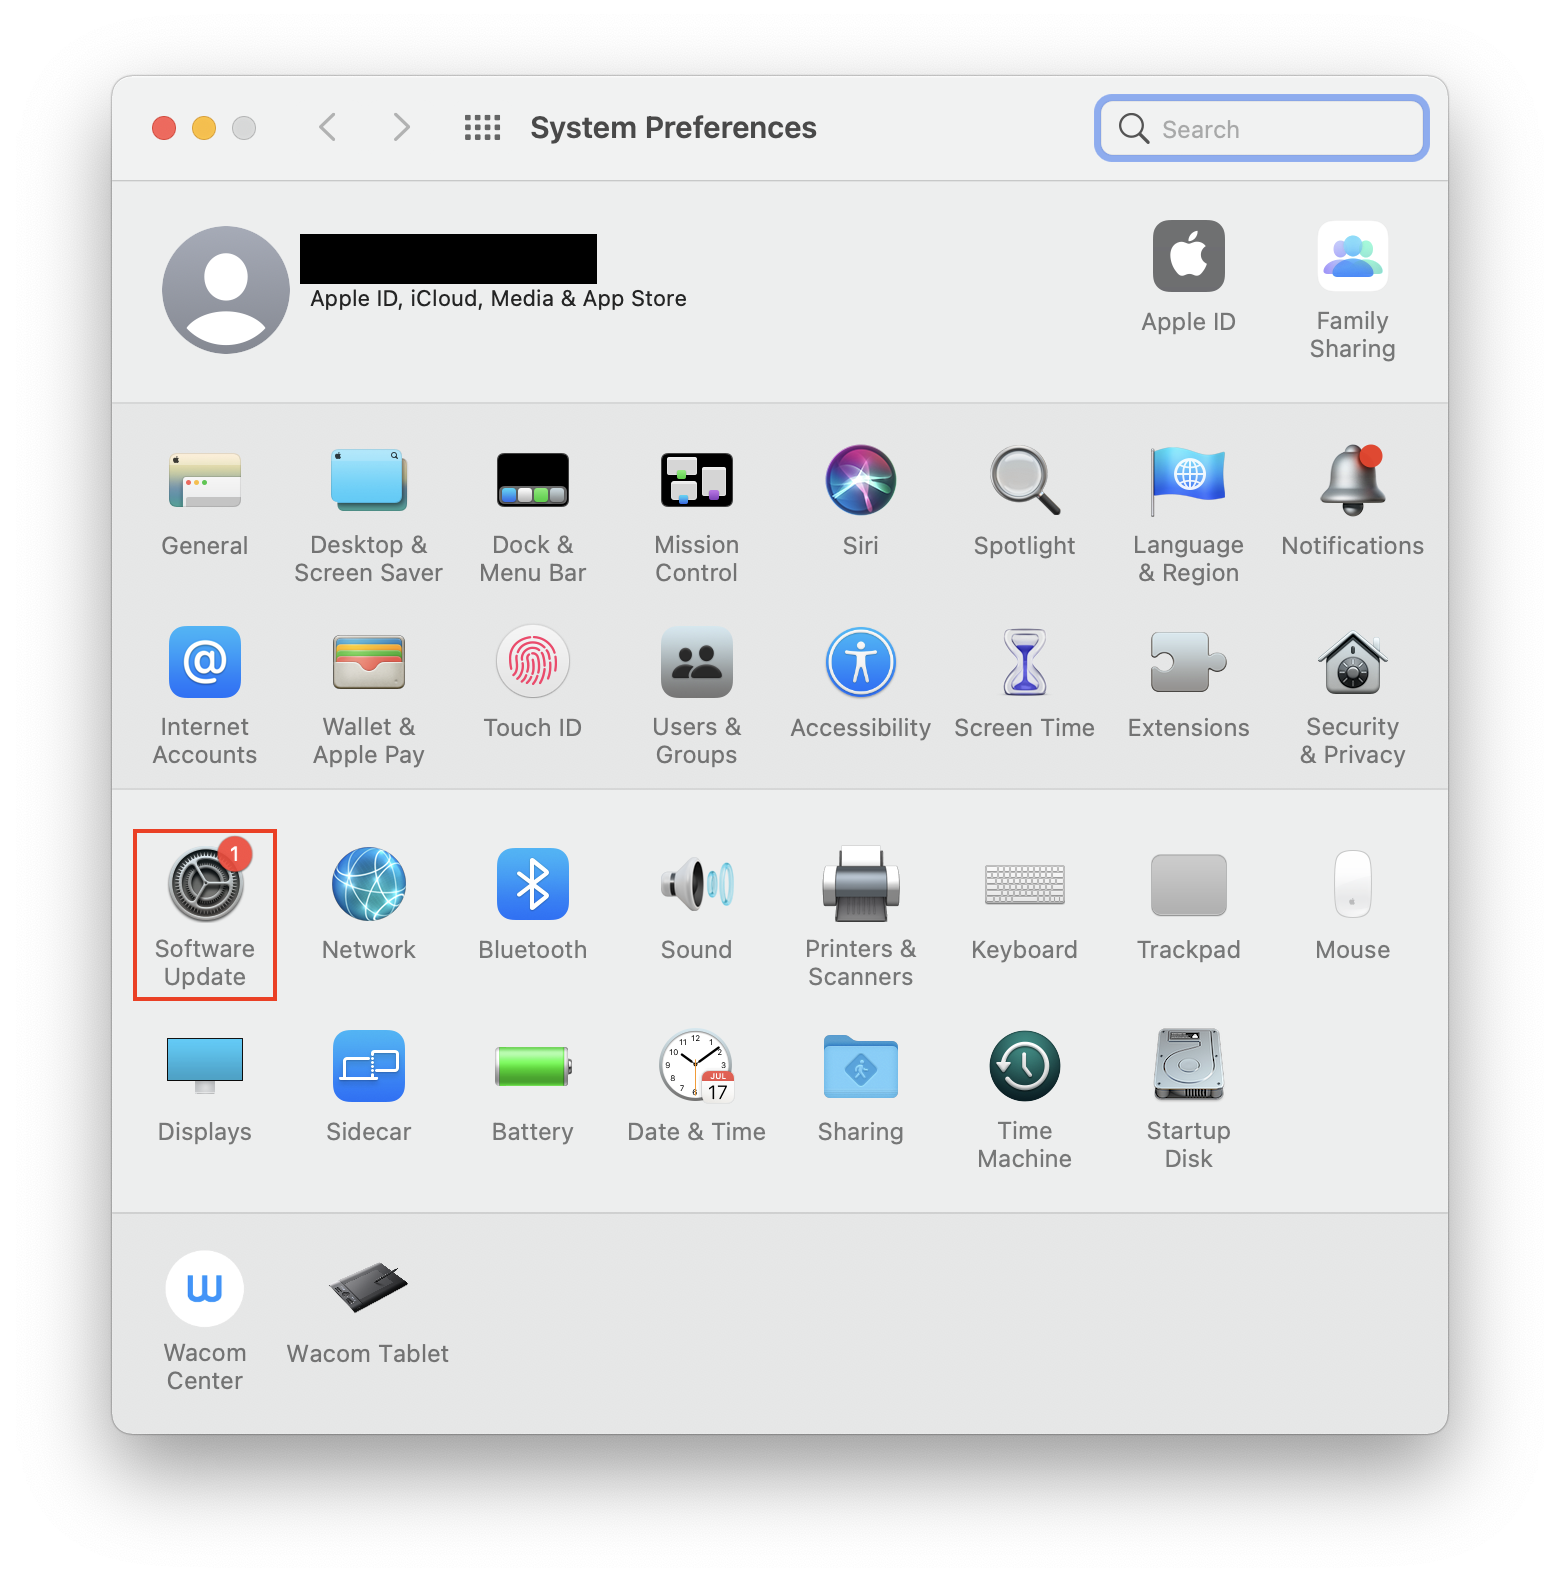
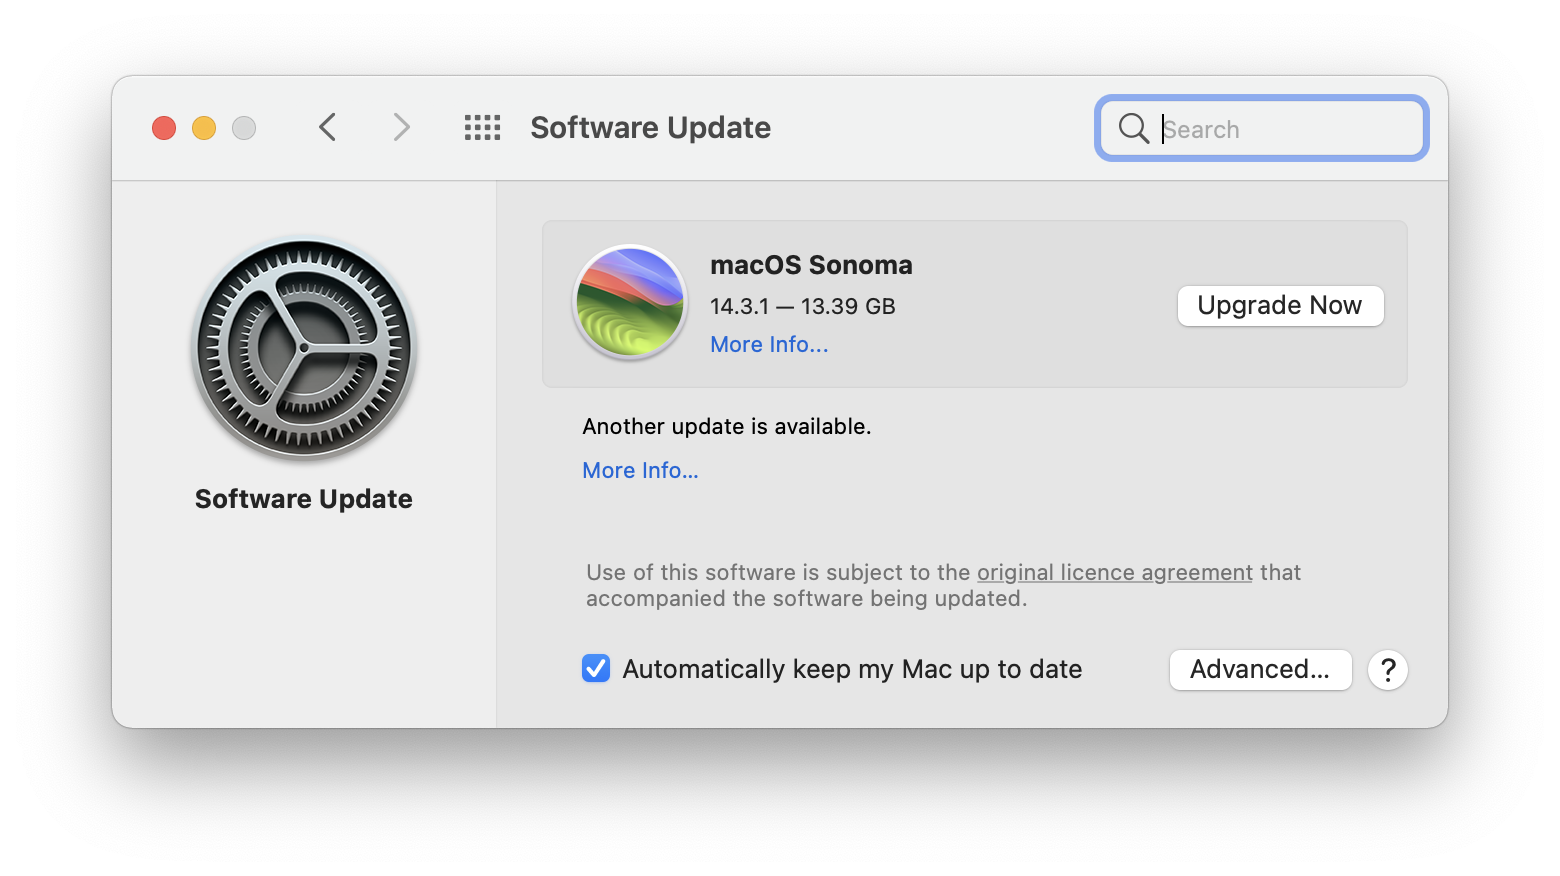
- Go to the Apple menu > System Preferences.
- Select Software Update.
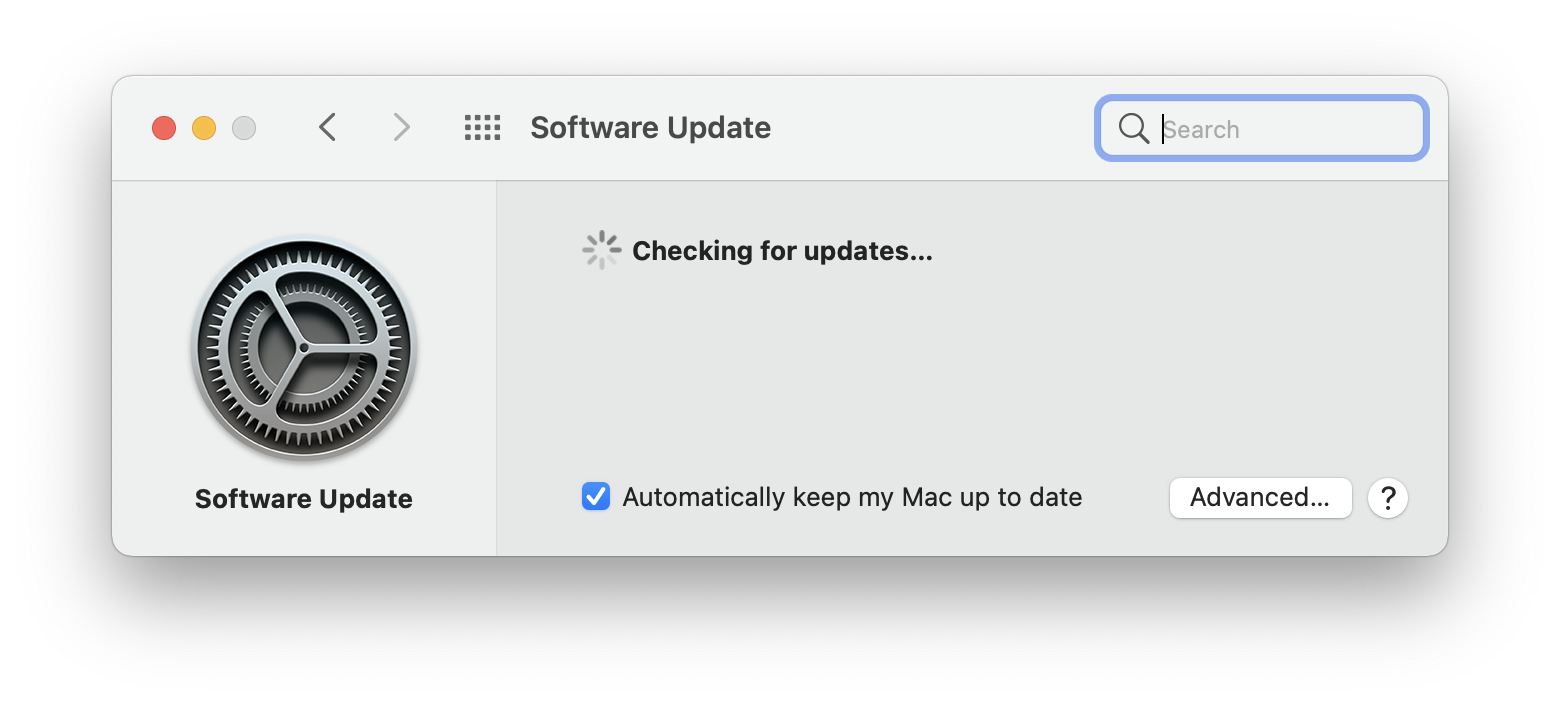
- macOS will search for updates automatically. If an update is available, click Update Now or Upgrade Now to begin downloading it.
- Once the update is ready, restart your Mac. The update will install once you reboot.
4. Switch off automatic graphics switching
If your MacBook has a standalone graphics chip, your graphics output might spread across two separate graphics processing units (GPUs). The standalone chip might handle more powerful tasks (like gaming or video rendering), while the integrated chip might handle the basics (like web browsing or word processing).
Automatic graphics switching helps reduce overall power consumption, increasing your battery life. However, it can also cause random MacBook screen flickering.
How to disable automatic graphics switching
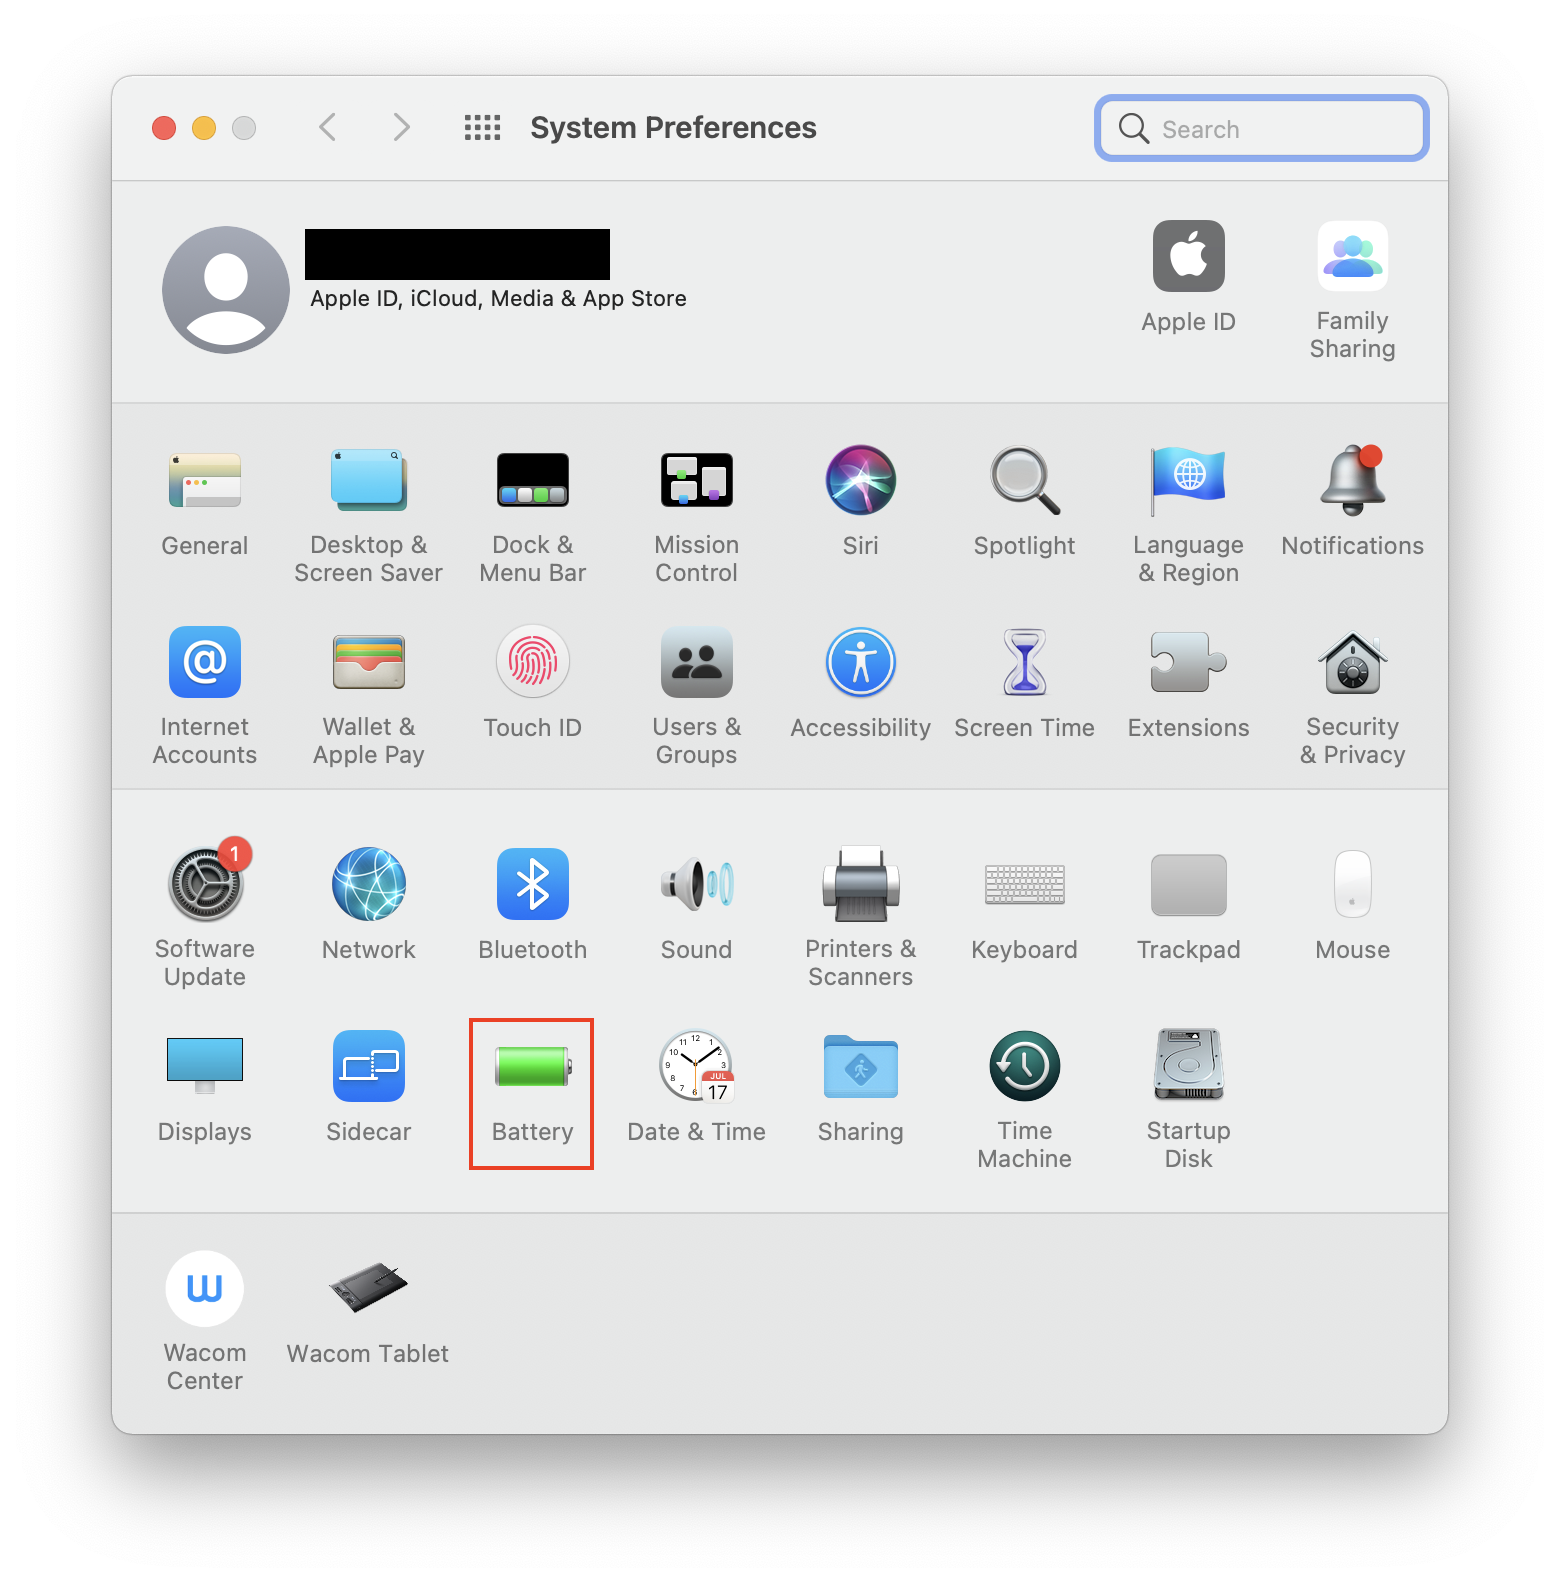
- Go to the Apple menu > System Preferences.
- Choose Battery. In the Battery menu, press the Battery option on the left.
- Uncheck the Automatic graphics switching checkbox to disable this feature.
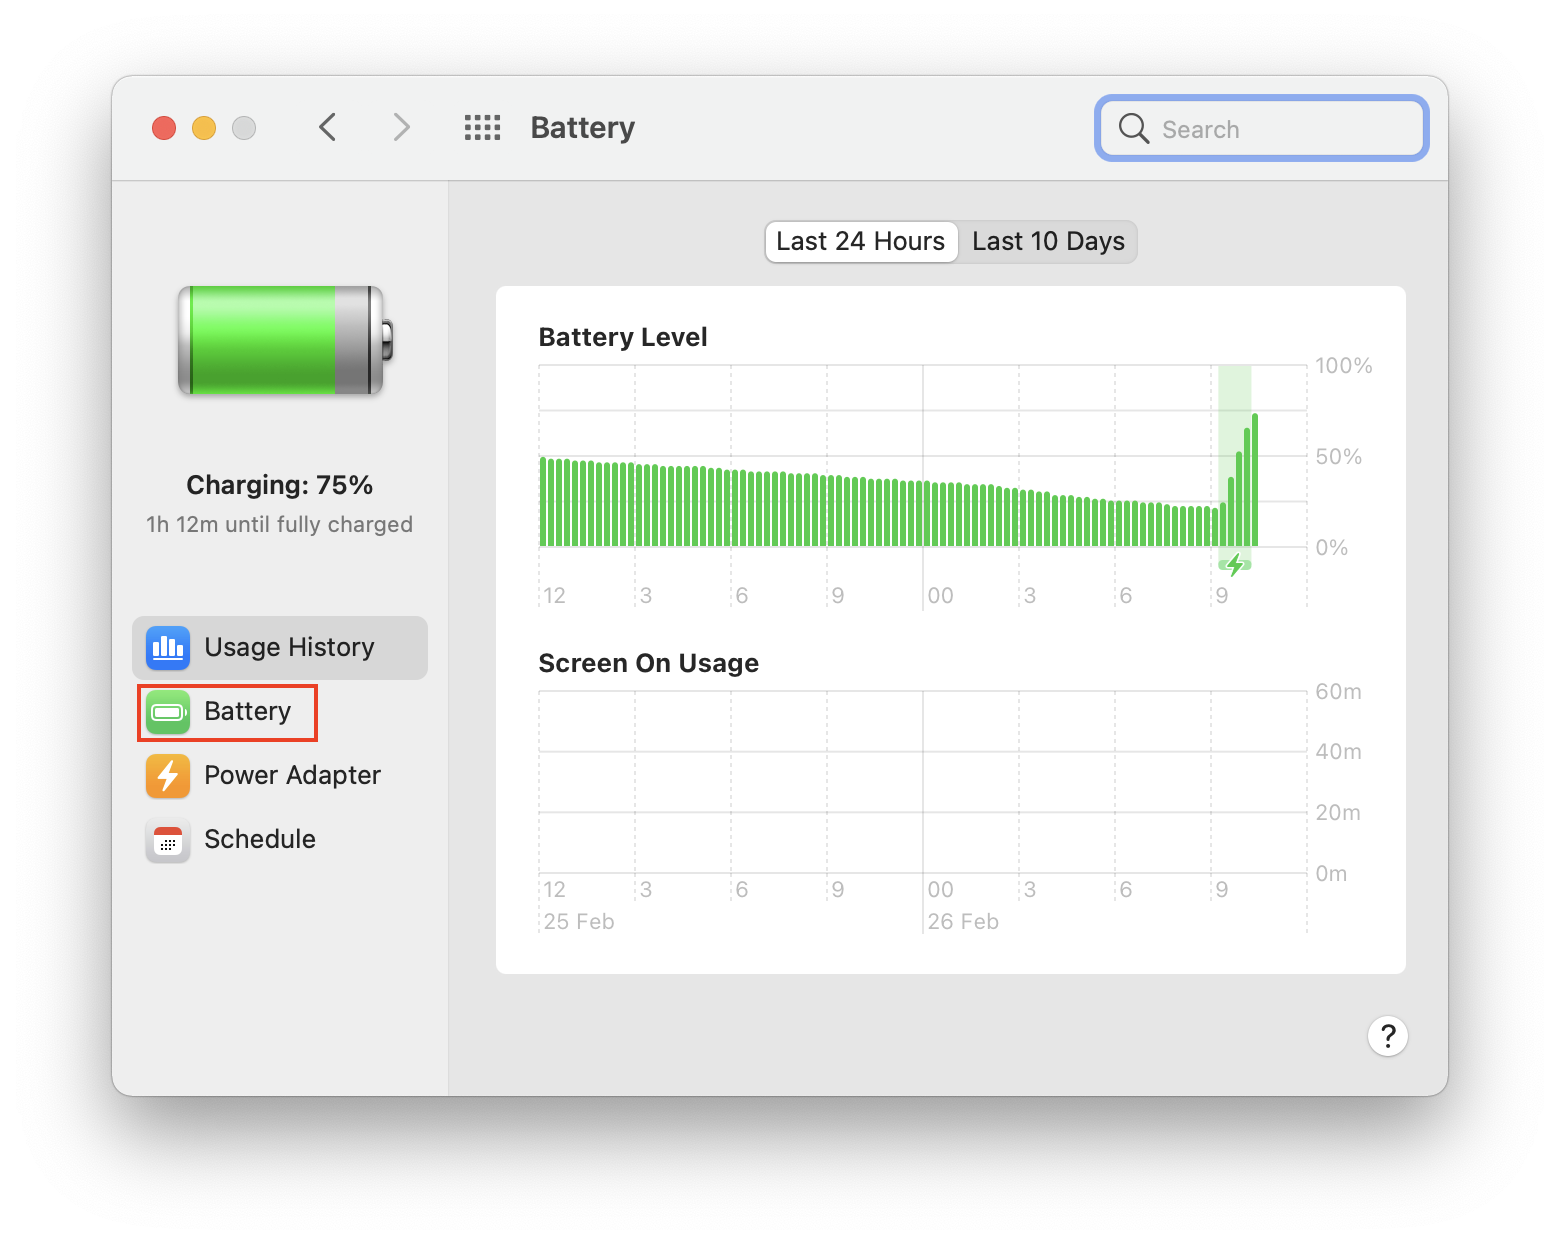
Expert tip: If automatic graphics switching isn’t listed in your settings, your laptop doesn’t have two GPUs. This means this feature isn’t available and can’t be why your MacBook screen glitches.
5. Turn off the True Tone
True Tone adjusts the color and intensity of your display to match the ambient light. It can really enhance your display—but it can also cause screen glitches.
Turn True Tone off to see if this is causing your problem:
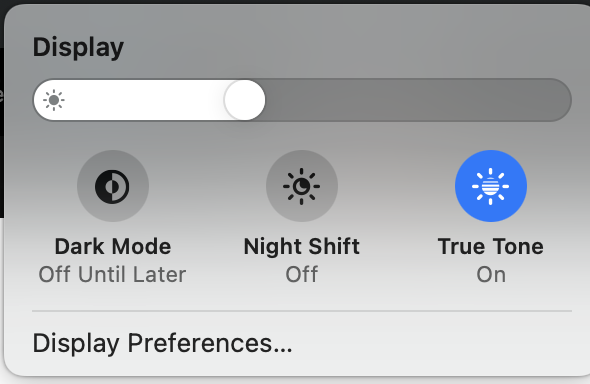
- Go to Apple menu > System Preferences > Displays.
- Uncheck the True Tone checkbox.
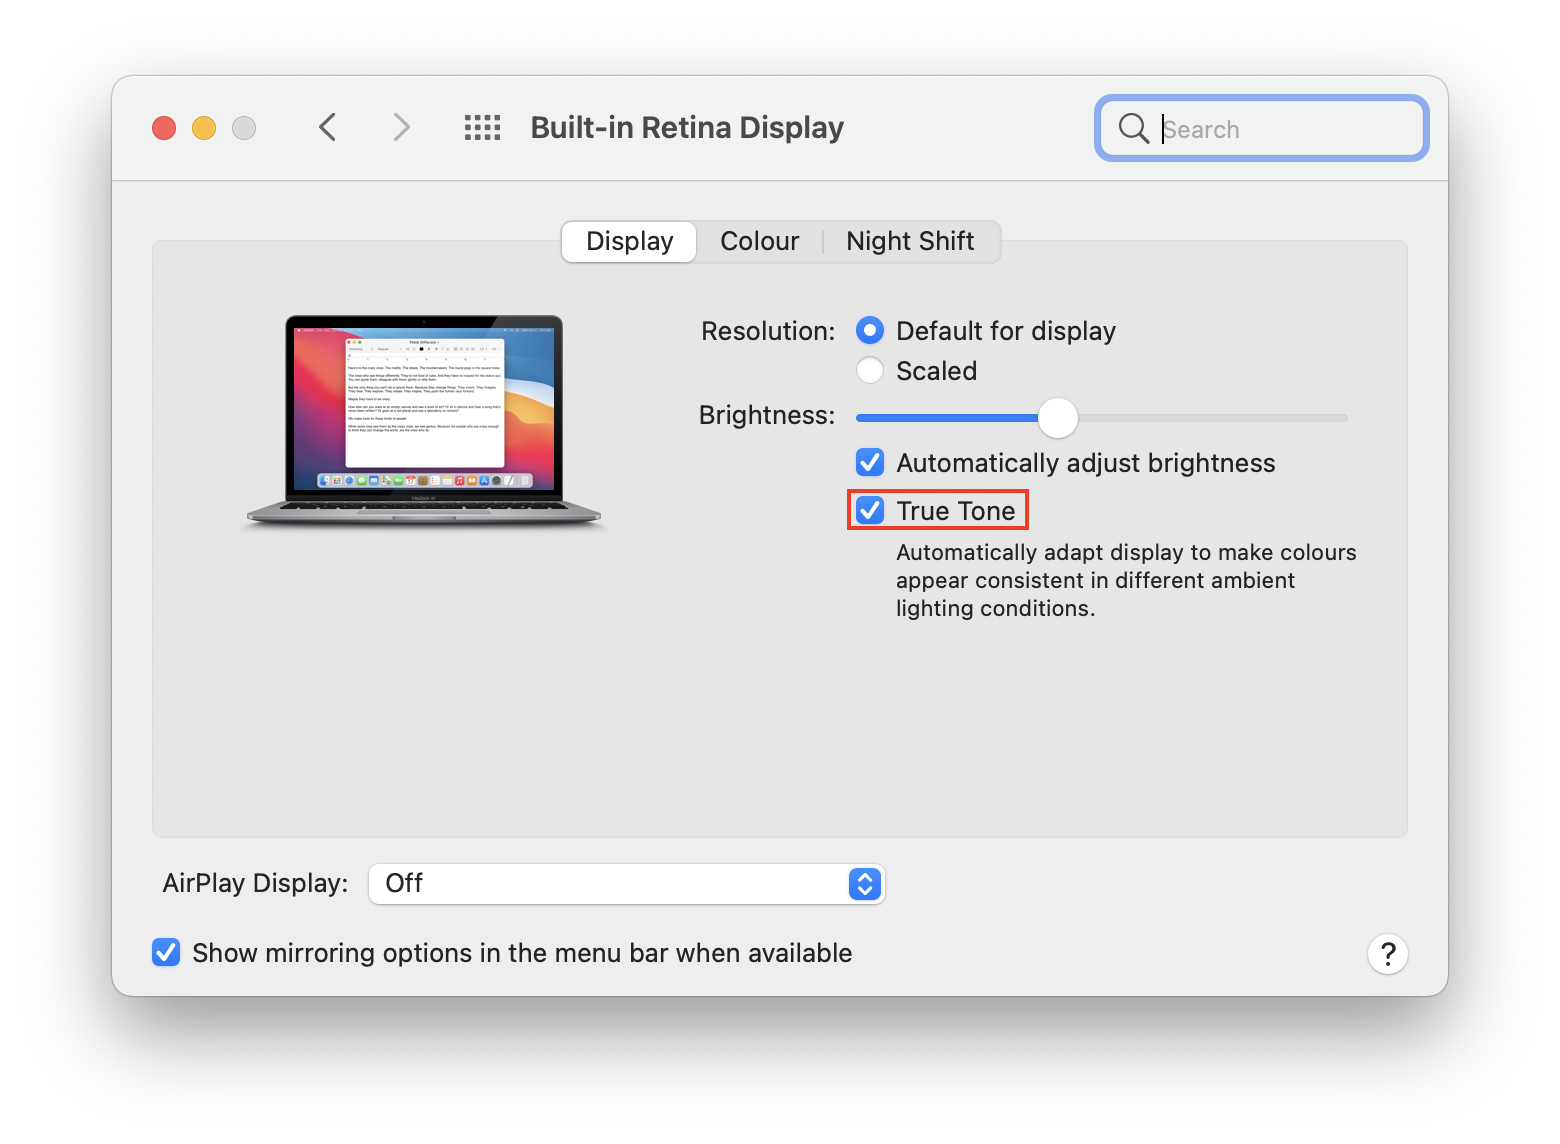
Note: The True Tone checkbox will only appear if your display supports True Tone. If it doesn’t show up for you, then this isn’t available on your system and isn’t the cause of your glitches.
6. Disable Dark Mode
MacBooks can be used in light/dark mode or automatically switch between the two depending on the time of day. These modes change how the menu bar, dock, windows, and various apps look.
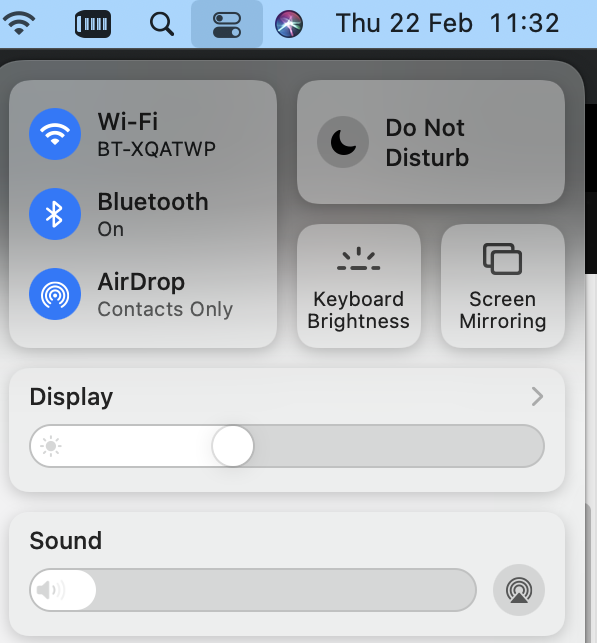
You can turn Dark Mode off quickly using the Control Center in the menu bar:
- Open the Control Center and select Display.
- If Dark Mode is turned on, click the icon to turn it off.
7. Clean your drive of junk files and recent downloads
Many of us have far too many junk files and unnecessary downloads stored on our MacBooks. They fill up our storage space–and insufficient storage can cause screen glitching.
Fortunately, MacKeeper makes cleaning your MacBook easy and quick.
Use MacKeeper to clean up junk files:
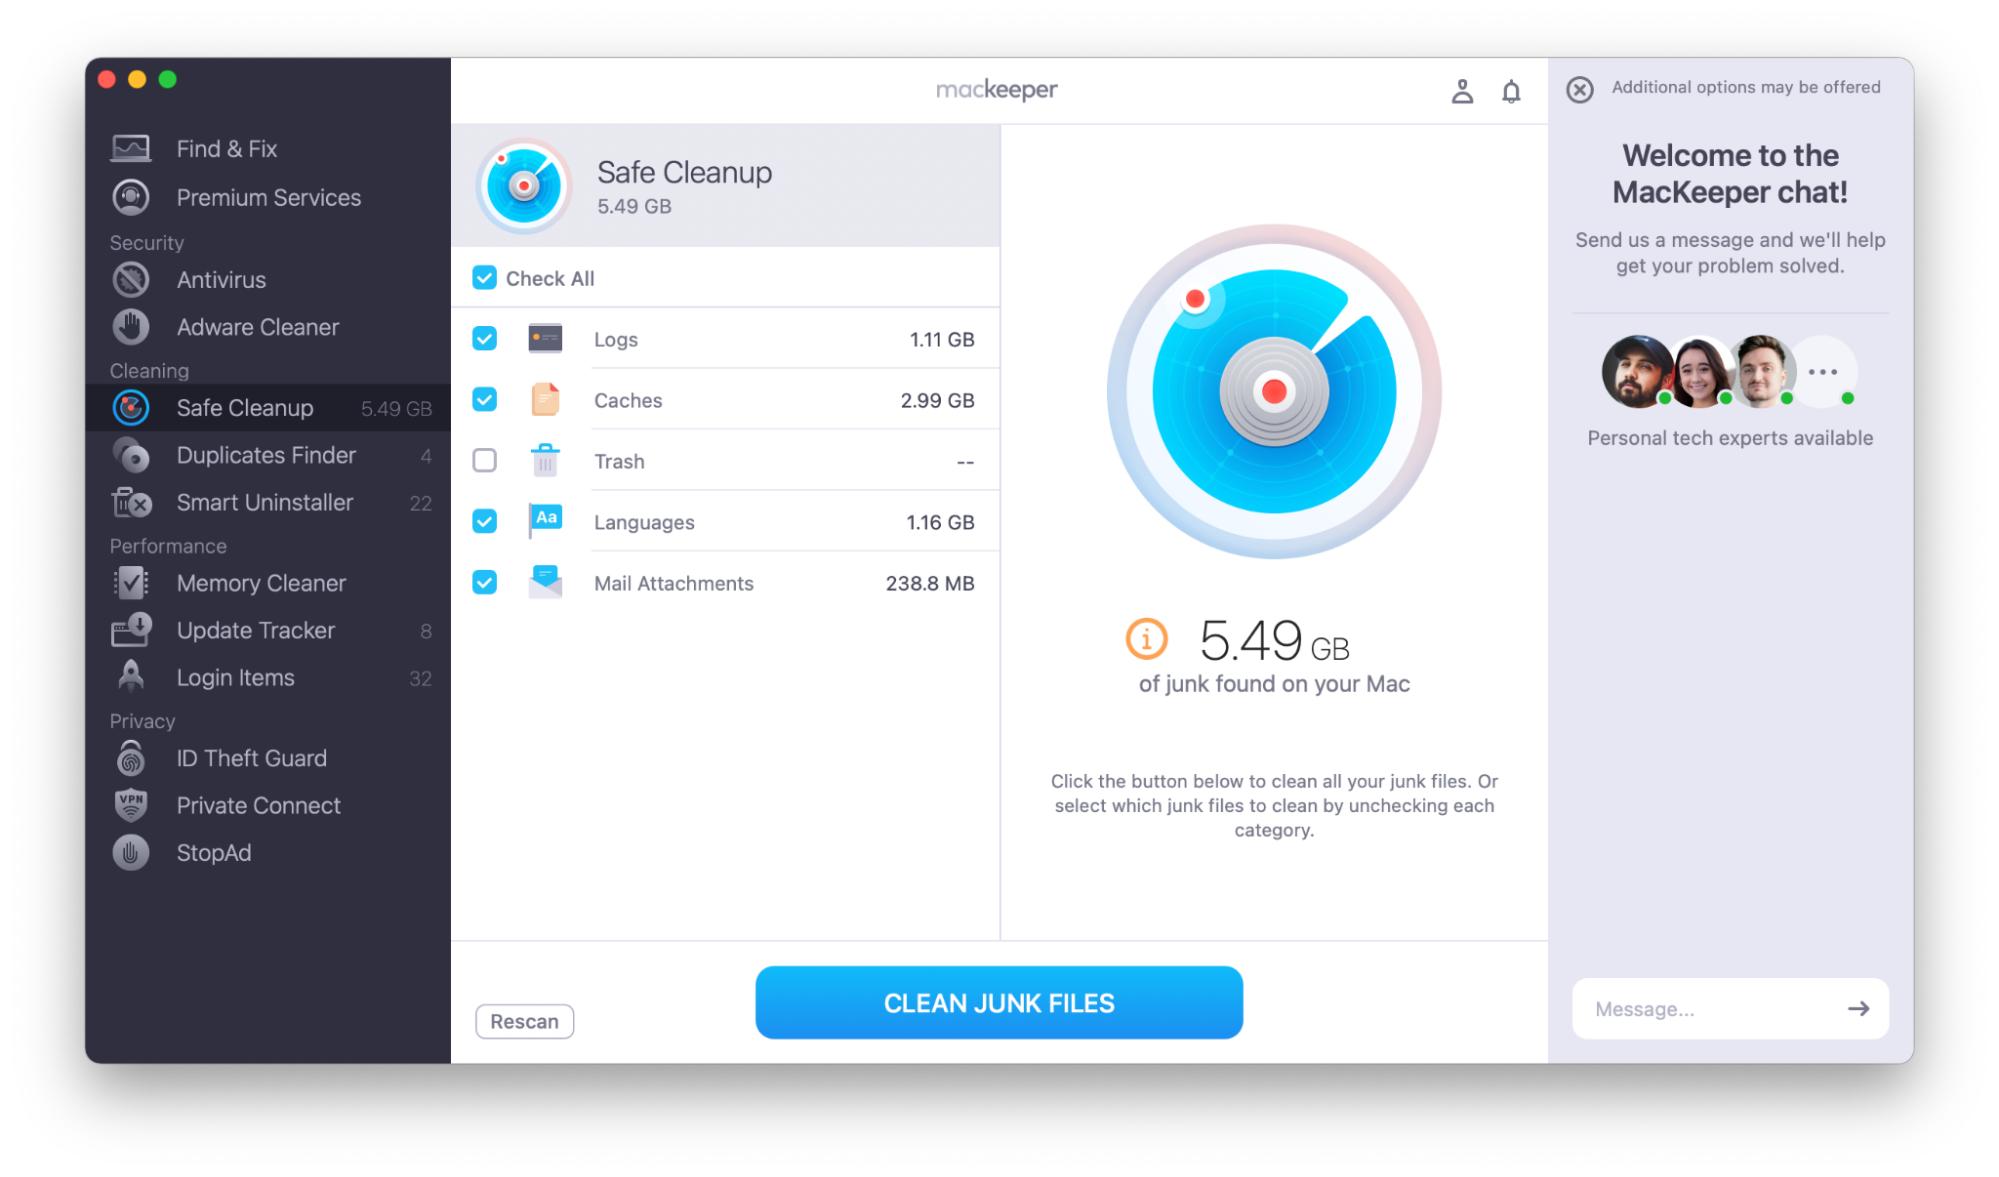
- Open MacKeeper and select Safe Cleanup.
- Choose Start Scan.
- When the scan is completed, select any categories that you want to delete and choose Clean Junk Files.

To clear your downloads folder manually, navigate to it in Finder, or choose Downloads from the Dock on your Mac. Delete any downloads that you don’t need.
8. Clear the cache on your MacBook
Cache files are small pieces of data. They’re created when you visit a website, open an app, or access a file. You might also hear them called temporary files.
While they can be useful, they can also take up a lot of space—and being low on storage can cause MacBook screen glitching.
Use MacKeeper to clear your cache:
- Open MacKeeper and choose Safe Cleanup in the sidebar.
- Click Start Scan.
- Once the scan is completed, make sure that Caches is selected, and choose Clean Junk Files.


9. Disable hardware acceleration for your browsers
Hardware acceleration means that your web browser can bring you video streaming and graphics in the highest possible quality. However, it can also put a lot of strain on your laptop and potentially cause screen glitching.
Expert tip: This isn’t possible in all browsers—for example, you can’t disable hardware acceleration in the latest versions of Safari.
How to disable hardware acceleration in Chrome:
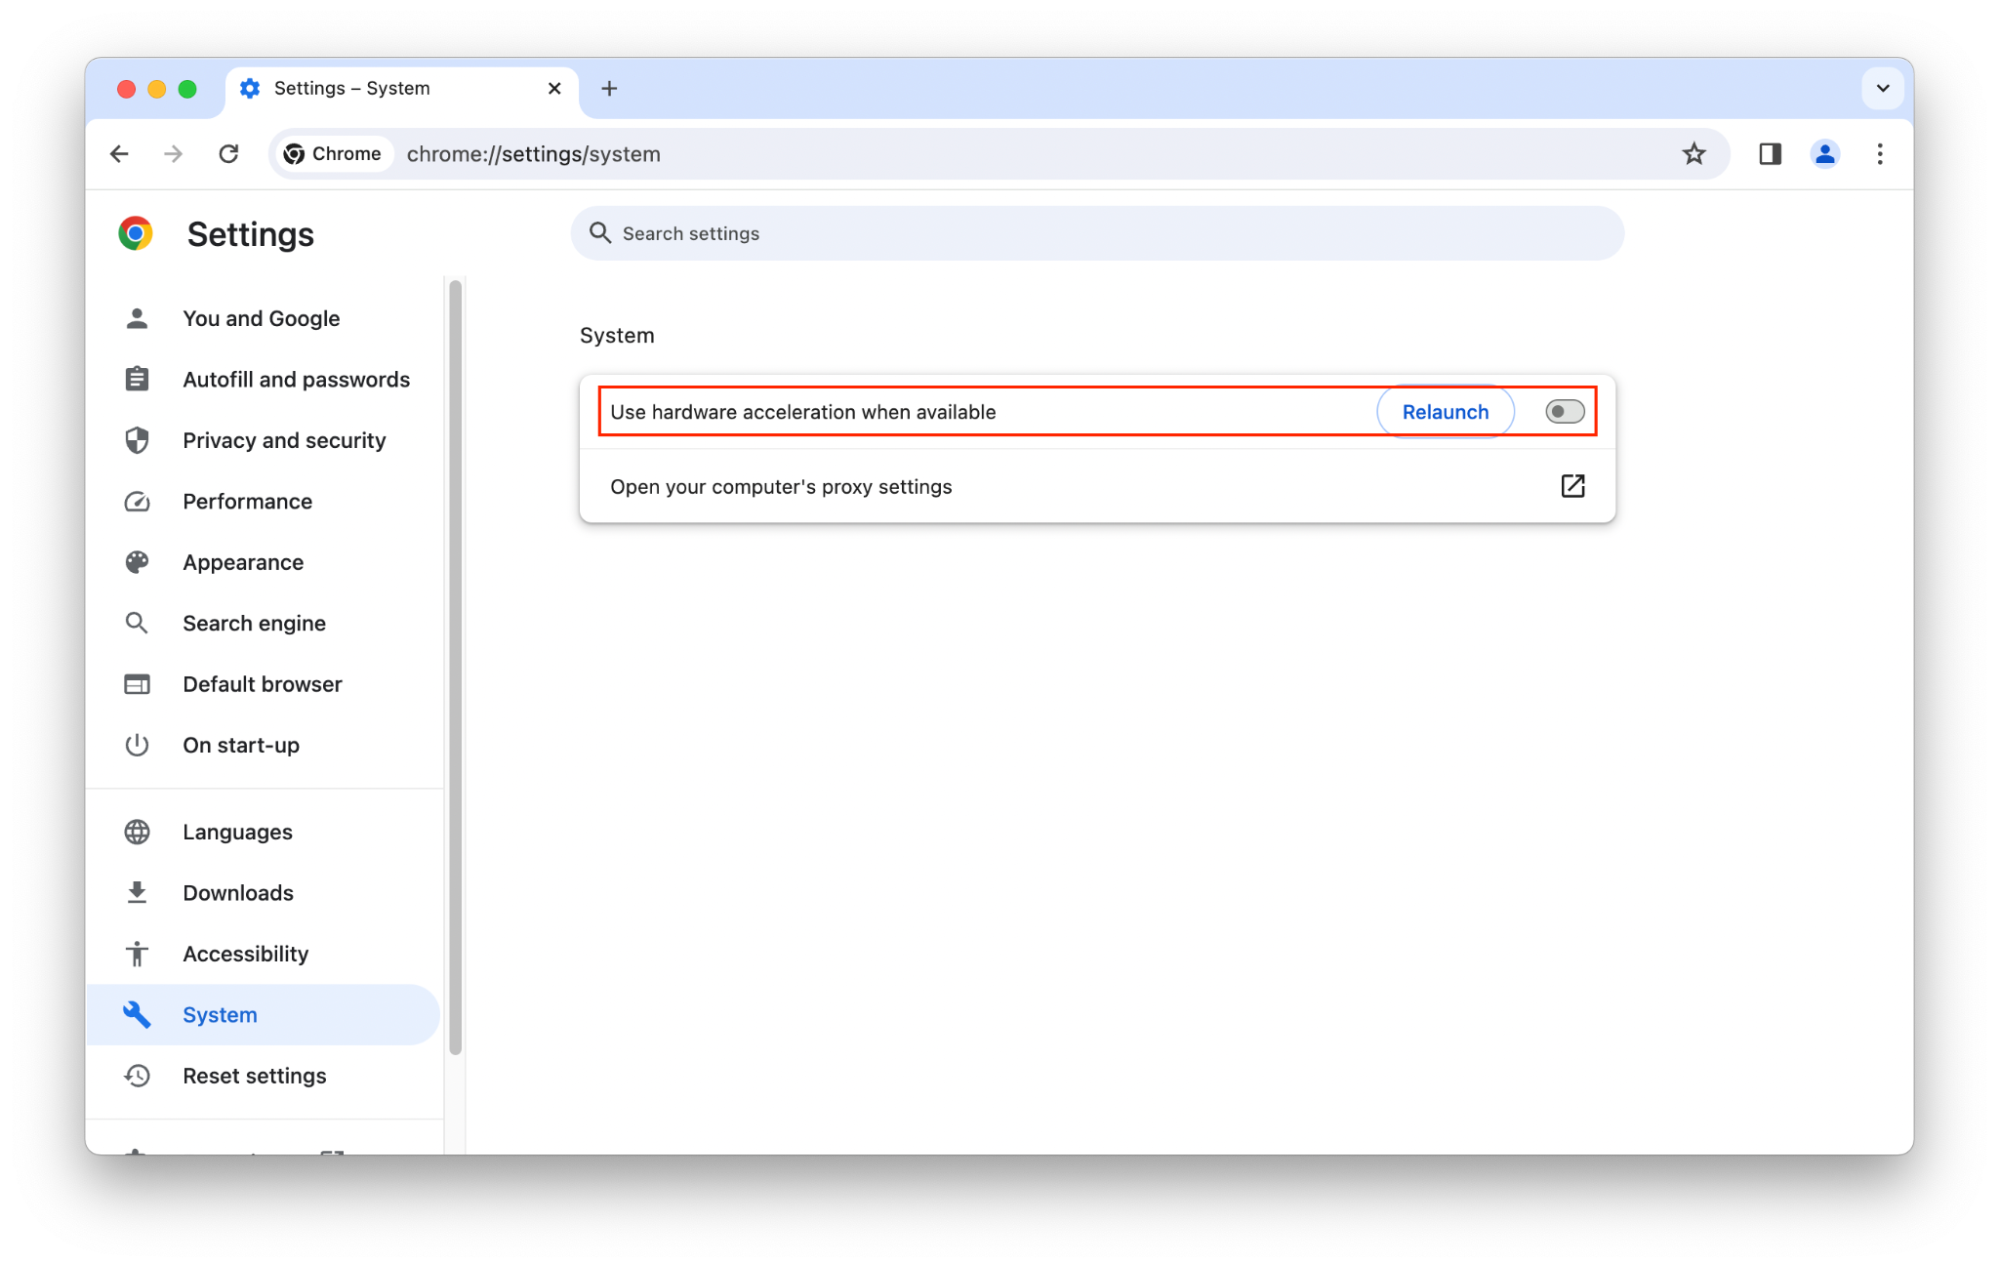
- Go to Menu (three dots) > Settings.
- Click System in the left-hand menu.
- Click the toggle marked Use hardware acceleration when available, and Relaunch your browser.
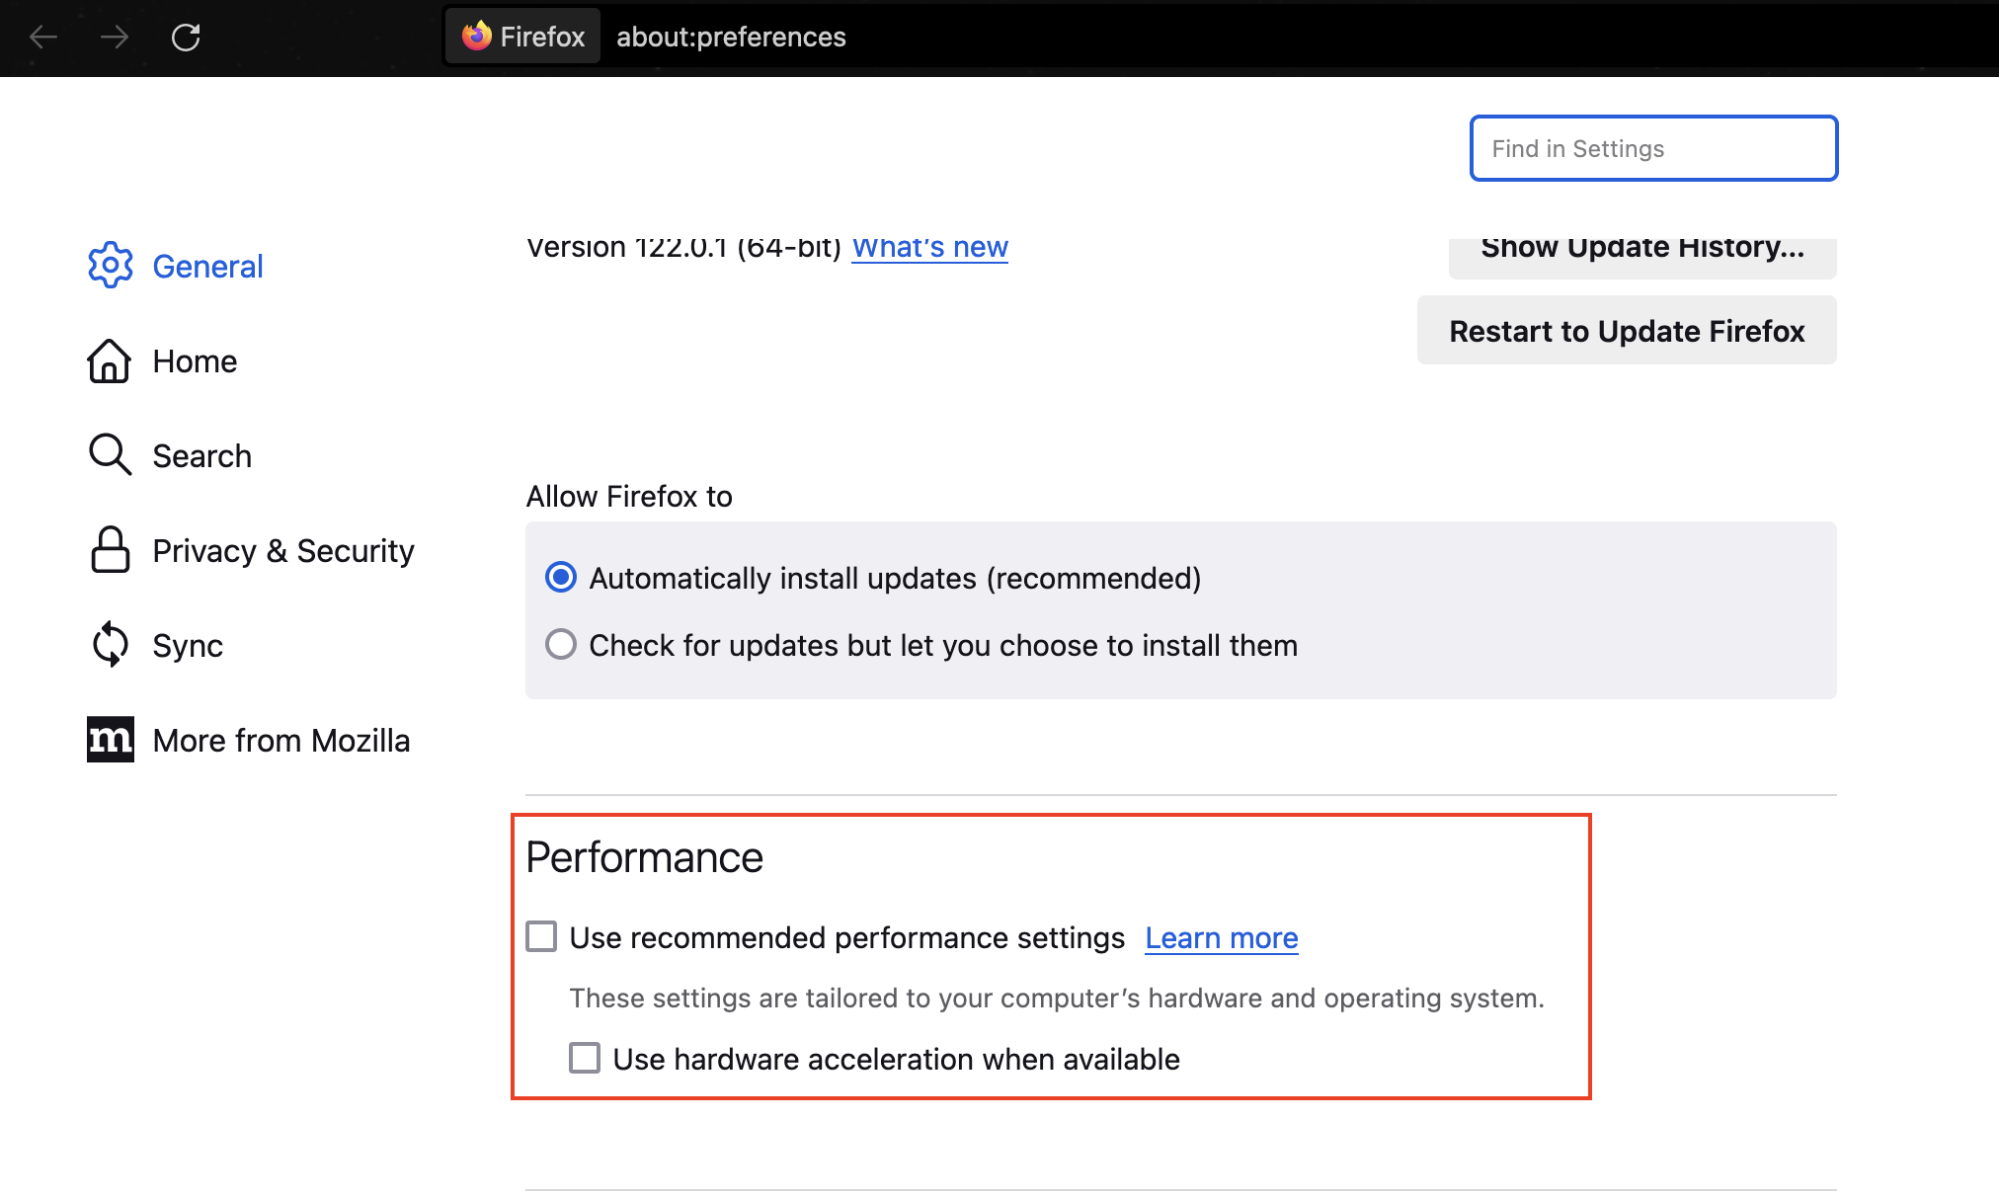
How to disable hardware acceleration in Firefox:
- Go to Menu (three lines) > Settings.
- Under General, scroll down to Performance. Uncheck Use recommended performance settings.
- This will bring up an additional option–uncheck Use hardware acceleration when available.
- Restart Firefox.
10. Reboot your macOS in safe mode
Safe mode prevents some software from launching on startup. Restarting in safe mode can help diagnose if your screen glitches are caused by software issues.
If your MacBook has an Apple Silicon M1 or M2 chip, here’s how to reboot in safe mode:
- Shut down your MacBook.
- Press and hold the Power button until Loading Startup Options appears.
- Select your disk.
- Press and hold the Shift key, and choose Continue in Safe Mode.
If your MacBook has an Intel Processor, here’s how to reboot in safe mode:
- Restart or turn on your MacBook, and immediately hold down the Shift key.
- When you see the login screen, log in as normal.
- You may need to log in a second time.
You should see the words Safe Boot in the menu bar on the login screen.
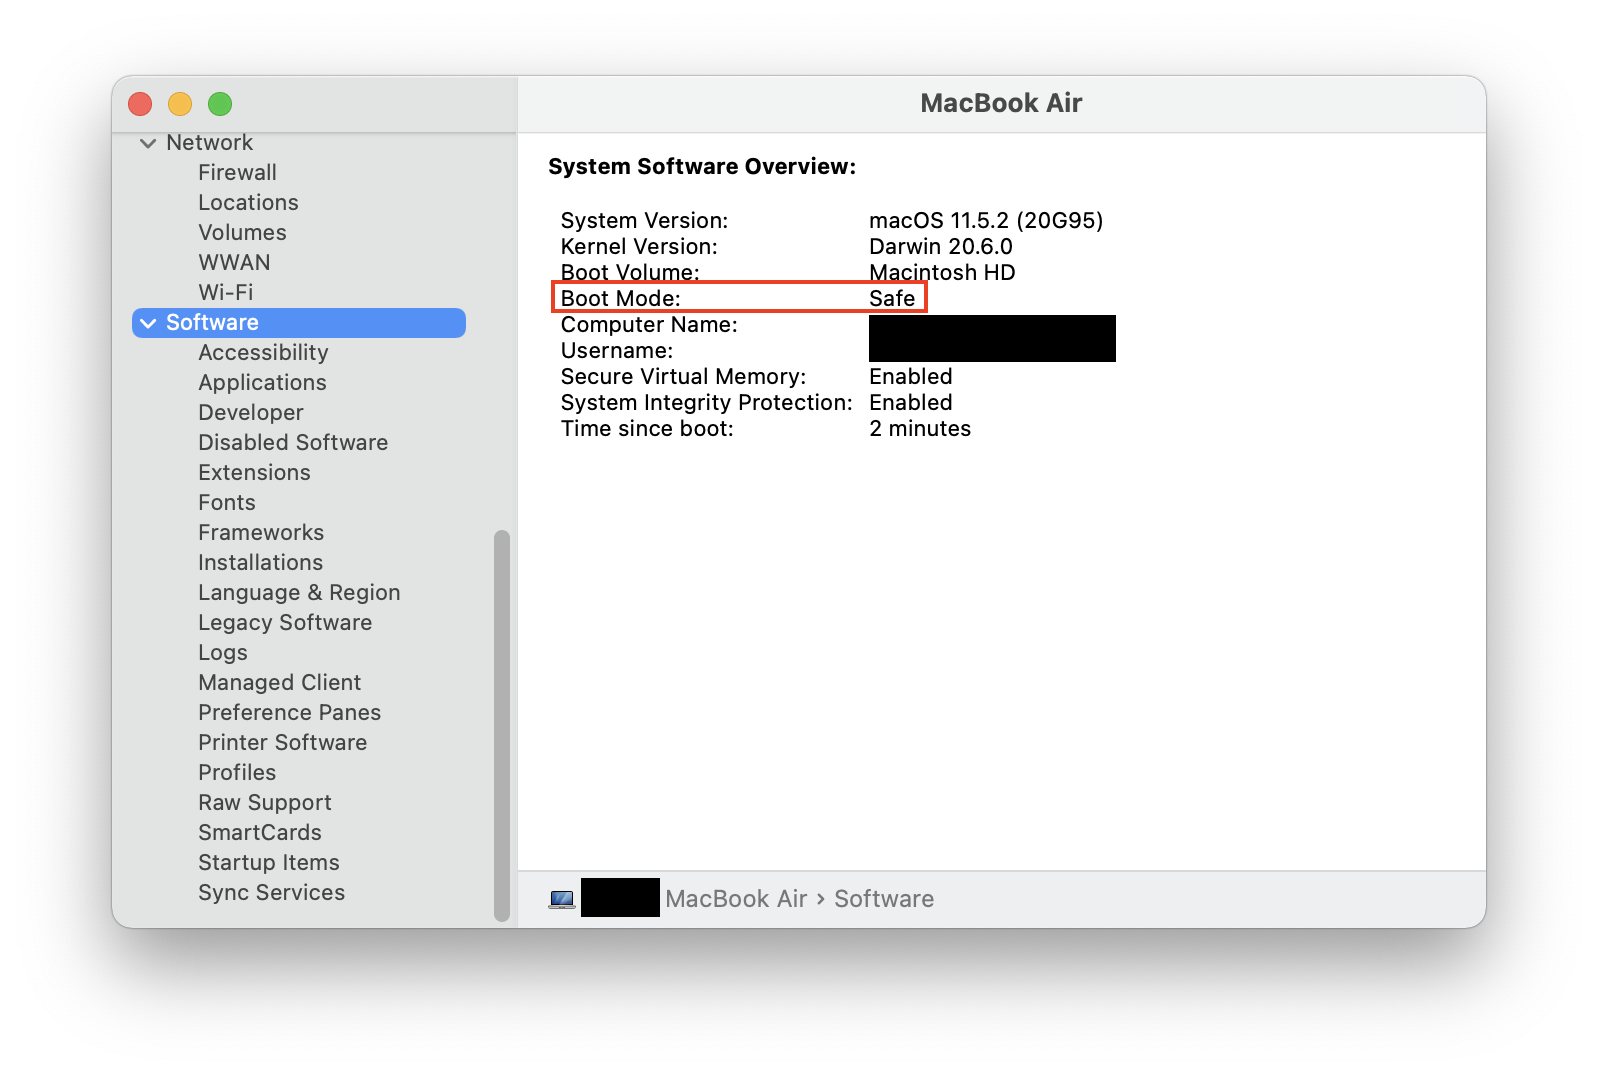
How to confirm you are in safe mode once you’ve logged in:
- Hold down the Options key.
- While holding Options, go to the Apple menu > System Information.
- Scroll down to Software in the left sidebar.
- If it says Safe next to Boot Mode, you are in safe mode.
If you don’t experience screen flickering problems in safe mode, one of your login items may be the culprit.
11. Reset your System Management Controller
Your MacBook’s SMC (or System Management Controller) is an important chip that controls several internal power settings. It handles the process of putting your Mac to sleep and waking it, charging your battery, switching between different graphics modes, and more.
Resetting your MacBook’s SMC may fix the MacBook screen flashing issue.
How to reset SMC on MacBooks with an Apple T2 Security Chip
If your laptop has an Apple T2 security chip, follow these instructions to reset your SMC:
- Switch your MacBook off and disconnect from the power. Press and hold Control + Option + Shift together for at least seven seconds, then press the Power button (while also holding the other keys).
- Continue to hold the keys for at least another seven seconds, then release them.
- After a few moments, press the Power button as normal.
How to reset SMC on older MacBooks (pre-2018)
MacBooks released before 2018 don’t have the Apple T2 security chip.
If your MacBook is older, follow these instructions to reset your SMC:
- Switch off your MacBook and disconnect from the power. Press and hold the Shift + Control + Option keys.
- With the keys selected, press and hold the power button. Hold the keys for at least 10 seconds, then release them.
- Press the power button.
Reset your NVRAM or PRAM Chip
The NVRAM (non-volatile random access memory) chip stores system-critical information, such as your current graphics configuration. Older PowerPC MacBooks use the PRAM (parameter random access memory) chip for this.
Resetting these chips can help display issues.
To reset your NVRAM or PRAM chip, follow these instructions:
- Shut down your MacBook.
- Press the power button to begin the boot-up process, then press and hold the Option + Command + P + R keys. Release these keys after approximately 20 seconds.
- Your MacBook should restart.
Check out our more in-depth article about how to reset NVRAM on Mac.
12. Reinstall macOS
If none of the previous steps have fixed your issue, you could reinstall the latest version of your macOS. It’s easy to do through macOS Recovery.
Note: Don’t worry. Reinstalling macOS won’t delete your personal files and data.
If your MacBook has an Apple Silicon M1 or M2 chip, launch macOS Recovery by following these instructions:
- Press and hold the Power button.
- When you see Options, release the Power button and select Options.
- Click Continue, and enter your password if prompted.
If your MacBook has an Intel Processor, launch macOS Recovery by following these instructions:
- Turn on your MacBook, and immediately press and hold Command+R.
- Select your wifi network.
- Enter your password when prompted.
In both types of MacBook, you can then choose to reinstall macOS.
13. Take service support in the Apple store
If the steps above can’t cure your MacBook screen flickering, it may be a hardware issue. Contact your local Apple store for further assistance.
Conclusion
Whether you’re using a MacBook Air or Pro, you may find your Mac screen blinking or glitching at some point. It might be a sign of several problems, but fortunately, most of these issues are fixable.
You may also experience other computer display issues. Try our advice for dealing with the Mac white screen, or find out how to repair the MacBook pink screen.


