In this article you will find the following:
When you boot up your Mac and get that message pointing towards Zsh over the good old Bash–it might be surprising. Luckily, it's just Apple's way of adapting and evolving, trying to provide users with what they believe is a better shell experience.
But the beauty of macOS is that you aren't locked into anything. Whether you're a die-hard Bash enthusiast or curious about Zsh, the power of choice remains with you.
Our comprehensive guide is here to give you clarity. We'll walk you through the why behind this change, and more importantly, the how–so you can confidently choose your shell path.
BEFORE WE START
Curious about the macOS default shell message? One of the keys to a smooth-running Mac is regular maintenance. Much like our need for health check-ups, Macs need TLC (tender loving care). For this aim, use MacKeeper’s Memory Cleaner to refresh your Mac. It manages memory usage and curbs resource-hogging processes. Plus, this is your straightforward way to boost performance and keep those pesky errors at bay.
Here’s how to use MacKeeper’s Memory Cleaner:
- Download MacKeeper.
- Launch MacKeeper and select Memory Cleaner from the left pane.
- Click Open.
- Select Clean Memory.
Meaning of "The default interactive shell is now Zsh"
The alert "The default interactive shell is now Zsh" indicates the macOS's transition from Bash to Zsh within Terminal. Although, if Terminal isn't your thing, no stress. But for regular users, while it's a noteworthy shift, it barely tweaks your typical Terminal interactions.
Why do you see this warning message?
You’re already know that thewarning message serves as a heads-up about underlying changes in macOS. Here are the primary reasons for this alert:
- The transition from Bash to Zsh: Apple decided to switch its default Unix shell in Terminal from Bash to Zsh. This change boosts security and offers newer features, such as interactive auto-completion, themable prompts, and path expansion.
- User awareness: It ensures that regular Terminal users are aware of the system's default settings, even if the overall user experience remains largely the same.
- Software consistency: As software evolves, notifications like these help bridge the gap between previous and current versions.
Is Zsh good for your Mac?
Zsh, also termed the Z shell, builds upon the foundation set by Bash, which was the go-to shell for macOS. Given its enriched features, it's no surprise that using Zsh over Bash is often the top pick. To elevate the experience further, we recommend introducing a framework to Zsh, which customizes how you handle settings, plugins, and attractive themes.
What to do if you see "The default interactive shell is now Zsh" message
Encountering this message can be perplexing for some Mac users. But, don’t worry. Next, we’ll guide you through what steps you can take upon seeing it:
- How to switch from Zsh to Bash
- How to switch to the bash with Homebrew
- How to hide “The default interactive shell is now Zsh” and continue using bash
How to switch from Zsh to Bash
Thankfully, adjusting between Zsh and Bash is a breeze. To transition from Zsh to Bash, type chsh -s /bin/zsh in your Terminal. After restarting, new sessions will default to Bash.
Now follow these steps to change Zsh to Bash:
- Open the Apple menu and select System Preferences.
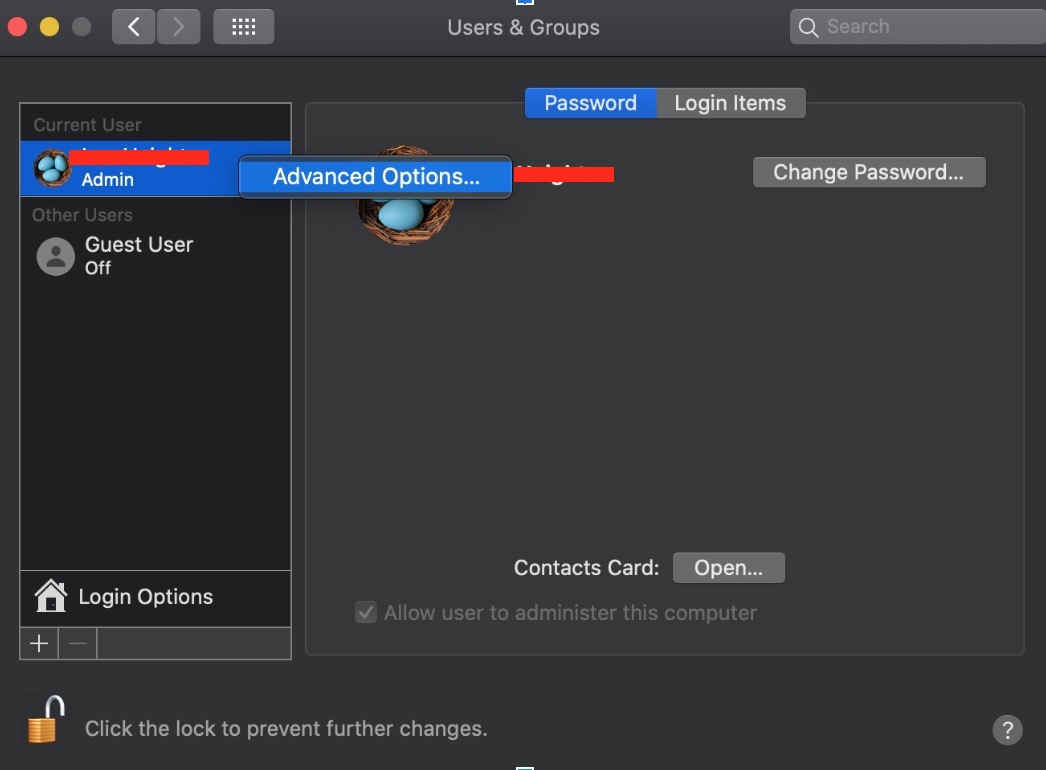
- Navigate to Users & Groups.
- Right-click on your username and select Advanced Options.
- If prompted, enter your password and confirm.
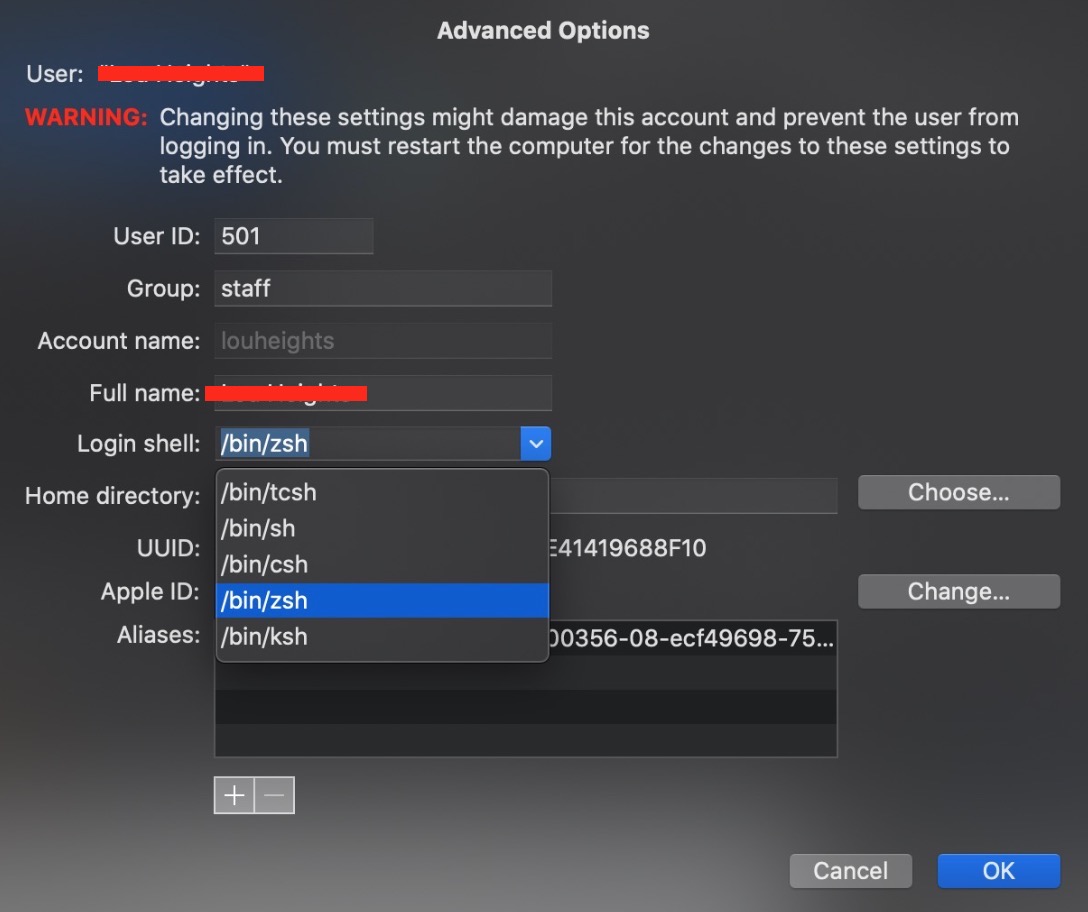
- Find the Login shell drop-down menu and select /bin/zsh.
- Press OK and close System Preferences.
How to switch to the Bash with Homebrew
To switch to a new shell, like Bin/Bash, add its name to the shell file and save it. This step ensures your computer knows it's okay to use that shell. Think of it as a safety net, stopping you from accidentally picking something that could mess things up.
Here’s the detailed instructions on how to switch Zsh to Bash with Homebrew:
- Start Terminal.
- Enter xcode-select --install and press Enter. When prompted, click Install and patiently wait for the process to finish.
- To initiate the Homebrew installation, key in /bin/bash -c "$(curl -fsSL https://raw.githubusercontent.com/Homebrew/install/HEAD/install.sh)” and press Enter. This might take a moment, so wait a bit.
- If alerted that /opt/homebrew/bin isn't in your PATH, take Homebrew's advice by copying their recommended command and pasting it into Terminal. Confirm with Enter.
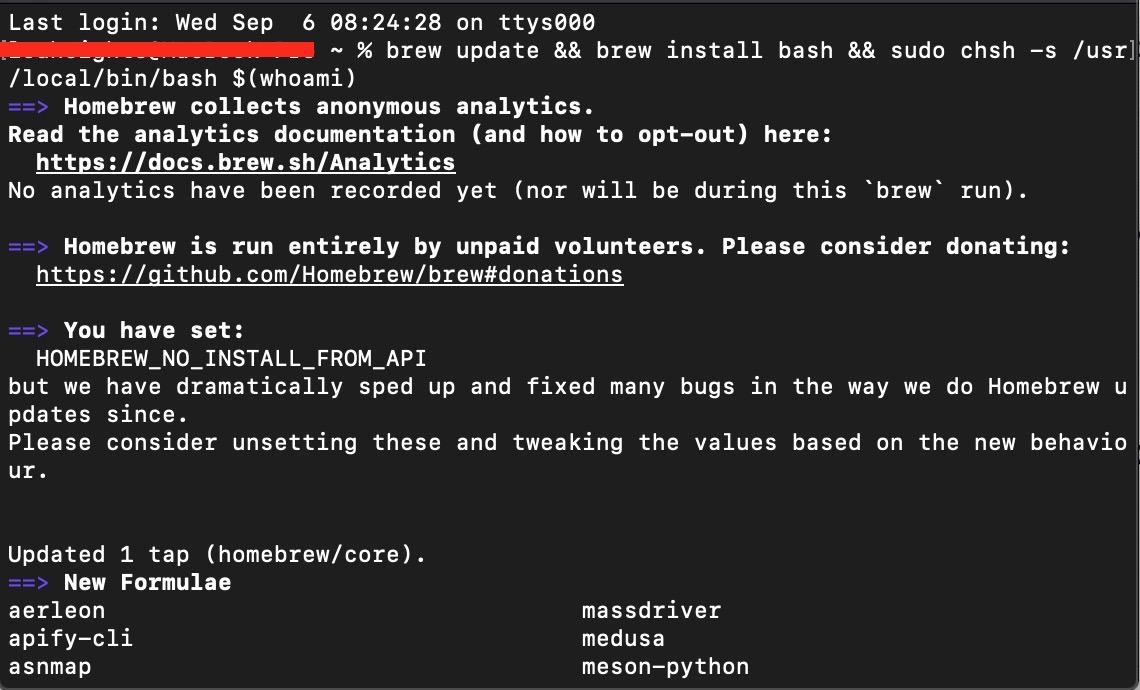
- Conclude by running brew update && brew install bash && sudo chsh -s /usr/local/bin/bash $(whoami) to update and establish your new Bash shell.
With Homebrew, a popular package manager for macOS, you can effortlessly install a newer version of bash and set it as your default shell.
How to hide “The default interactive shell is now Zsh” and continue using Bash
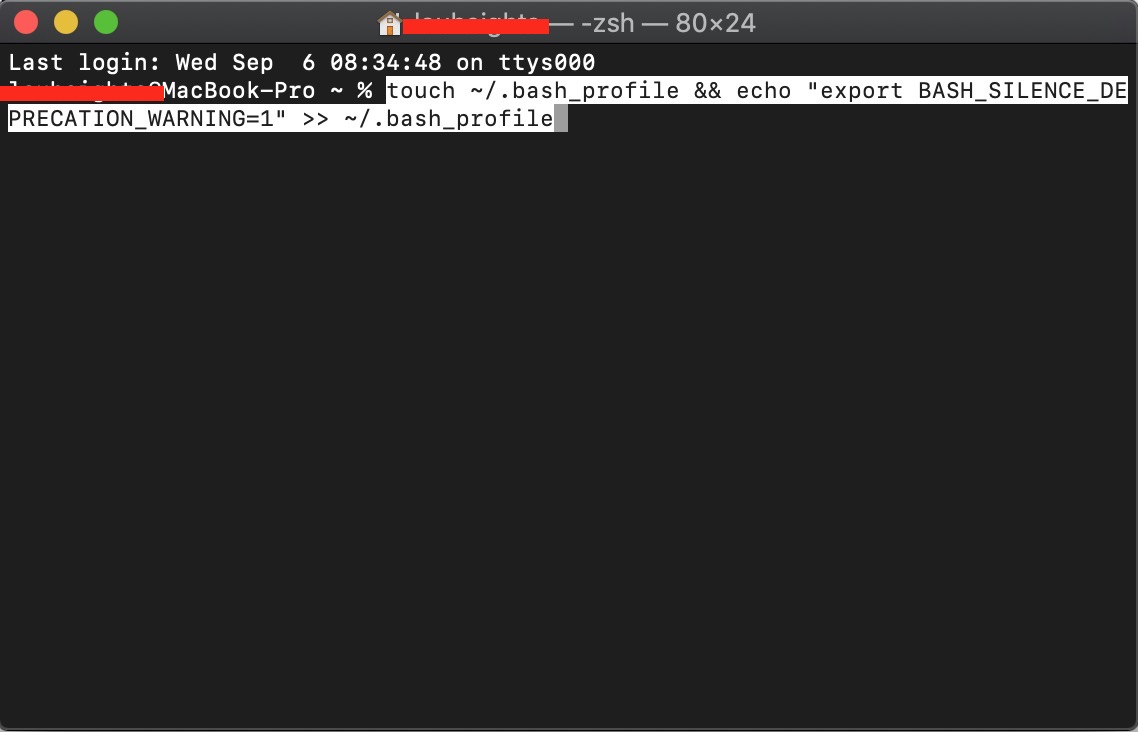
For those who appreciate Zsh's advanced features but remain loyal to Bash, there's a solution to mute the default shell notification. After integrating a specific code snippet (export BASH_SILENCE_DEPRECATION_WARNING=1) into configuration files like ~/.bash_profile, ~/.profile, or ~/.bashrc, you can easily use Bash instead of Zsh on Mac.
Now see the steps to dismiss the alert and persist with Bash in a logical sequence:
- Launch Terminal on your Mac.
- To mute the notification, type and execute the following command: touch ~/.bash_profile && echo "export BASH_SILENCE_DEPRECATION_WARNING=1" >> ~/.bash_profile.
- If the alert remains, it might be necessary to adjust another profile file. Simply substitute ~/.bash_profile in the command with ~/.profile or ~/.bashrc and run it again.
Note from our experts: For those who've transitioned to Zsh and still see the message, you might find success by adding the line to the /etc/profile as root. This approach often helps ensure consistent silencing of the notification.
Wrapping up with a Bash
Navigating between the digital lanes of Zsh and Bash might feel a tad overwhelming at first. So, our team has explored how to silence pesky notifications and made some tweaks to embrace the shell of your choice.
However, there's a broader picture here. Beyond just updates and settings, it's the consistent care of your Mac that makes all the difference. This is where MacKeeper’s Memory Cleaner shines. By managing your Mac’s memory and waving goodbye to time-draining processes, you're not just fixing issues, you're preventing new ones.
If you found this guide helpful, don't forget to check out our other expert walkthroughs on Zsh permission denied on Mac and check SSD health on Mac for more insights and solutions.


