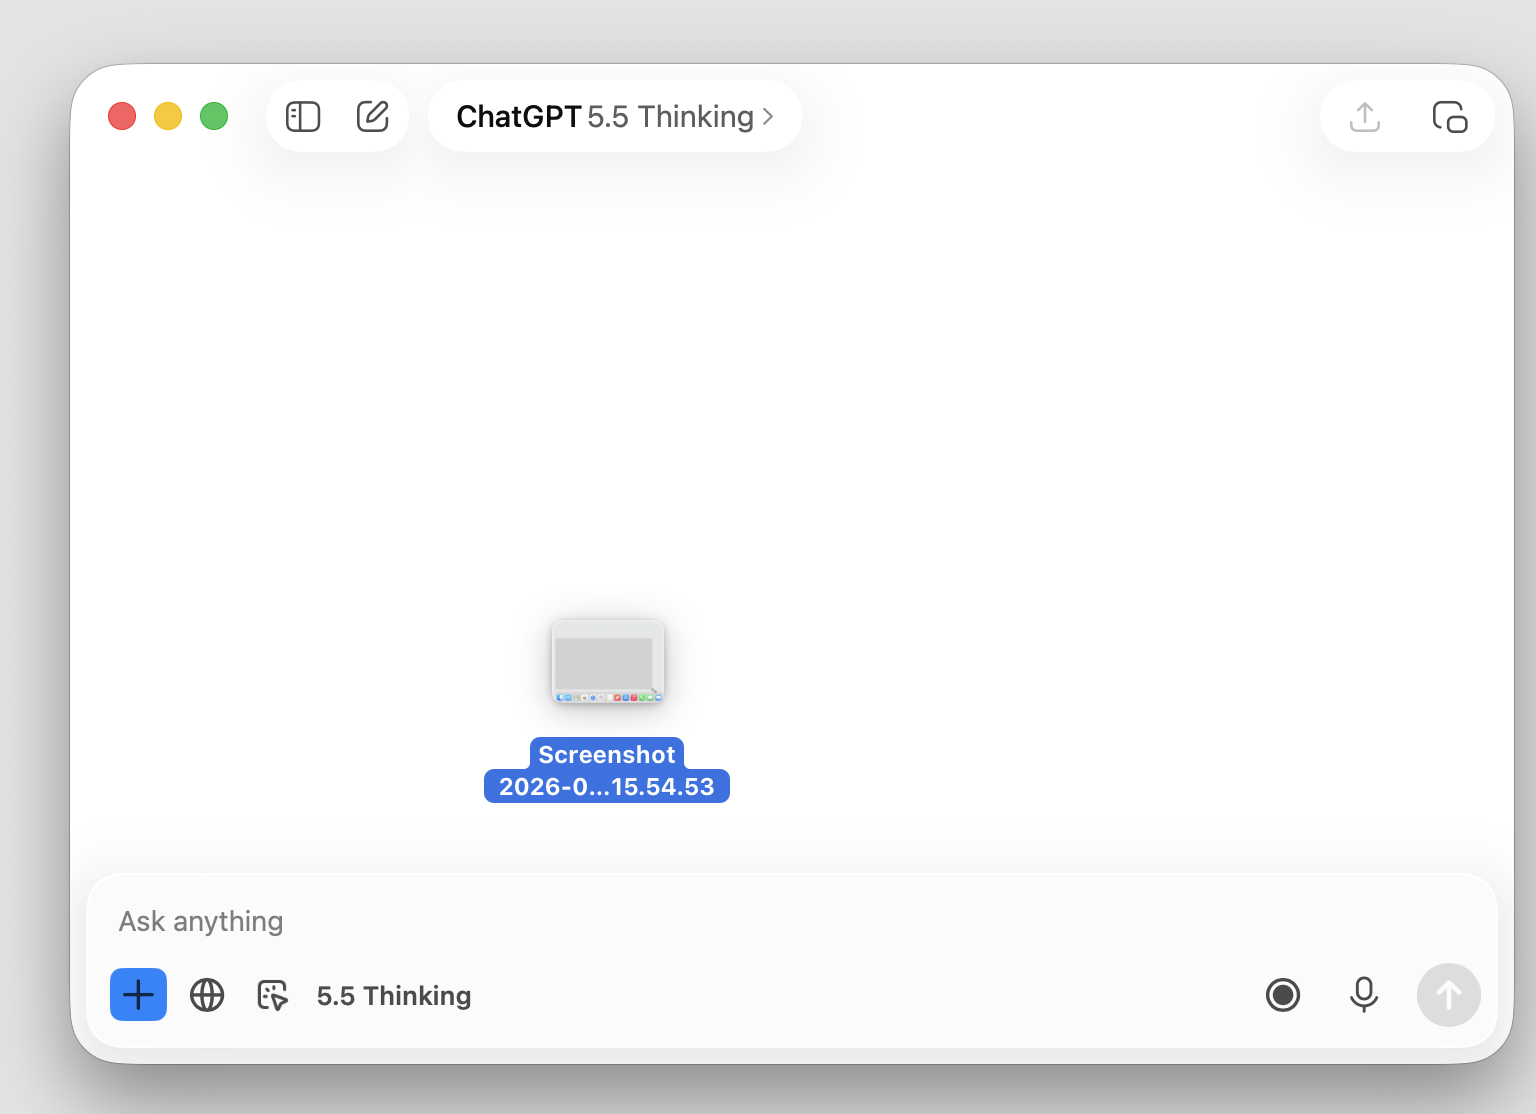
Ever tried to show ChatGPT what’s on your screen and hit a wall? Learning the steps to access the ChatGPT macOS app screenshot tool takes a minute, and so does tidying the screenshots that pile up afterward. MacKeeper’s Duplicates Finder spots look-alike copies so your folders stay clean.
How to allow screenshot access for ChatGPT on Mac?
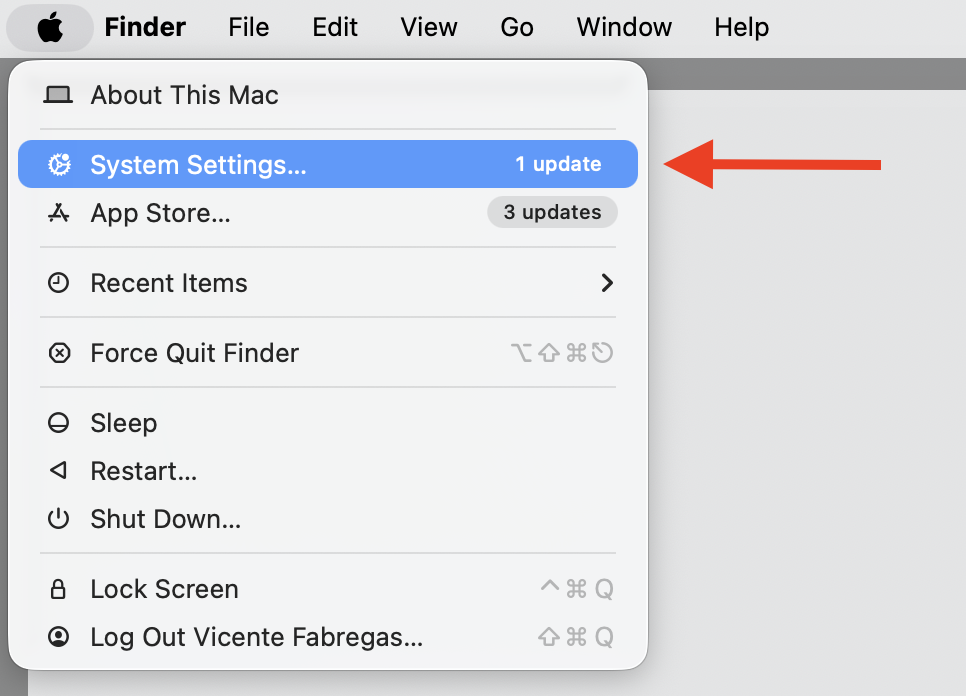
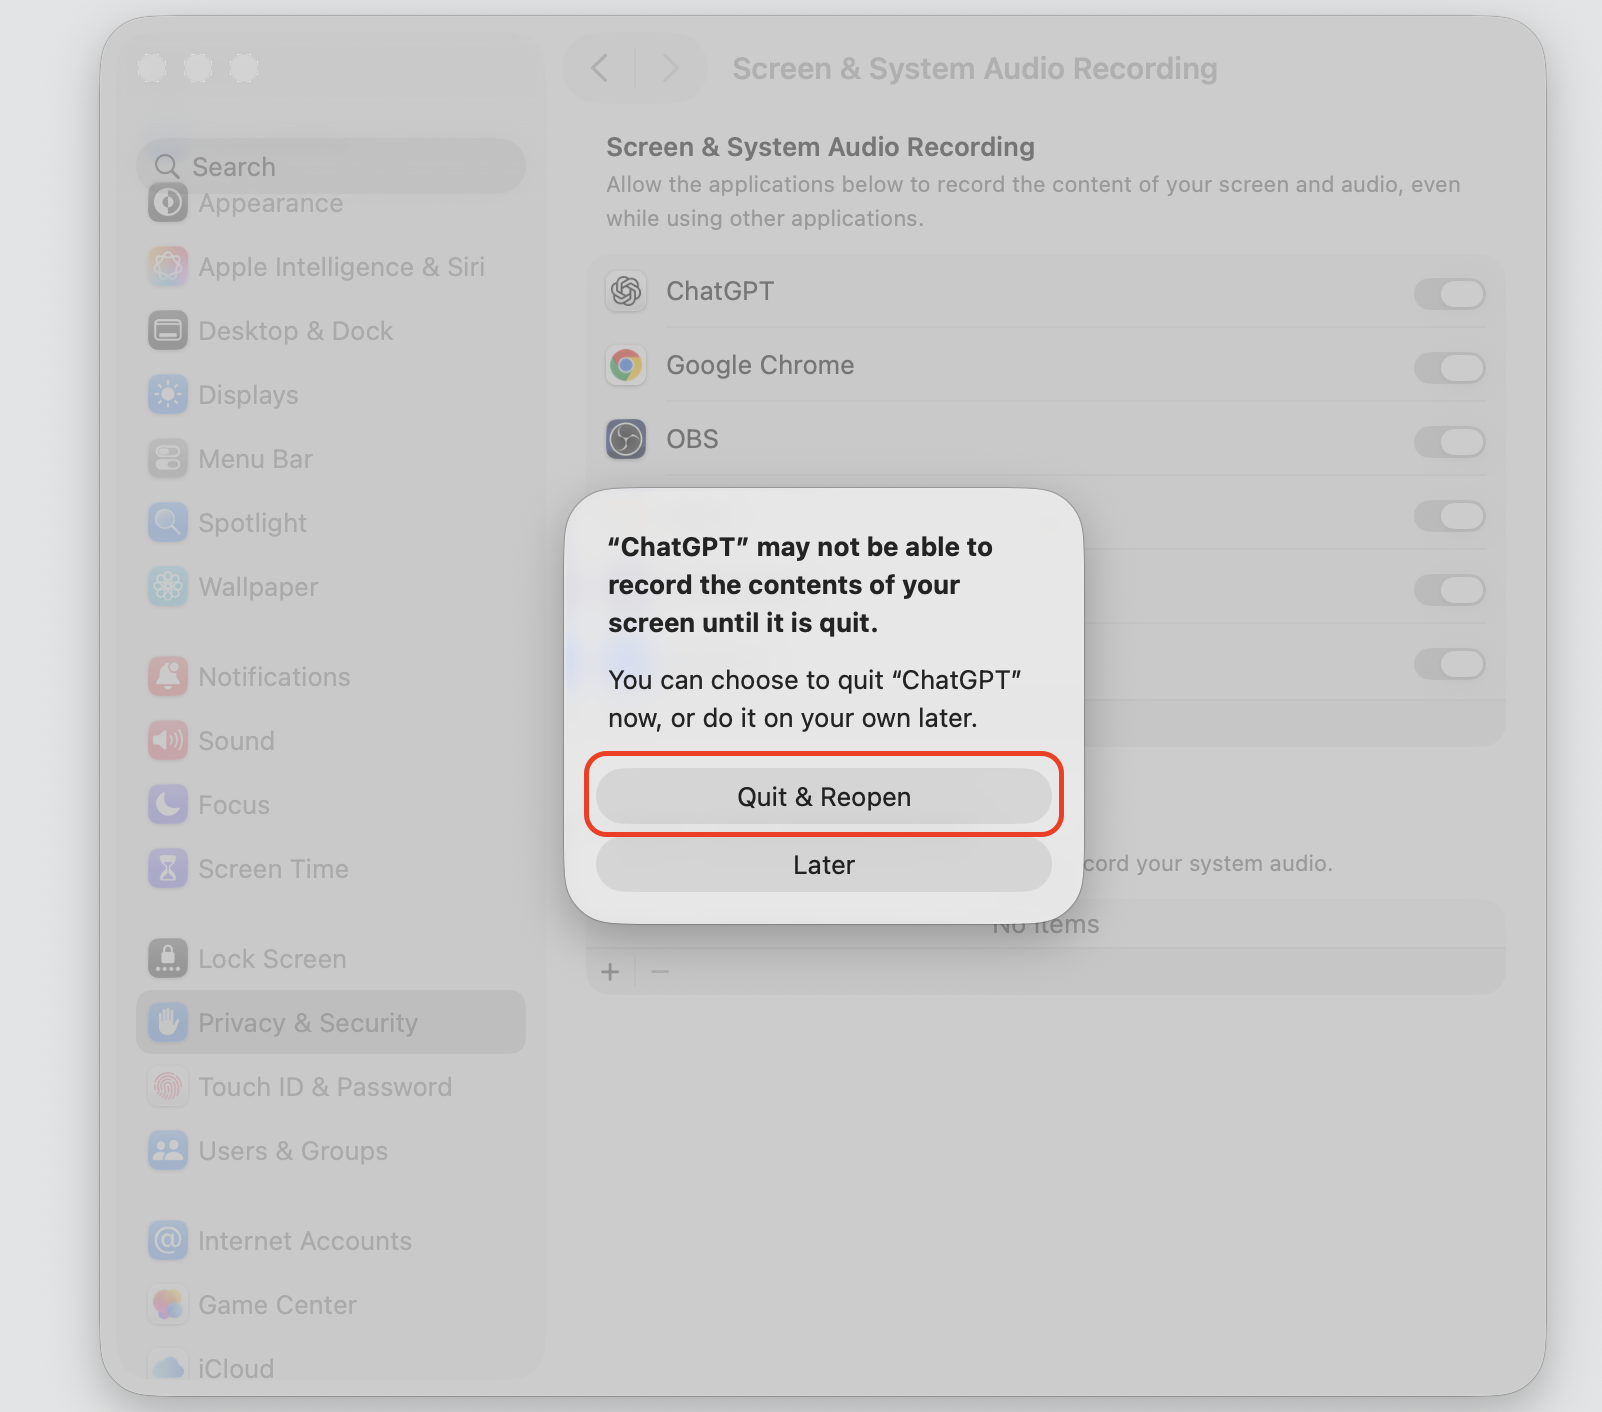
Before the app can capture anything, macOS asks for your permission—that’s the system keeping your screen private. The first time you reach for the screenshot feature, a prompt appears, and you flip a switch in System Settings. If your Mac asks for confirmation, just authenticate with your password or Touch ID—here’s how:
Open System Settings from the Apple menu in the top-left corner of your screen.
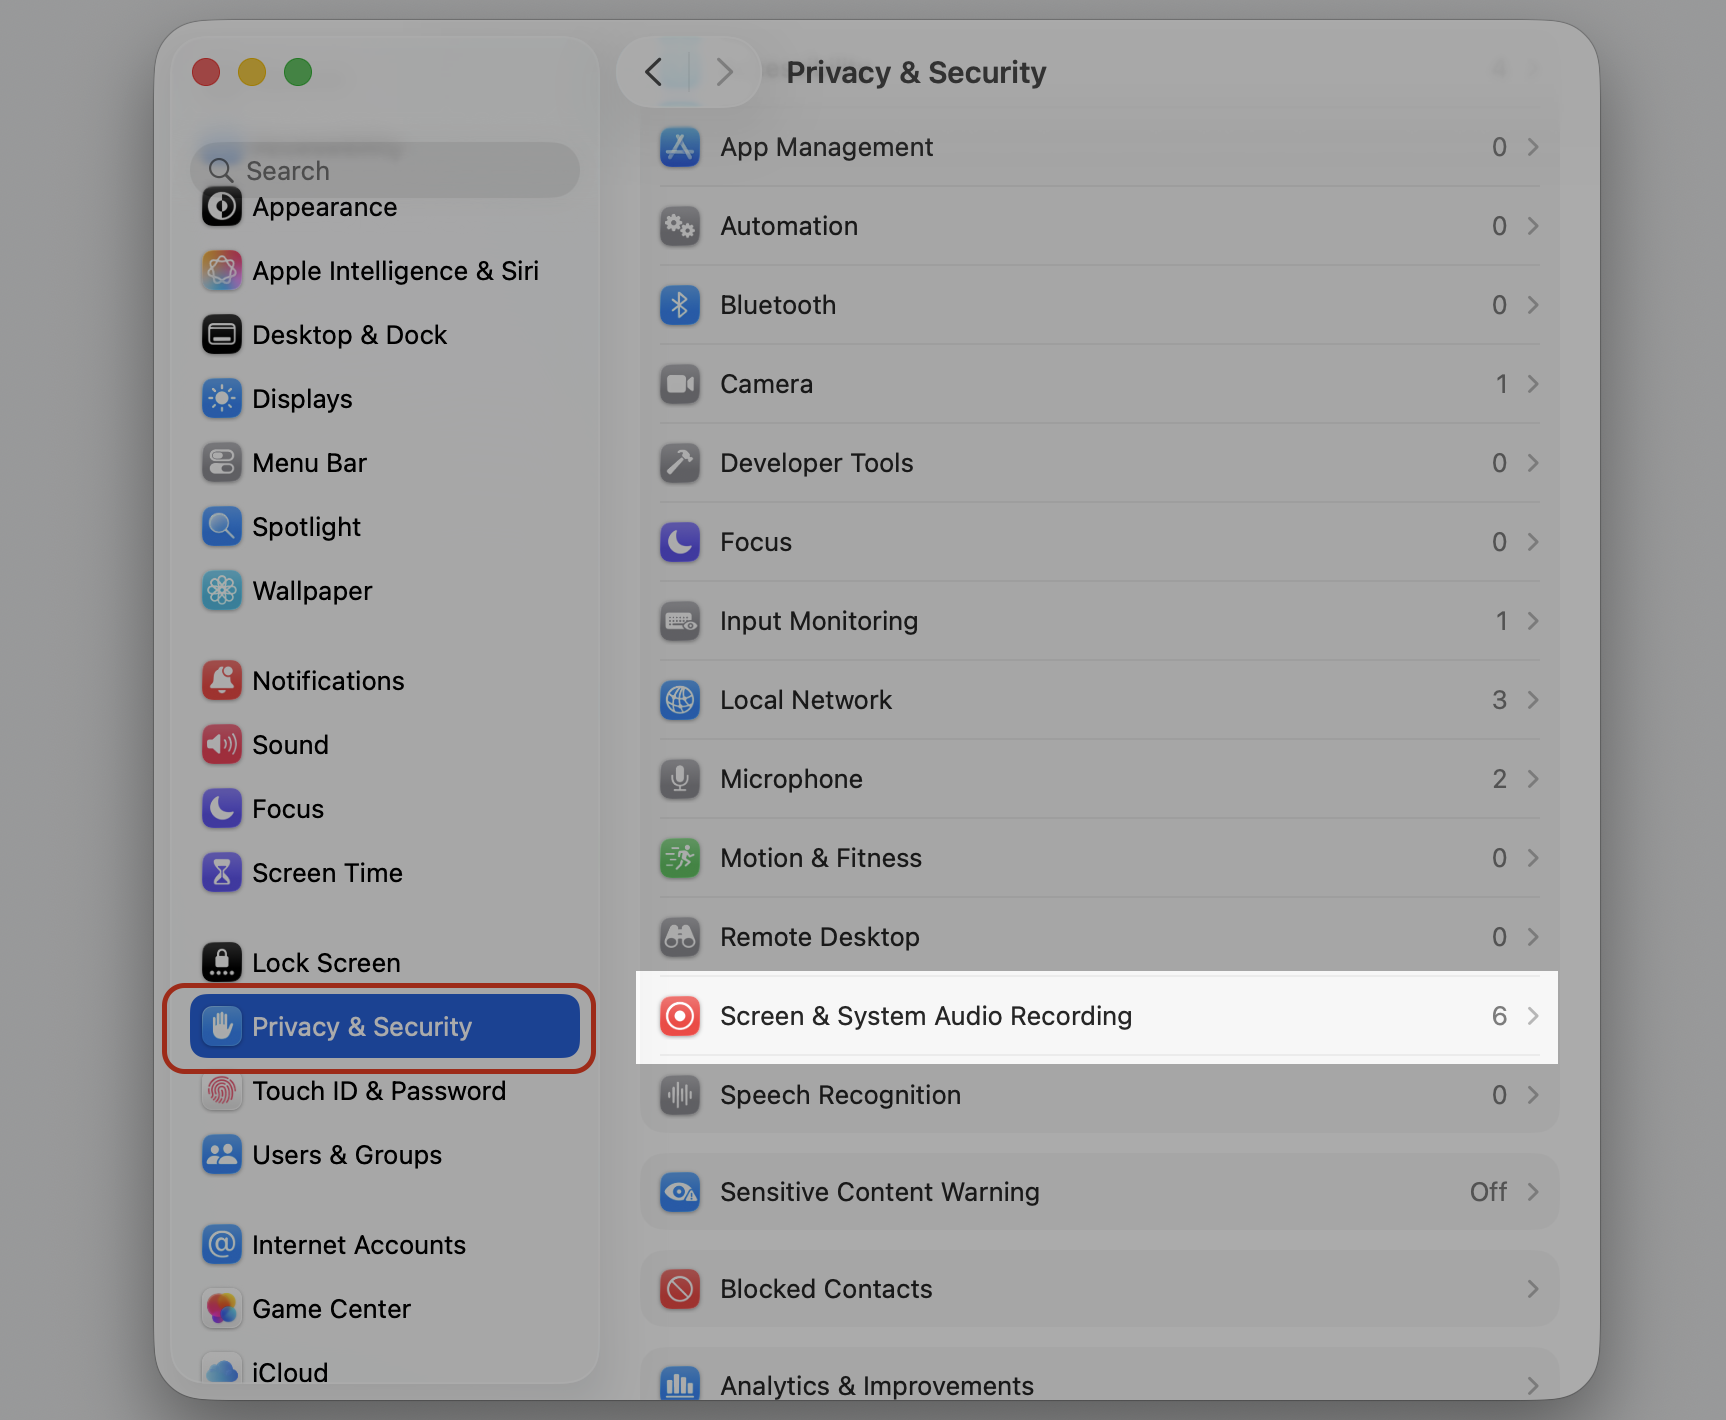
Select Privacy & Security, then choose Screen & System Audio Recording.
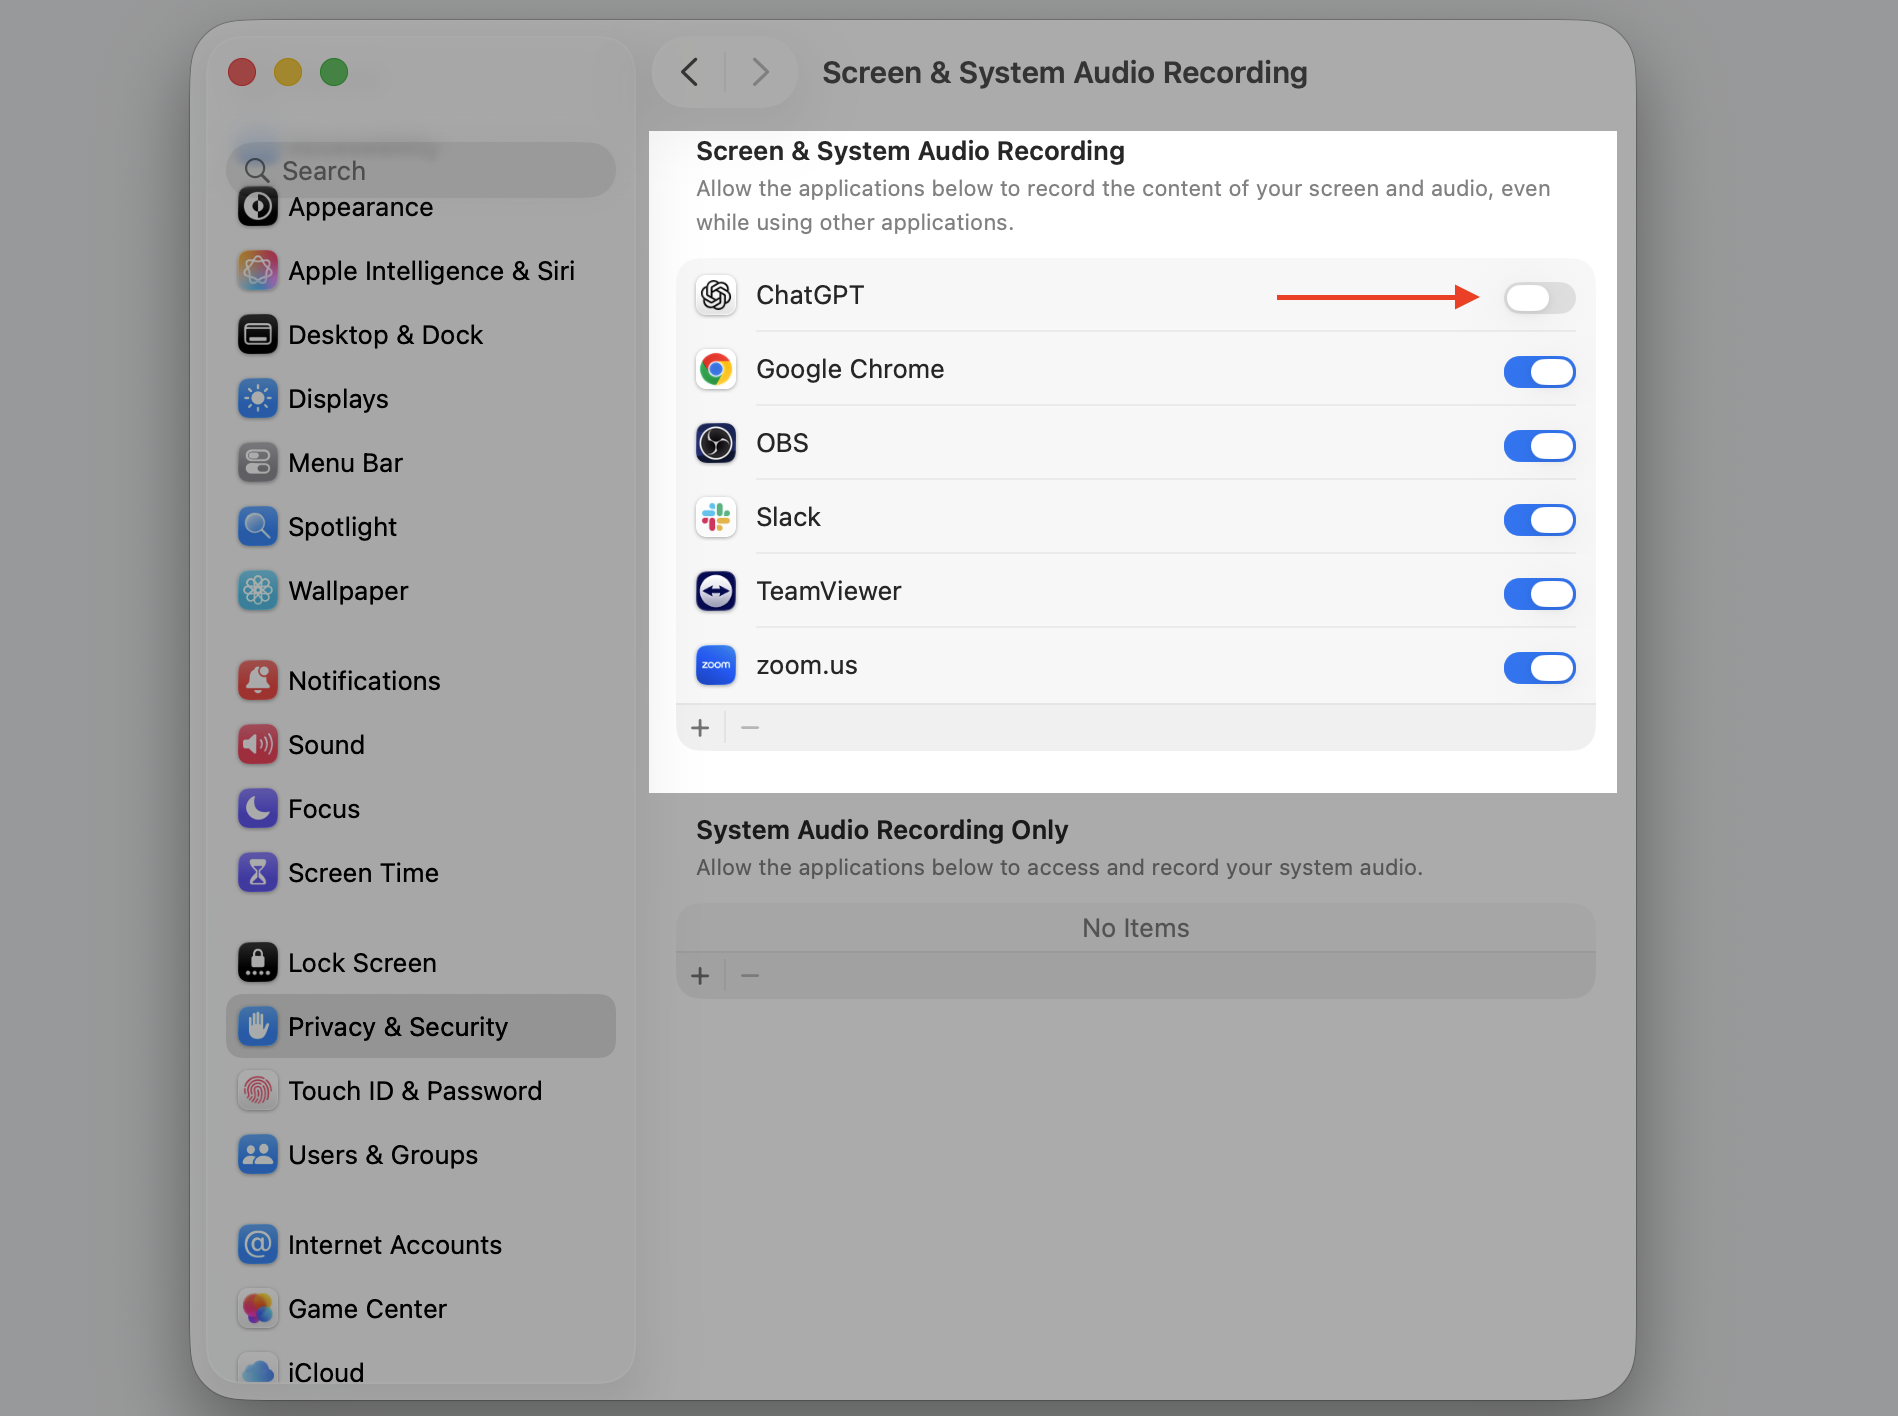
Toggle on ChatGPT in the list of apps.
If prompted, enter your password or use Touch ID to authenticate the change.
Quit and reopen ChatGPT so the new permission takes effect.
Step 1. Go to Apple Logo > System SettingsStep 2. Select Privacy & Security and go to Screen & System Audio RecordingStep 3. Turn on the toggle next to ChatGPTStep 4. Quit and reopen ChatGPT if it asks
Remember that making multiple screenshots on your Mac without deleting them often accumulates the solid volume of hidden redundant files, so make sure you remove them at least sometimes. Using the third-party app that finds these duplicate copies and deletes them in one click is surely the best solution to make your Mac clean and well-performing.
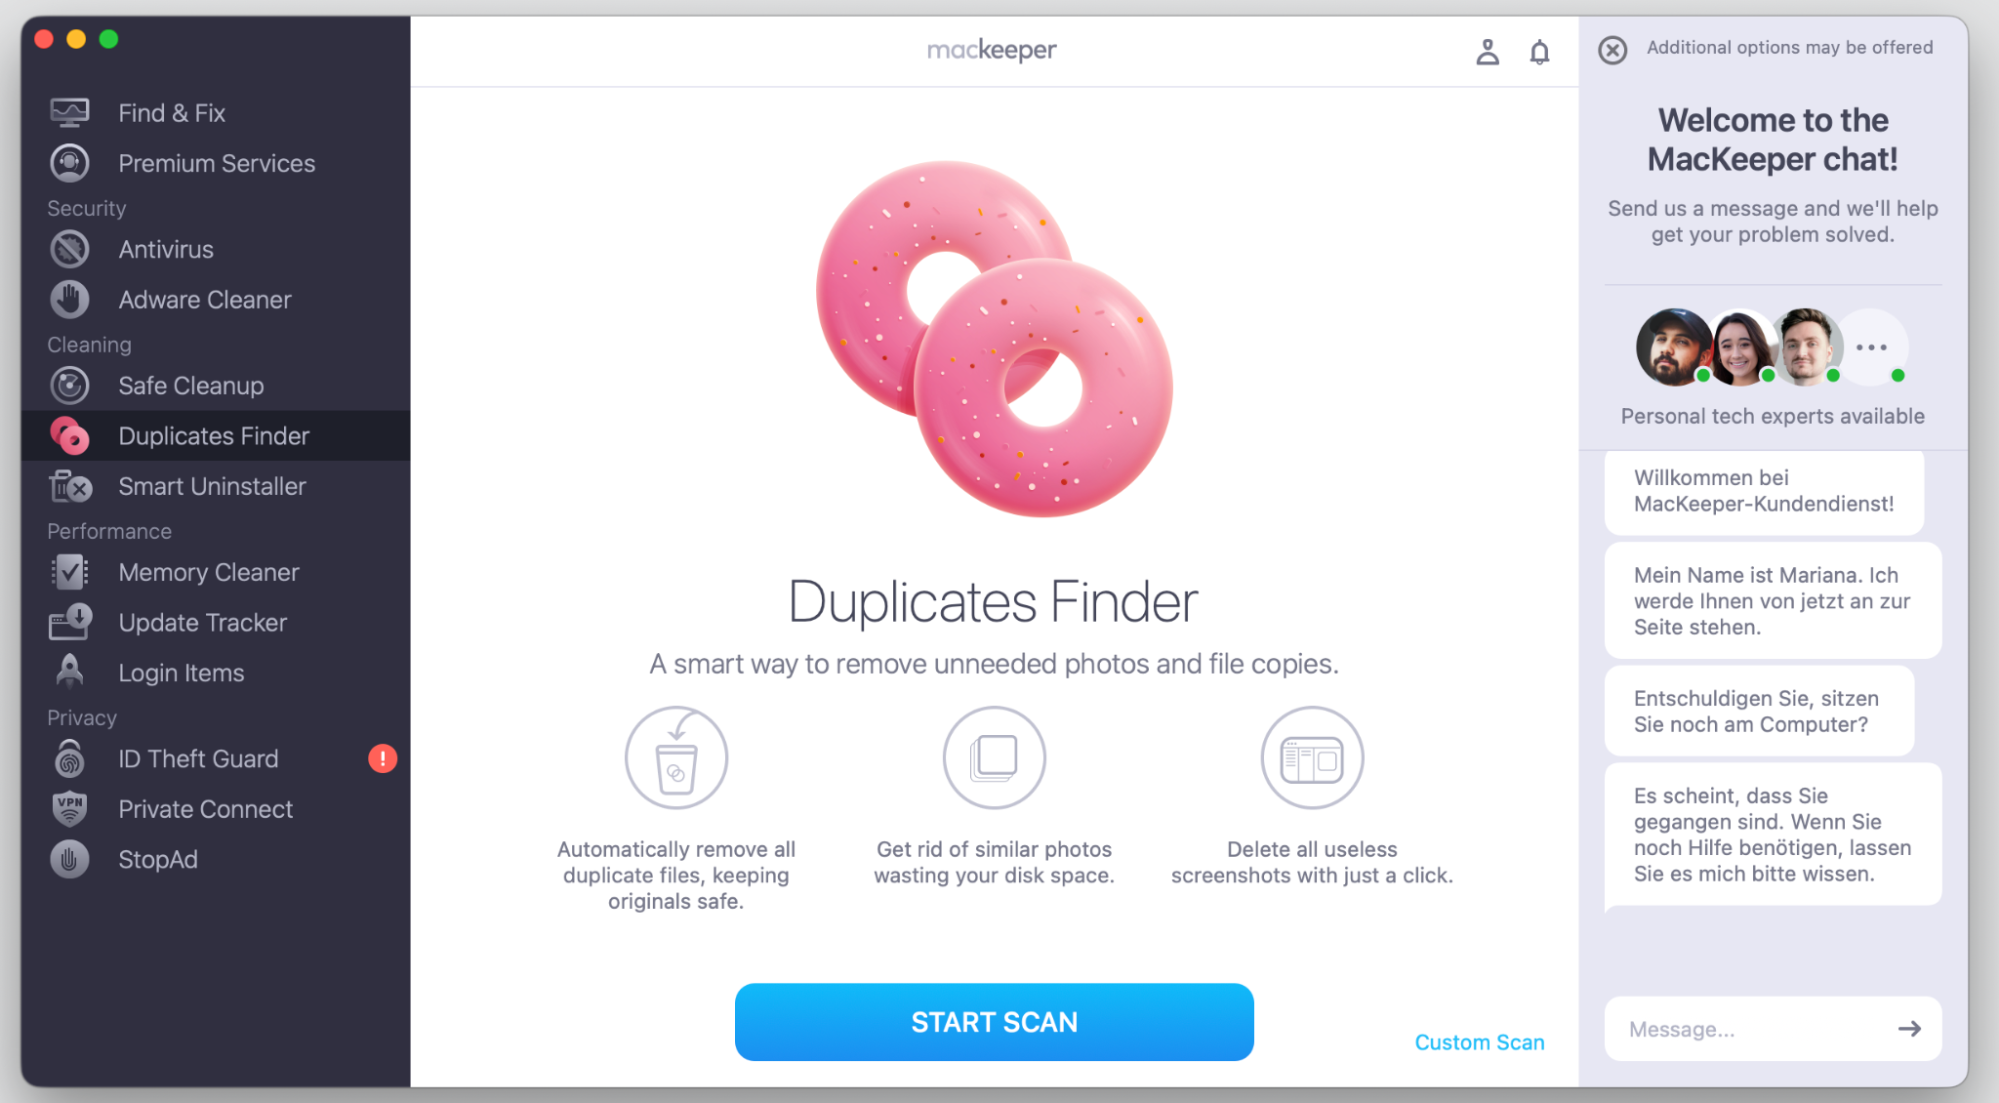
If you want this decluttering job is done for you automatically, benefit from using MacKeeper’s Duplicates Finder:
After installing and opening the app, choose Duplicates Finder and click Start Scan.
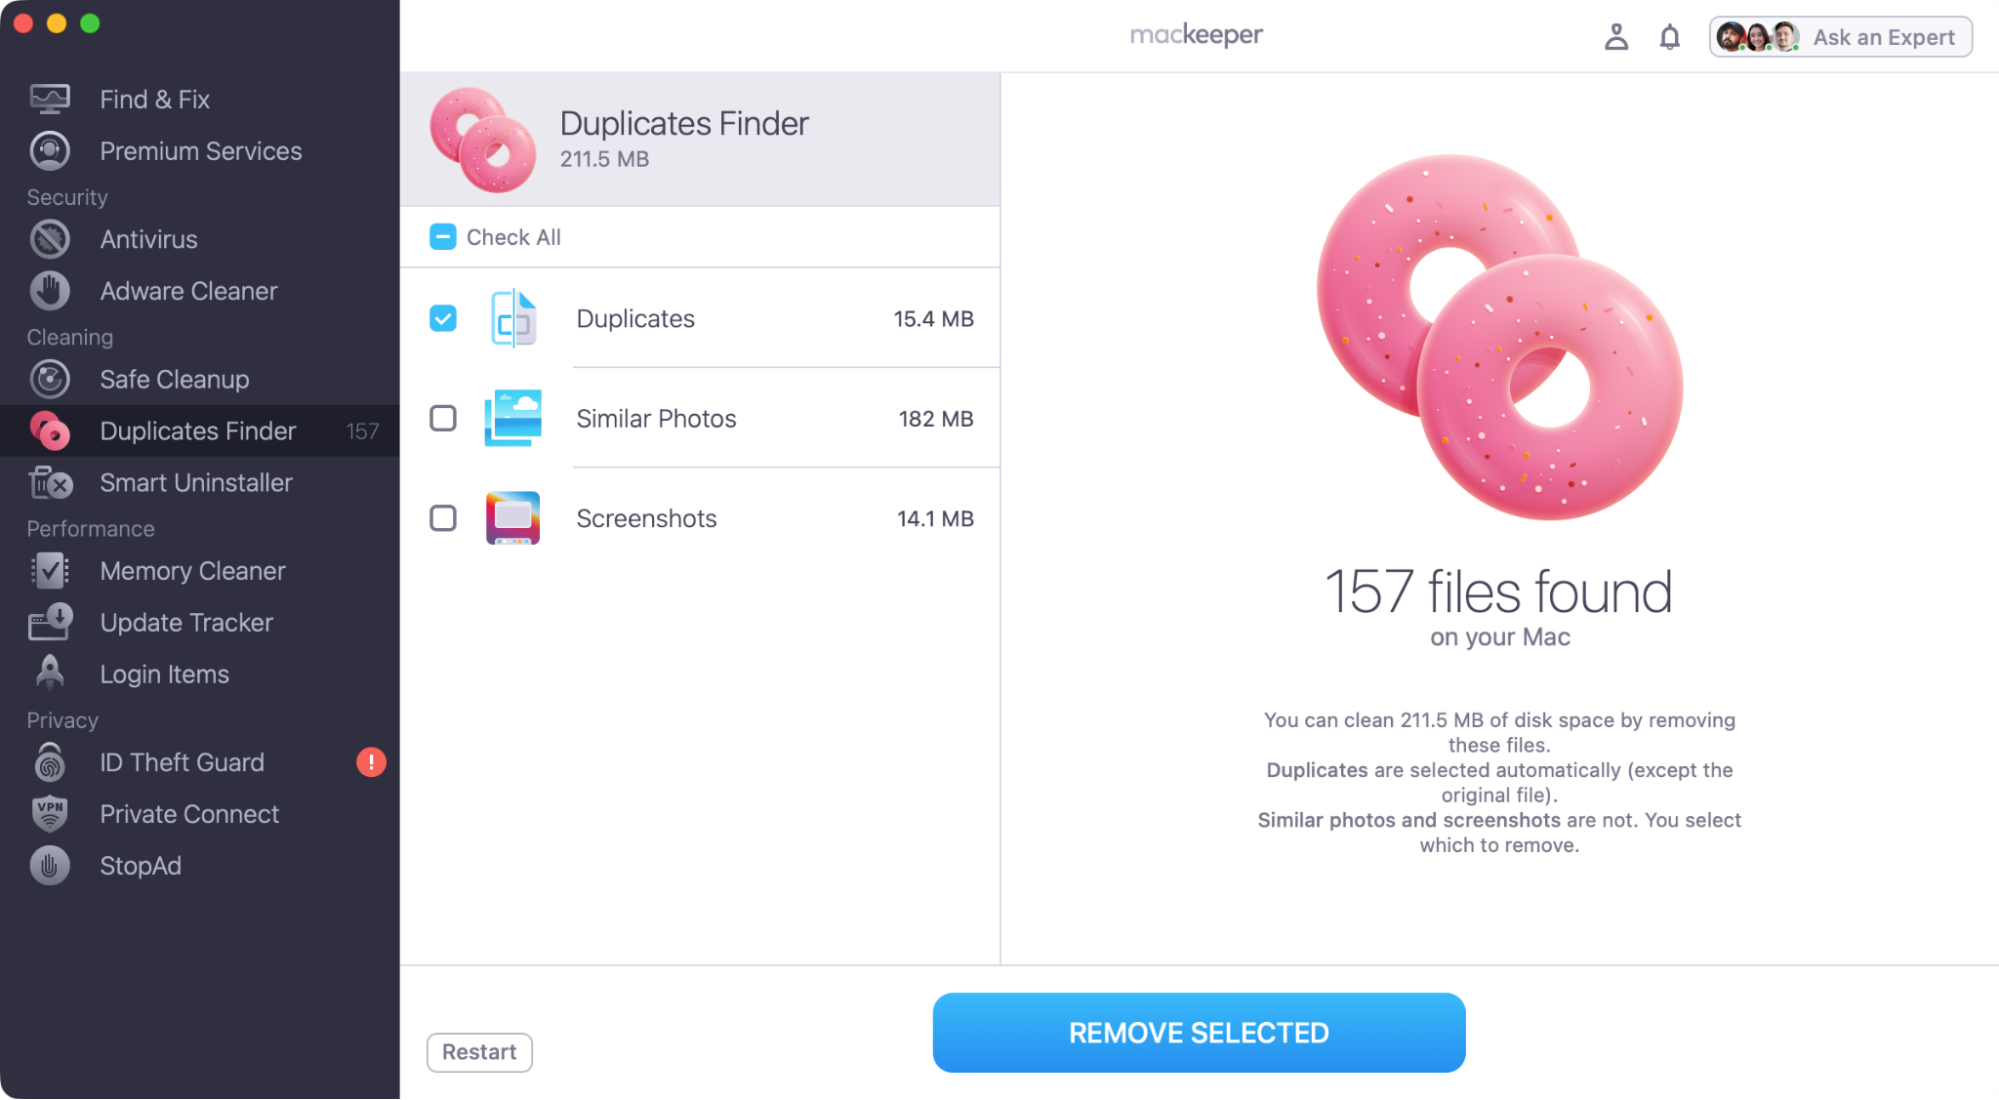
See the scan results and select what to remove.
Click Remove.
Step 1. MacKeeper > Duplicates Finder > Start Scan Step 2. Choose the categories & files to delete > confirm by clicking Remove Selected
How to access a screenshot tool in ChatGPT macOS app?
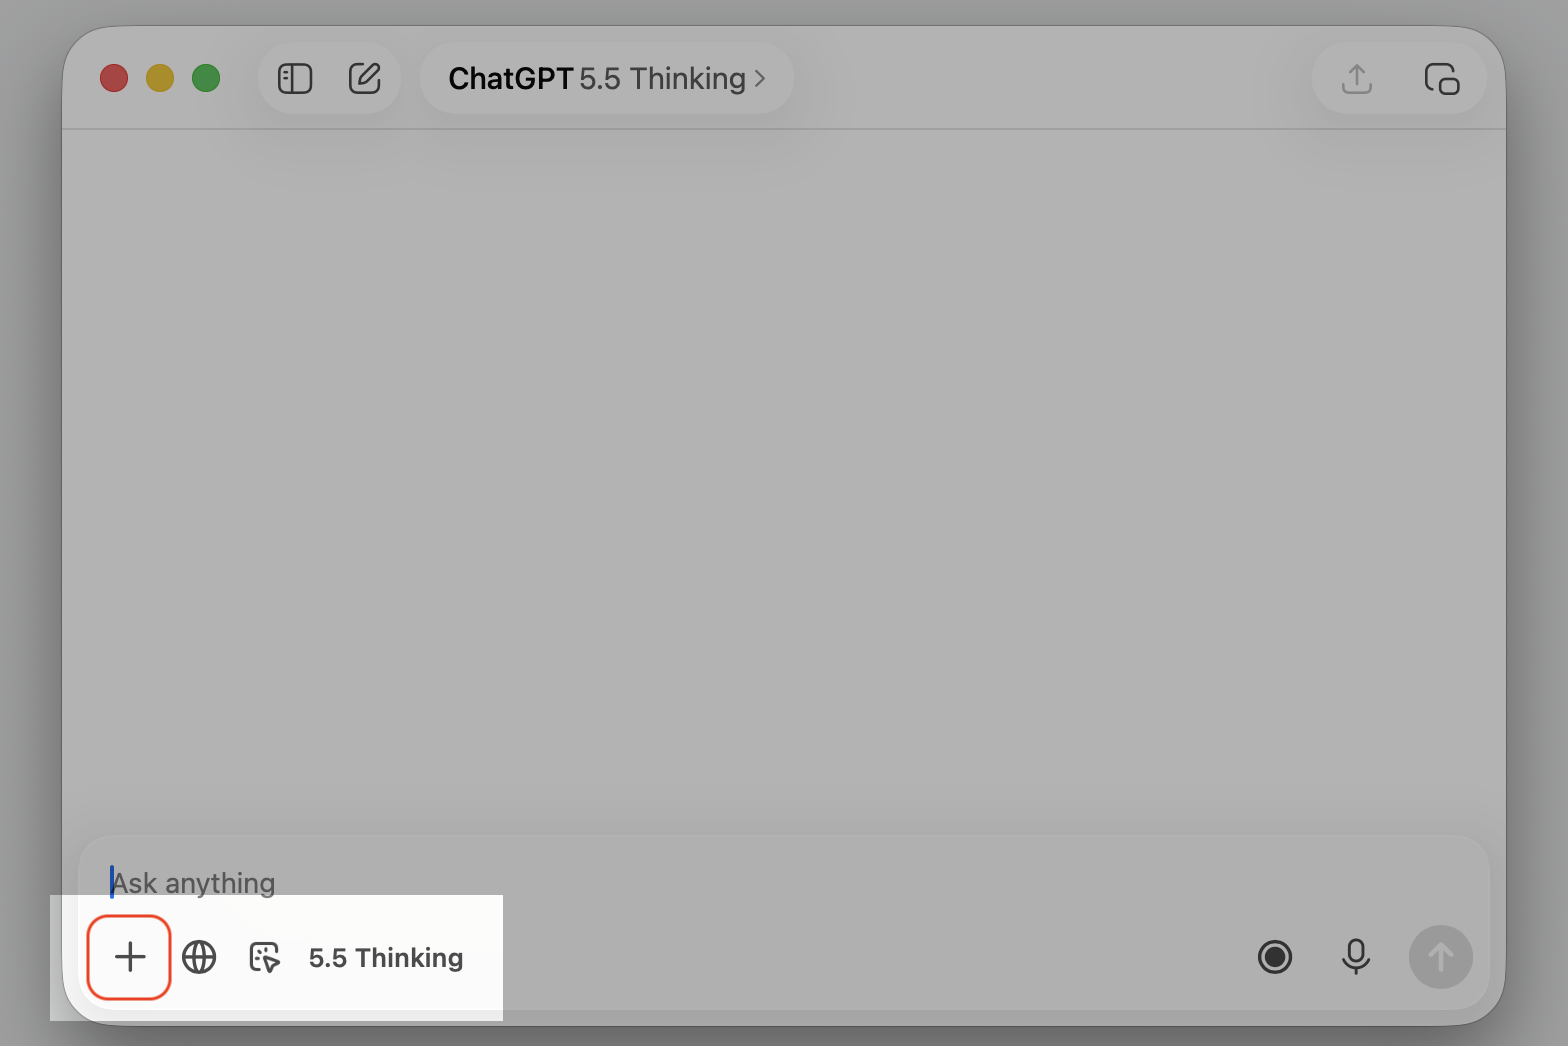
Once permission’s in place, the tool sits right inside the chat interface—no extra app or shortcut needed. Here’s how to find it on your Mac:
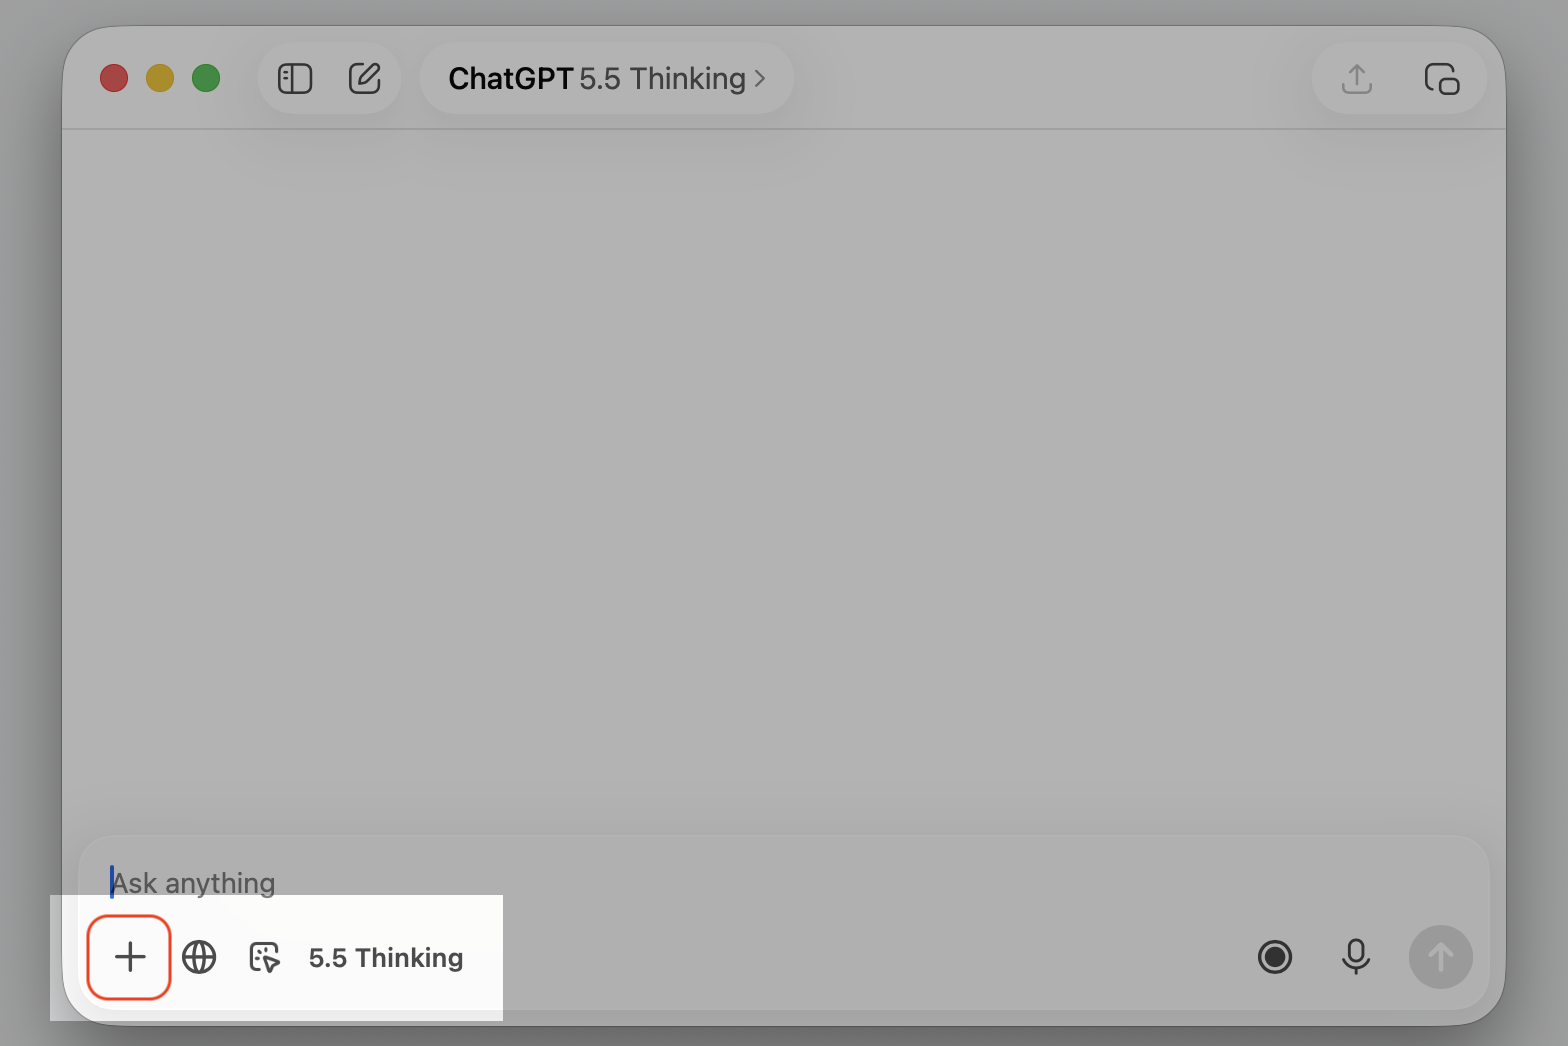
Open the ChatGPT app, or summon the launcher with the Option + Space keyboard shortcut.
Look at the message field at the bottom of the conversation.
Click the Plus icon just to the left of where you type.
Choose Take Screenshot from the attachment menu.
How to take a screenshot of an app window in ChatGPT?
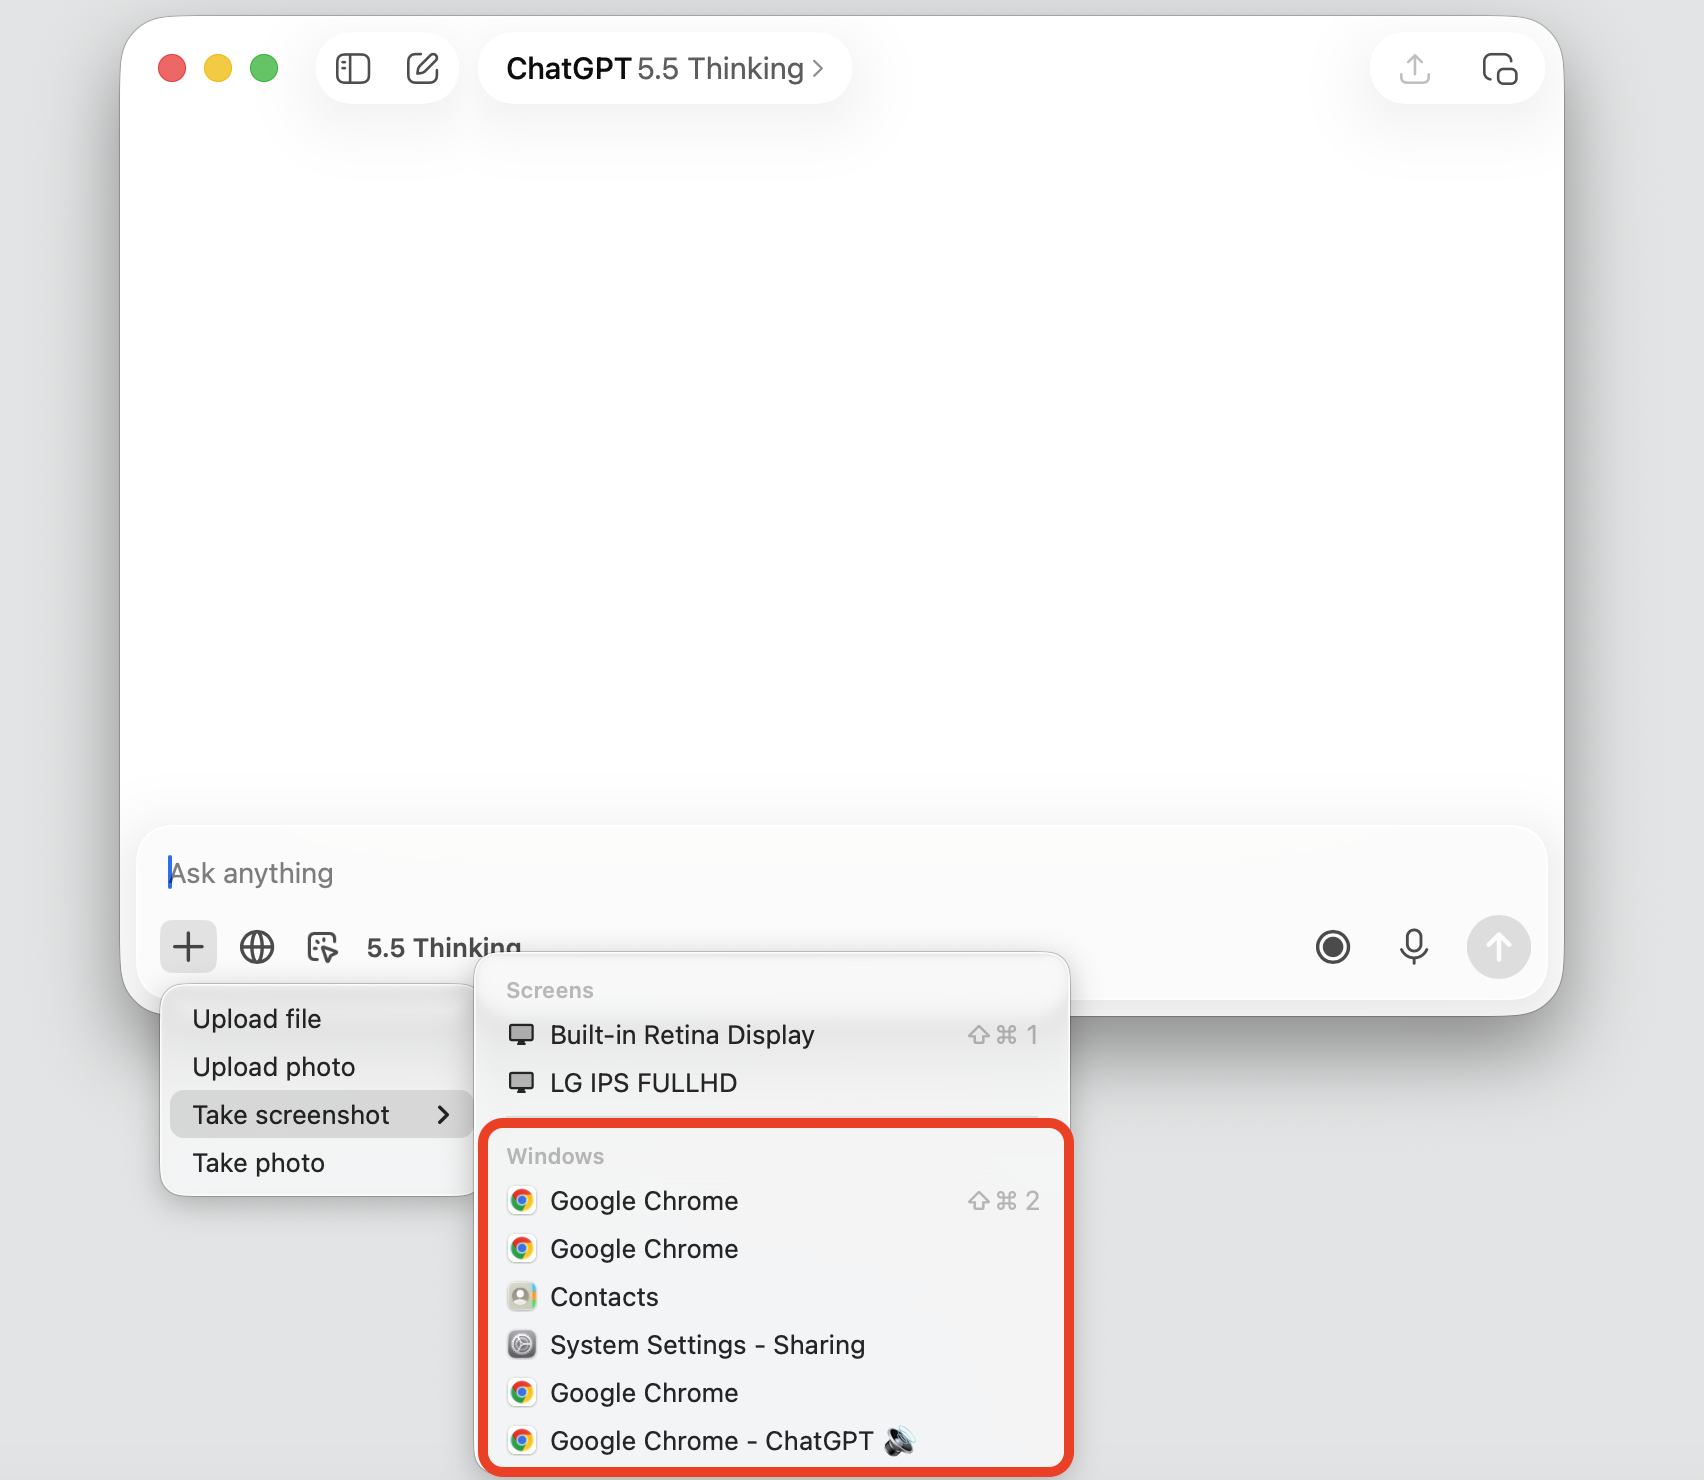
Sometimes you only want to show one thing—a single app window, not your whole desktop. The tool lists every window you’ve got open so you can pick just the right one. Do the following:
Open the screenshot tool from the Plus menu as described above.
Review the thumbnails of your currently open app windows in the Take screenshot section.
Select the window you’d like to share.
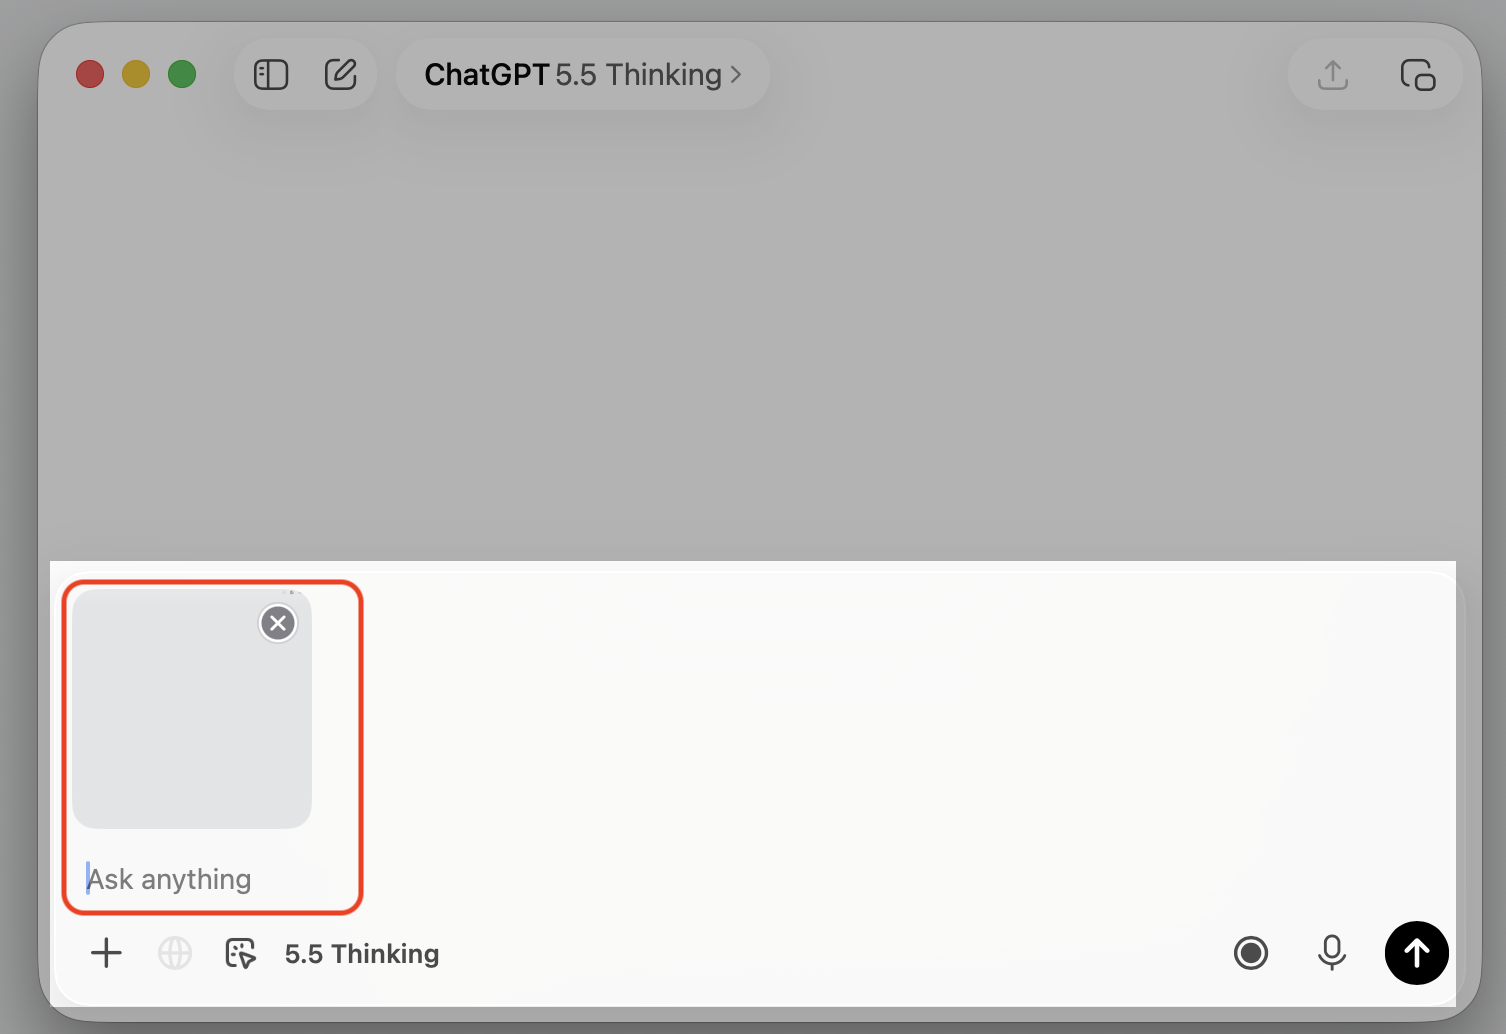
The capture attaches to your chat, ready for a question or instruction.
Step 1. Open Chat GPT app and go to Plus menuStep 2. In the Take screenshot menu, choose the corresponding window Step 3. See the capture attached to your chat
How to take screenshot of entire screen in ChatGPT?
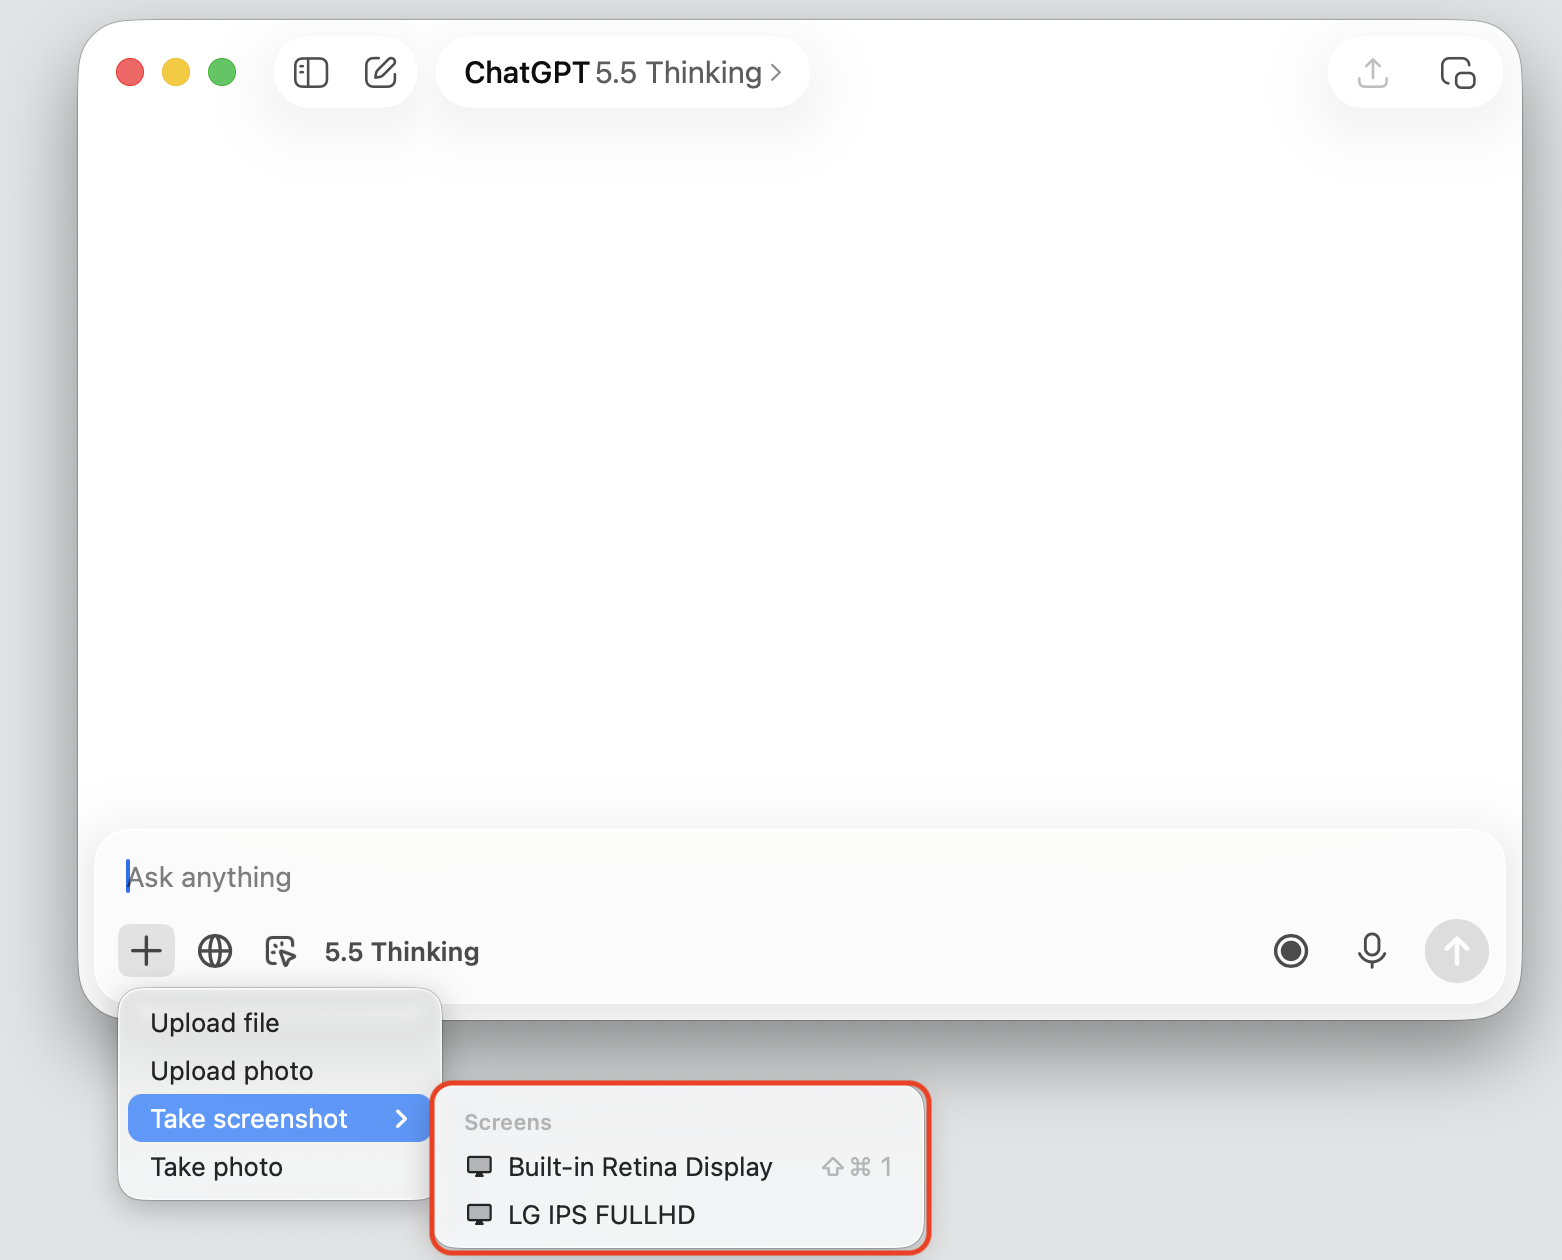
Other times, context is everything—you want ChatGPT to see your desktop, several windows at once, or a system-level item. The entire-screen option captures the full picture. See how it goes:
Open the screenshot tool from the Plus icon near the message field.
Choose the Entire Screen option from the tool.
If you use more than one display, select which screen to capture.
The full-screen image attaches to the conversation automatically.
Step 1. Open Chat GPT and go to Plus menuStep 2. Select the display you need to take a screenshotStep 3. The capture attaches to your chat
How to attach a screenshot to a new or existing chat?
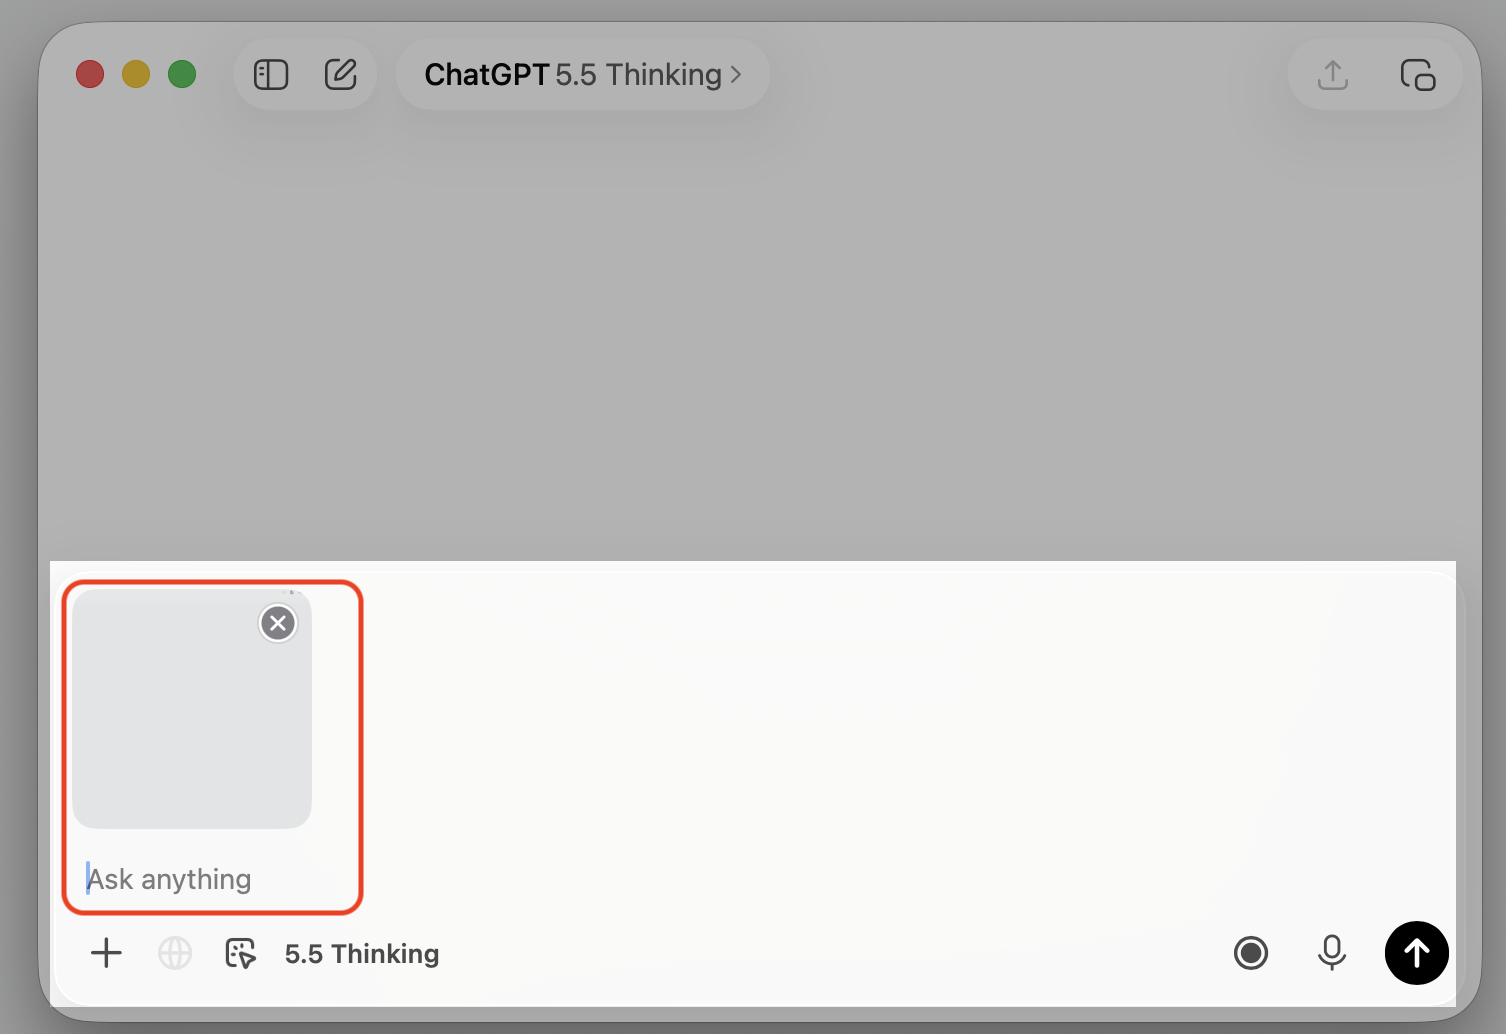
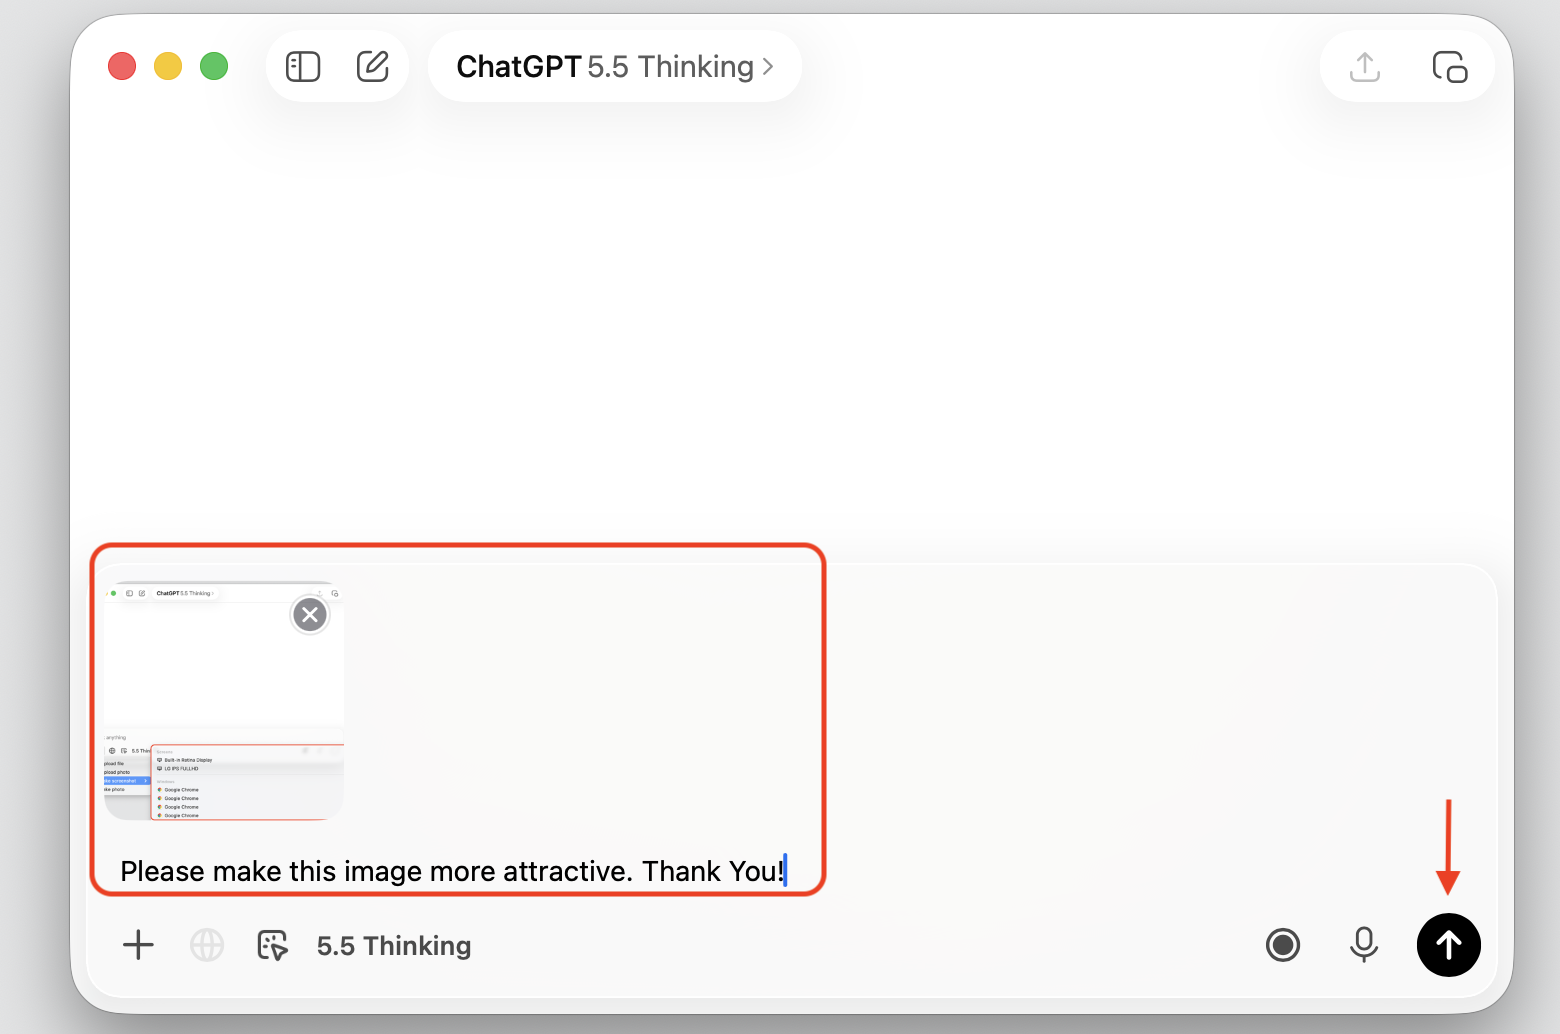
The handy part? Your screenshot lands right where you’re already typing. After you capture it, the image shows up in the message field of whatever conversation you’re in. Your action plan will be like this:
Take your screenshot using one of the options above.
Watch for the image to appear in the message field of your current chat.
Type a question or instruction next to it, such as what you’d like ChatGPT to explain.
Press Return to send the screenshot and your message together.
Can ChatGPT take selected-area screenshot on Mac?
Here’s an honest note from us—the built-in tool is mainly described as supporting open app windows and the entire screen. There’s no dedicated selected-area option inside the app just yet.
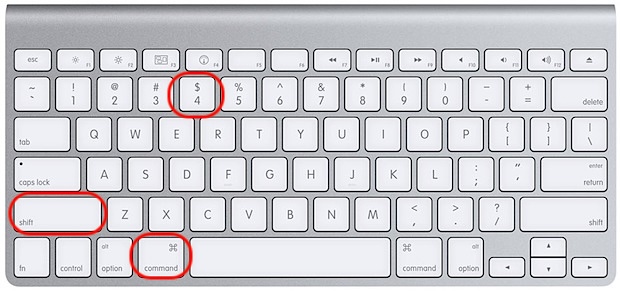
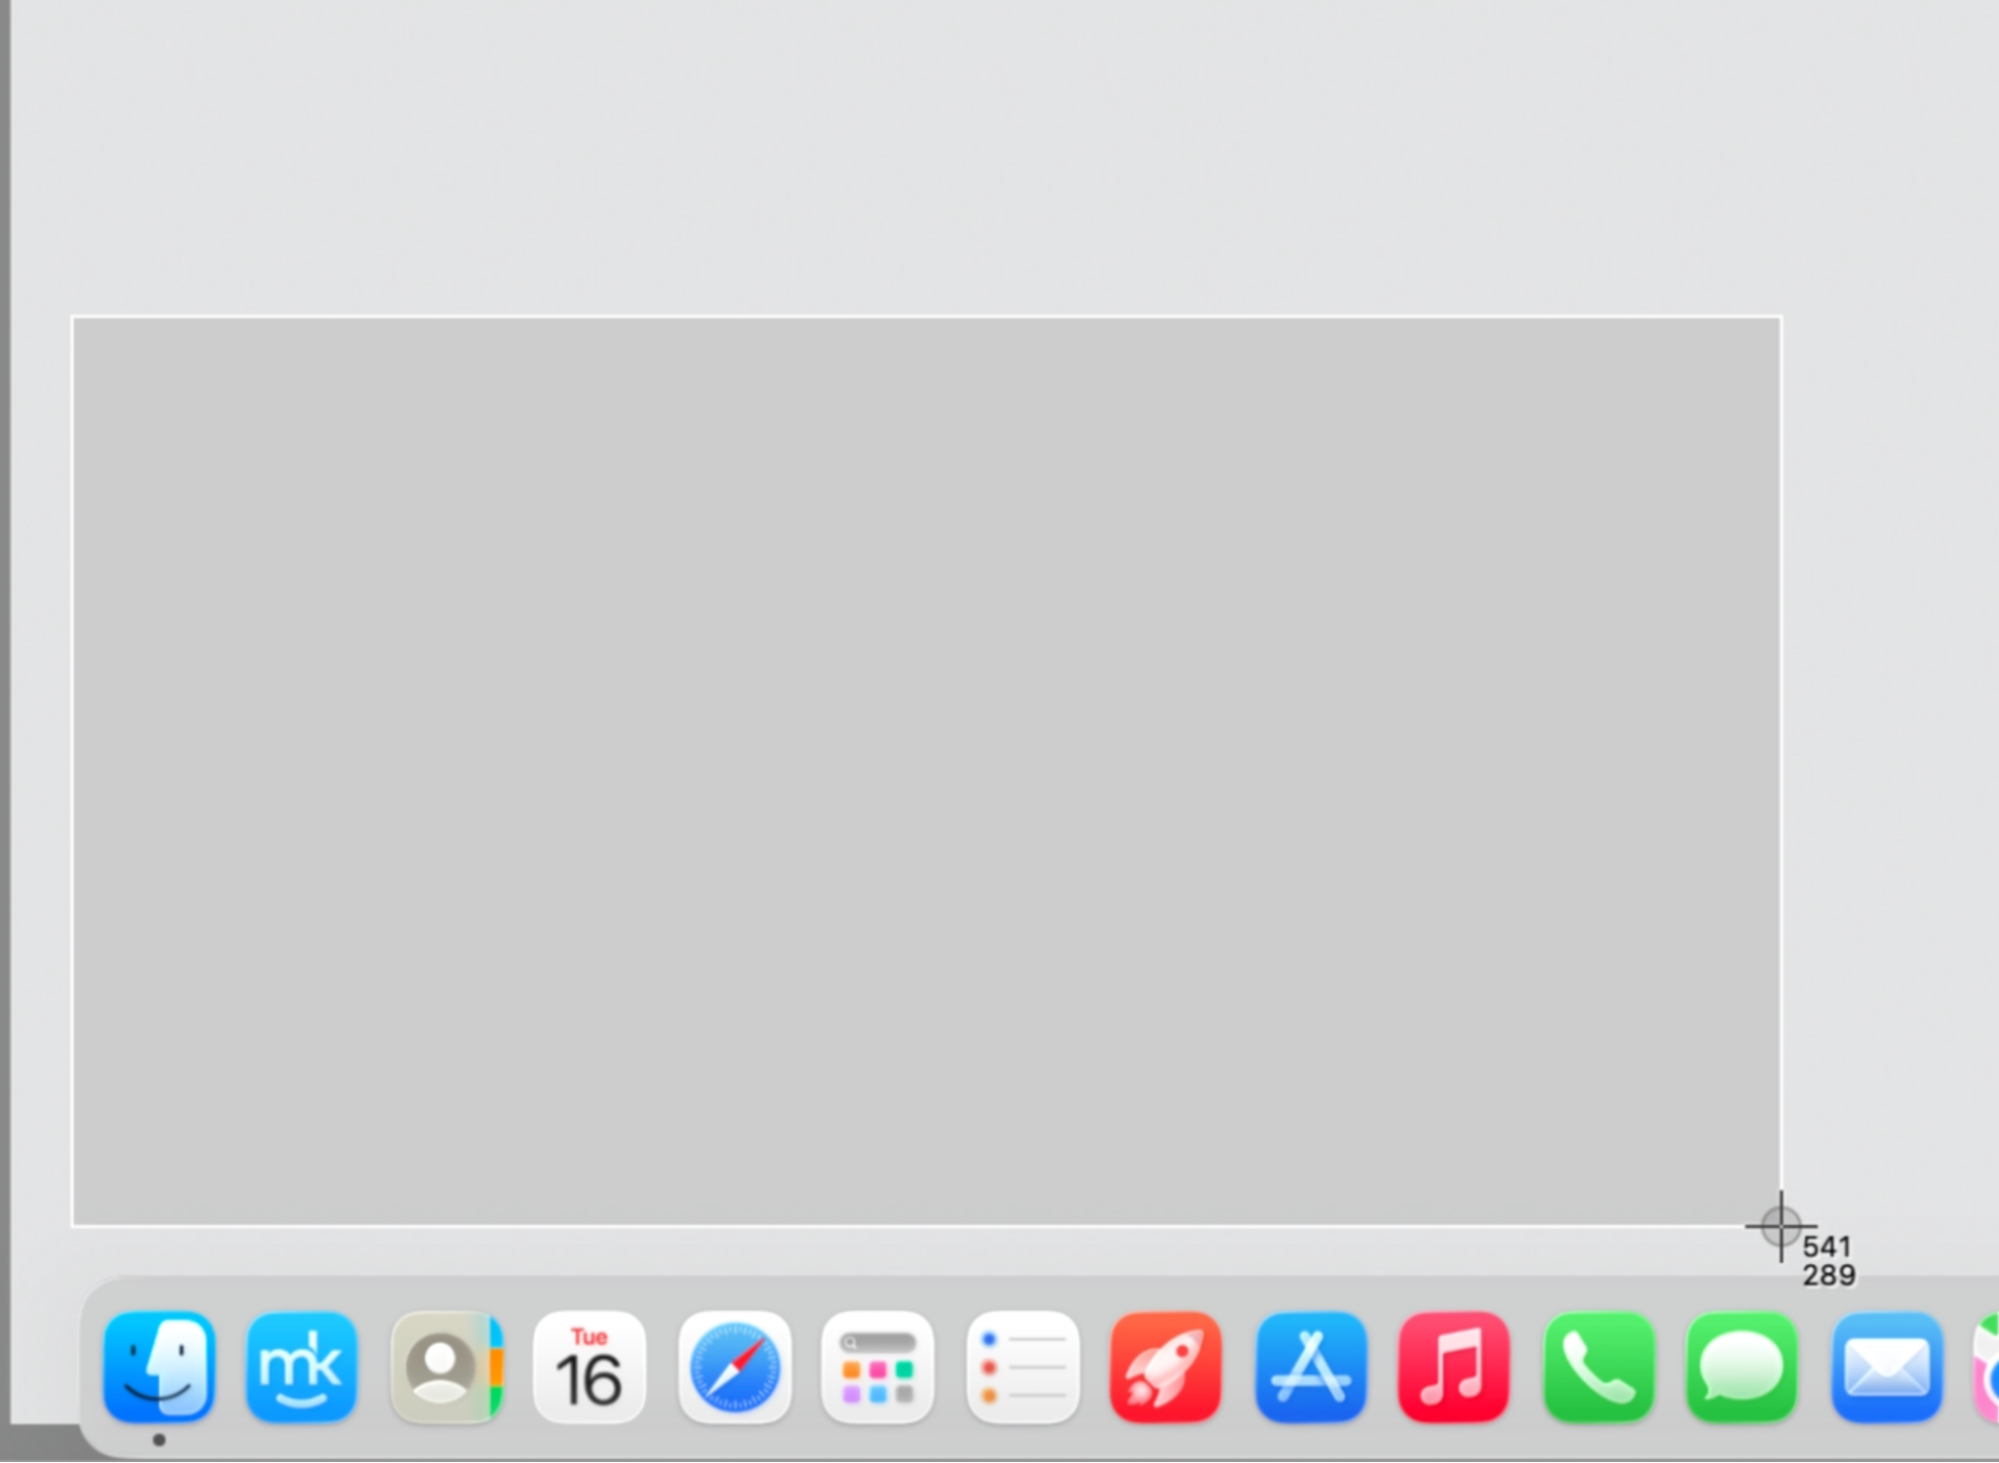
If you only want a small region, that’s still easy. You can use the native macOS screenshot shortcuts to grab a portion of your screen, then paste or upload that image into the chat by hand. Just follow our instructions below:
Press Shift + Command + 4 to drag a box around any area.
Find the saved image on your desktop, then drag it into the message field.
Or copy the capture and paste it straight into the conversation with Command + V.
Step 1. Press Shift + Command + 4Step 2. Select the area you want to screenStep 3. Drag the screenshot nto the message field of Chat GPT
Keep your screenshots clean and your Mac clutter-free
To use the ChatGPT macOS app screenshot tool, first grant screen recording permission, then capture an app window or the entire screen straight from the app. Those images add up fast, though. Also, we’d like to remind you that MacKeeper’s Duplicates Finder finds look-alike copies, keeping your folders tidy. Equip yourself with its help to manage your files smartly!
We respect your privacy and
use cookies
for the best site experience.
Privacy Preferences Center
We use cookies along with other tools to give you the best possible experience while using the
MacKeeper website. Cookies are small text files that help the website load faster. The cookies we
use don’t contain any type of personal data meaning they never store information such as your
location, email address, or IP address.
Help us improve how you interact with our website by accepting the use of cookies. You can change
your privacy settings whenever you like.
Manage consent
All cookies
These cookies are strictly necessary for enabling basic website functionality (including page
navigation, form submission, language detection, post commenting), downloading and purchasing
software. The website might malfunction without these cookies.