Do you have dozens of notifications on your Mac? Clear them out and stop adware with MacKeeper's StopAd, which blocks annoying ads before they become a problem. Better yet, you'll also protect yourself from trackers.
Although Mac notifications can help you complete essential tasks and find out when someone has contacted you, they also have their downsides. In serious circumstances, cybercriminals can use adware to spam your computer and hinder its performance.
When excessive notifications impact your Mac, you’ll be unable to work as efficiently as before. But whether you’re enduring adware or simply want to remove notifications from your device, I’ll help you clear all notifications on Mac with the two most efficient methods today.
A note from our experts:
Stopping adware is better done through prevention. With MacKeeper’s StopAd tool, you can block the annoying ads and browse the internet websites without banners and notifications.
Choose your preferred web browser extension and hit Enable.
Open your website browser preferences and make sure that boxes related to MacKeeper are chosen.
Select Turn On after completing all of the above steps.
How to clear all notifications on Mac manually
Clearing your Mac notifications manually will help you stay on top of everything whenever it suits you. Doing so is pretty easy, and I’ve outlined each step you should follow below.
Click on the time and date at the top of your screen.
Your notifications will appear in a stack. For multiple notifications, you’ll see [number]more notifications. Click on this.
Select the circle icon with three dots.
Click on Clear All.
For instances where you only have one notification in the Notification Center, tap the x icon instead.
How to clear all notifications on Mac using Automator service
While manually clearing notifications is the easiest route to take, I can also show you how to remove correspondences with more of a tech-savvy approach. The Automator solution allows you to, as you may have guessed from the name, automate notification clearing.
Go to Spotlight.
Search for and launch Automator.
Click on New Document.
Select Quick Action and press Choose.
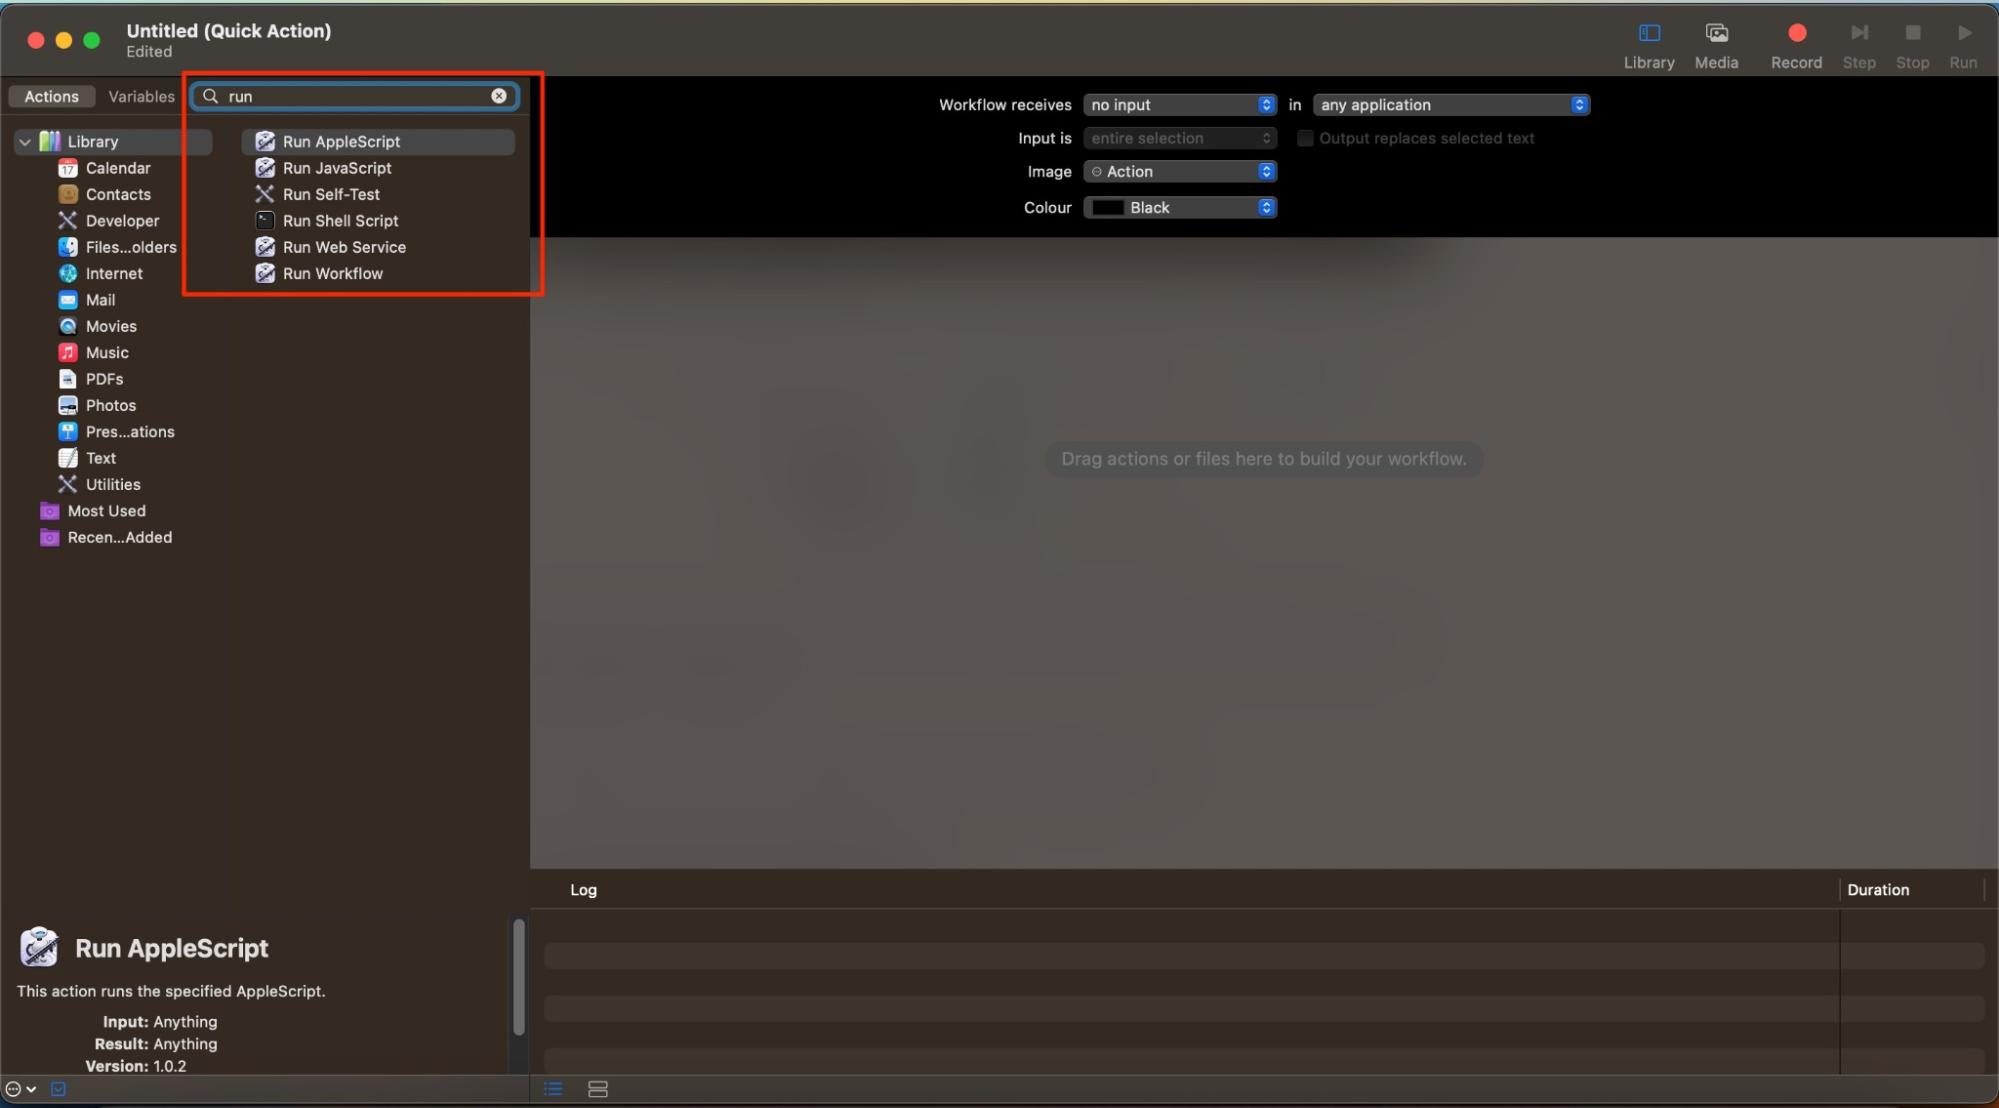
From the dropdown menu, customize the top bit so it says Workflow receives no input in any application.
Type Run JavaScript in the left-hand search bar.
Type the prompt in Step 3 of the screenshots below.
Close the Automator document. You’ll need to give your prompt a name. Press Save when you’ve altered everything as needed.
Step 1. Quick Action > ChooseStep 2. Type and select Run JavaScriptStep 3. Type the code needed to remove macOS notificationsStep 4. Save your macOS notification clearance prompt
Alternatively, on an iPhone, you can turn off iMessage notifications and other alerts by going to your Settings app.
Take control of and organize your Mac notifications
Clearing notifications on Mac is easy and shouldn’t take too long. You can delete alerts that you no longer need to see, in addition to those that are straight-up annoying.
To block ad notifications, and ads altogether for that matter, you can always use MacKeeper’s StopAd solution.
We respect your privacy and
use cookies
for the best site experience.
Privacy Preferences Center
We use cookies along with other tools to give you the best possible experience while using the
MacKeeper website. Cookies are small text files that help the website load faster. The cookies we
use don’t contain any type of personal data meaning they never store information such as your
location, email address, or IP address.
Help us improve how you interact with our website by accepting the use of cookies. You can change
your privacy settings whenever you like.
Manage consent
All cookies
These cookies are strictly necessary for enabling basic website functionality (including page
navigation, form submission, language detection, post commenting), downloading and purchasing
software. The website might malfunction without these cookies.