Included with every iPhone and iPad, FaceTime is Apple’s first-party video and voice calling app. But it’s not just for mobile devices. You can use FaceTime on Mac too. To avoid potential calling issues caused by third-party apps, use MacKeeper’s Update Tracker to ensure your apps are all up to date.
FaceTime is Apple’s videotelephony software, which enables you to make video and audio calls with other FaceTime users. It’s a proprietary program, so you can only use it on iOS, iPadOS, and macOS devices. Anyone who has the phone number or email address linked to your Apple account can contact you, but you can also turn off FaceTime by signing the app out of your account.
How to set up FaceTime on Mac?
Unless your Mac is very old, FaceTime will have come preinstalled with macOS. If you’ve already created and signed your Mac into your Apple account, then FaceTime may already be signed in too. If not, then you’ll need to manually set up FaceTime on your Mac.
If you have any issues, read our guide on what to do if you find FaceTime not working.
A note from our experts:
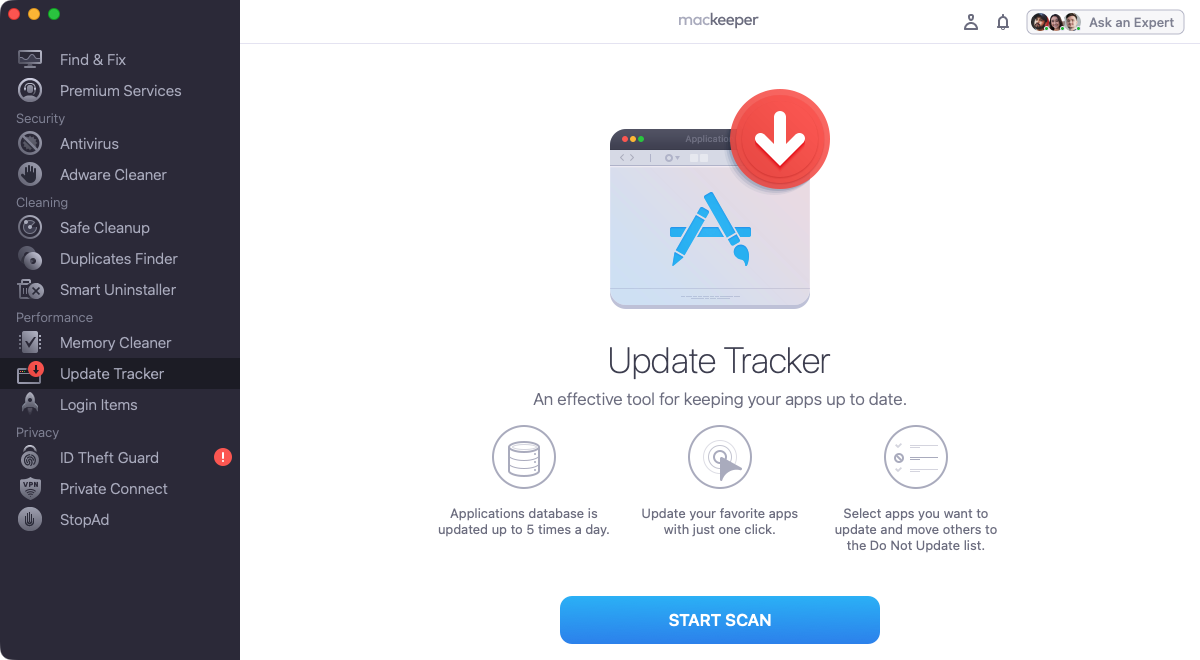
FaceTime is designed to be easy to use, but third-party apps may cause problems with it. If that happens, use MacKeeper’s Update Tracker to keep all those apps up-to-date. Here’s how:
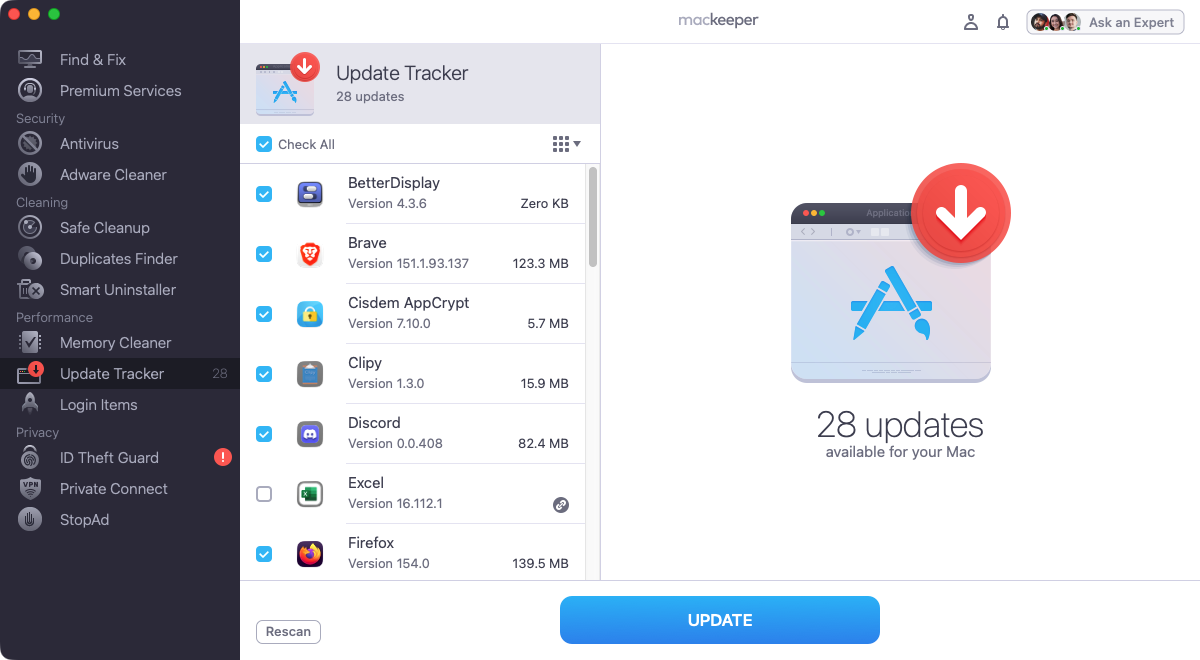
Choose what you want to update, then click Update.
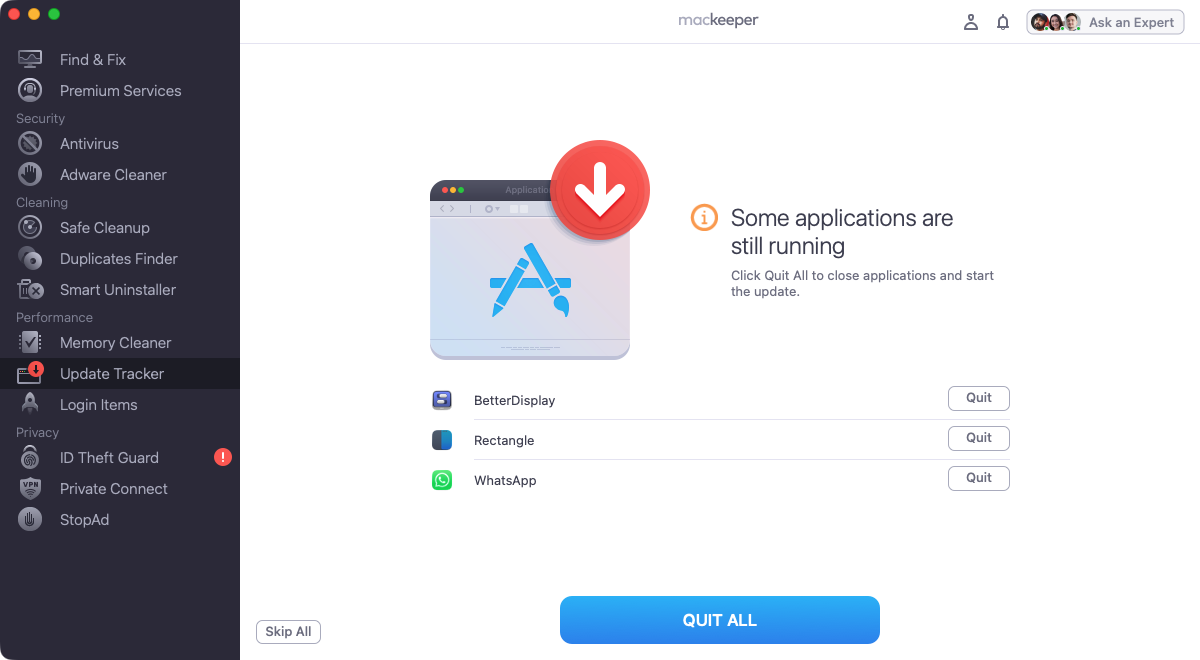
If you see a warning about running apps, click Skip All or Quit.
Wait while MacKeeper downloads and applies all the updates.
Step 1. Select Update Tracker and click Start ScanStep 2. Select what to update and click the Update buttonStep 3. Quit any running apps you want to update
Open FaceTime and sign in
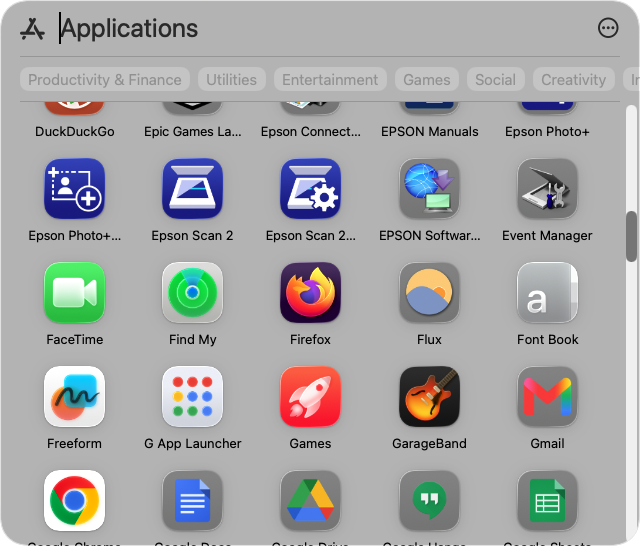
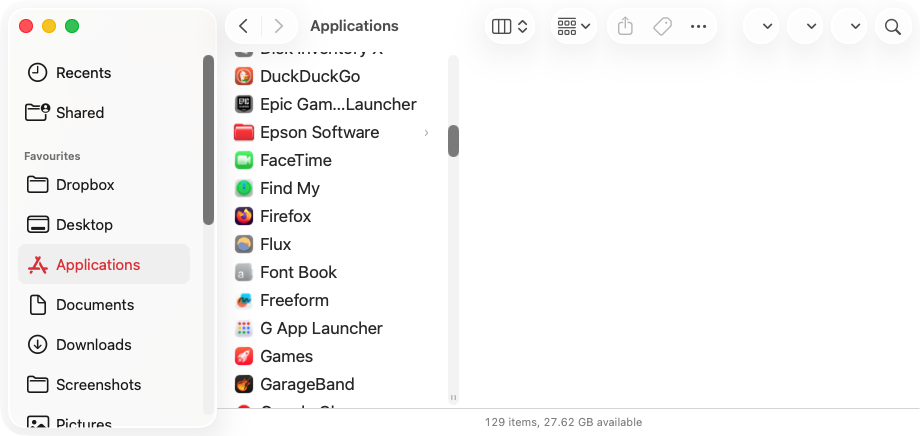
FaceTime is stored in your Mac’s Applications folder. There are a few different ways you can launch the app:
Click the FaceTime icon in your Dock.
Open your Applications folder and double-click the FaceTime icon.
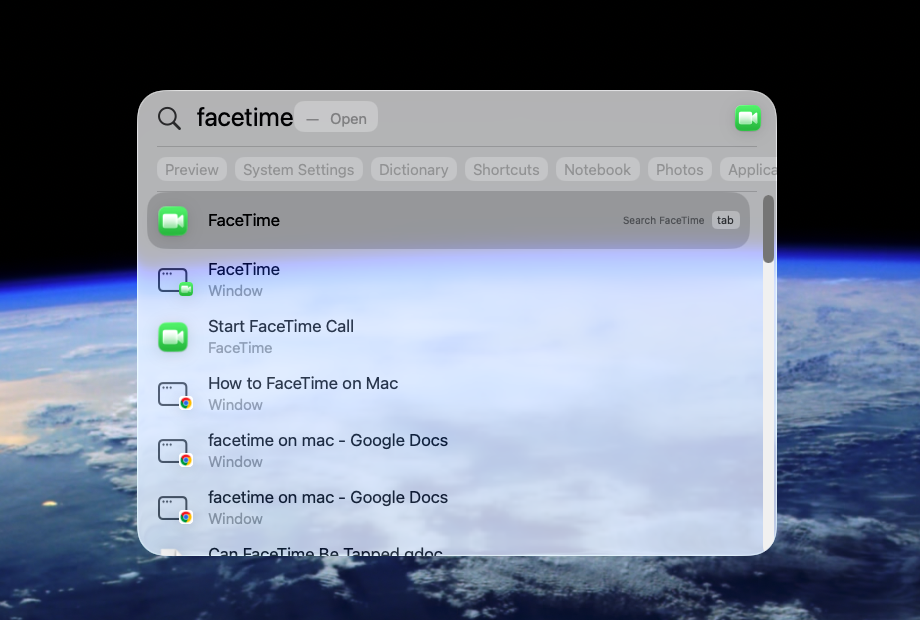
Open Spotlight with Cmd + Spacebar, then type FaceTime, and press Enter.
Click the Apps shortcut in your Dock and select FaceTime.
Open FaceTime from your DockUse the Apps shortcut in the Dock to open FaceTimeYou can open FaceTime directly from ApplicationsUse Spotlight to open FaceTime
One you’ve started the FaceTime app, you can log in, like this:
Type in your email address or phone number, and press Enter.
Add your password, and click Sign In.
Enter your details to log into FaceTime
Check your FaceTime contact details
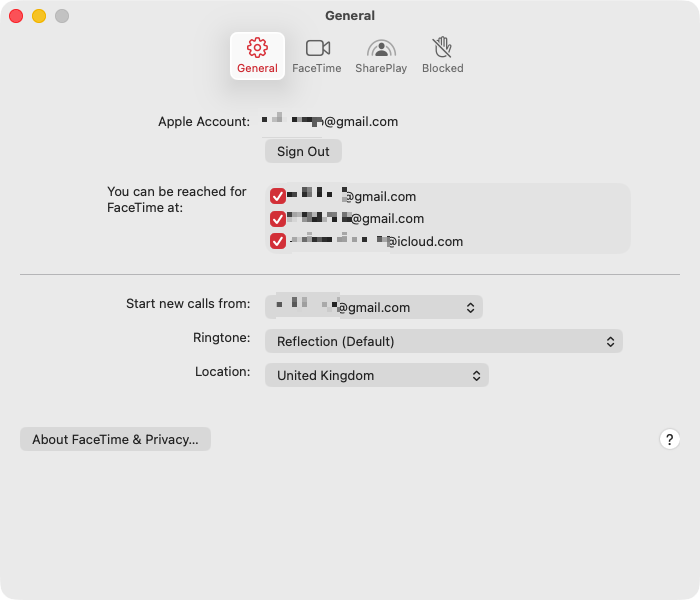
In FaceTime, you can change how other people reach you, and which details people see when you initiate a call. To set this up, do as follows:
In FaceTime, select FaceTime > Settings from your menu bar.
Select General.
Under You can be reached for FaceTime at, choose the email addresses and phone numbers you want to be available for FaceTime.
Next, use the Start new callsfrom the dropdown menu to choose what other people see when you call them. This can be an email address or a phone number.
Step 1. Open your FaceTime settingsStep 2. Check that your email addresses and phone numbers are linked to FaceTime
Turn on Calls from iPhone if needed
macOS also offers the ability to make and take standard cellular iPhone calls on your Macintosh machine. This is separate from FaceTime video calls, but it still uses the FaceTime app. The setup essentially goes like this:
Connect your iPhone and Mac to the same Wi-Fi network.
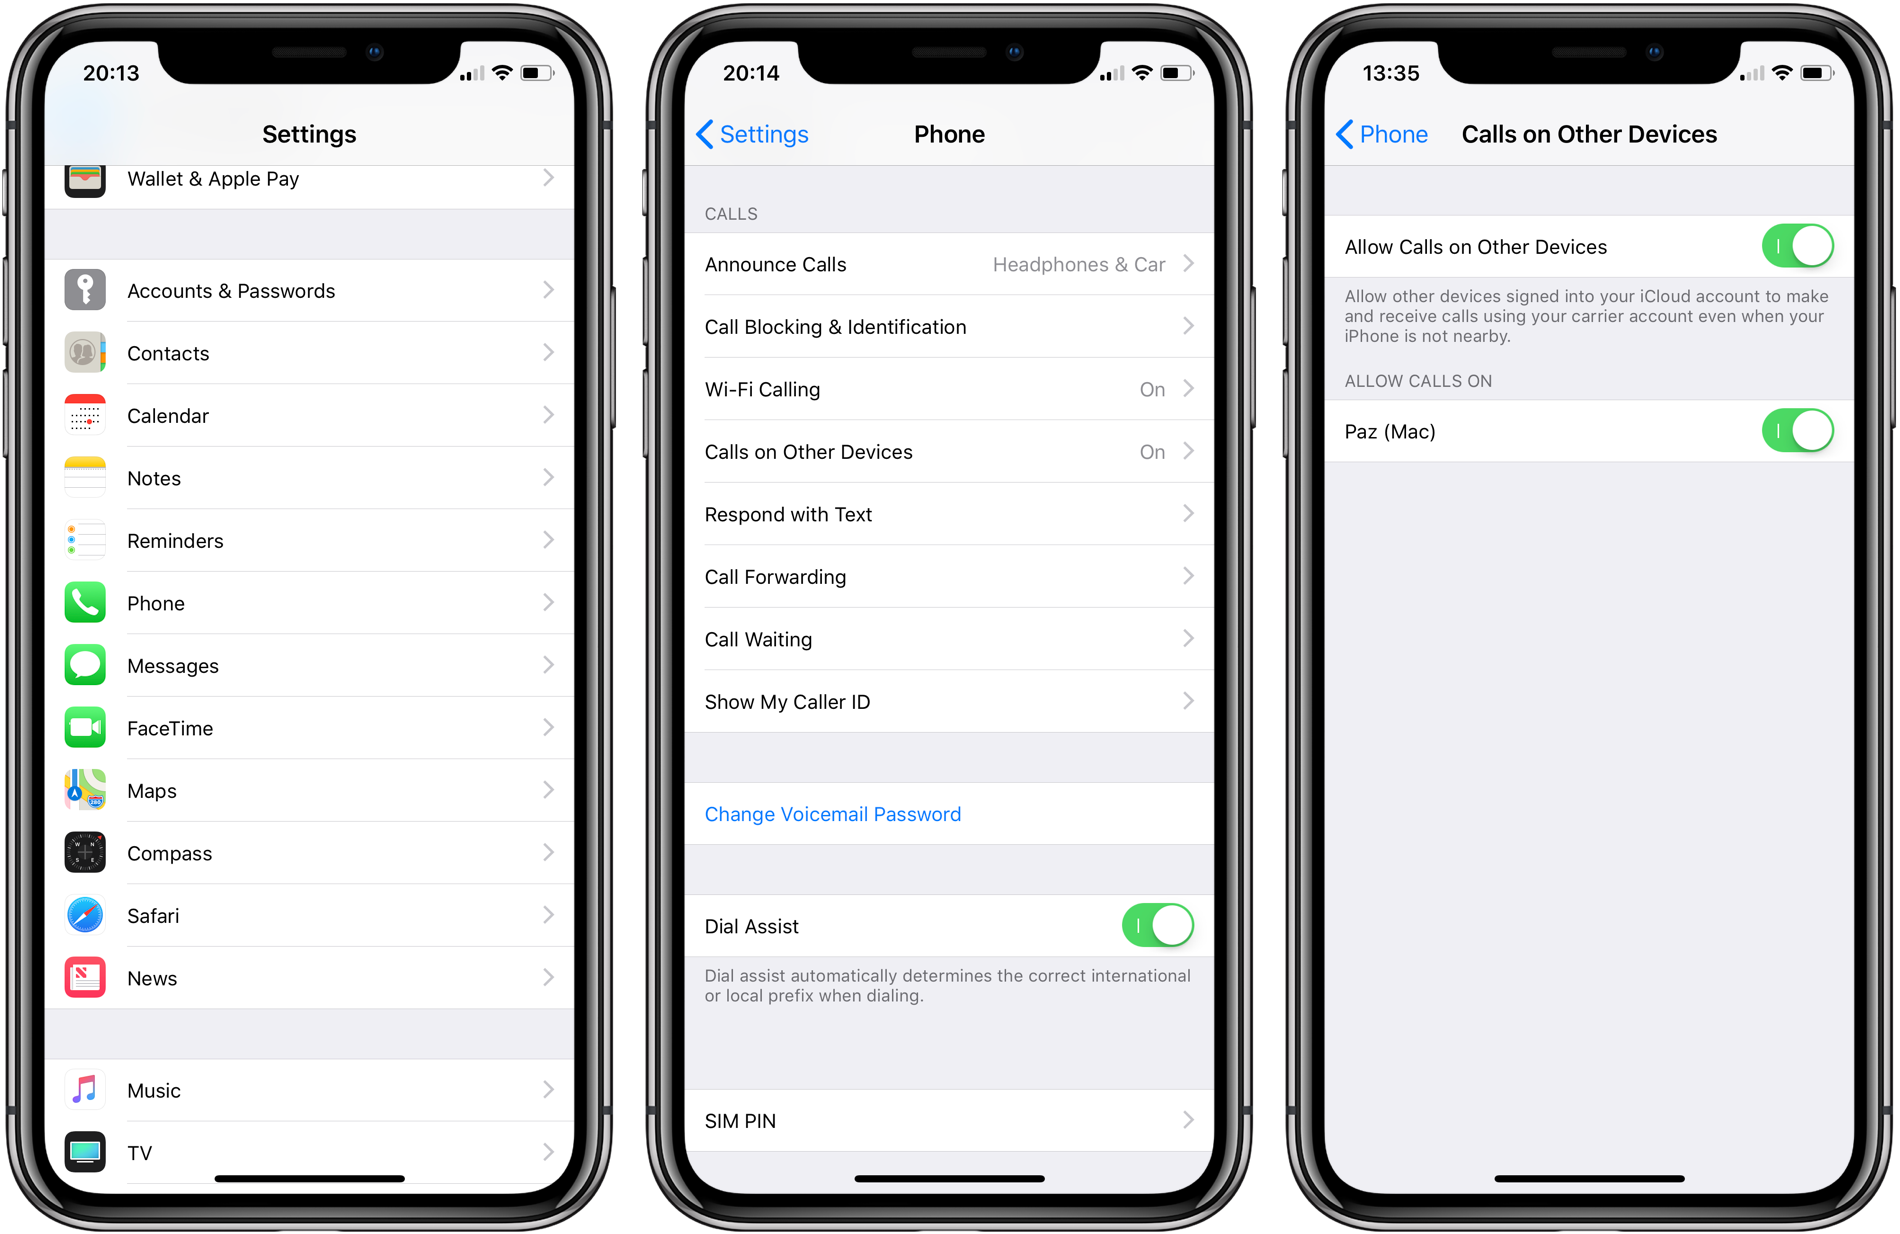
In your iPhone settings, go to Apps > FaceTime. Make sure FaceTime is on and your phone number is linked to the app.
Go to Settings > Apps > Phone and select Calls on Other Devices.
Enable Allow Calls on Other Devices, and select the devices you want to allow calls on.
Now, on your Mac, open FaceTime and select FaceTime > Settings from the menu bar.
Ensure FaceTime is using the same account as your iPhone.
Select your number under You can be reached for FaceTime at and Start new calls from.
Select Calls from iPhone.
You can turn on calls from other devices on your iPhone
You can now make or answer phone calls from your Mac, or transfer calls from one to the other.
How to make and receive FaceTime calls on MacBook?
Now you’ve finished the setup, how do you use FaceTime on MacBook, iMac, and other Apple systems? It’s all simple, as we’re about to show you. Essentially, you just pick a name from your address book, and click the call button or video button to reach out to someone. If they contact you, you just hit the pickup button.
Make FaceTime video calls
There are few ways to initiate a video call in FaceTime. You can search for people, look through your address, or connect with people in your calling history. This is what you need to do:
On the left-side of FaceTime, you’ll see your calling history. Click the person you want to call.
Now click the video calling button.
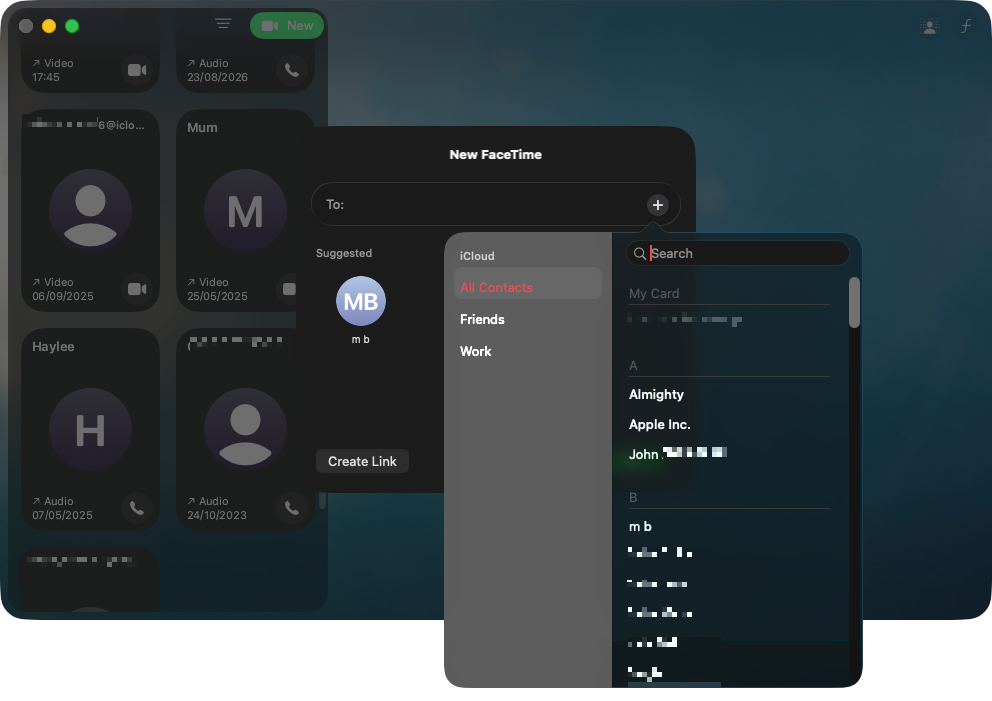
Alternatively, click New to open the New FaceTime panel.
Click the + button, and select a contact, or type their name in the box and search them.
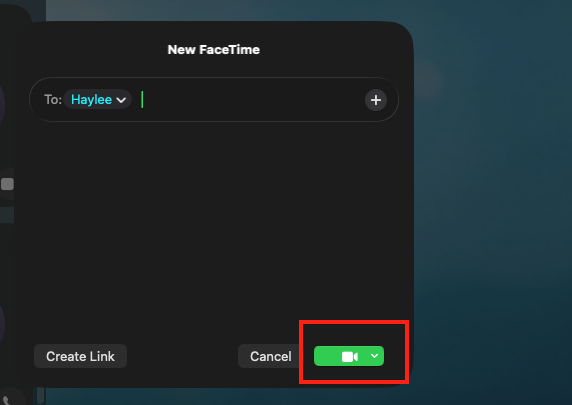
If that contact has FaceTime, you should see a green video calling icon in the bottom right. Click it to start a call.
Step 1. Click on a recent contactStep 2. Click the video call buttonStep 3. Search for contacts or type them in directlyStep 4. Click the video call button
Not sure if your camera is working? You can go to camera on your Mac using the Photo Booth app.
Make FaceTime audio call
You don’t have to make video calls with FaceTime. To start an audio-only call, do as follows:
Open a contact from your calling history and click the audio call button.
Alternatively, click New, then search for a contact.
Click the arrow next to the video call button to open the dropdown menu, and select FaceTime Audio.
Select FaceTime Audio
Answer or decline a FaceTime call
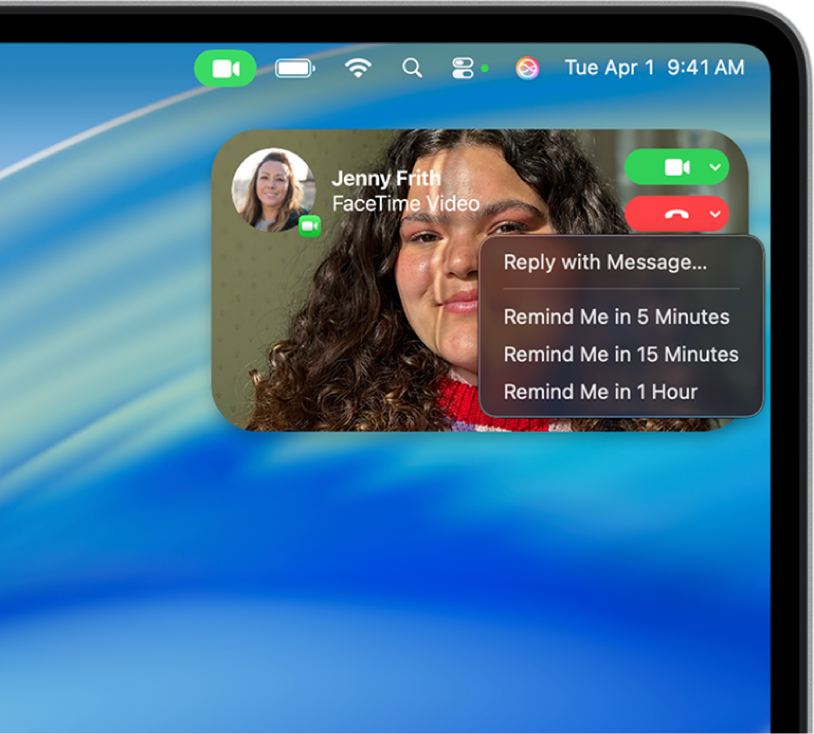
To accept a video or audio, click the green button when a call comes in and shows up in your notification area. To reject or stop a call, just click the red button.
To answer a FaceTime call, click the green button
Make group FaceTime call
When you start a new call using the New FaceTime panel, you can add more than one person to the call. As long as all your chosen contacts are using FaceTime, you’ll be able to initiate the video or audio call.
You can add more than one contact to a call
How to adjust sound and microphone in FaceTime
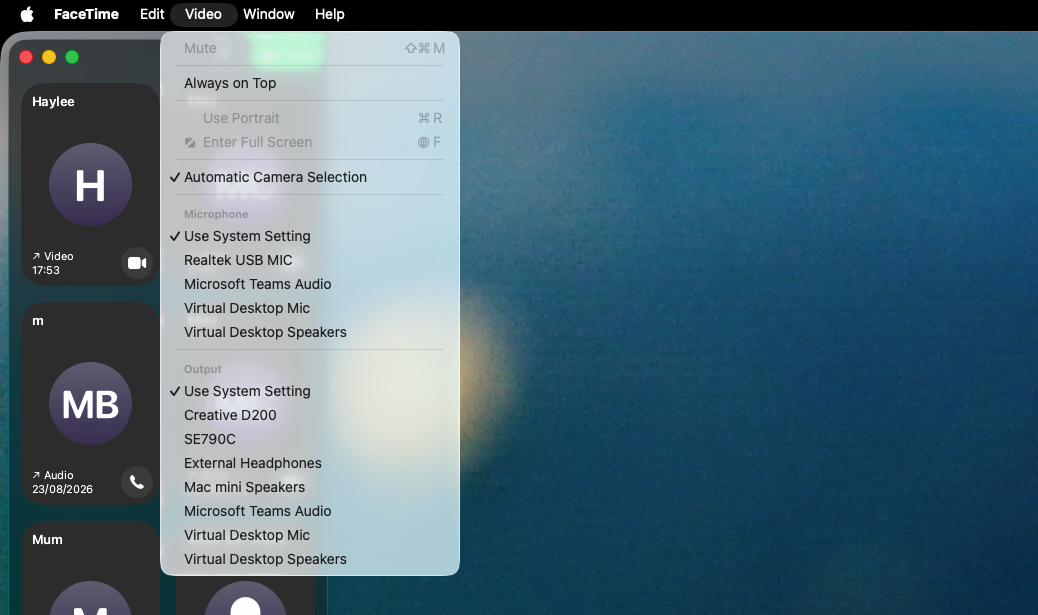
If you’re anything like us, you’ll have been on a FaceTime call with someone you can’t see or hear. It could be because their Mac or MacBook microphone is not working. More likely, their volume is muted, or they haven’t selected the right video or audio device for FaceTime. We can fix this problem easily, like this:
Click Video in the FaceTime menu bar.
Make sure that Automatic Camera Selection is chosen.
Under Microphone, choose your audio input device.
Under Output, choose which device you want to listen to calls with.
Check your FaceTime audio and video settings
How to adjust camera and background in FaceTime
You can apply various effects to your video output in FaceTime, including blurring your background or replacing it completely. You have a few options here:
Click the buttons in the top right of FaceTime to toggle Portrait or Background.
Click the FaceTime icon in your menu bar, then choose Portrait, Studio Light, or Background.
If you want to change the background, click the rectangle next to Background and make your choice.
Step 1. Click these icons to quickly toggle video effectsStep 2. Use the shortcut in your menu bar to try more effectsStep 3. Change your background to whatever you want
Useful FaceTime features on Mac to know
FaceTime has a few other handy features you might not know about. Here are a couple of our favorites.
Share your screen
While you’re on FaceTime call, you can screenshare with other people on the call. This lets them see either your whole screen or a particular app—useful for discussing presentations or other content you’re all interested in. Here’s how to do it:
Click the FaceTime icon in your menu bar.
Click the Share Screen button in the top right.
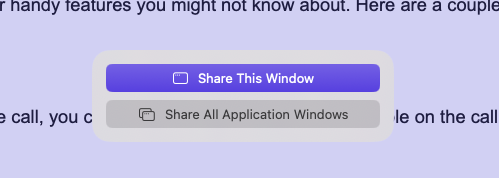
Select Share the whole screen in the top right of your screen. Or hover over a window and click Share a window or Share all windows in one app.
Step 1. While you’re on a call, click the Share Screen buttonStep 2. Click Share Entire screen to show everything you’re doing on your MacStep 3. Alternatively, you can share a window or all windows from a particular app
Use SharePlay
While you’re on a call, you can watch TV shows and movies together, or listen to music together. You just need to enable SharePlay, and it should happen automatically on calls, as long as the other people on the call also have access to that content (via a subscription or purchase). All you need to do is:
Open your FaceTime settings, and open the SharePlay tab. Make sure SharePlay is enabled.
Now when you’re on a call, just play a video in Apple TV or a track in the Music app.
Turn on SharePlay, and you consume media together with your callers
Have a better time with FaceTime
FaceTime is designed to be easy to use, but you might need to do a little bit of setting up to get it exactly how you want it. Just make sure you’re signed in, check your contact details, learn the basic controls, and you should be good to go. Whether you’re making video or audio calls, you quickly adjust your settings, and being able to blur your background is handy if your office space could do with tidying up!
If you do encounter any issues with FaceTime, make sure they’re not caused by third-party apps. Keep everything up to date with MacKeeper’s Update Tracker instead. In just a few clicks, it will download the updates you need and apply them—saving you valuable time in the process. Check it out today and see for yourself.
We respect your privacy and
use cookies
for the best site experience.
Privacy Preferences Center
We use cookies along with other tools to give you the best possible experience while using the
MacKeeper website. Cookies are small text files that help the website load faster. The cookies we
use don’t contain any type of personal data meaning they never store information such as your
location, email address, or IP address.
Help us improve how you interact with our website by accepting the use of cookies. You can change
your privacy settings whenever you like.
Manage consent
All cookies
These cookies are strictly necessary for enabling basic website functionality (including page
navigation, form submission, language detection, post commenting), downloading and purchasing
software. The website might malfunction without these cookies.