Want to watch your Mac on a bigger screen? Roku screen mirroring on Mac lets you show photos, videos, and presentations on your TV in minutes. If your Mac feels sluggish, first use MacKeeper’s Memory Cleaner to free up memory by quitting background processes you’re not using.
Screen mirroring shows your entire Mac display on a TV that’s connected to a Roku device. Whatever you view on your Mac—your desktop, an app, or a slideshow—appears on the big screen at the same time.
Casting works a little differently. Instead of showing everything, it sends only the content you select, like a single video, photo, or song, while the rest of your Mac stays private.
AirPlay is Apple’s built-in way of doing both, and it isn’t only for TVs. You can also use it between your own devices, such as sending AirPlay from iPhone to Mac, so the same technology powers much of the sharing across the Apple ecosystem.
A note from our experts:
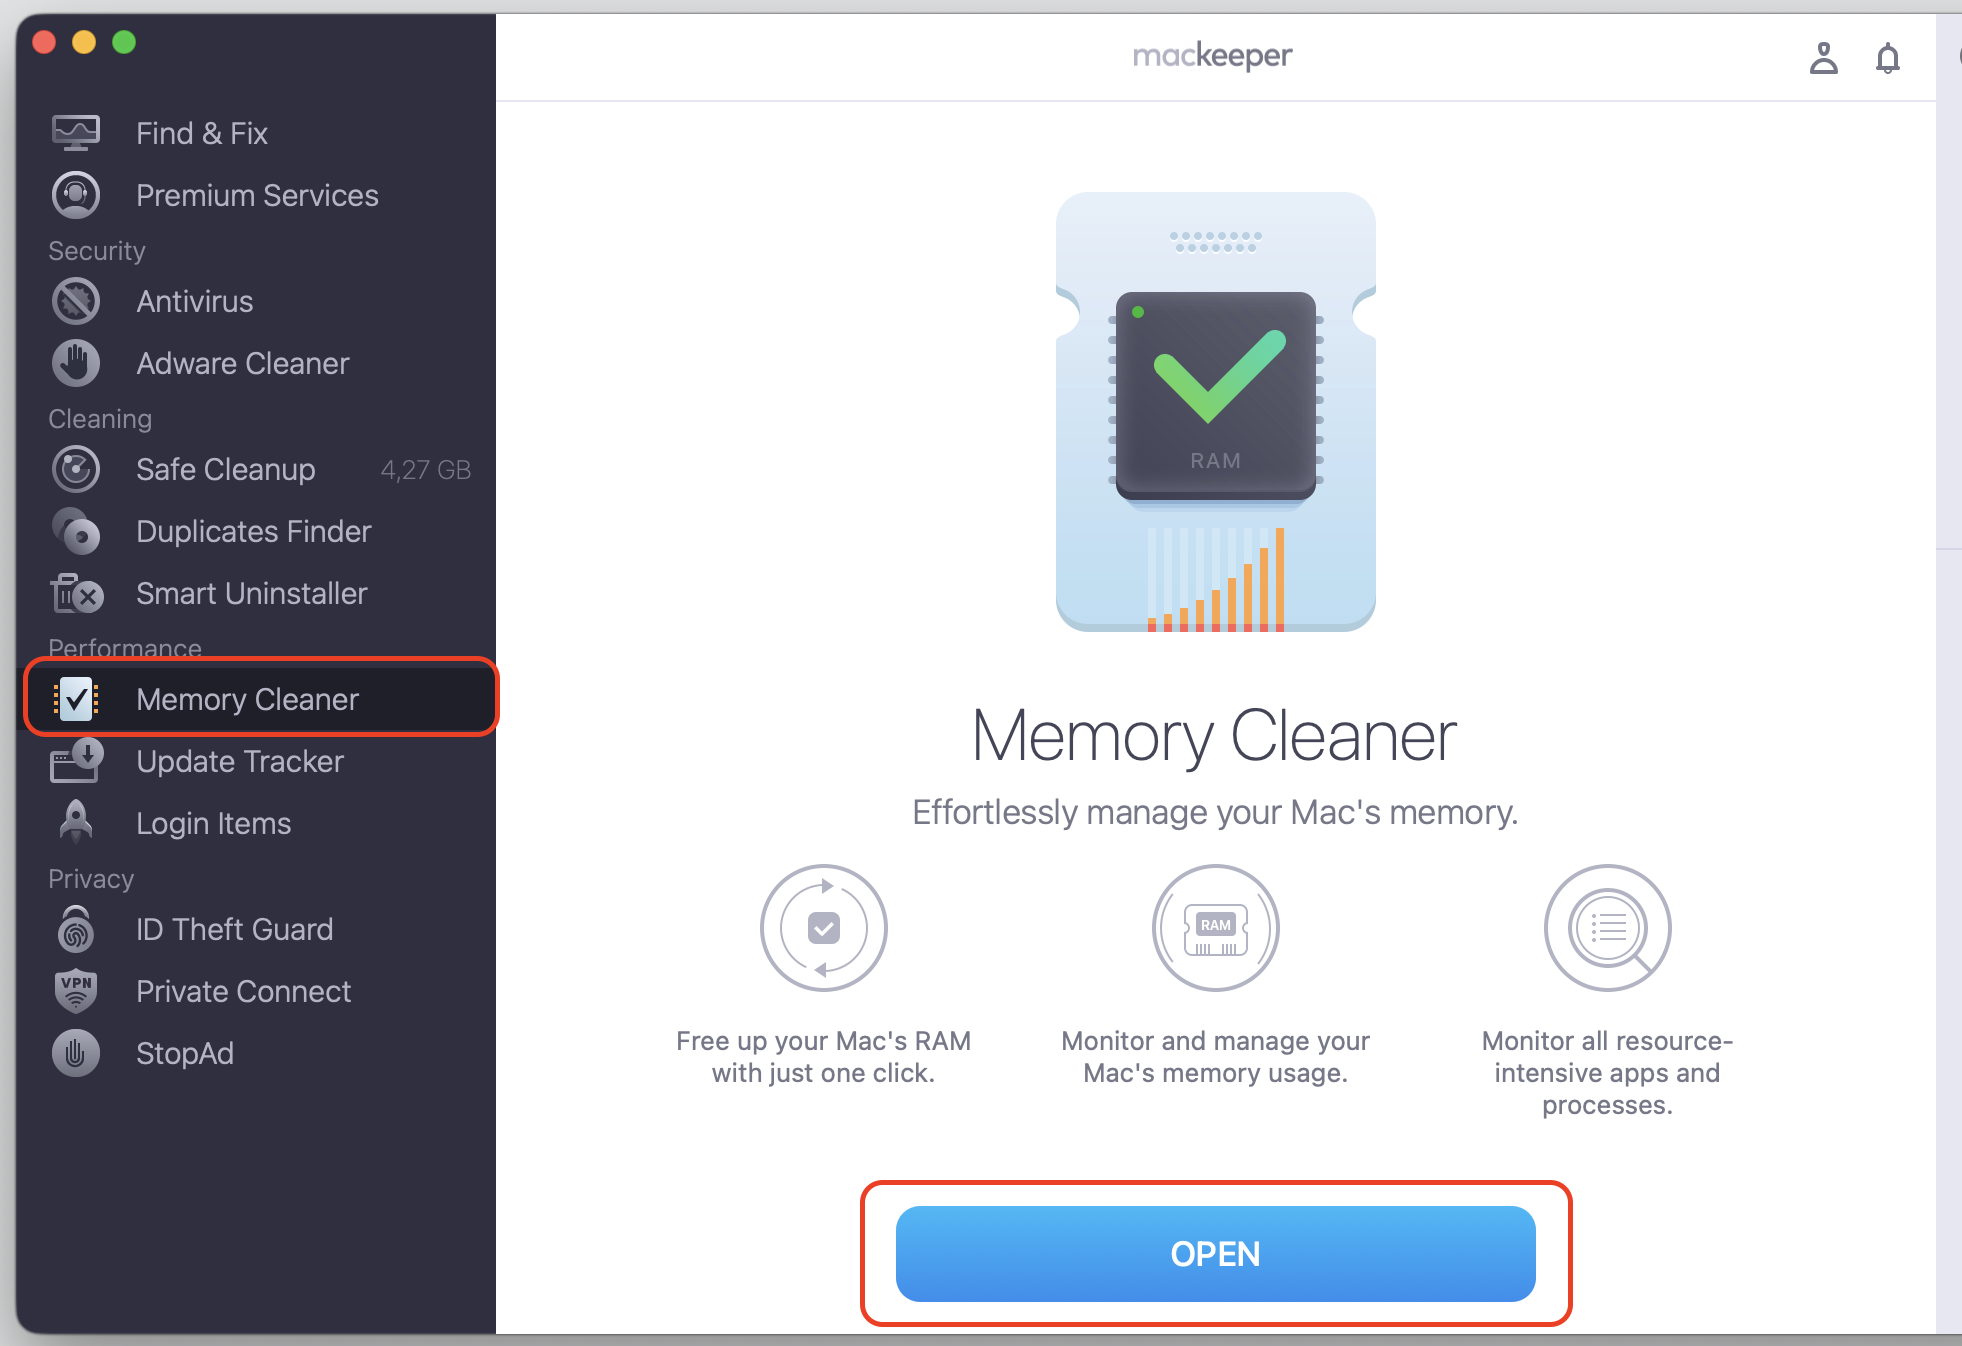
Sharing your Mac’s screen on other Apple devices is usually an energy-intensive process, so we suggest you prepare for this activity and disable other currently non-essential processes on your Mac. To do it quickly and efficiently, use MacKeeper’s Memory Cleaner:
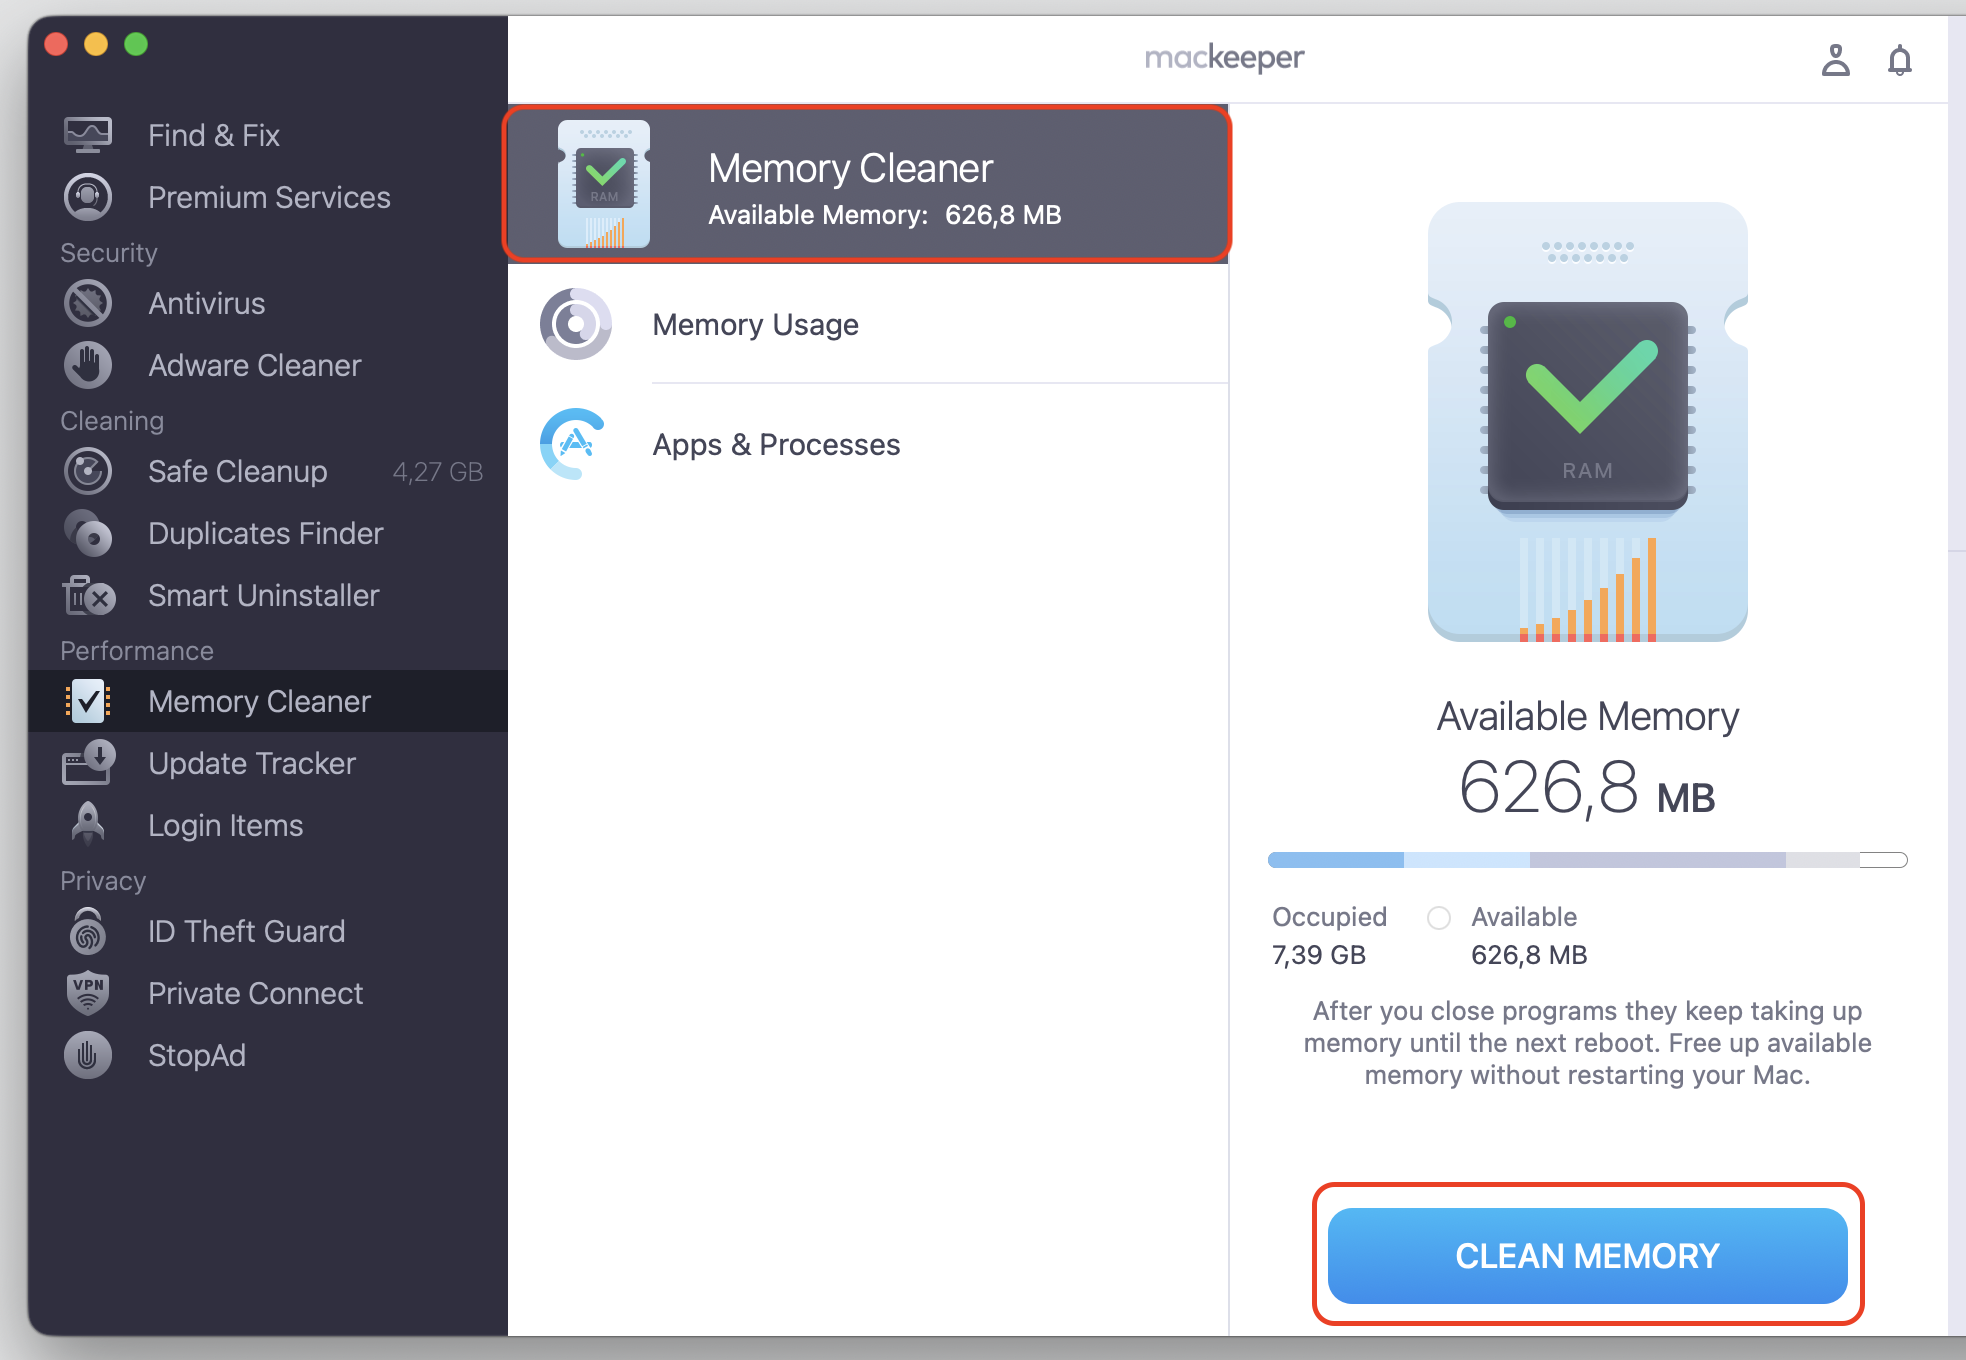
After installing and launching the app, select Memory Cleaner > Open and find Apps & Processes. Then, choose the apps and processes you want to stop right now.
Click the Clean Memory icon to confirm your action.
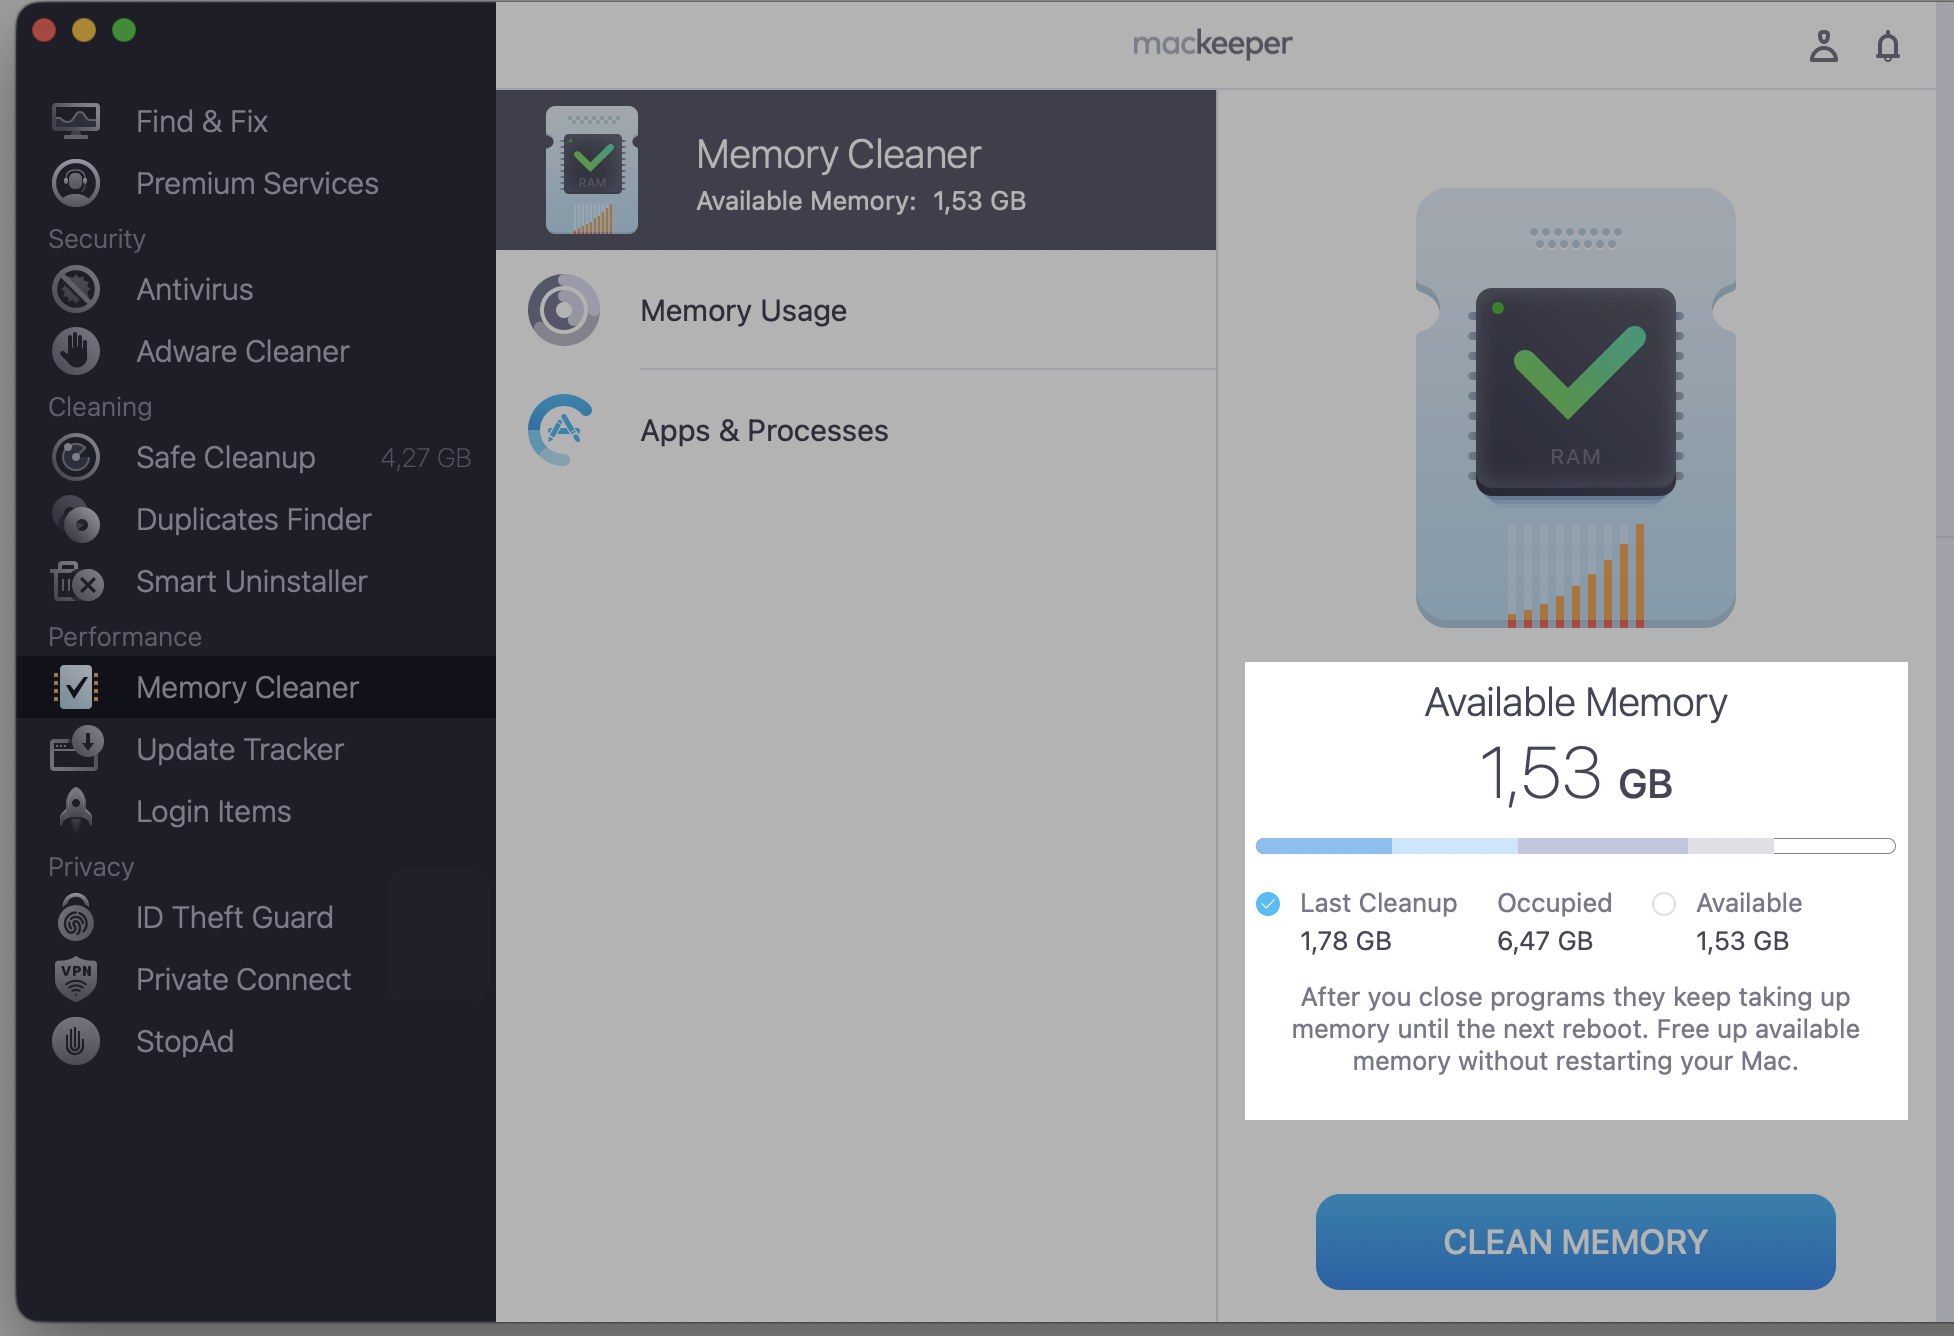
Recheck the CPU usage after Memory Cleaner has done its job.
Step 1. Go to MacKeeper > Memory Cleaner and select OpenStep 2. Select the Memory Cleaner section, then click Clean MemoryStep 3. Check the available memory now
Can you screen mirror Mac to Roku?
Yes, you can. Many recent Roku players and TVs support AirPlay, so Roku TV screen mirroring from Mac is wireless and quick, with no extra software to install.
You’ve got three main routes. AirPlay is the go-to option if your Roku supports it; a third-party app helps when it doesn’t, and an HDMI cable is a reliable wired choice when wireless mirroring isn’t available.
Mirroring isn’t the only trick here. If you’d rather use your TV as a second workspace, you can extend screen on MacBook instead of duplicating it, which gives you more room to work. Whether you’re on a new MacBook or an older Macintosh, the steps are much the same.
What do you need before mirroring Mac to Roku?
A little prep makes setup smoother. Run through these checks before you connect your Mac to your Roku:
Make sure your Roku supports AirPlay.Most models require Roku macOS 9.4 or later for AirPlay to work
Update your Mac to a recent macOS version. We suggest it because older Macs may not show the Screen Mirroring option.
Connect your Mac and Roku to the same Wi-Fi network. In this case, they can find each other.
Turn AirPlay on in your Roku settings. We should warn you here that mirroring won’t appear as an option until it’s enabled.
Keep your Wi-Fi signal stable. Staying low on interference is important to avoid lag, freezing, or dropped streams.
It’s also worth confirming your Roku is running the current software. Here’s how to check and update it:
On your Roku, open Settings > System > About to see the software version it’s running.
Go to Settings > System > System update, then select Check now.
Install any available update, so AirPlay works smoothly.
Roku’s official support pages list every compatible player if you’re ever unsure.
Once everything’s connected, your TV becomes a comfortable place to stream. The same setup makes it easy to download Netflix on Mac and play it on the big screen.
How to screen mirror Mac to Roku?
There’s more than one way to get your Mac onto the big screen, and the right one depends on your Roku model and whether you prefer wireless or a cable. Here are four simple methods for screen mirroring from Mac to Roku, starting with the wireless options. To connect a MacBook to a Roku TV, AirPlay is the wireless route, while HDMI is the wired one.
1. Mirror Mac to Roku with AirPlay
AirPlay is a direct, built-in option for AirPlay from Mac to Roku TV, and it works without downloads. Here’s how to use AirPlay on a Mac and connect to your Roku.
On your Roku, press the Home button, open Settings > Apple AirPlayand HomeKit, then turn AirPlay on.
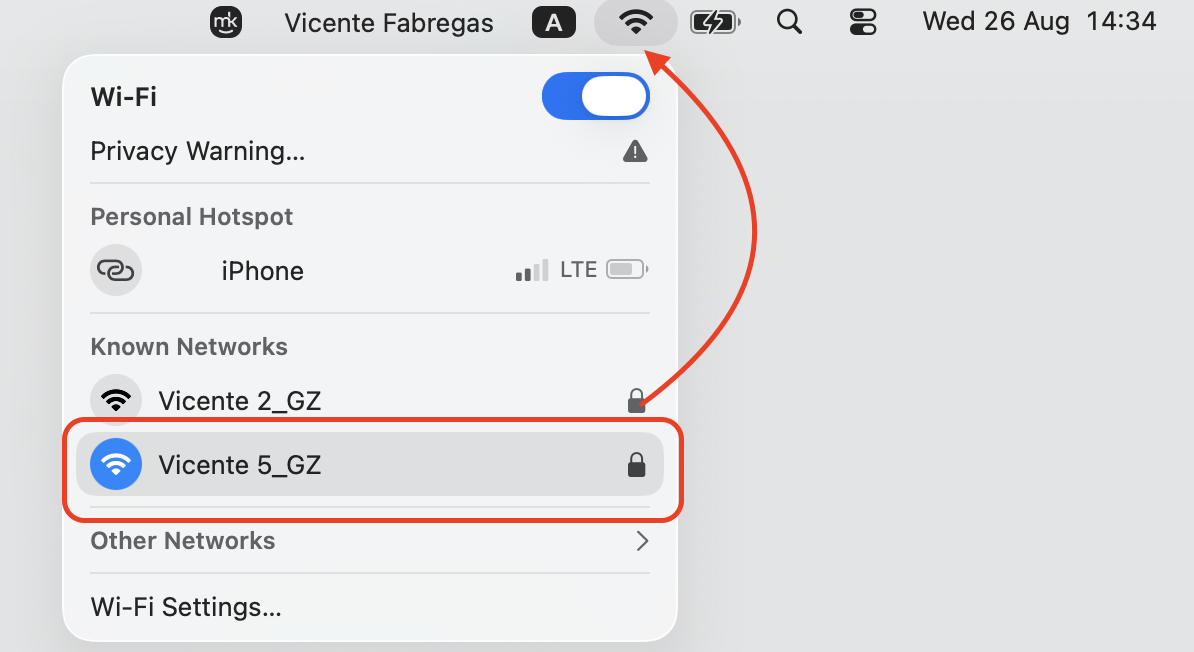
Connect your Mac and Roku to the same Wi-Fi network.
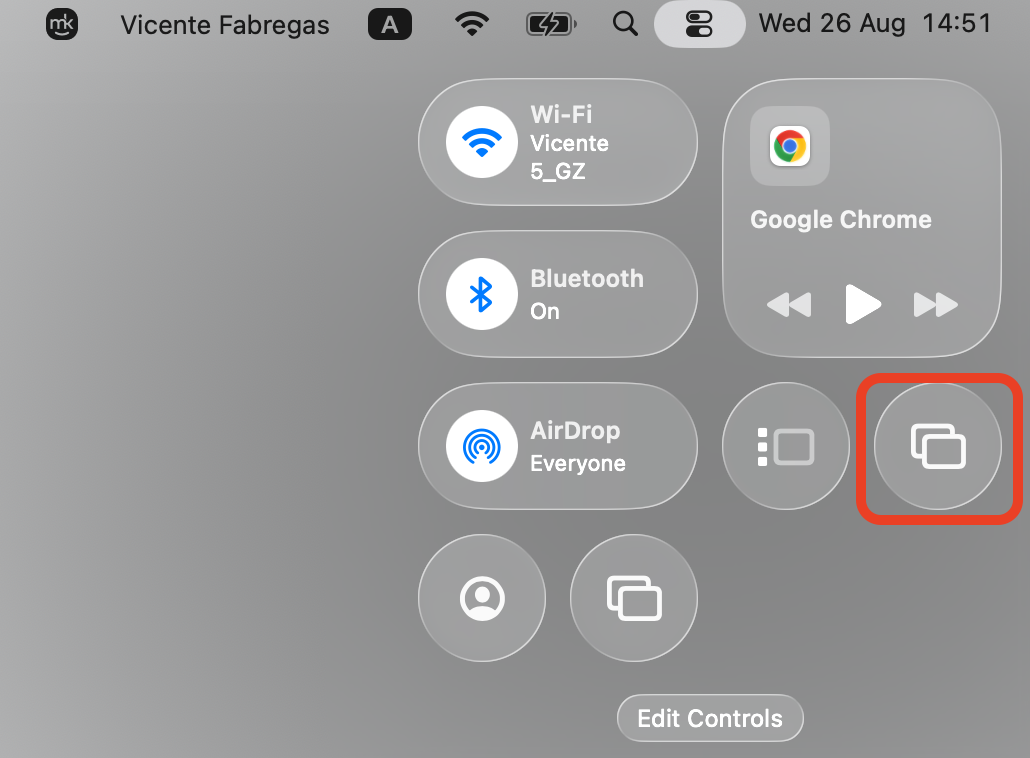
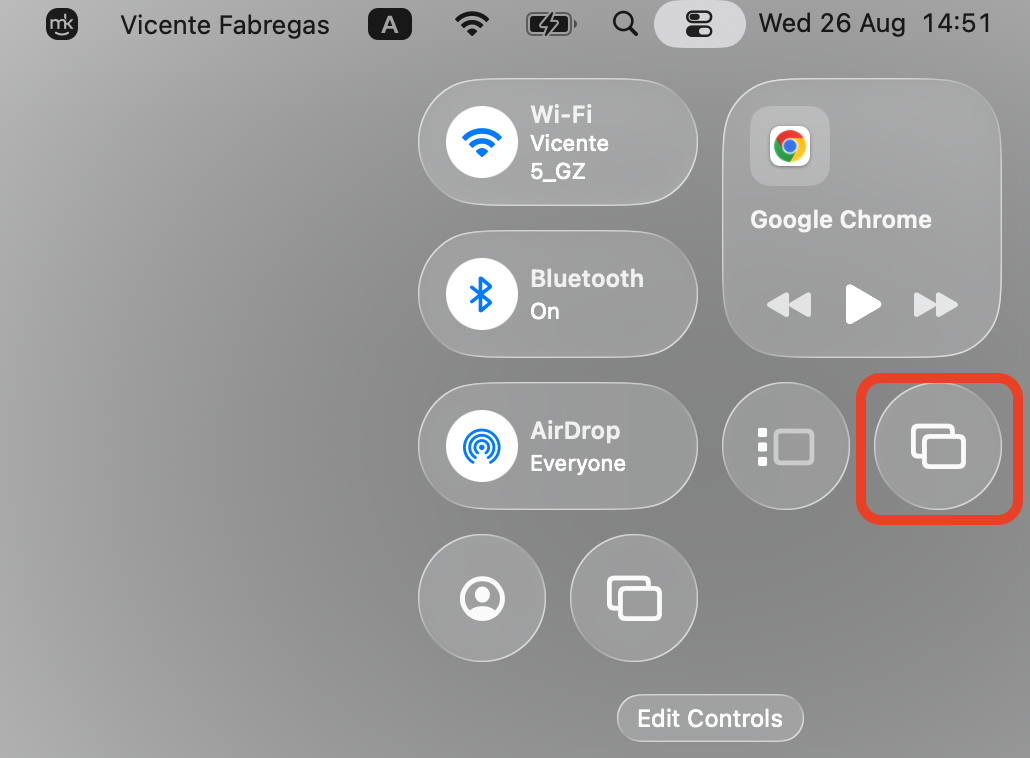
On your Mac, open Control Center from the top-right of the menu bar.
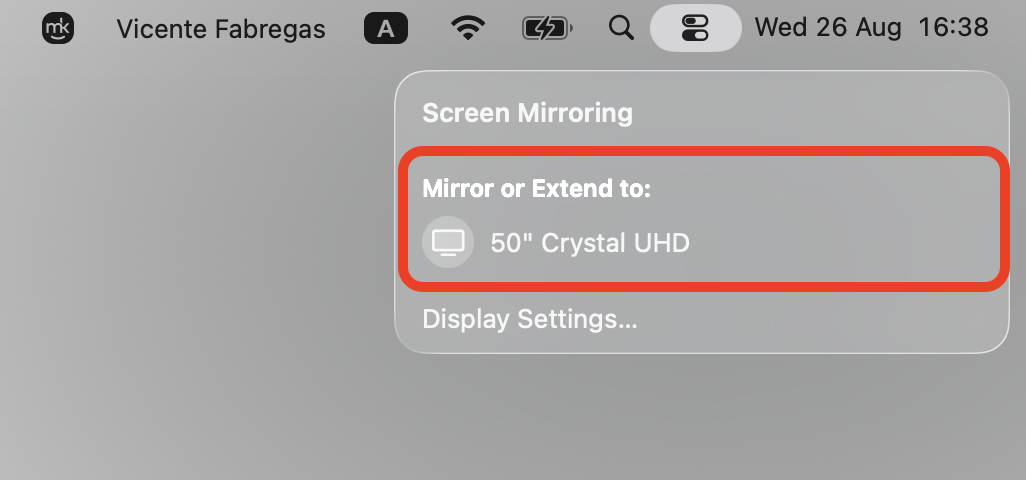
Click Screen Mirroring, then select your Roku from the list.
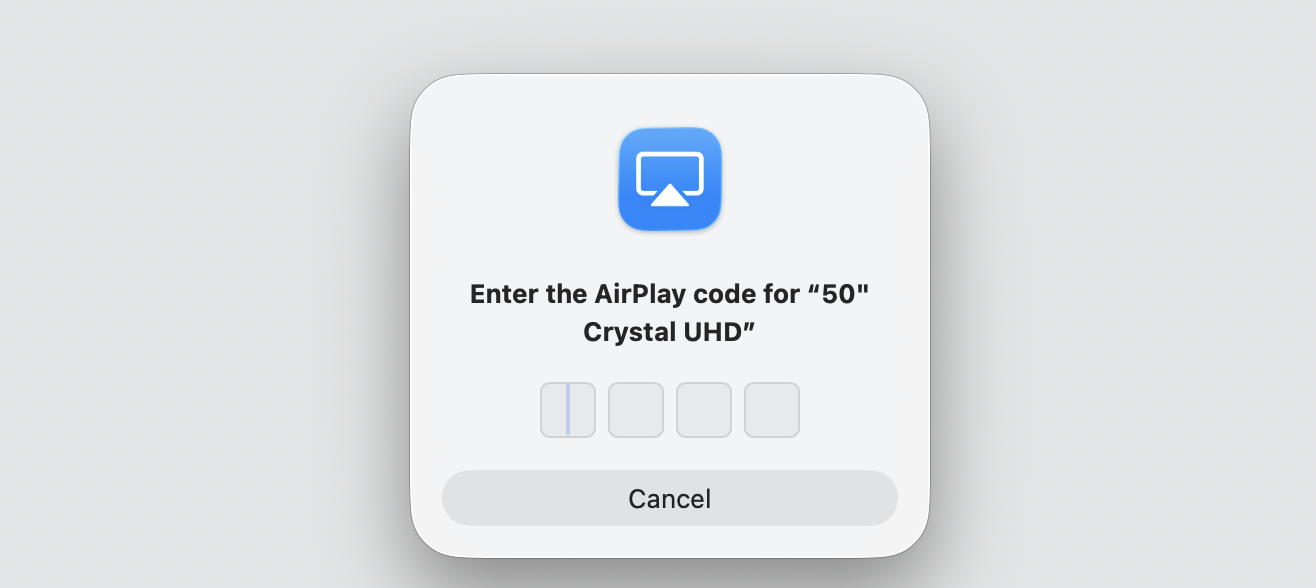
If a password appears on your TV, type it on your Mac to connect.
Step 1. Click the Wi-Fi icon and make sure your Roku device is connected to the same Wi-Fi network as your MacStep 2. Go to Control Center and select Screen MirroringStep 3. Select your Roku from the listStep 4. If a password appears on your TV, type it on your Mac to connect
2. Cast specific media from Mac to Roku with AirPlay
Sometimes you only want to share one video or playlist, not your whole desktop. Casting sends just that content to your TV while you keep using your Mac for other tasks. Do this:
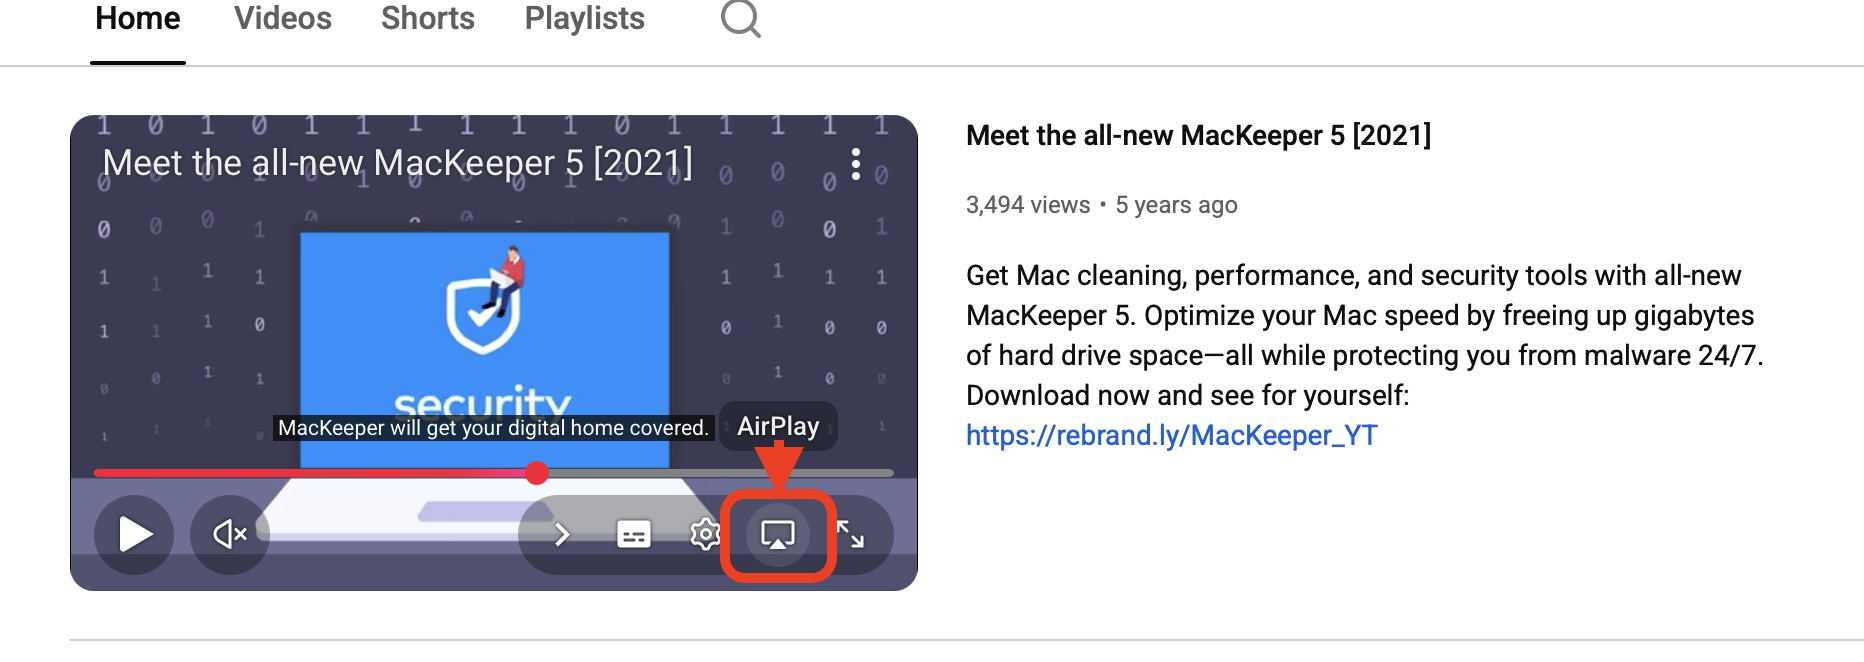
Open an app that supports AirPlay, such as the Apple TV app, Photos, or a video in Safari.
Start playing the video, photo, or song you want to share.
Click the AirPlay icon in the player controls.
Select your Roku to start showing the content on your TV.
Click the AirPlay icon in the player controls
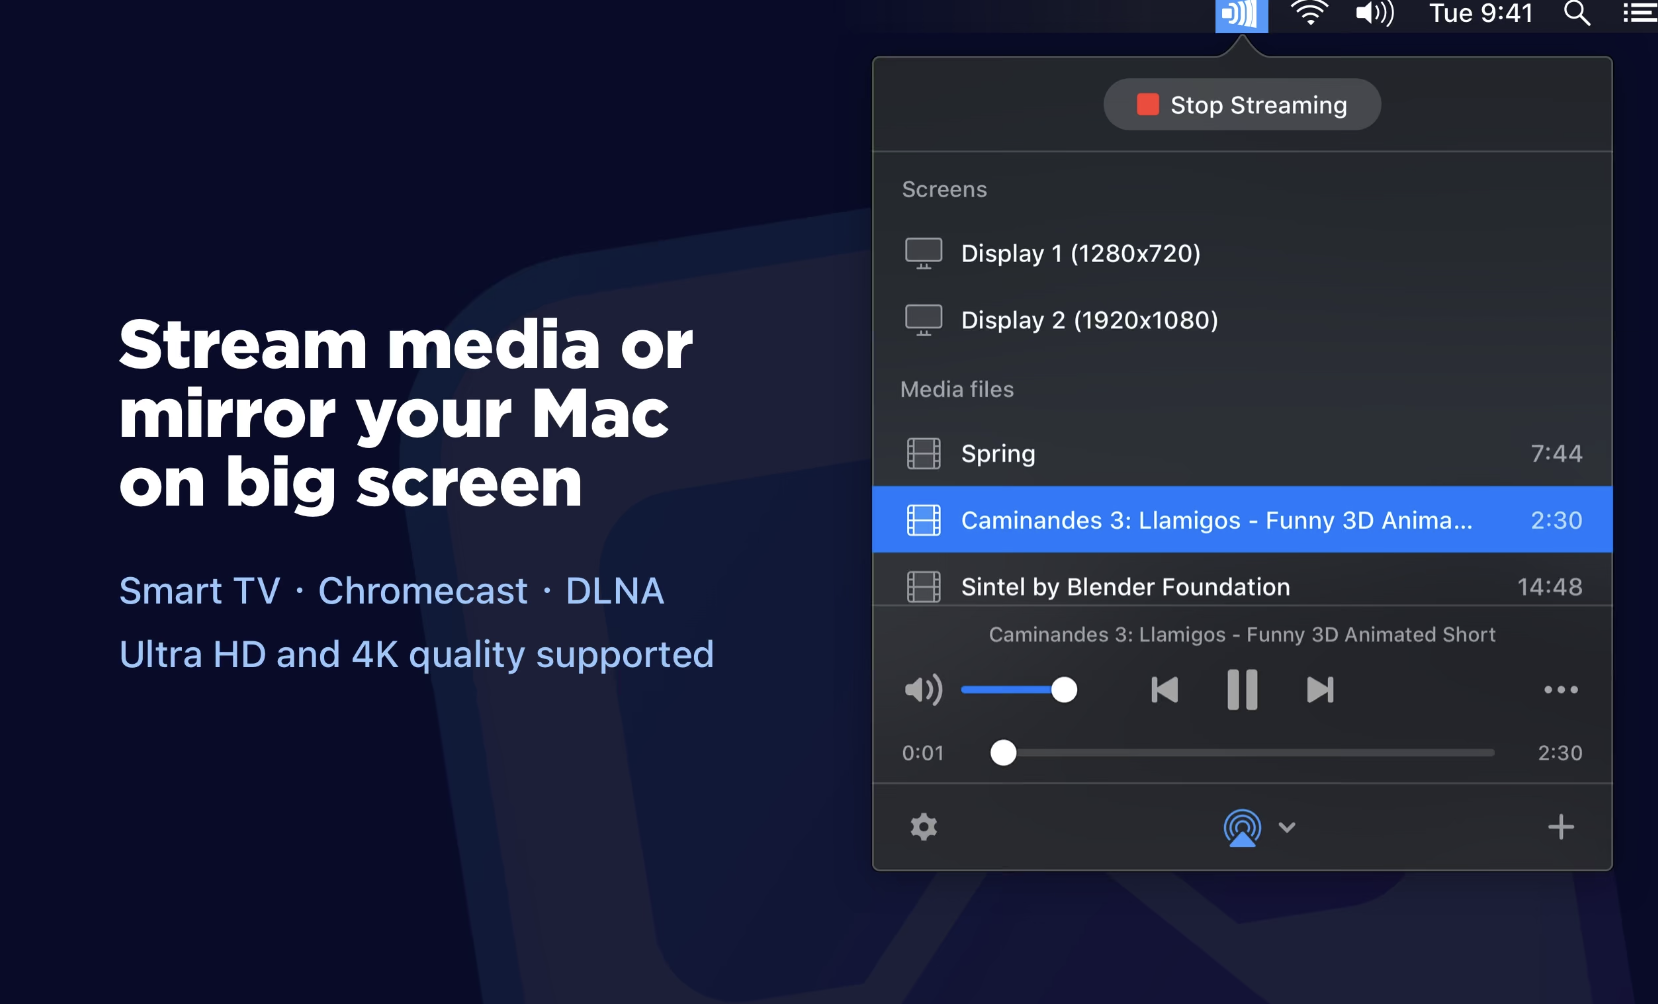
3. Mirror Mac to Roku with third-party apps
If your Roku is older and doesn’t support AirPlay, a third-party mirroring app can fill the gap. These apps also help when you want extra options, like sharing offline files. Apps such as JustStream, AirBeamTV, or DoCast are built for Mac-to-Roku mirroring. Most ask you to install a small helper on your Mac and pick your Roku from a list. Check that the app supports your exact Roku player before you buy, since compatibility varies.
4. Connect Mac to Roku TV with HDMI
When AirPlay isn’t available or your Wi-Fi is unreliable, an HDMI cable provides a stable, wired connection. You’ll need an HDMI cable and a USB-C to HDMI adapter if your Mac doesn’t have an HDMI port. Now, do the following:
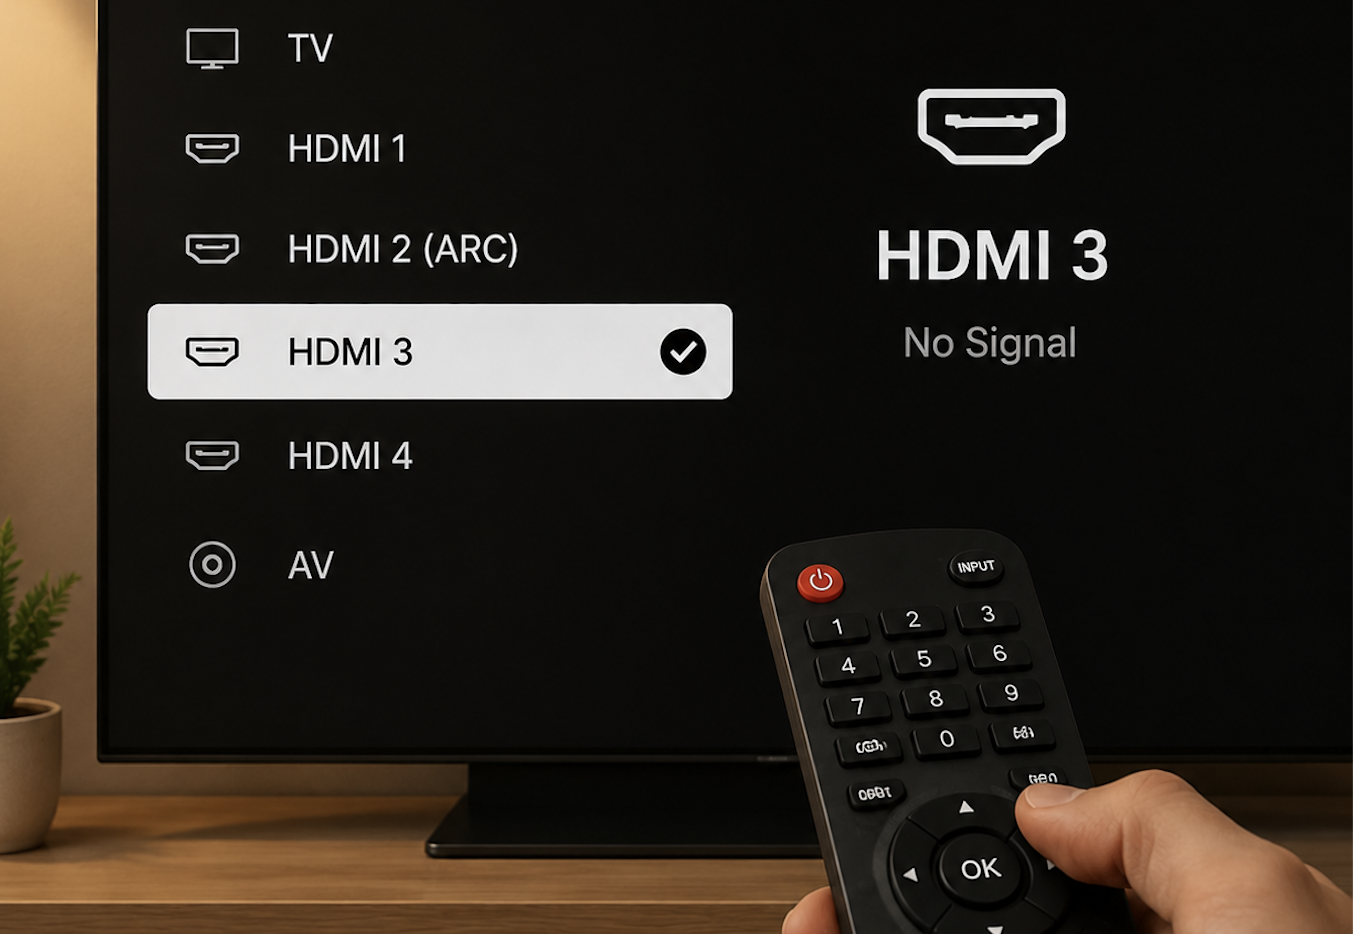
Plug the HDMI cable into your TV and note which input you used.
Connect the other end to your Mac, adding a USB-C adapter if needed.
On your TV remote, switch to that HDMI input.
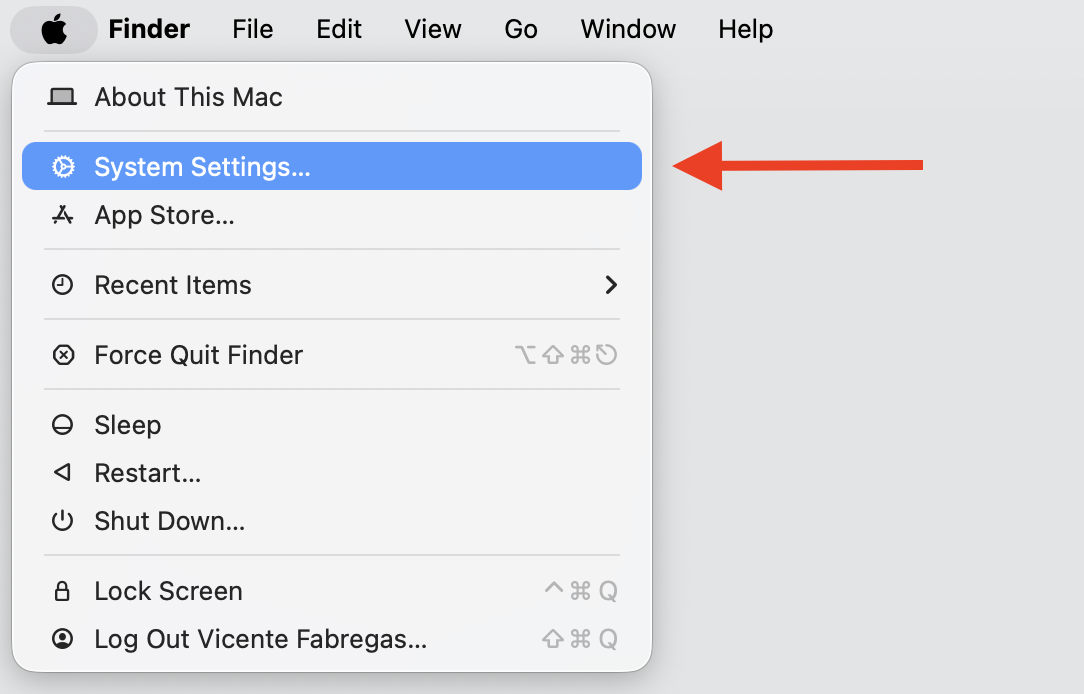
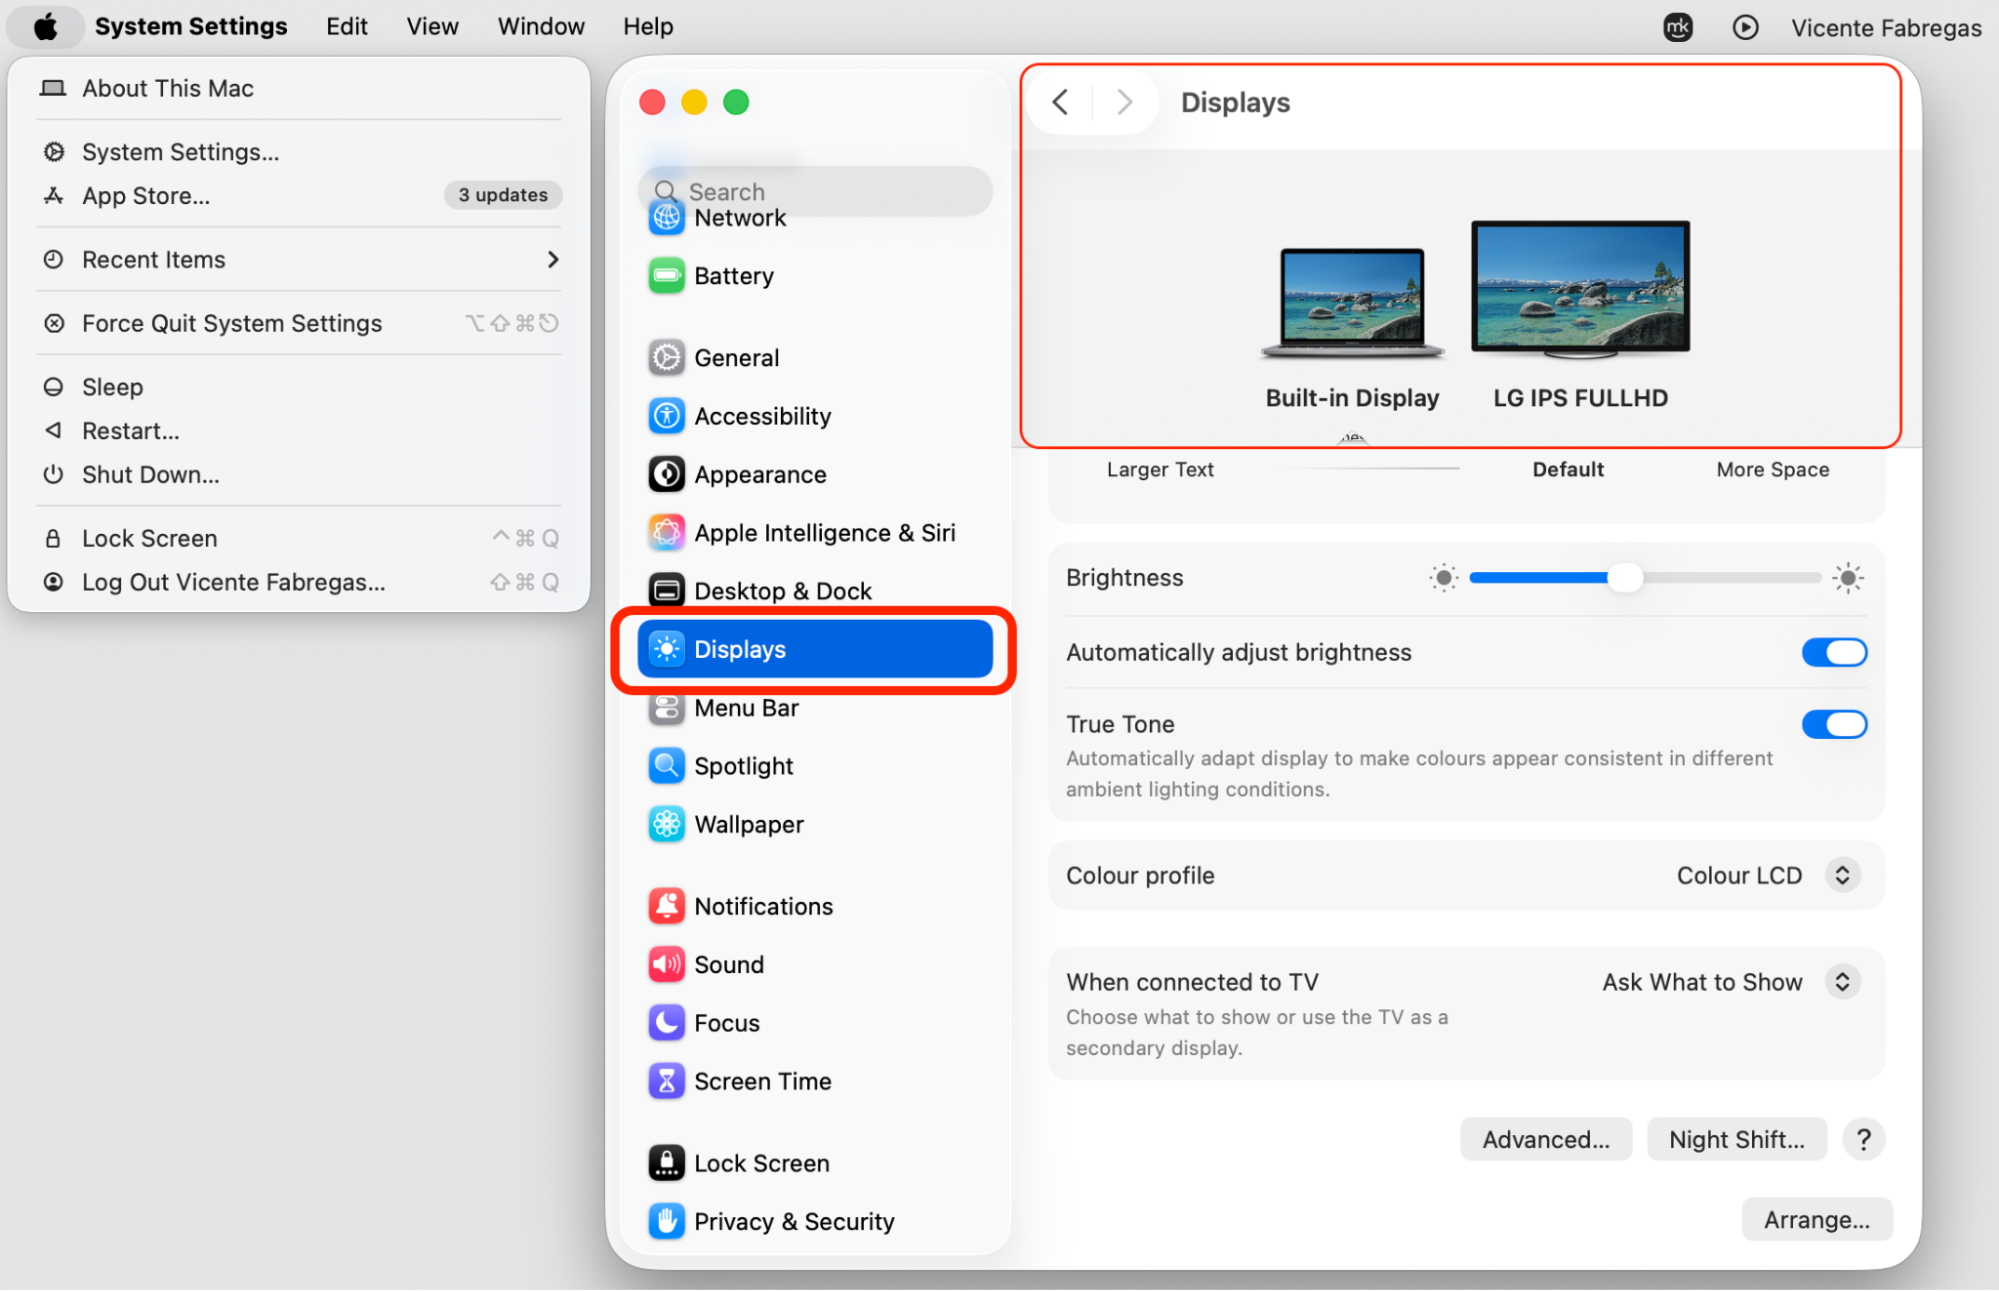
Your Mac should appear right away. If it doesn’t, open System Settings > Displays and select your TV.
Step 1. Switch to the HDMI input on your TVStep 2. Go to System Settings on your MacStep 3. Select your TV from Displays Section
A hint from us:
If the cable’s plugged in but nothing’s showing, the common reasons for HDMI not working on a MacBook are a loose adapter, an unplugged cable, or the wrong input. Our attached dedicated quide will help you solve this riddle.
Screen mirroring vs casting from Mac to Roku
Both methods send your Mac’s content to a Roku, but they suit different moments. The difference comes down to how much they show and how much of your Mac stays free.
Screen mirroring shows your entire Mac display on the TV, so your desktop, your apps, and anything you open all appear at once. That makes it a good fit for presentations, demos, or browsing together, though your Mac stays tied to whatever’s on screen and everything is visible to the room.
Casting is more selective. It sends only the media you pick—say, one video or a playlist—while the rest of your Mac stays private and free for other tasks. It works well when you just want to sit back and watch a single thing on the big screen.
Mirroring is great for showing things off, while casting is great for sitting back and watching.
How to stop screen mirroring from Mac to Roku?
When you’re done, stopping is as easy as starting. Pick whichever of two methods matches how you connected. Just follow our steps below:
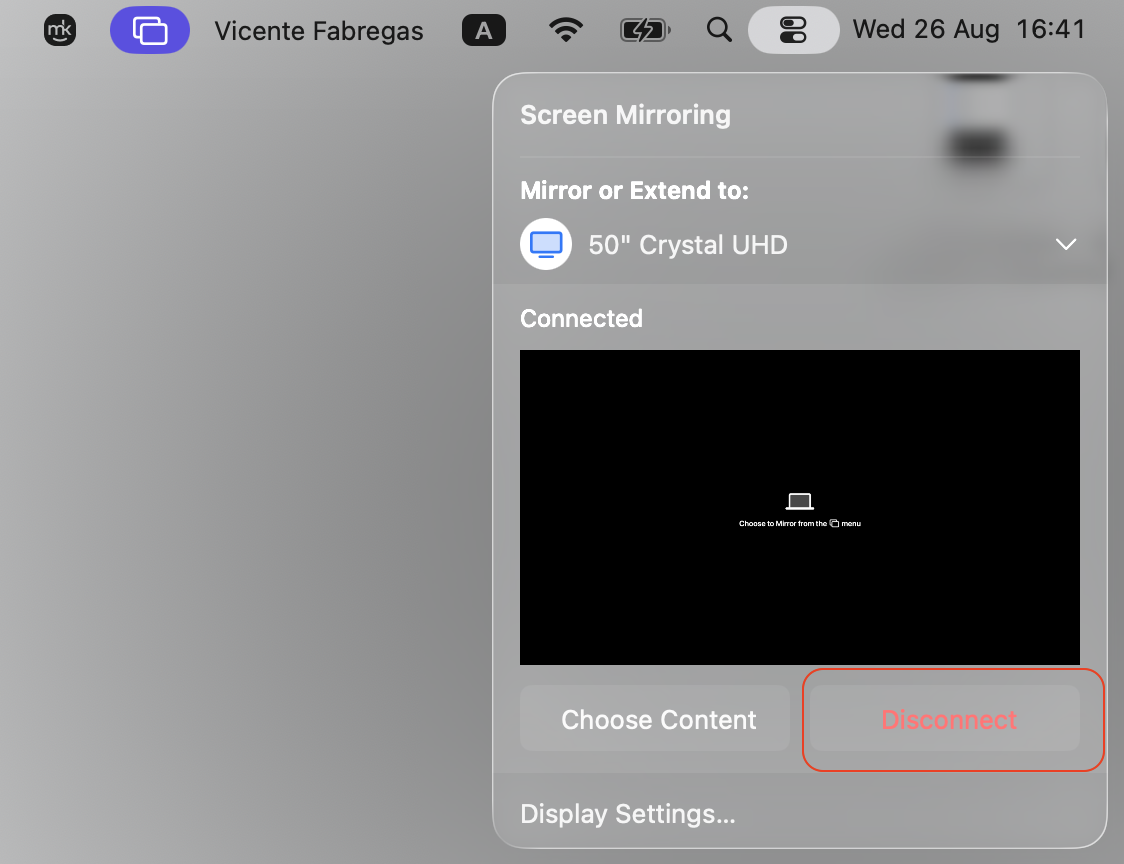
Open Control Center, click Screen Mirroring, then click Stop Mirroring.
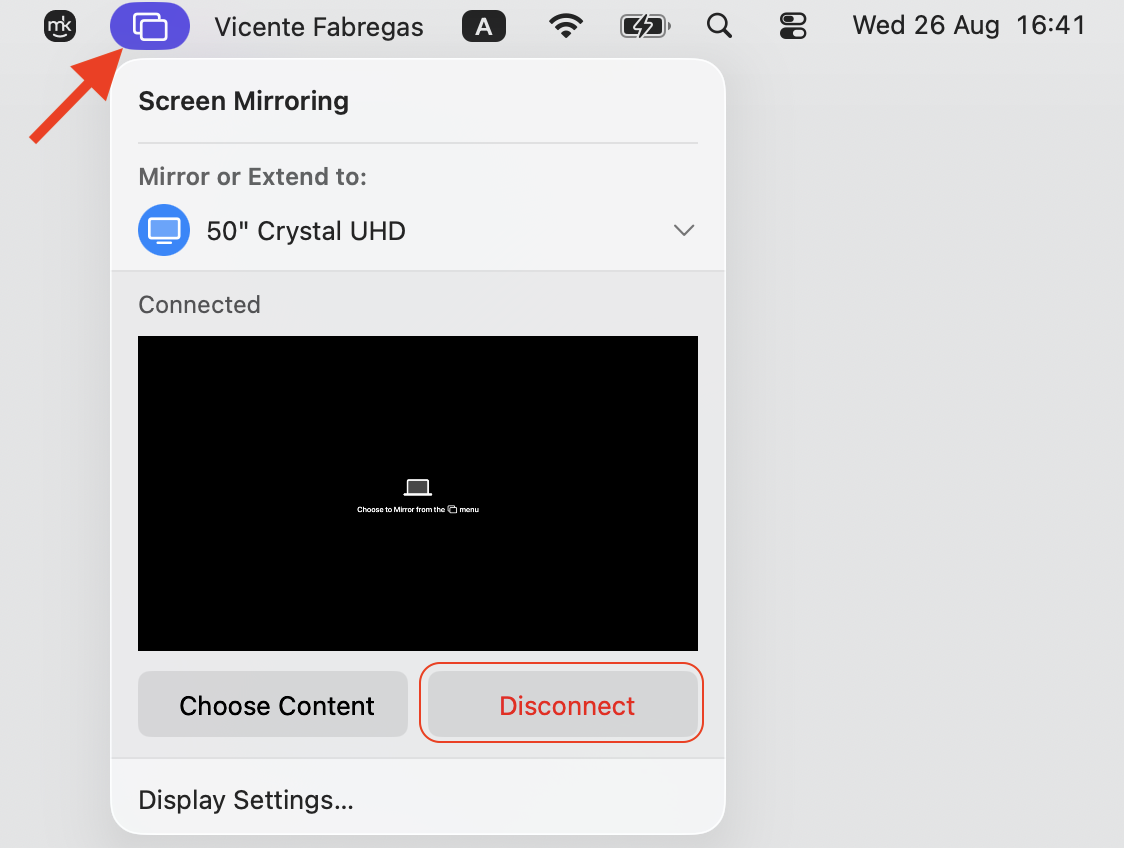
Click the blue Screen Mirroring icon in the menu bar, then choose Stop Mirroring.
If you used a third-party app, quit it or press its Disconnect button.
For an HDMI setup, switch your TV to another input or unplug the cable.
Step 1. Click the blue Screen Mirroring icon in the menu bar, then choose Stop MirroringOr go to Control Center from the top-right of the menu bar and select Screen MirroringStep 2. Select Disconnect
Conclusion
Roku screen mirroring on Mac usually comes down to AirPlay, a third-party app, or HDMI—pick the one that fits your Roku and your Wi-Fi. If your Mac slows down while streaming, MacKeeper’s Memory Cleaner frees up memory by quitting processes you don’t need. Try it today and enjoy a clear view on the big screen.
We respect your privacy and
use cookies
for the best site experience.
Privacy Preferences Center
We use cookies along with other tools to give you the best possible experience while using the
MacKeeper website. Cookies are small text files that help the website load faster. The cookies we
use don’t contain any type of personal data meaning they never store information such as your
location, email address, or IP address.
Help us improve how you interact with our website by accepting the use of cookies. You can change
your privacy settings whenever you like.
Manage consent
All cookies
These cookies are strictly necessary for enabling basic website functionality (including page
navigation, form submission, language detection, post commenting), downloading and purchasing
software. The website might malfunction without these cookies.