We often come across various image file formats online, like JPG, PNG, or HEIC, though we don’t know much about them.
JPG (Joint Photographic Experts Group) and PNG (Portable Network Graphics) are the most popular image formats, but neither is better nor worse. Each serves a different purpose and offers exceptional features.
In everyday life, we mostly deal with JPG files, especially when using social media, slideshows, and archive photos. By contrast, we use PNG images in web graphics, design, and image editing. So, we choose which format suits us best based on what we require.
However, sometimes you might have to change image formats according to your needs. We’ve already talked about how to convert HEIC to JPG on Mac, so today, let's find out how to convert PNG to JPG on Mac and vice versa.
A note from our experts:
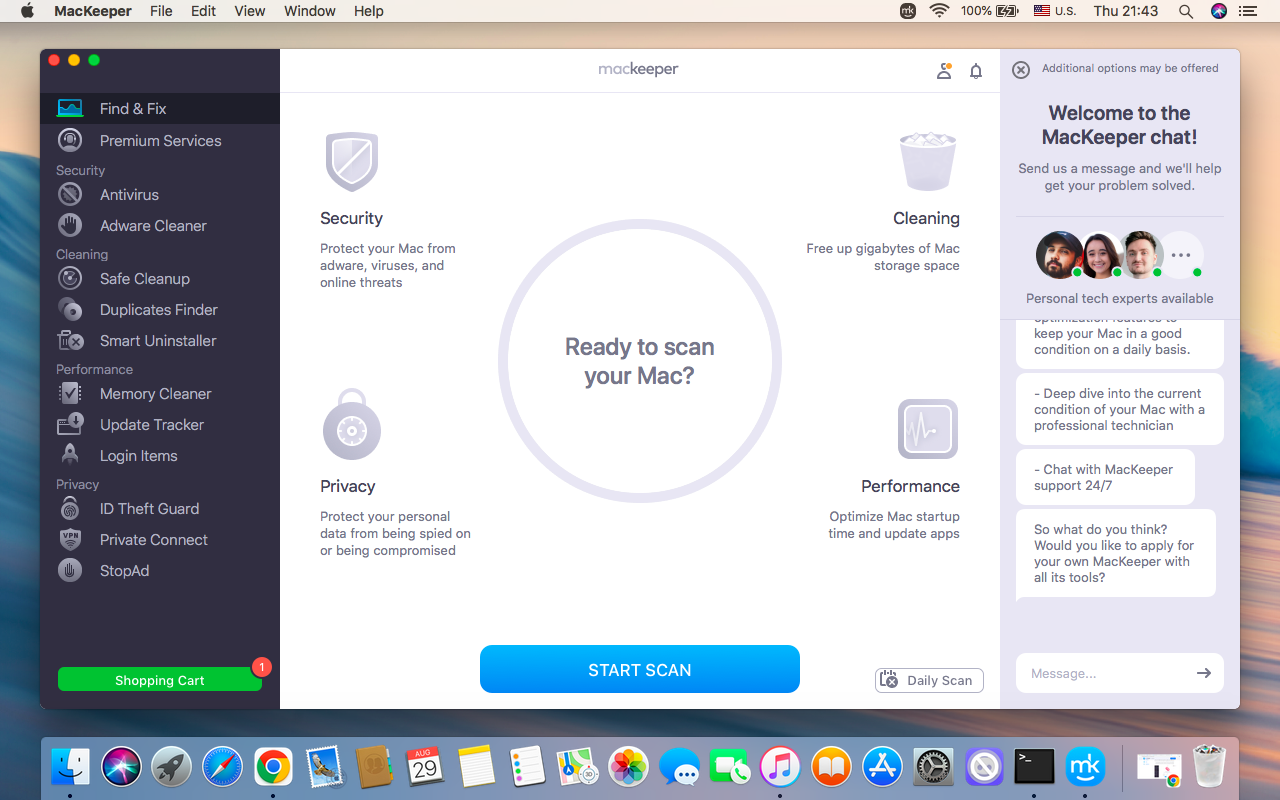
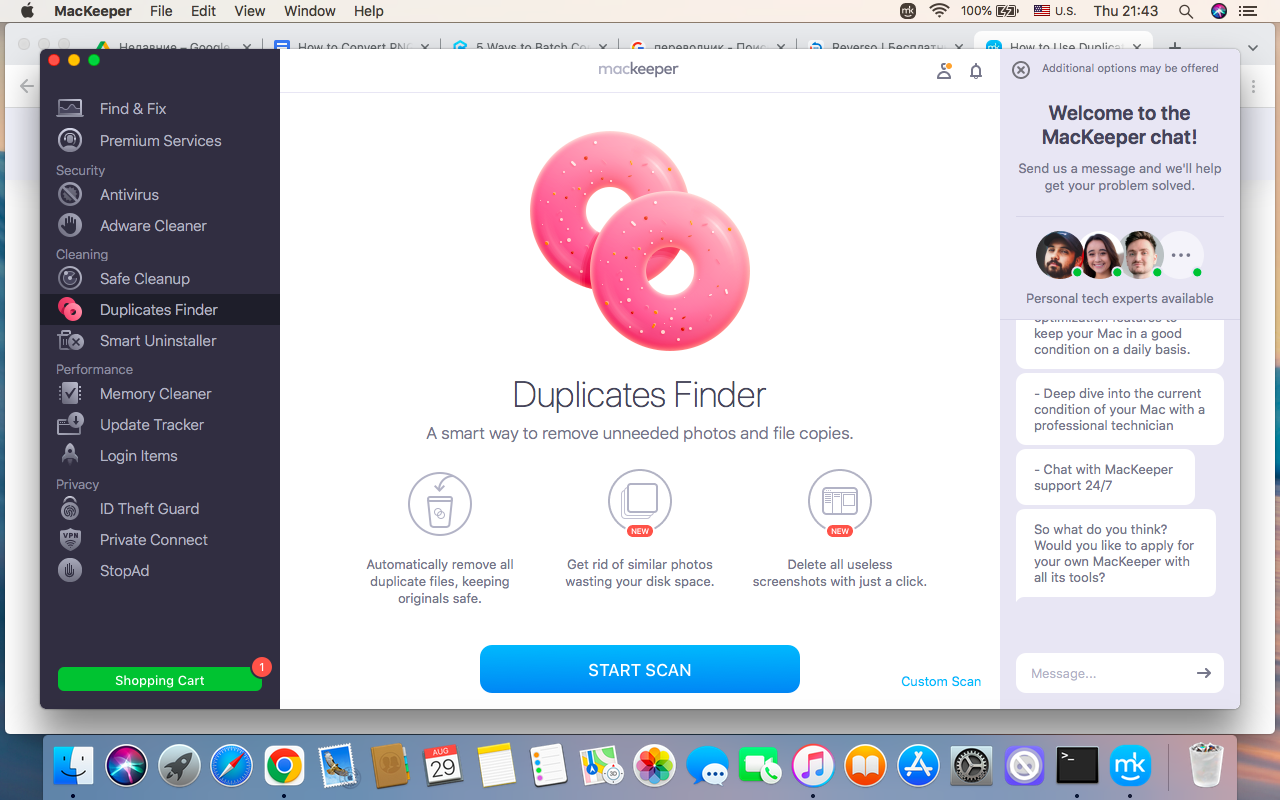
Here’s how to use MacKeeper’s Duplicates Finder:
- Download our app from the official site, install it, then launch it.
- Find and select the Duplicates Finder on the left.
- Start Scan to find any duplicates on your computer.
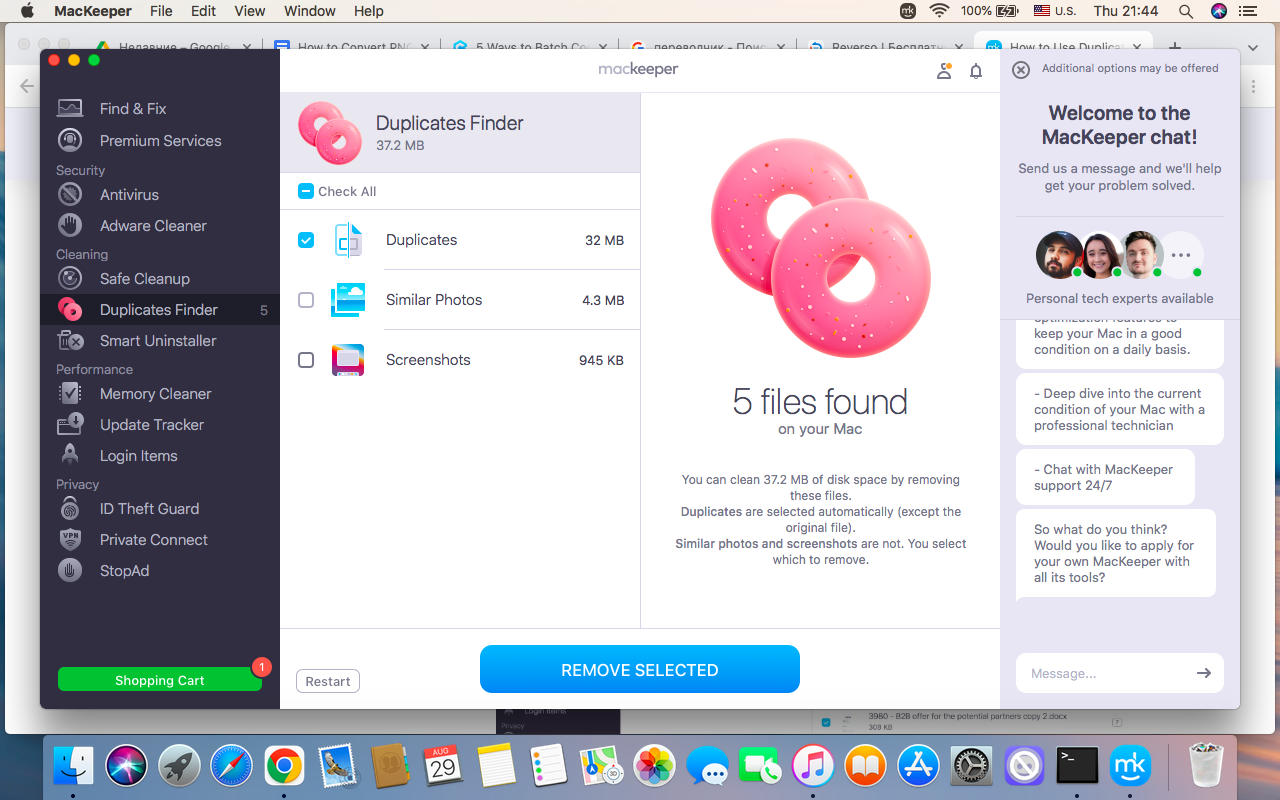
- Choose the particular categories or Check All copies found.
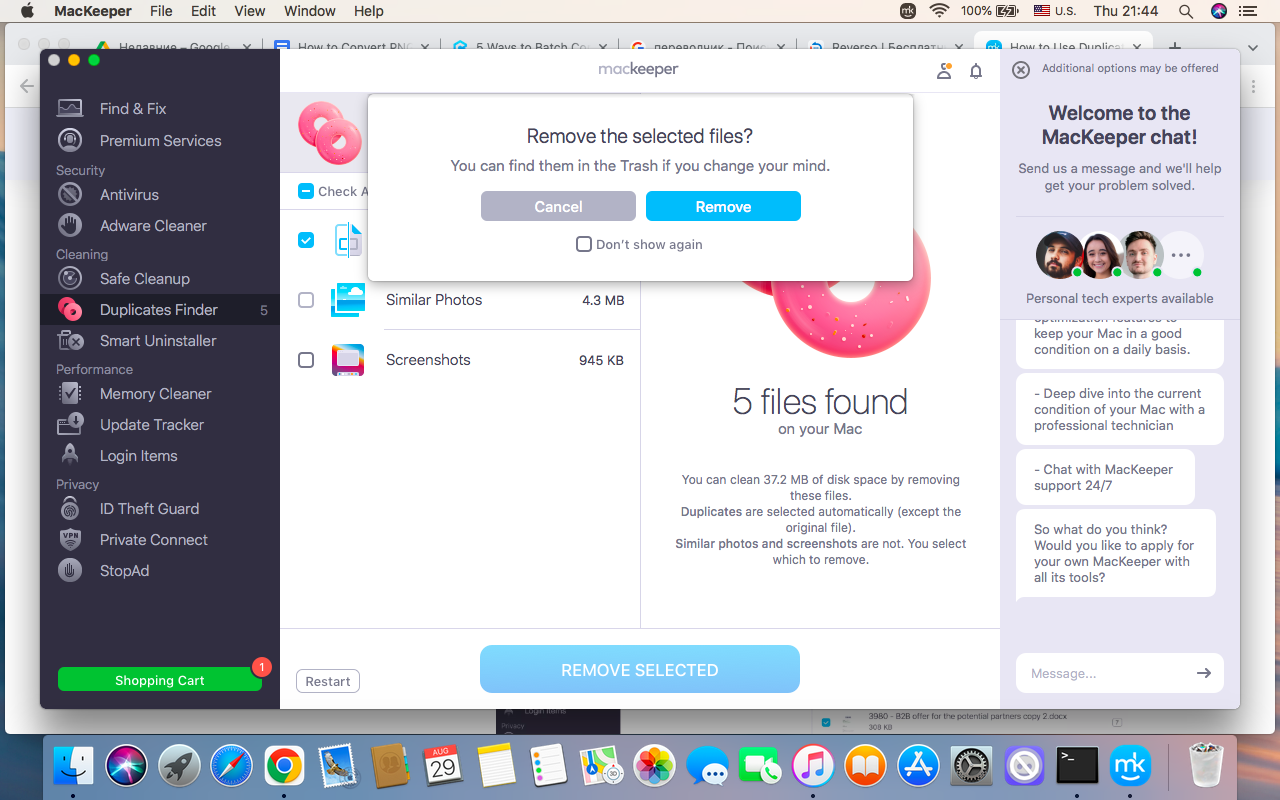
- End with the Remove Selected button to delete unnecessary copies.
As you can see, our duplicate file finder searches for similar-looking screenshots, images, and other files (even if they have different names), and sorts them into groups accordingly. After the scan, you can easily select those to delete. This simple action helps save space on your Apple computer for more essential content.
In this article you will find the following:
What is the difference between JPG and PNG
JPG and PNG are image formats with different purposes and exclusive features. The JPG format is used for photographs as it offers a smaller file size, loses compression, and has no transparency. PNG has a larger file size, doesn’t lose compression, provides higher quality, and supports transparency, which is best for graphics and images.
Important:
If you’re going to work with large images downloaded from the internet, learn how to use a .zip file for Mac.
How to change PNG to JPG on Mac
As a MacBook user, are you struggling to decide which method of format altering is best for you?
Don’t worry, we’ve got you covered. Below, we’ll share the best practices for changing the image format from PNG to JPG on your Mac:
- With Preview
- Via third-party apps
- With Terminal
- Online
A warning from our experts: If you need to change an image format’s size, quality, or other properties, our team suggests fixing corrupted files on Mac before converting. As best practice shows, this measure excludes unexpected bugs.
Convert JPG to PNG on Mac with Preview
Let's start with Preview, as it’s the built-in Mac app that easily enables the conversion of a JPG to a PNG image. Its main advantage is straightforwardness, as this conversion method doesn’t require you to install any additional software on your computer.
Here’s how to use it:
- Open the JPG image in Preview. For this, locate the image you want to change in Finder > Click twice on the image to open it in the Preview app.
- Go to the File menu in the upper left corner of the screen, then select Export.
- Click the Format option and choose PNG from the list.
- Pick the destination, rename the file, and Save the converted file.
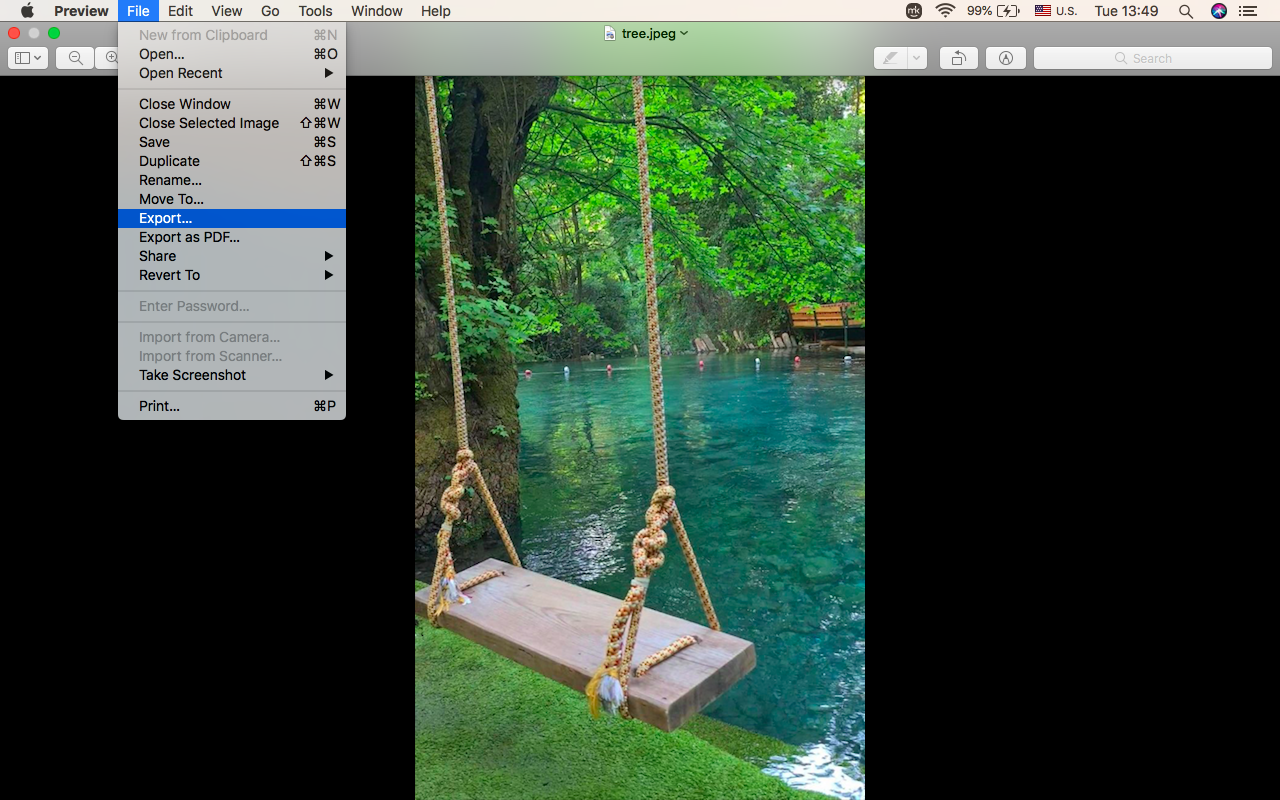
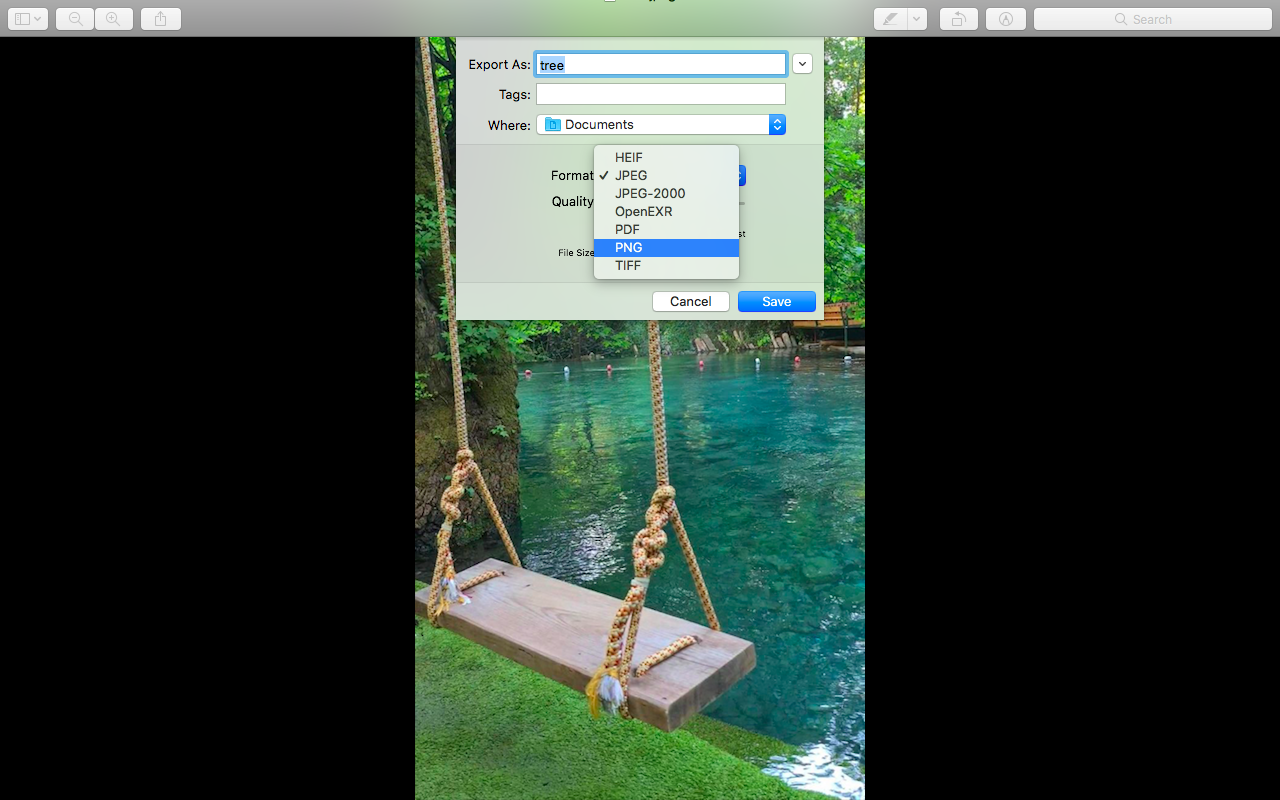
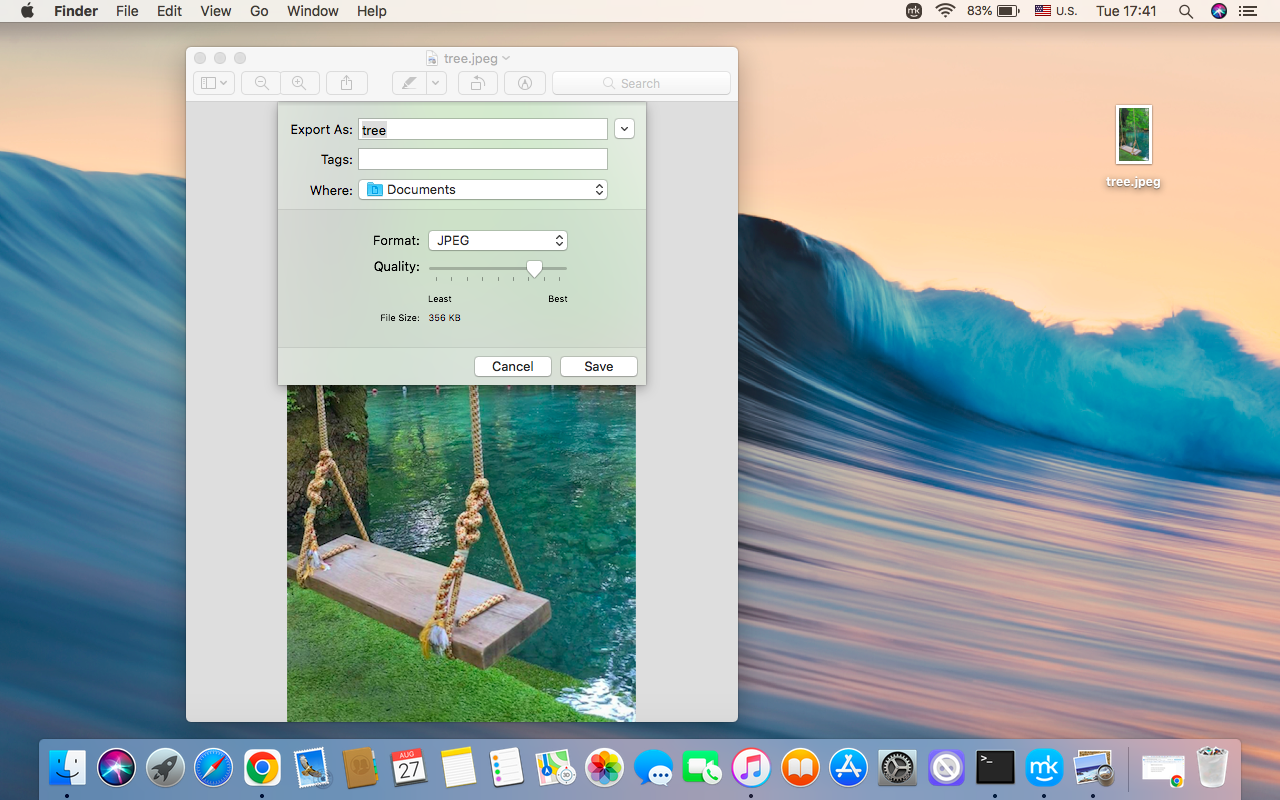
Important: When applying the above method, you can choose the quality of the file and its size.
Turn PNG into JPG on Mac via third-party apps
If you’re not satisfied with the limitations of the Preview app, then you can use third-party apps to change PNG to JPG on your Mac. We recommend GIMP and Adobe Photoshop.
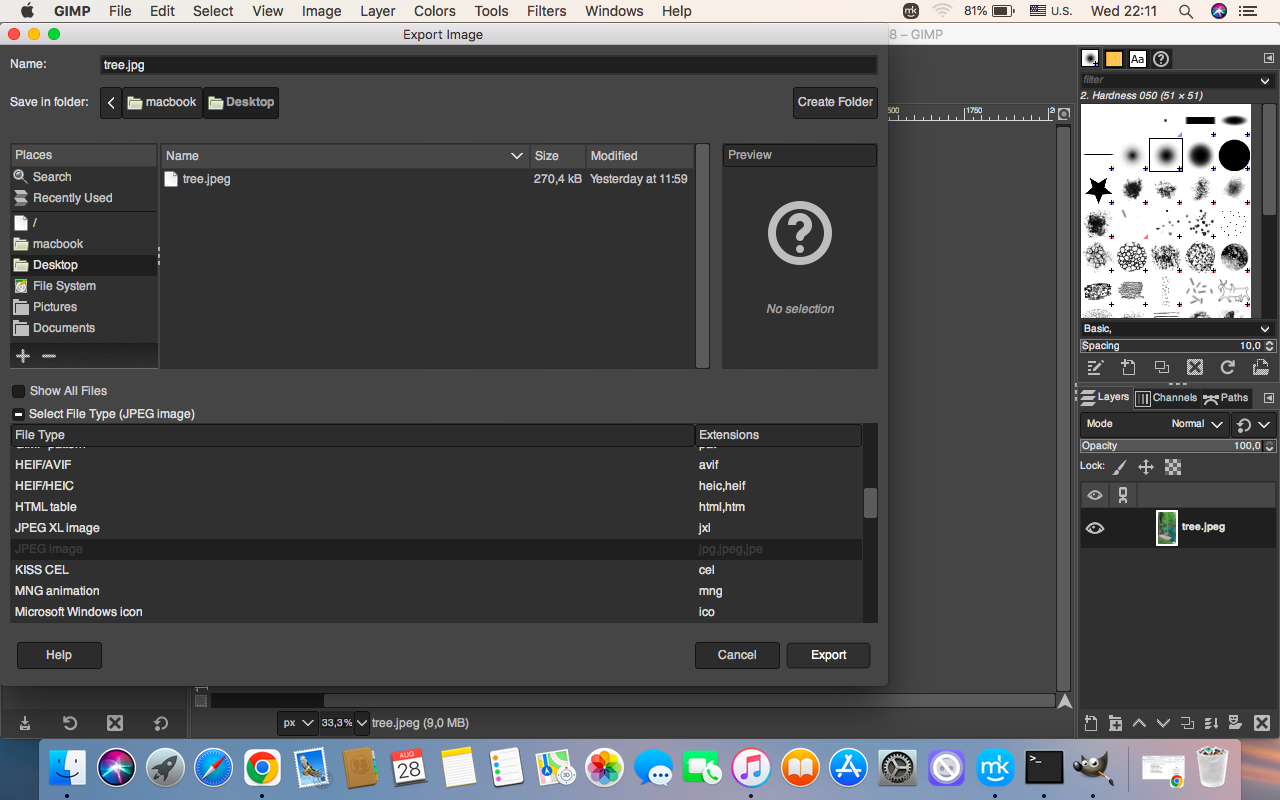
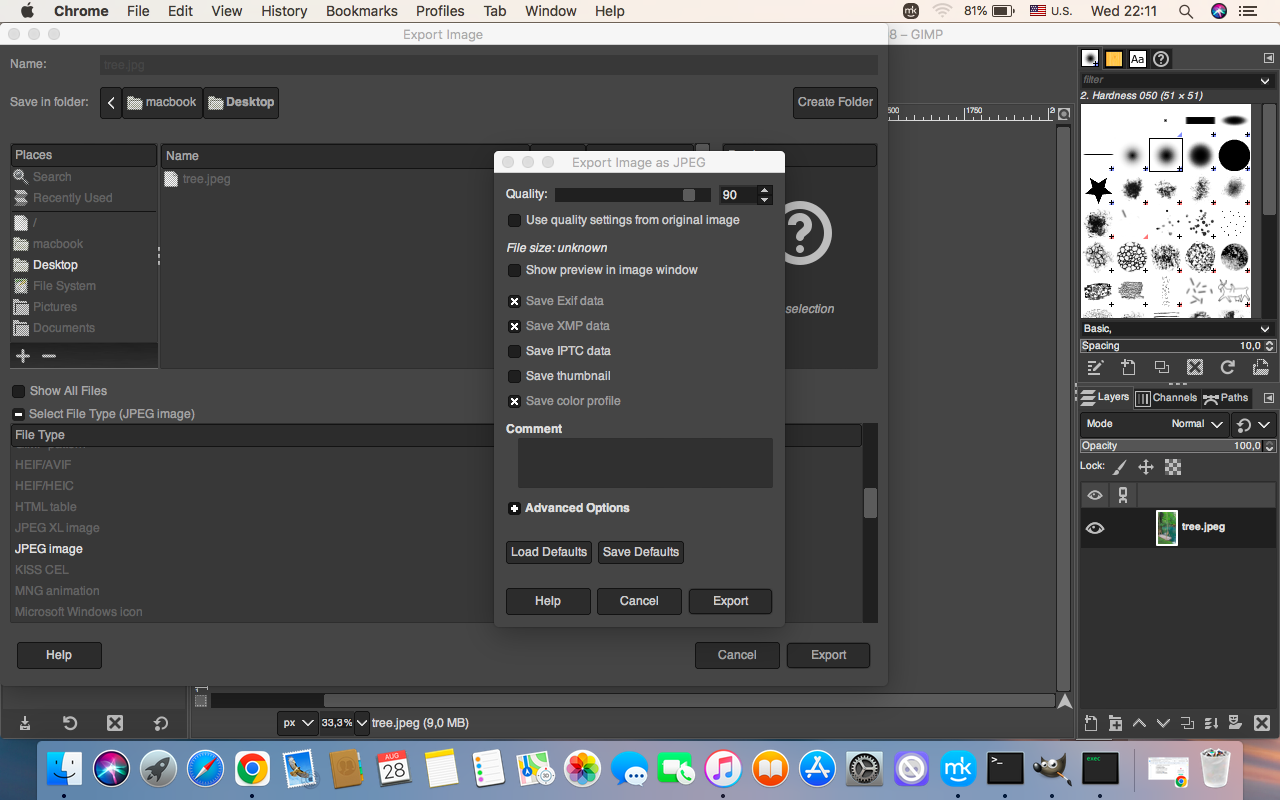
How to convert the image format with GIMP, a free image editor:
- Open the PNG image in the app.
- Go to the File menu > click Export As.
- Change the file extension to .jpg > click Export.
- Set up settings if necessary > click Export again.
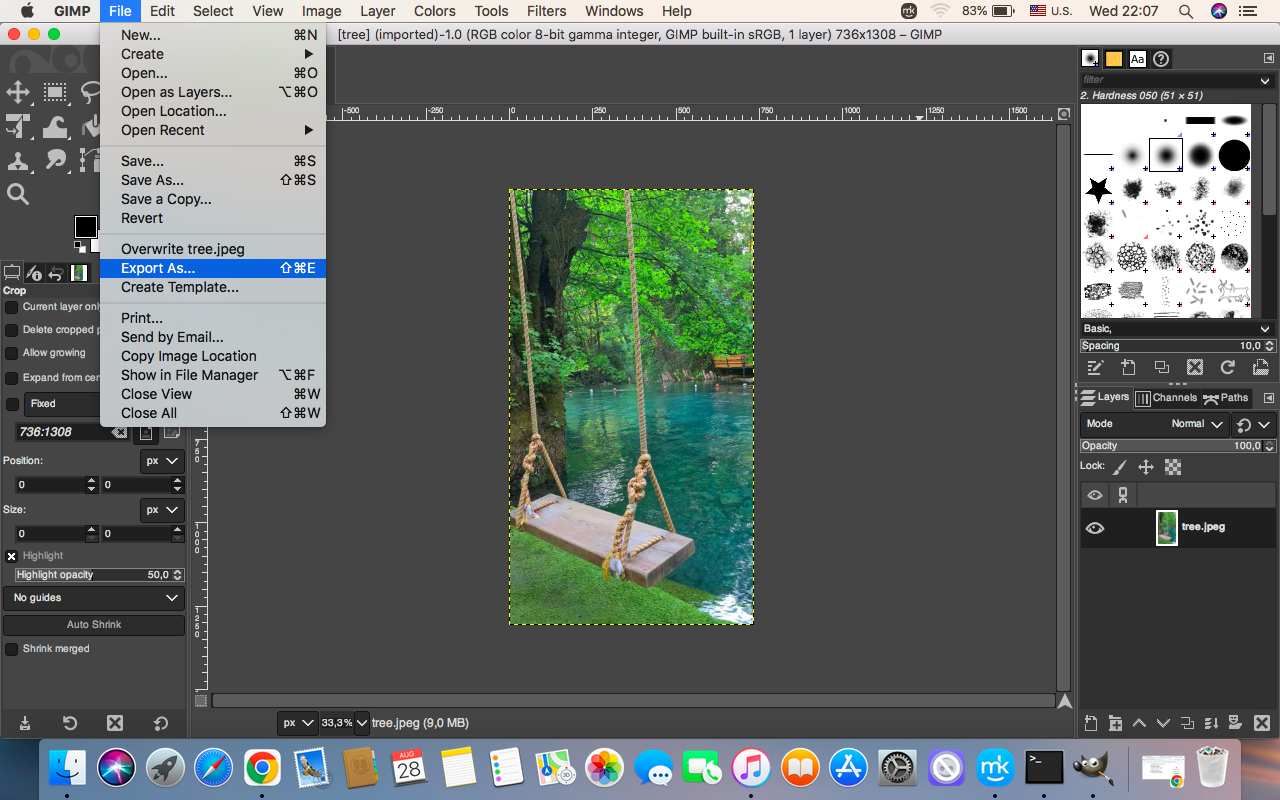
A similar process of editing the image format is available through Adobe Photoshop:
- Open the PNG image in the app.
- Go to the File menu > click Save As.
- Choose the JPG format from the given list.
- Set up quality settings if necessary > click Save.
Convert PNG to JPG on Mac with Terminal
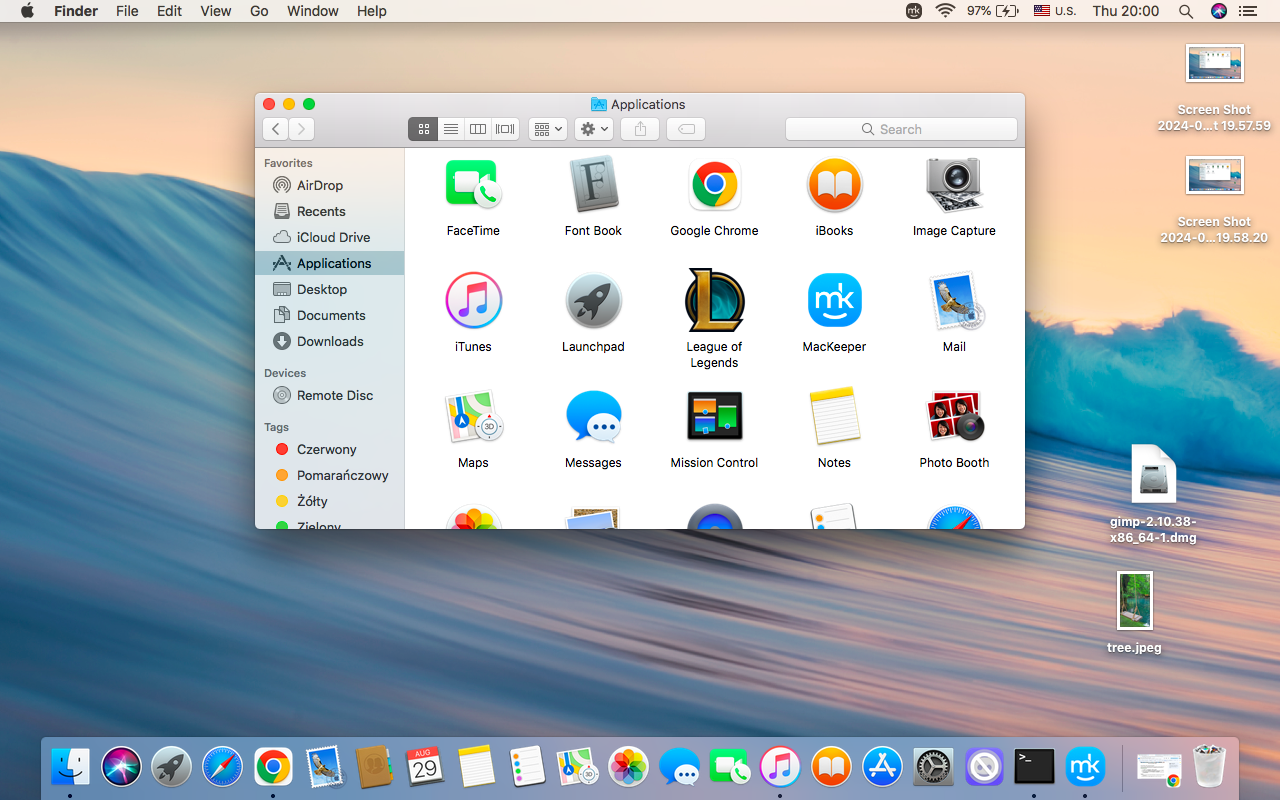
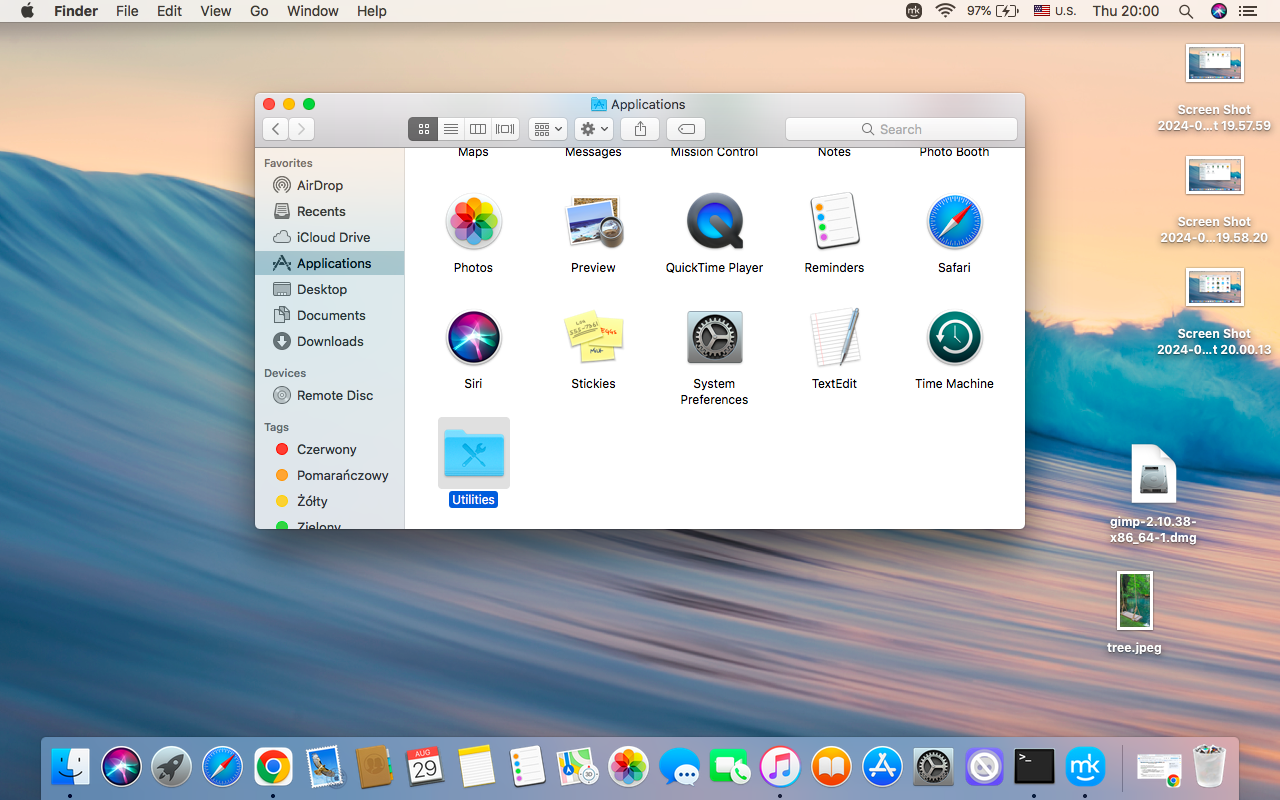
If you aren’t eager to engage with additional software when converting image formats, and you know how to work with command lines, use Terminal to turn PNG into JPG on Mac:
- Go to Finder > open Applications > Utilities > Terminal.
- Type CD > press the SpaceBar > drag the PNG file you want to convert to Terminal.
- Run the command “sips -s format jpeg input.png --out output.jpg” in the line.
- Change input.png to the name of your PNG file, and output.jpg for the desired name of the output JPG file.
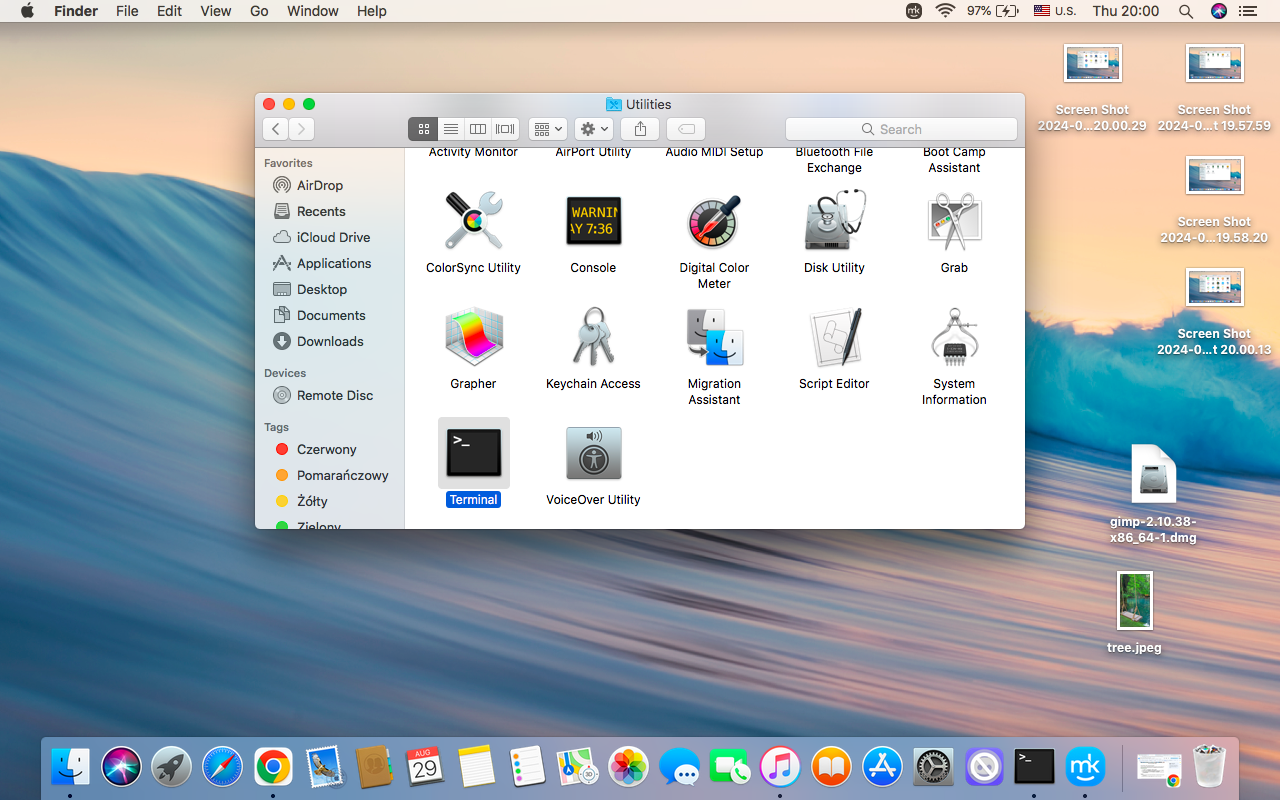
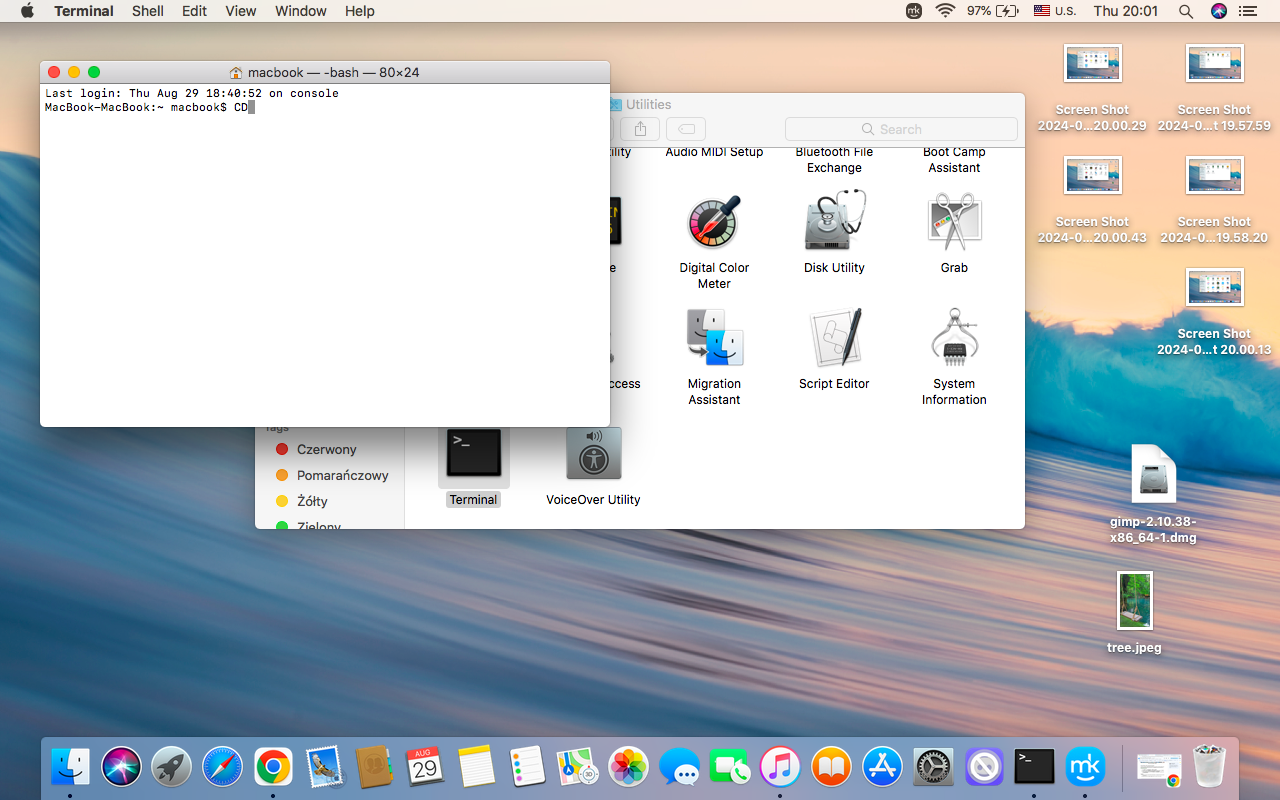
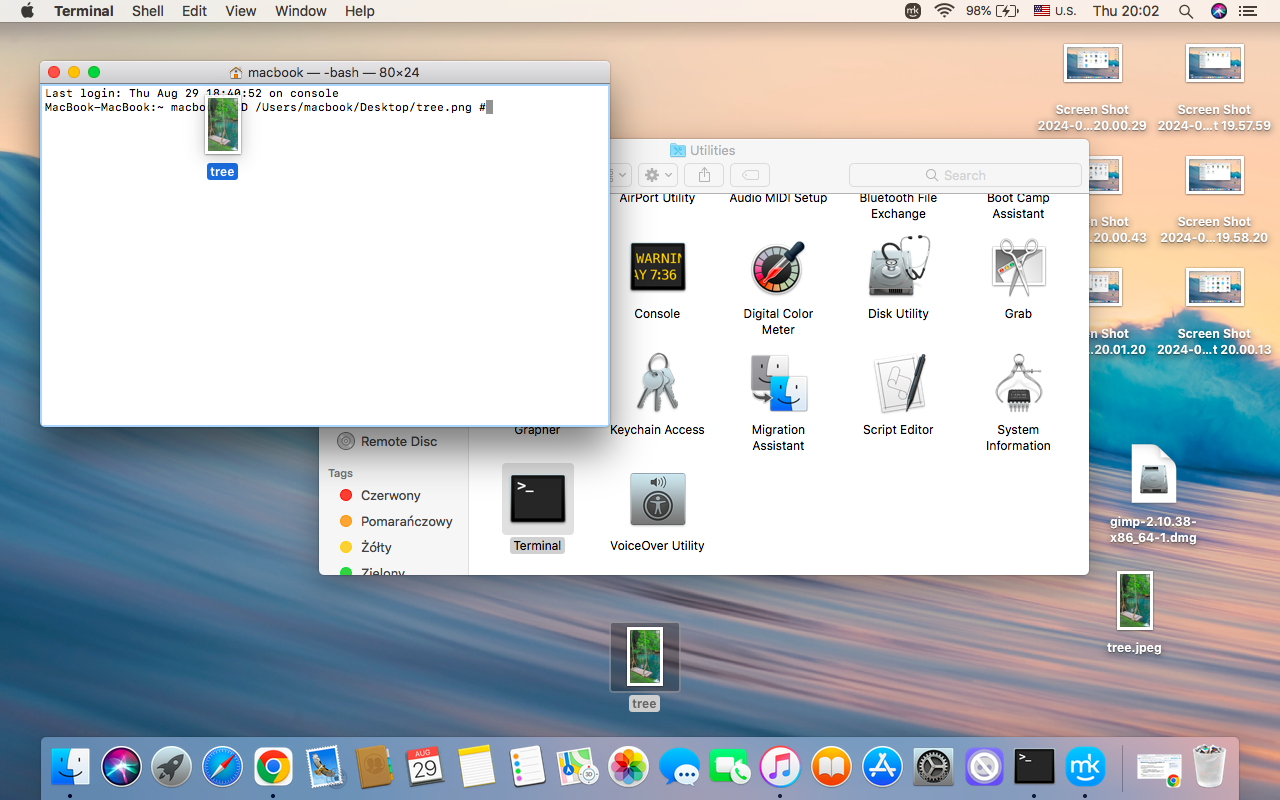
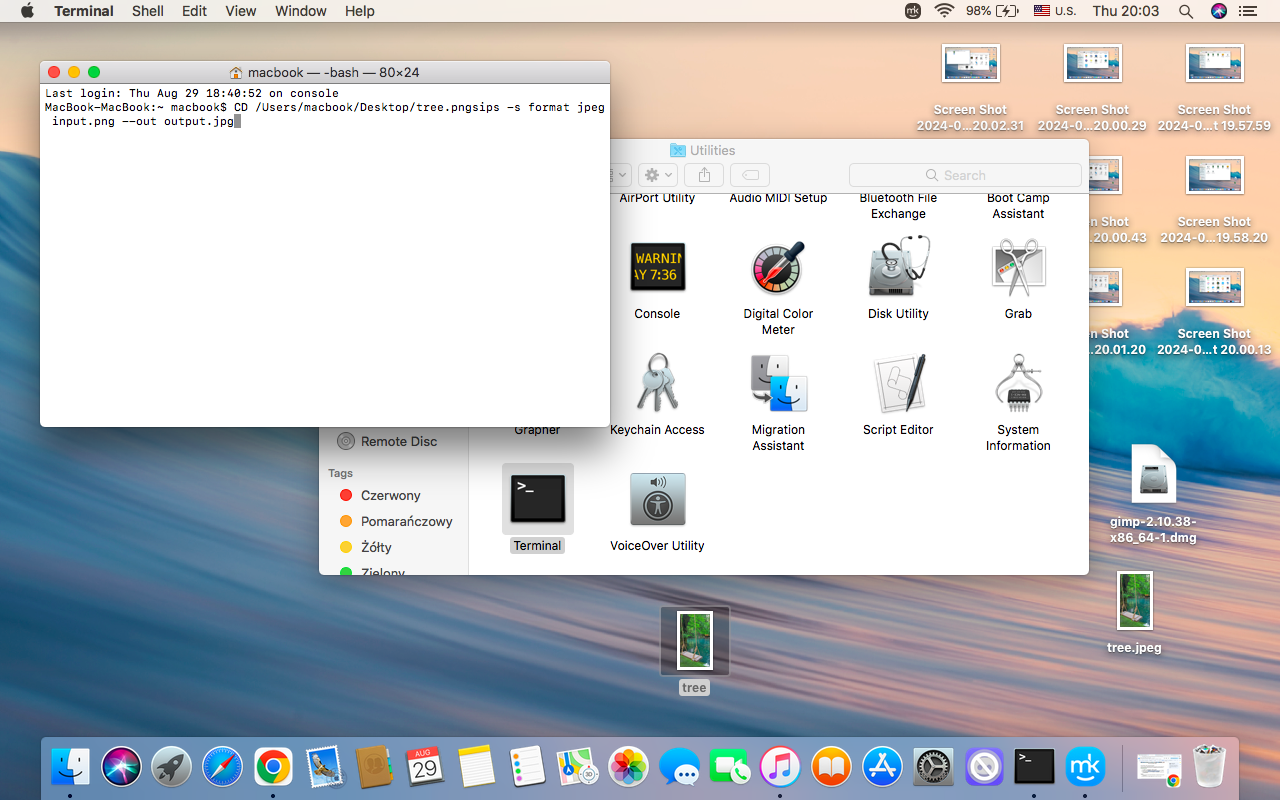
An important note from us: Using Terminal to convert images to other formats provides default quality settings. Hence, we recommend using other tools if you need to access a wide range of image settings and modify them as you want.
Change PNG to JPG on Mac online
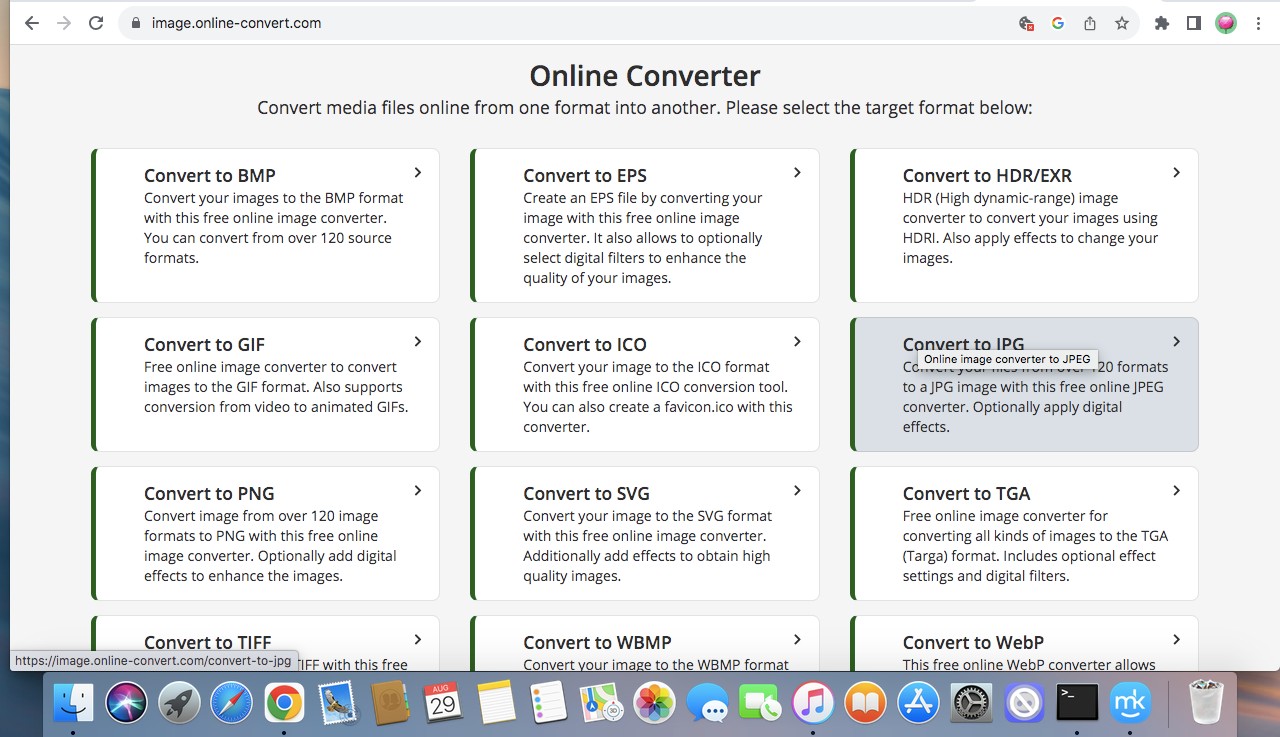
If you’re an adherent of online services, don’t change your habits and use online tools to turn PNG image format into JPG. There are a few free converting services available in any browser, and we recommend the following ones:
- Online-Convert
- Convertio
- IIoveIMG
- TinyPNG
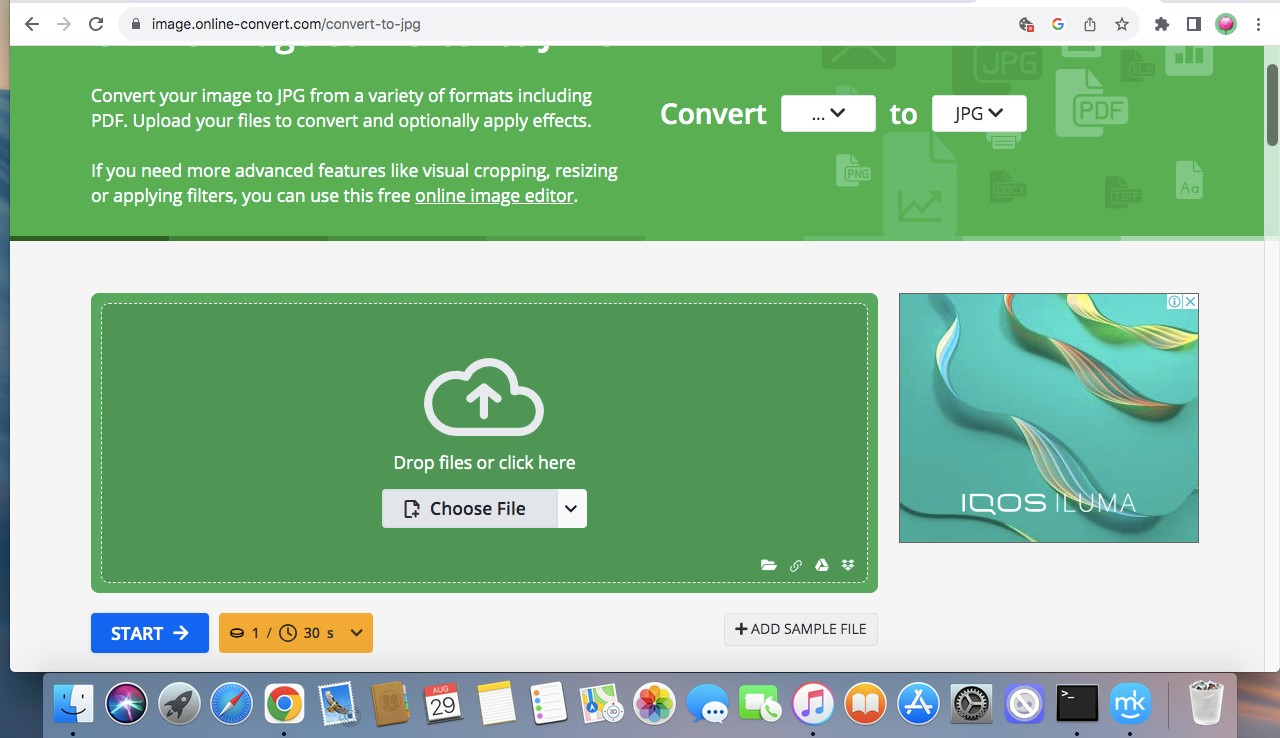
Let's consider a general approach to online image conversion services usage:
- Open any Online Image Converter on your browser.
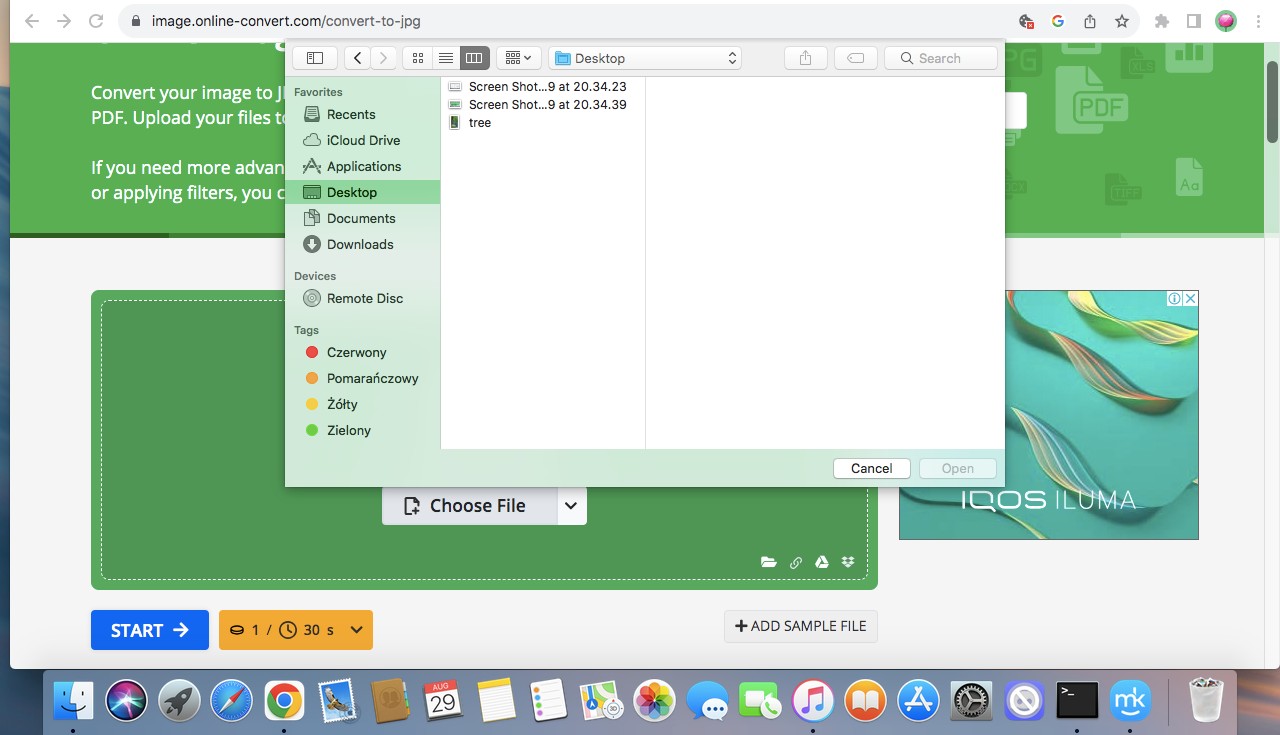
- Upload the PNG file you want to convert by clicking the suggested button, Choose File, Upload Image, or Drag and Drop (the name differs for different services).
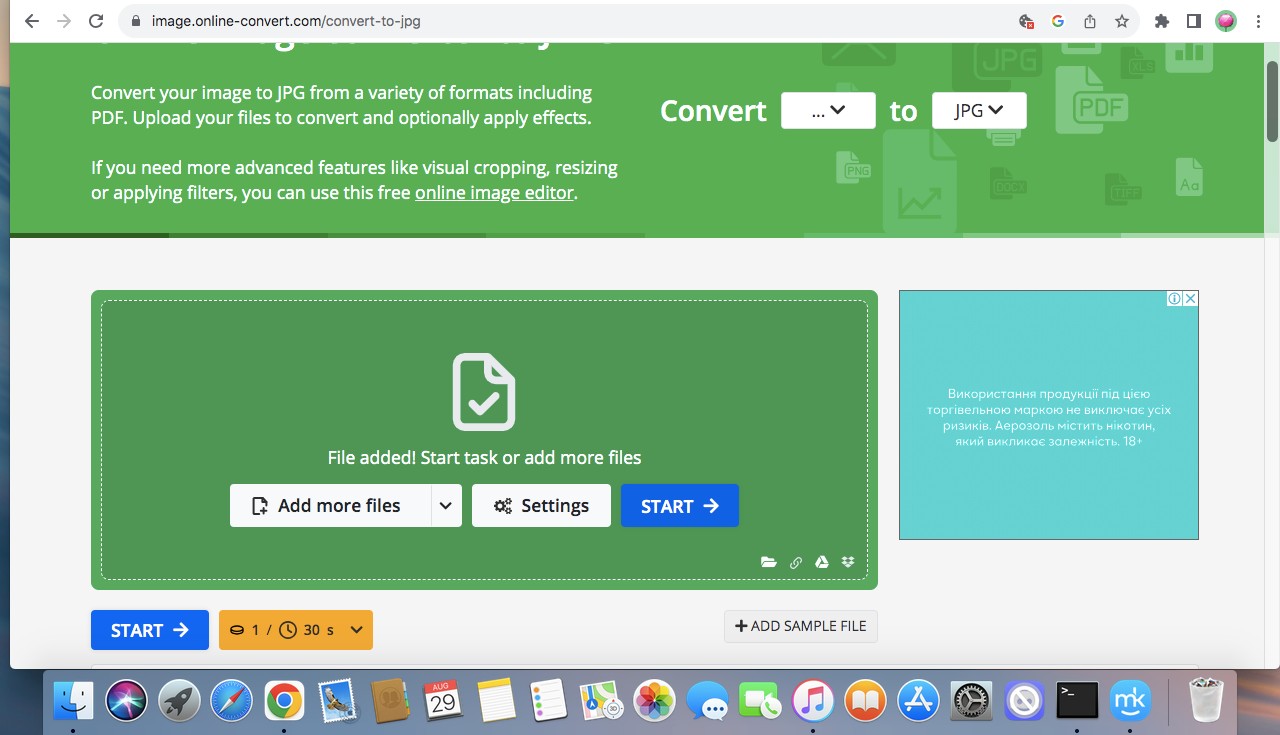
- Choose JPG or JPEG as the desired format (some services offer to adjust additional settings such as image quality).
- Start the conversion process by clicking Convert > Start Conversion (the button name differs for different services).
- Go to the link suggested by the service or click the download button to save the converted JPG file to your Mac.
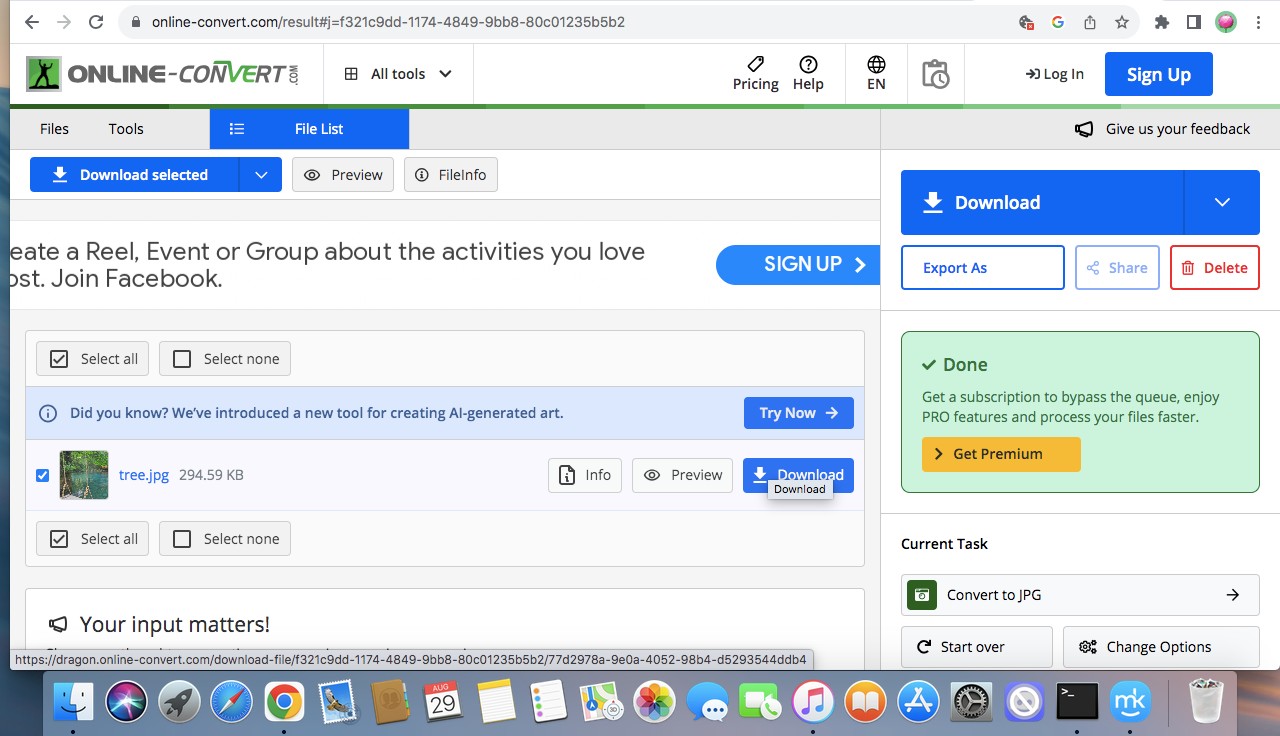
Essential things to consider when choosing the best online file size conversion services:
- Some online conversion services have file size restrictions. If your file is large, it’s better to check the site's restrictions before uploading.
- Remember to check the service’s reputation to protect your data.
- Make sure you have a stable internet connection so you can convert your file without disruption.
Conclusion
Converting a PNG image format to a JPG is a simple process with multiple ways available. You can choose the built-in Preview app or Terminal commands to get the desired result quickly and with little effort. Also, for the excellent quality of your visuals, we advise you to download specific apps like Adobe Photoshop and GIMP. If you can rely on your stable internet connection, try free online services.
Regardless of the method you choose, our expert team suggests using MacKeeper’s Duplicates Finder to organize your photos and images, remove their duplicate copies, and declutter storage space.
Do the following to use MacKeeper’s Duplicates Finder:
- Launch our MacKeeper app.
- Choose Duplicates Finder from the left sidebar.
- Click Start Scan to find duplicate files.
- See the results, click Remove Selected, and confirm it.
