In this article you will find the following:
Why is Lightroom so slow on your Mac
If you notice that Lightroom is slow on your Mac, it could be due to software issues, large RAW files, or accumulated cache—all of which can affect your Mac’s performance. We recommend restarting your MacBook to help reset RAM and improve overall speed.
How Lightroom’s features impact performance
When your Mac has too many background processes, it can struggle to keep up with tasks like Lightroom editing. Features such as previews, plugins, and filters can consume significant resources, affecting performance. We advise limiting these features to speed up Lightroom and improve your device’s stability.
A note from our experts:
Here’s how to use MacKeeper’s Safe Cleanup:
- Download MacKeeper.
- Open the app, and choose Safe Cleanup.
- Press Start Scan and allow the tool to scan your Mac for unwanted cache and logs.
- Go through the list and tick the items you want MacKeeper to remove.
- Click Clean Junk Files and Remove to confirm the action.
How to speed up Lightroom on Mac
Ready to speed up Lightroom on your Mac? Below, we’ll show you how to boost your Mac’s performance for a smoother, uninterrupted editing experience:
- Update your macOS and Lightroom software
- Change Lightroom settings
- Streamline Lightroom interface
- Manage Lightroom catalog
- Optimize Lightroom sync and preview settings
- Manage disk space and storage
- Additional tips for better Lightroom performance
A pro hint from us:
Before changing your system or app settings, think of how to clean MacBook storage first. Insufficient space can impact editing efficiency, but freeing up your storage can make all the difference. In the attached article, you can check out our recommendations to improve Mac efficiency.
1. Update your macOS and Lightroom software
The first thing we would do to speed up Lightroom on Mac is check if both macOS and Lightroom are up-to-date, as older versions can slow down their performance.
Here’s how to check for macOS updates:
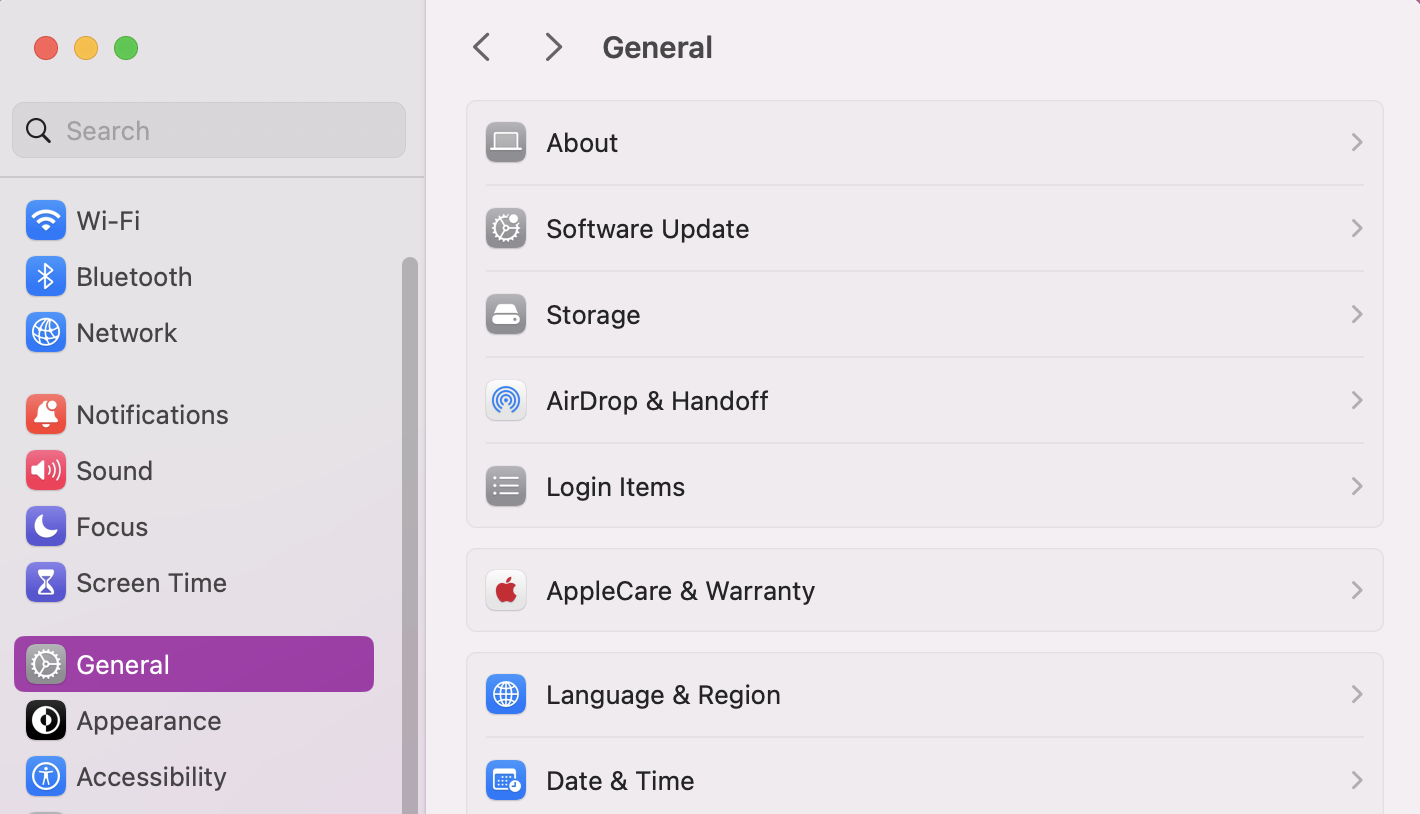
- Click on the Apple Icon and choose System Settings.
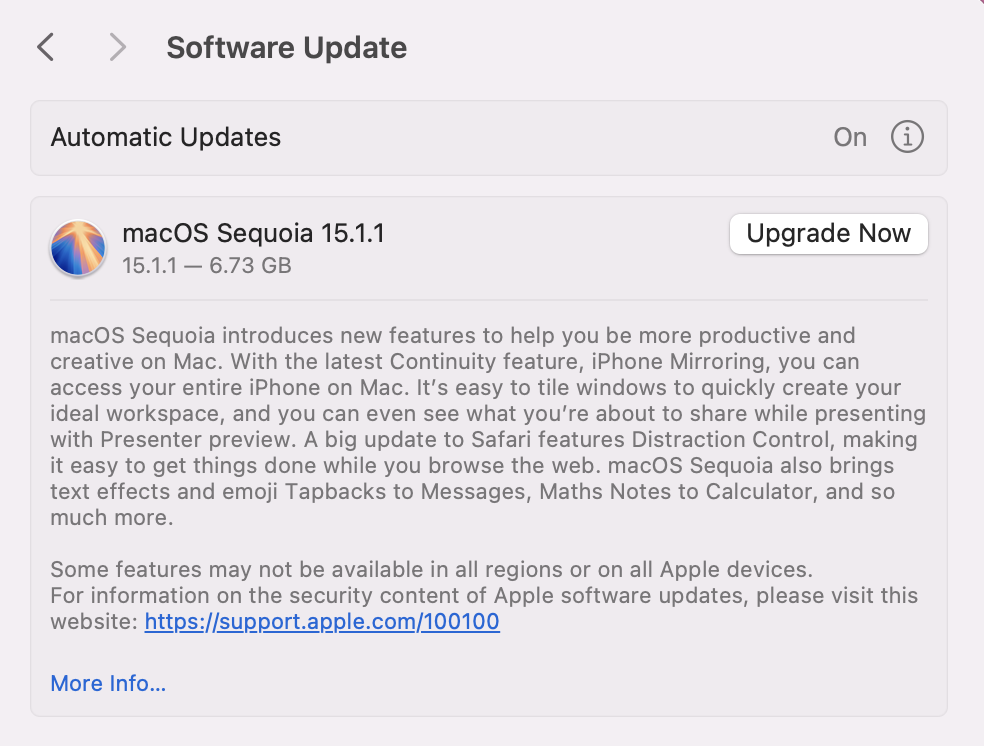
- Go to General > Software Update.
- If an update is available, click Update Now.
A helping hand from our team:
If you would like some more guidance on how to update your Mac, read our supporting blog article to find each step to follow along.
To check for Lightroom updates, follow the steps below:
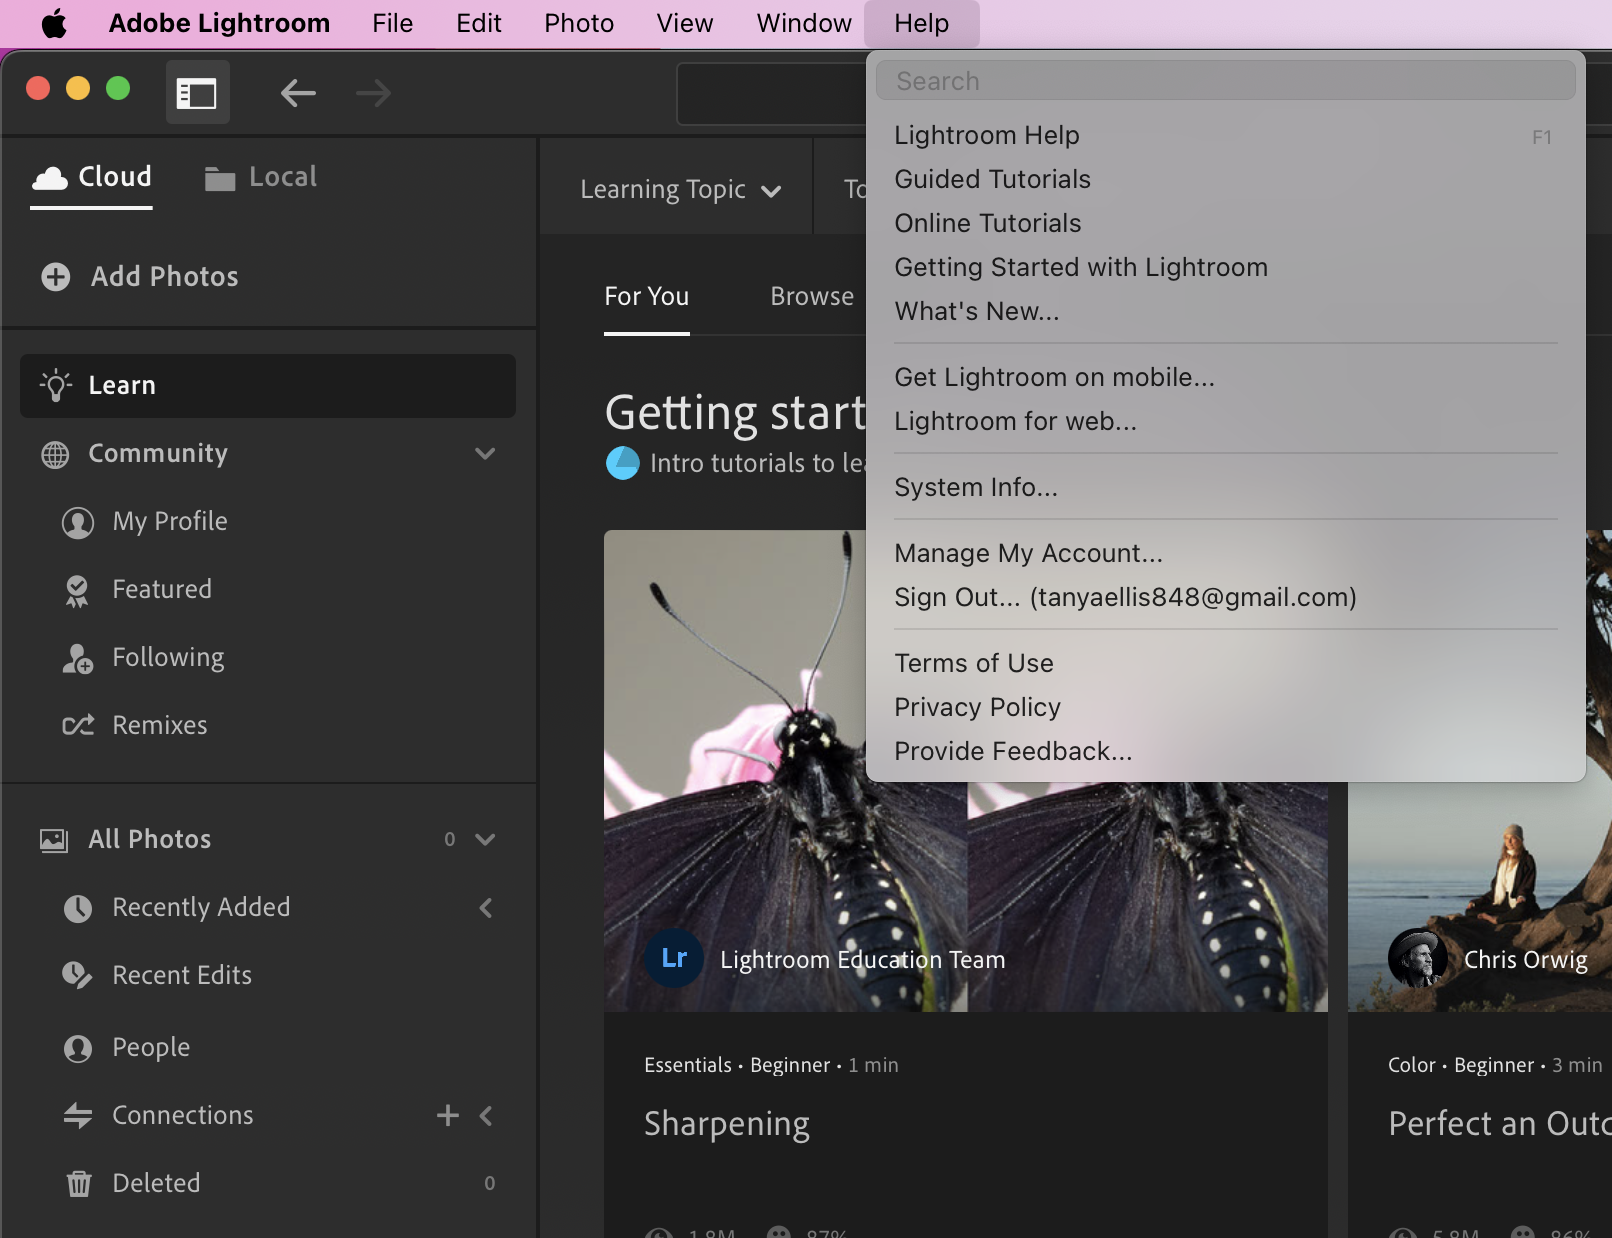
- Open Lightroom and click on the Help menu.
- If there are any new updates, you’ll see Updates in the list ready for you to install.
An extra tip from MacKeeper:
Do you need to edit some pictures, but you're not familiar with how Lightroom works? Then let us help you—learn how to edit a picture on Mac with our help. You’ll be a photo editing master in no time!
2. Change Lightroom settings
In many cases, you can optimize Lightroom by changing its settings. We’ve noticed this can improve the app’s responsiveness and make my editing tasks much less painstaking.
2.1 Increase cache size
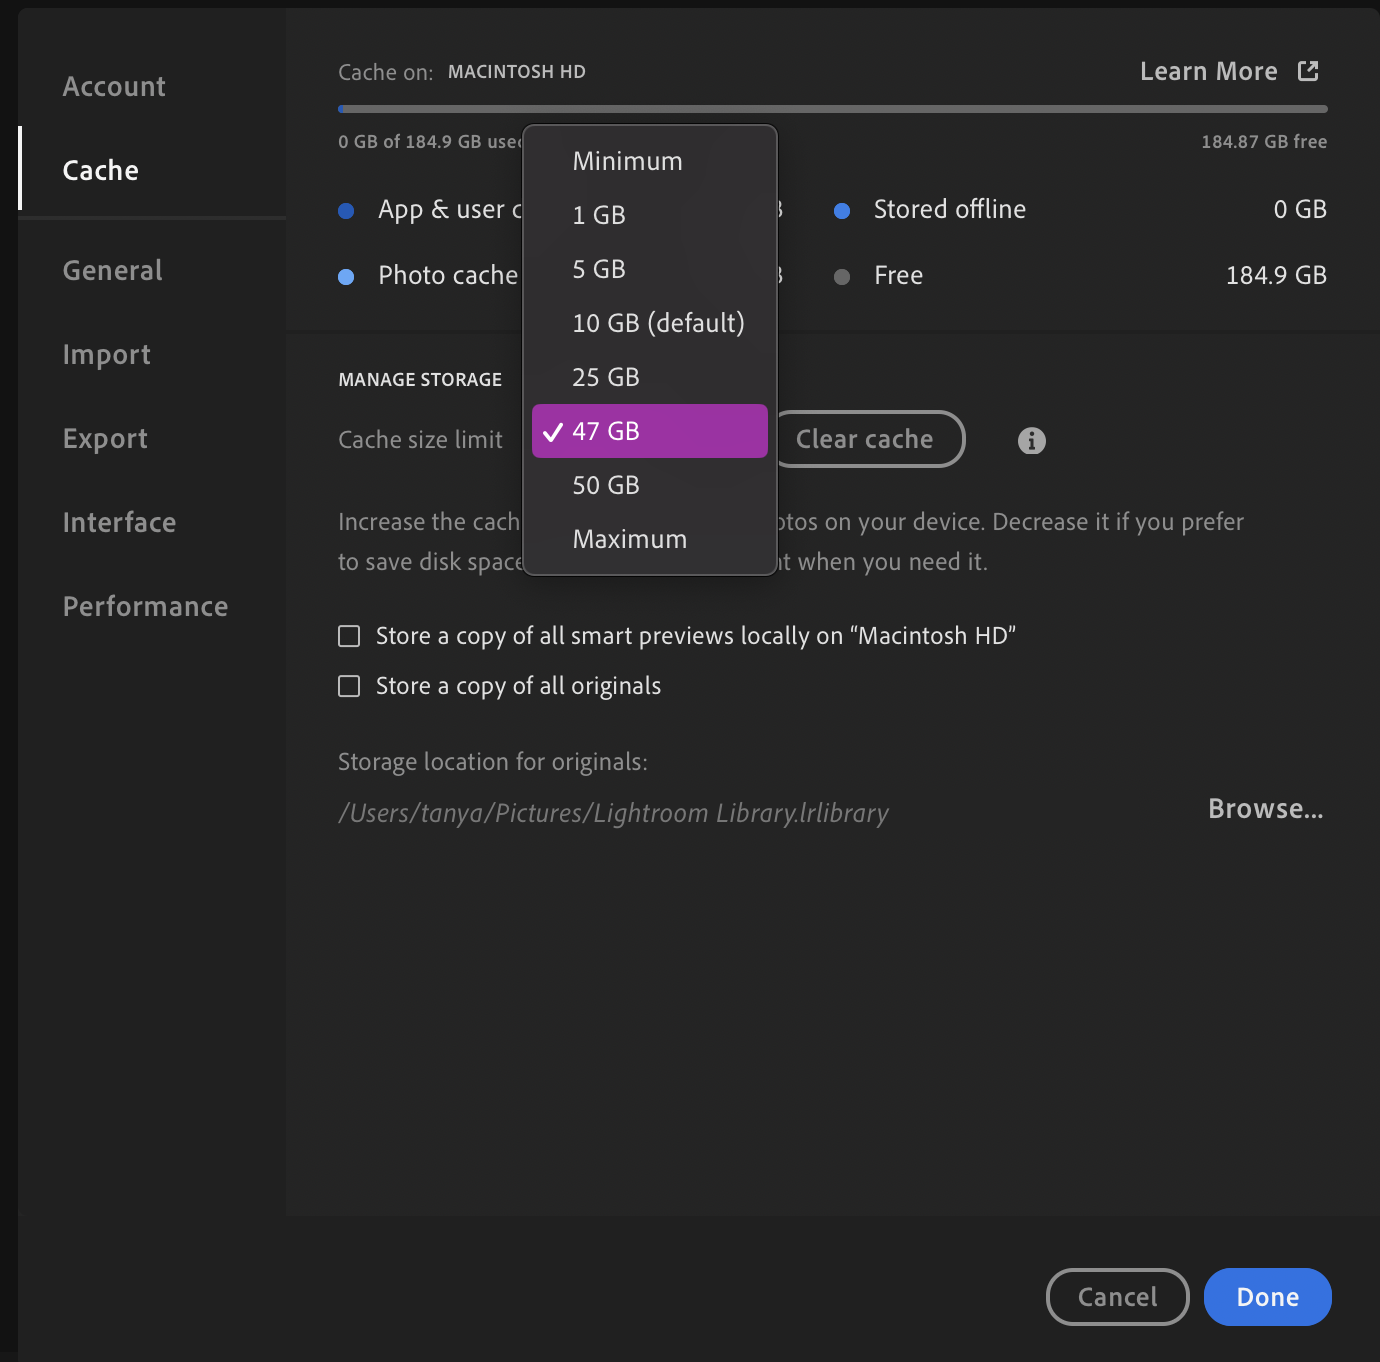
You can start by increasing the cache size to help Lightroom process large files faster. Here’s how:
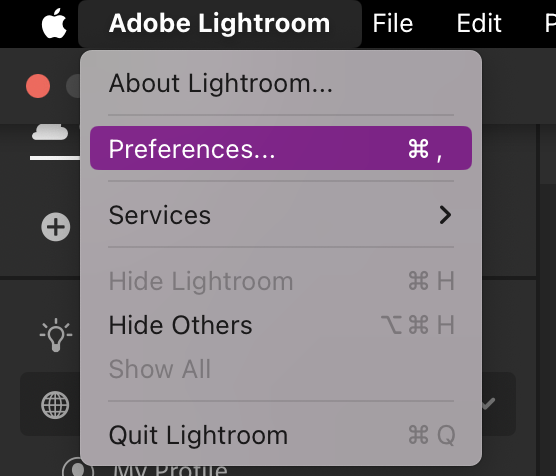
- Open Lightroom and go to Preferences.
- In the pop-up menu, select Cache.
- Under the Manage Storage section, click on the Cache Size Limit to change it.
- Press Done to confirm the change.
2.2 Set up resolution
Adjusting your resolution settings can also help to speed up your content editing. Here’s how we adjust the set-up resolution:
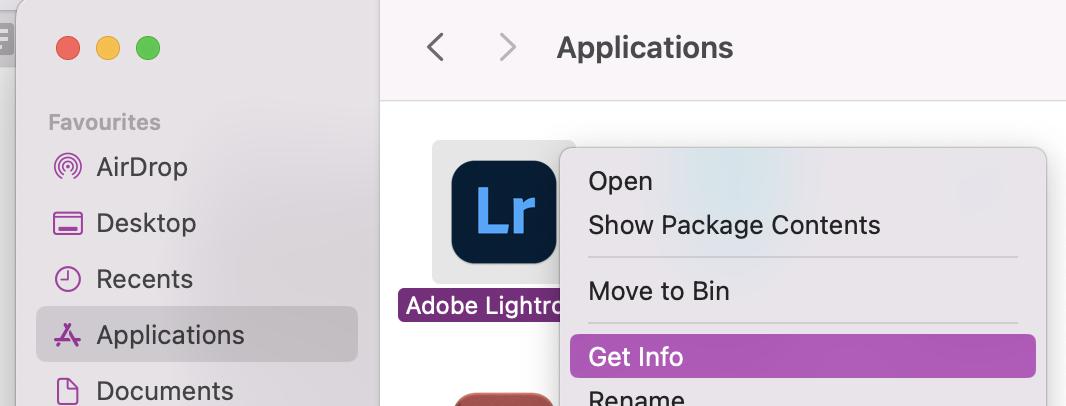
- Open Finder and go to your Applications Tab.
- Find Lightroom and right-click the icon.
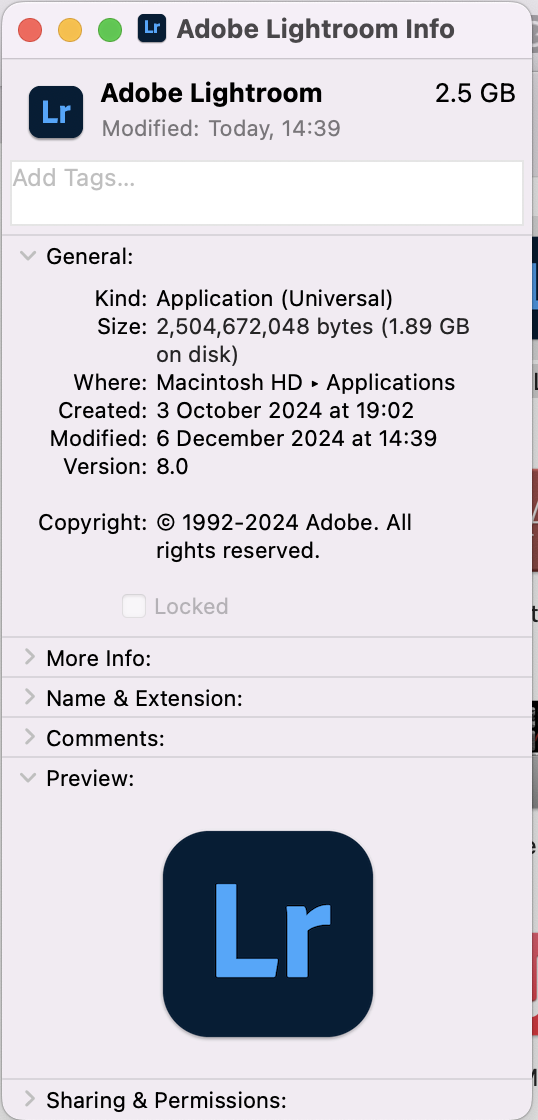
- Click on Get Info and tick Open in low resolution.
2.3 Improve camera RAW cache
Improving the Camera RAW cache is also known to help Lightroom handle larger files more efficiently, as it can reduce lag when editing high-resolution photos. Here’s how we do it:
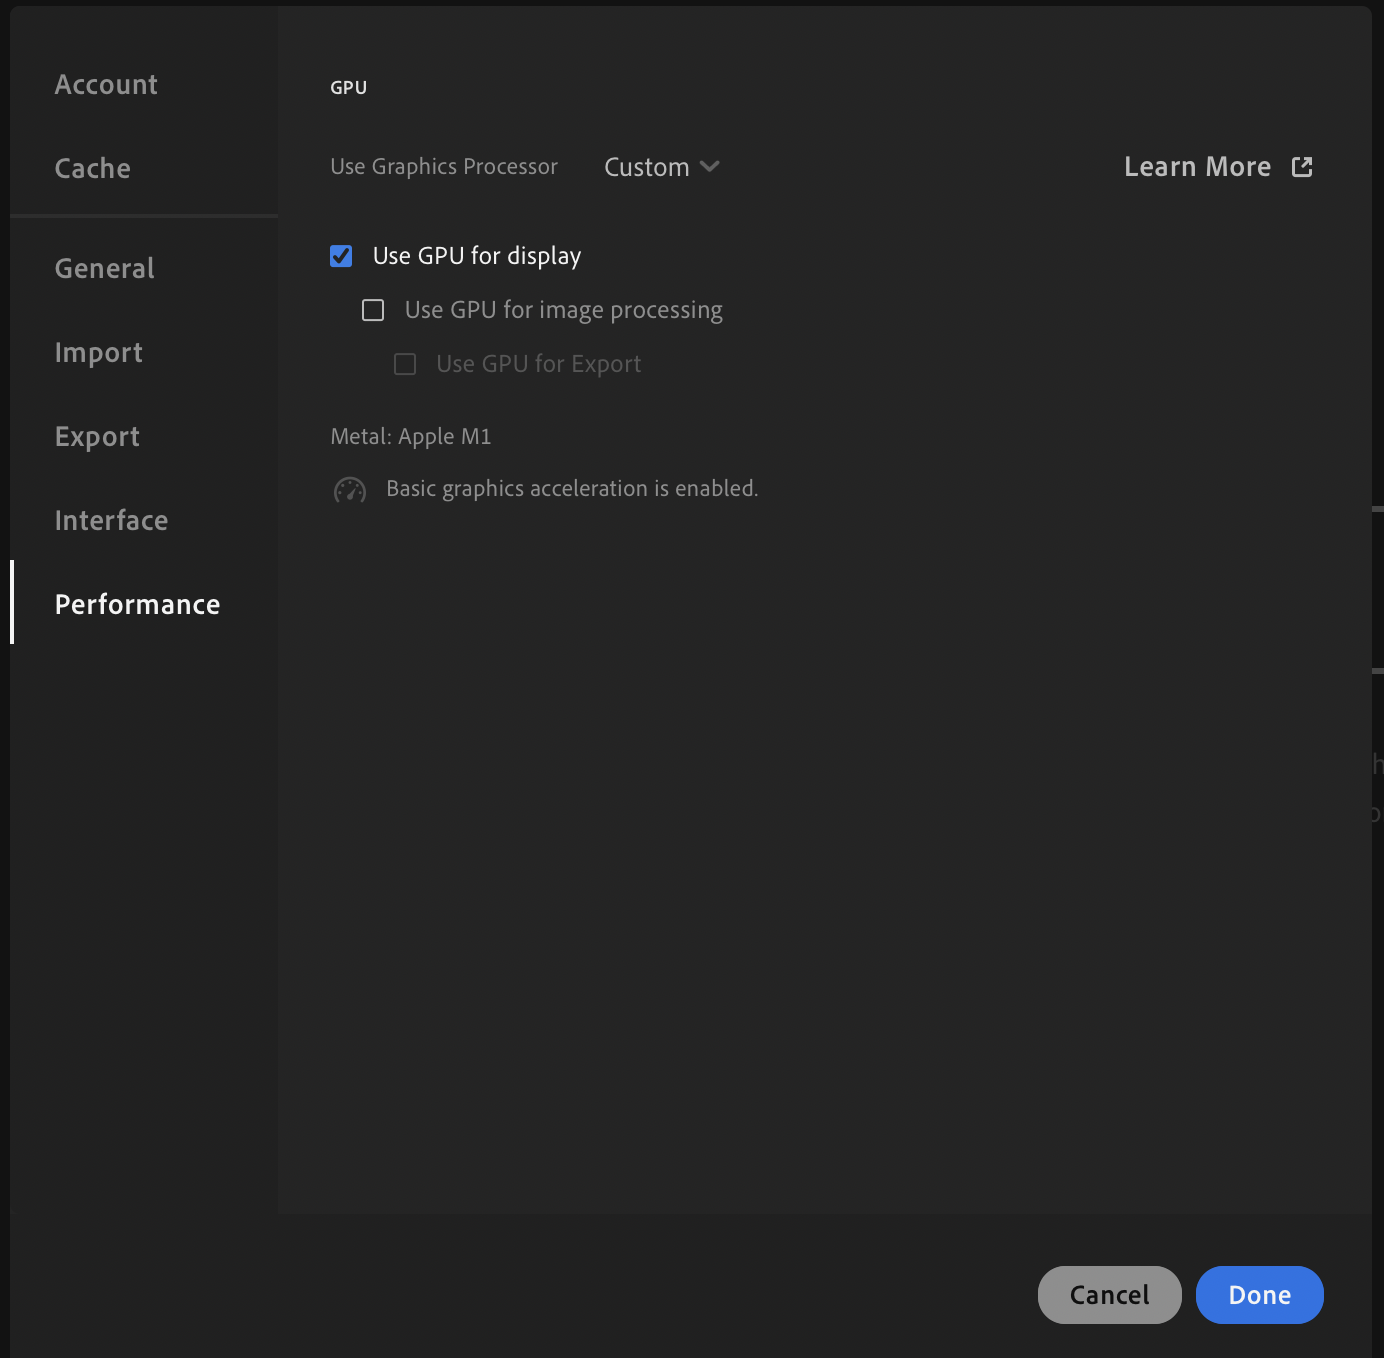
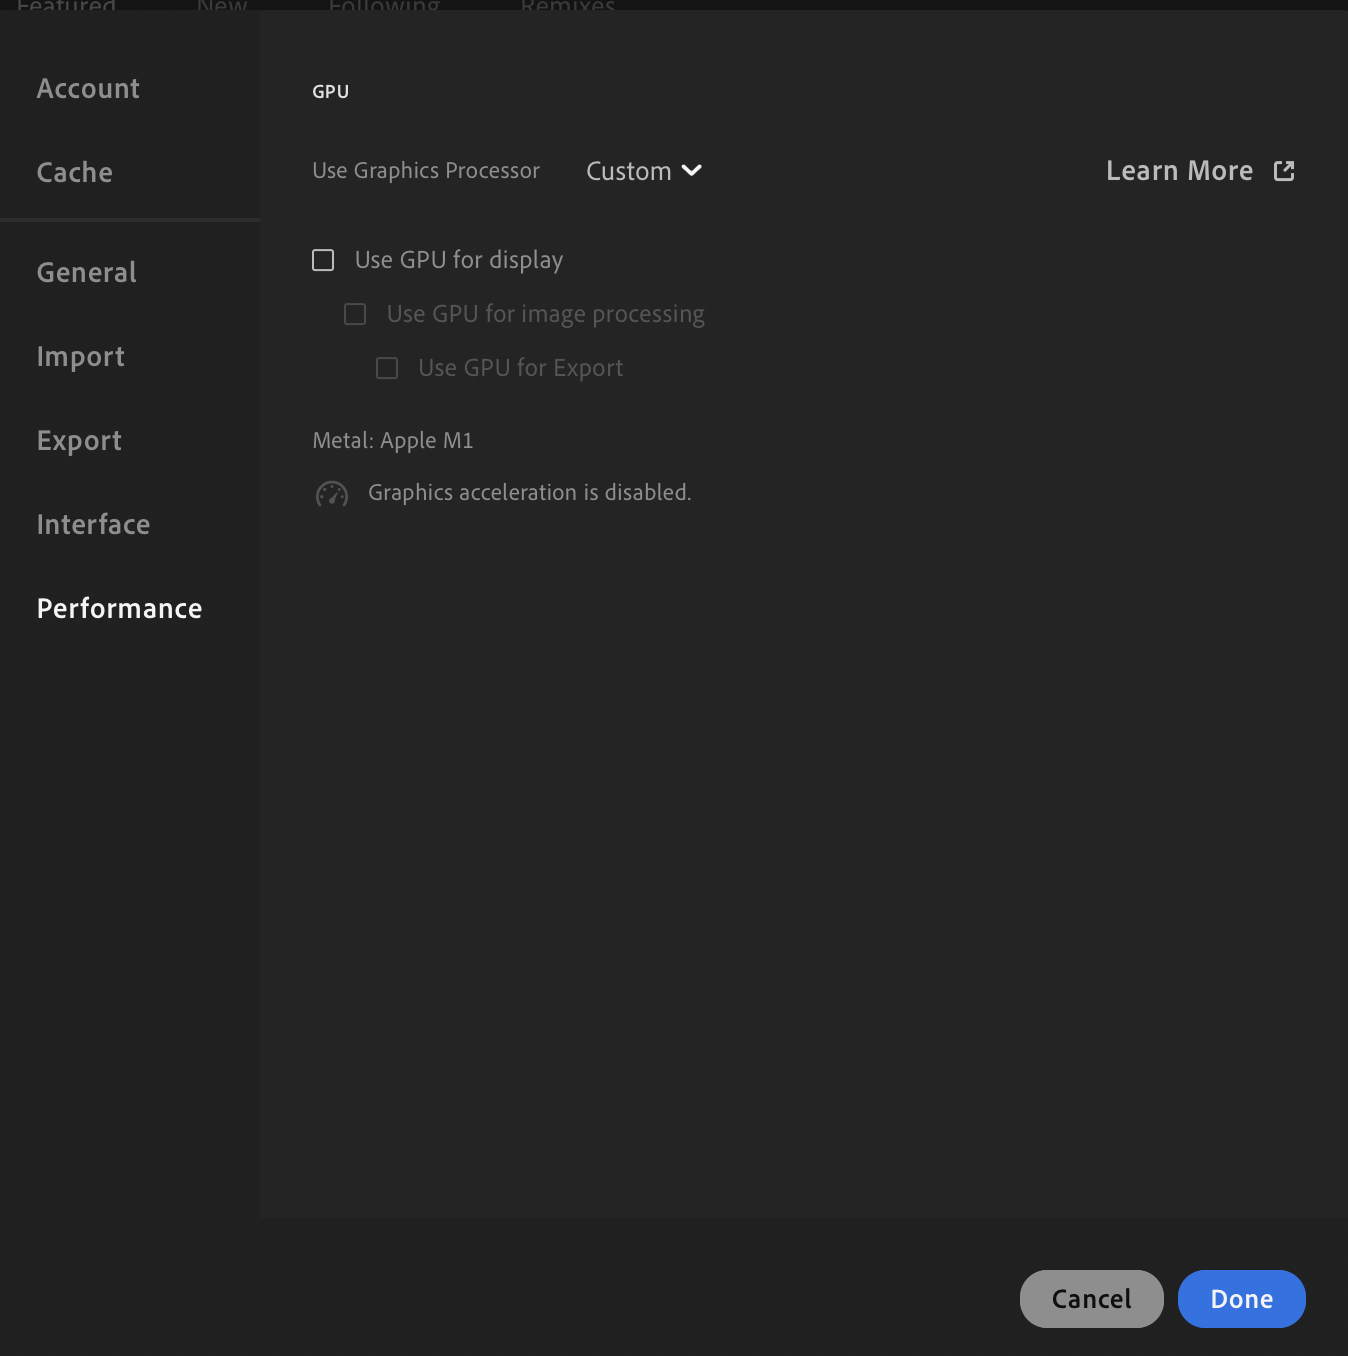
- In Lightroom, open Preferences.
- Press on the Performance Tab.
- Under GPU, change to Custom and tick the box next to Use GPU for image processing.
3. Streamline Lightroom interface
If adjusting your Lightroom settings hasn't improved its speed, we recommend streamlining its interface by minimizing unnecessary panels and histograms.
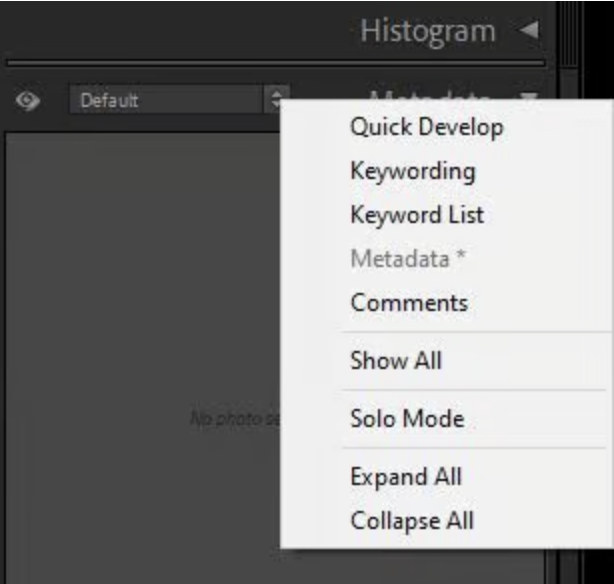
3.1 Minimize unnecessary panels
We consider it useful to minimize panels, as it reduces the amount of data Lightroom needs to load and display. Here’s how you can minimize unnecessary panels:
- Right-click on the panel header.
- Select Close to minimize unnecessary panels.
3.2 Minimize Histogram
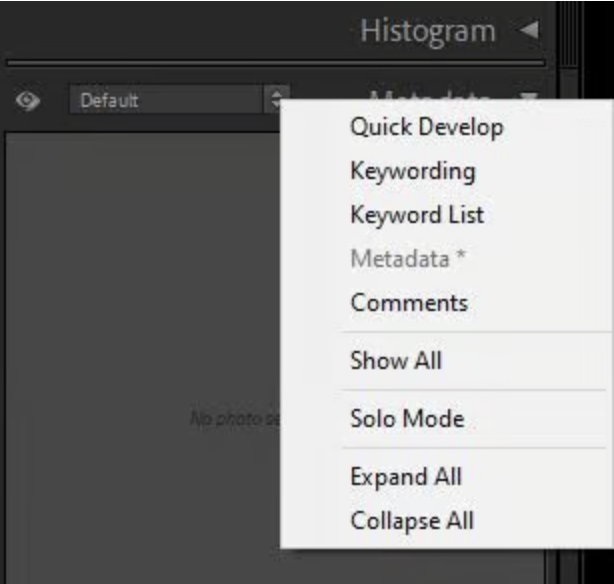
The Histogram can also be resource-intensive and should be minimized to speed up Lightroom on Mac. Here’s how we recommend minimizing Histogram:
- Click the small arrow in the top-right corner of the Histogram panel.
- Choose Collapse All.
4. Manage Lightroom catalog
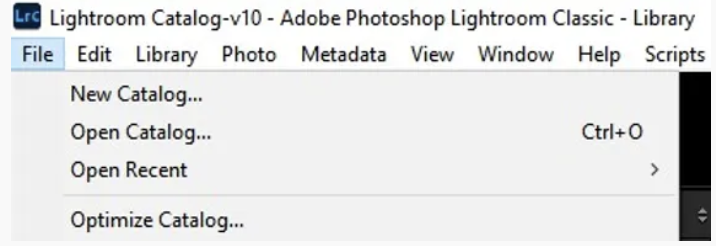
Is Lightroom still slow on your Mac? It may be time to optimize your catalog settings for better file management. Here’s how to manage your catalog:
- In Lightroom, click on File.
- Then select Optimize Catalog.
5. Optimize Lightroom sync and preview settings
Another way we suggest for optimizing the Lightroom app is to limit unnecessary functions by disabling syncing and using smart previews.
5.1 Disable sync
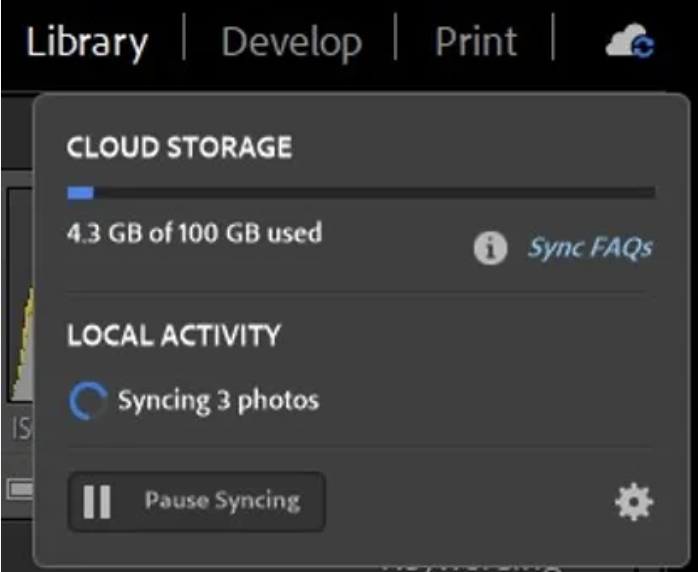
Unnecessary syncing, such as cloud uploads, can slow down Lightroom. We recommend turning the sync off to help boost speed. Here’s how to disable sync:
- Open the Lightroom app.
- Click on the cloud icon to Turn off/on sync.
5.2 Use smart previews
Smart previews demand less of your Mac’s resources but still maintain quality. To enable smart previews, follow these steps:
- In Lightroom, open the Performance tab.
- Tick the box Use Smart Previews instead of Originals for image editing.

6. Manage disk space and storage
Too many files on your disk can slow down your system and apps, but using an external disk is known to speed up Lightroom on your Mac.
6.1 Inspect disk space
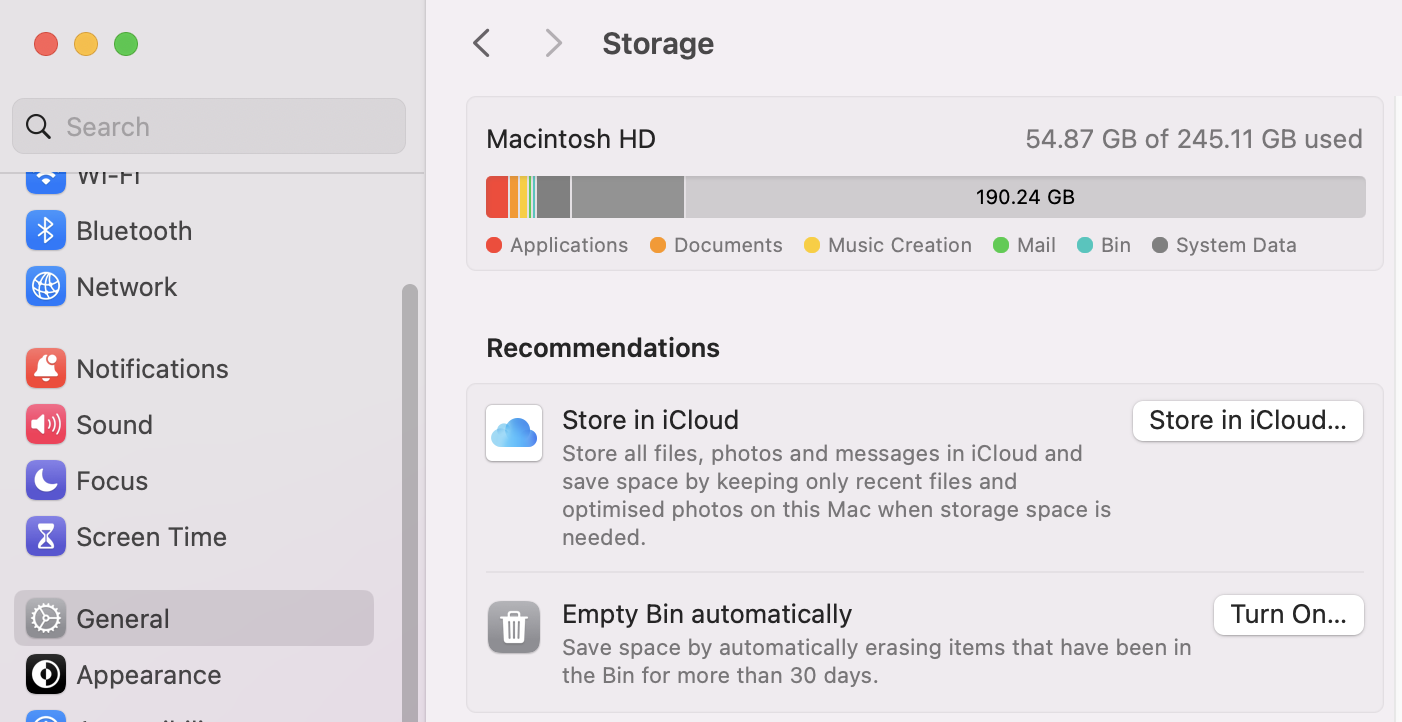
To manage the available disk space, we usually do the following:
- Click on the Apple icon and choose About This Mac.
- Press More Info.
- Click on the Storage Tab.
- Look through Recommendations to free up disk space.

6.2 Use SSD for Lightroom files
Have you considered using an SSD to house your Lightroom content? It’ll help speed up your Mac, that’s for sure. Here’s how to use an SSD:
- Connect your SSD to your Mac.
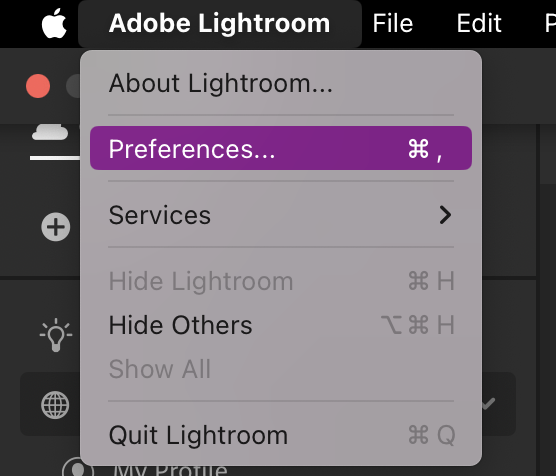
- Open Lightroom and go to Preferences > Performance.
- Under Storage Settings, select your SSD as the default location for catalogs and previews.
Advice from our experts:
While we do recommend using an external SSD for Mac to reduce clutter, choosing the right one can be tricky. This dedicated article explains the differences in SSDs to help you pick the best option for your needs.
7. Additional tips for better Lightroom performance
Choosing the right file size and regularly clearing the cache are two additional methods that can enhance Mac speed and performance.
7.1 Correctly choose your file/camera size
When working with RAW files, the wrong file sizes can push your Mac’s resources too far, so selecting the right size is crucial.
Here’s how to alter file/camera sizes:
- Camera size: Adjust your camera settings to shoot small RAW files in lower resolution.
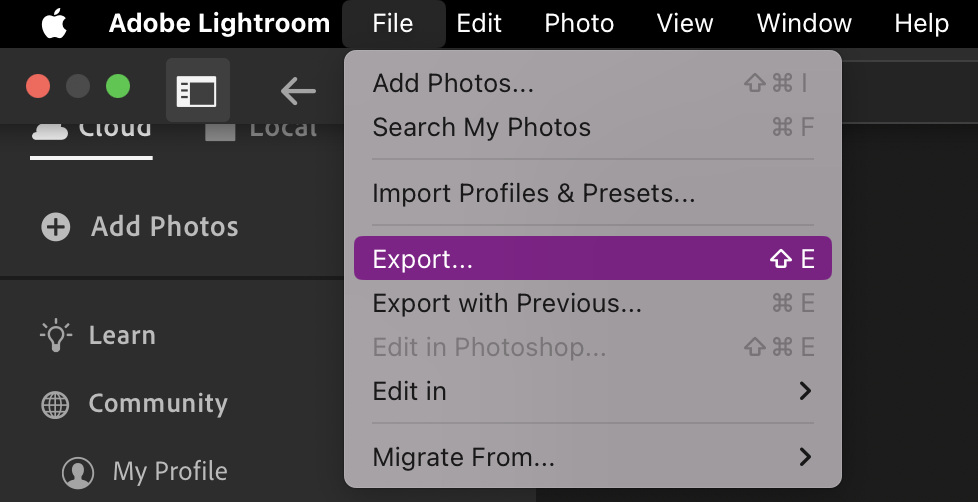
- File size: Lightroom’s export settings can help you create smaller optimized files to edit.
7.2 Clear Lightroom cache regularly
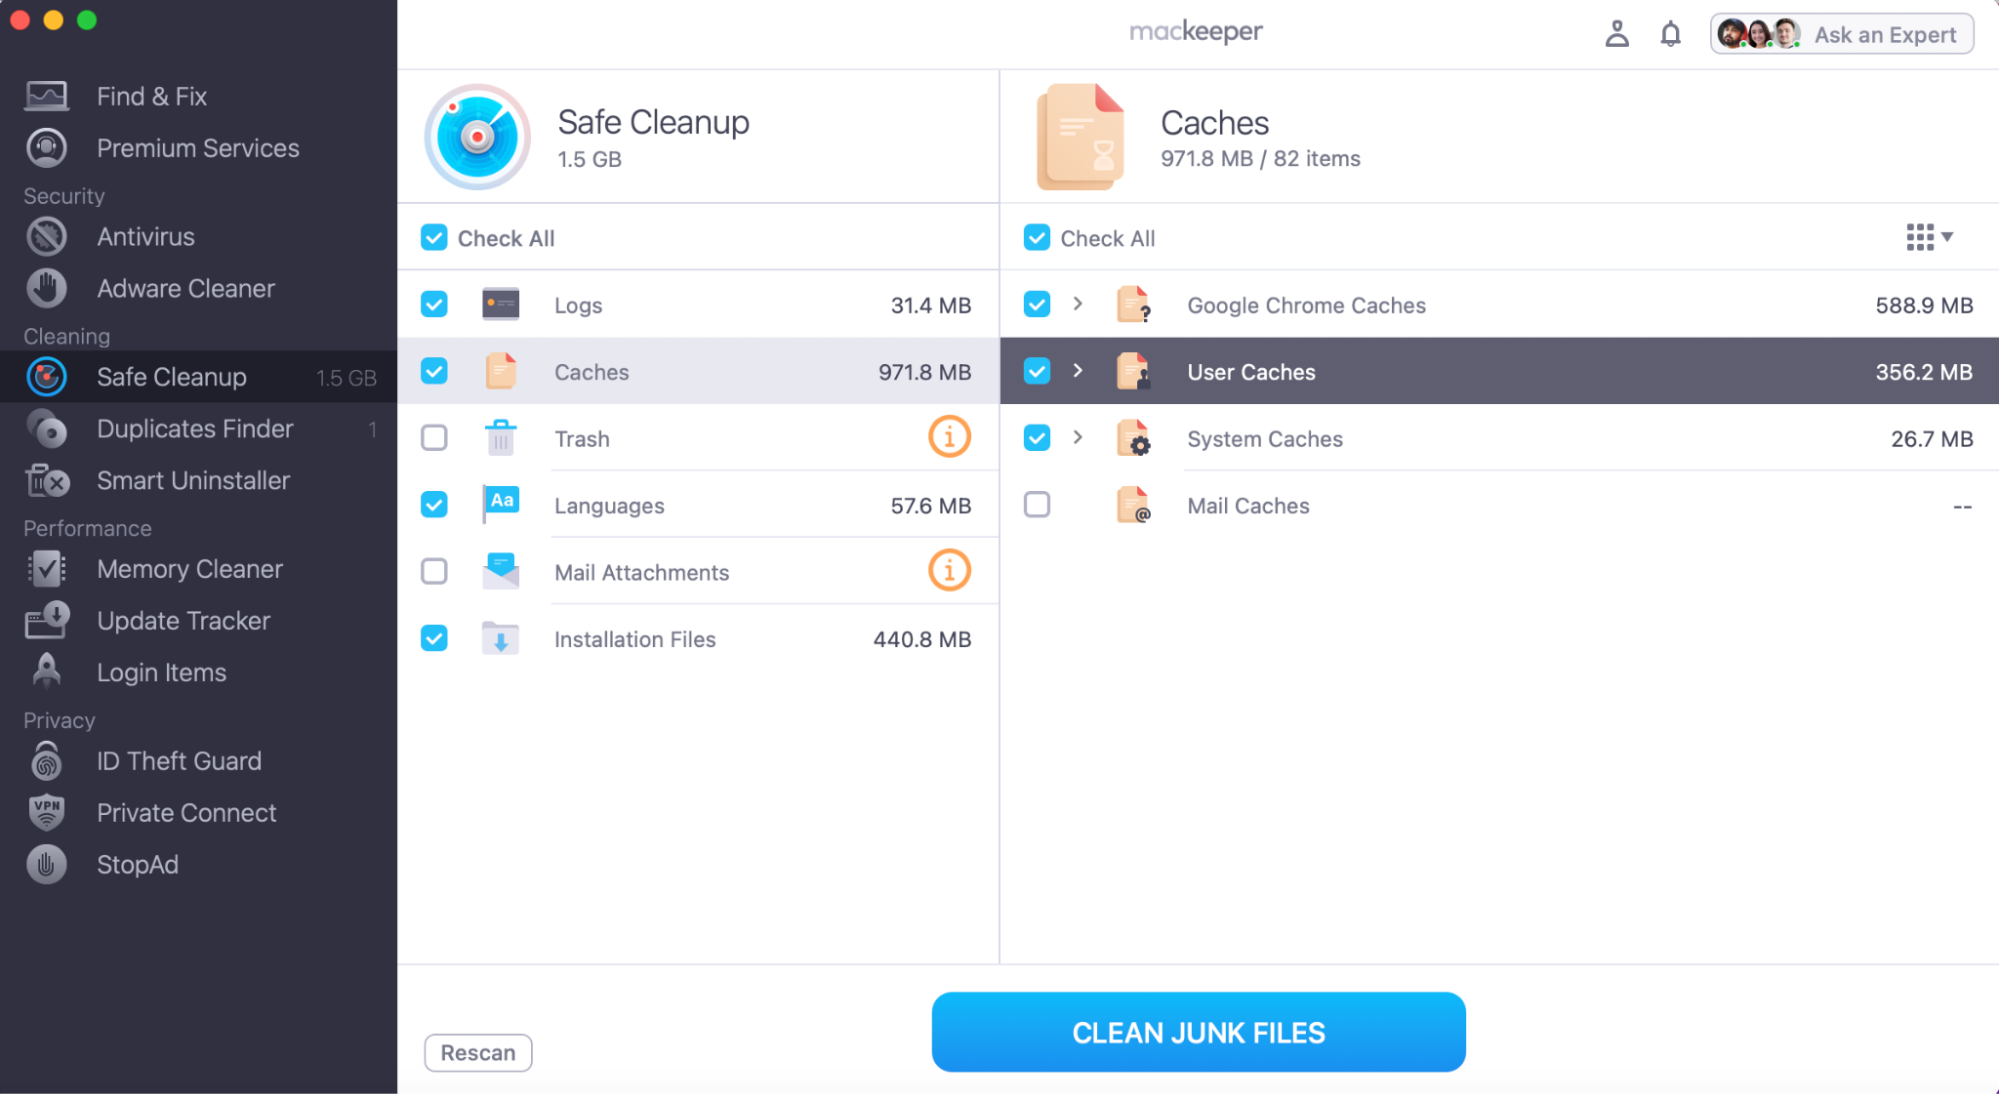
If Lightroom is still slow on Mac, I'd try decluttering it with the help of MacKeeper’s Safe Cleanup. Here's a reminder on how to use it:
- Open MacKeeper and choose Safe Cleanup.
- Press Start Scan.
- Once complete, highlight any cache related to Lightroom.
- Click Clean Junk Files and Remove.
The final tip from our team:
Clearing application cache on Mac is a great way to boost its performance, but it can be time-consuming. Plus, you don't want to remove the wrong files. In our attached piece, you’ll learn how to safely remove cache to keep your Mac running smoothly.
Conclusion: Fixing a slow Lightroom performance on Mac
Dealing with a slow Lightroom can be painful, but the right optimization tricks can restore your Mac’s performance speed and make your editing activities seamless. After all, keeping your device free of digital clutter is essential for smooth operation.
If you need professional help, MacKeeper’s Safe Cleanup can quickly remove your unnecessary files, ensuring Lightroom runs at its best. Try it yourself.


