To open a RAR file on your Mac, visit the App Store and type in RAR. You’ll find several apps, but Unzip One stands out with its high ratings. After you download and install the application, locate your RAR file. Right-click on it and choose Open With Unzip One. The app's user-friendly interface will guide you through the rest.
Finding it hard to extract RAR files on your Mac? You're not alone. The RAR file format is a popular archive file type known for its efficient compression.
Unlike ZIP files, MacBooks don't come with a built-in program to handle RAR files. But don't worry, our guide will help you access the contents of these files with ease.
While macOS doesn't offer native support for RAR files, you can easily open them using third-party applications like The Unarchiver or RAR Extractor Lite. Just download one of these apps from the Mac App Store, install it, and use it to unpack RAR on your Mac.
A note from our experts
Here’s how to use MacKeeper’s Duplicate Finder:
- Download MacKeeper
- Launch MacKeeper and select Duplicate Finder in the left pane
- Click Start Scan
- Check the box next to Duplicates
- Now click Remove Selected > Remove.
In this article you will find the following:
Use an application to open RAR files
Thankfully, there are plenty of tools that will assist you in opening RAR files. For instance, The Unarchiver is an amazing free unarchiver for Mac. Designed with simplicity in mind, it can handle a wide range of compressed file formats without any complications: Zip, RAR, 7-zip, Tar, Gzip, or Bzip2.
Now, let's go further to open RAR files with our helpful guidelines:
- Choose a tool to open RAR files
- Download the application
- Launch the application
- Unarchive selected files.
1. Choose a tool to open RAR files
If you're an occasional user, a simple RAR opener for Mac like The Unarchiver might be perfect. But if you're diving into compressed files often, you might want to explore a bit more.
Here’s how to pick a third-party tool to open RAR files:
- Open the App Store and search for RAR
- Review the options available. Popular choices include The Unarchiver, Keka, and RAR Extractor Lite
- Check user reviews and features to determine which tool suits your needs best.
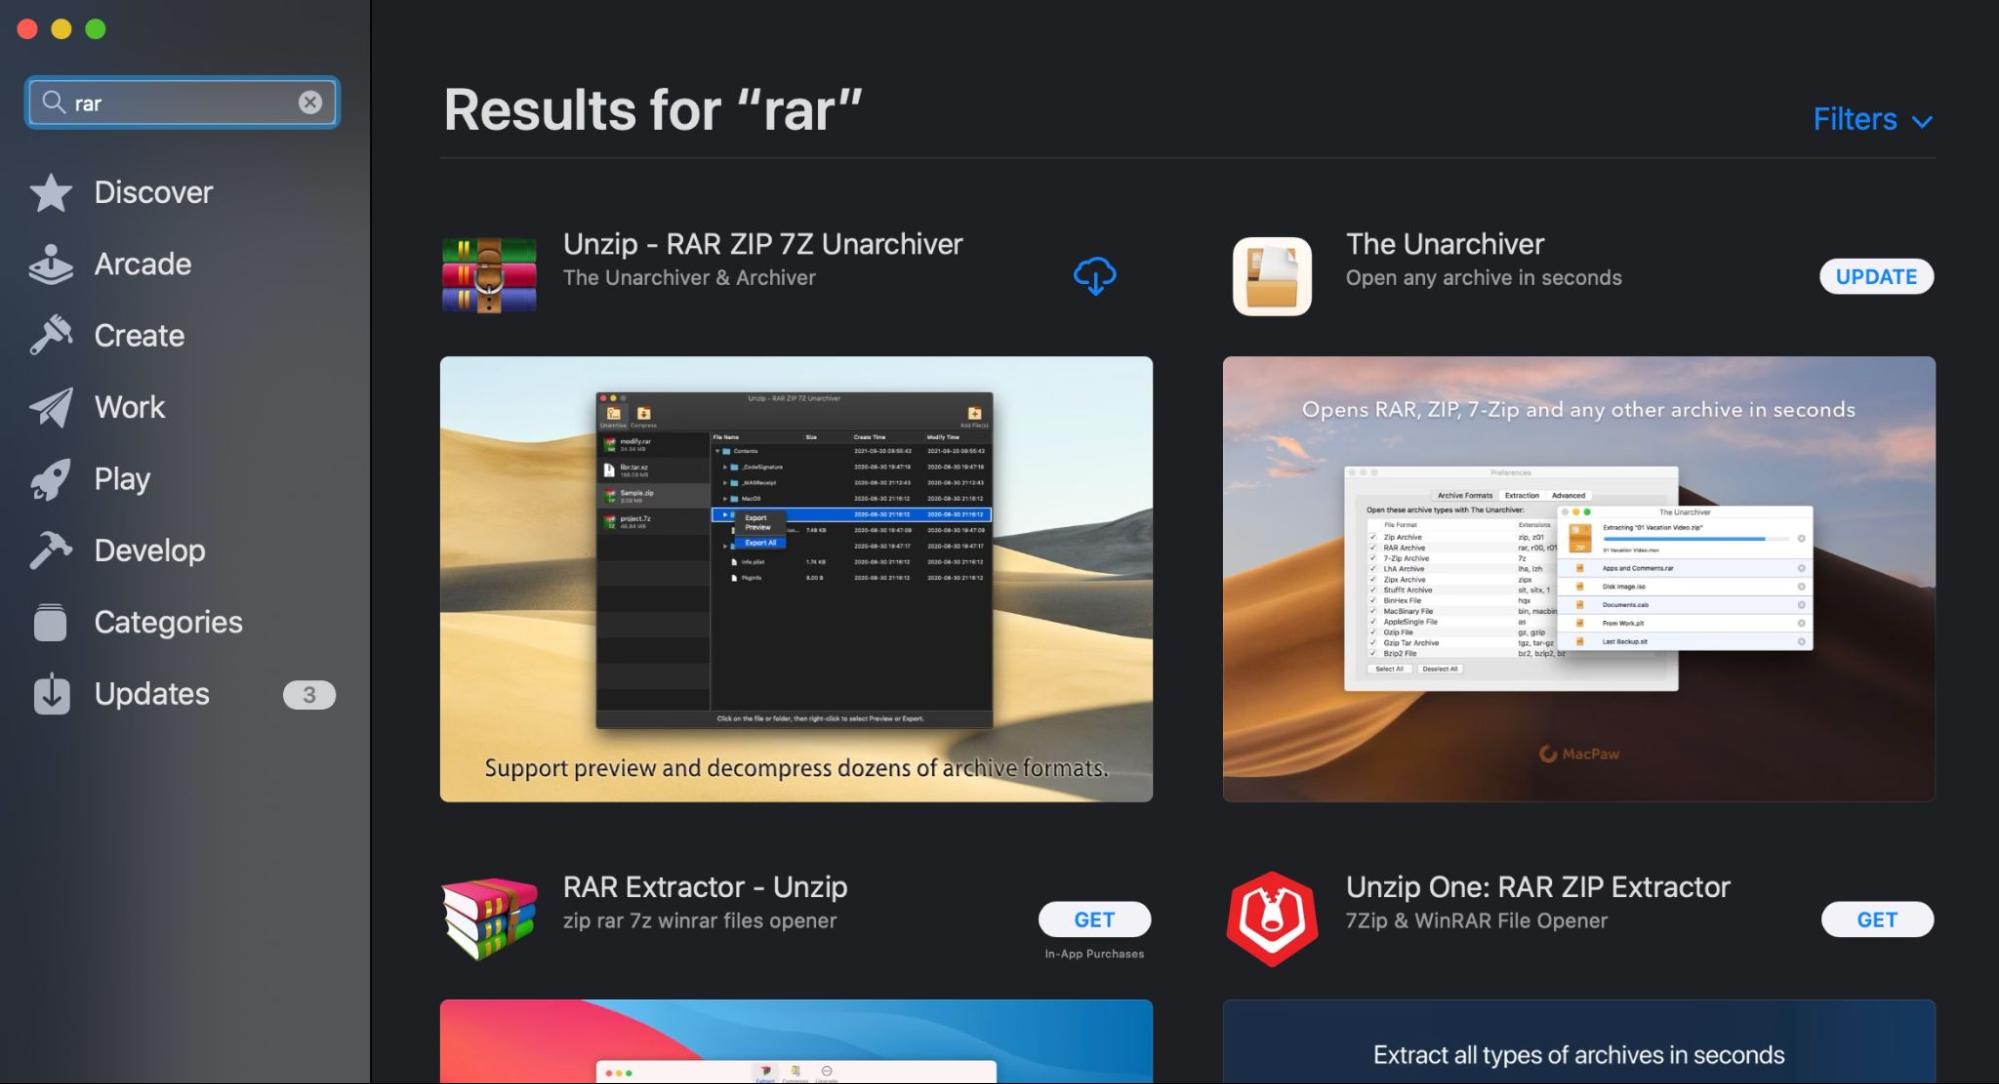
2. Download the application
Now that you've picked the right tool to uncompress RAR on your Mac, it's time to get it installed.
Here are some quick steps to download your chosen application:
- After choosing your tool, click on the Get button
- Wait for the download to complete.
3. Launch the application
You're almost there! With the app now on your Mac, it's time to fire it up and see it in action.
Follow these easy steps to start up your RAR extractor app:
- Navigate to your Applications folder or the Mac Dock
- Spot the app you just downloaded
- Give the application icon a Double-Click to get it started.
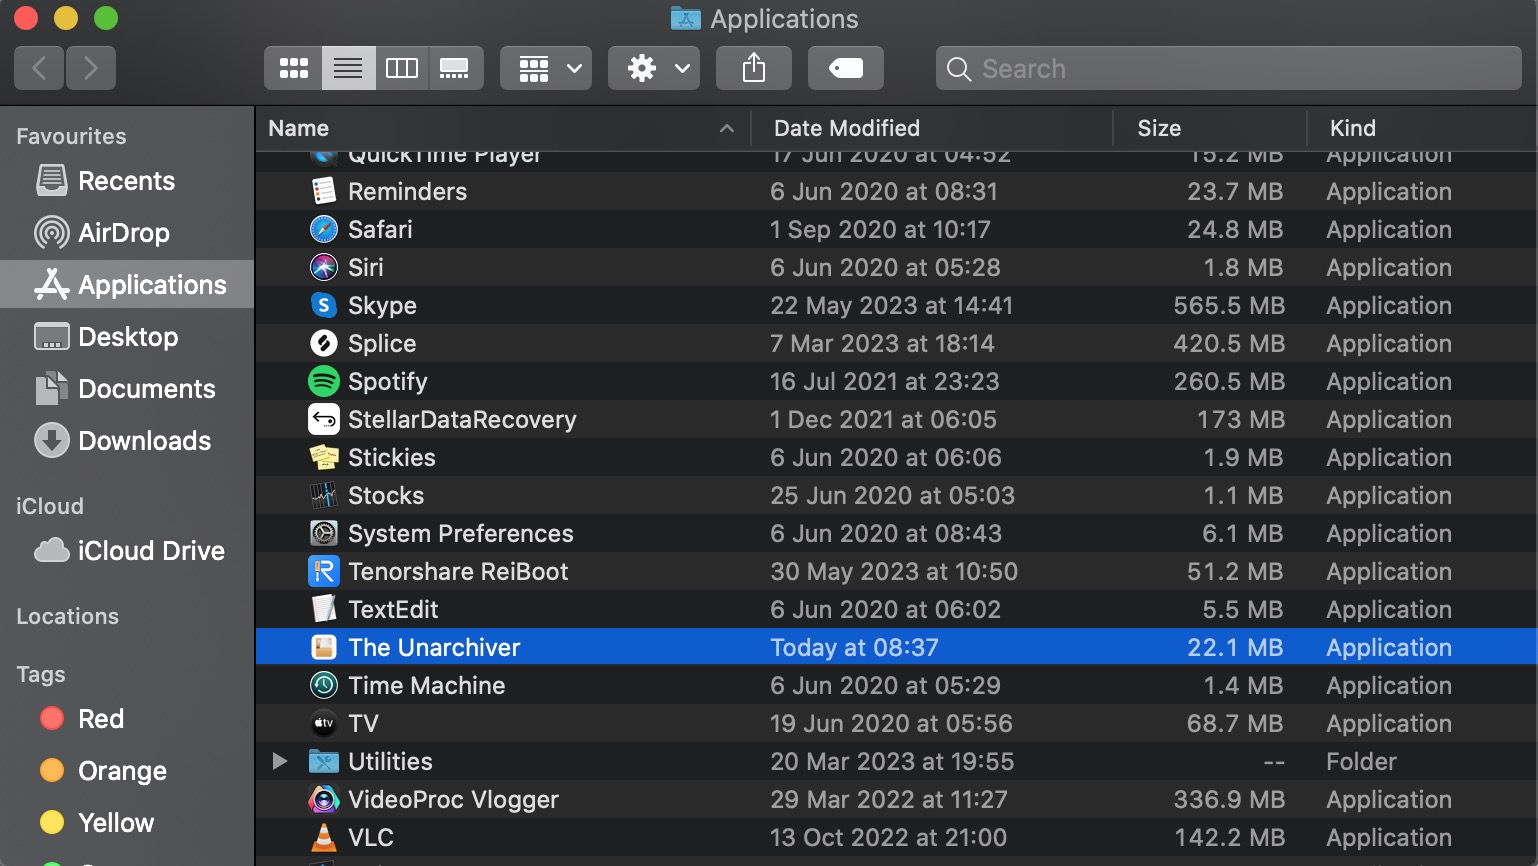
4. Unarchive selected files
Unarchiving selected files from a RAR archive is a straightforward process with The Unarchiver.
Here's how to use The Unarchiver to unarchive RAR files on your Mac:
- Click File in The Unarchiver menu
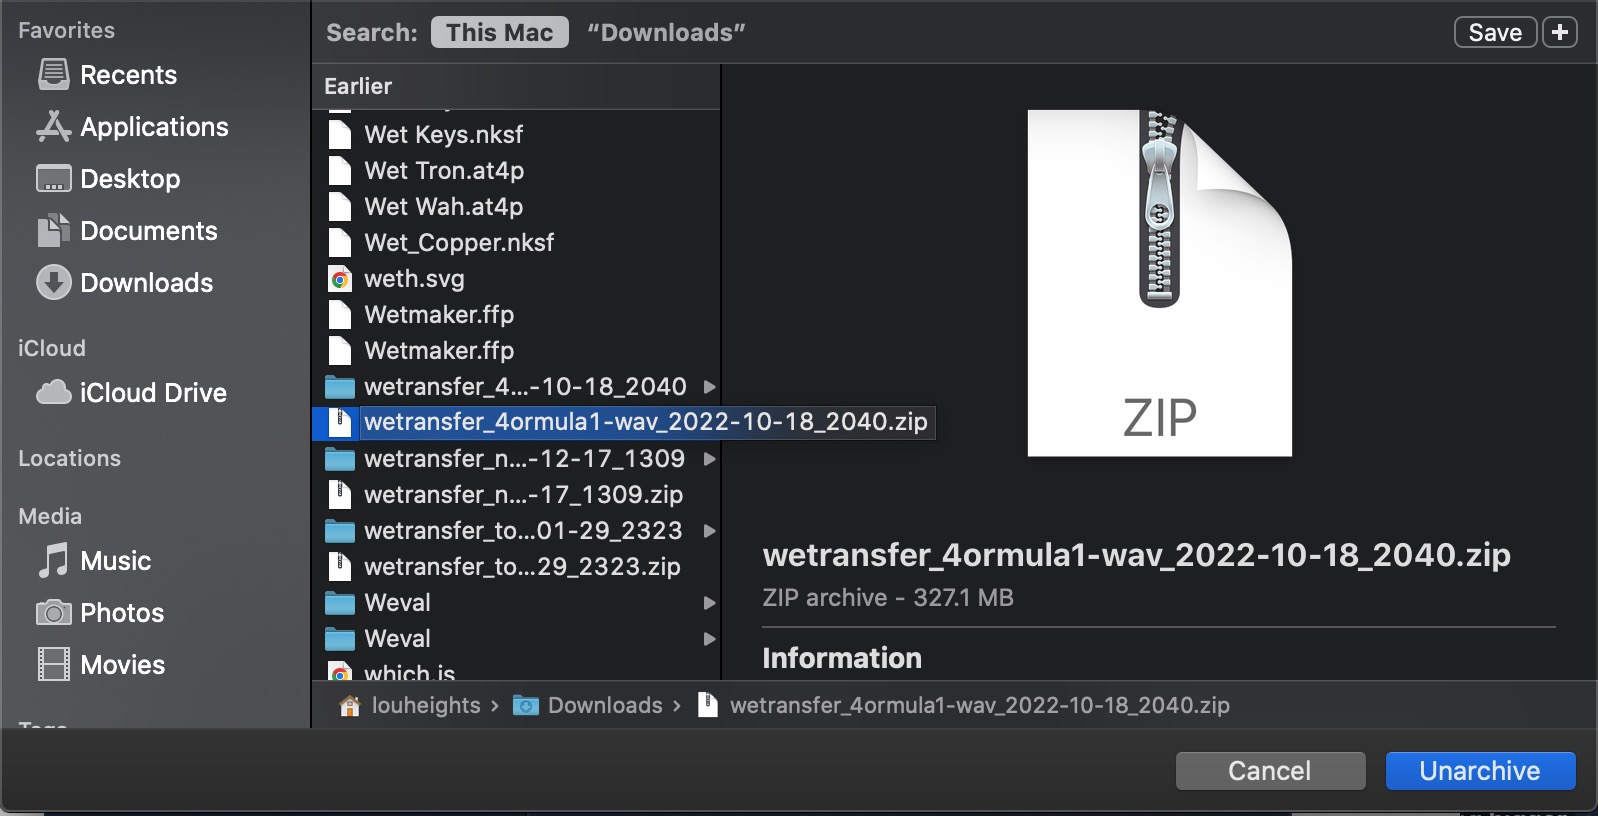
- Select Unarchive to... and then pick the RAR file you want to open
- Once you've selected your RAR file, click on Unarchive
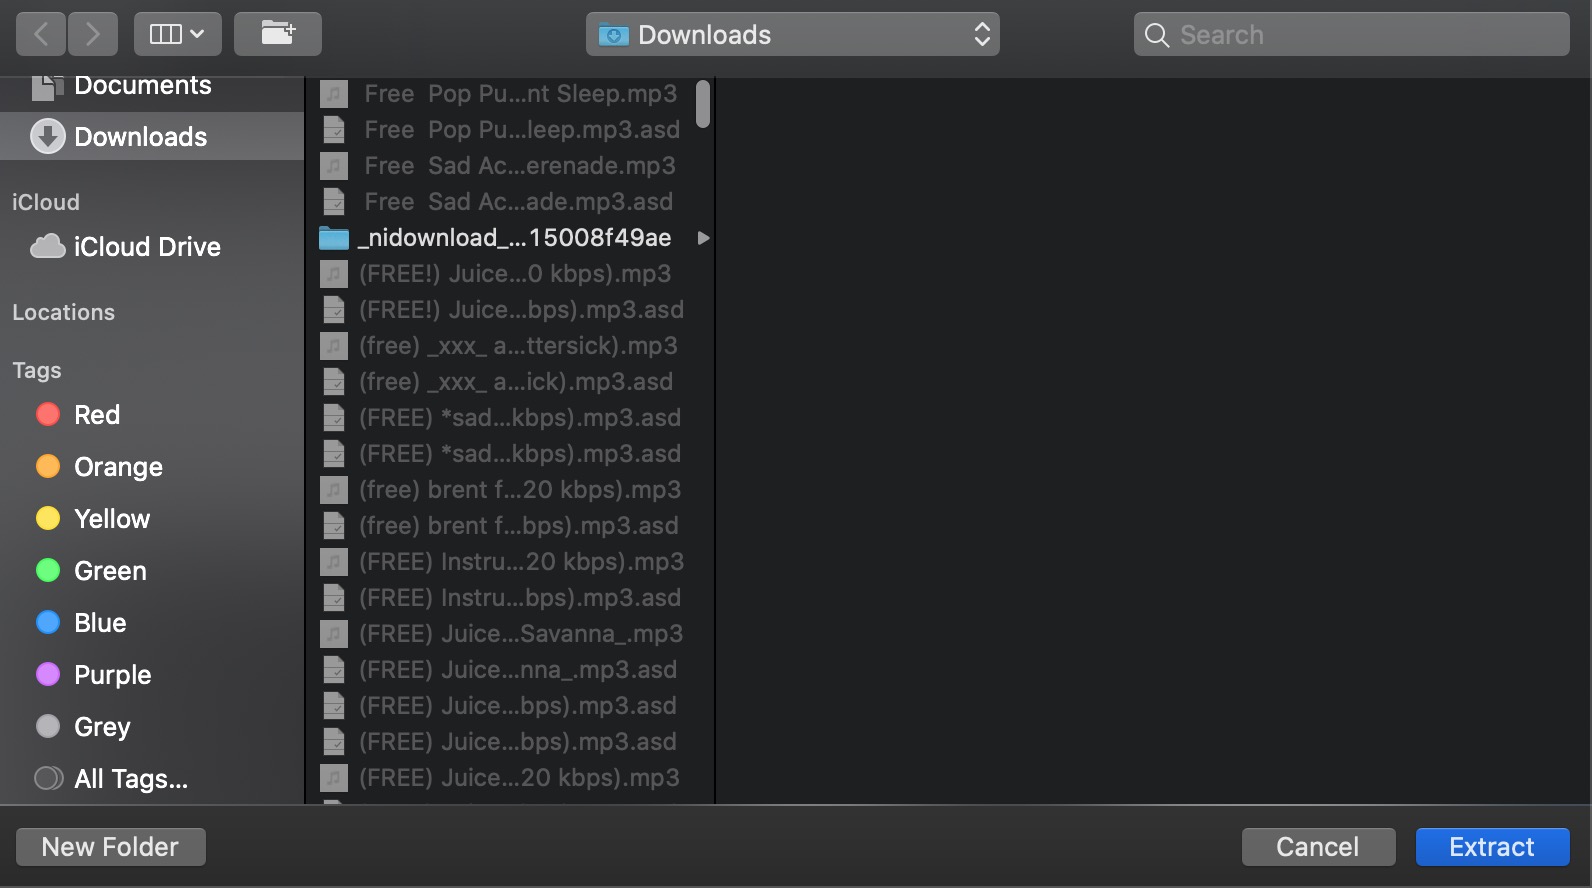
- Decide where you want your extracted files to go, and click Extract
- Head to the location you chose, and you'll find your extracted files waiting for you.


Tip from our experts: If you're in a hurry, just drag your RAR file onto The Unarchiver's icon in your dock. It'll use your default settings to quickly extract the files.
Unpack RAR files using Terminal
If you're looking for a simple yet powerful way to extract RAR files, Terminal has a neat trick up its sleeve. After following these easy steps, you'll be able to unrar on Mac like a pro.
But first, make sure you have the necessary privileges on your Mac to perform these actions. You either need to be the administrator or have the administrator password handy.
Now, follow our simple steps to unpack RAR documents with Terminal:
- Go to the Finder, click on Go in the menu, then select Utilities, and finally, click on Terminal
- Now, type the command xcode-select --install and press Enter. This will set up the required developer tools. The installation might take a few minutes, so relax and let it do its thing.
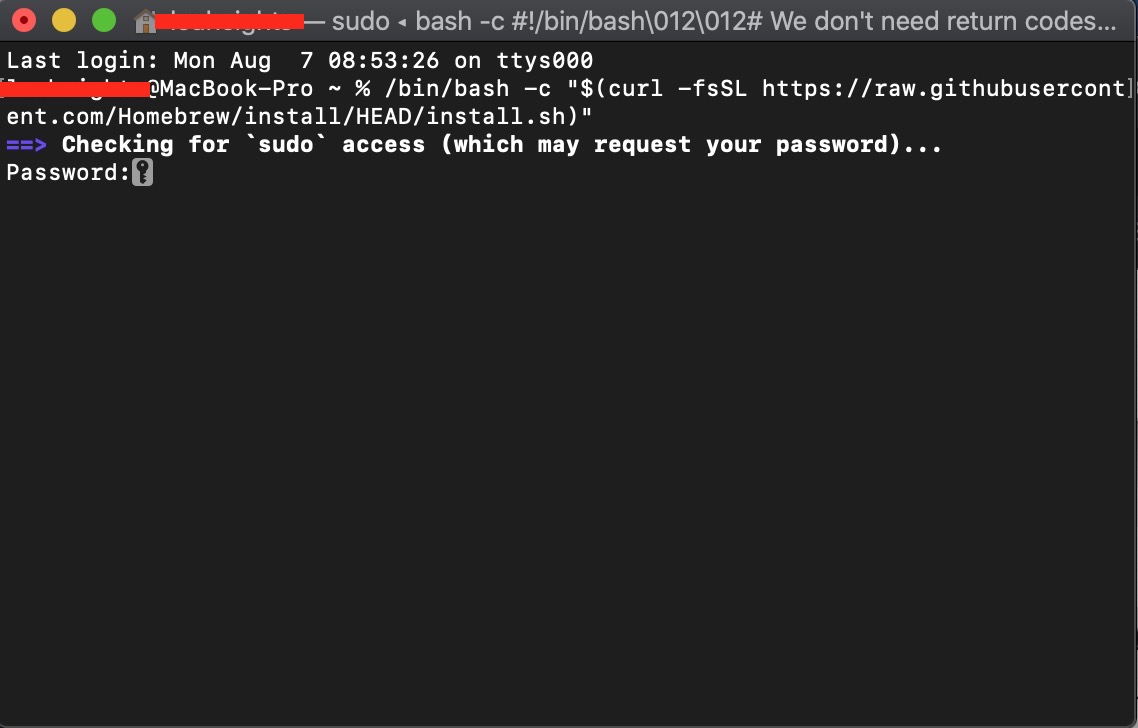
- Homebrew is an efficient package manager. To install it, copy and paste the command /bin/bash -c "$(curl -fsSL https://raw.githubusercontent.com/Homebrew/install/HEAD/install.sh)" into Terminal and hit Enter
- When prompted, type in your Mac password (you won't see the characters as you type) and press Enter
- Homebrew's installation process will take a little time
- Now, type brew install unar in Terminal and hit Enter
- Use the unar command in Terminal, then drag the RAR file you want to unpack into the Terminal window and press Enter
- Once the process completes, Terminal will display Successfully extracted to /file name/
- To find your unarchived files, go to Finder, click on Go, and select Home.
How to use the application as your default RAR file extractor?
Grab the answer at once! Follow these steps to use the app as a default RAR file extractor:
- Locate your RAR file in Finder
- Control+Click the RAR file and select Get Info
- Under Open With, choose The Unarchiver
- Click Change All... and confirm the action.
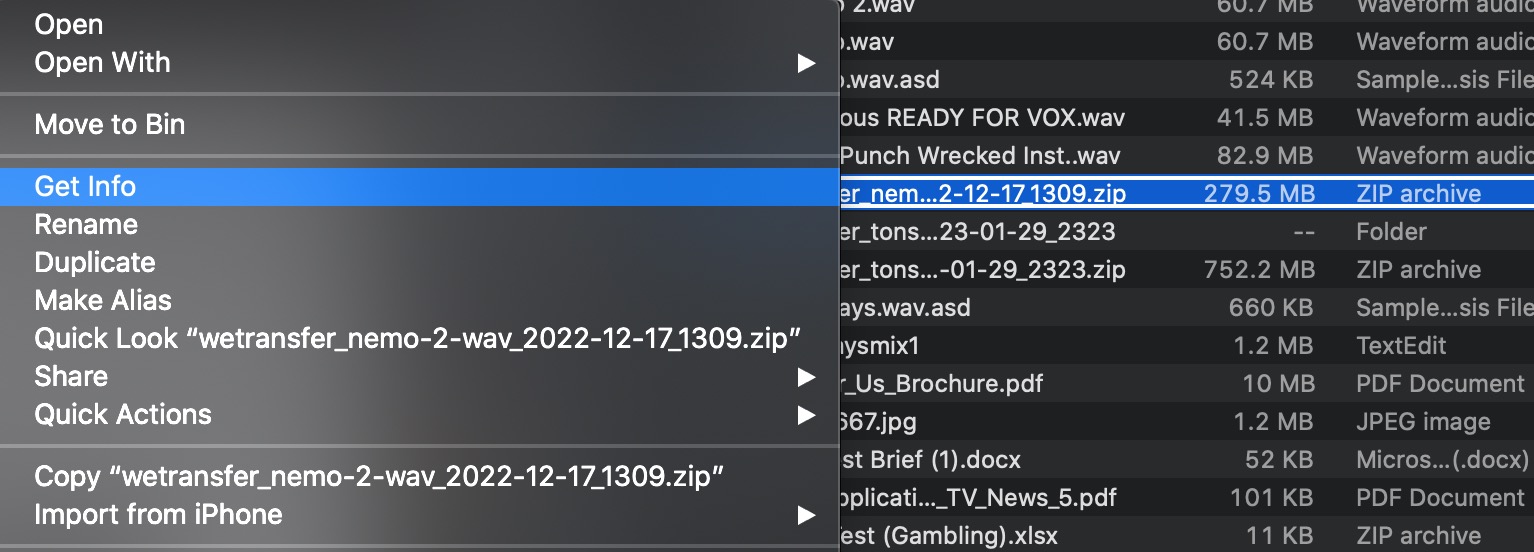
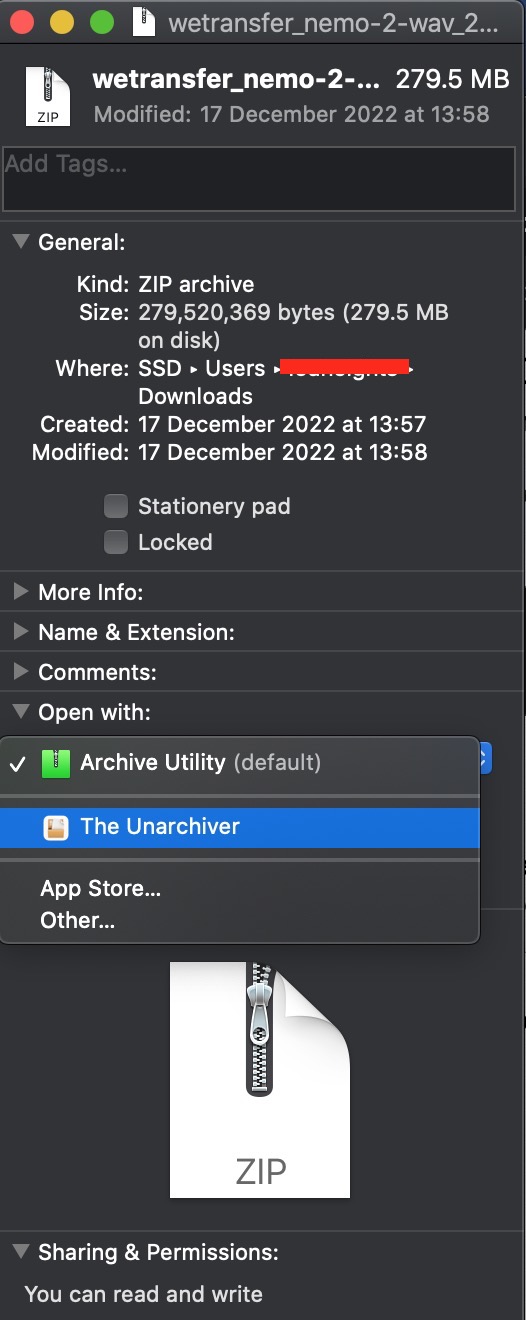
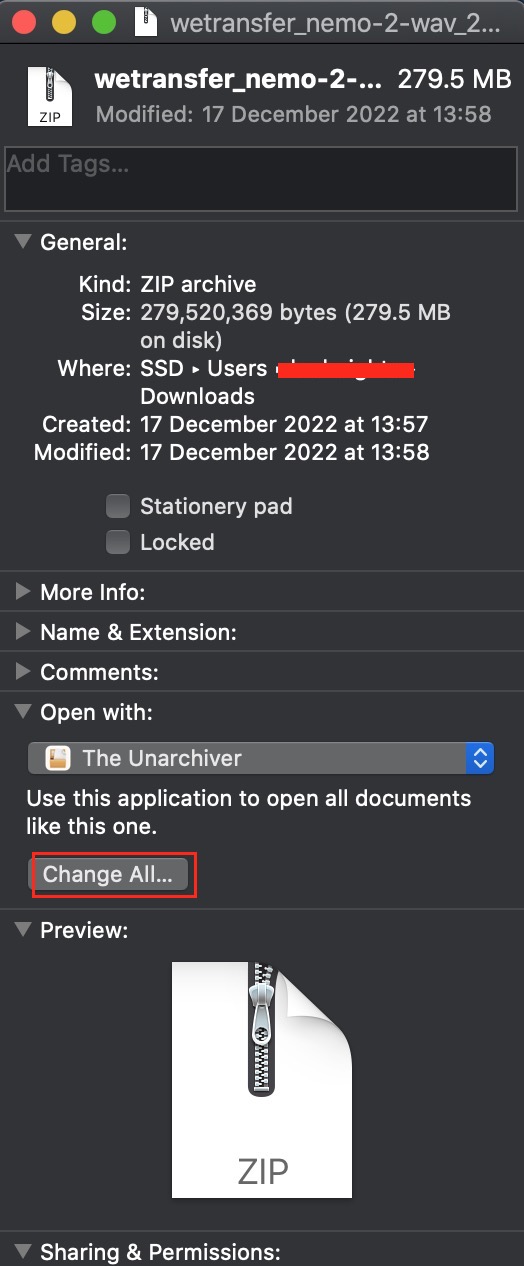
As you see, setting The Unarchiver as your default RAR file extractor allows for quick extraction with just a double-click. In a few simple steps, you can configure The Unarchiver as the go-to app for handling RAR files.
RAR vs ZIP
RAR and ZIP are both popular file compression formats, so what’s the difference? While ZIP is more universally accepted and has native support on many operating systems, RAR often offers better compression rates. However, RAR requires third-party software for extraction on some platforms, unlike ZIP.
To make things easier, we’ve provided a table outlining key differences:
Feature | RAR | ZIP |
Compression Rate | Typically higher, more efficient | Slightly lower than RAR |
Popularity | Less common than ZIP | More universally accepted |
Native Support | Requires third-party software on many OS | Supported natively by many OS |
File Spanning | Can split archives into multiple files | Limited support, less common |
Encryption | Stronger encryption options | Basic encryption available |
Licensing | Proprietary | Open standard, more freely available |
Recovery | Has recovery records for damaged archives | Lacks this feature |
Are RAR files safe for Mac?
RAR files, like any other downloads, can contain malware. While the RAR format itself is safe, always check the source is trustworthy before you download and open RAR files on your Mac. This action will help avoid potential security threats.
Benefits of using RAR files on Mac
RAR files group multiple documents into a single compressed pack, making downloading or sharing easier on a Mac. When you open one, it feels just like a regular folder, giving you quick access to everything inside. So, it’s a better option if you need to deal with large archives and many files.
List of RAR benefits to sum up:
- It packs files tightly to free up storage
- Makes sharing or uploading easier
- Uses encryption for added security
- Can mend small file damages
- Many Mac apps can handle RAR files.
Opening RAR on Mac the easy way
Ultimately, navigating the process of opening RAR files on your Mac is simple once you have the right tools. While macOS doesn't natively support RARs, several third-party applications make the task hassle-free.
However, as you frequently decompress RAR on your Mac, you might notice duplicate files piling up. That's where MacKeeper's Duplicate Finder comes in. This tool is brilliant in identifying and removing those redundant files, allowing your Mac to remain organized. So, as you master the art of handling RAR files, let MacKeeper be your sidekick in maintaining a clean workspace.
For more easy-to-follow tips for your Mac, we've got you covered. Have a look at how to make a ZIP file on Mac and how to fix a corrupted file on Mac. Plus, there are plenty more expert Mac guides you can find in our MacKeeper’s blog and ease up your daily user’s life.


