In this article you will find the following:
Microsoft Paint was one of the best programs for creating illustrations and editing pictures on a Windows computer. Whether you’ve recently switched to Mac or you’re a long-time user of Apple devices, you might be wondering if you can use Paint on Mac. Unfortunately, however, that isn’t the case.
As Paint was designed specifically for Microsoft-powered computers, you can’t access the program on your Mac or MacBook. With that in mind, seeking an MS Paint alternative for Mac is essential if you want to edit pictures on Mac like Paint.
The good news is that you have access to a handful of alternatives. You also don’t need to go too far to find them, with one of them already being installed on your device. Today, I’ll show you the best Apple Paint app equivalents.
Before we start
Although Microsoft Paint doesn’t have a one-to-one equivalent on Mac devices, you can download some alternatives. In most cases, you shouldn’t have any problems using these services on your device. However, you’ll need to be careful not to clutter your computer with duplicate files.
Duplicate files can result in your Mac performing slower than usual. Moreover, it can lead to a lot of confusion when you’re trying to access different programs. Fortunately, keeping your device in order is straightforward—and you can streamline much of the process (and limit manual work) by using MacKeeper’s Duplicates Finder.
To use MacKeeper’s Duplicate Finder, follow these steps:
- Download MacKeeper.
- Go to Cleaning in the toolbar on the left.
- Select Duplicates Finder.
- Click on Start Scan.
- When the search returns your results, tick the files you want to delete from your device
- Click on Remove Selected to delete the duplicates from your Mac.
Built-in tools in Preview
I’ll show you some more alternatives later, but you don’t actually have to download anything or visit websites to find a similar Mac Paint program. The Preview app is a fantastic place to begin when looking for a Paint MacBook equivalent.
You may have used Preview in the past to edit PDFs, add connotations to images, and perform various other tasks. Here, you’ll find a broad suite of tools at your disposal, including the ones listed below:
- Sketch: This tool lets you scribble on your document or image with your cursor. The pen is thinner than Draw.
- Draw: Works in a similar way to Sketch, but you’ll have a thicker pen to use for creating your designs.
- Shapes: You can add numerous shapes to your drawing in the Preview app, such as circles and squares. With each shape you add, you can customize the colors for both the border and fill.
- Text Box: You can use the Text Box to write within a certain section on your document or image.
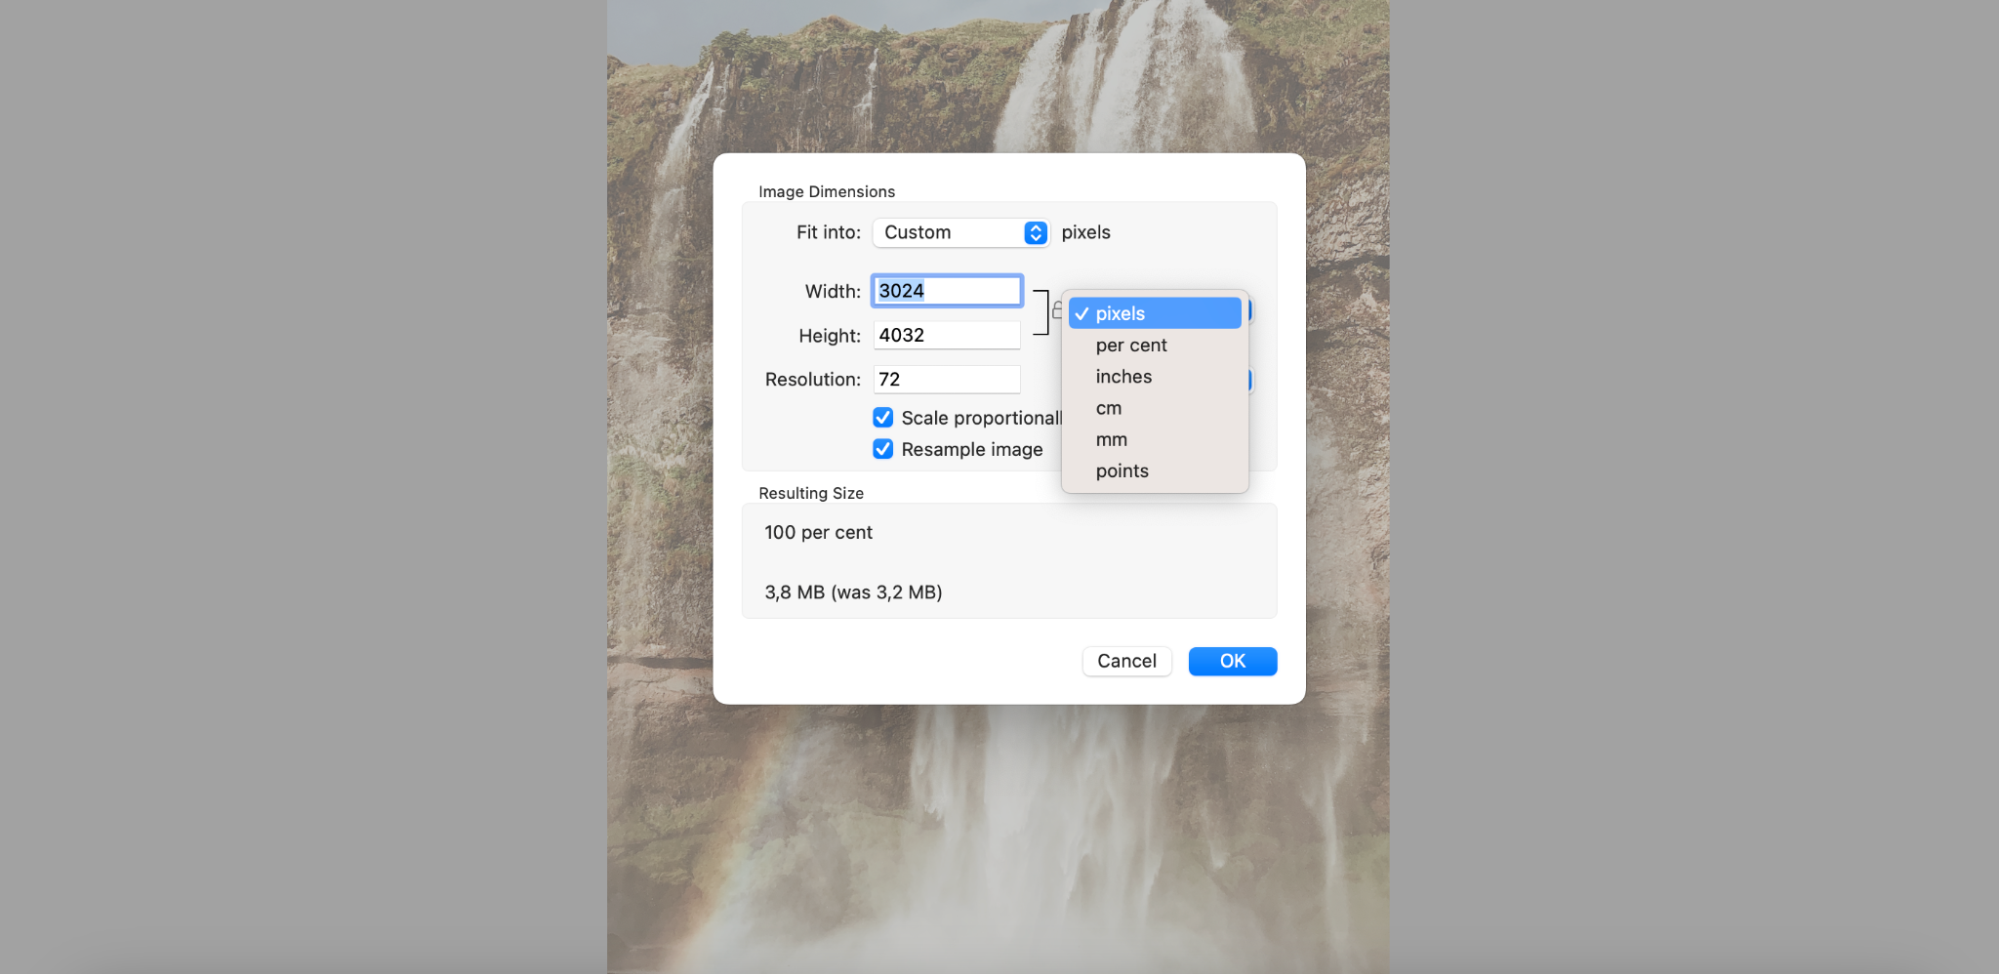
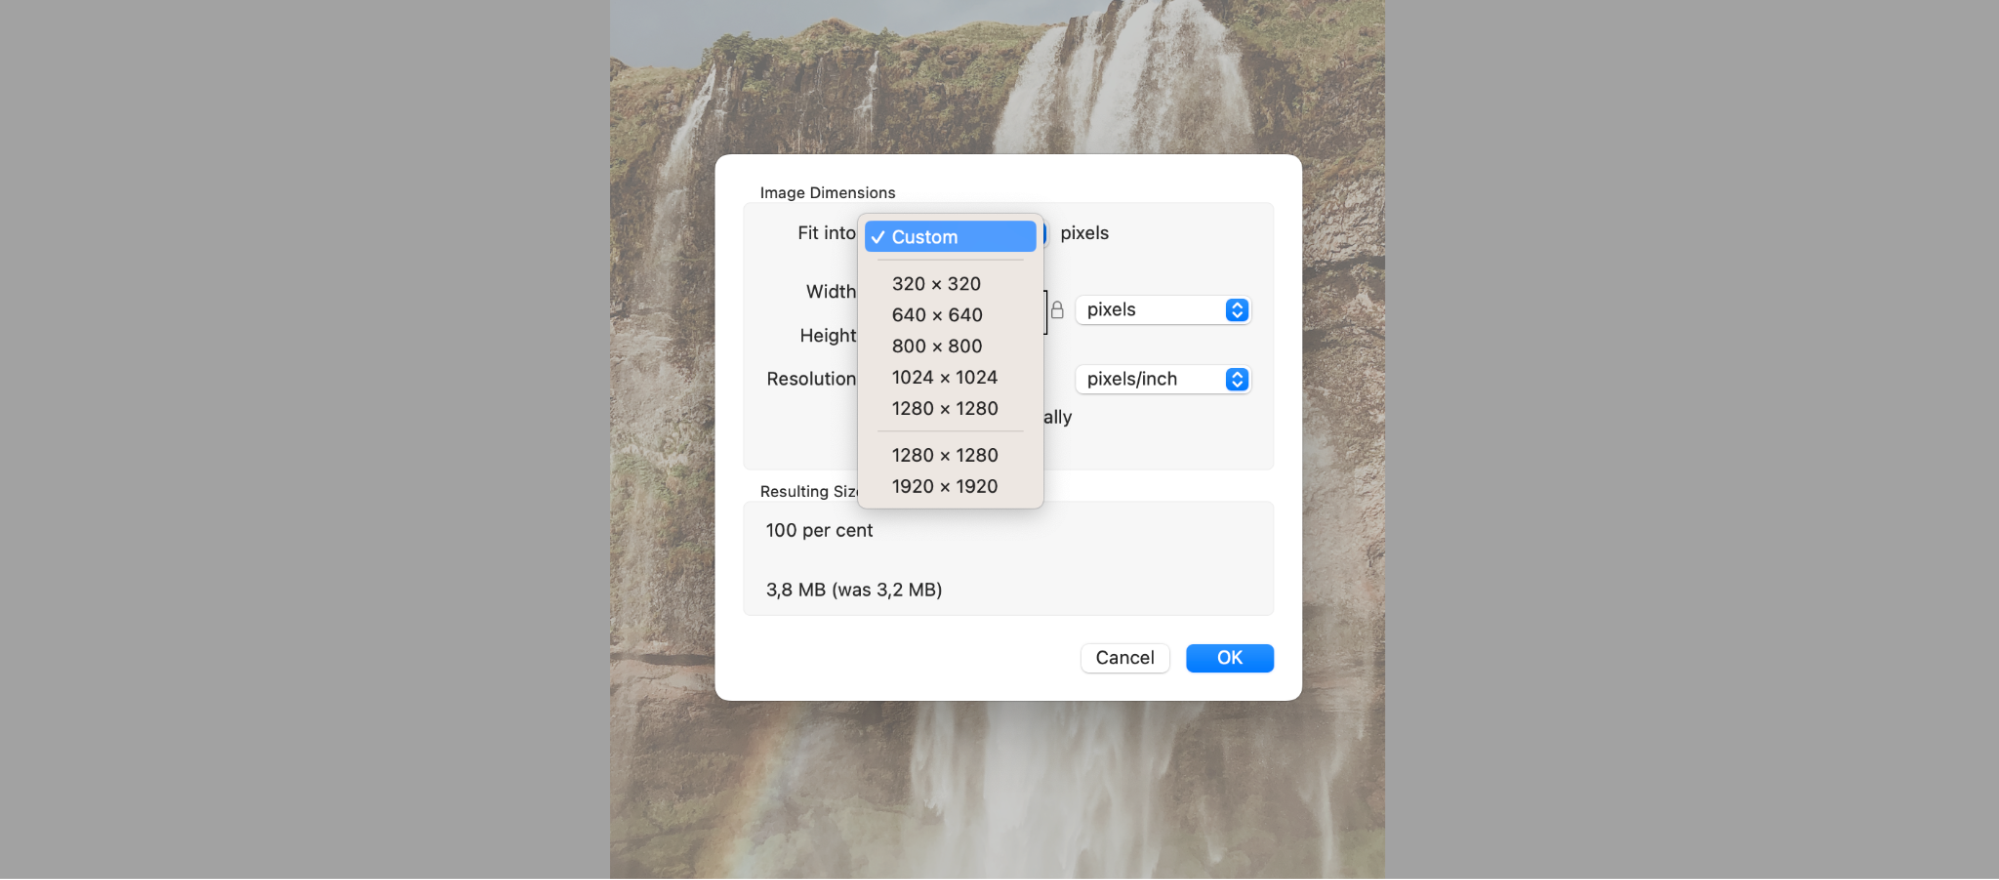
- Adjust Size: The Adjust Size option lets you change the size of your image. You can enter your own pixels, along with choosing a predesigned option from the dropdown list.
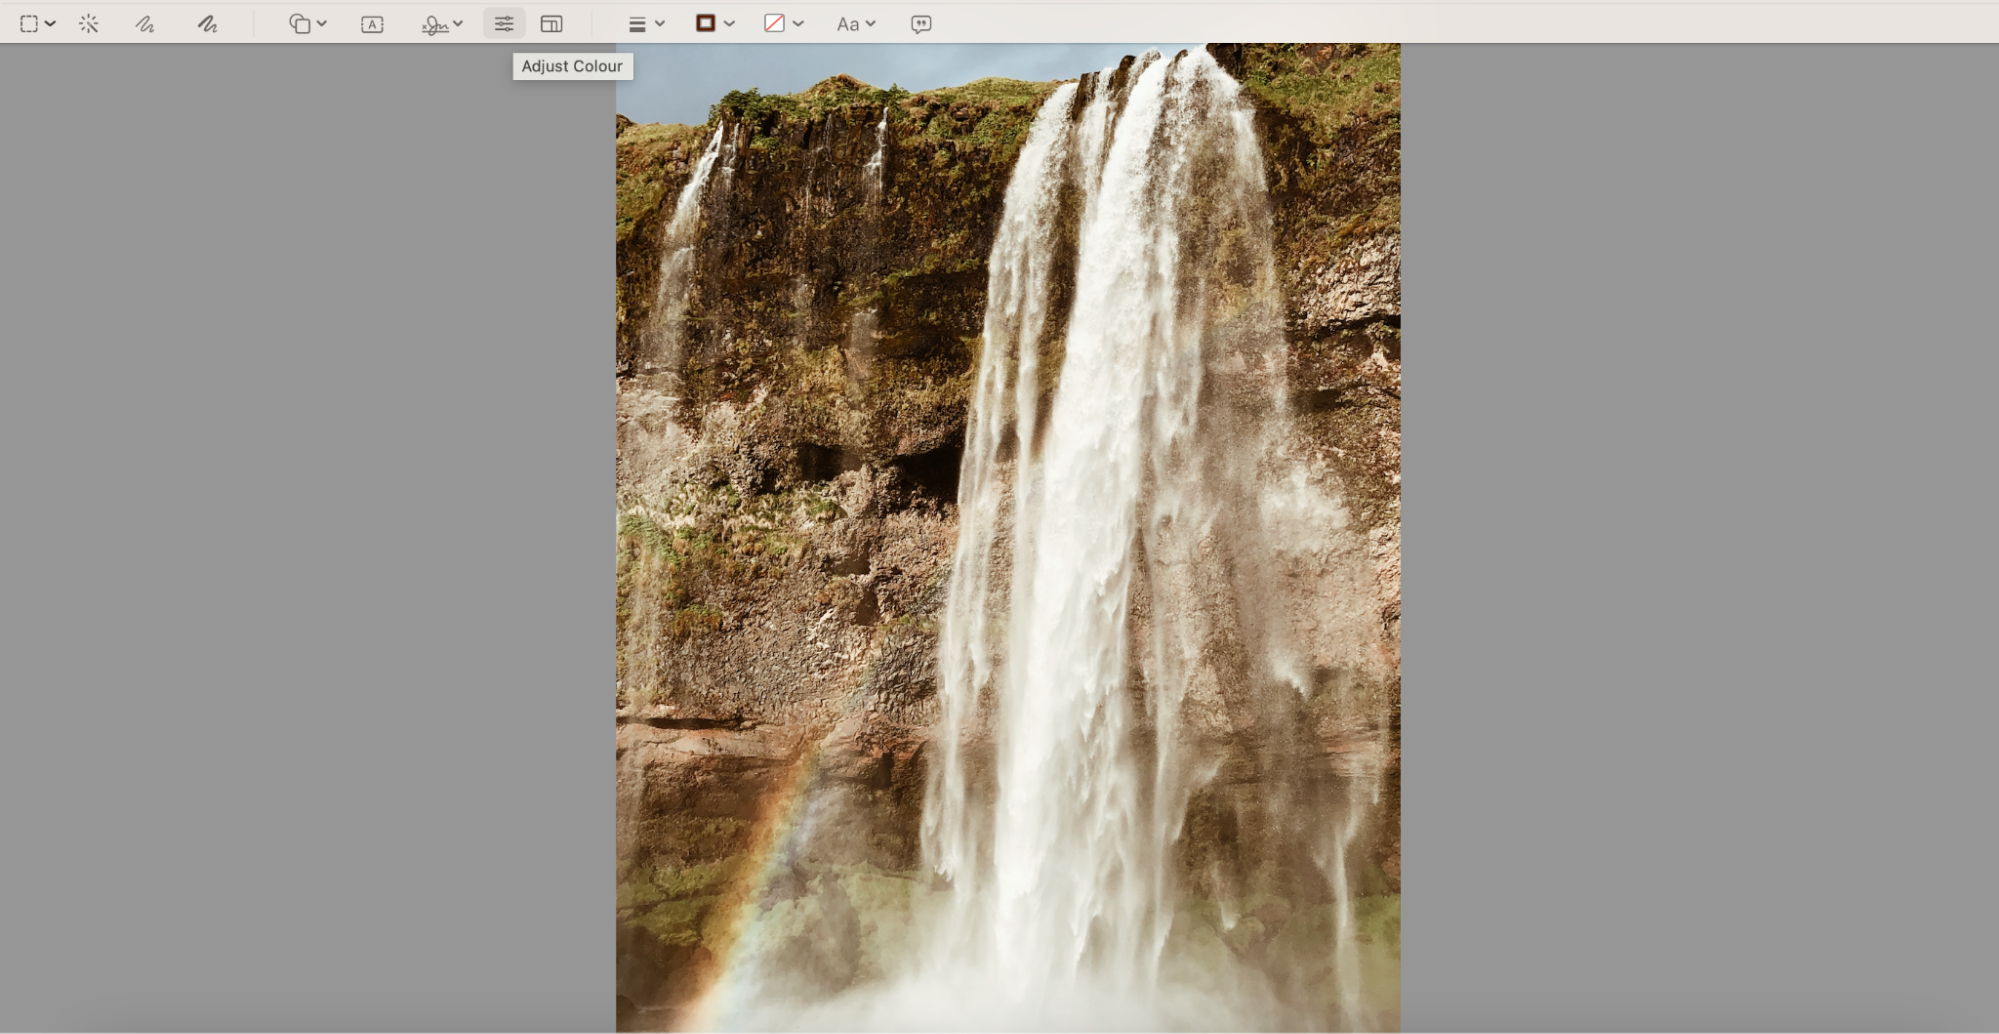
- Adjust Color: To edit pictures on a Mac like Paint, you can use the Adjust Color tool. It works similarly to what you’ll find in programs like Apple Photos and Adobe Lightroom, with the option to tweak the exposure and more.
Now let’s look at how to access the majority of these tools as they can frequently be hidden, and how to use the Show Markup Toolbar option of the Preview app to fix it.
How to find the built-in tools in Preview on Mac
Accessing Preview’s picture editing tools is very simple, so follow these instructions to achieve that result.
- Open the Preview app on your Mac.
- Go to Show Markup Toolbar in the right-hand corner.
- Choose the feature you want to use and customize it however you feel is necessary.
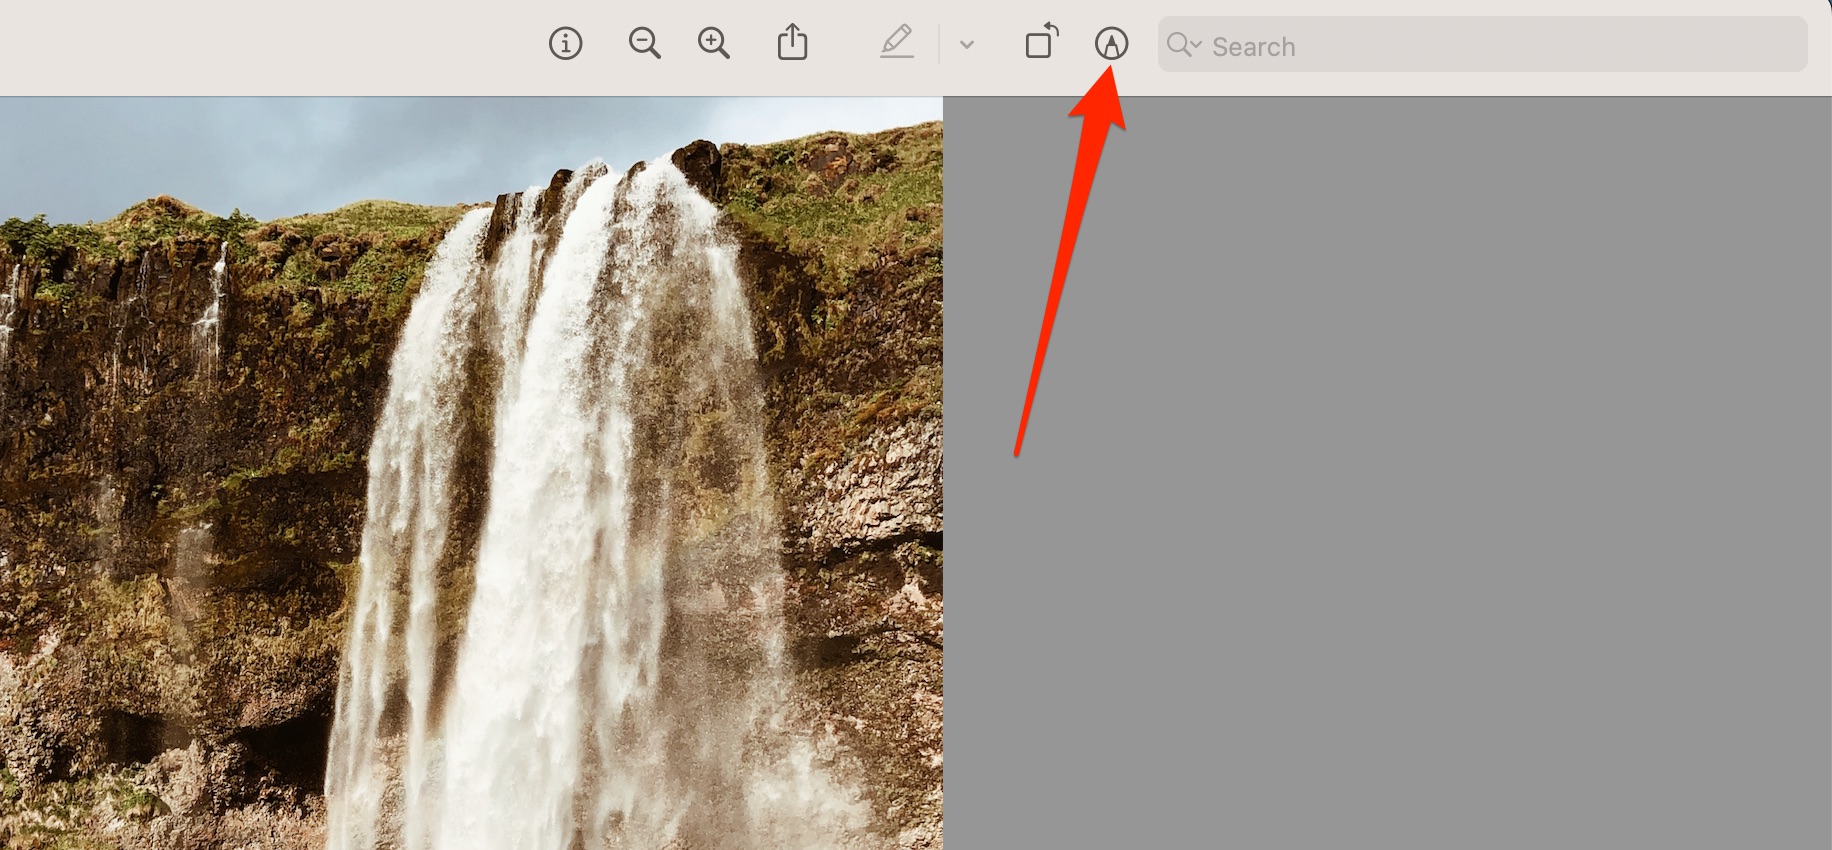
Since you now have the knowledge to use the main built-in Preview tools, check out how to tweak the more advanced options below.
Adjust Size
Resizing a picture is useful if you want to upload it to social media platforms like Instagram, where adhering to the size guidelines is essential for maximizing your image quality. The Adjust Size tool can be harder to understand than using similar features in programs like Lightroom and Photoshop, but it’s still handy to know.
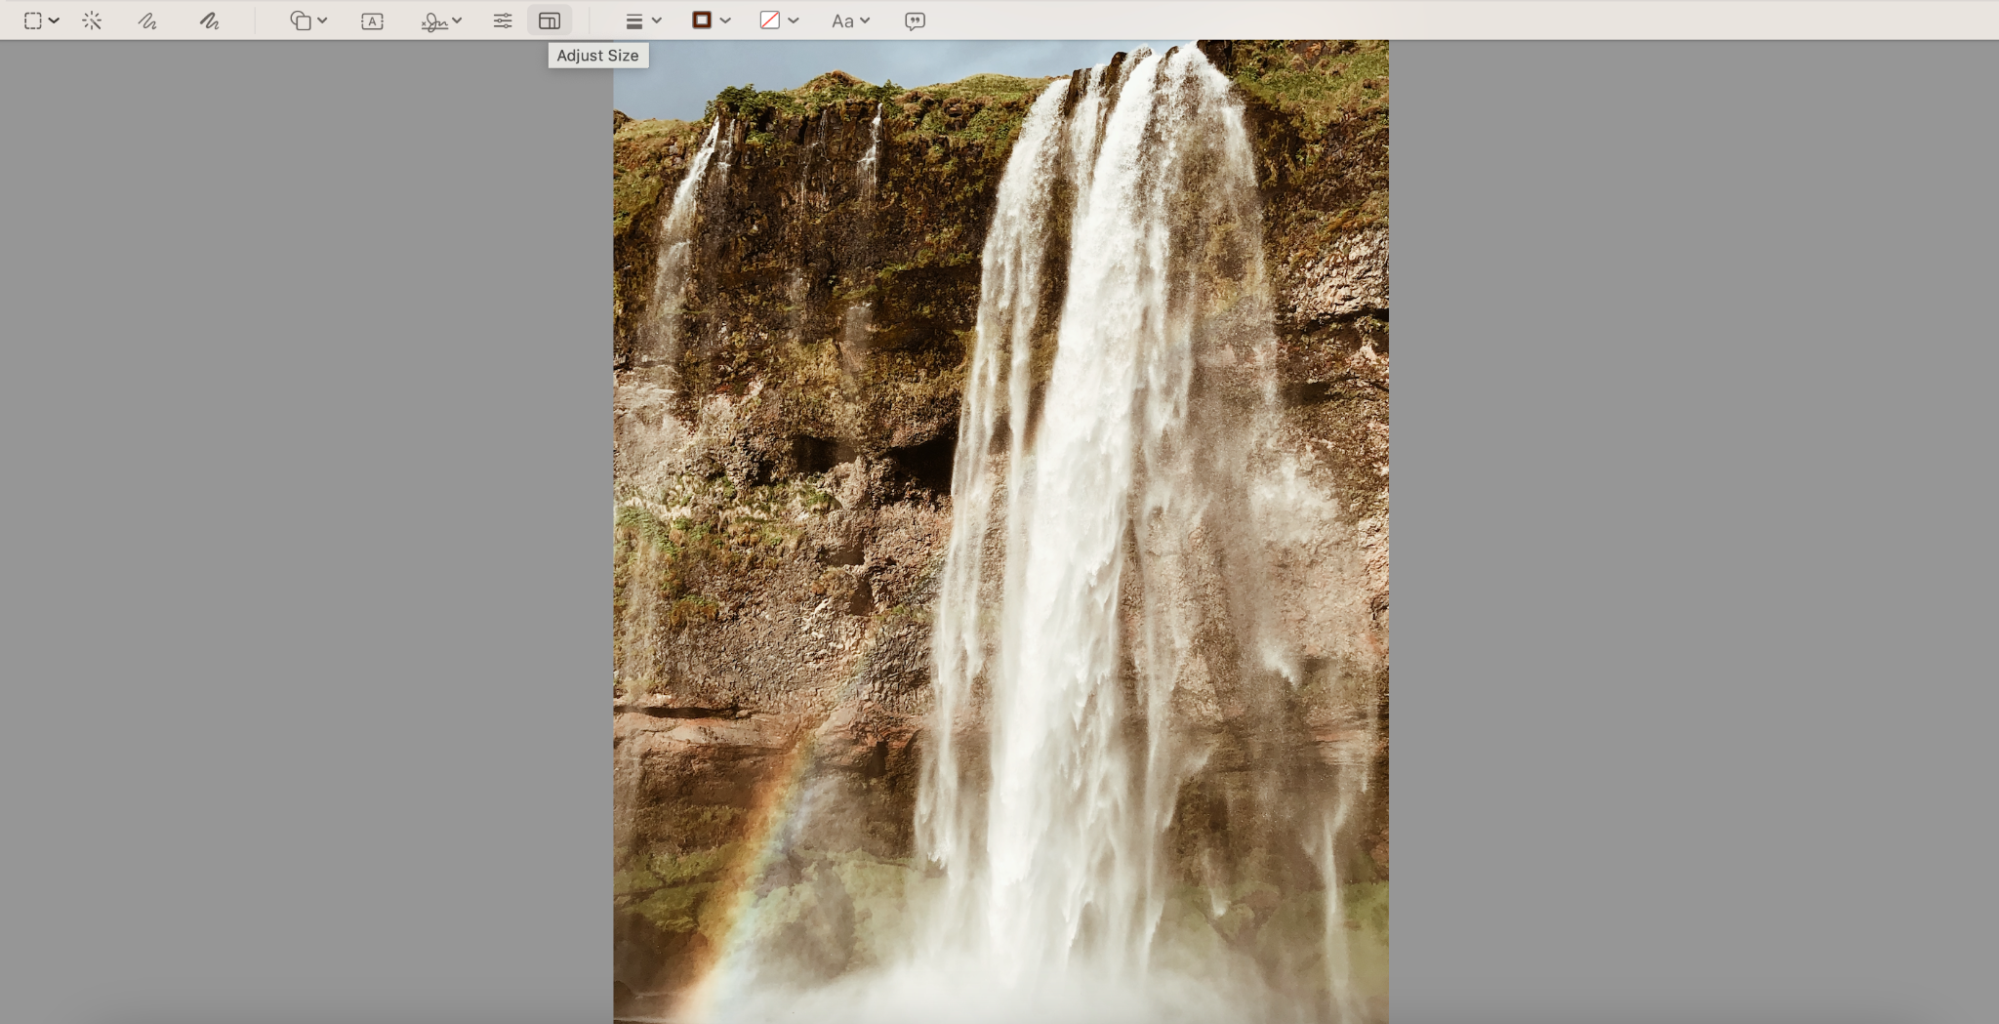
- Access Adjust Size by going to Show Markup Toolbar > Adjust Size.
- Expand the dropdown menu next to Width and Height to choose your preferred metric. You can select inches, mm, points, and various others.
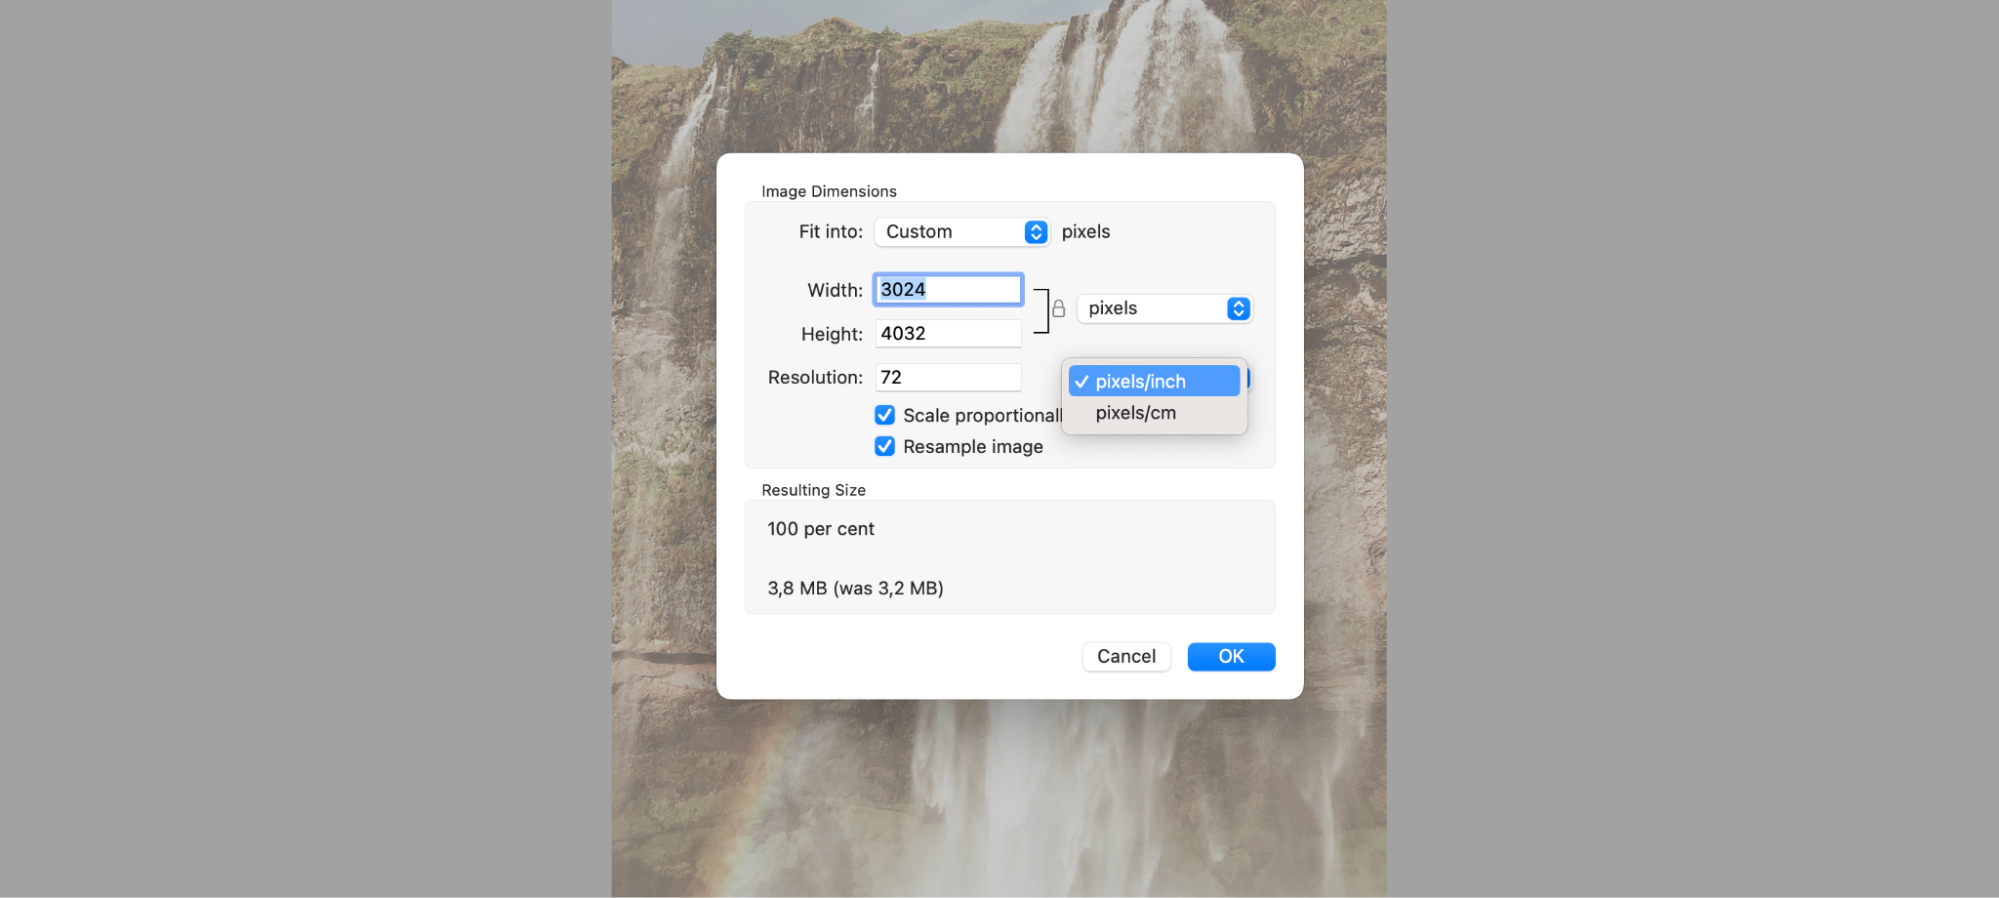
- Choose whether you want pixels/cm or pixels/inch from the dropdown menu next to Resolution.
- If you’d rather pick from a preset range of pixels, expand the dropdown menu next to the Fit into: box.
- After customizing your settings, click on the OK button, and the changes will come into effect.
Adjust Color
Knowing how to edit a picture on Mac will make it much easier to make the alterations you need and share your visuals elsewhere. Perhaps the most useful feature in Preview is Adjust Color, which also lets you tweak the lighting.
Access the Adjust Color tool by going to Show Markup Toolbar > Adjust Color, which is the icon with sliders next to the signature option.
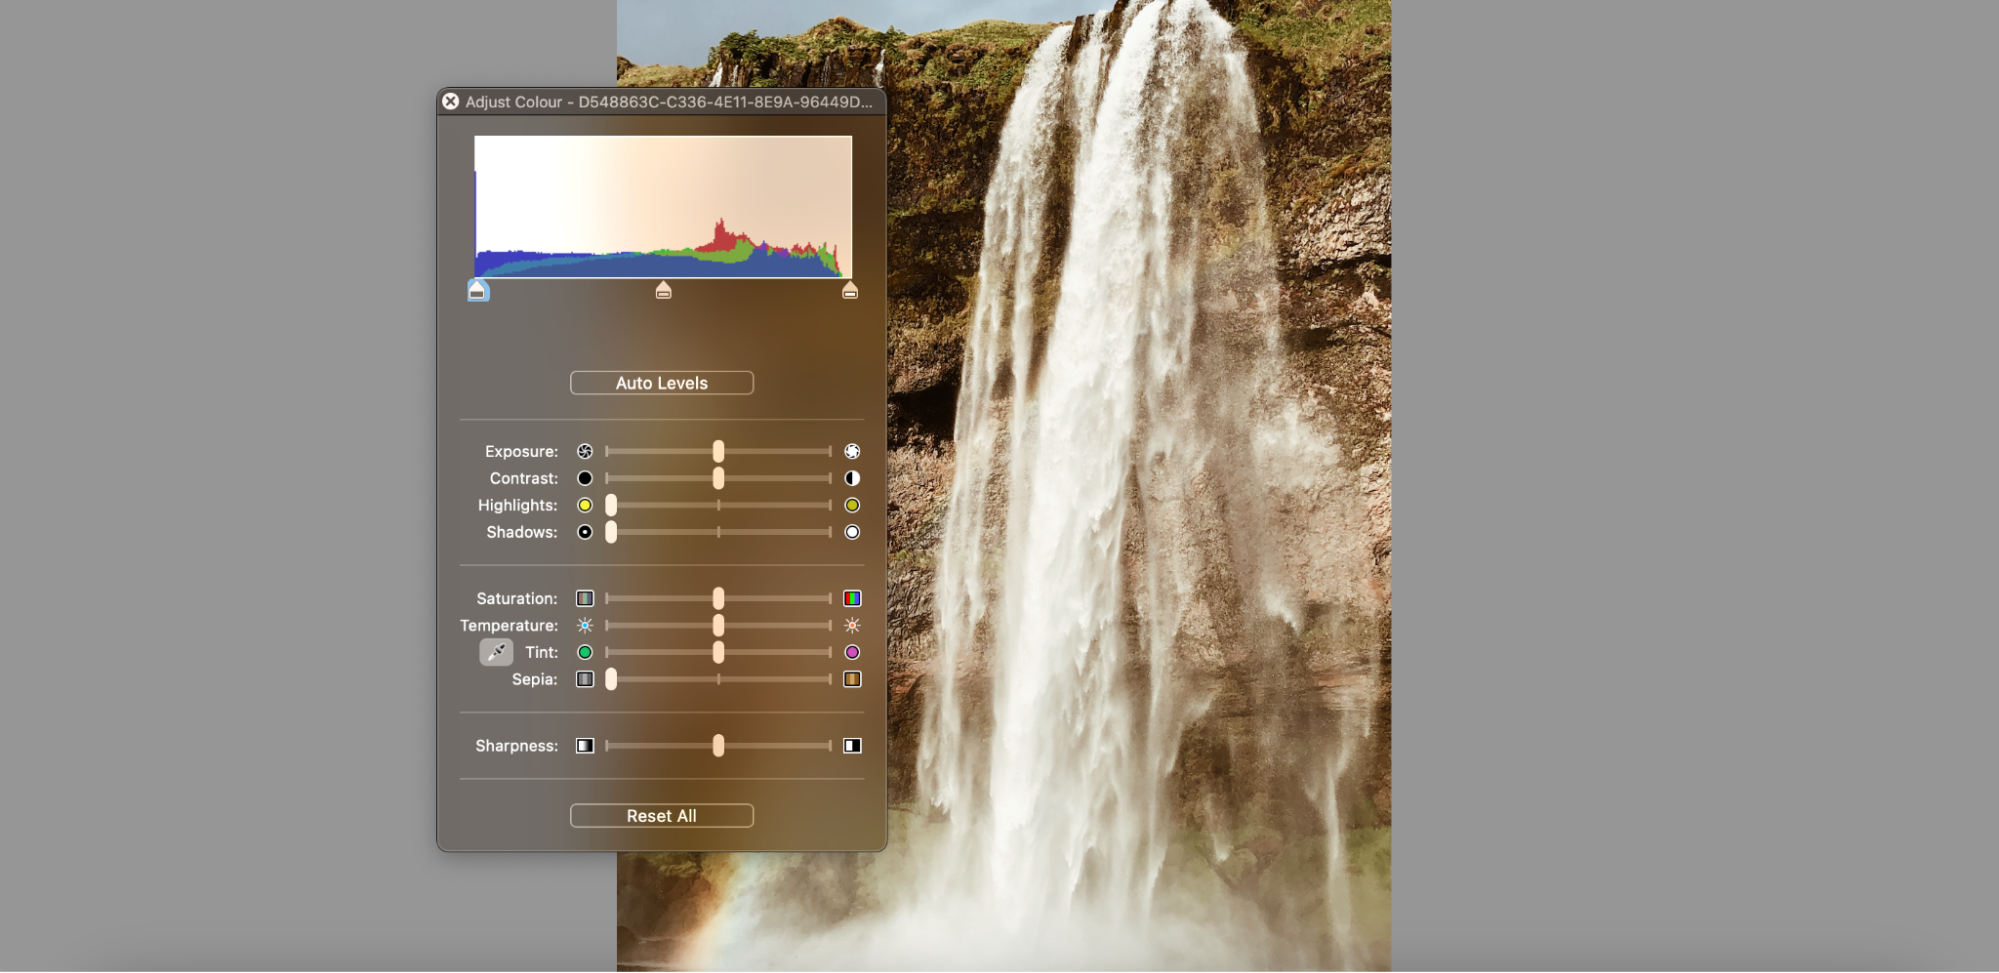
You’ll then see numerous sliders for editing your picture. Below is a run through of each of them. For each tool with sliders, moving these to the left will decrease the impact on your picture. On the flip side, sliding to the right will increase what you see.
- Auto levels: They automatically adjust the lighting and color to whatever the Preview app deems appropriate.
- Exposure: It changes the overall lighting levels in your picture.
- Contrast: Adjusts the difference in brightness and darkness between various parts of your photo.
- Highlights: Changes the lighting in your highlights, which could be sky, hair, and other objects.
- Shadows: Increases or decreases the darkness in areas of your image considered to be shadows.
- Saturation: Adds or removes color from your entire picture.
- Temperature: Makes your image look warmer or cooler, depending on whether you slide right or left.
- Tint: Increases the green or magenta look in your image.
- Sepia: Moving this slider to the right adds more of a sepia tone to your photo, whereas doing the opposite will remove more of those colors.
- Sharpness: Changes how strong the details in your image are.
If you aren’t happy with the changes you make, you can either press Reset All or move the sliders back to the middle.
Free Paint alternatives for your Mac
While Preview is the closest you’ll get to using Paint on Mac, it’s not your only choice. You can also pick a couple of excellent alternatives online.
- GIMP: Open-source editing software.
- Paintbrush: The original MS Paint equivalent for Mac
Let’s now check out both programs.
1. GIMP
GIMP is arguably the most famous open-source photo editing platform on the internet. It’s entirely free to use and has been a core part of the photography and graphic design community since its inception in 1998.
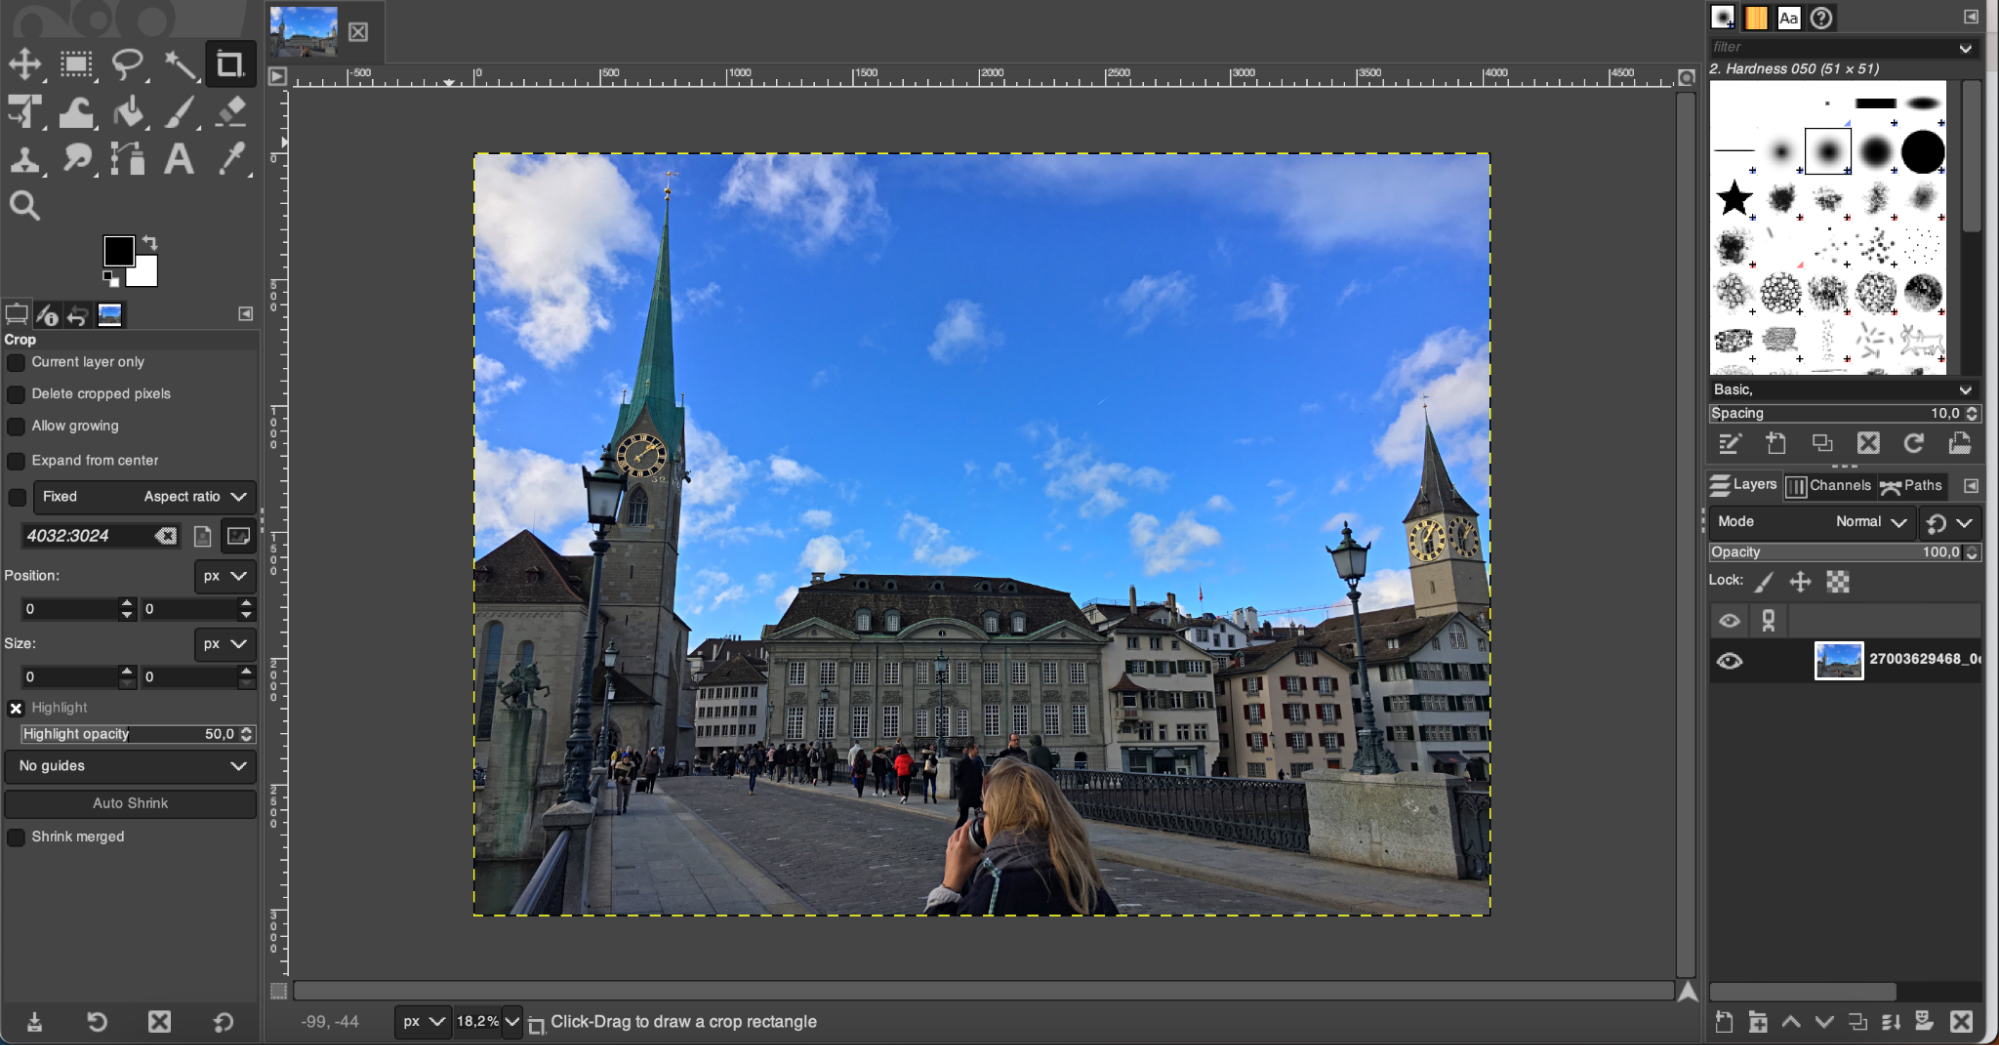
For users who don’t want to pay for a Photoshop subscription, GIMP is about as close as you’ll get to Adobe’s high-end design and editing platform. You can use layers to ensure that you don’t destroy parts of your image, along with a lasso tool to drag parts of your picture. Cropping your photos for blog posts, social media, and YouTube thumbnails is also straightforward.
Here’s a list of GIMPs core features:
- Lasso: Select parts of the picture that you’d like to delete or remove.
- Layers: Create multiple layers to give your editing workflow more structure and ensure that previous edits aren’t overwritten.
- Cropping: Choose whether you want to crop based on pixels, inches, and numerous other metrics.
- Clone: Stamp parts of the picture that you’d like to feature in other areas, such as objects and dots.
- Color balance: Adjust the balance between yellow/blue, green/magenta, and cyan/red in the highlights, shadows, and midtones.
Pros | Cons |
| Lots of advanced image editing tools available | The software interface can be tricky to navigate initially |
| Free to use | |
| Open-source | |
| Available on Intel and Silicon Macs |
2. Paintbrush
Paintbrush has a simplistic design that’s very similar to MS Paint, making it an excellent option if you’re a complete beginner to image editing or illustration.
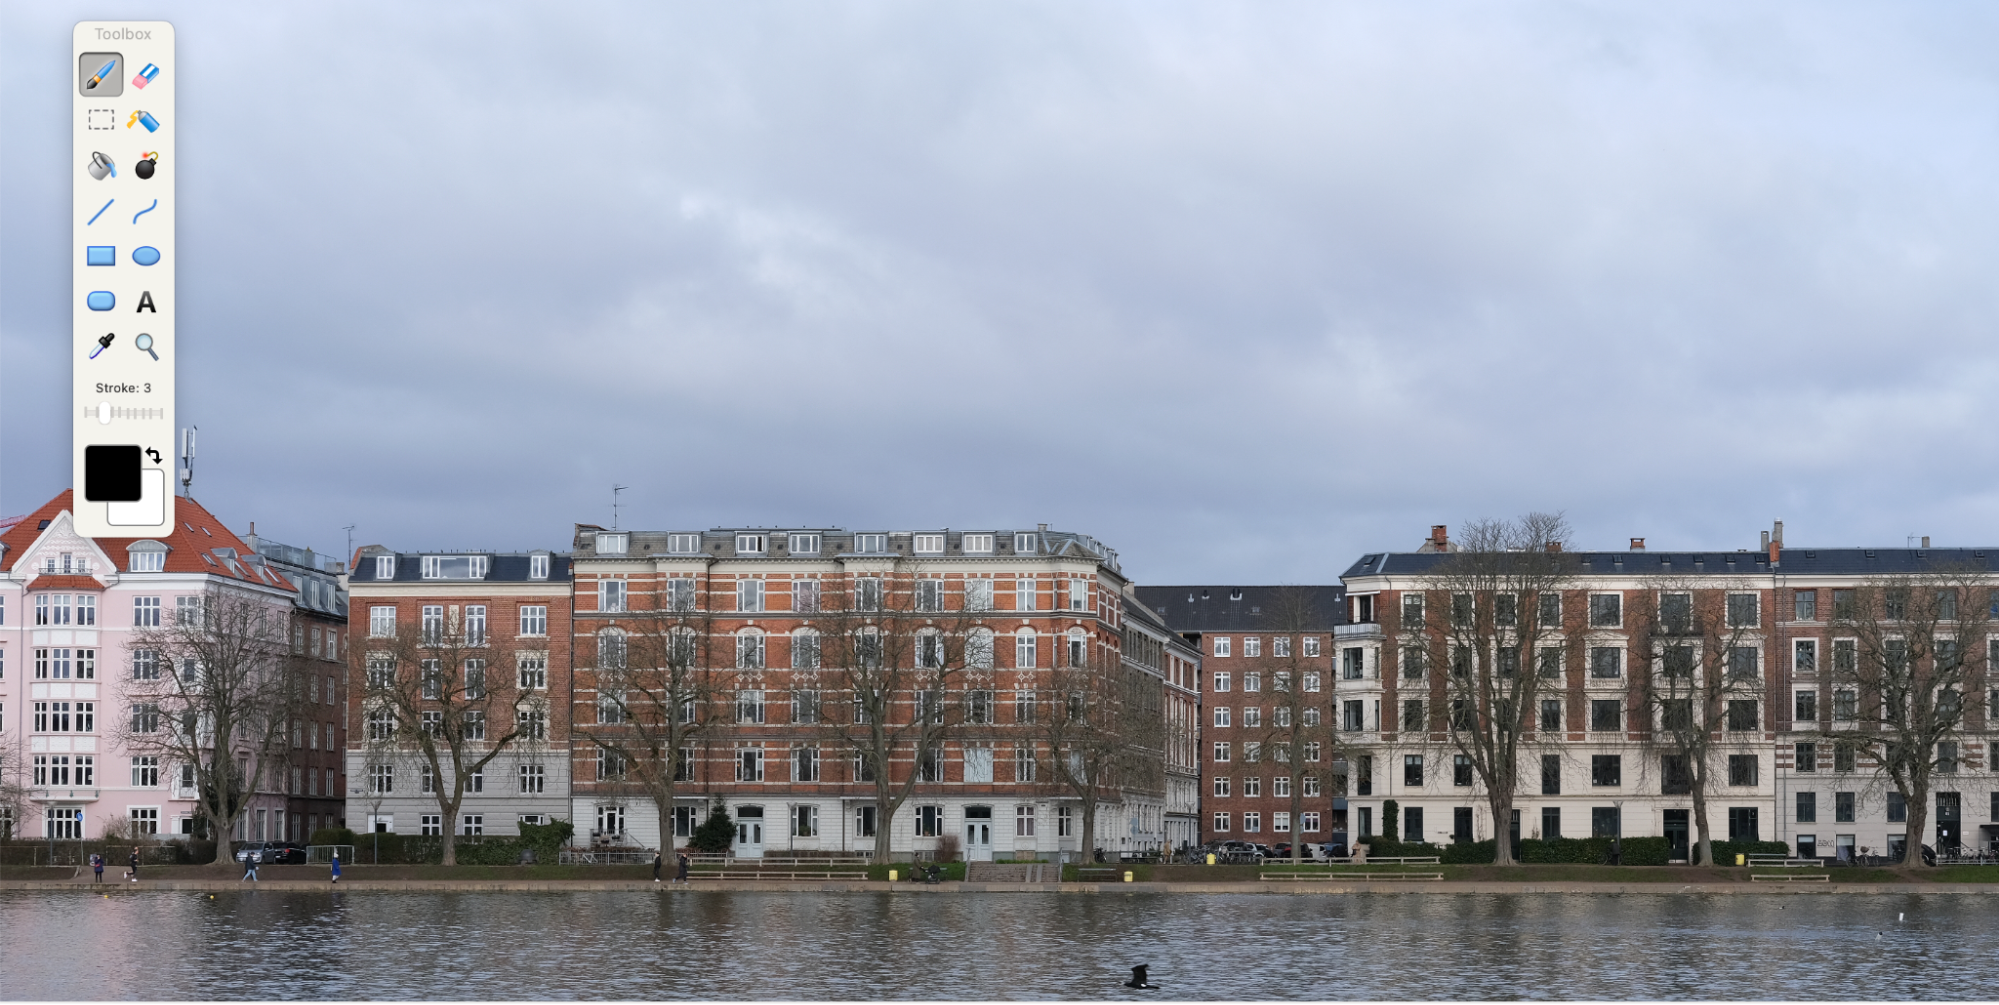
When using Paintbrush, you have access to drawing and text typing tools. Plus, you can add fill within certain sections of your image or drawing. One thing to keep in mind, however, is that you don’t have a suite of editing tools as advanced as GIMP.
Here are some of the main tools you can use in Paintbrush:
- Text: Add sentences, words, and paragraphs wherever you need to.
- Eraser: Remove edits that you no longer want, along with areas in your image that you don’t want to use.
- Draw: You can draw freehand wherever you want on your canvas.
- Shapes: Add ovals, circles, and rectangles to your creation.
Pros | Cons |
| Free | Too simplistic for advanced editing |
| User-friendly | Images can show up way too big on your screen when you first upload them |
| Basic tools are available |
No Apple Paint application? No problem
Microsoft Paint was an incredibly useful tool for Windows computers, and it’s understandable if you want to enjoy the platform on your Mac as well. While it’s unfortunately not available on Apple computers, Preview performs many of the functions you’ll ever need to edit your pictures. Also, You can, of course, use some of the alternatives to Paint software on Mac—such as GIMP and Paintbrush.
In addition to MS Paint not being available on Apple computers, you also don’t have access to Notebook++. Thankfully, however, a Notepad++ alternative for Mac exists.
In situations where you’ve edited or downloaded a lot of files, our team suggests you keep your Mac organized with MacKeeper’s Duplicates Finder.


