In this article you will find the following:
To remove purgeable space on macOS Mojave at once, follow these steps:
- Click the Apple icon in the top left corner of your screen.
- Select Restart from the drop-down menu.
- Your Mac will restart now, and temporary purgeable files will be removed.
When checking how much storage you’ve used on your Mac, it’s easy to get confused by what exactly is meant by purgeable space. It’s an ambiguous term, making it unclear how much space you have left on your device. Fortunately, we’ve got you covered at MacKeeper, and in this guide, we’ll help you understand what purgeable space is on macOS Mojave and how to free up disk space on Mac.
Before we start:
Though we’ll go in-depth in this guide on how you can manually free up purgeable space, some steps can be quite confusing and difficult to carry out—even for advanced Mac users. To save you time and trouble, the easiest and fastest way to remove purgeable space is by using dedicated software such as MacKeeper. It includes a Safe Cleanup feature, allowing you to delete useless cache files in just a few clicks.
Find out how to use MacKeeper’s Safe Cleanup feature below:
- Download and install MacKeeper.
- Select Safe Cleanup from the menu on the left-hand side.
- Ensure the Caches box is ticked, then click Clean Junk Files.
- Wait a moment, and MacKeeper will remove the purgeable files from your Mac.
All you need to know about purgeable space on Mac Mojave
Purgeable space is a term used by Apple to identify temporary and nonessential files which will be automatically deleted, should your disk space get too full. Typically, purgeable files are made up of cache files.
How to check purgeable files on Mac Mojave
To check purgeable files on macOS Mojave using Disk Utility, follow the steps below:
- To open Spotlight Search, press command + spacebar at the same time.
- Then, type Disk Utility into the search bar, and hit Enter.
- Select your main disk drive from the side menu.
- To find out how much space is purgeable, look to the Available section, and it’ll be listed in brackets.
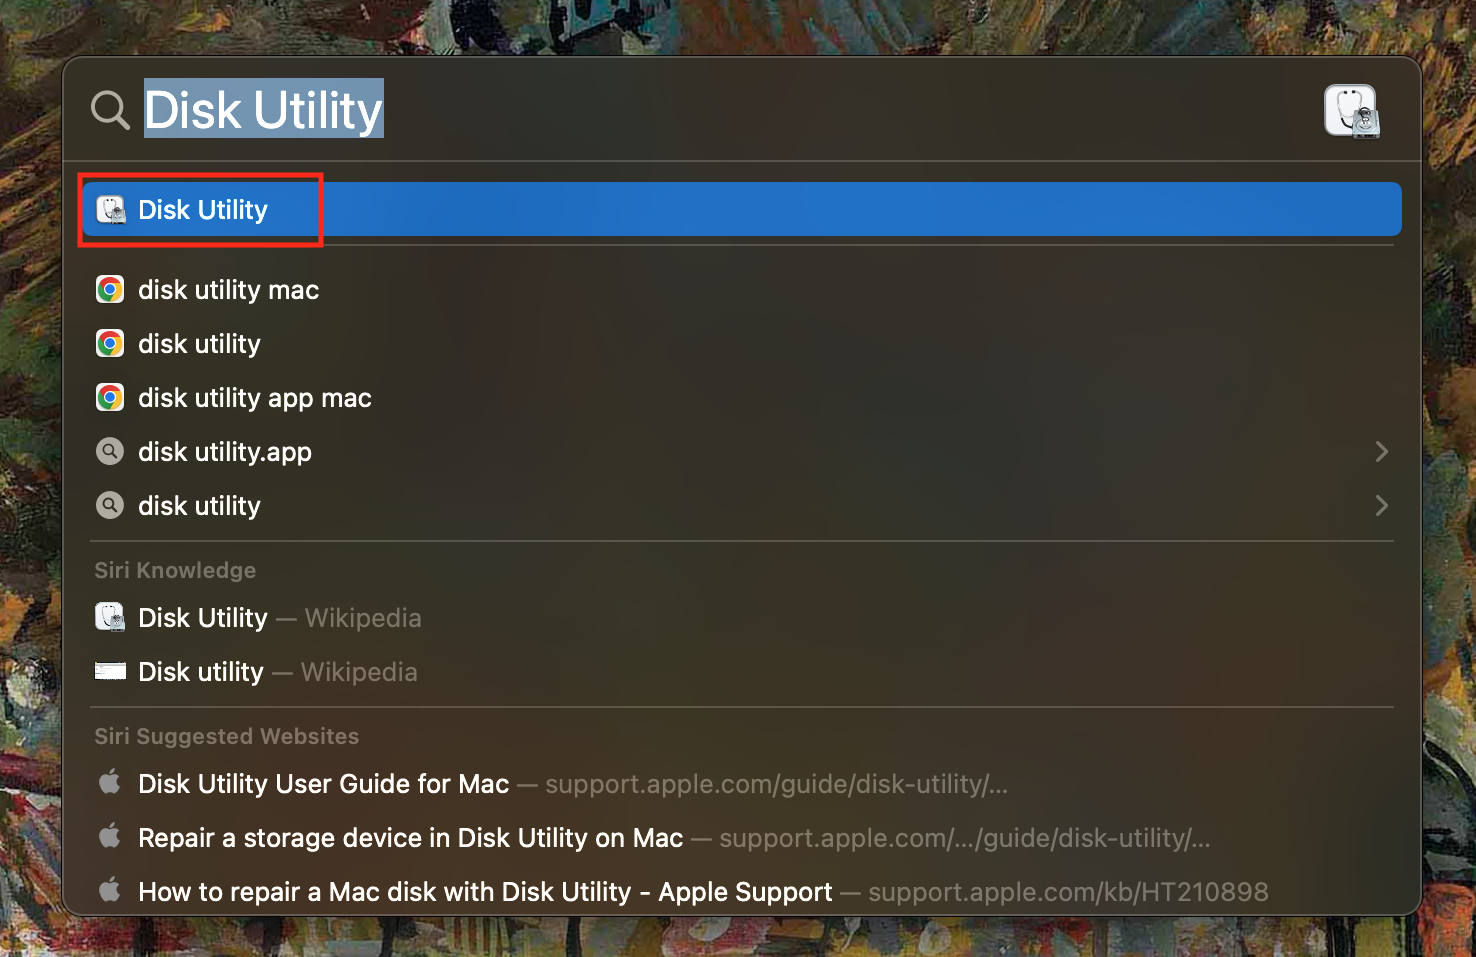
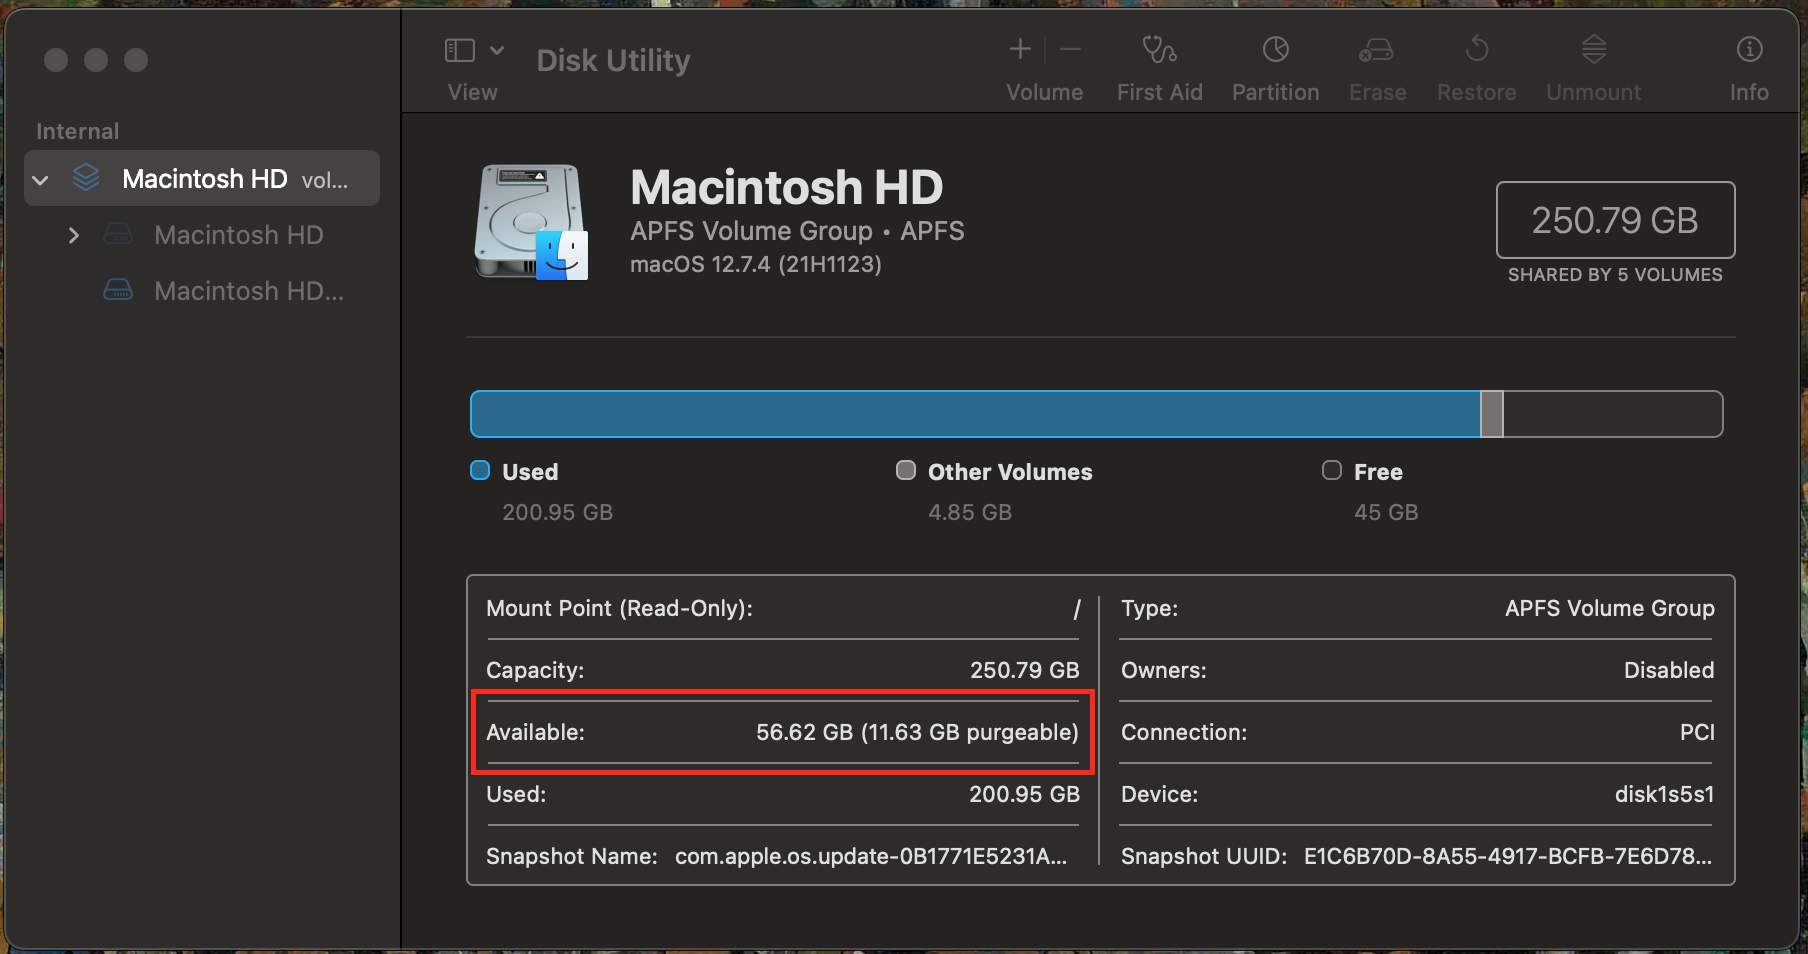
As you can see, it’s easy to find how much disk space is purgeable on macOS Mojave by using Disk Utility.
Hint from our team:
Apple has a tendency to be quite vague on purgeable space, and what exactly it is. This can be frustrating, as purgeable space doesn’t show up inside the About this Mac menu, and to check it, you’ll have to open your Mac’s built-in Disk Utility app, which is somewhat buried within macOS. To access it, you’ll need to use Spotlight Search.
Once inside Disk Utility, look at the section labeled Available in your disk summary. There, the amount of purgeable space will be stated inside some brackets.
How to remove purgeable space on your Mac Mojave
The best place to start when trying to erase purgeable space on Mac is to restart your laptop. However, though restarting your Mac is effective, there are many other ways you can free up space. One such method is to select Go in the Finder app and navigate to the Library folder. Here, you can delete cache files you don’t need.
Below are our top tricks if you want to remove purgeable space on macOS Mojave:
- Restart your Mac
- Use the Time Machine to disable local snapshots or to back up your Mac
- Empty Trash
- Clear the cache and temporary files
- Optimize your storage
- Flush your DNS cache
- Disable the Optimize Mac Storage for iCloud Drive option
1. Restart your Mac
Your MacBook will automatically generate temporary cache files for your open apps, which will be erased if and when you restart your Mac. Find out how to free up purgeable by restarting your Mac:
- Make sure you have saved any open documents before restarting.
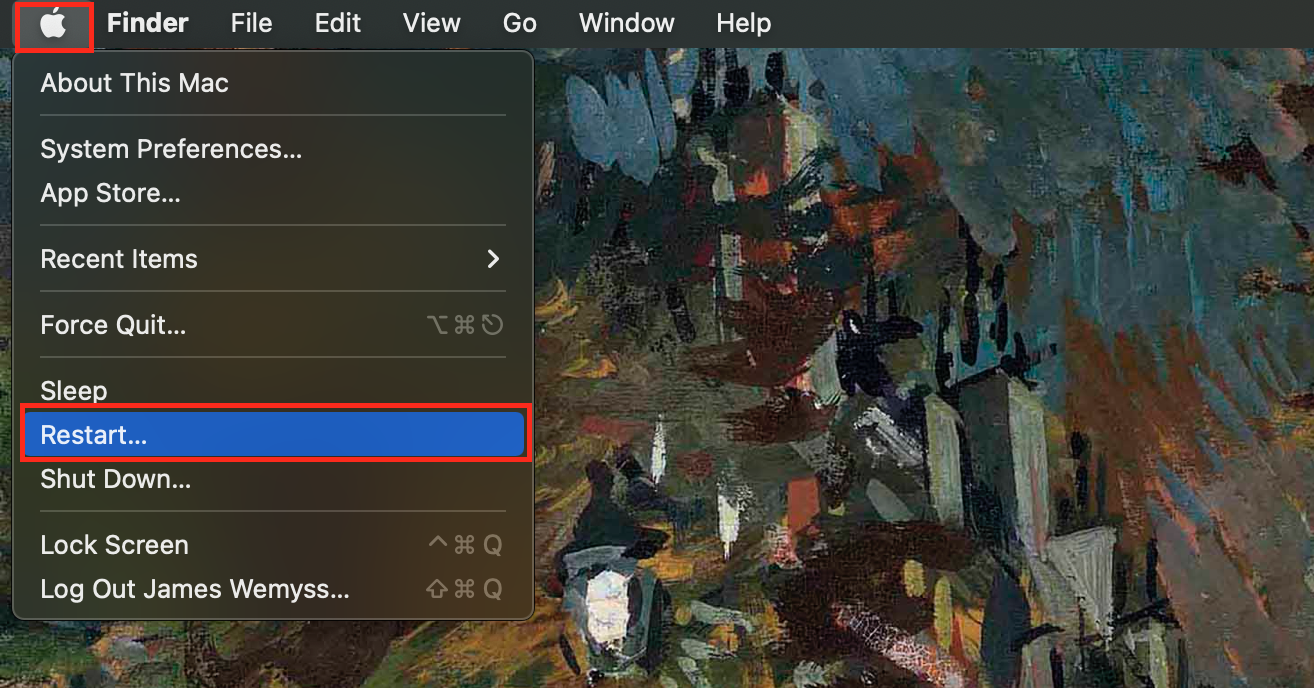
- Click the Apple logo in the top left corner of your screen.
- Select Restart from the drop-down menu.
- Wait for a couple of minutes, and your Mac will restart.
2. Use the Time Machine to disable local snapshots or to back up your Mac
To disable local snapshots on macOS Mojave, follow our instructions below:
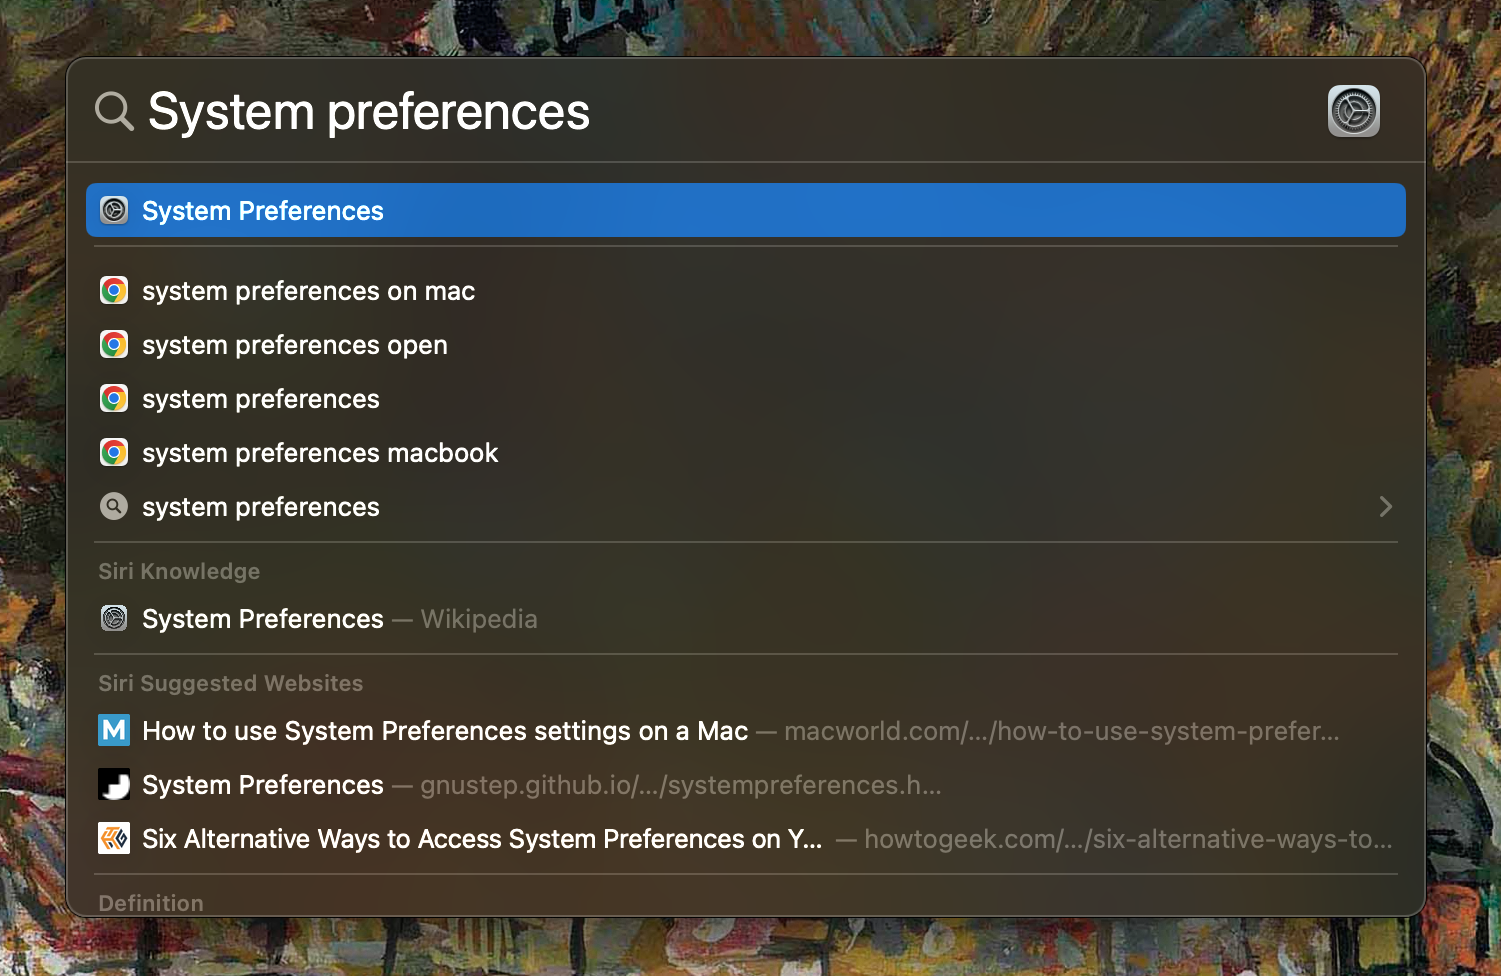
- Start by opening Spotlight Search by pressing Command + Spacebar.
- Type System Preferences into the search bar and hit Enter.
- Within the System Preferences menu, locate and click on Time Machine.
- Disable the option labeled Back Up Automatically by unchecking the corresponding box.
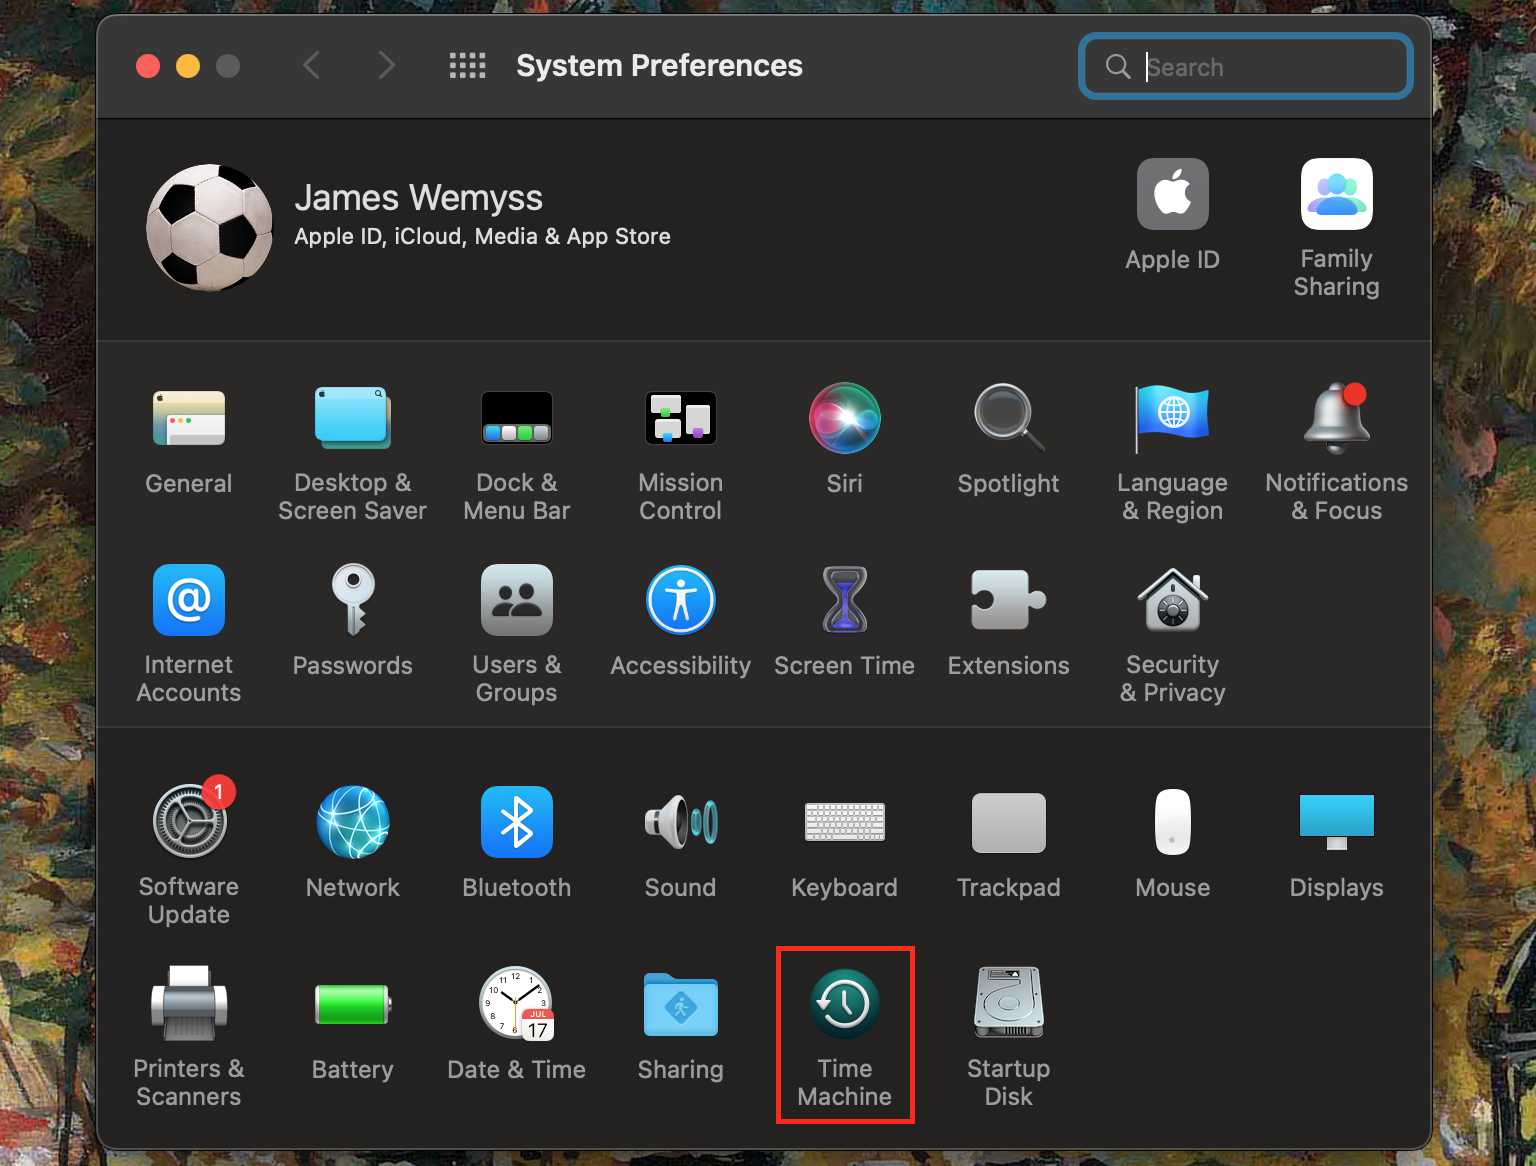
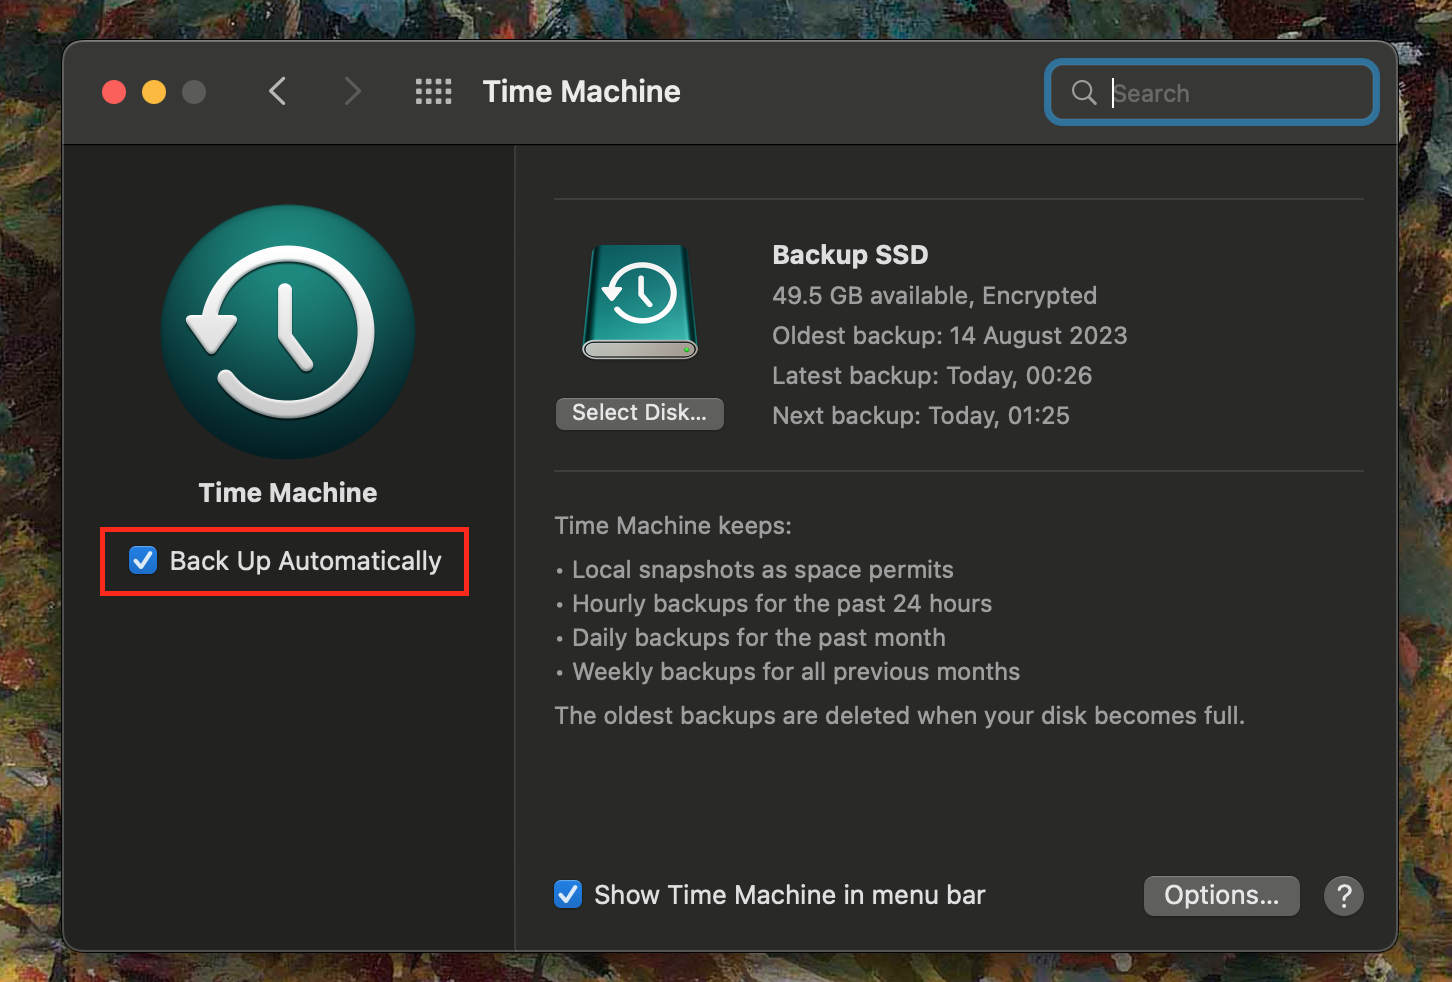
Using Time Machine is a great way to protect important files should there be a software or hardware issue with your MacBook Pro. The safest way to use it is to back up your laptop to an external hard drive. But, if you’re already doing this, you’ll likely find the local snapshots feature of little use.
Local snapshots create a backup of your system automatically each hour, meaning you’ll always have a safe state to restore in case anything goes wrong. However, these snapshots slowly build up over time, contributing to your purgeable space.
3. Empty trash
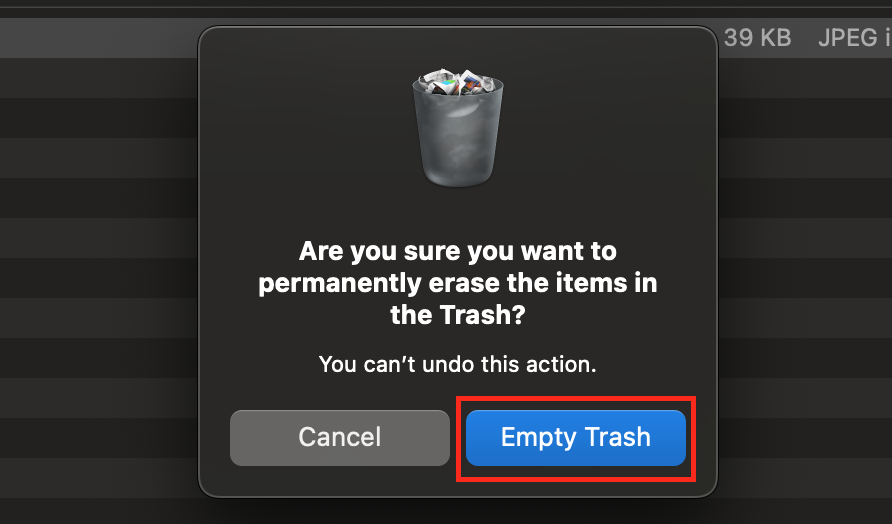
We all want to update our MacBooks to the latest software, but often we can’t install it because we lack enough free disk space for the size of macOS. So, if you need to free up purgeable space, the fastest way is to empty your Trash. Find out how to empty Trash below:
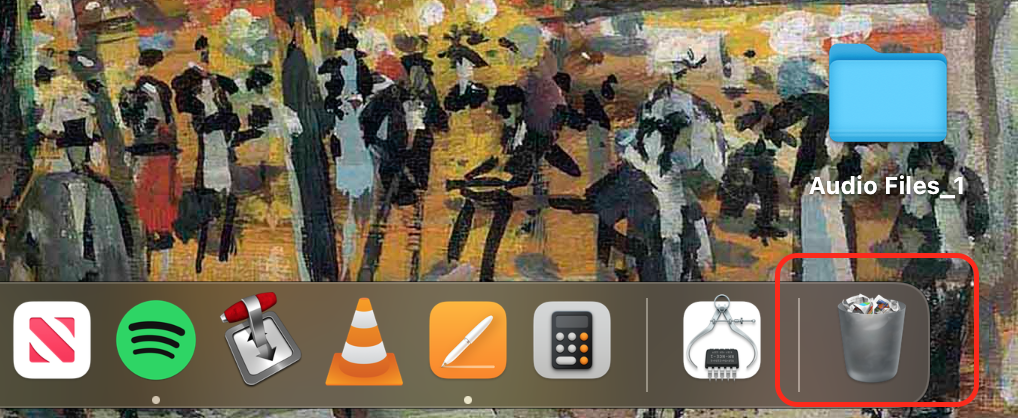
- To open your Trash, click on the Trash icon on the right-hand side of your Dock.
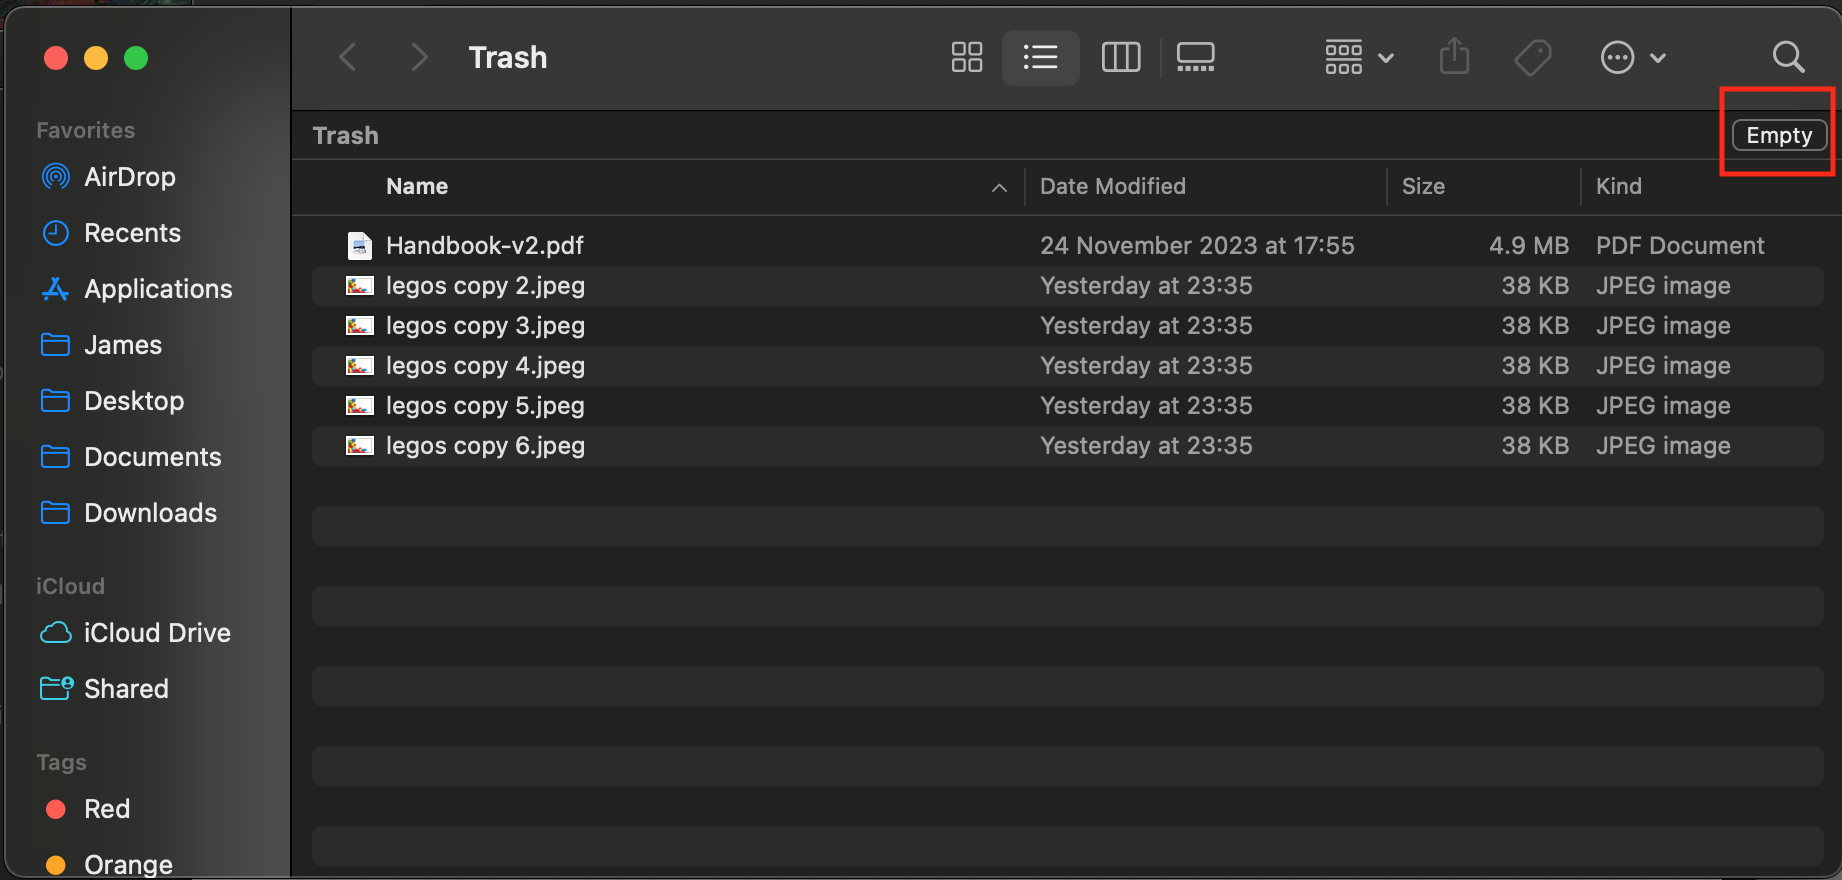
- Then click Empty Trash in the top right corner.
- Select Empty Trash from the pop-up window.
4. Clear the cache and temporary files
Macintosh computers generate caches over time, which are temporary files that enhance the performance of your apps. However, these caches can occupy significant disk space over time. To stay on top of your disk usage, we recommend you routinely clear your cache files to save on purgeable space. To clear cache files on macOS Mojave:
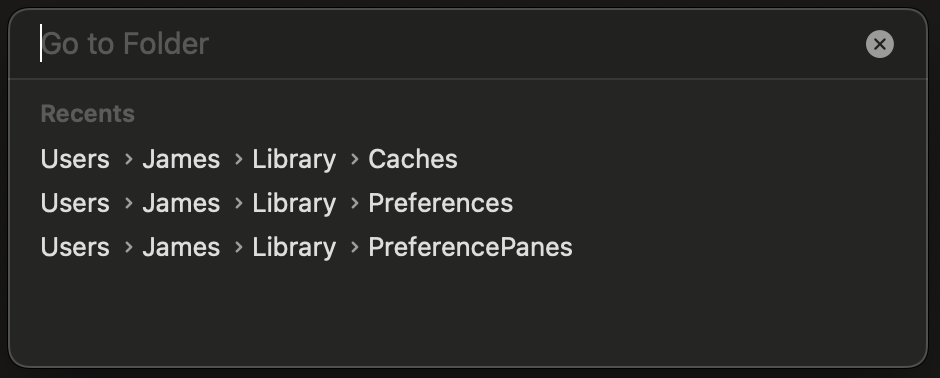
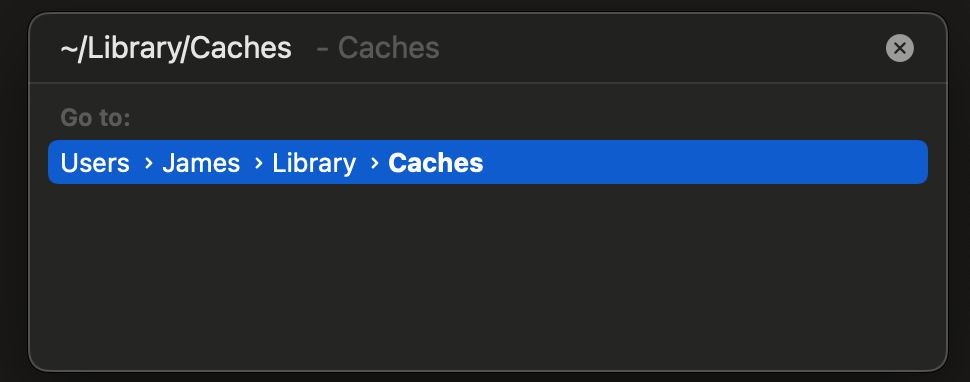
- Launch Finder and hold down Shift + Command + G. This action will prompt the Go to Folder window to appear.
- Paste the following text into the Go to Folder window: ~/Library/Caches, then click Go.
- Choose the library cache files you wish to delete and drag them into the Trash.
5. Optimize your storage
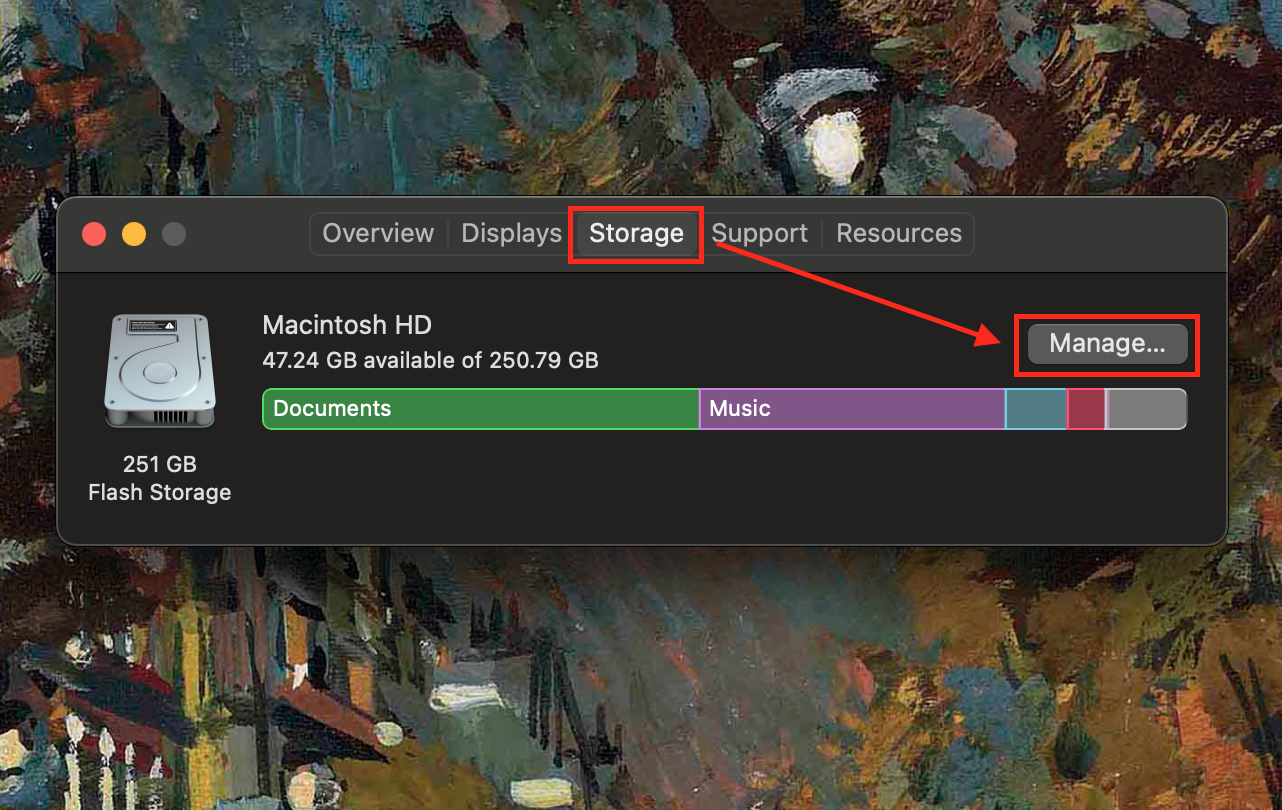
If you’re a binge-watcher, chances are you’ll have downloaded lots of TV to your Mac over the years. However, video files have a tendency to take up large amounts of space on your drive. So, if you’ve already watched them, it’s advisable to delete them using macOS Mojave’s built-in Storage Optimizer. Here’s how to remove purgeable video files using the Storage Optimizer:
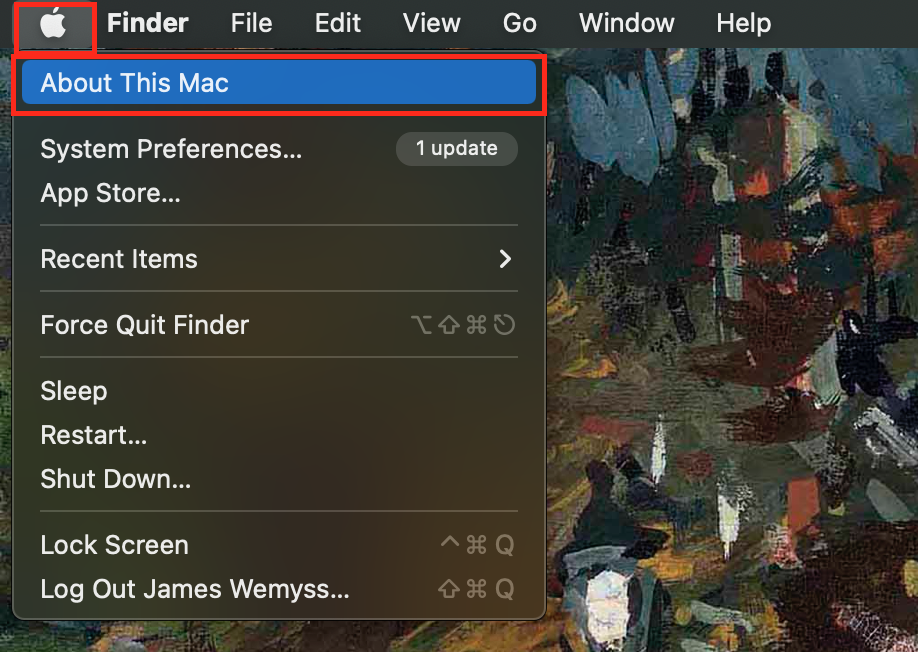
- Click the Apple icon located in the top left corner of your display.
- Choose About this Mac from the dropdown menu.
- Navigate to the Storage section, then hit Manage.
- Within the Recommendations tab, select Optimize to delete video files you’ve already watched.
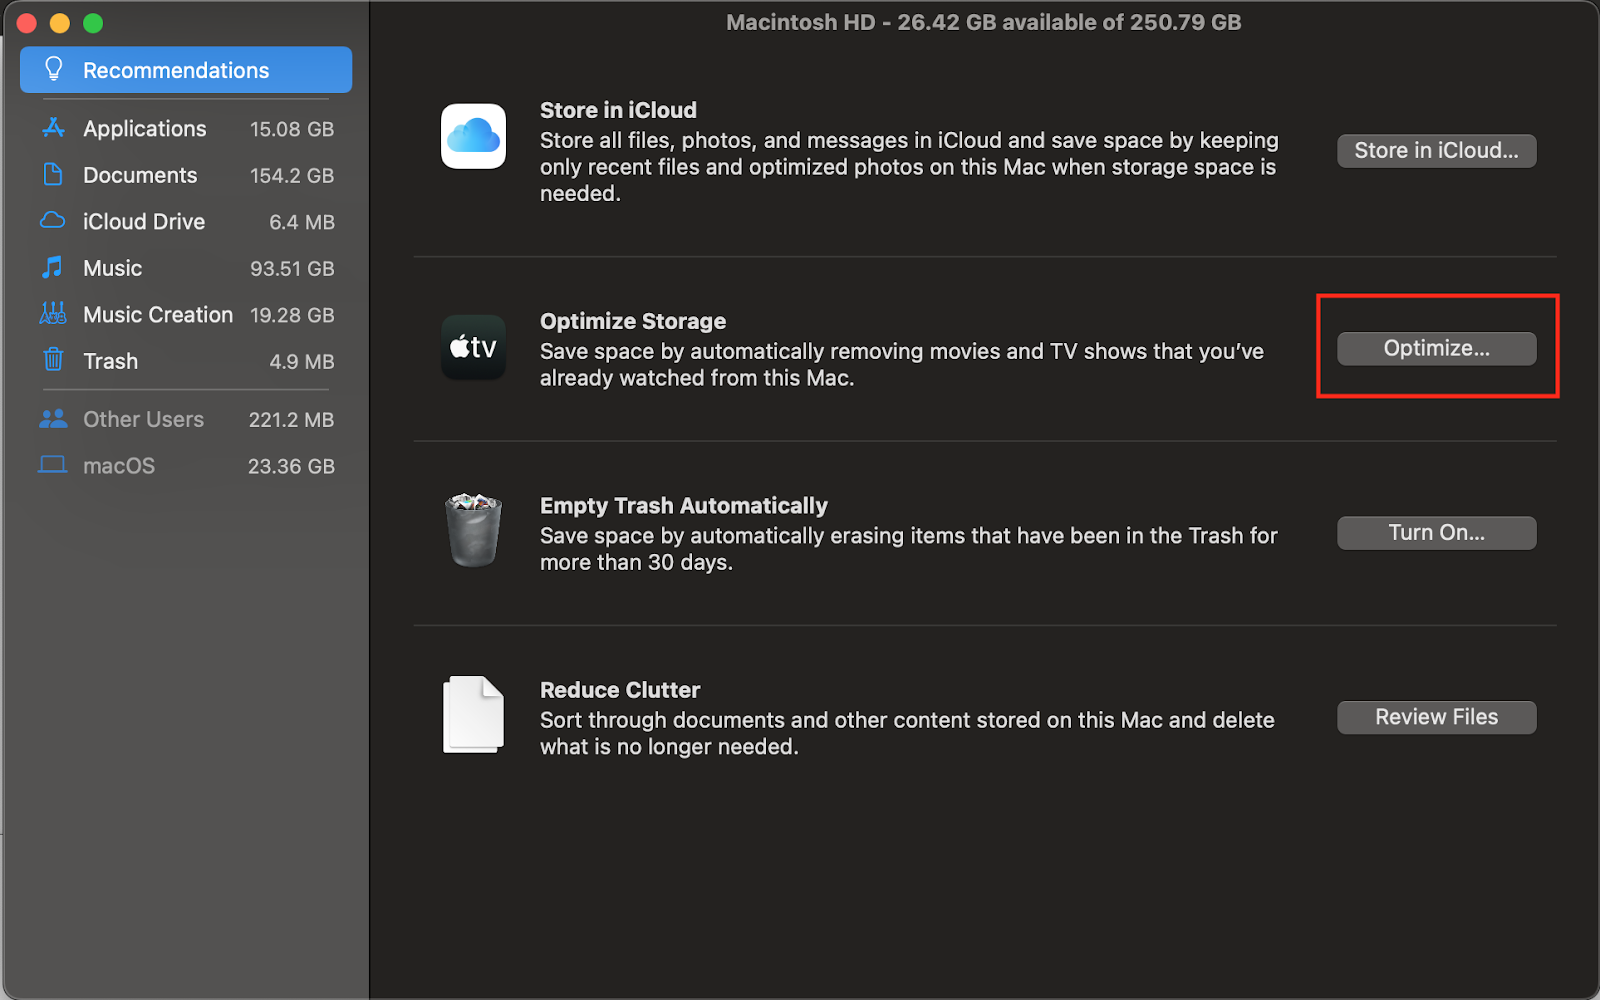
Don’t worry, you’ll still be able to re-download your shows if you want to rewatch them, but if you’re running out of space, it’s better to delete the redundant files right away.
6. Flush your DNS cache
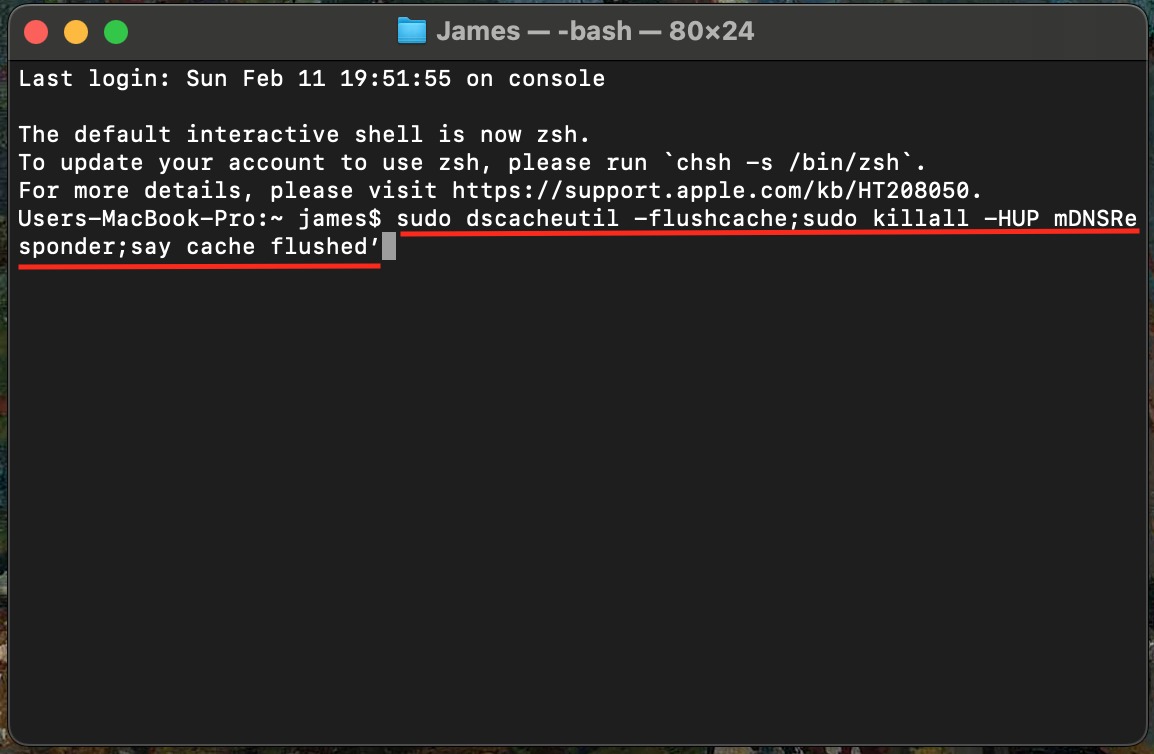
To improve how fast you can browse the web and access online services, your Mac will automatically retain records of the IP addresses you frequently visit online. The technical term for this is a DNS cache, and though it can be helpful, DNS caches contribute towards purgeable space. Here’s how you can flush your DNS cache on macOS Mojave:
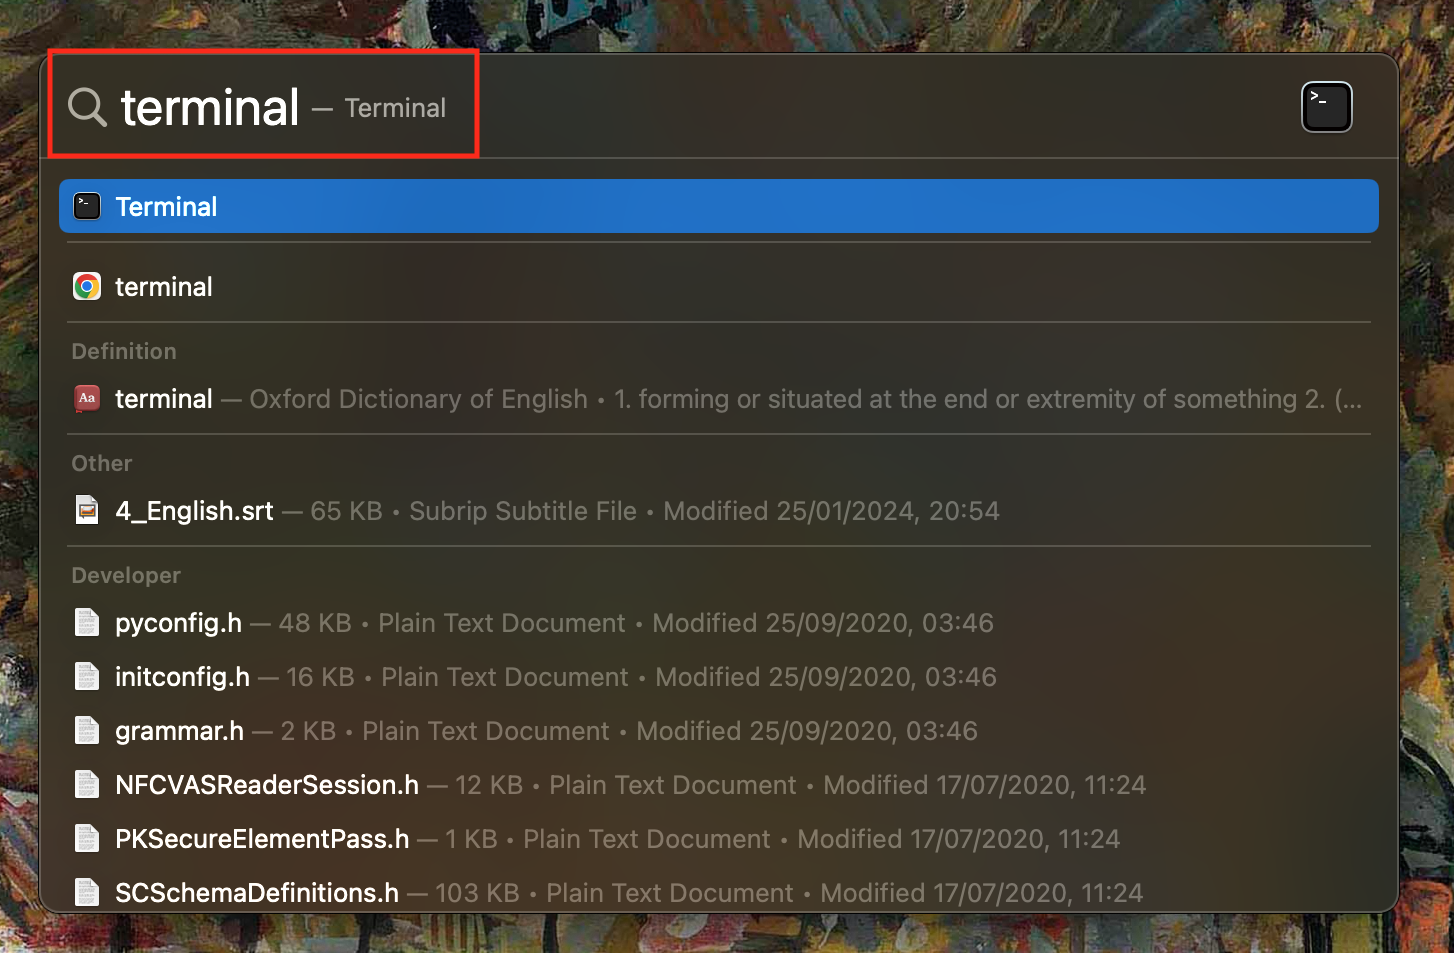
- Press command + space to open Spotlight Search.
- Type in 'Terminal' and press Enter.
- Copy and paste this text into Terminal: sudo dscacheutil -flushcache;sudo killall -HUP mDNSResponder;say cache flushed’.
- Hit Enter.
Note from our experts:
Should your device ever be hacked, DNS caches are useful for hackers to quickly find out what websites you frequently visit - meaning they know exactly where to enter any compromised passwords. So, flushing your DNS cache will not only save disk space, but will also keep you safe online.
Though flushing your DNS cache is useful to protect your Mac against hackers and phishing scams, the most effective and holistic way to protect yourself online is to use an antivirus. We recommend you use MacKeeper, which can help not only to manage purgeable space, but also to protect your Mac from viruses with its built-in Antivirus.
Moreover, MacKeeper also includes helpful privacy features. Its ID Theft Guard feature will automatically flag any of your passwords that have been compromised by hackers in data breaches, so that you can update them and stay protected online.
7. Disable the Optimize Mac Storage for iCloud Drive option
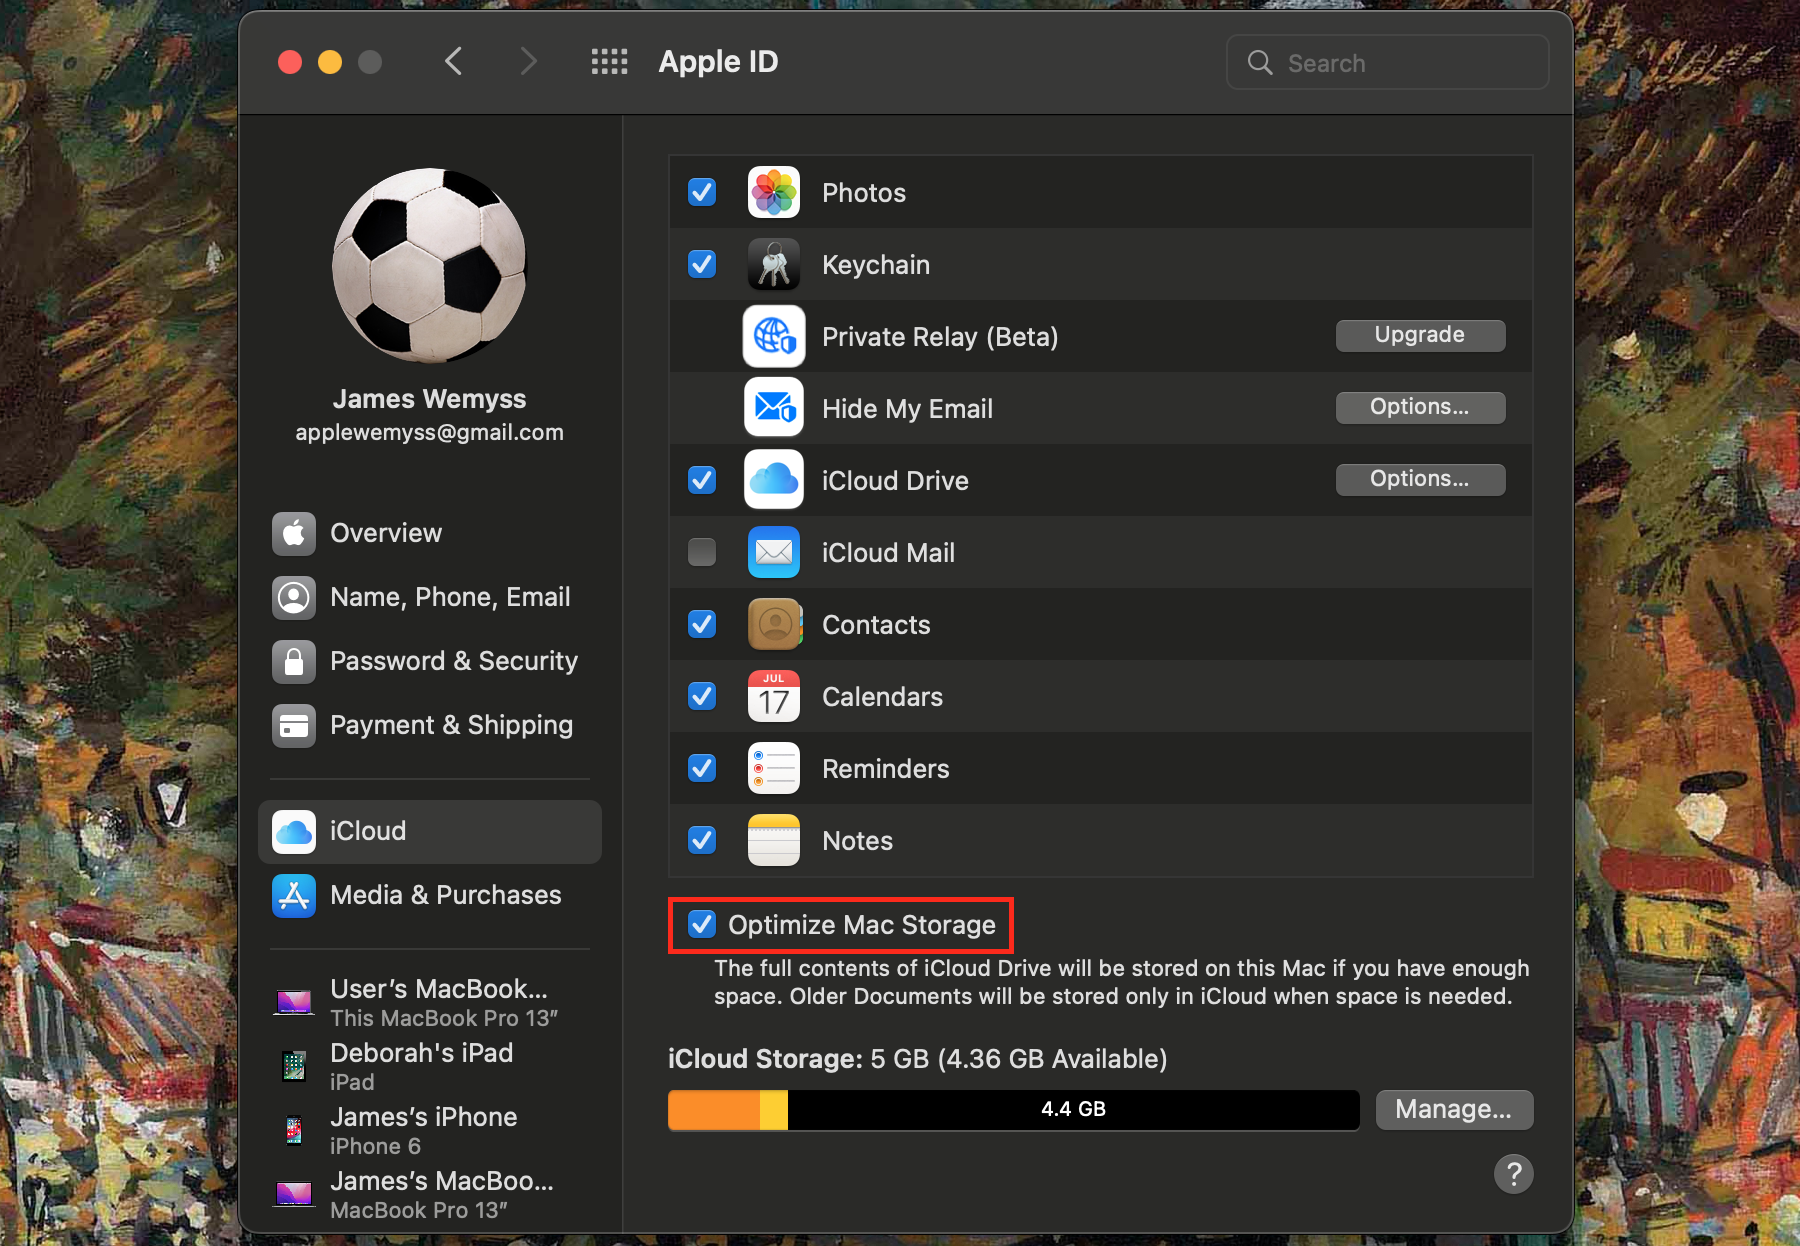
If you use iCloud Drive to back up important files, you might assume that any files stored on iCloud are automatically deleted from your device once uploaded. However, by default, your Mac stores these files, and files from your other Apple devices, locally on your MacBook’s disk drive—unless you choose to remove them manually. Should you wish to save on purgeable space by disabling Optimize Mac Storage for iCloud, follow our simple guide below:
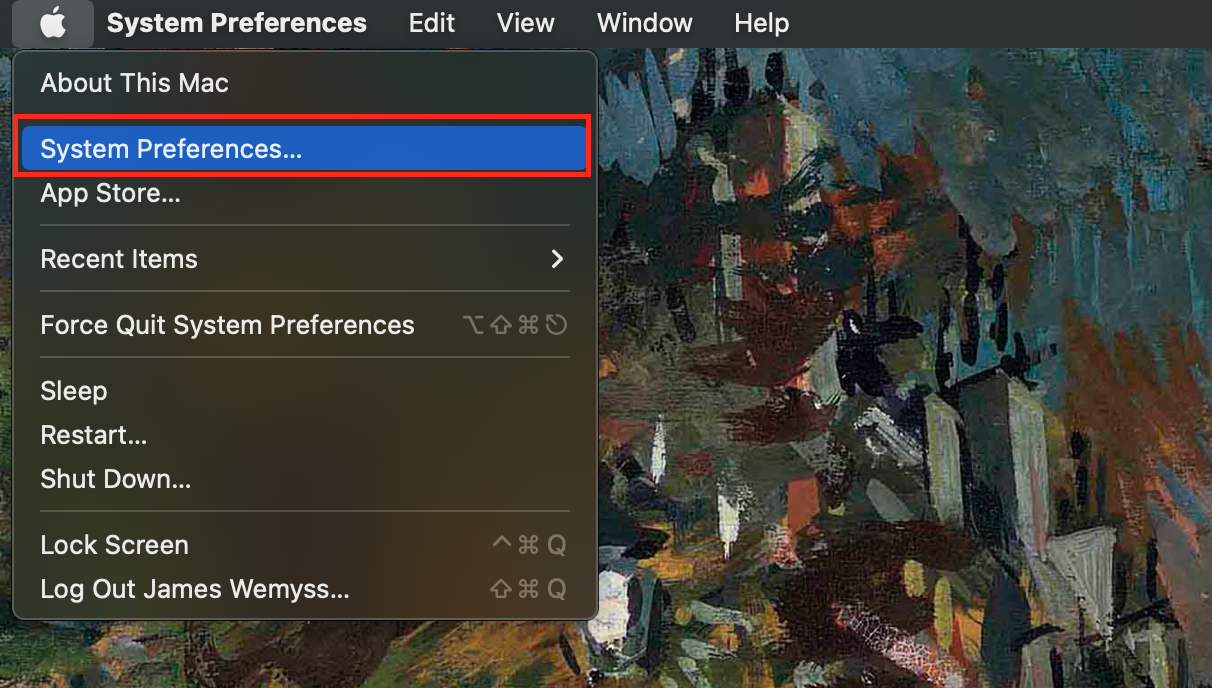
- Click the Apple icon in the top left corner of your display.
- Select System Preferences from the drop-down menu.
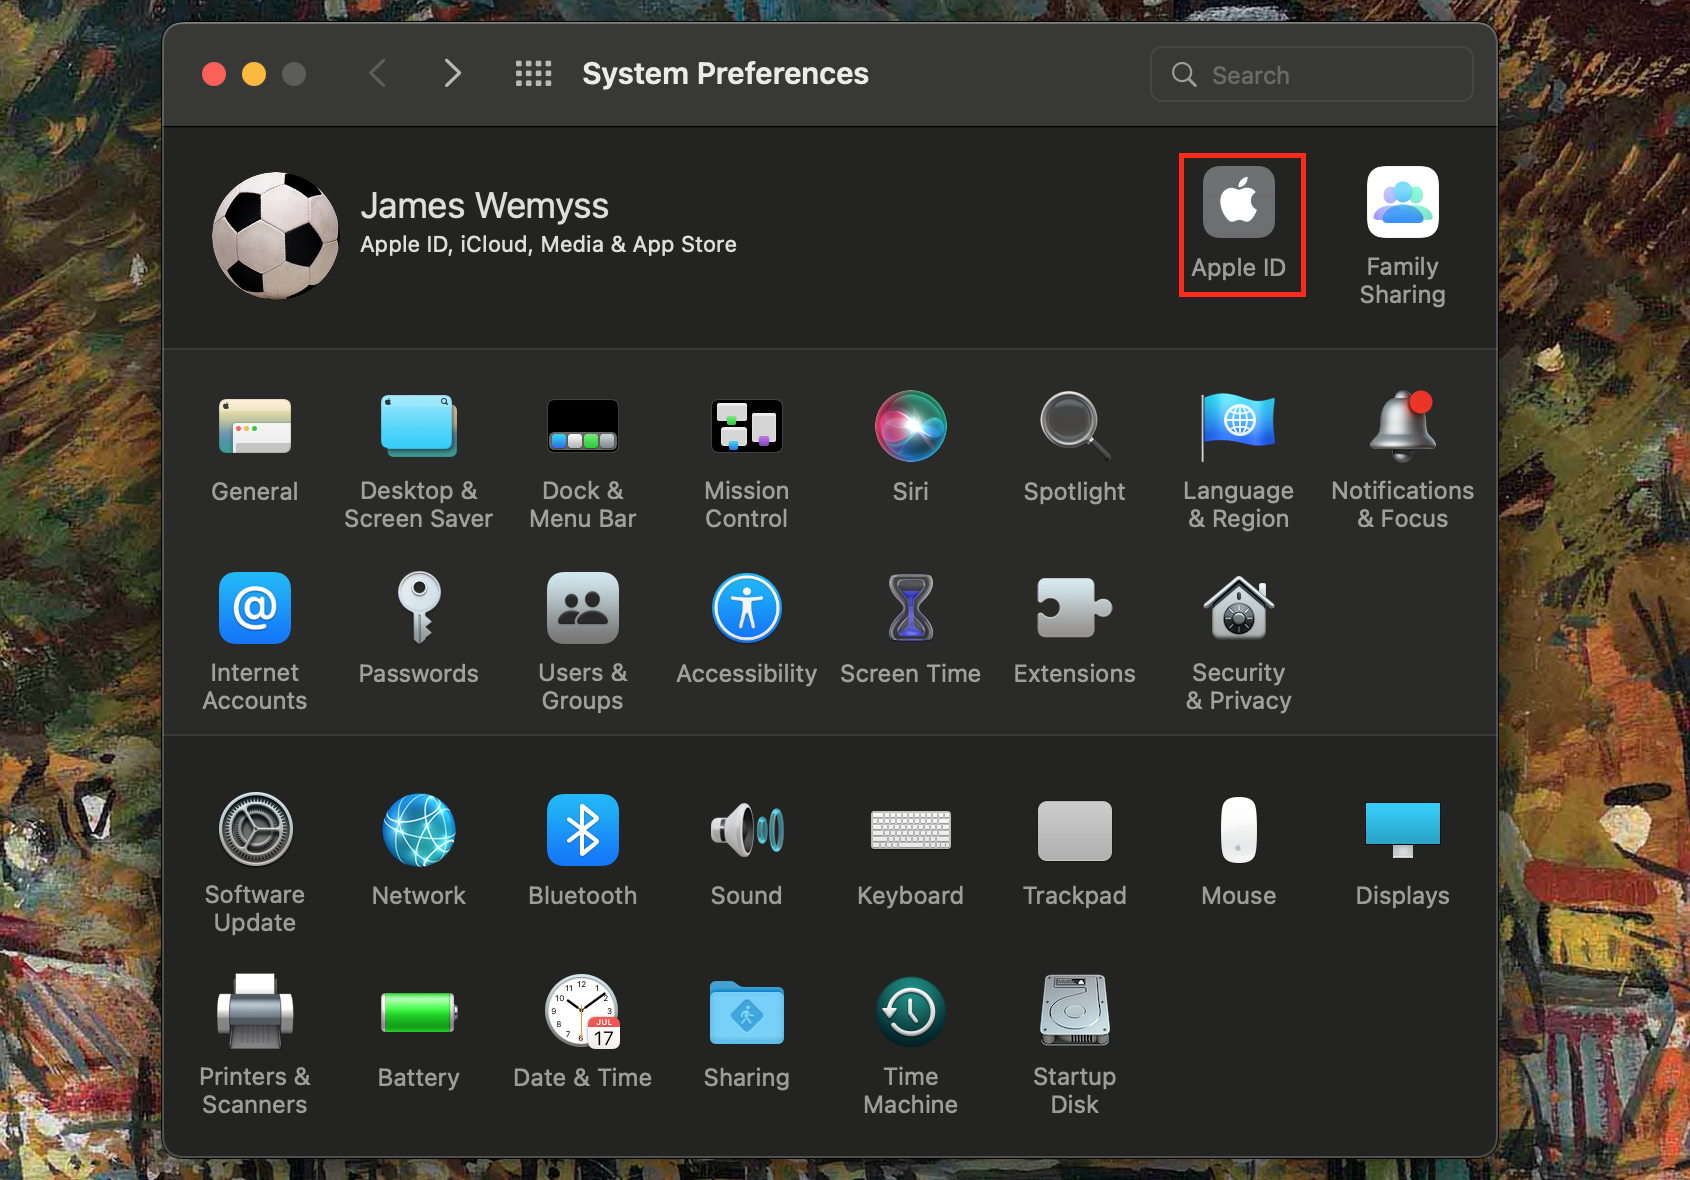
- Then, select the Apple ID icon in your settings.
- Untick the box labeled Optimize Mac Storage.
How to remove purgeable storage on macOS Mojave with Terminal
Local Snapshots are automatically generated by your Mac. They serve as a safe restore state for you should your device ever crash or undergo physical damage. However, if you back up your Mac to an external drive, they’re not really required. You can easily remove Local Snapshots using your Mac’s built-in Terminal app:
- Hit command + spacebar to open Spotlight Search.
- Type in Terminal, then press Enter.
- If you’d like to delete all of your local snapshots, simply copy and paste this command into the Terminal command (without the full stop in the end)line and press Enter: for d in $(tmutil listlocalsnapshotdates | grep "-"); do sudo tmutil deletelocalsnapshots $d; done.
- Then, Mac will ask you to enter your password to confirm you’d like to remove the snapshots. Do this, and then hit OK.
At first, Terminal can look intimidating, especially if you’ve never used it before and if you’re unfamiliar with command codes. Fortunately, we’ve got you covered to relieve you of any pain.
How to clean up purgeable space on Mac Mojave external drive
Though we’ve detailed how you can free up purgeable space on your MacBook’s disk, it’s also possible to clean up purgeable space on an external drive using macOS Mojave. Much like your internal drive, your external storage can start to get full of purgeable junk files over time, especially if you use it to back up your Mac. If you’re interested in backing up your Mac using an external drive, you will first need to learn how to format an external hard drive. In the meantime, find out how to clean up purgeable space on an external drive on macOS Mojave:
- Ensure your external drive is connected to your Mac.
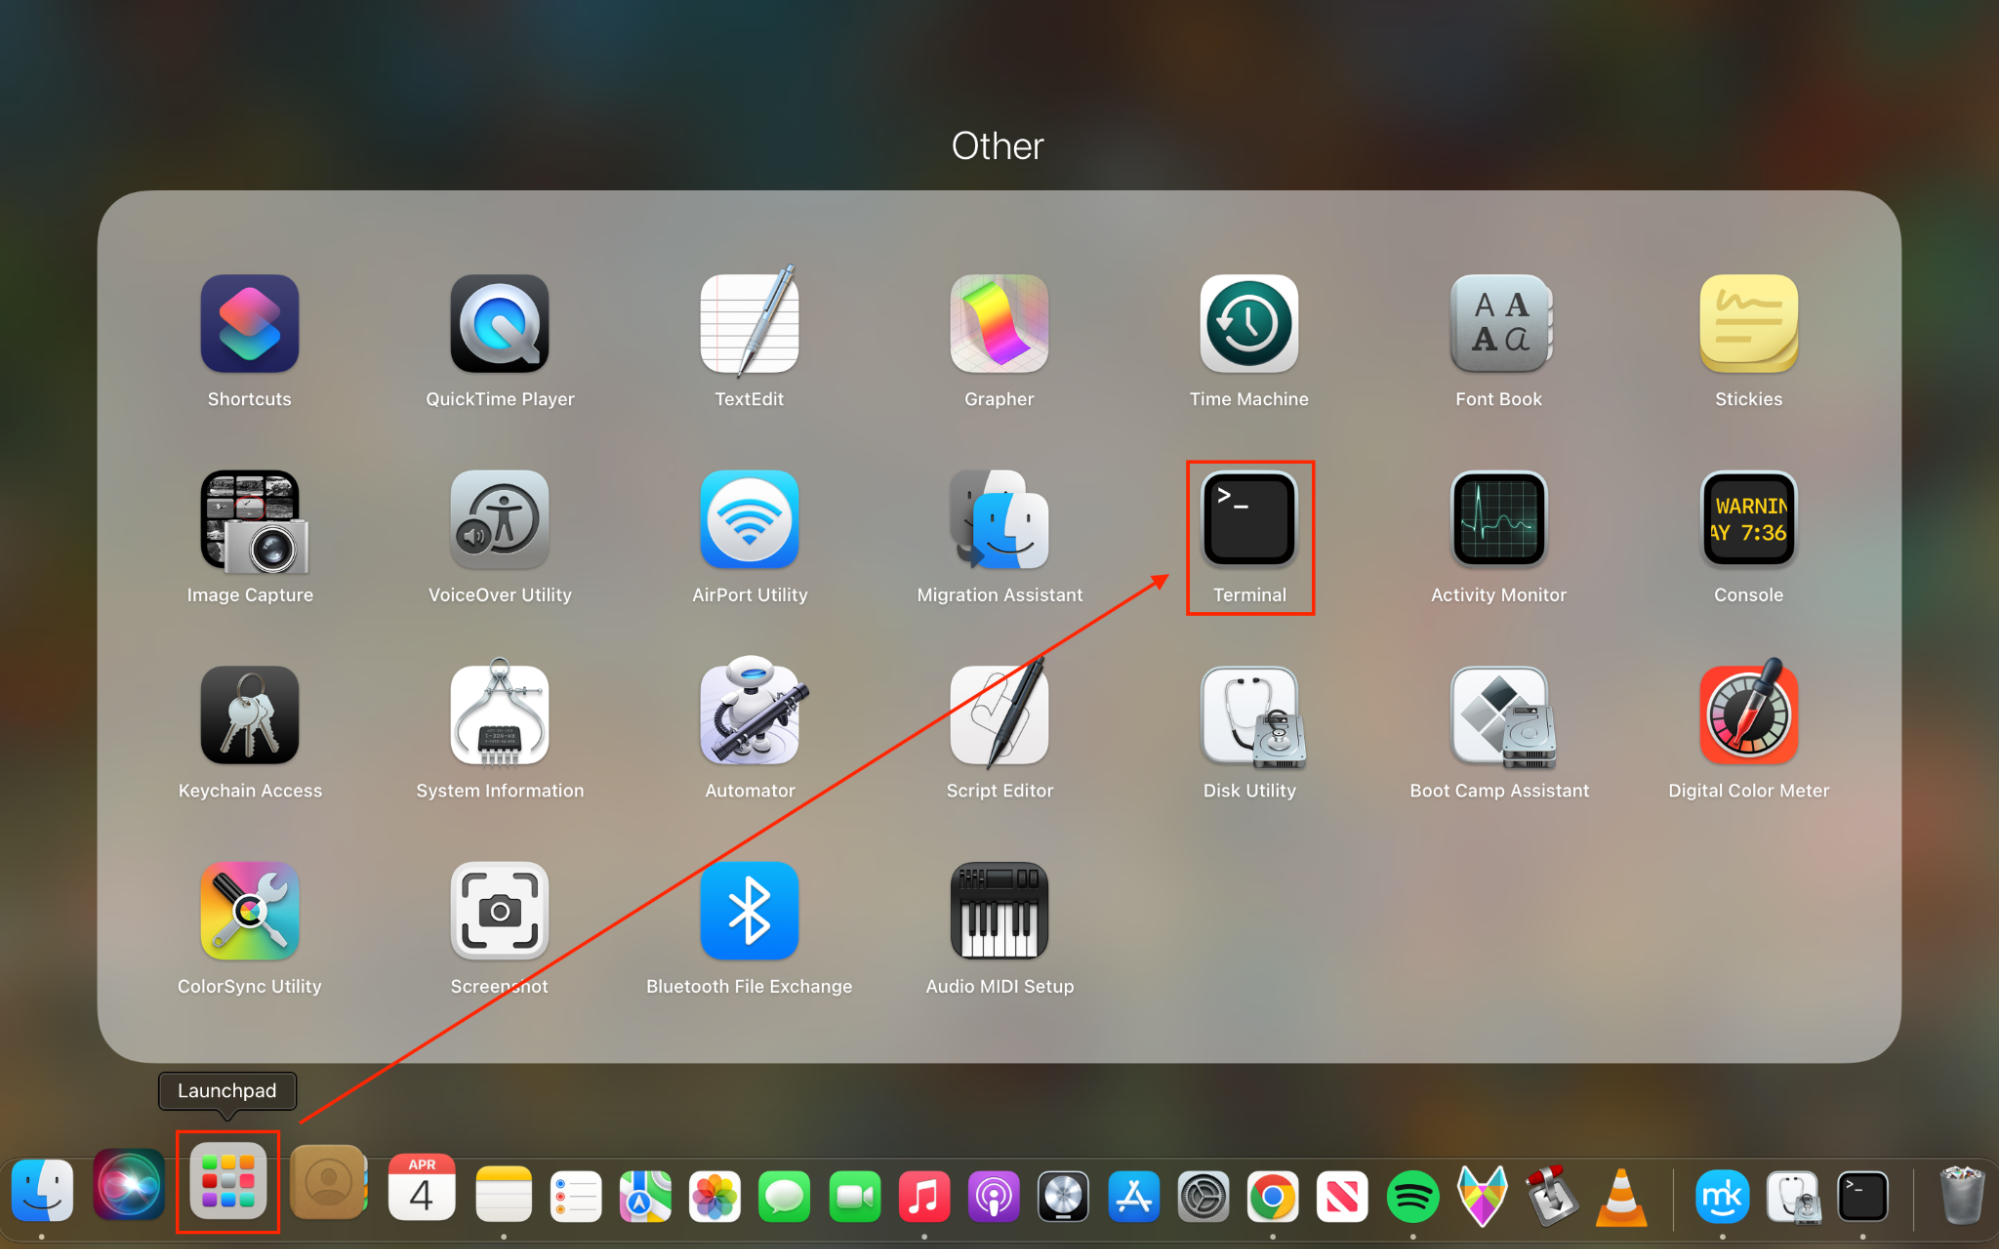
- Open Launchpad from your dock, and open the Terminal app. This is often located in the Other folder.
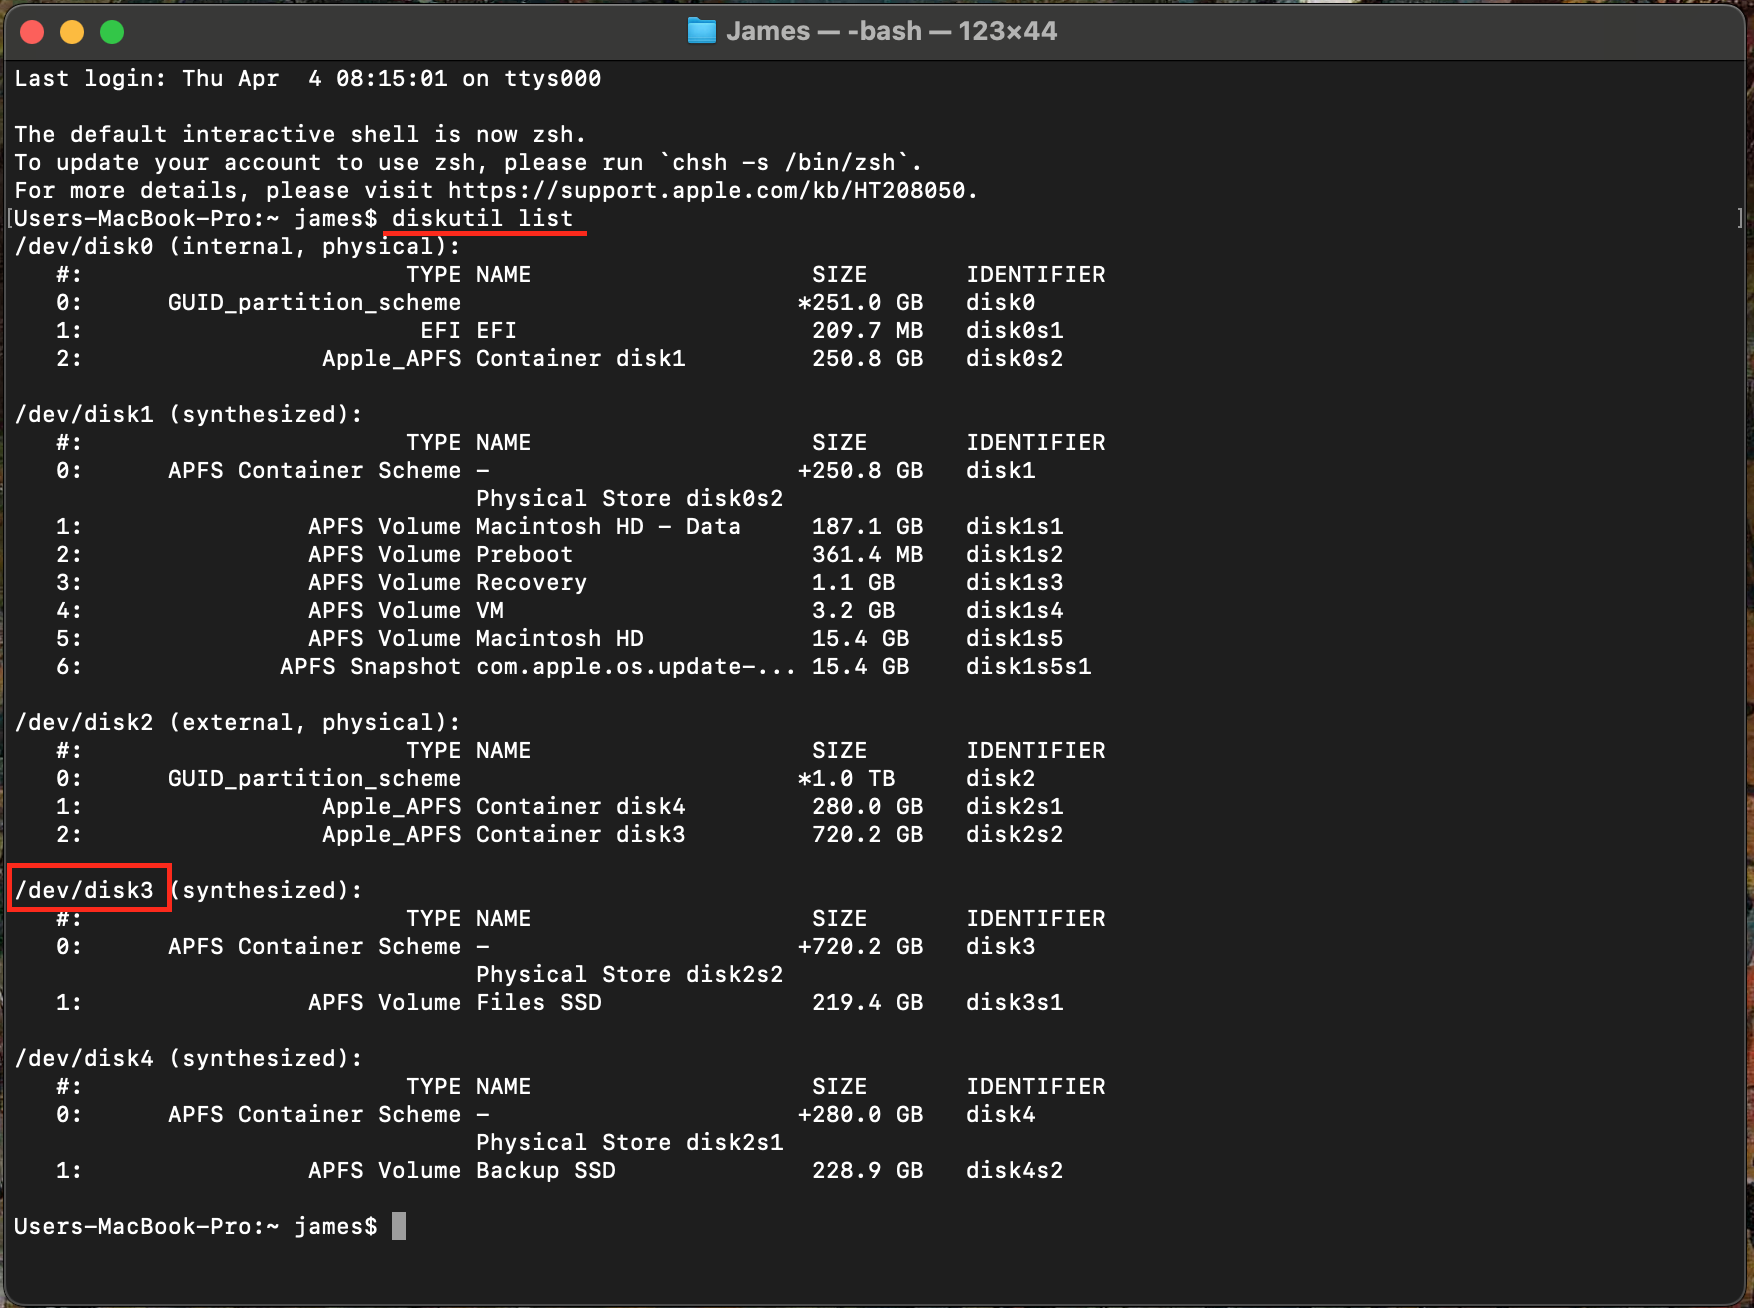
- Type the following into Terminal and hit Enter: diskutil list.
- This will display the names of all connected disks. Find the name for your external drive, which should look something like the following: /dev/disk3.
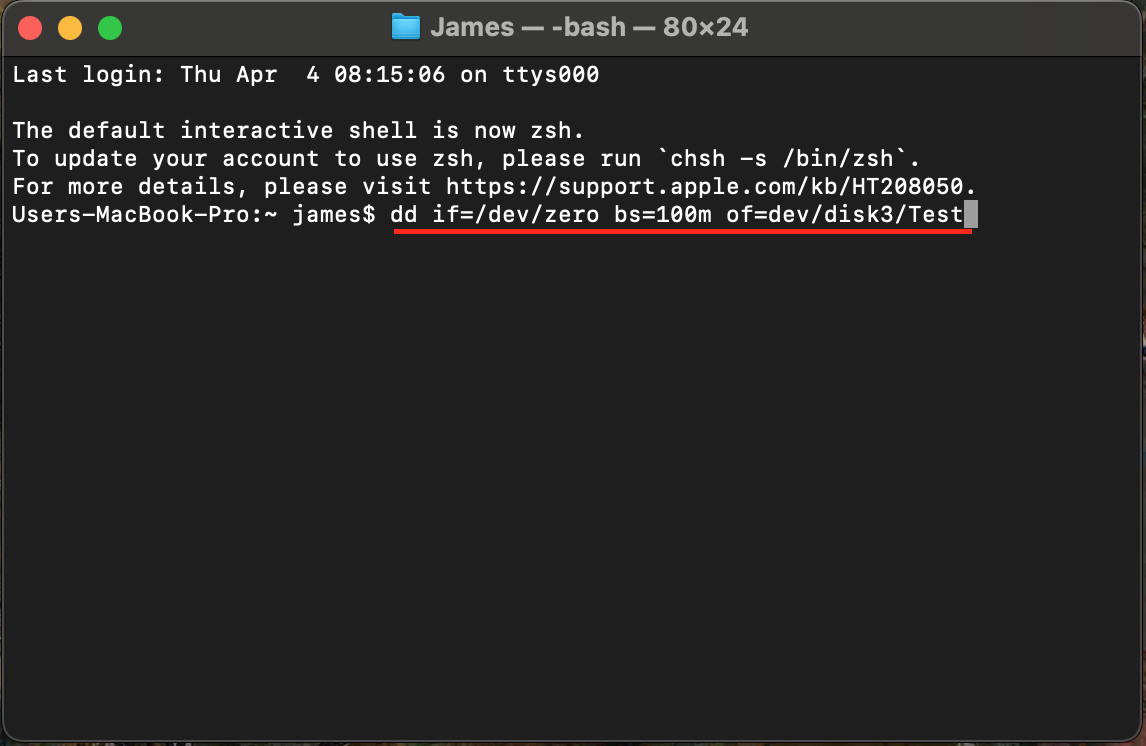
- If Terminal tells you there is no free space on your external drive, enter the following command, ensuring that you update the code with the correct disk identifier you found above. Type in: dd if=/dev/zero bs=100m of=dev/disk3/Test.
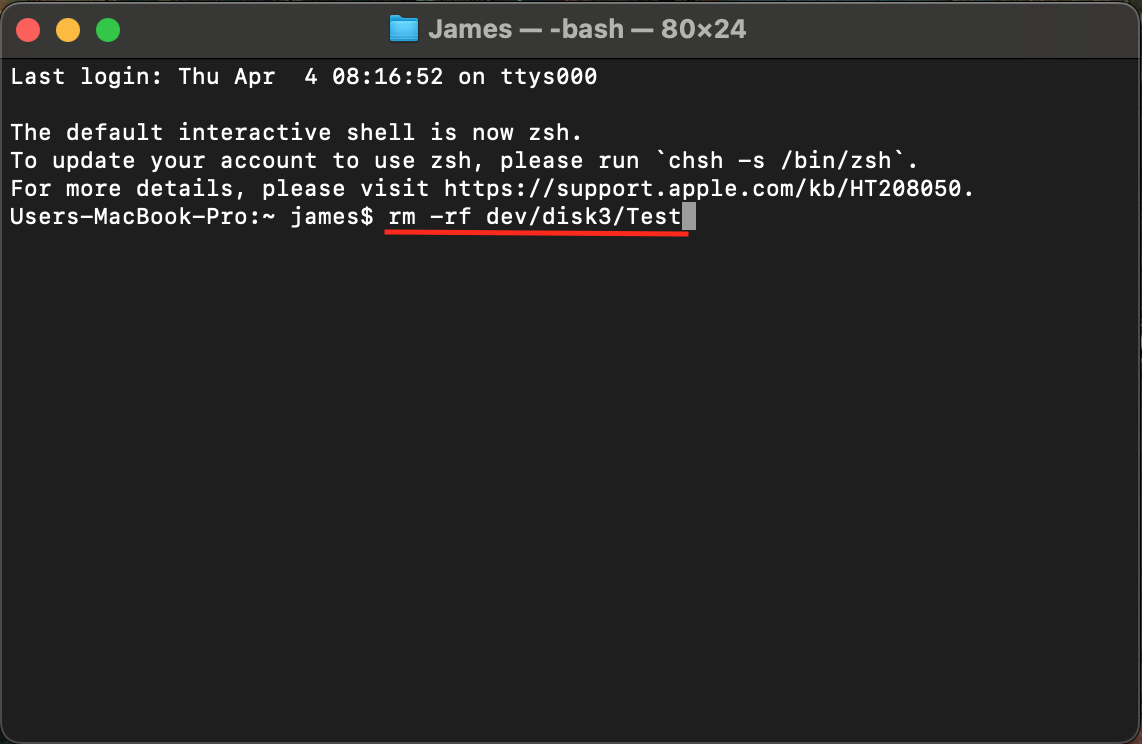
- To clear the purgeable space on your external drive, enter the following command, again ensuring the file path is the same as your external drive: rm -rf dev/disk3/Test. Finally, hit Enter.
Install cleaner to get rid of purgeable space on macOS Mojave
We hope you’ve found the above steps useful in clearing up purgeable space on macOS Mojave. However, we're afraid that our detailed guide may be a bit of an information overload for some of you. Hence, if you’d like to free up space in a few clicks, the best method is always to use cleaning software such as MacKeeper and perform a safe cleanup:
- Download and install MacKeeper.
- Select Safe Cleanup from the menu on the left-hand side.
- Tick the types of purgeable files you’d like to delete, e.g. logs, caches, and languages.
- Hit Clean Junk Files, and your purgeable space will be removed in seconds.
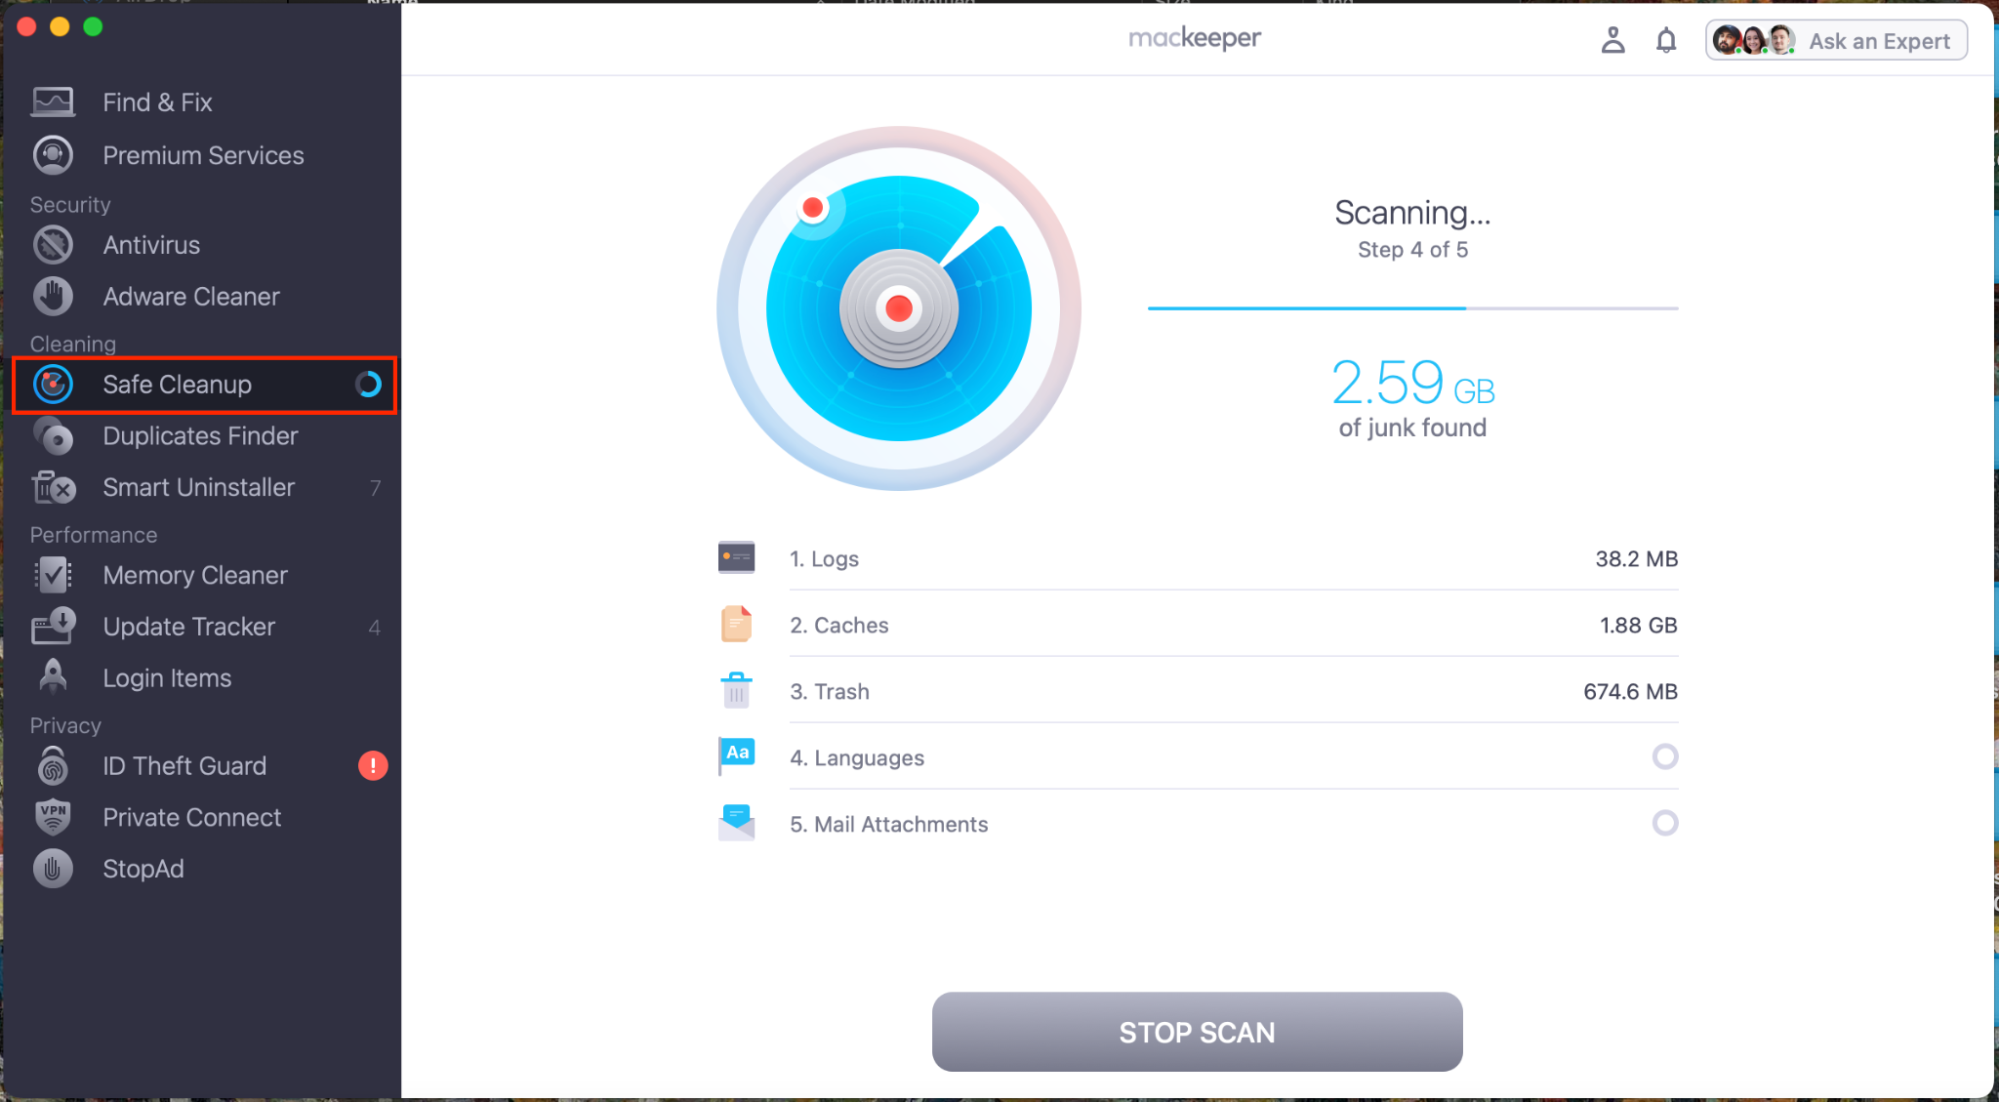
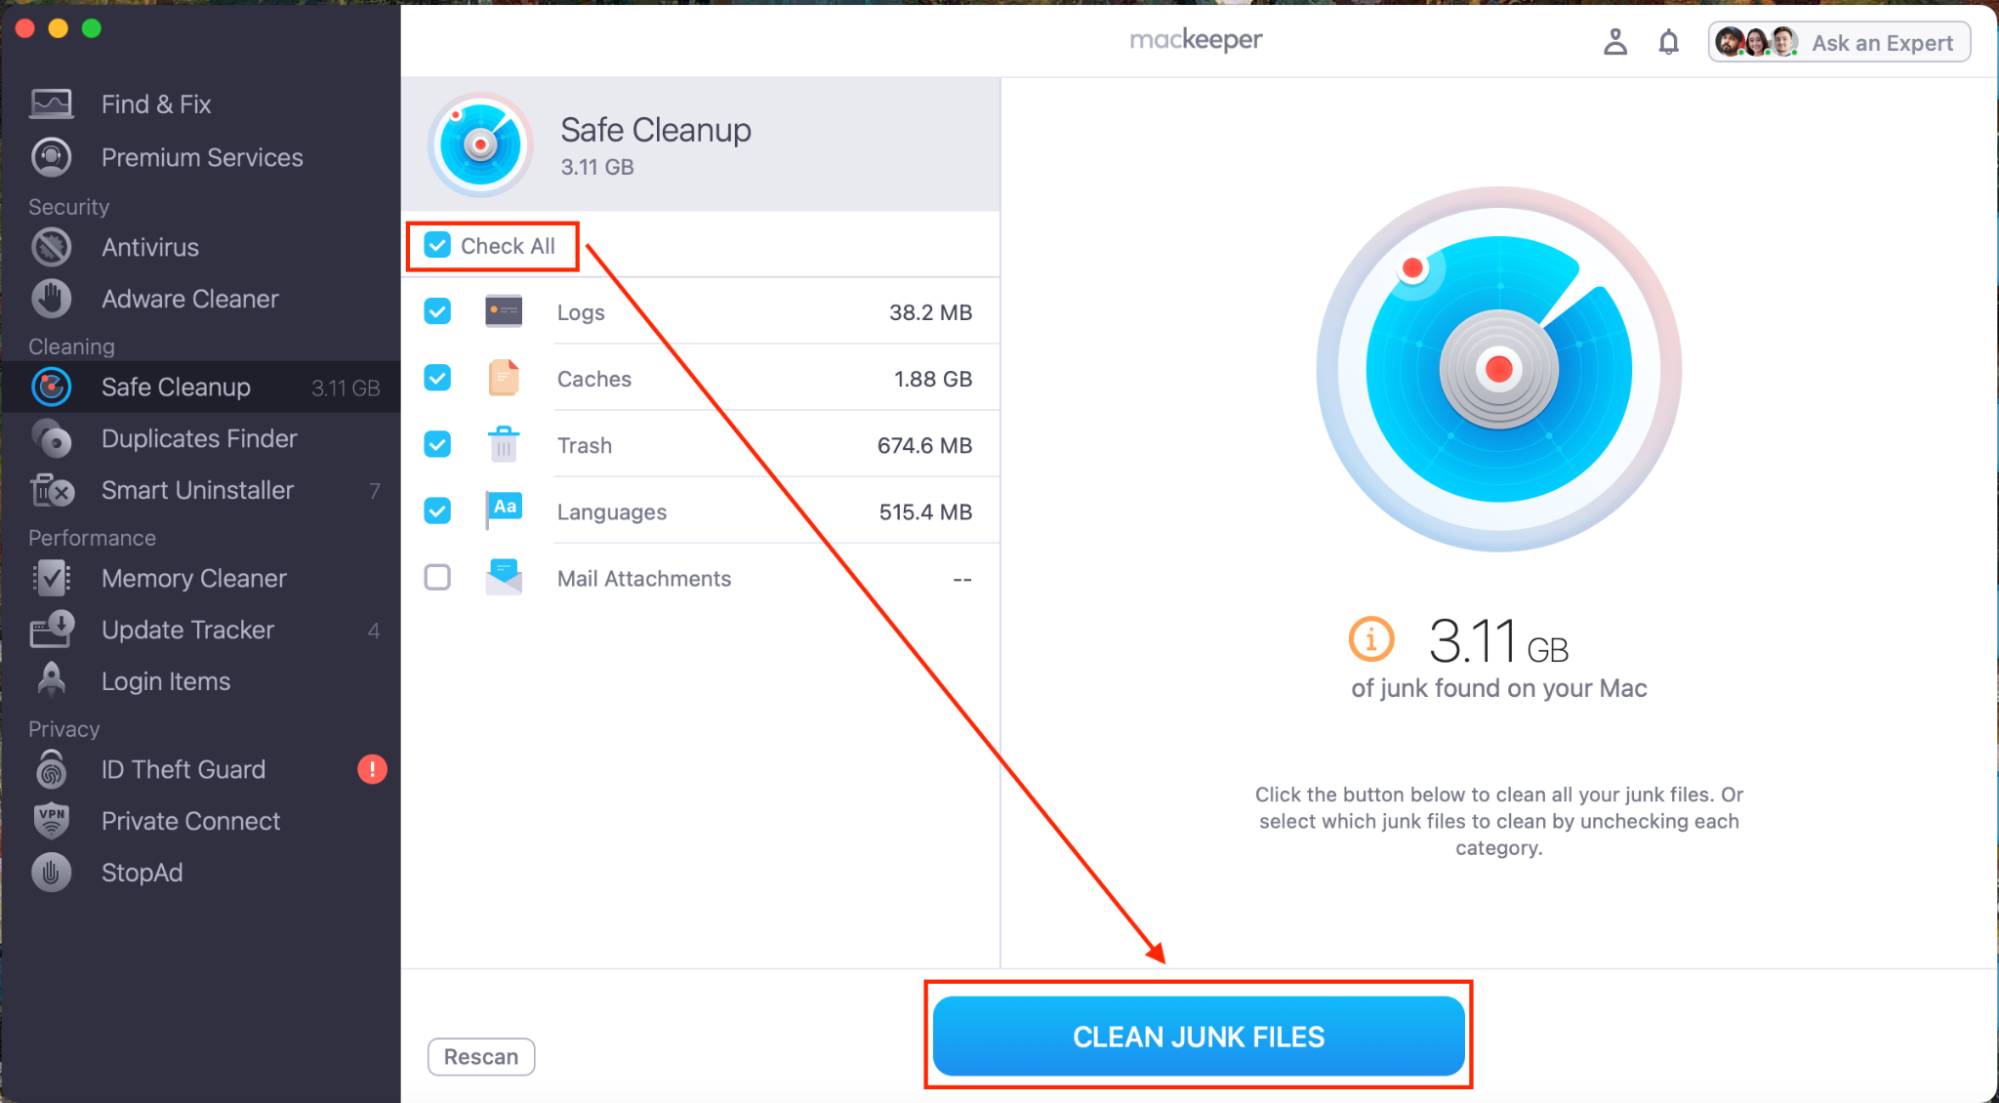
MacKeeper’s Safe Cleanup will automatically locate and remove junk files from your Mac to free up space, including caches, cookies, logs, language files, and email attachments. This means you’ll have more free disk space on your Mac without the need to delete any important files. Try it today.
Let’s make the purgeable workable
Phew, we made it to the end. We hope you’ve found our guide easy to follow and not overwhelming, but unfortunately, Apple doesn’t make it easy to clear purgeable space. Many of the steps, especially those using Terminal can appear intimidating to many Mac users, so our best recommendation is to use third-party software such as MacKeeper’s Safe Cleanup tool to automate the entire process when looking to erase purgeable files.
Moreover, MacKeeper includes a whole host of additional features to secure and protect your Mac from viruses and hackers, and contains performance tools such as Memory Cleaner. The latter will clear your RAM in a matter of seconds, which is a quick fix should your Mac begin to stutter when you have lots of apps open. Like us, you should now be an expert in all things purgeable space, and you’ll be able to free up some precious disk space. Happy purging!


