Is Logi Options slowing down your Mac or acting up after an update? MacKeeper’s Smart Uninstaller detects the app, finds its hidden launch agents and daemons, and clears them in one pass. Here’s how to fully uninstall Logi Options on Mac—the quick way and the manual way.
Logi Options and its newer version, Logi Options+, are configuration apps for Logitech devices—mice, keyboards, and webcams. They let you remap buttons, set gestures, and fine-tune scrolling across your Macintosh.
To do that, the software runs quietly in the background. It installs launch agents and background services, and it asks for system permissions like input monitoring so it can read what your keyboard and mouse are doing. That’s normal, but it also means the application leaves more behind than a basic app would.
Why uninstall Logi Options from your Mac?
Plenty of everyday reasons push people to remove Logitech Options on Mac. If Logi Options+ is eating background CPU and memory, clearing it out is one simple way to speed up slow Mac. As we’ve tested on our part, here are the common triggers to delete Logi Options:
Software glitches or crashes after a macOS update
Gesture conflicts with other input tools or trackpad settings
Permission prompts that keep reappearing
Switching to a different mouse, keyboard, or brand
A note from our experts:
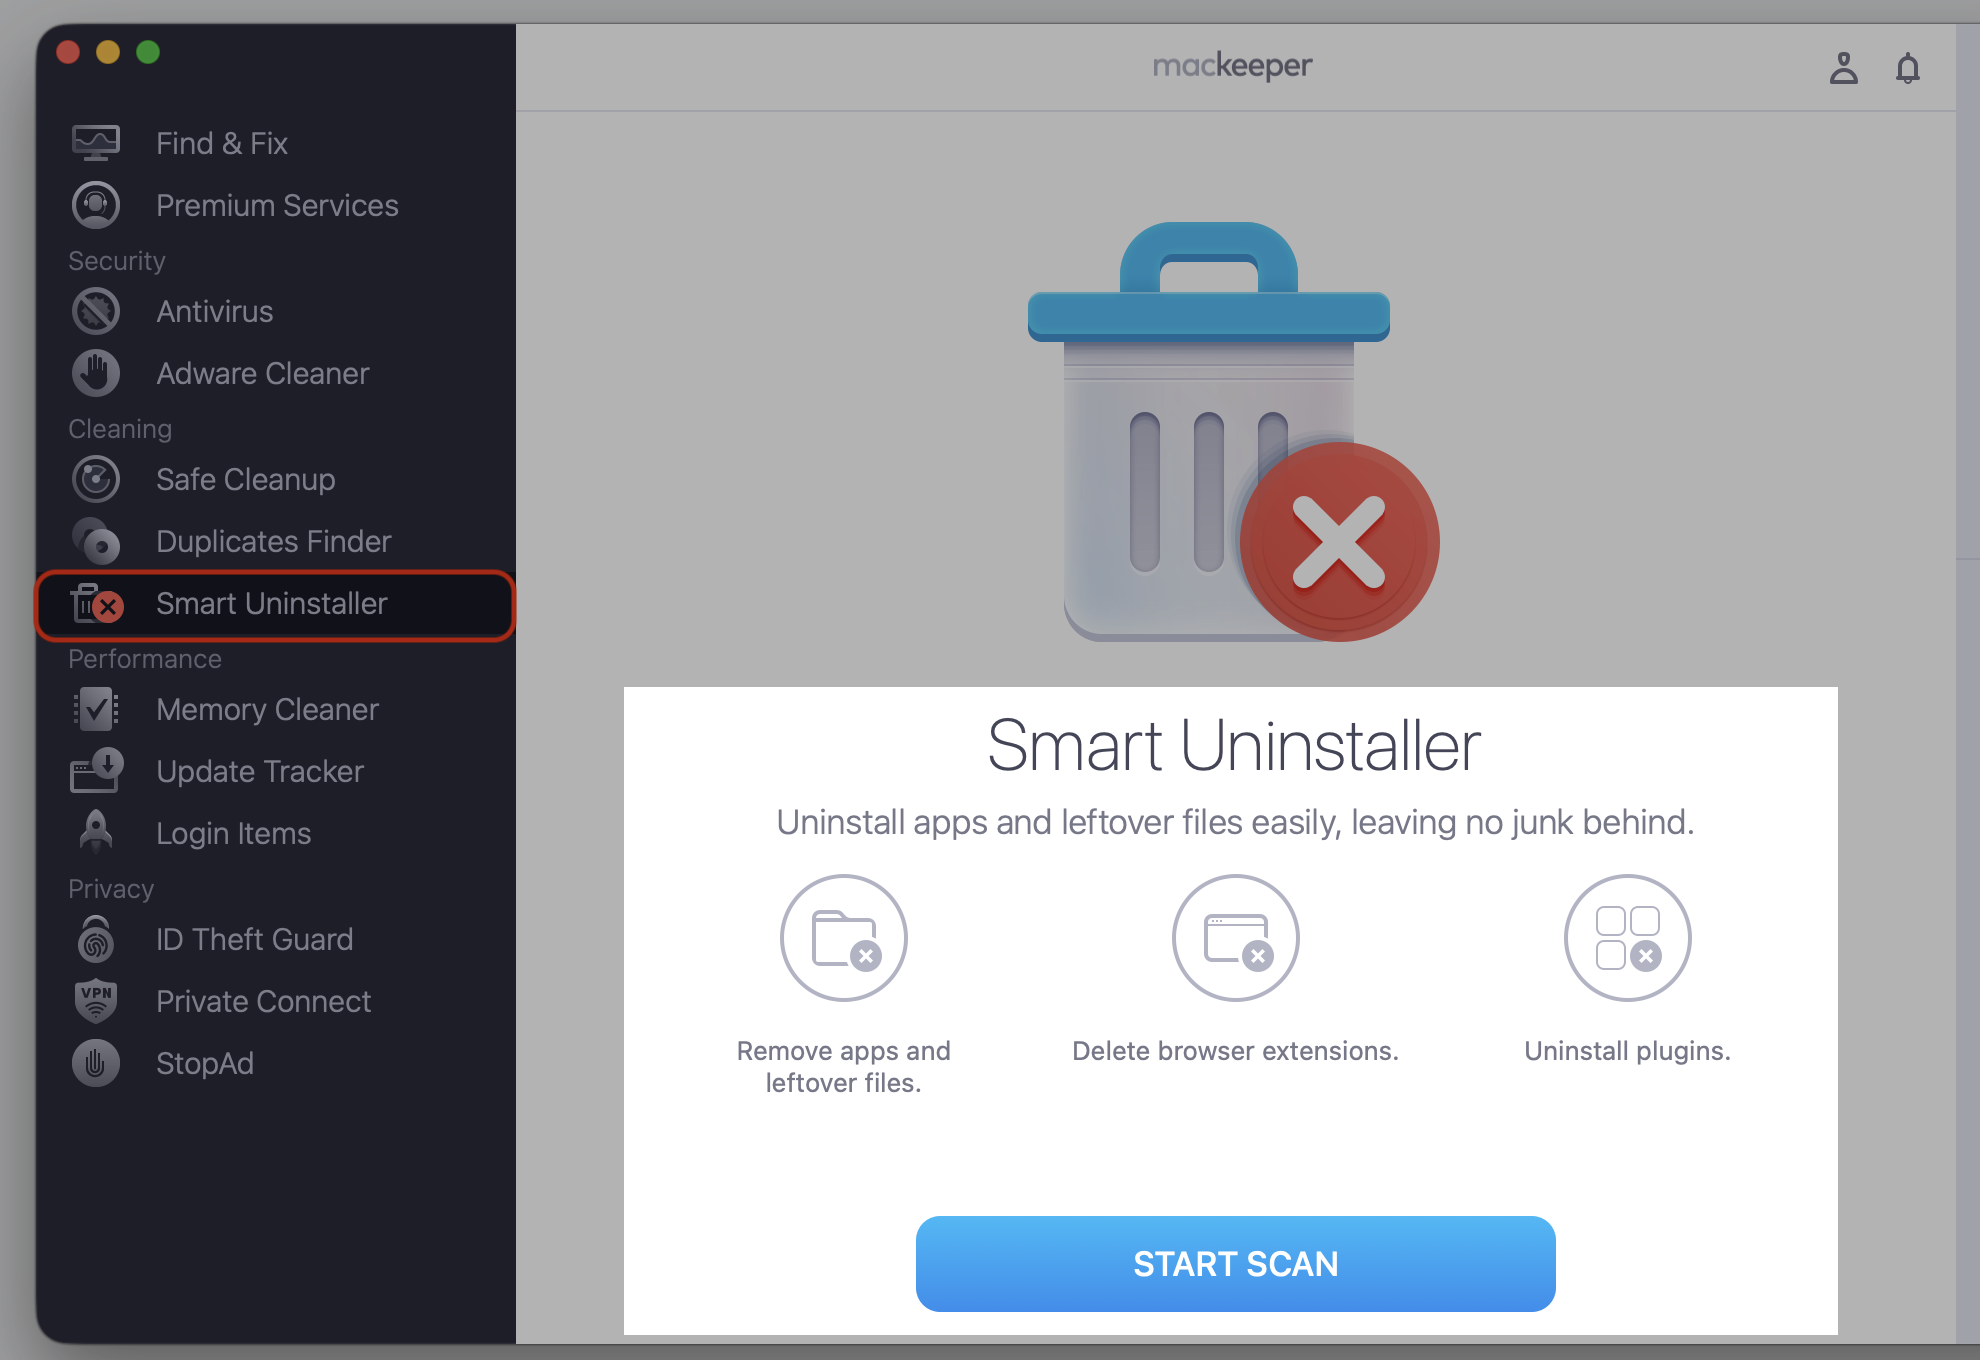
Now, when you’re aware of the most common WHYs, let’s move to the best HOW. We suggest proceeding with the app deletion automatically, as this saves time, simplifies the procedure, and ensures everything is done safely and completely. In practice, you can use MacKeeper’s Smart Uninstaller, which we sincerely recommend, to remove the redundant or malfunctioning apps along with all the hidden files. Try it out today!
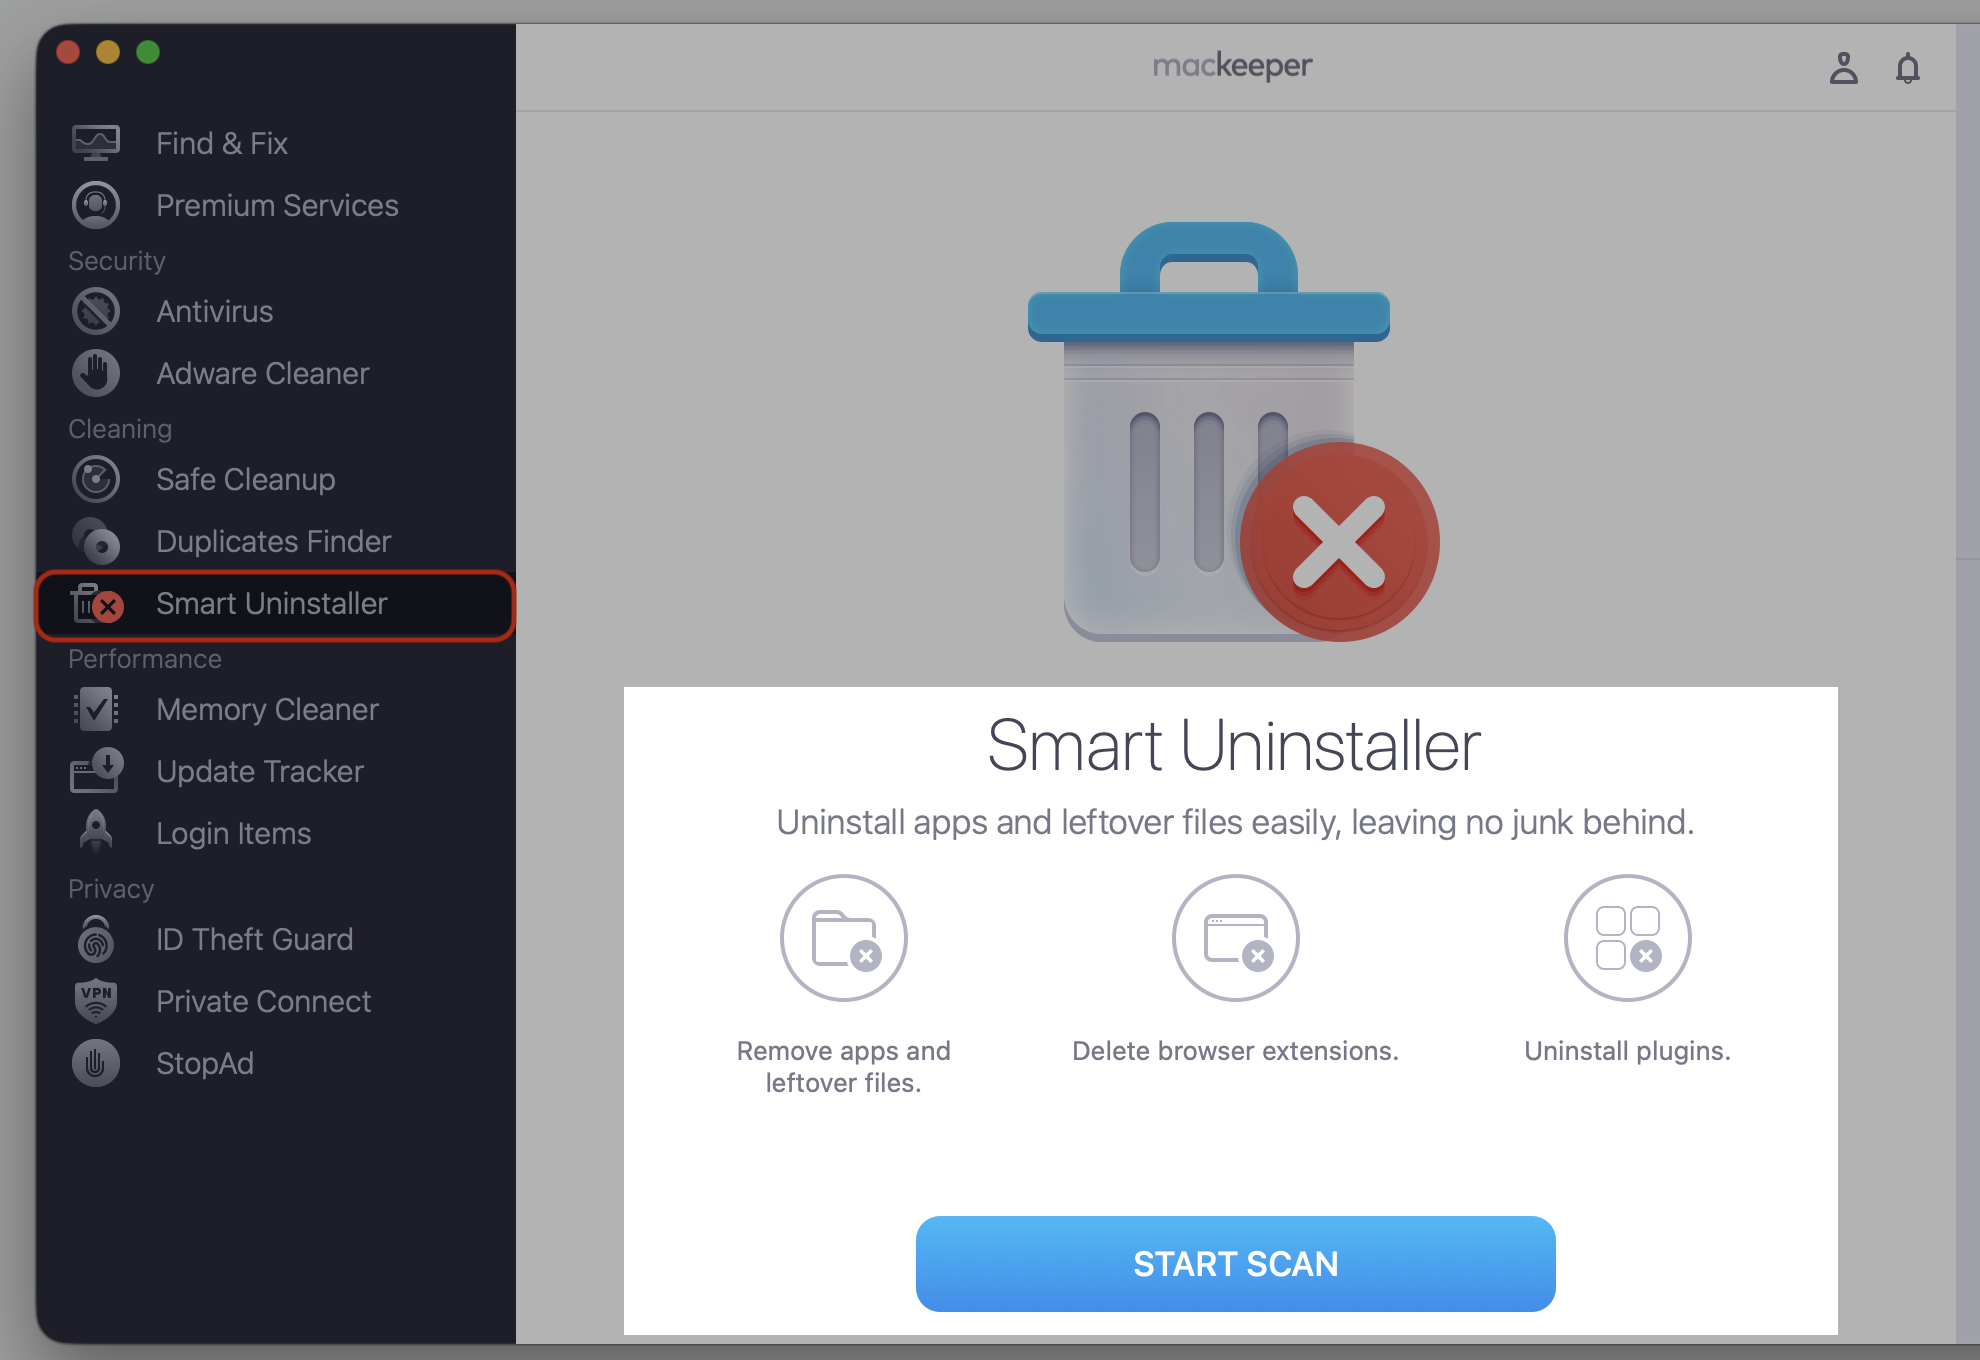
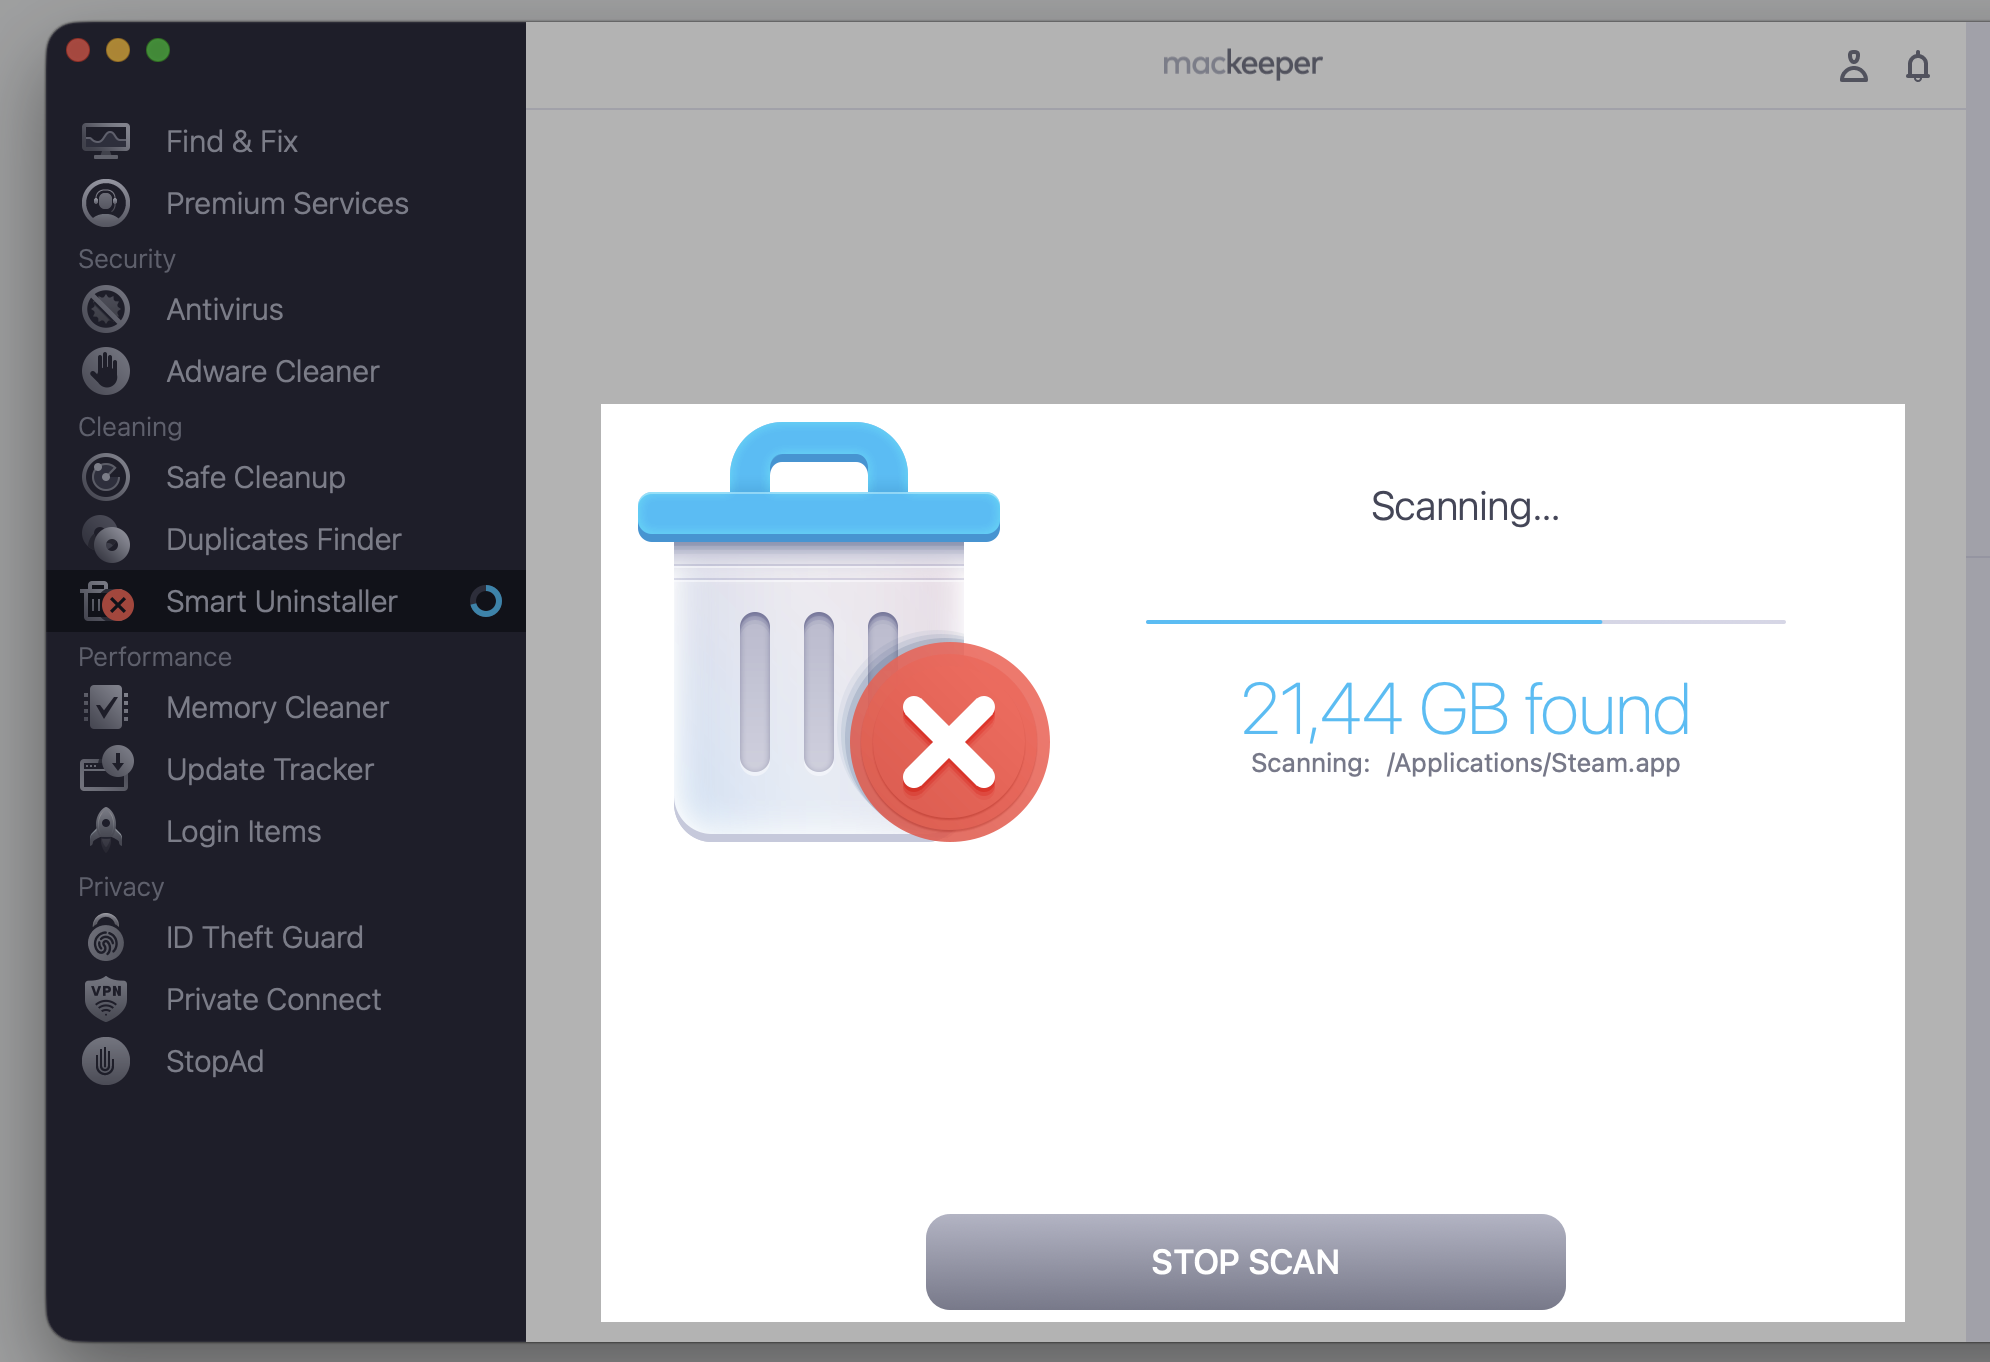
Go to MacKeeper > Smart Uninstaller > Start Scan
What to do before uninstalling Logi Options from MacBook?
A little prep keeps things tidy and stops ghost permissions or lost settings from following you around. Let’s run through our three checks below before you delete Logi Options from MacBook.
1. Back up your custom settings
Removal resets your button assignments, gestures, and app-specific profiles to factory defaults, so let’s save them first to avoid rebuilding everything later.
Let’s back up your setup first:
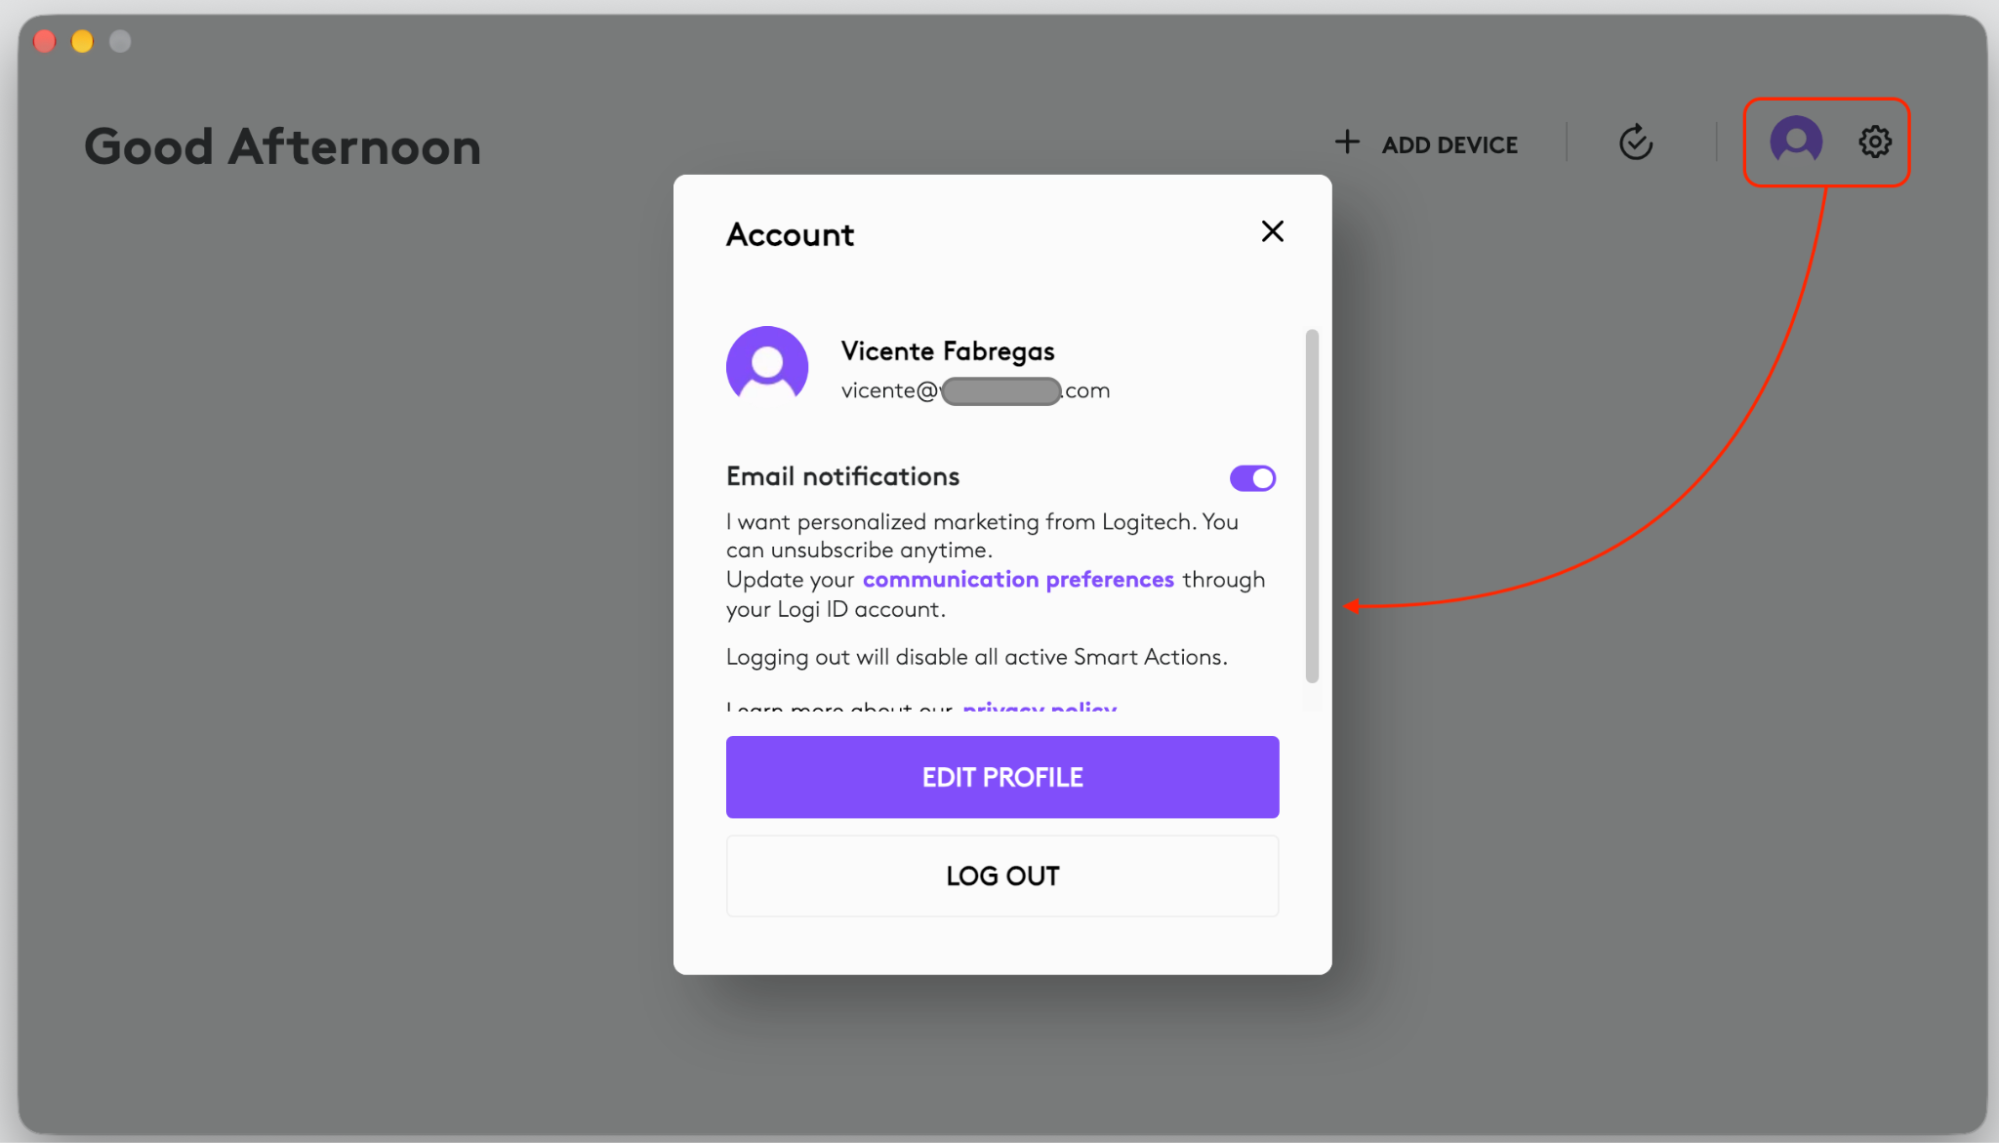
Open Logi Options+ and sign in to your Logi ID if you use one.
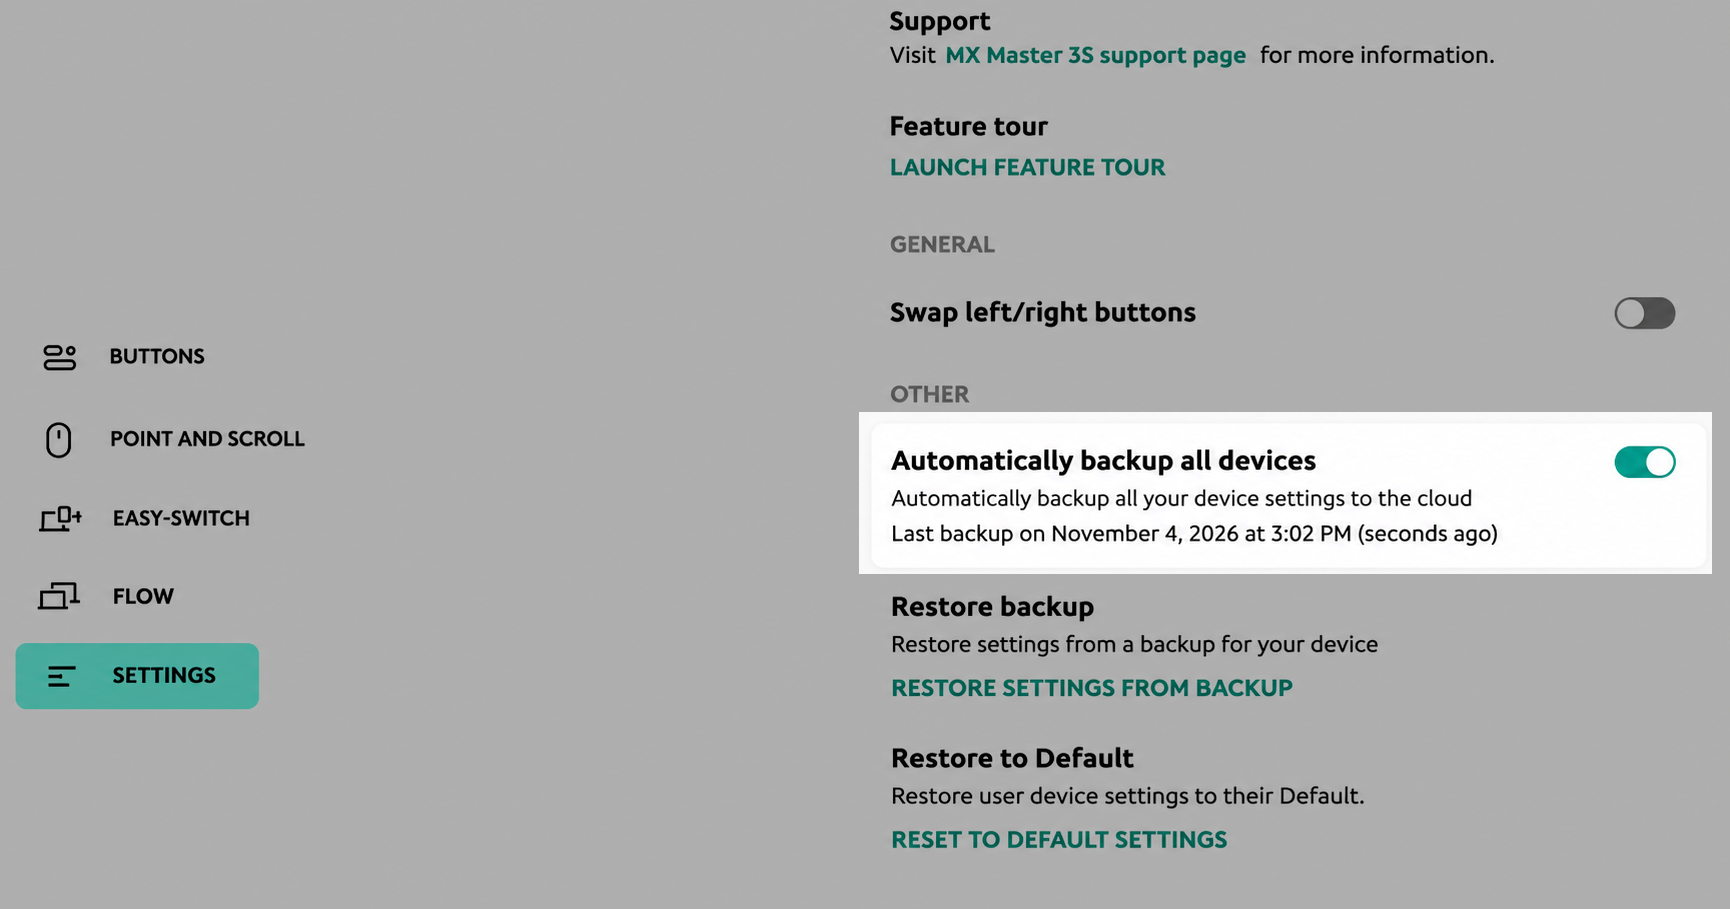
Turn on settings backup so your profiles sync to your account.
For anything custom, note your key button assignments and gestures somewhere handy.
Step 1. Open the Options+ app and log in to your accountStep 2. Go to Settings and select Automatically backup all devices
2. Disconnect your Logitech devices
Running the removal while a device is mid-pairing can leave the connection in a strange state, so let’s power everything down first.
Start with this quick step:
Turn off your wireless Logitech mouse or keyboard.
Unplug any USB receivers or dongles from your Mac.
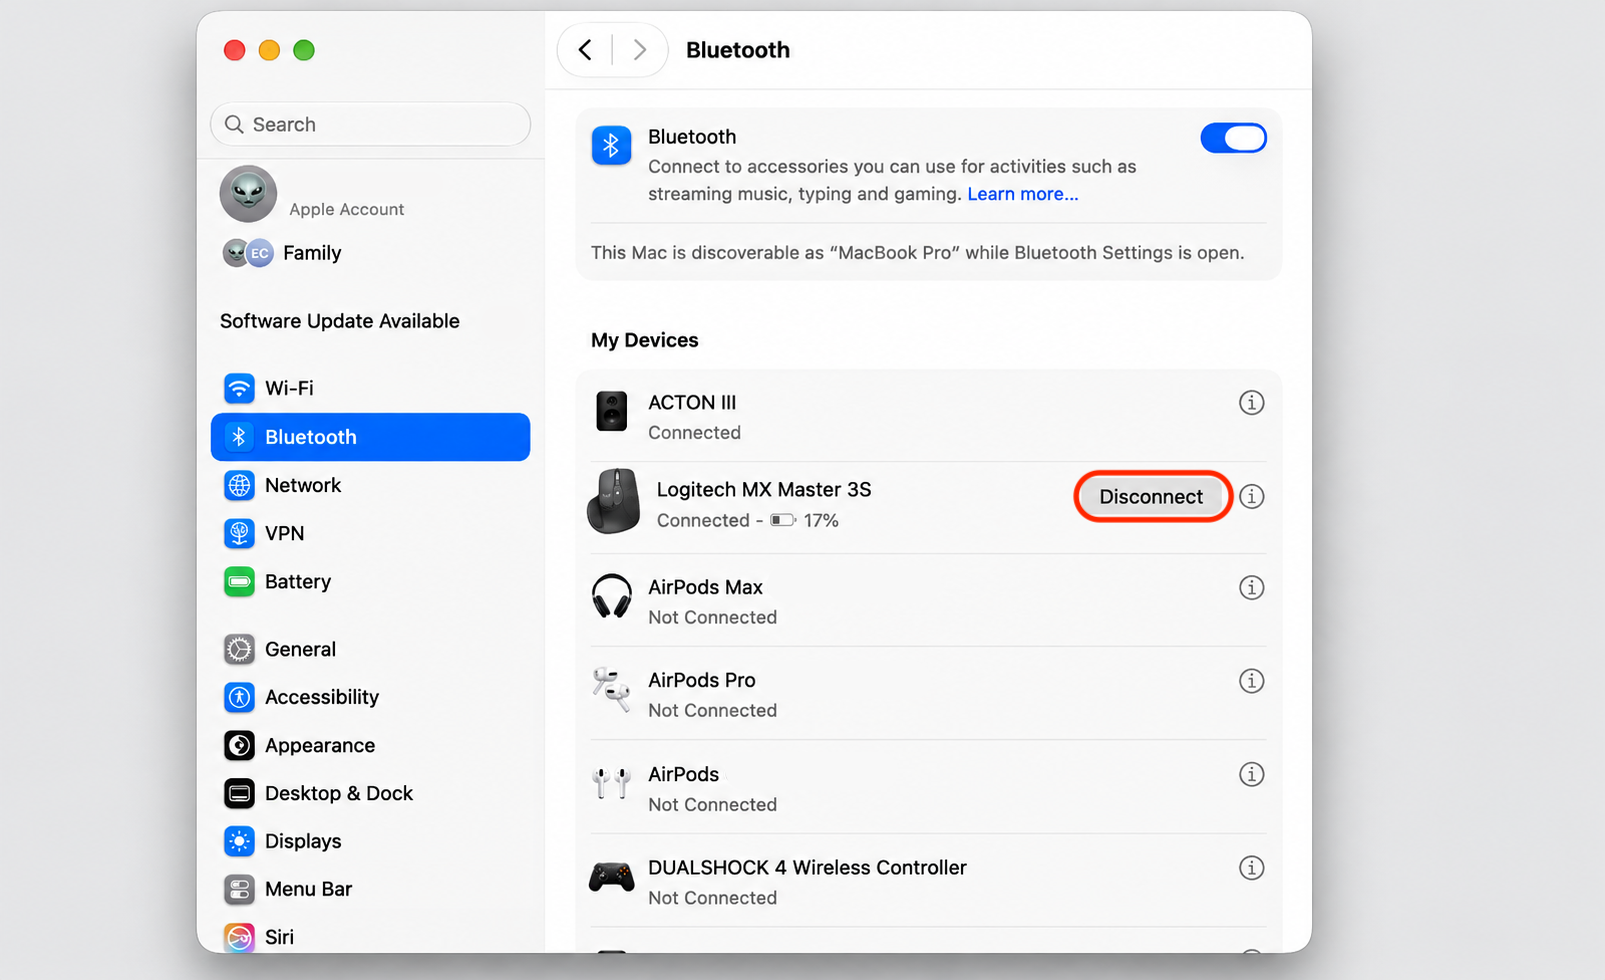
Unpair Bluetooth devices in System Settings > Bluetooth if you’re switching brands.
Go to Settings > Bluetooth> Disconnect Logitech Device
3. Remove app permissions in System Settings
We’ll first leave you the steps on how to delete the app permissions on Mac through System Settings on the newer macOS versions, as the method differs from the older ones.
Now let’s revoke that access:
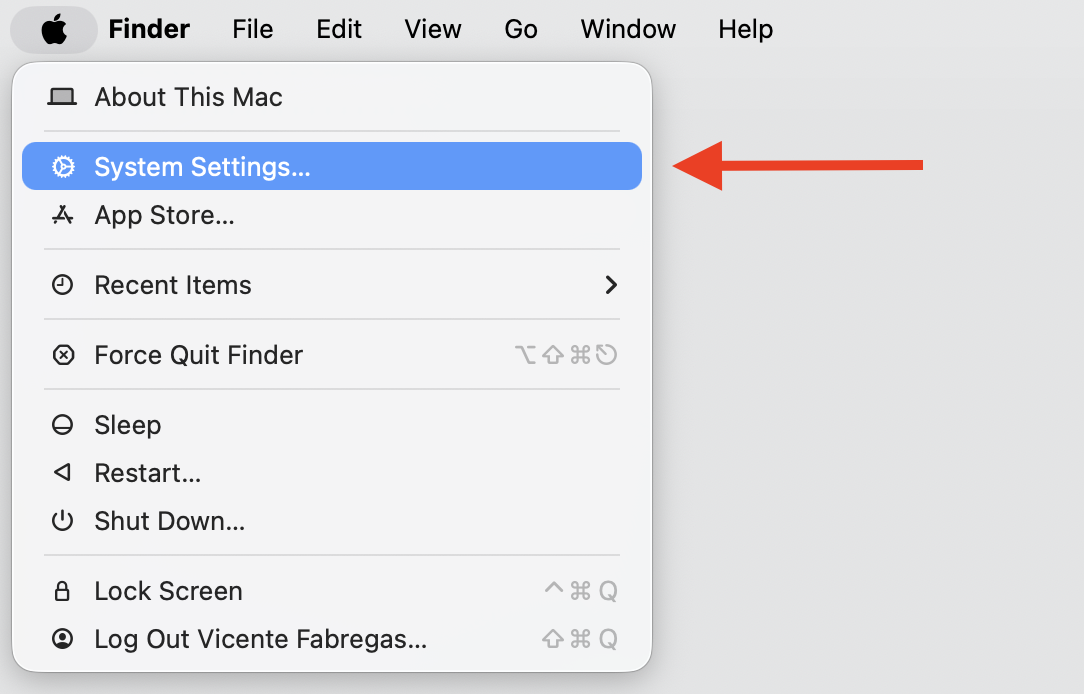
Open the Apple menu > System Settings.
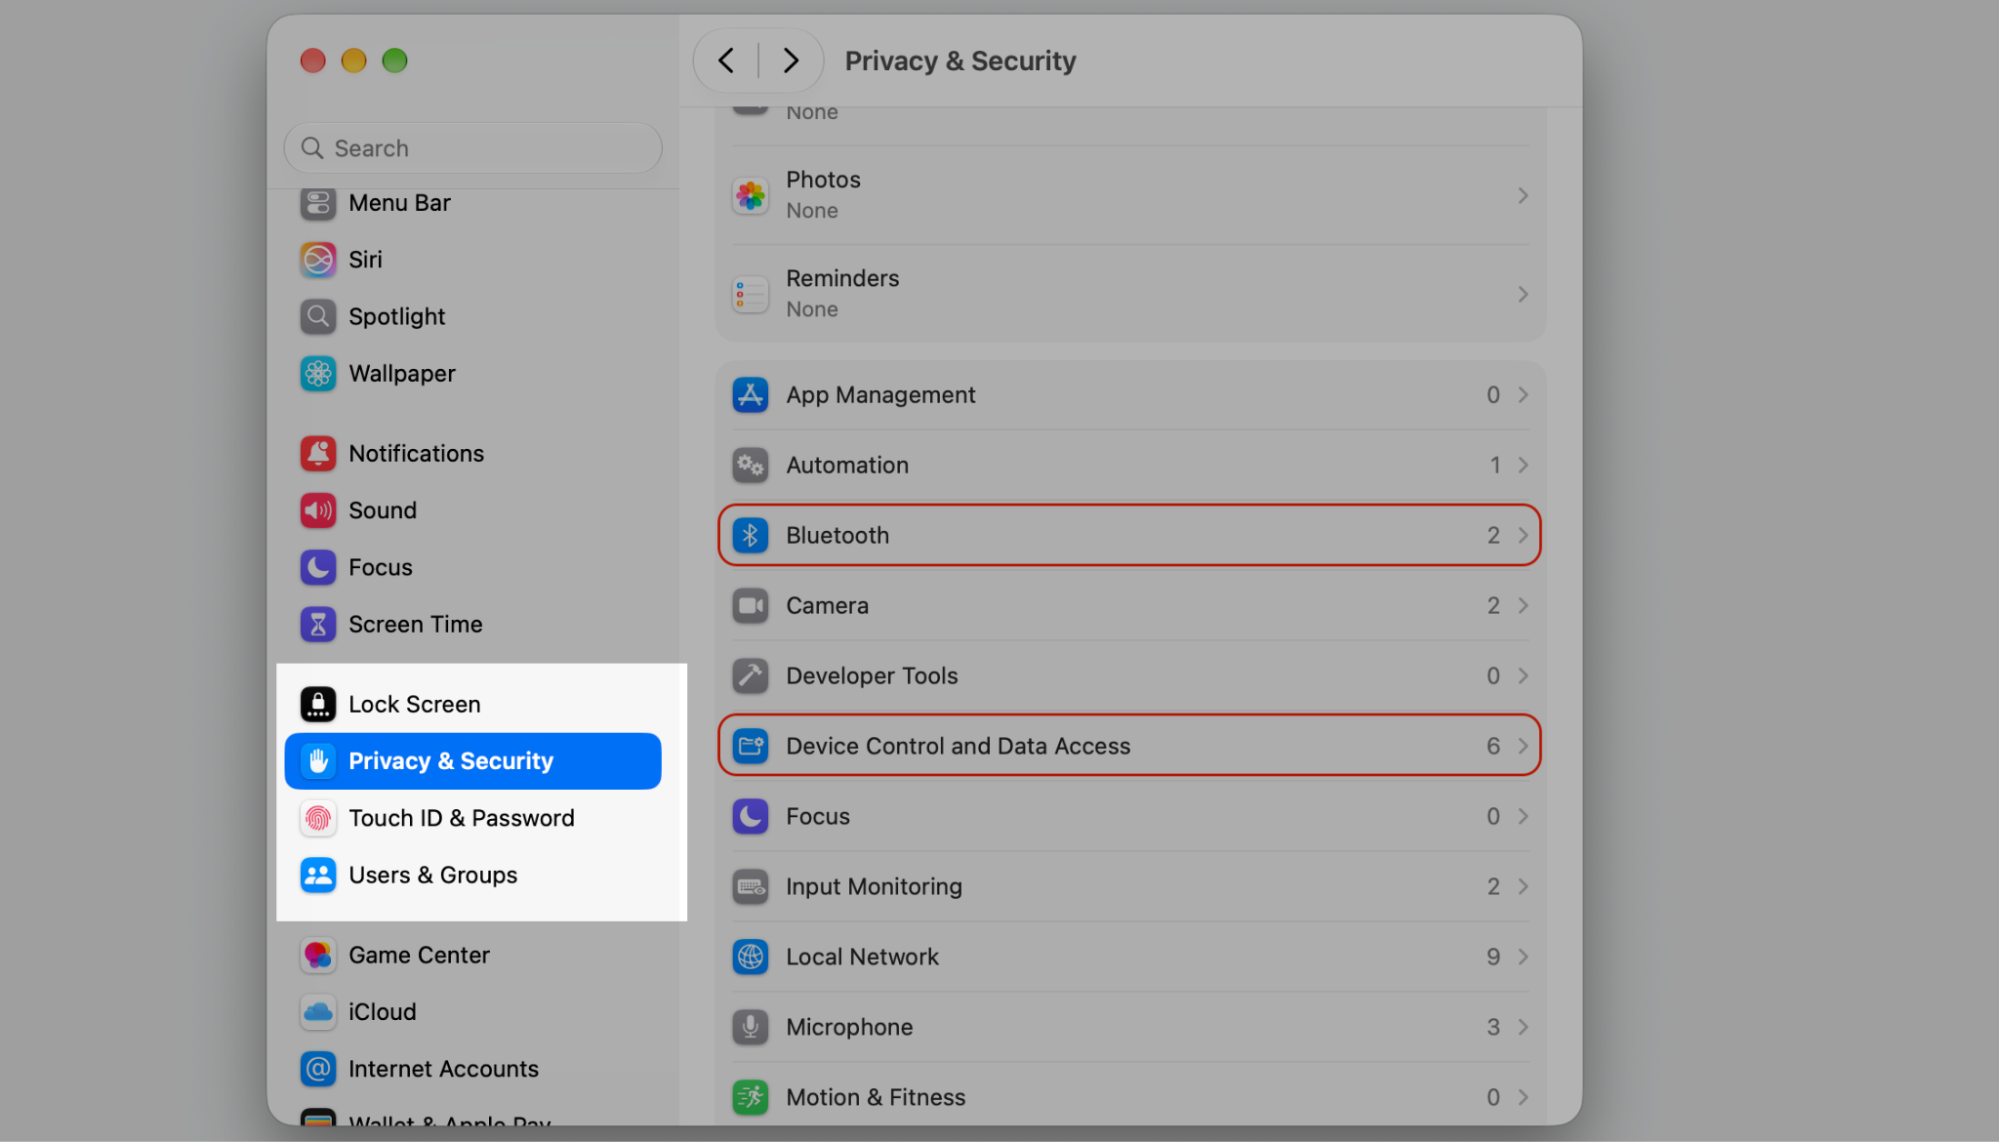
Select Privacy & Security in the sidebar.
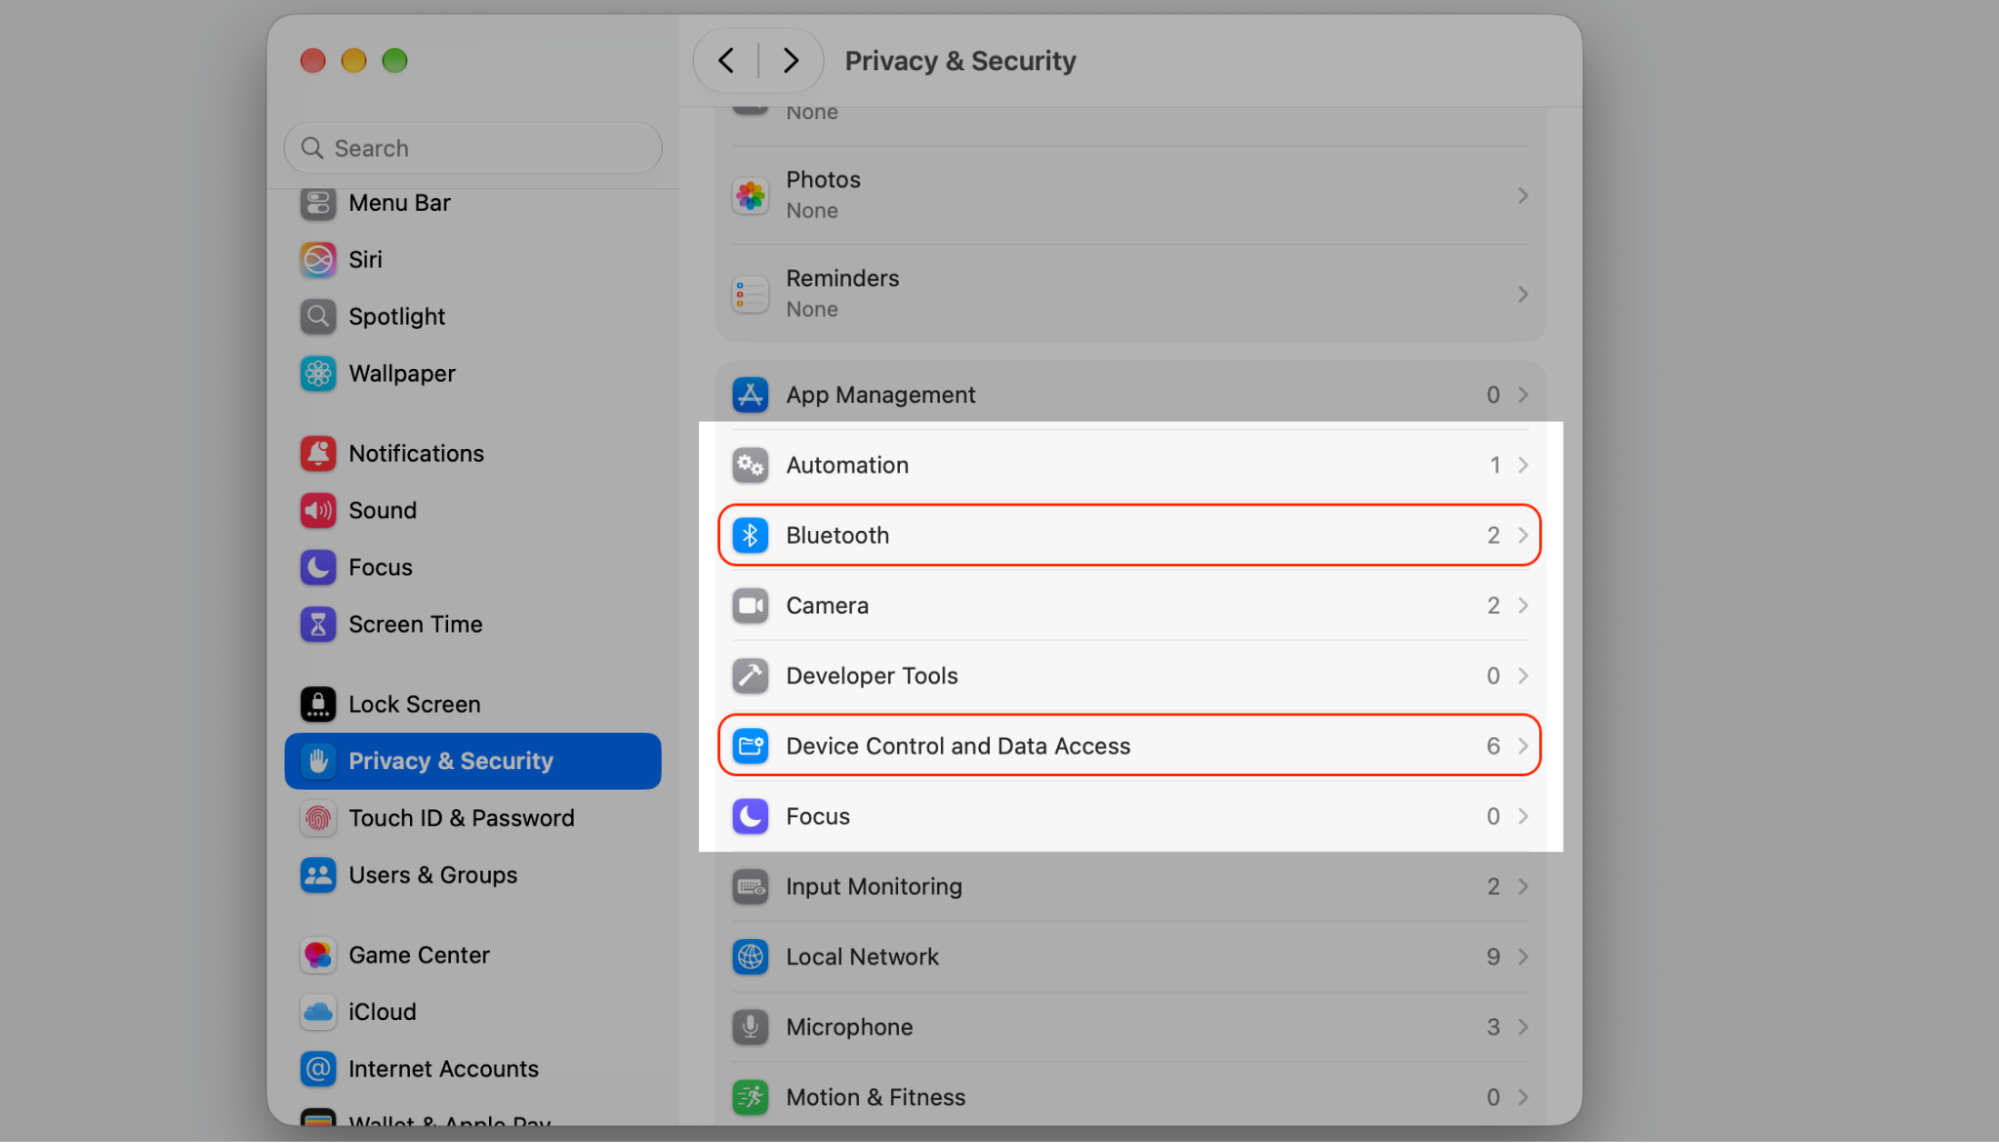
Choose Bluetooth.
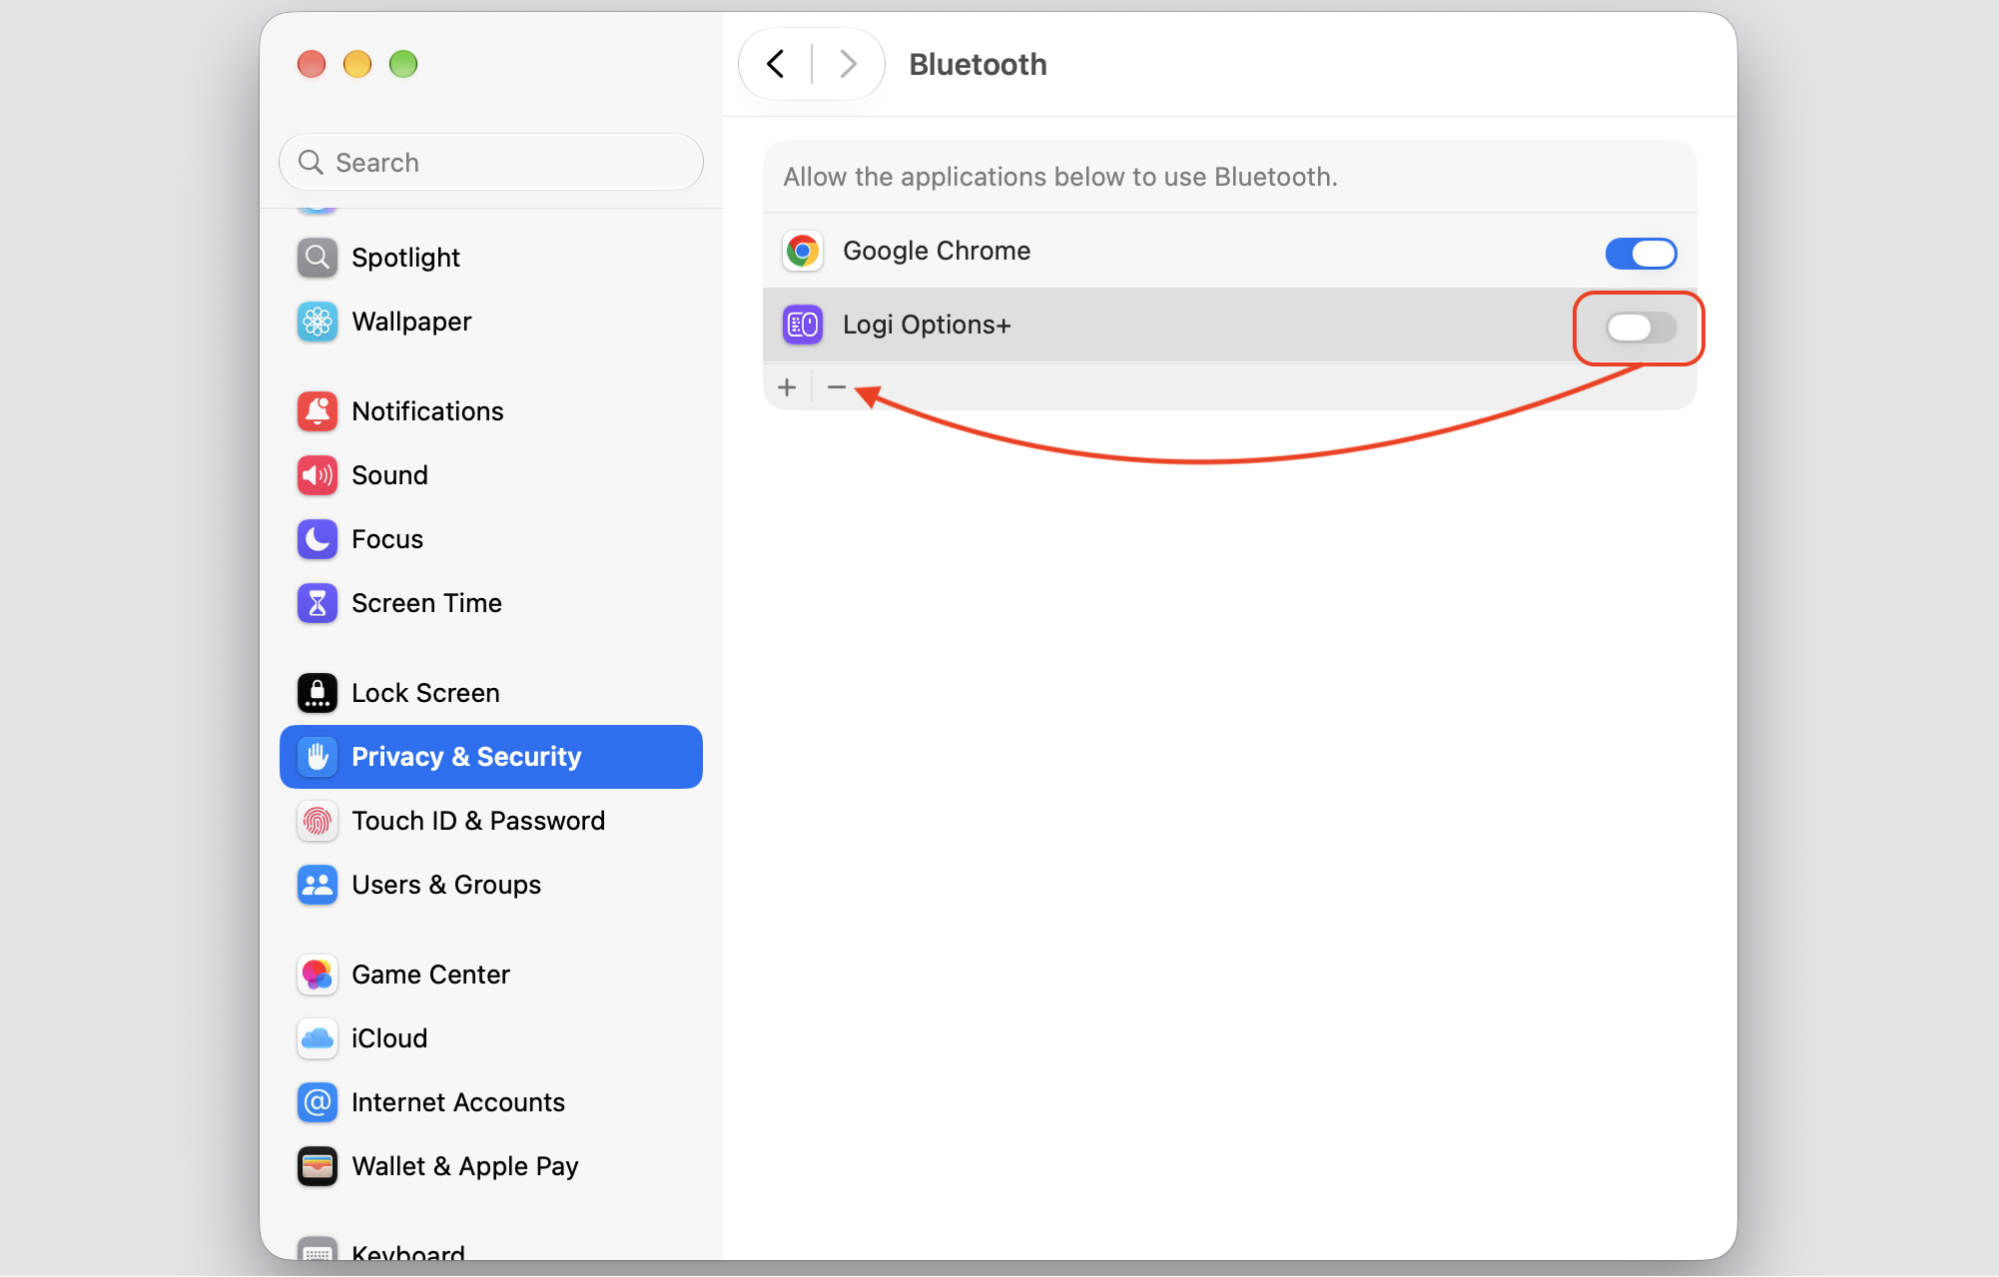
Find Logi Options+ and turn off its toggle.
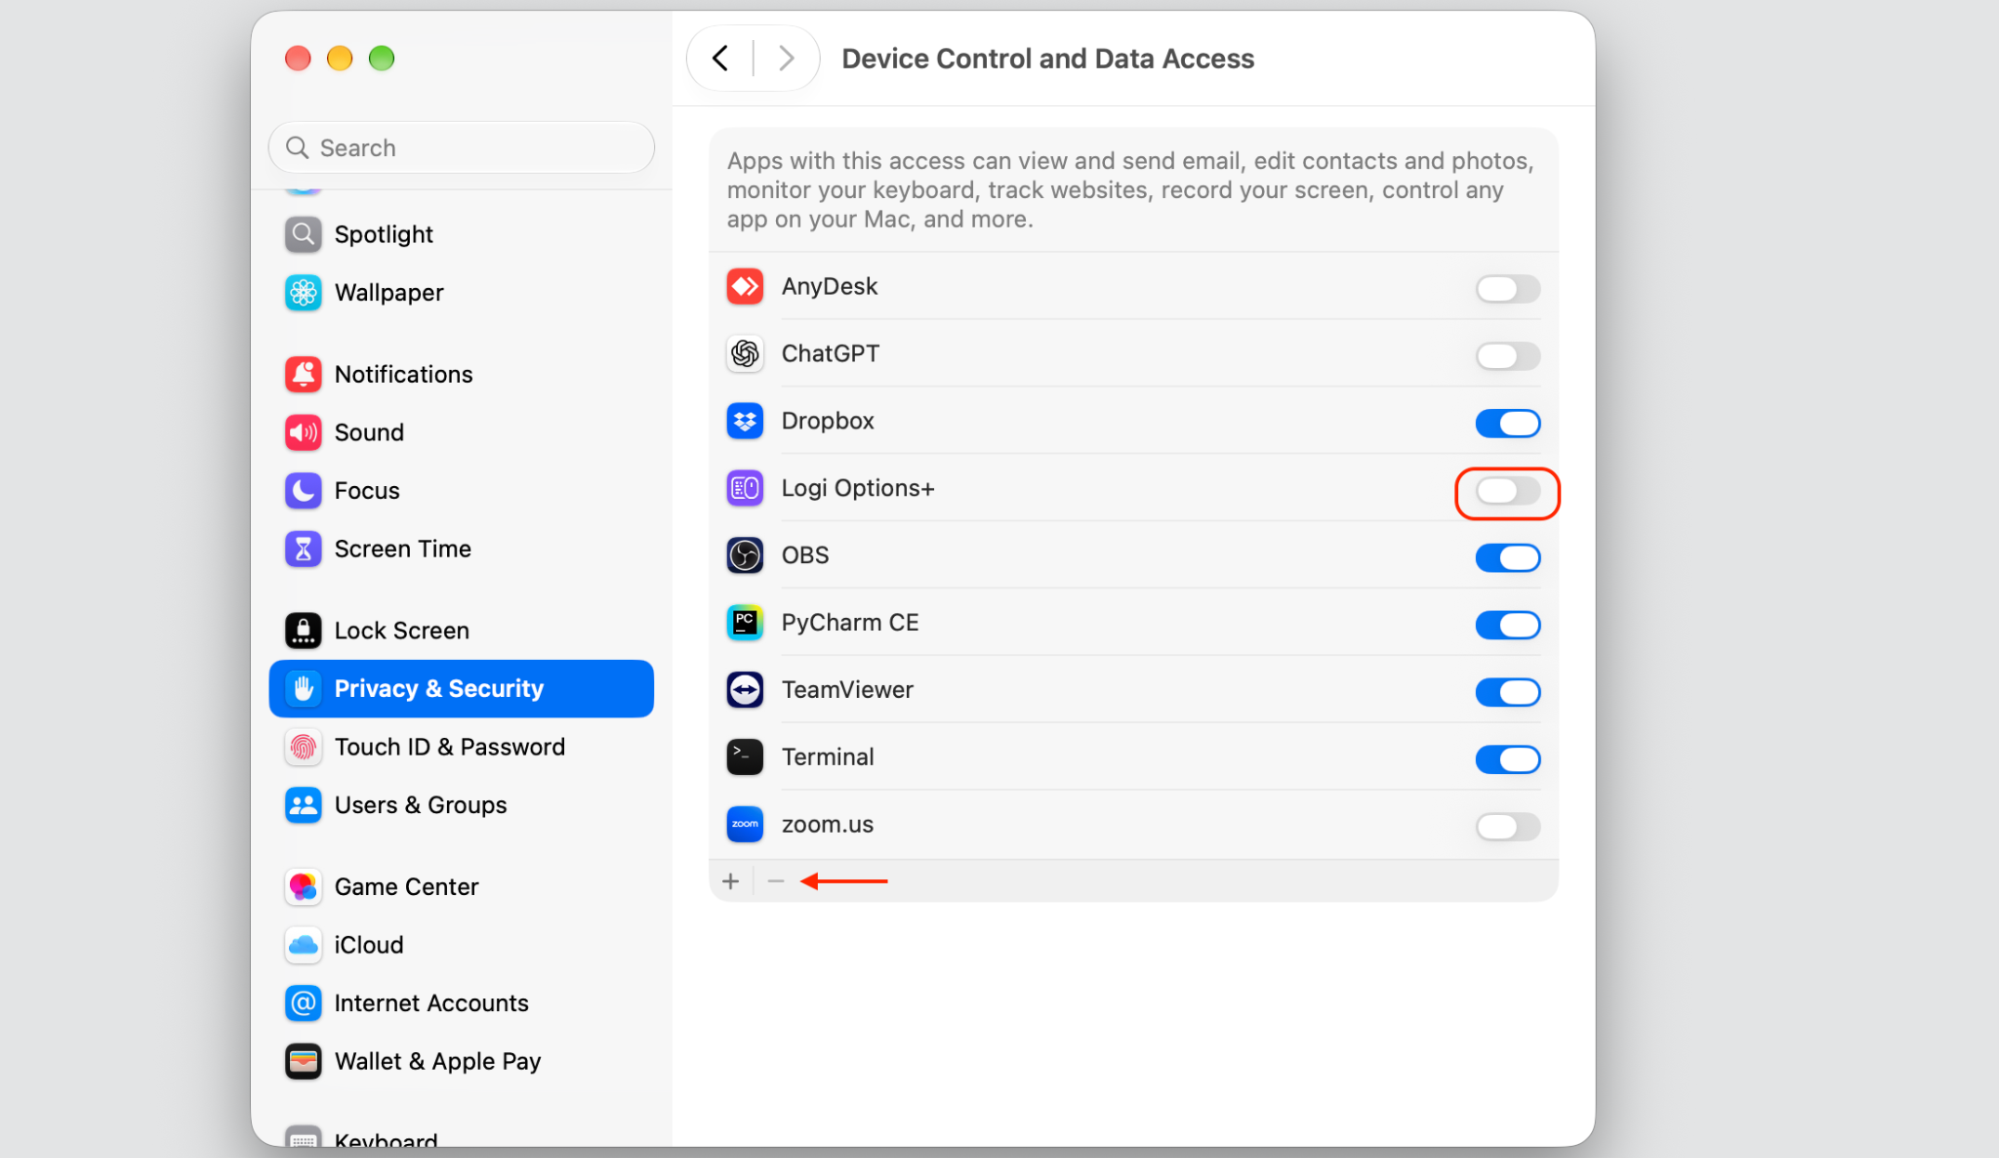
Return to Privacy & Security and open Device Control and Data Access (if available).
Find Logi Options+ and disable its permissions or remove its entry if the option is available.
Step 1. Go to Settings from Apple LogoStep 2. Go to Privacy & SecurityStep 3. Select Bluetooth and Device Control and Data Access (one by one)Step 4. Toggle off Logi Option + from Bluetooth (or remove it)Step 5. Toggle off Logi Option + from Device Control and Data Access (or remove it)
A hint from us:
On older macOS versions, however, Logi Options asks for Accessibility and Input Monitoring access, so we’ll revoke these first to prevent leftover permission entries. Do this instead of following the first instructions in this section:
Open the Apple menu > System Settings.
Select Privacy & Security in the sidebar.
Open Accessibility, find Logi Options, and toggle it off.
Do the same under Input Monitoring.
How to uninstall Logi Options on Mac?
There’s more than one way to get this done, and the same thinking applies when you uninstall programs on Mac in general. Let’s start with the manual methods below and finish with an automatic cleanup.
1. Move application to Trash manually
No uninstaller? We can move the app ourselves and then clear Trash to remove it for good. Quit it fully first so nothing stays active.
Move it out with these steps:
Quit Logi Options+ from the menu bar.
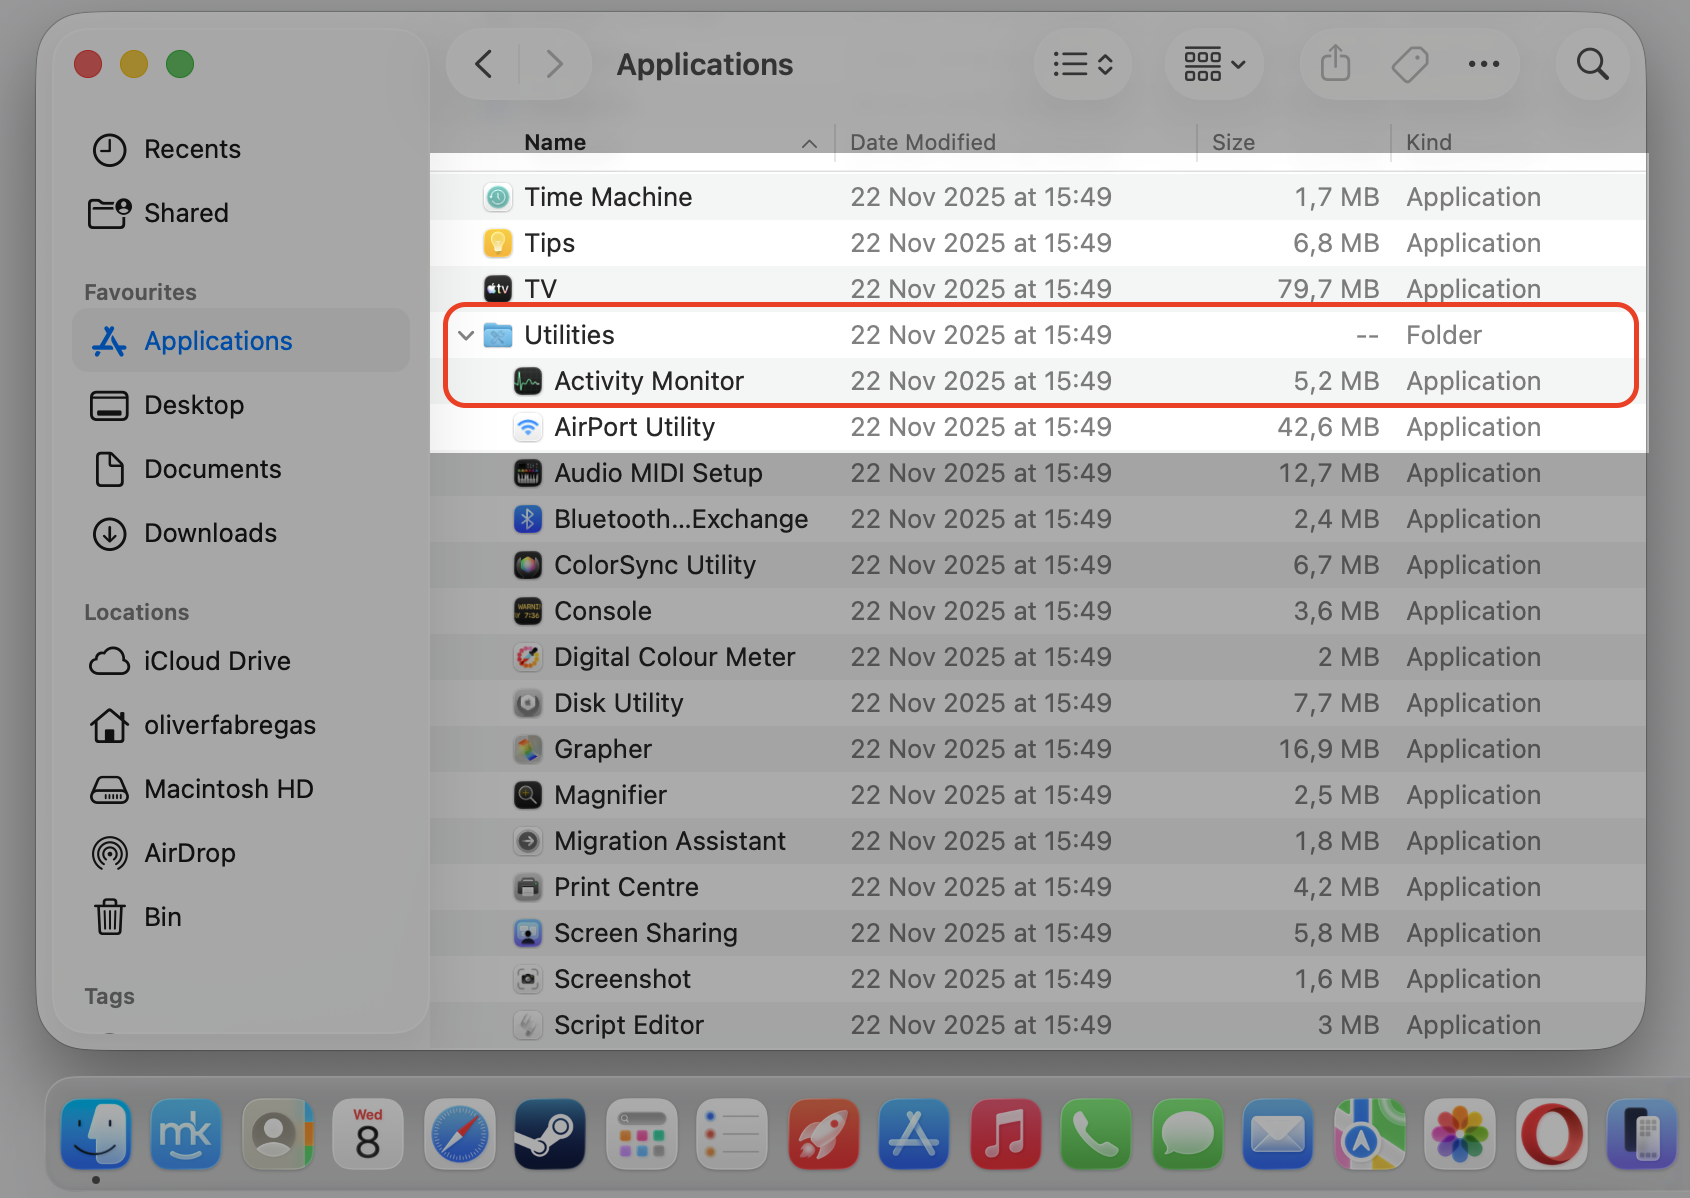
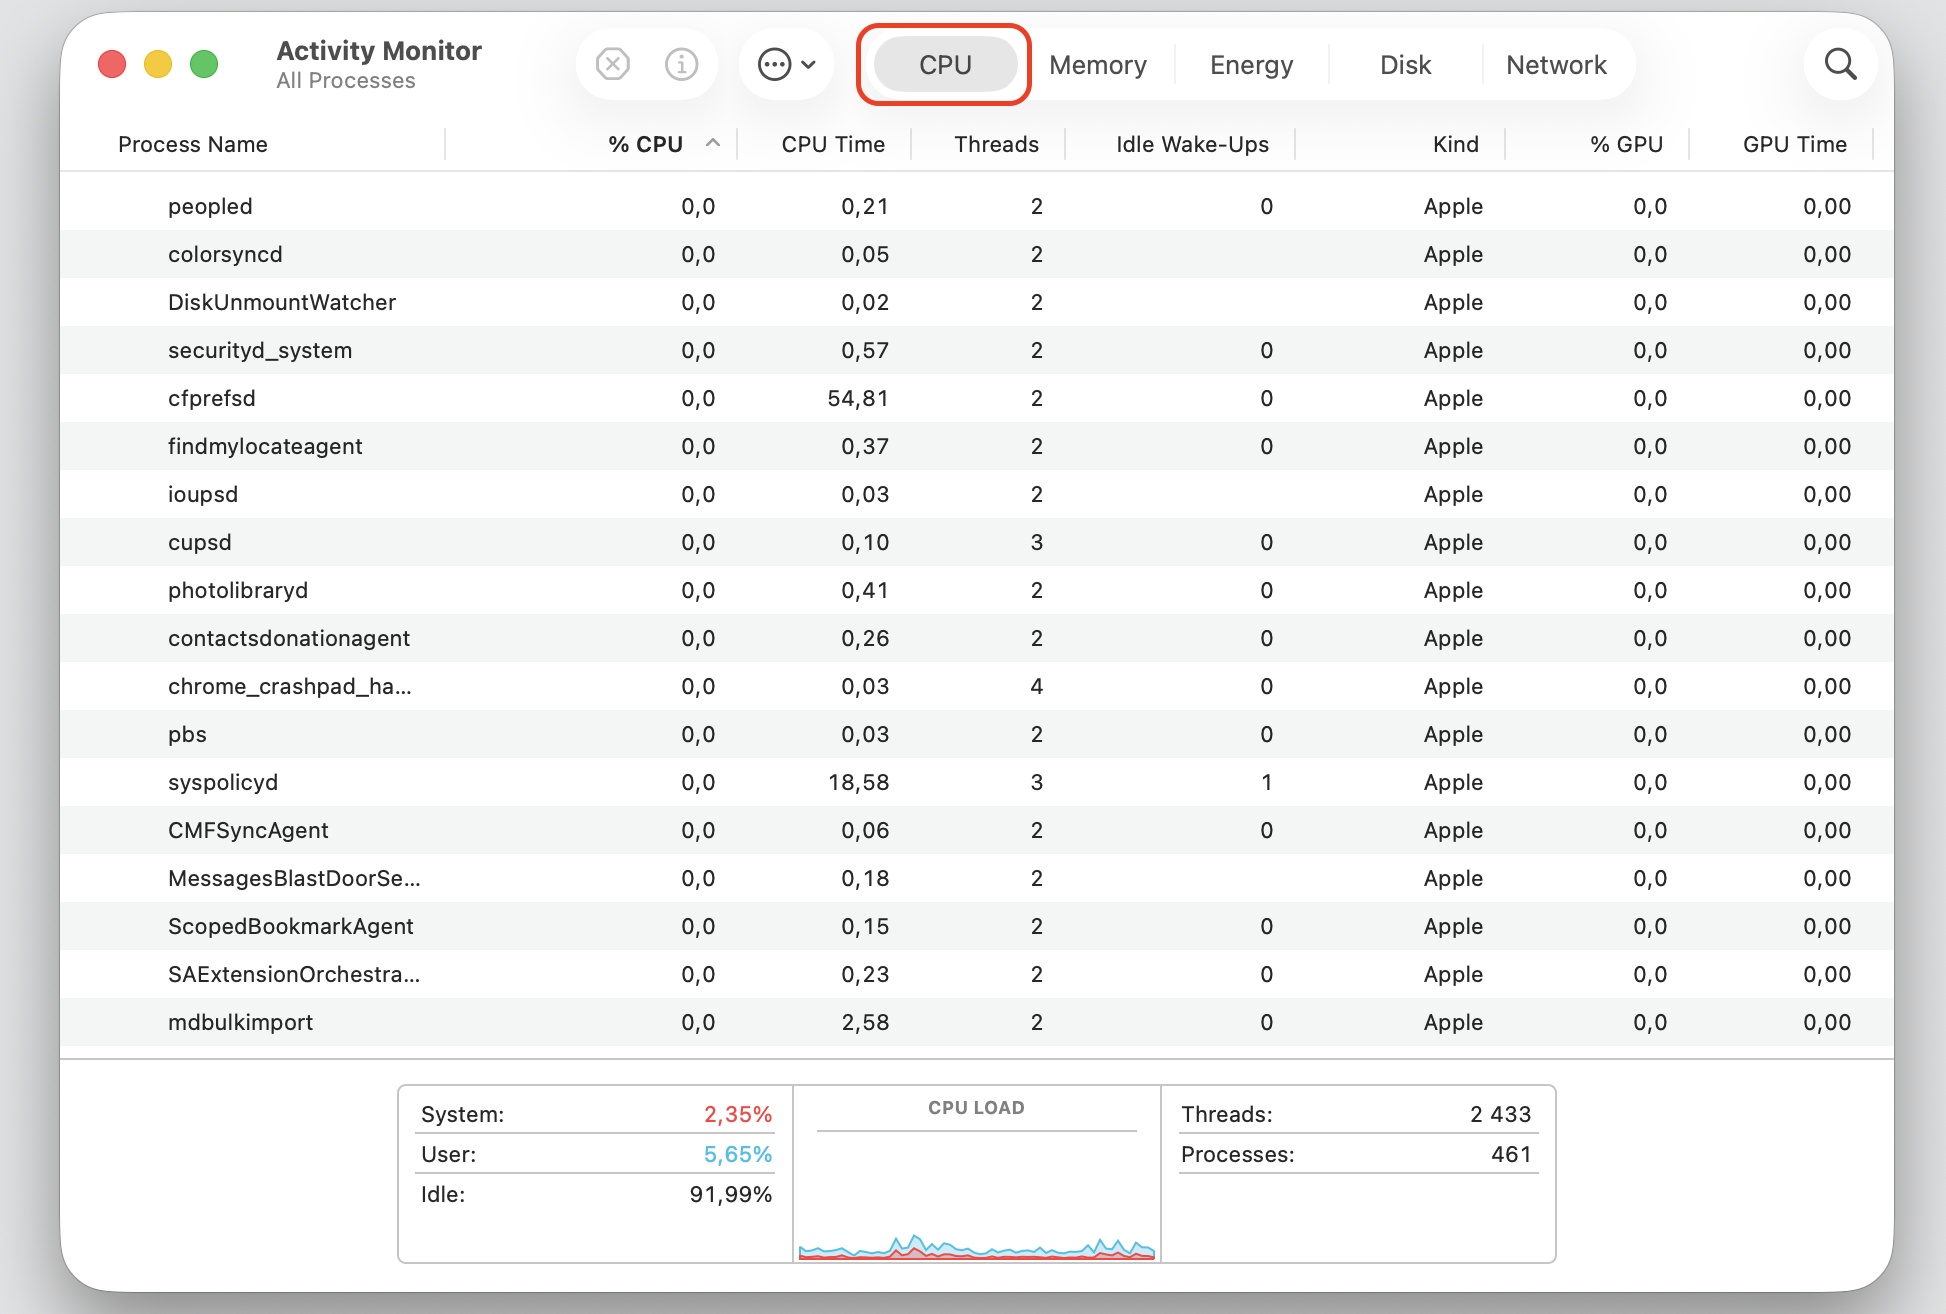
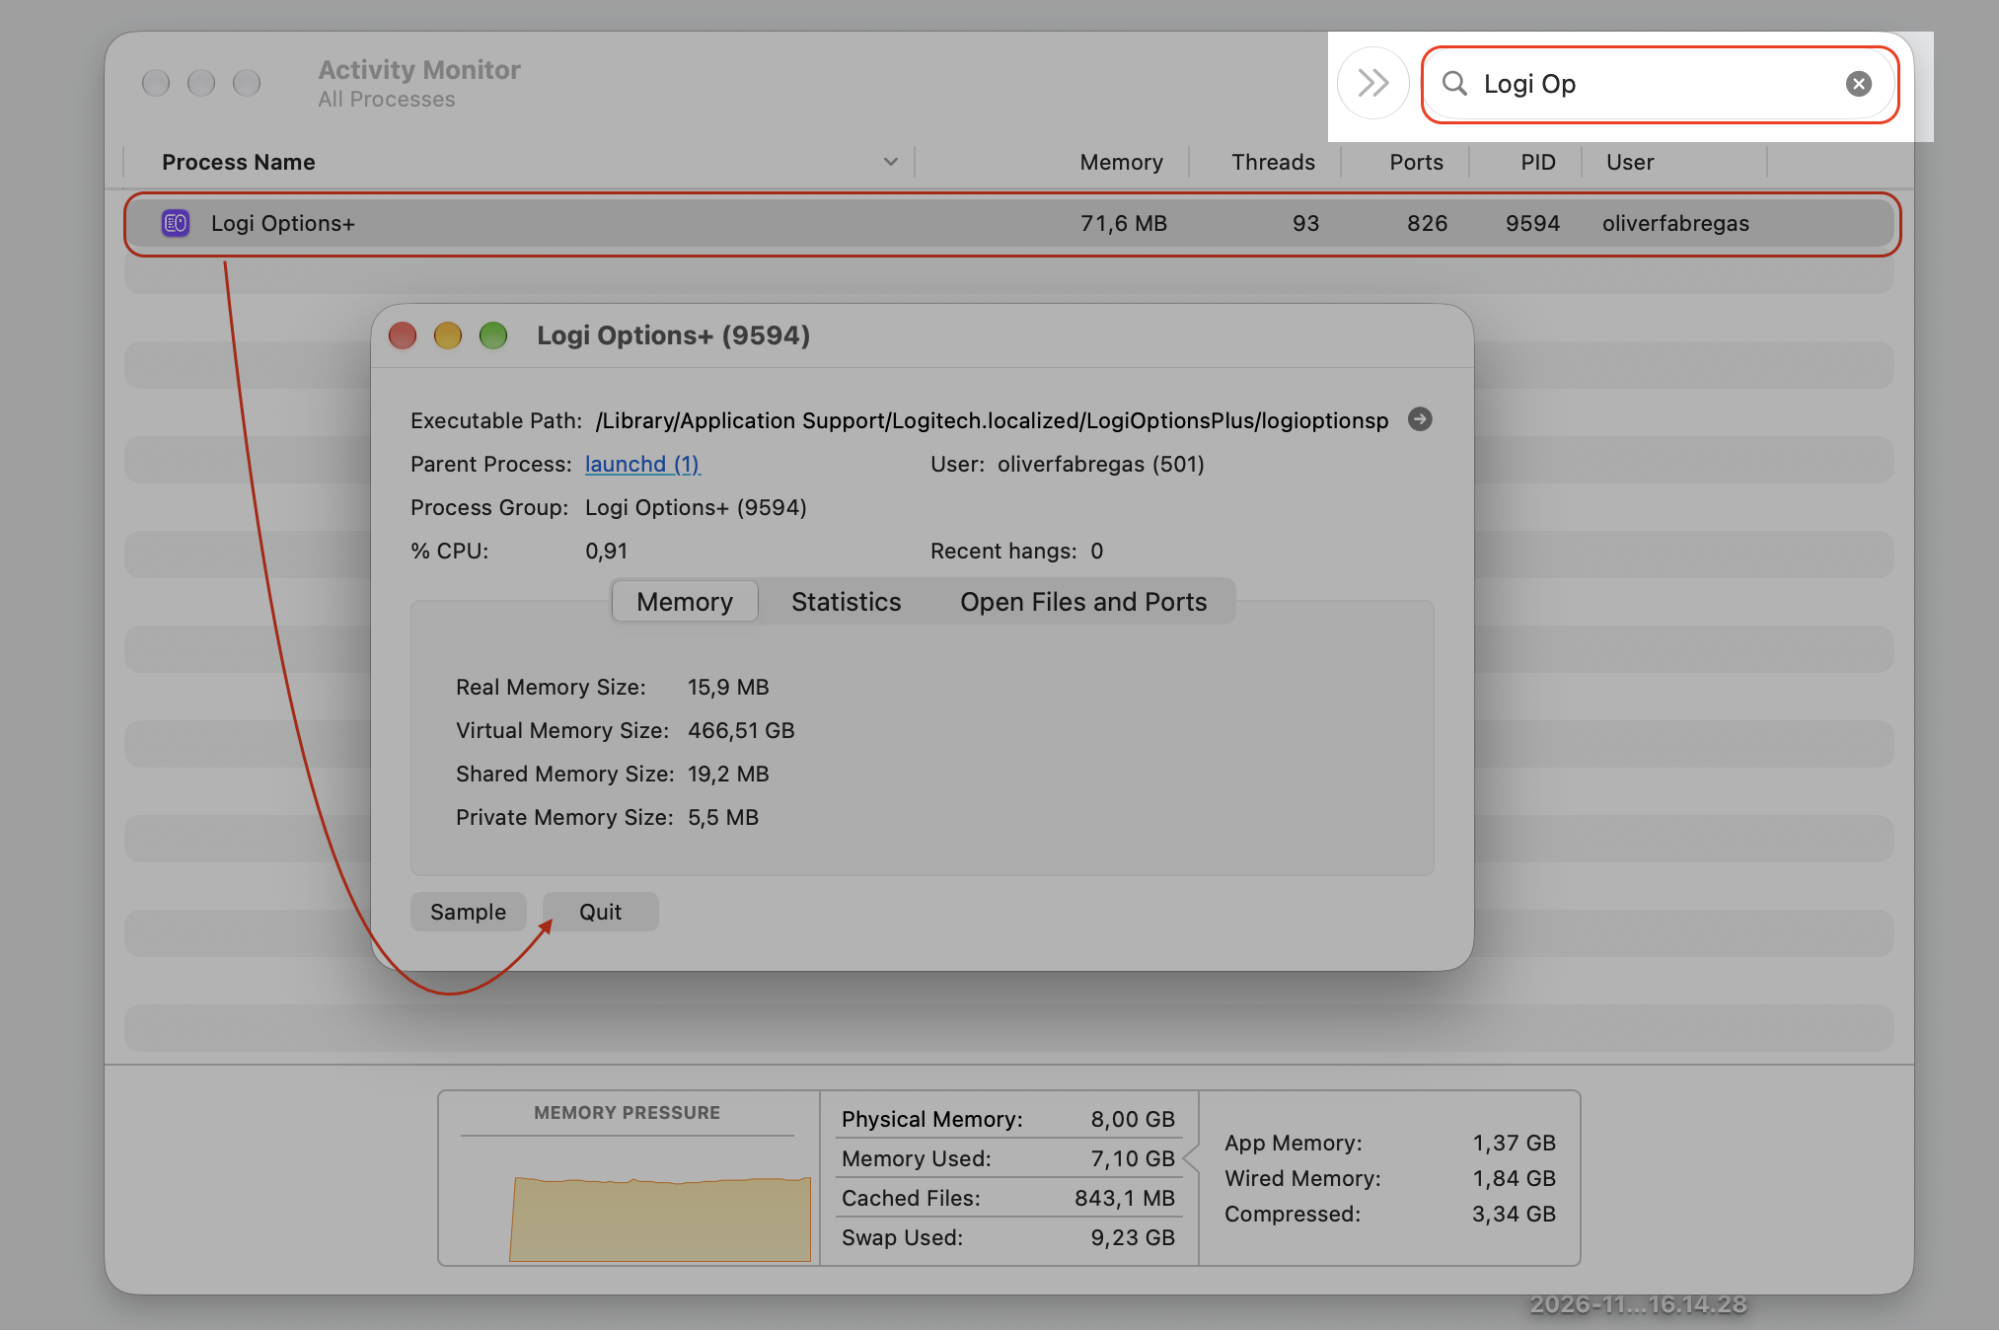
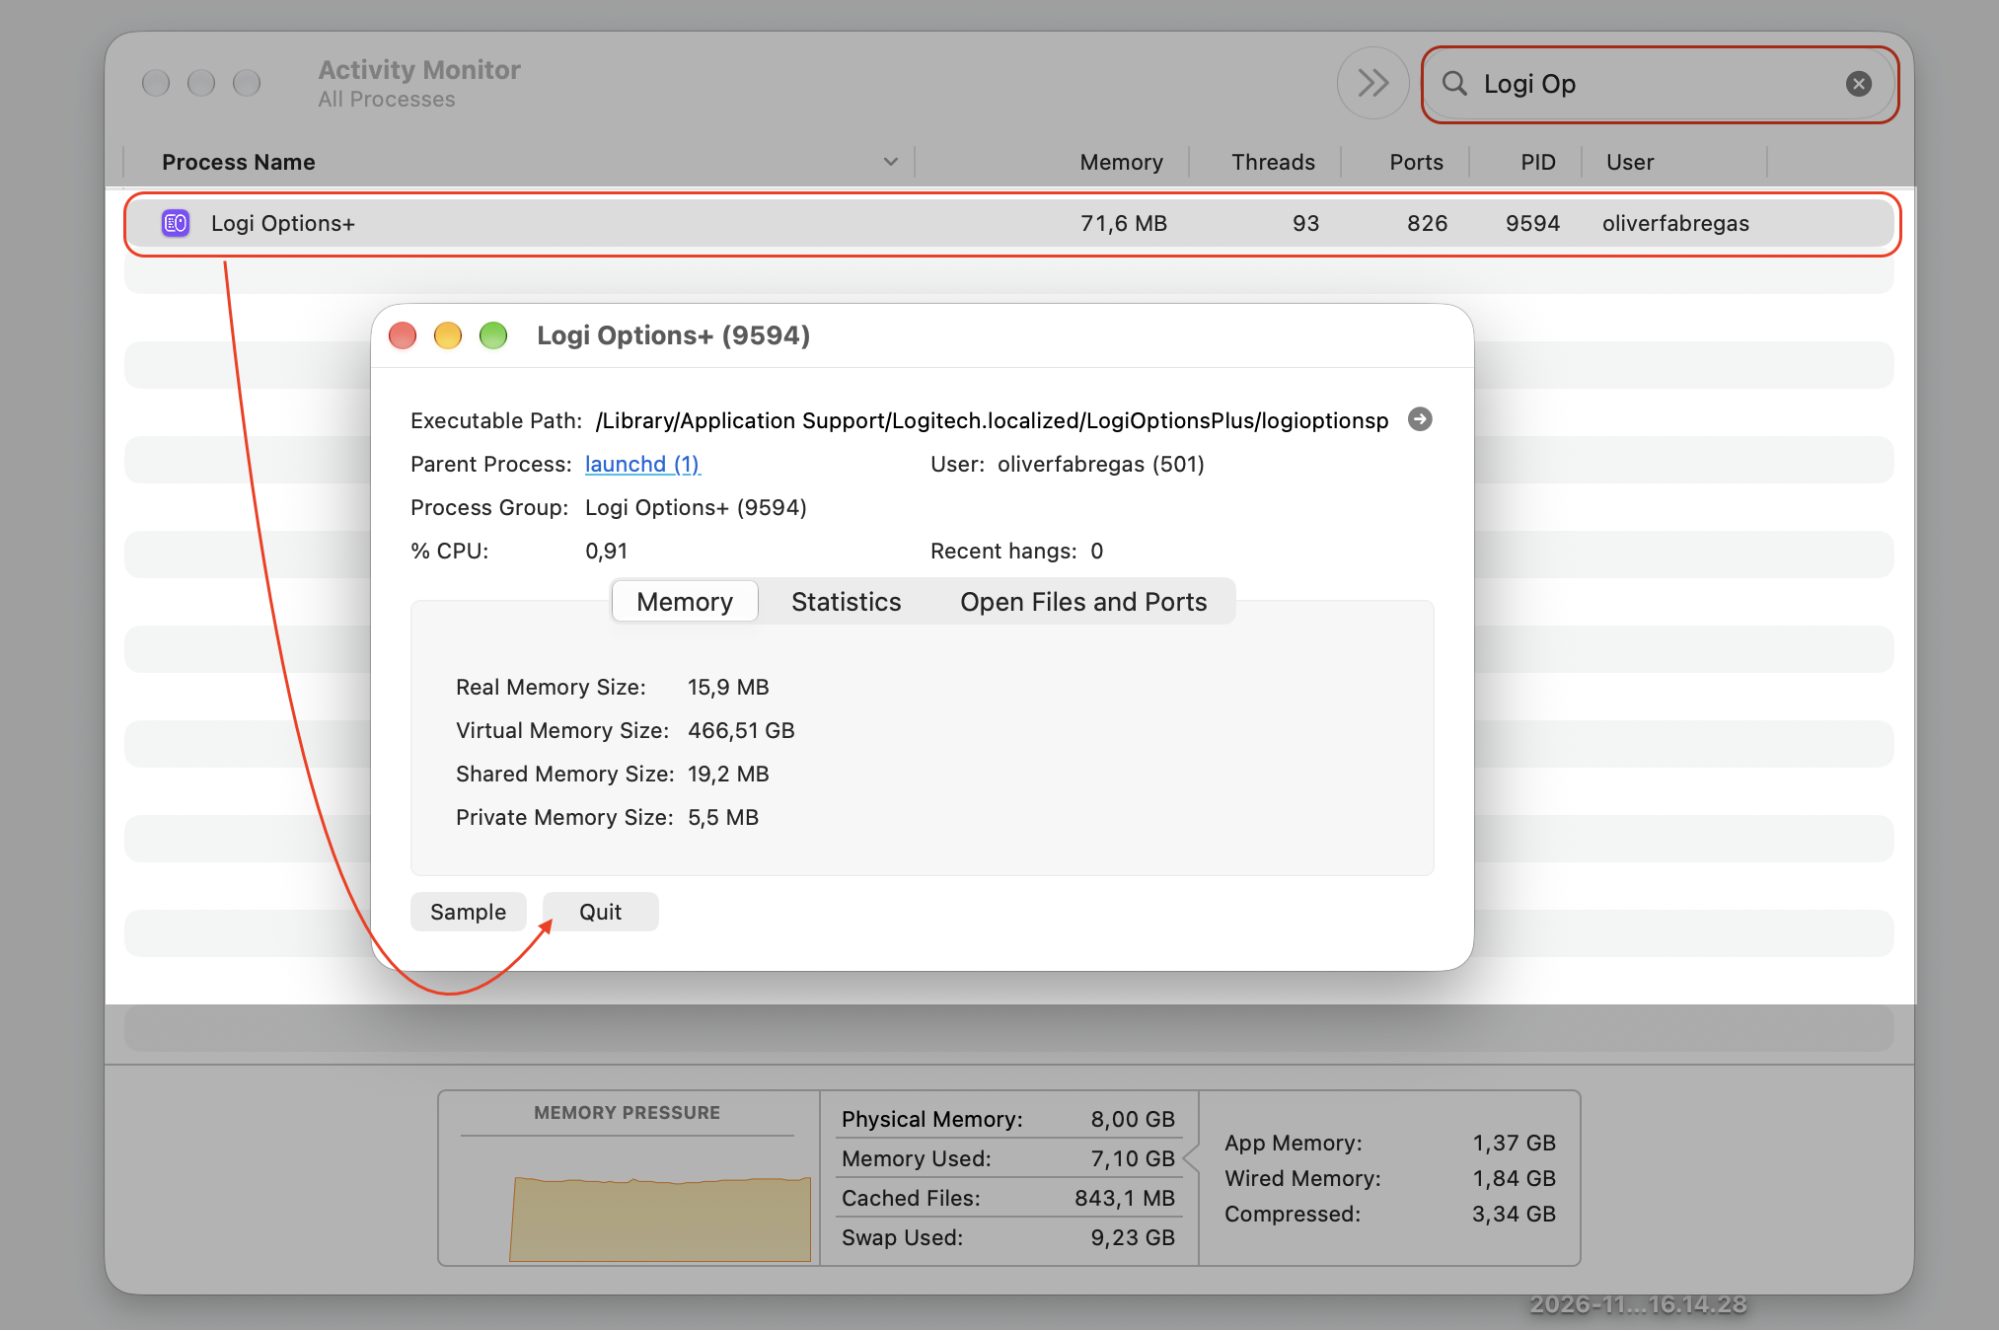
Open Activity Monitor (in Applications > Utilities), select any Logi processes, and quit them.
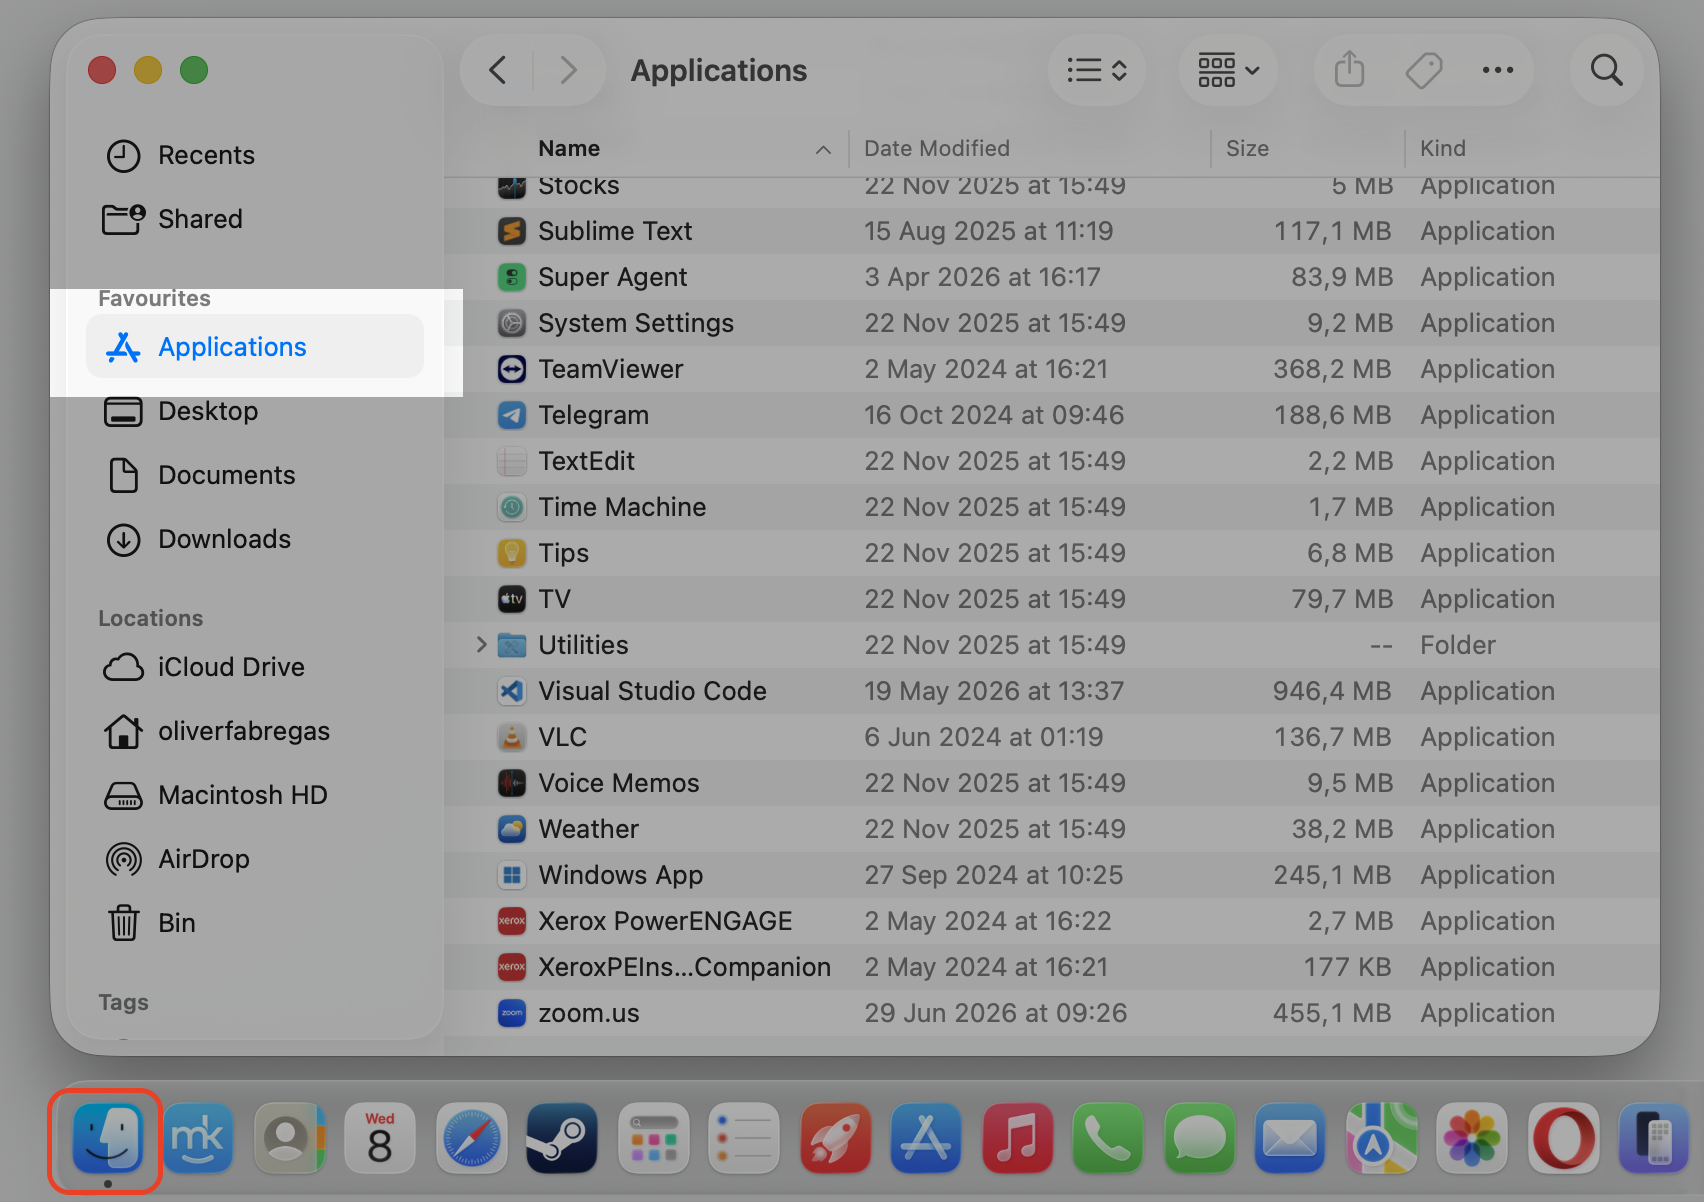
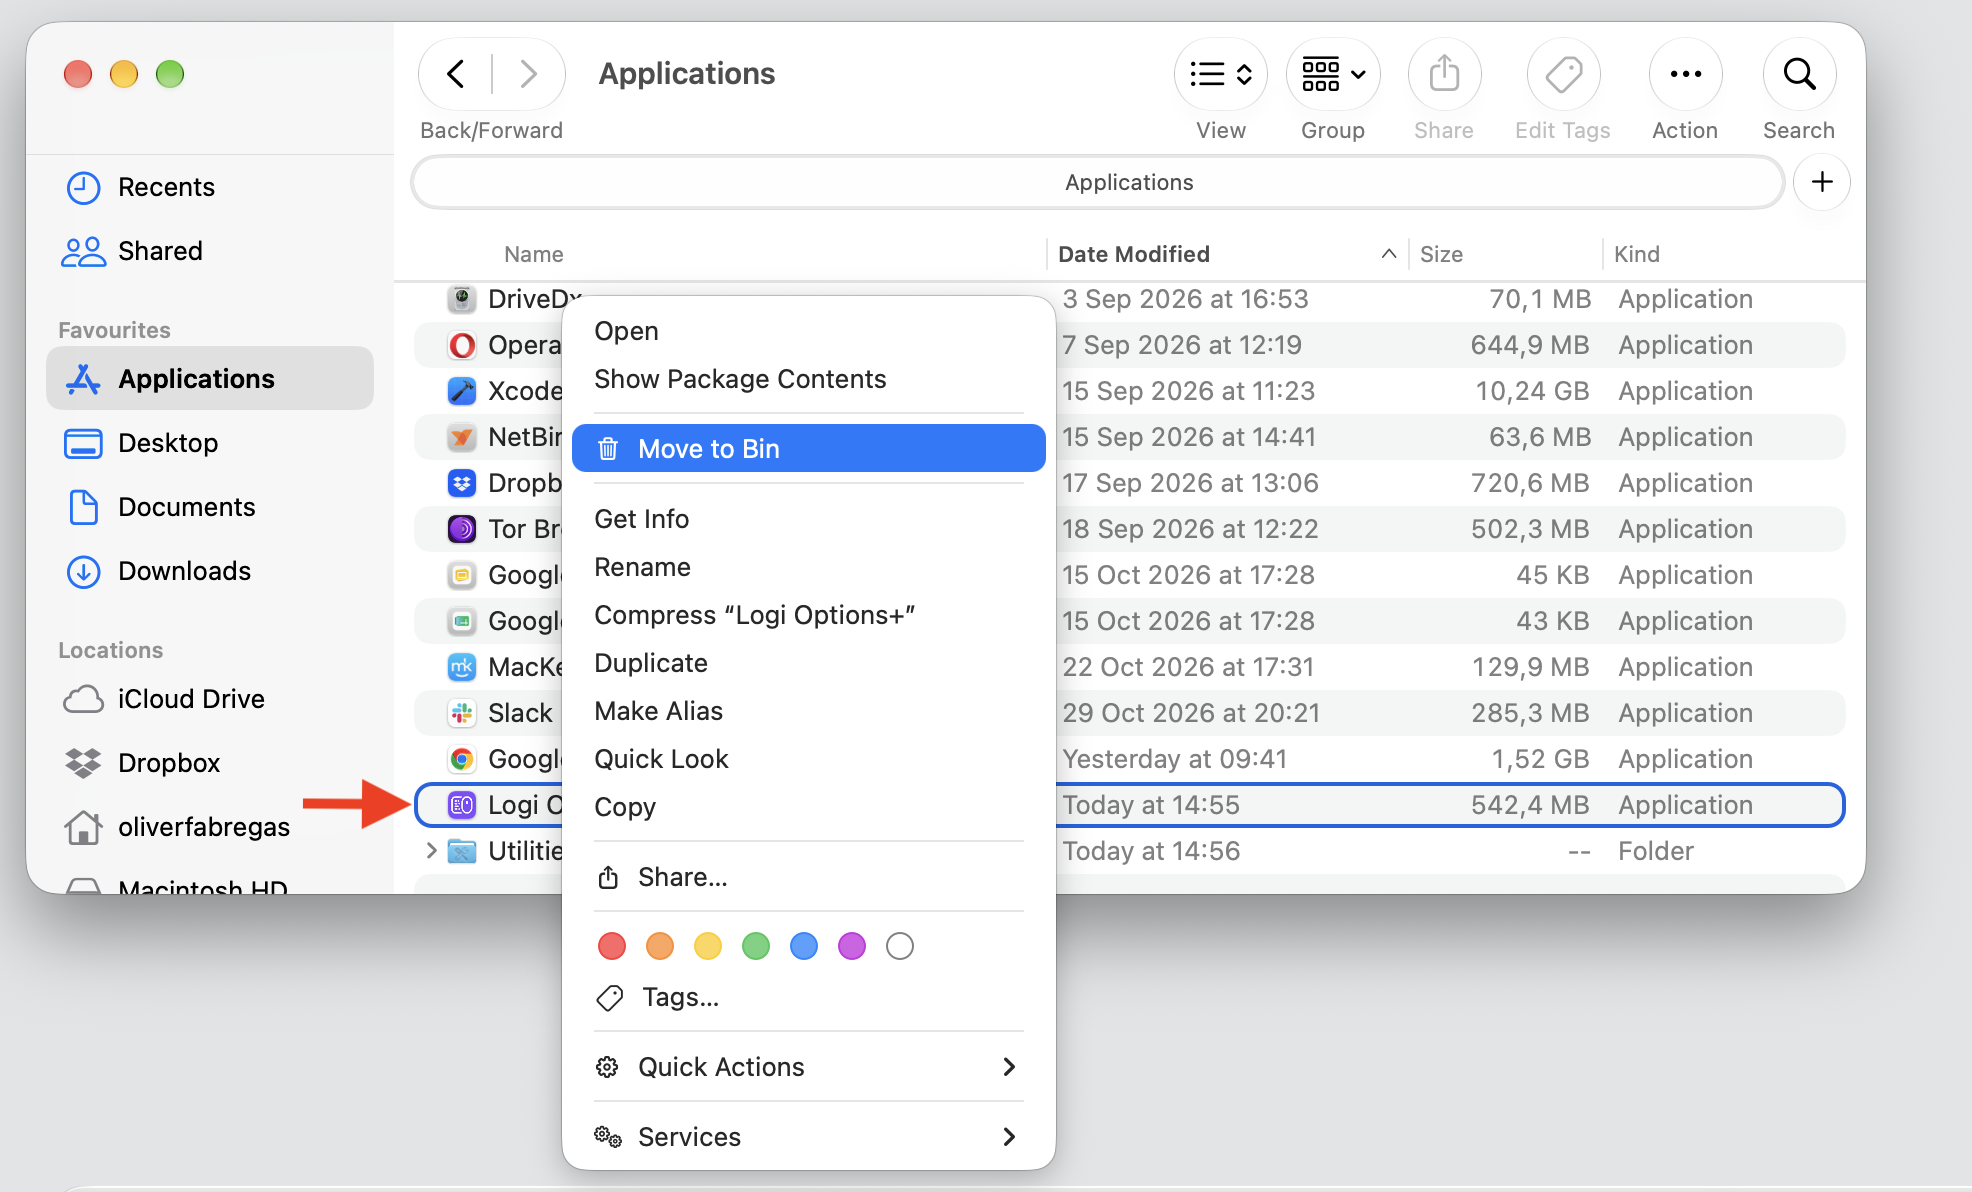
In Finder > Applications, drag Logi Options+ to the Bin.
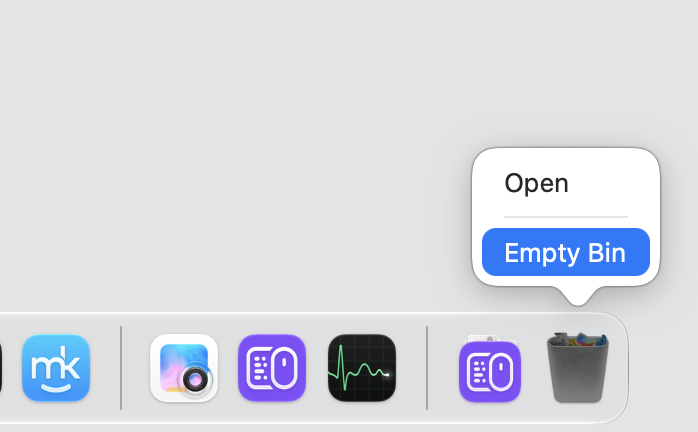
Empty the Bin to finish the removal.
Step 1. Go to Logi+ preferences and select QuitStep 2. Go to Finder > ApplicationsStep 3. Expand the Utility folder and select Activity Monitor appStep 4. Select the CPU tabStep 5. Type Logi in the Search BarStep 6. Select the process with the double-click and proceed with the Quit buttonStep 7. Go back to Finder > Applications, select the application with Control-click, and Move to the BinStep 8. Empty Bin
2. Delete leftover files and folders from Library
Dragging the app to Trash leaves support files behind, so to completely remove Logi Options from Mac, we’ll check your Library folders too—these hidden locations are where you delete all program files on Mac that the app left behind.
Check these spots next:
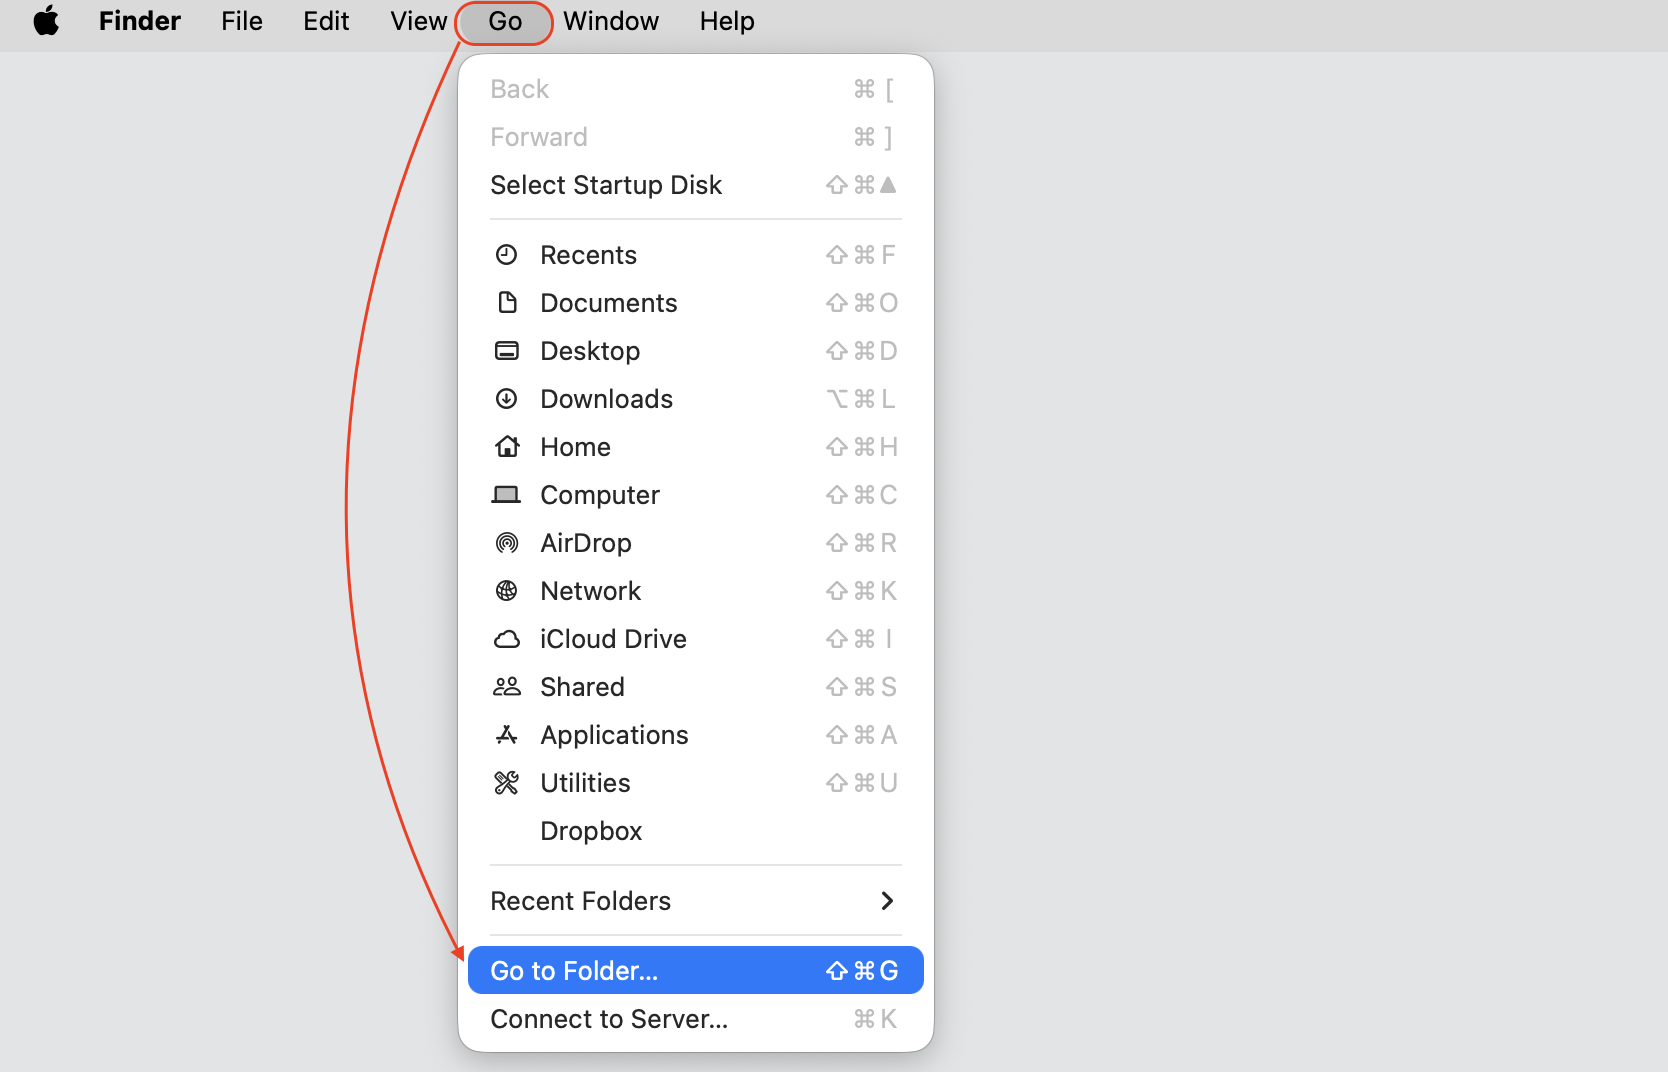
In Finder, select Go > Go to Folder from the menu bar.
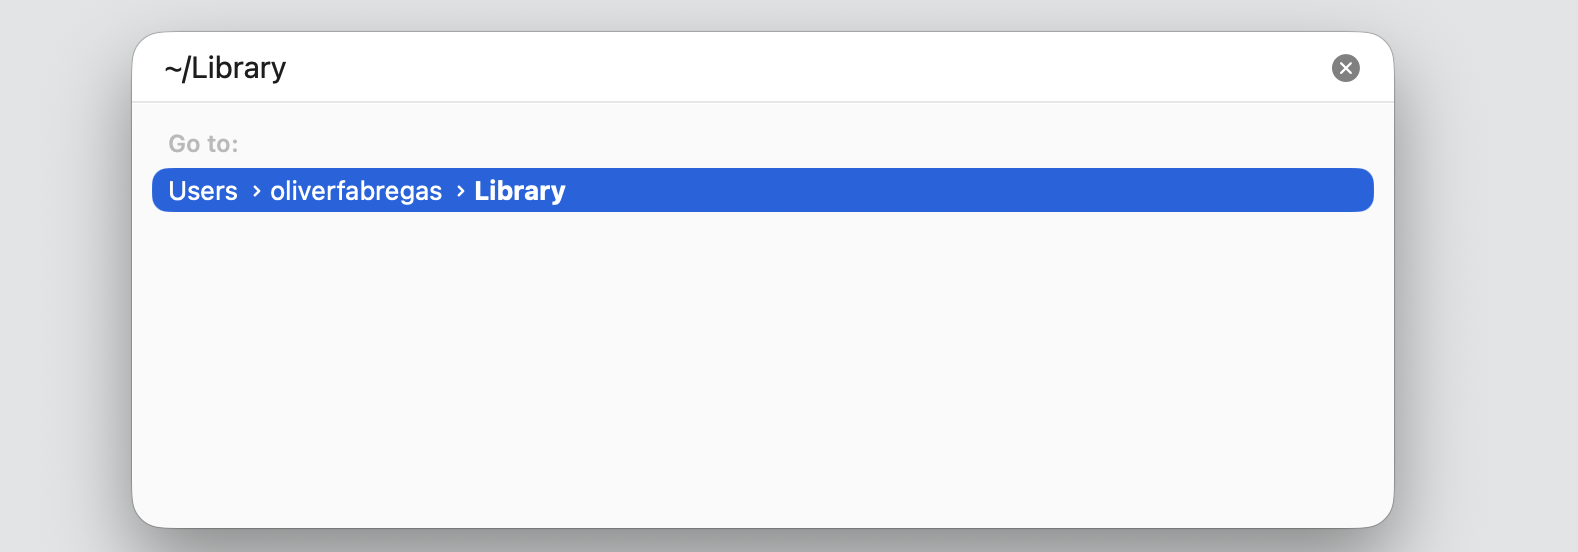
Enter ~/Library and press Return.
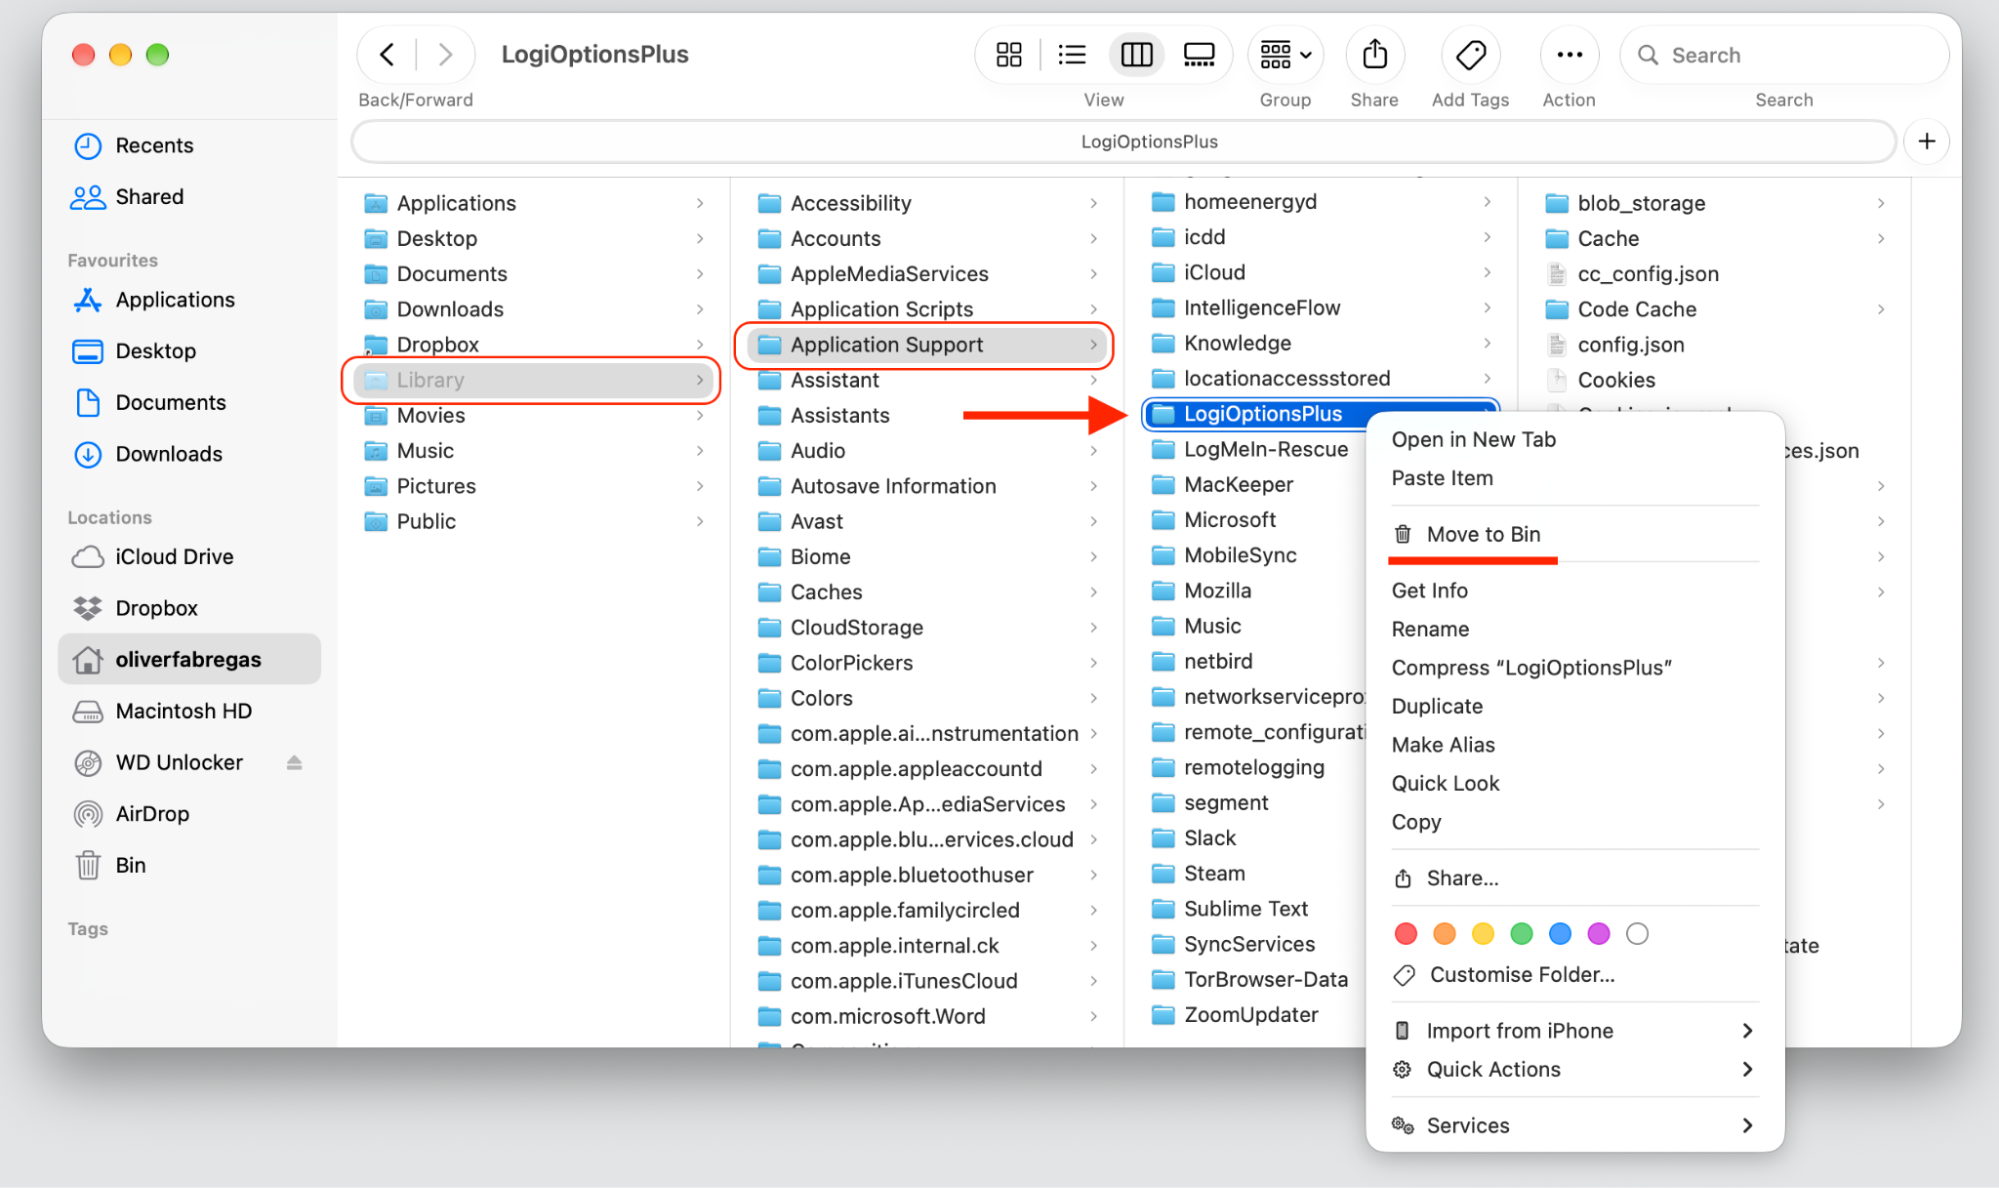
Open Application Support and move the LogiOptionsPlusfolder to Bin.
Open LaunchAgents and remove any com.logi.optionsplus files.
Open Preferences and delete the com.logi.optionsplus plist files.
Open Caches and clear out the Logitech cache folders.
Step 1. Go to Finder > Go > Go Step 2. Type ~/Library and hit ReturnStep 3. Select all Logi-related files and folders, Control-click the chosen items, and click Move to Bin
3. Uninstall Logi Options automatically using third-party apps
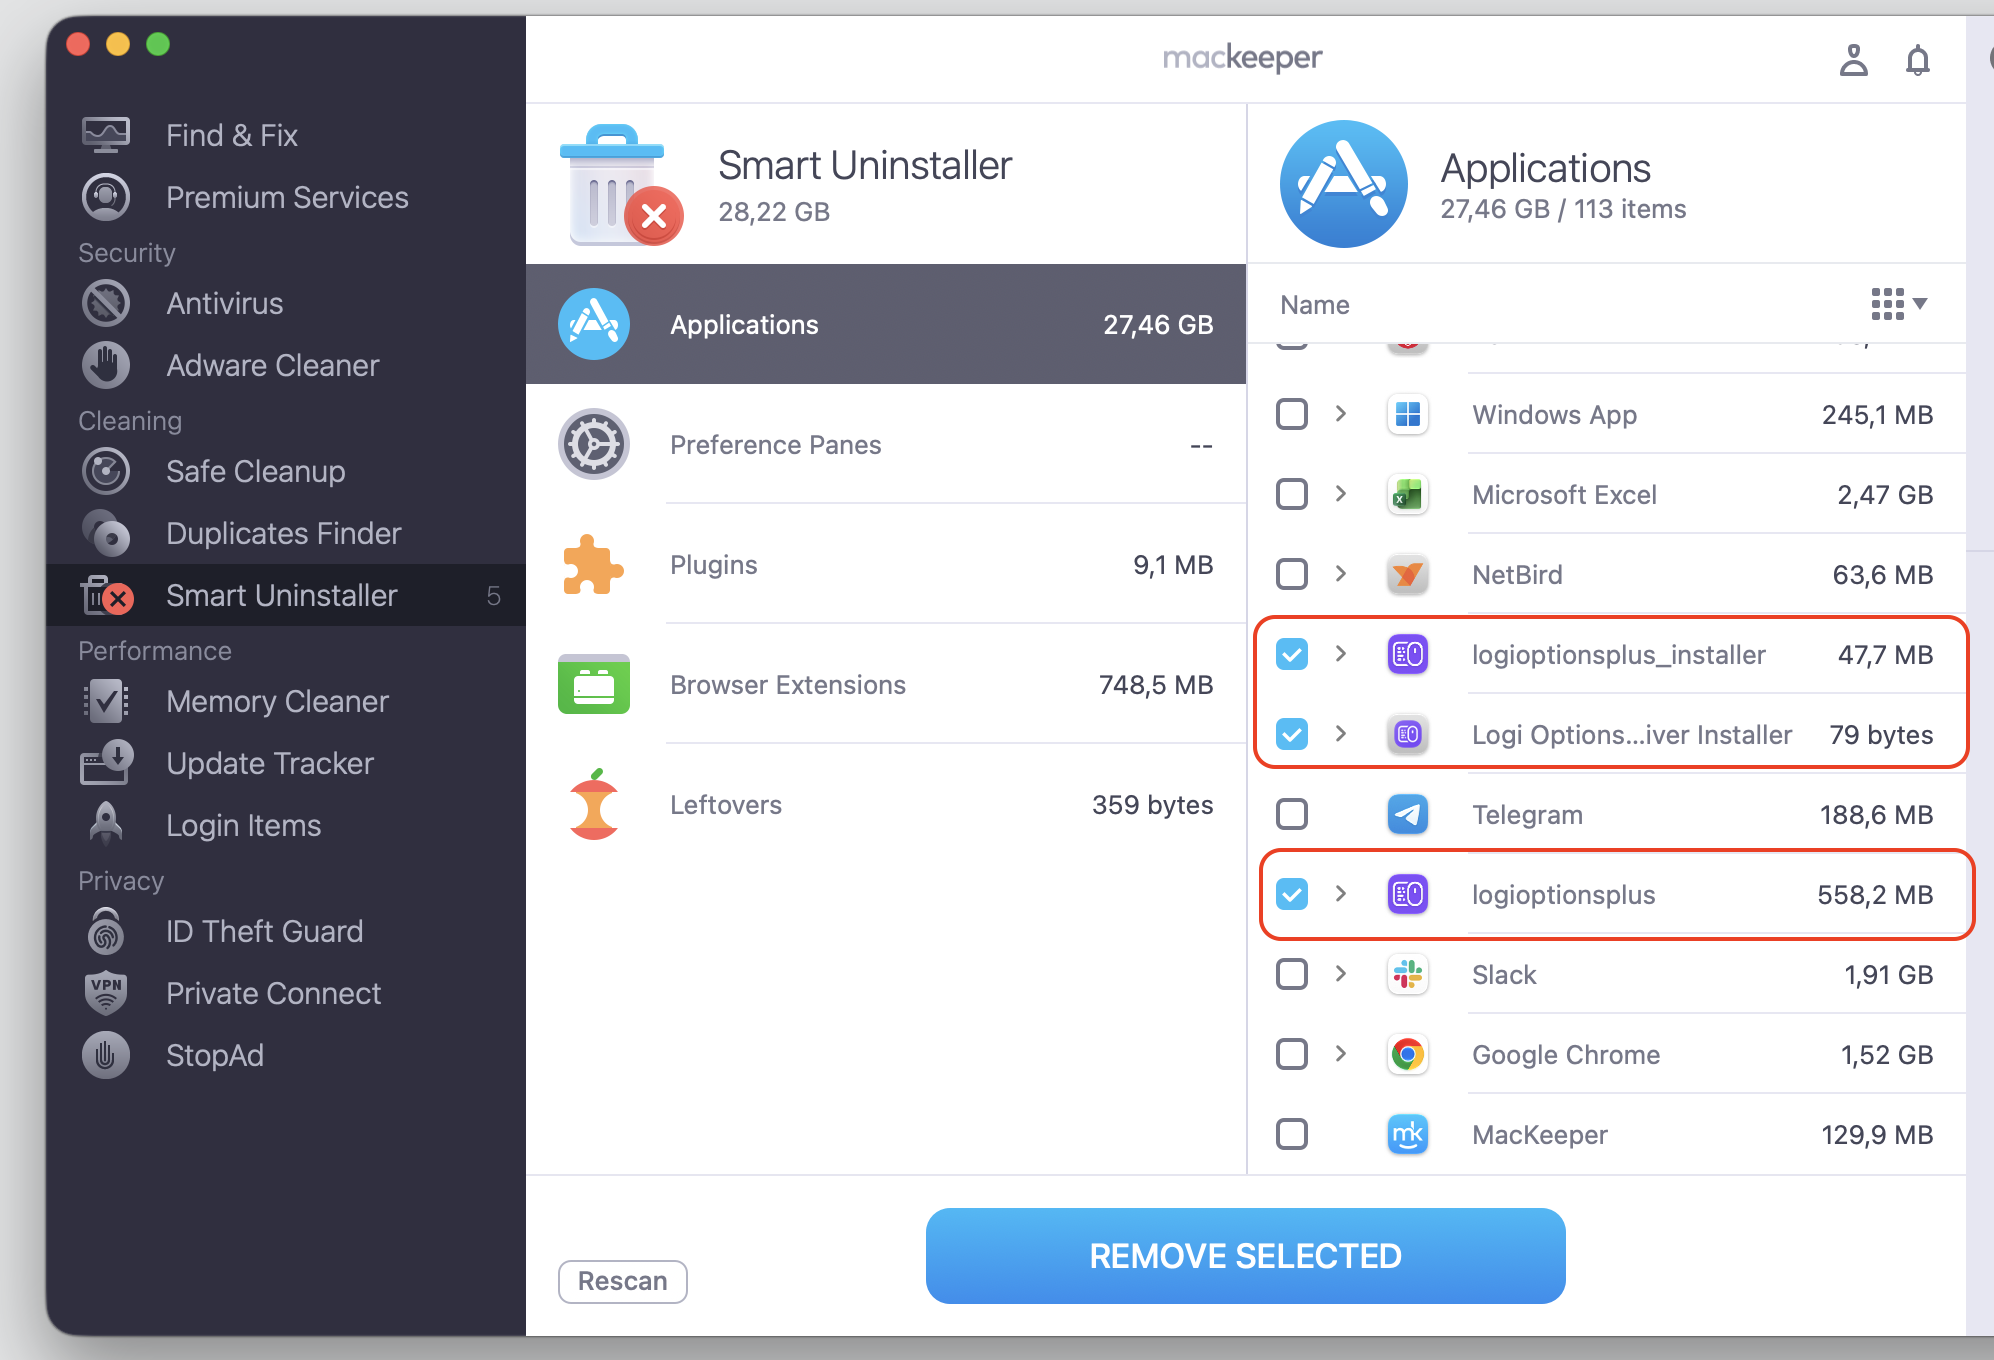
Manual removal works, but it’s easy to miss a hidden daemon or launch agent. That’s where MacKeeper’s Smart Uninstaller helps us out—it finds every linked file for you and clears it in one pass.
That’s how you fully uninstall Logi Options on Mac without hunting through folders yourself.
Step 1. Go to MacKeeper > Smart Uninstaller > Start ScanStep 2. Wait until the scan is finishedStep 3. Select the app and proceed with the Remove Selected button
Conclusion
A simple drag-to-Trash rarely does the job with Logi Options+. Its launch agents, daemons, and preference files stay behind, which can keep processes running and permissions lingering. That’s why a proper Library cleanup—or a dedicated uninstaller—matters when you want to completely remove Logi Options from Mac.
If checking Library locations and Terminal commands feels like a lot, MacKeeper’s Smart Uninstaller handles it for you. It detects the app, gathers its hidden files, and clears them in one click, so your Mac stays clean and clutter-free. Ready to reclaim that space? Download MacKeeper and remove Logi Options for good.
We respect your privacy and
use cookies
for the best site experience.
Privacy Preferences Center
We use cookies along with other tools to give you the best possible experience while using the
MacKeeper website. Cookies are small text files that help the website load faster. The cookies we
use don’t contain any type of personal data meaning they never store information such as your
location, email address, or IP address.
Help us improve how you interact with our website by accepting the use of cookies. You can change
your privacy settings whenever you like.
Manage consent
All cookies
These cookies are strictly necessary for enabling basic website functionality (including page
navigation, form submission, language detection, post commenting), downloading and purchasing
software. The website might malfunction without these cookies.