Trying to remove Claude Code from Mac but can’t find it in your Applications folder? That’s normal—it lives in Terminal, not the Dock. We suggest using MacKeeper’s Smart Uninstaller feature, which finds an app’s scattered files and clears them in a few clicks, so nothing lingers behind.
Claude Code is Anthropic’s terminal-based coding assistant. You type a command, and it reads your codebase, edits files, and runs tasks for you—whether you’re on a MacBook or a desktop Mac.
Unlike a typical app, it installs as a command-line tool, so it won’t show up in your Applications folder with an icon you can drag to the Trash. Instead, it sits quietly in a hidden directory and runs through the claude command. That’s why the usual drag-to-Trash trick won’t work here, and why the right method depends on how it landed on your Macintosh in the first place.
What to do before uninstalling Claude Code?
Before you delete Claude Code from macOS, it’s worth saving anything you’d like to keep. A clean uninstall wipes your settings and history, so a quick backup now saves headaches later.
Your MCP configuration, stored in the ~/.claude.json file
Custom settings and permissions from the ~/.claude directory
Project instructions saved in CLAUDE.md files inside your projects
Any session data or notes you’d like to reference again
We usually copy these to a separate folder first. That way, reinstalling later feels less like starting over.
Does uninstalling Claude Code affect your projects or account?
Short answer—no, not the parts that matter most. Removing the CLI takes away the tool, not your work. Here’s what stays and what goes.
Your source code and project files stay on your Mac.
Claude Code’s settings and cache get removed, since those are the CLI’s own files.
Your Anthropic account and cloud data live online, so they’re untouched.
Separately installed MCP servers stay put unless you remove them yourself.
So your code is safe. You’re clearing out the assistant, not the projects it helped you build.
A note from our experts:
Struggling to uninstall Claude Code from your Mac? Do you have other unused apps? Remove them from your Mac easily—along with all their files—using a dedicated third-party app — MacKeeper’s Smart Uninstaller.
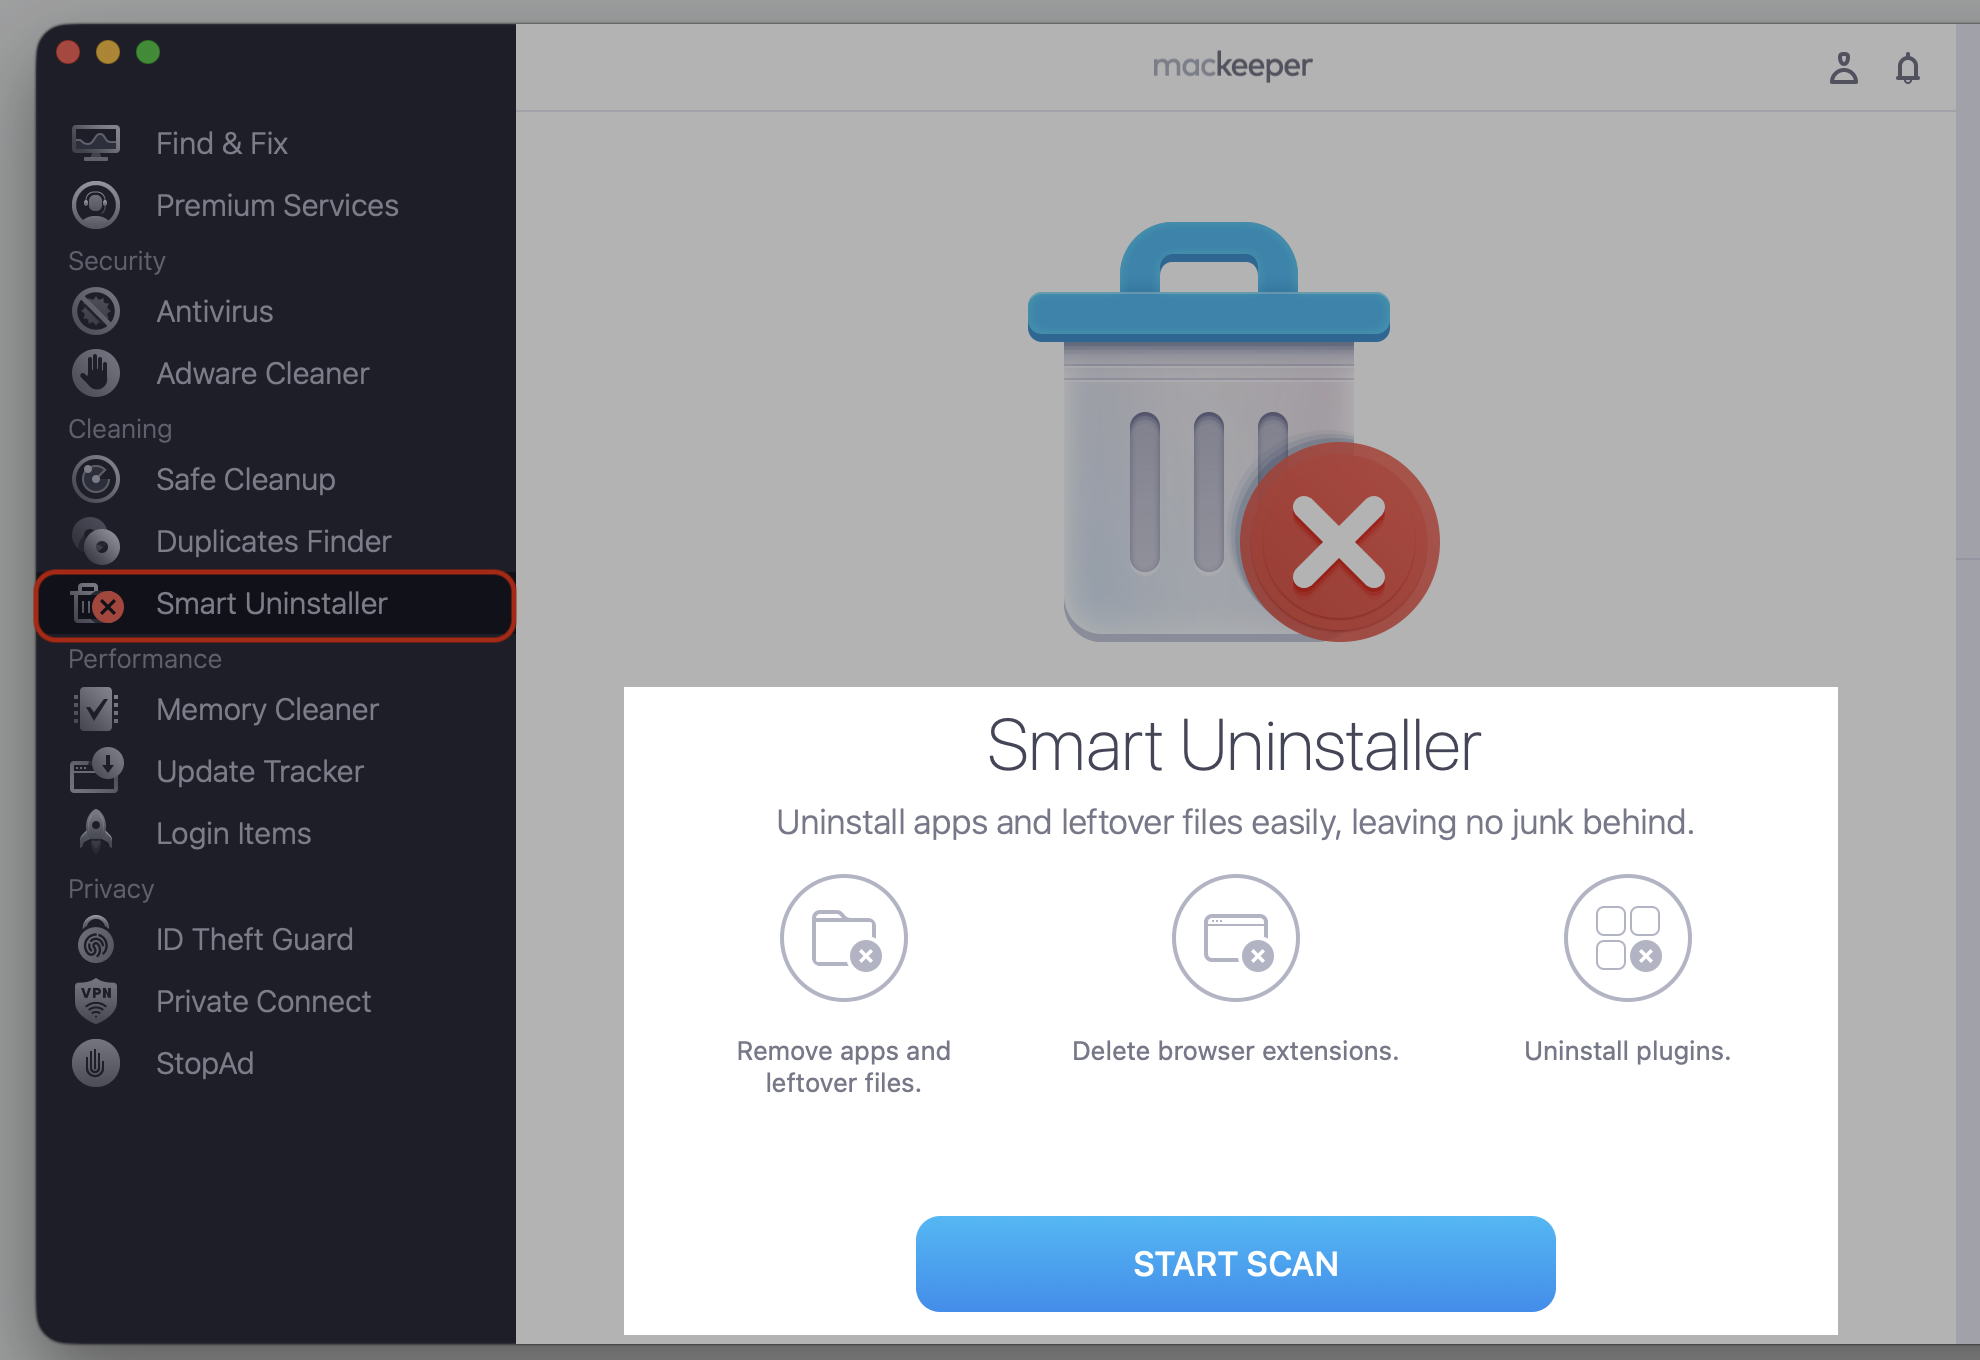
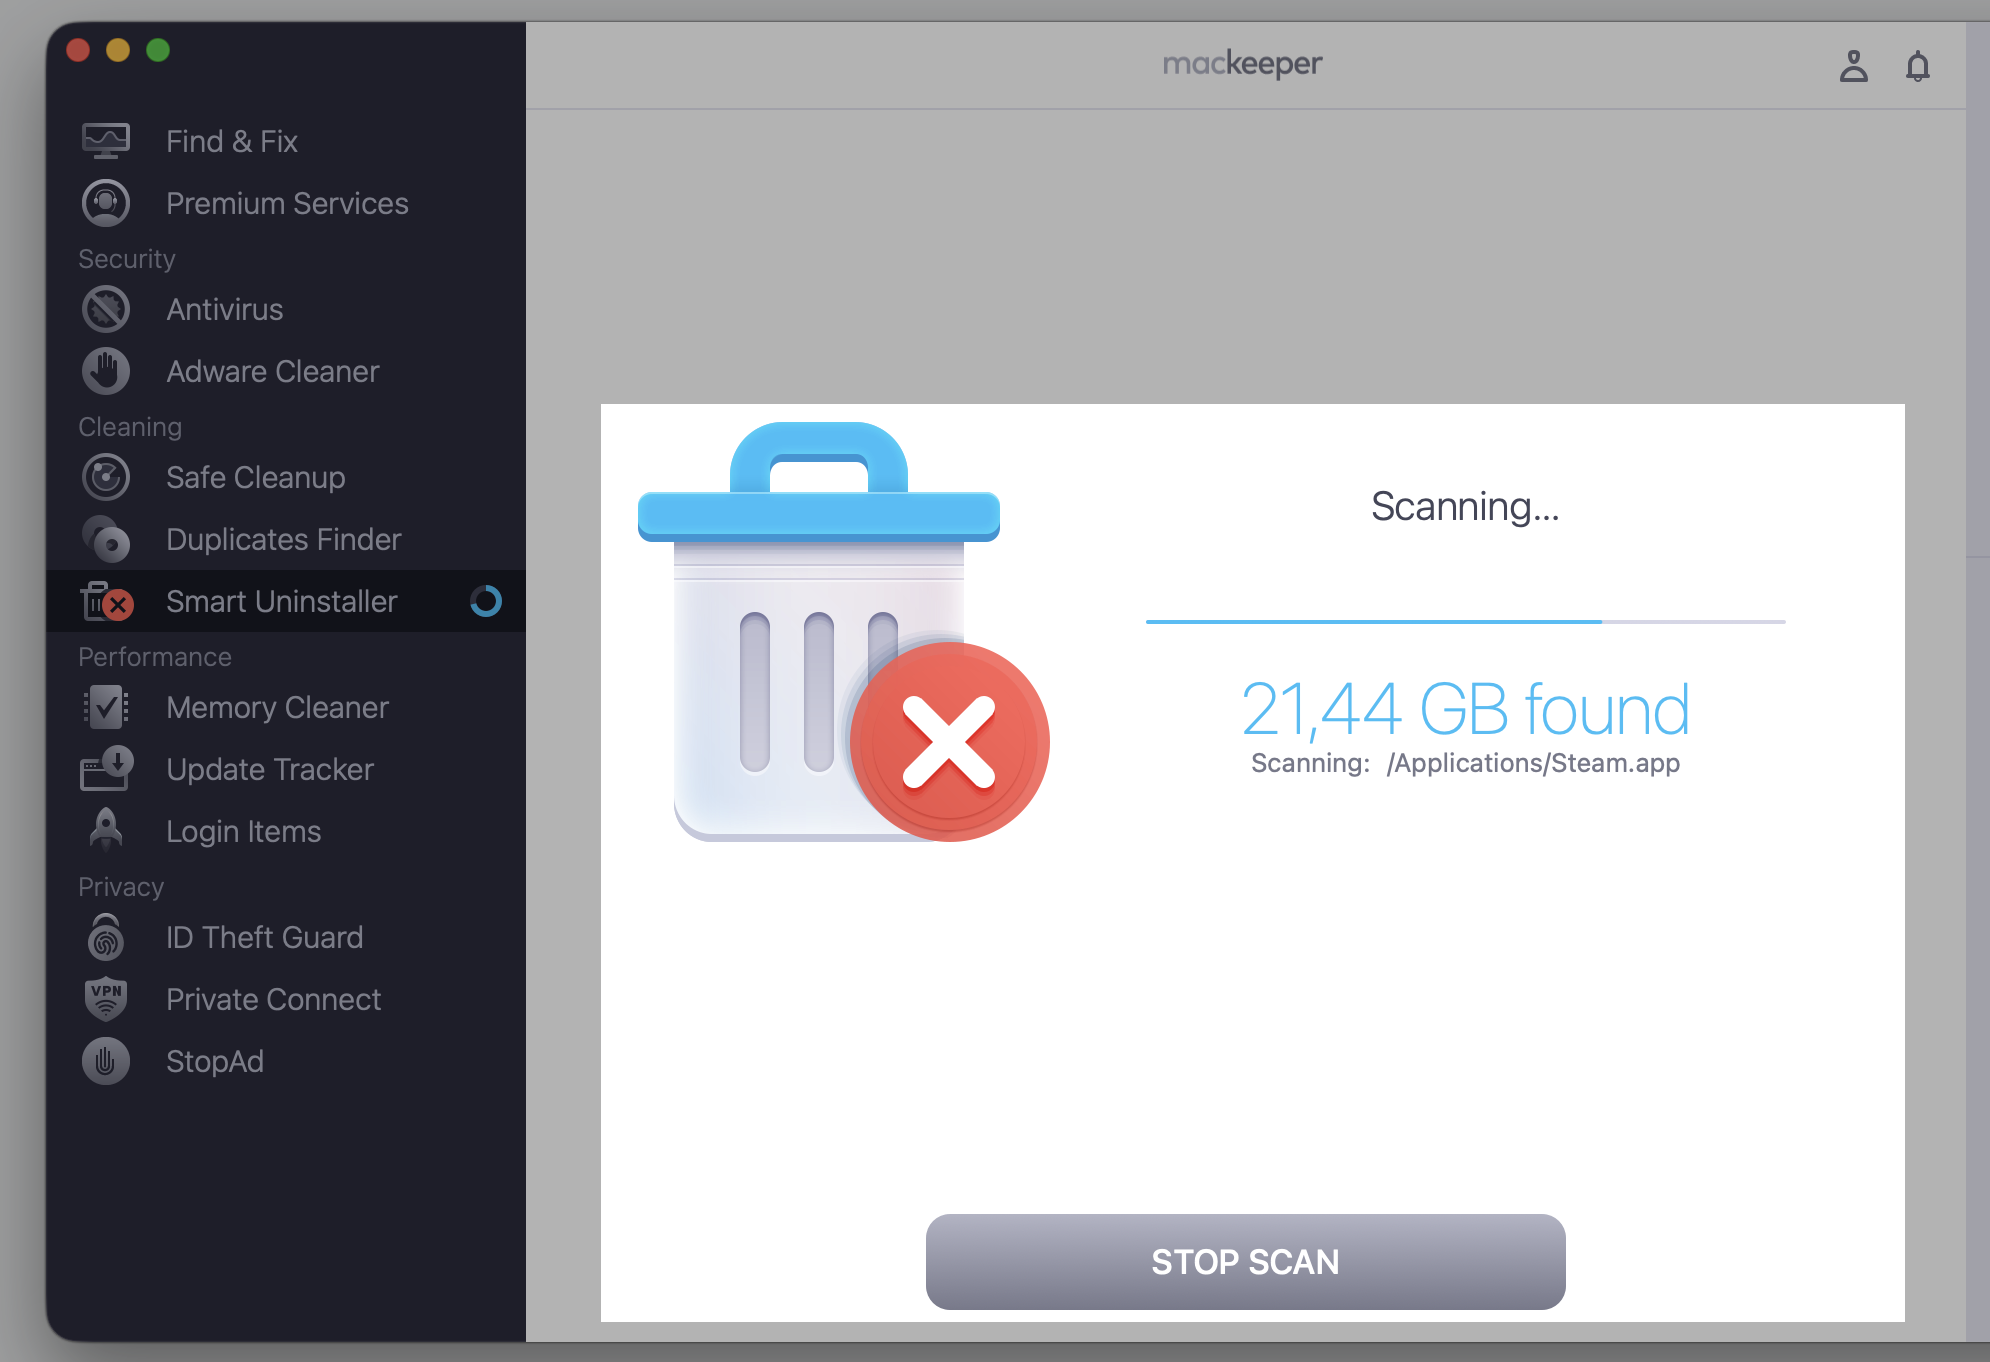
Select Start Scan and let the app finish the process.
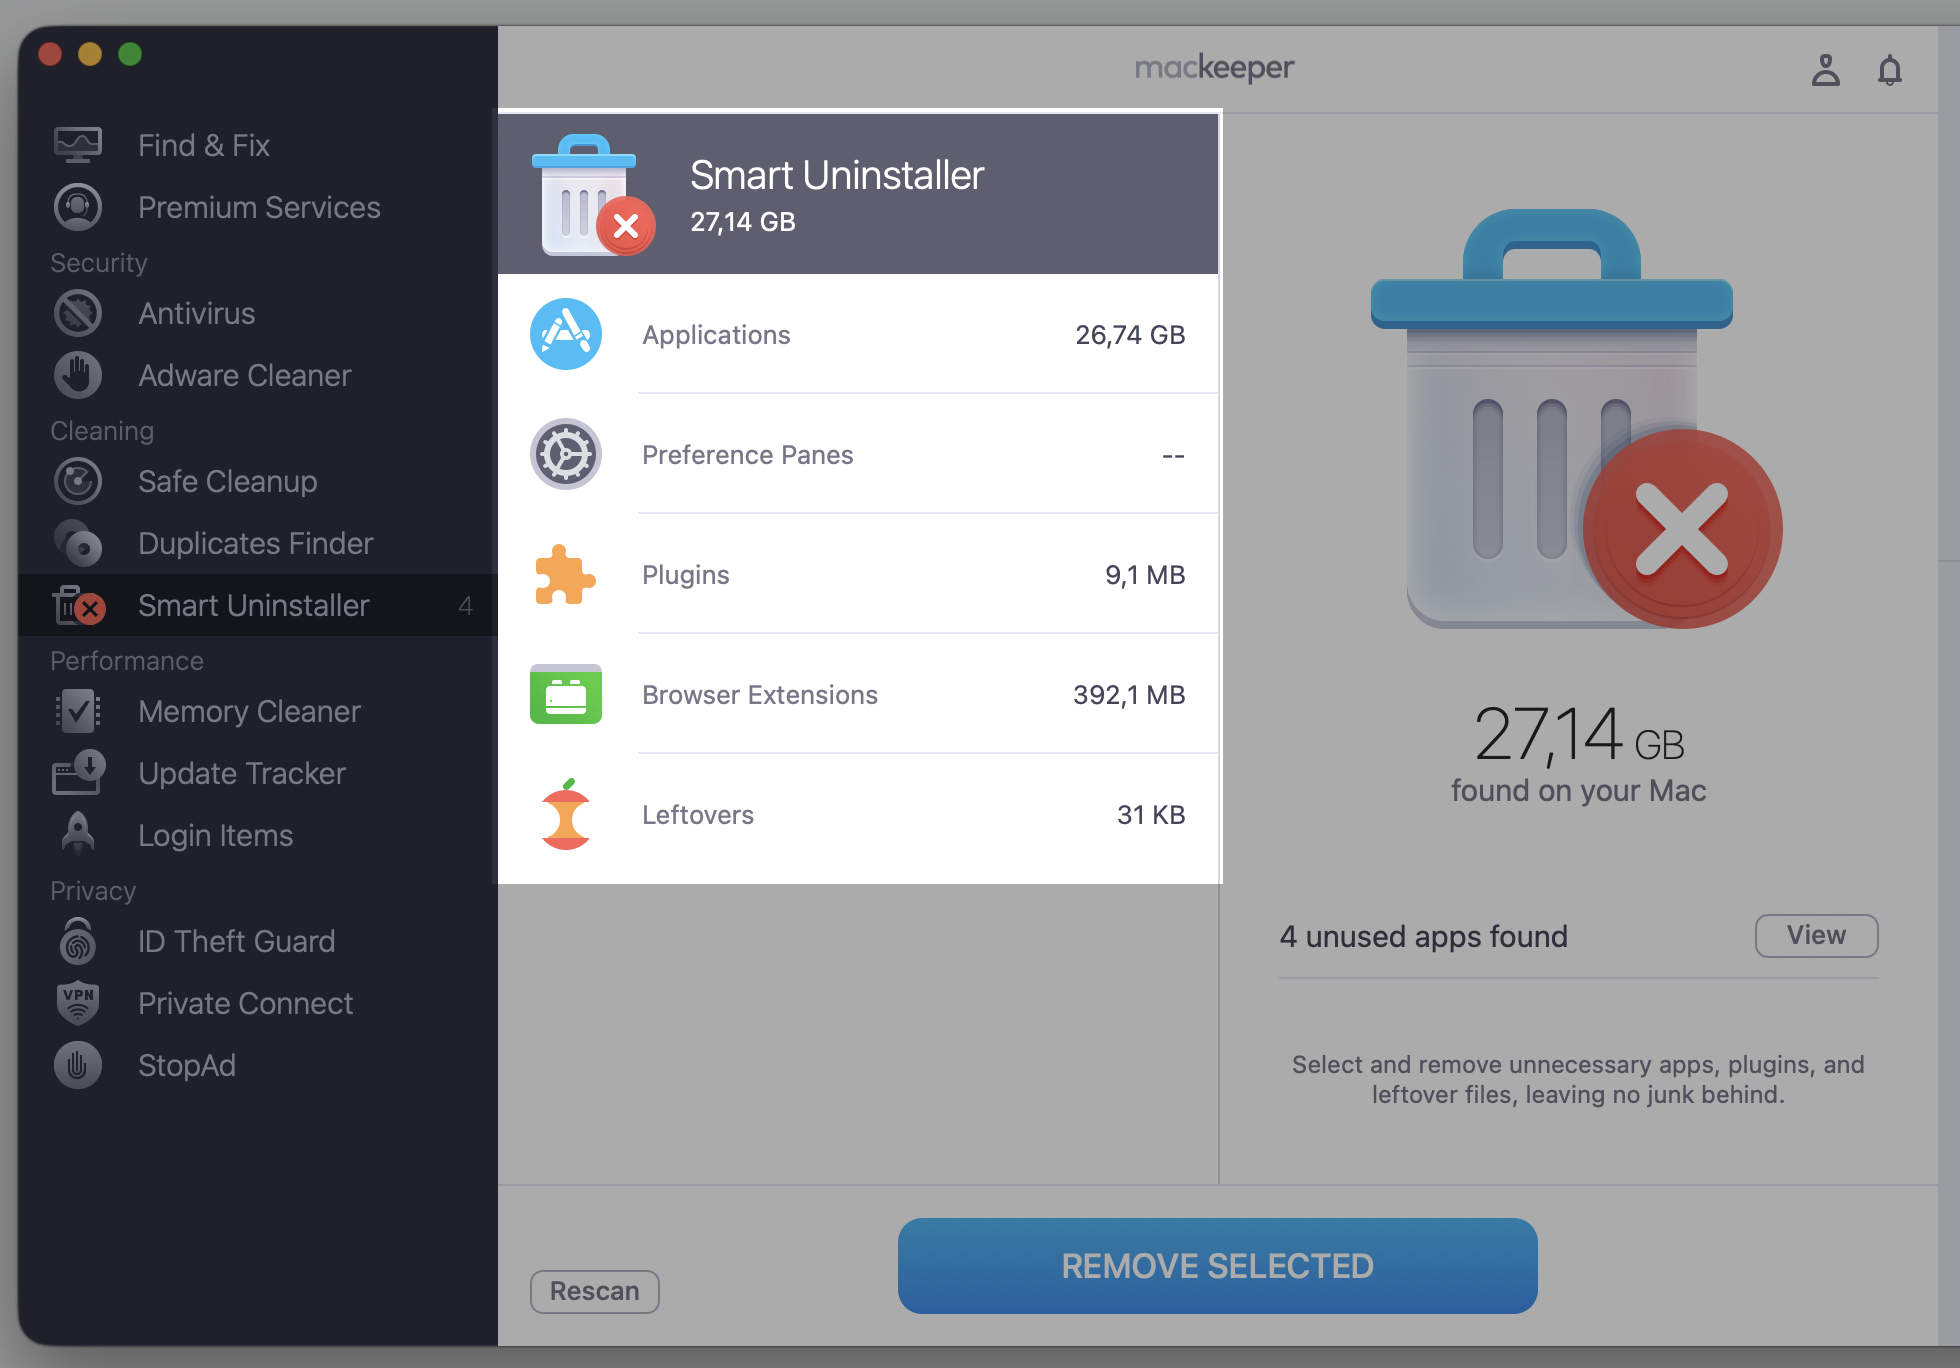
In the results, choose Applications and find all the apps you don't need anymore.
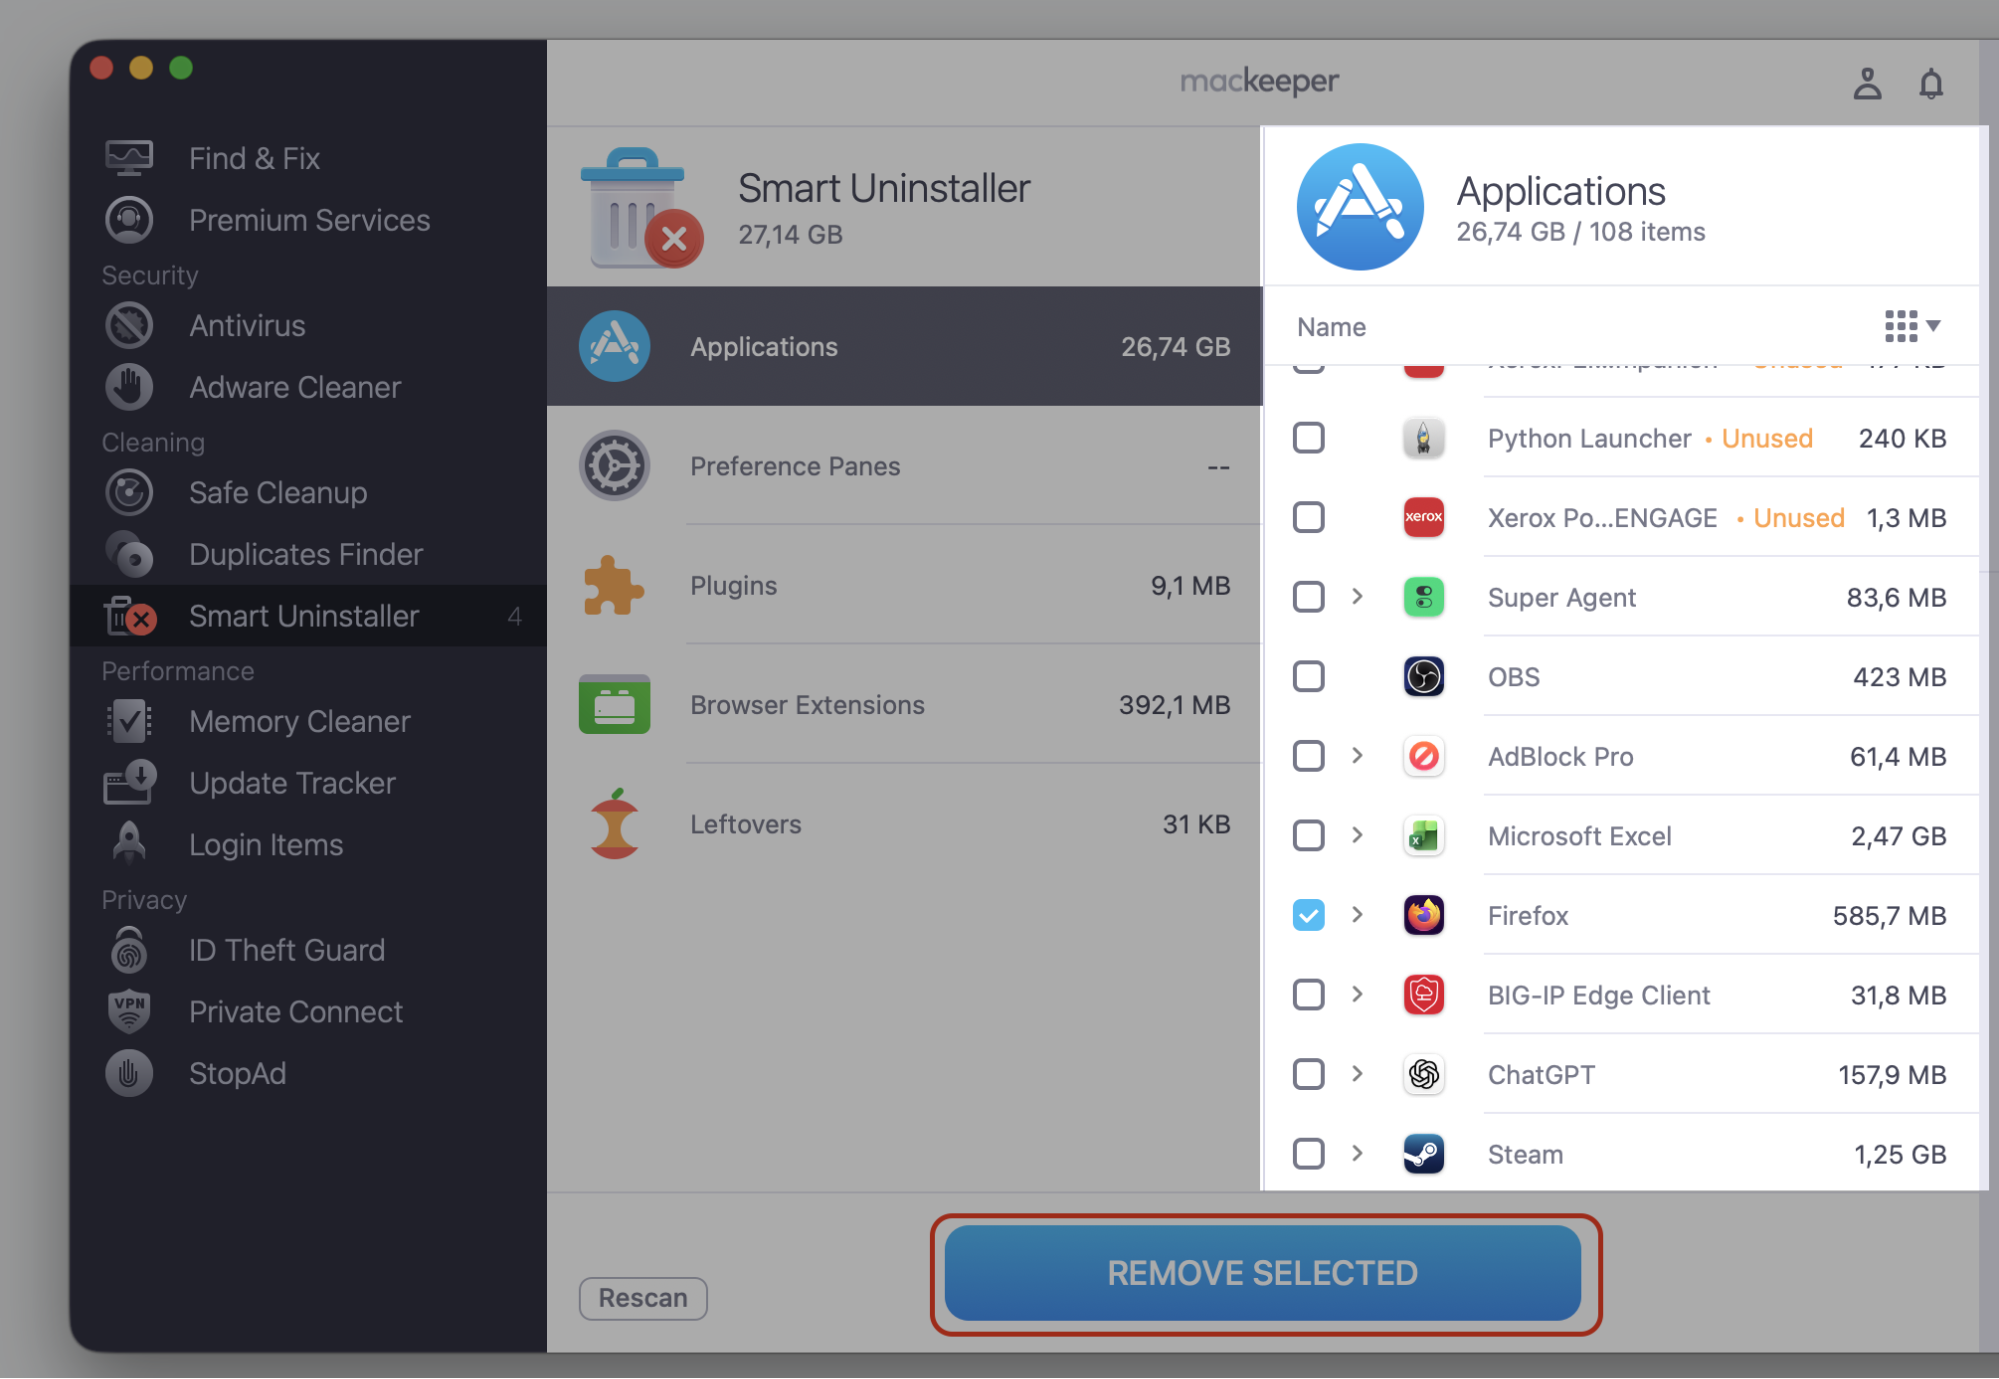
Tick the corresponding boxes.
Click Remove Selected.
Step 1. Go to MacKeeper > Smart Uninstaller > Start ScanStep 2. Wait until the scan is finishedStep 3. Select the category you need to checkStep 4. Select the item you want to delete and proceed with the Remove Selected button
Choosing what to remove when both Claude tools are installed
Many people run Claude Code alongside Claude Desktop, Anthropic’s separate desktop app. They share a similar name but live in different places, so it’s easy to delete the wrong file by accident.
Before you touch a thing, decide which product you actually want to keep. Let’s walk through the three most common setups together.
1. Remove Claude Code but keep Claude Desktop
Keeping the app but dropping the terminal tool? The rule simply flips. The only files we touch are Claude Code’s own—the executable, the ~/.claude directory, and the ~/.claude.json config—while Claude.app and its Library data stay put. Once you’ve settled on this, pick the removal method further down that matches how you installed the CLI, and leave the desktop side untouched.
2. Get rid of Claude Code and Claude Desktop together
Clearing out both? Then order is the thing to get right. We remove Claude Desktop first, uninstall Claude Code through its matching method below, and only once both are gone do we delete any shared or leftover Claude files. Working in that sequence keeps you from stripping a file one product still relies on while the other is only half-removed.
How to uninstall Claude Code from Mac?
There’s no single button here—the right method depends on how Claude Code landed on your Mac. Whatever the source, the goal is the same when you delete an app —take out the tool, then sweep up what it leaves behind. That two-step rhythm is exactly how you completely uninstall application of any type. We’ll walk you through each method below, so start with the one that matches how Claude Code got onto your Mac.
1. Check how Claude Code was installed
Before removing anything, let’s pin down which installer you used, because that single fact decides your method. A couple of Terminal commands show the active copy, flag any duplicates, and reveal where each one lives.
Follow our instructions:
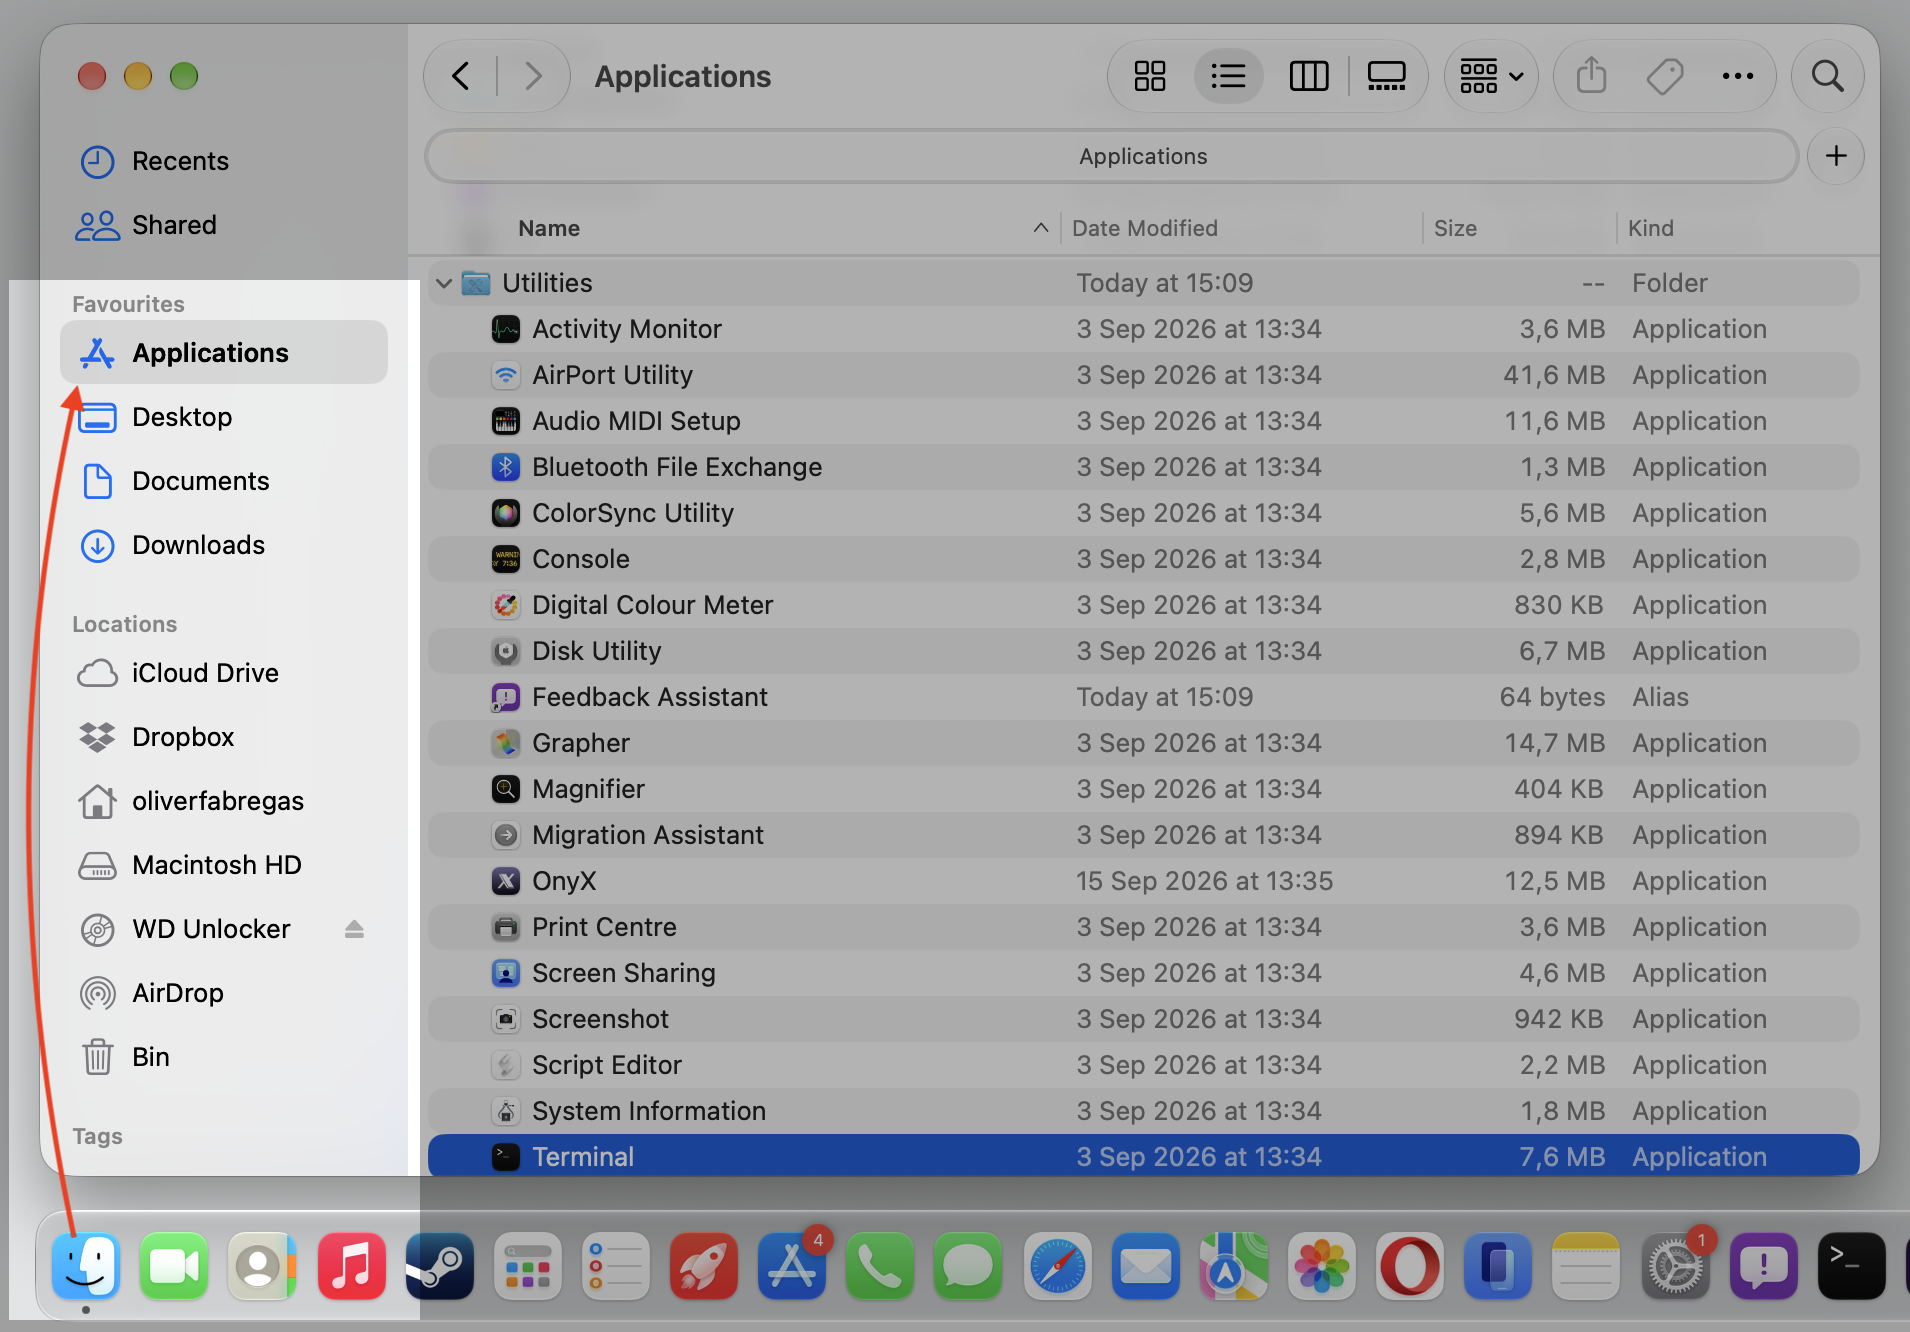
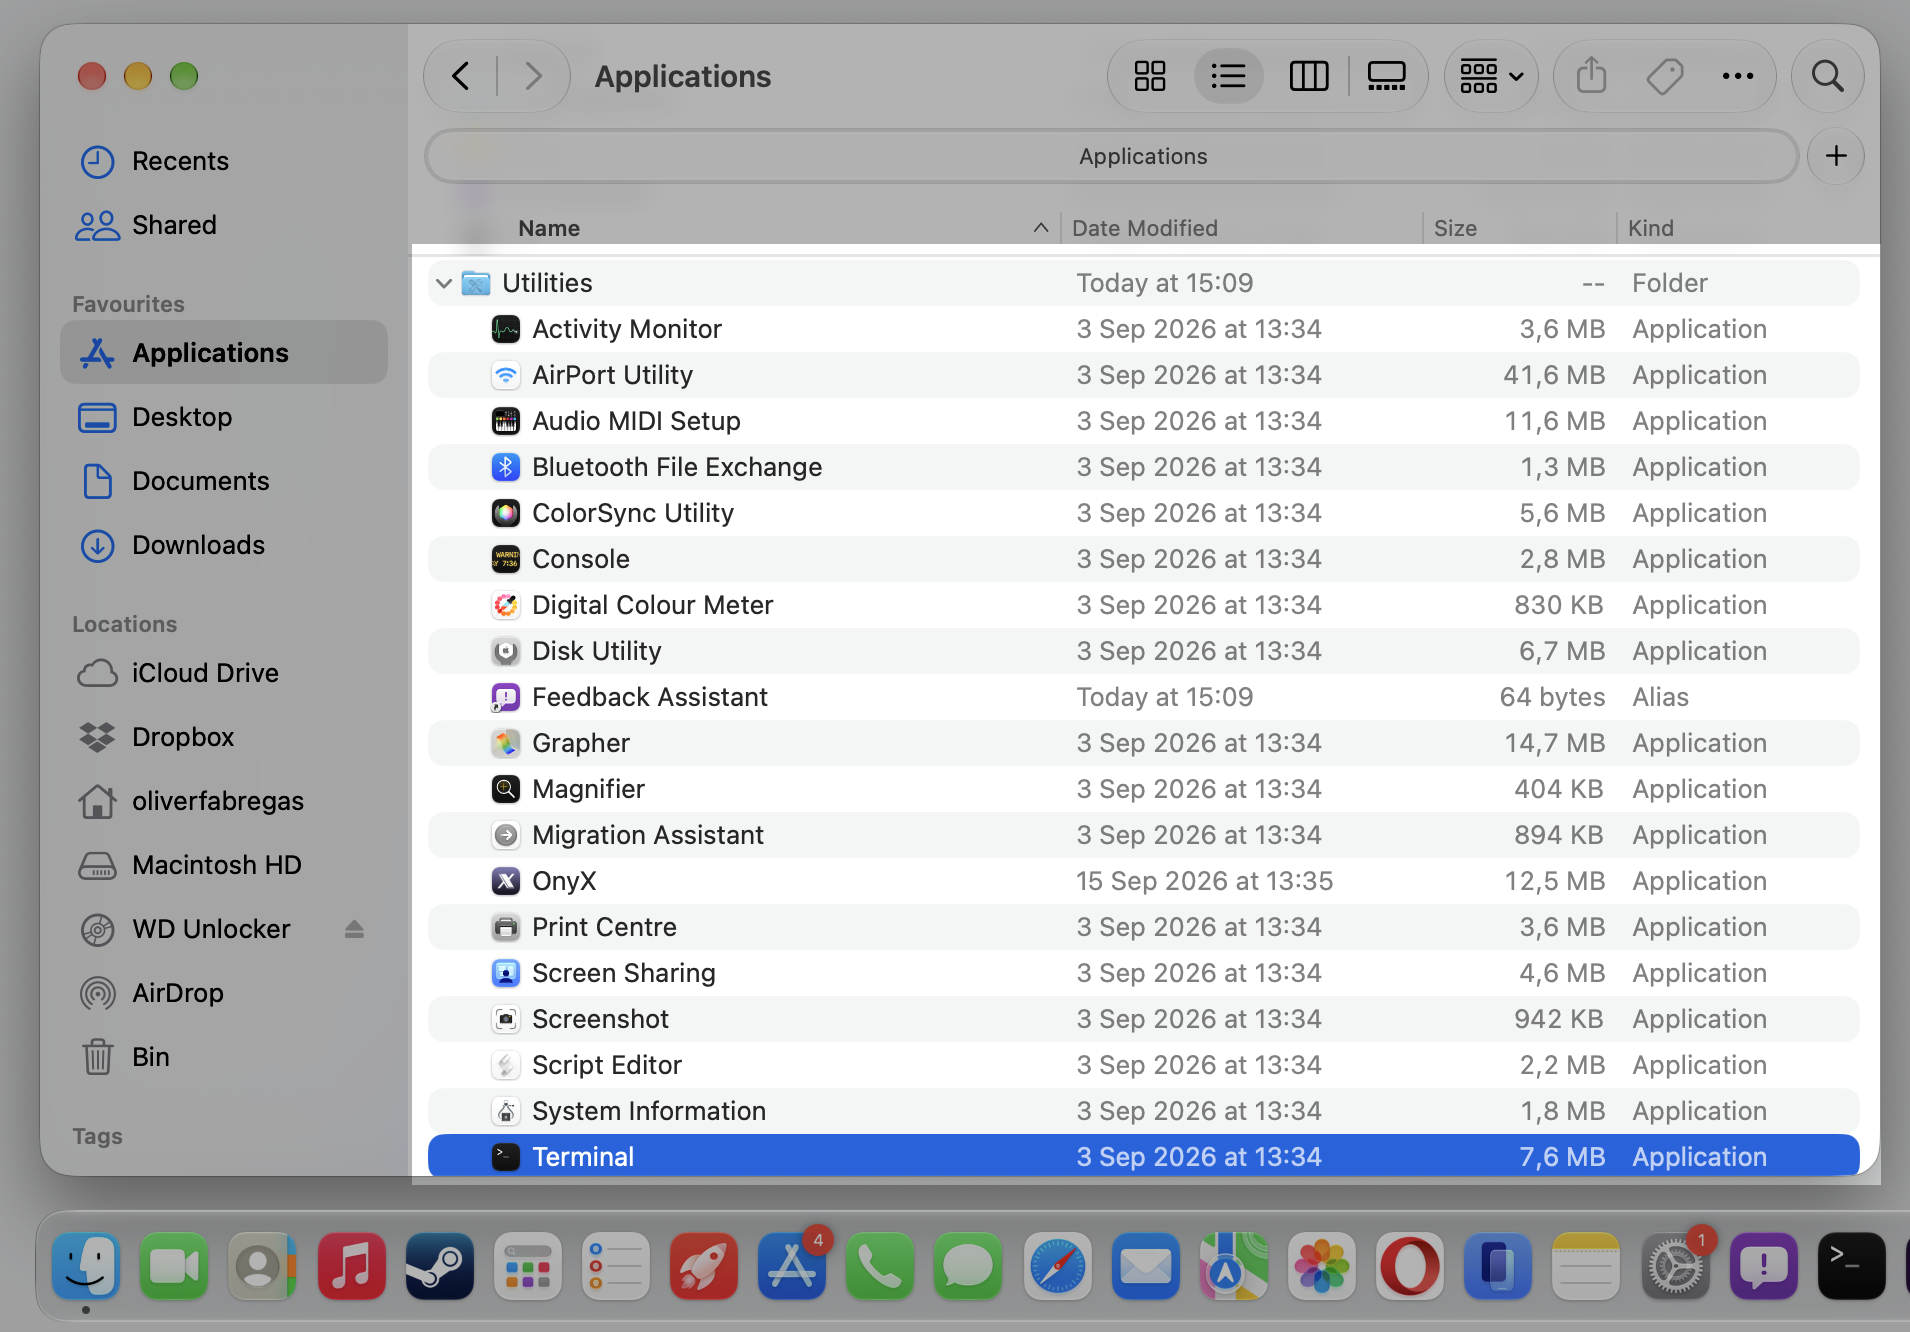
Open Terminal from Applications > Utilities.
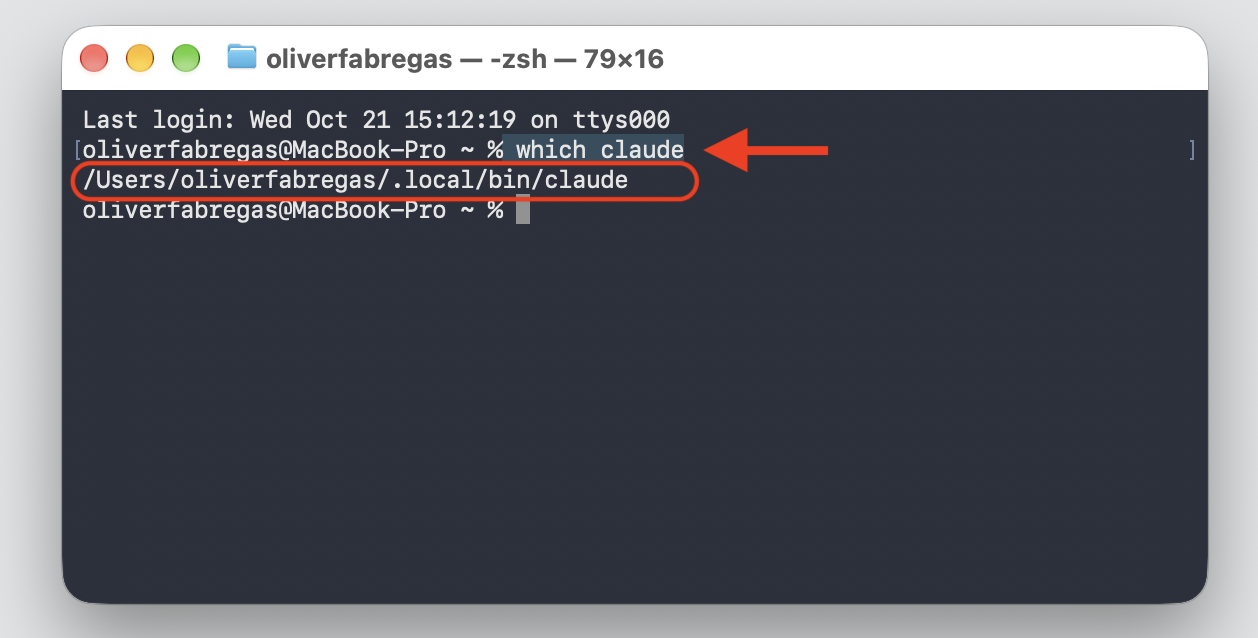
Type which claude and press Return to see the active path.
Run which -a claude to reveal every copy, since more than one install can exist.
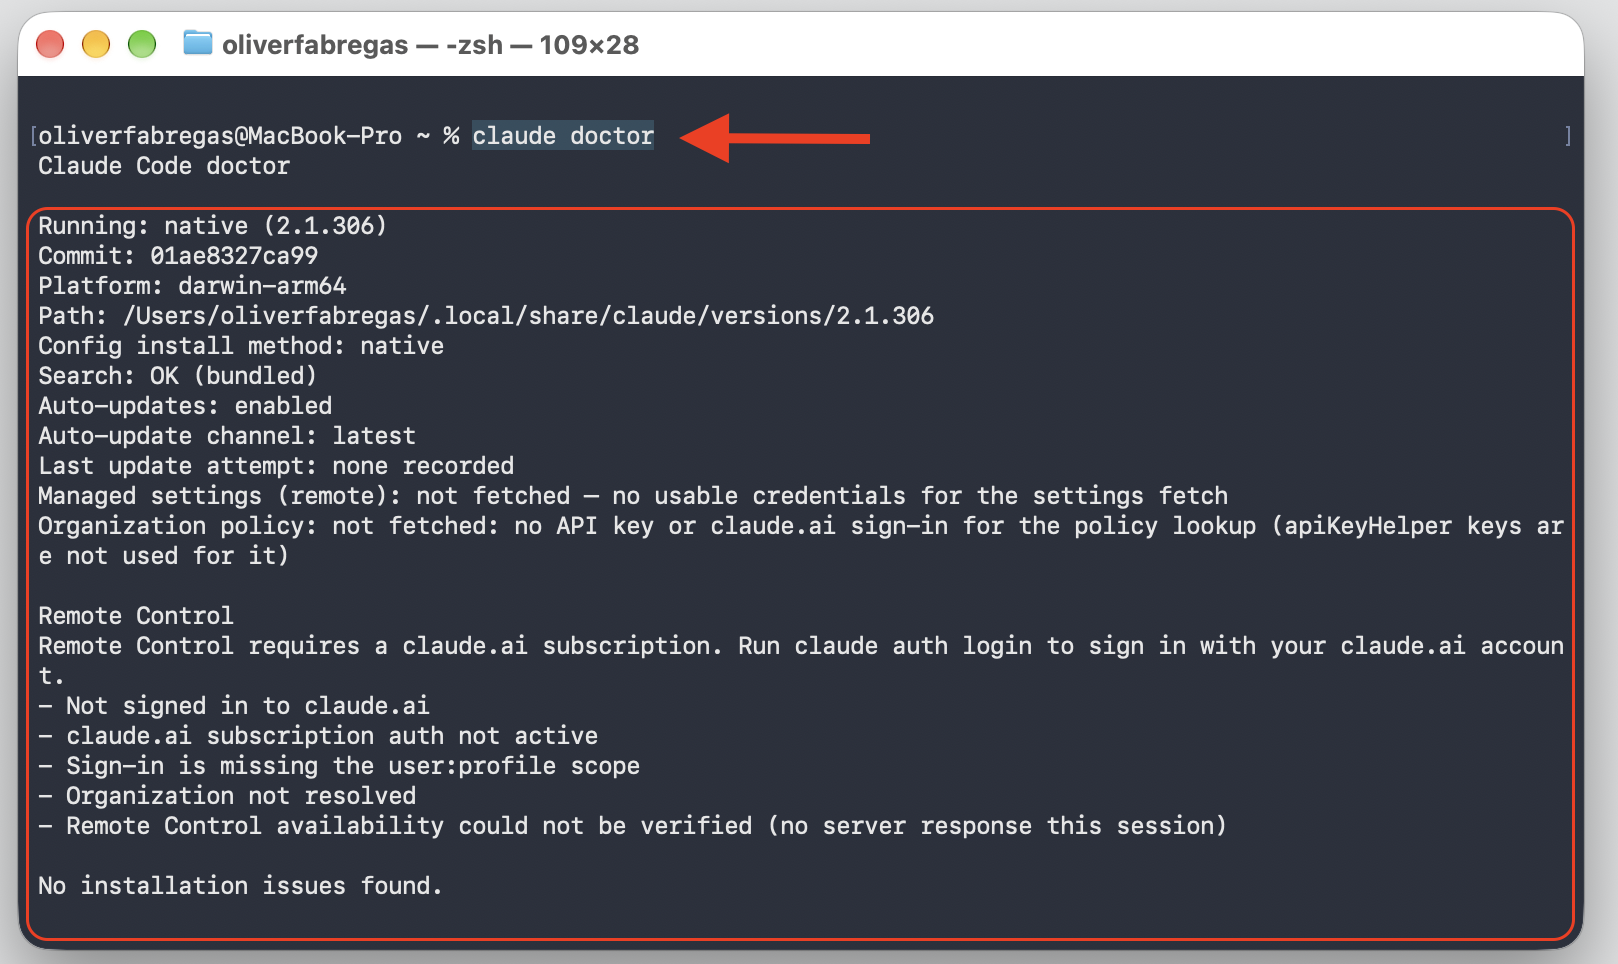
Try claude doctor for a report on your installation type and version.
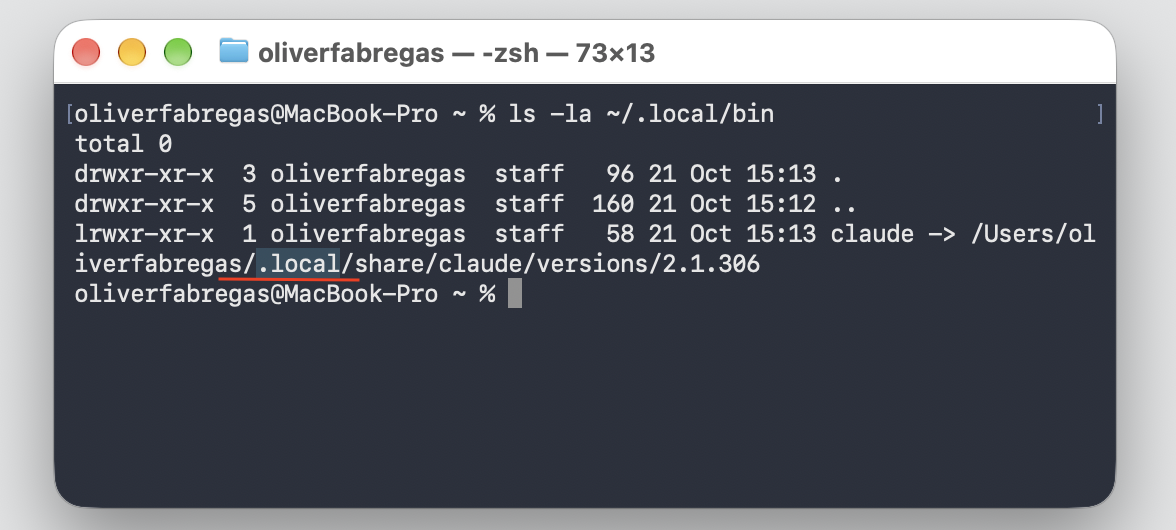
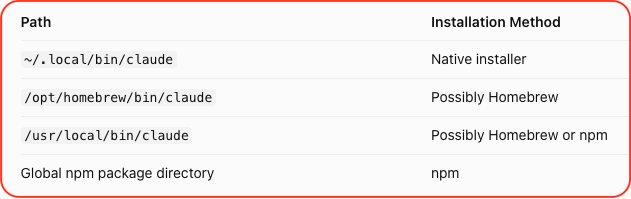
Read the path—a Homebrew folder points to Homebrew, a global node path points to npm, and ~/.local/bin points to the native install.
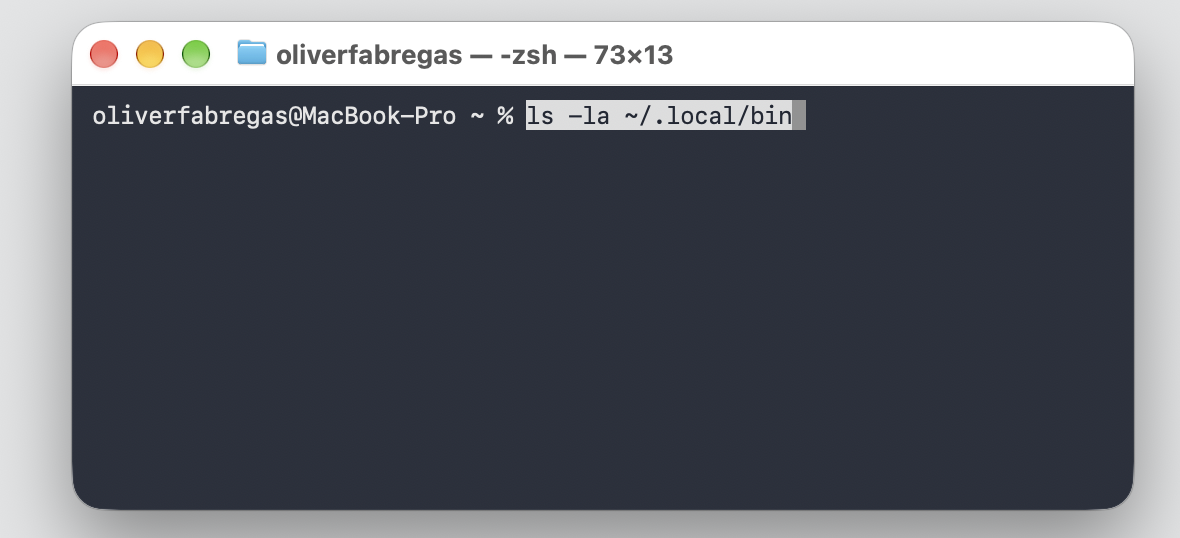
Step 1. Go to Finder > ApplicationsStep 2. Select Terminal from the Utilities FolderStep 3. Type which claude and press Return to see the active pathStep 4. Type claude doctor and press Return to retrieve a report on your installation type and versionStep 5. Type ls -la ~/.local/bin command and press ReturnStep 6. Check the resultStep 7. Depending on how Claude Code was installed, you may see one of the following paths!
2. Uninstall Claude Code using third-party app
A third-party app can round up an app’s scattered pieces for you, and this is where our own tool comes in. MacKeeper’s Smart Uninstaller scans for installed apps and their associated files, then removes them together in a few clicks—handy for graphical apps and the leftovers they hide across your Library folders.
Because Claude Code is a command-line tool, check that your version detects it before relying on this route; CLI installs made through Terminal, npm, or Homebrew may still need their matching manual method below. Either way, getting into the habit of learning to delete all application files is smart, because residual files are what quietly eat storage, and it helps you delete all application files on Mac without hunting through hidden folders one by one.
3. Delete native Claude Code installation in Finder
Prefer clicking to typing? Let’s remove the native install straight from Finder, Apple’s built-in file manager. If the window freezes while you dig through hidden folders—a Finder not responding moment more common than you’d think—give it a second to catch up before you continue.
Do this:
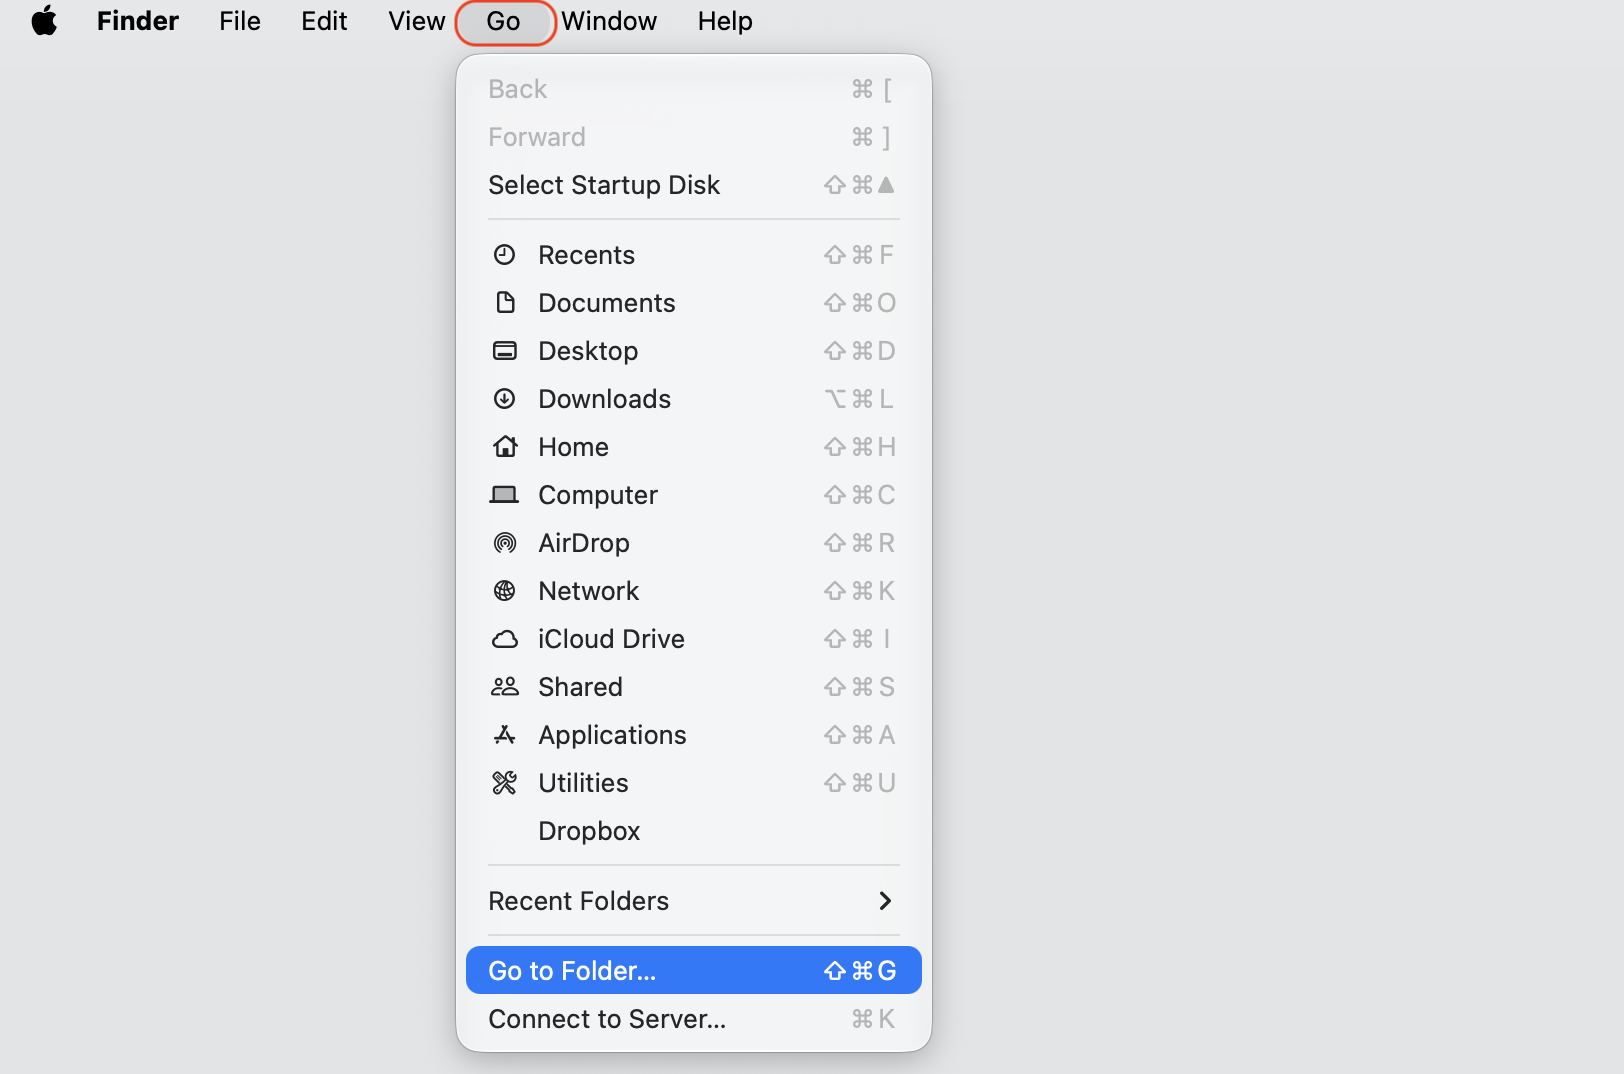
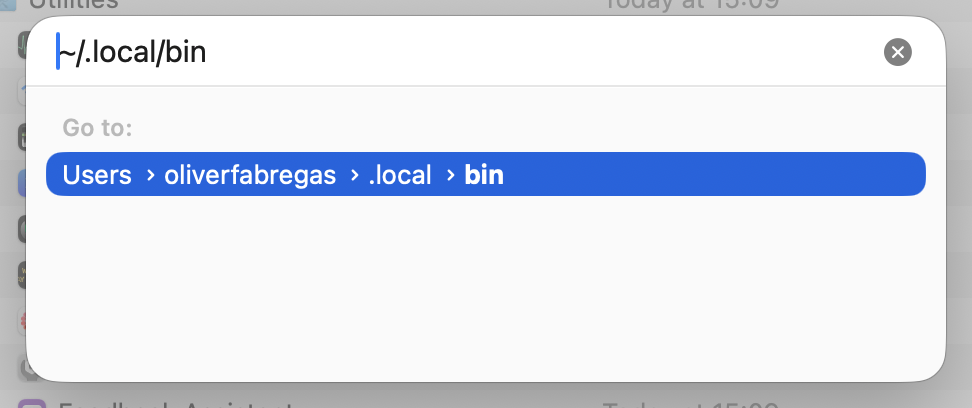
Open Finder and select Go > Go to Folder from the menu bar.
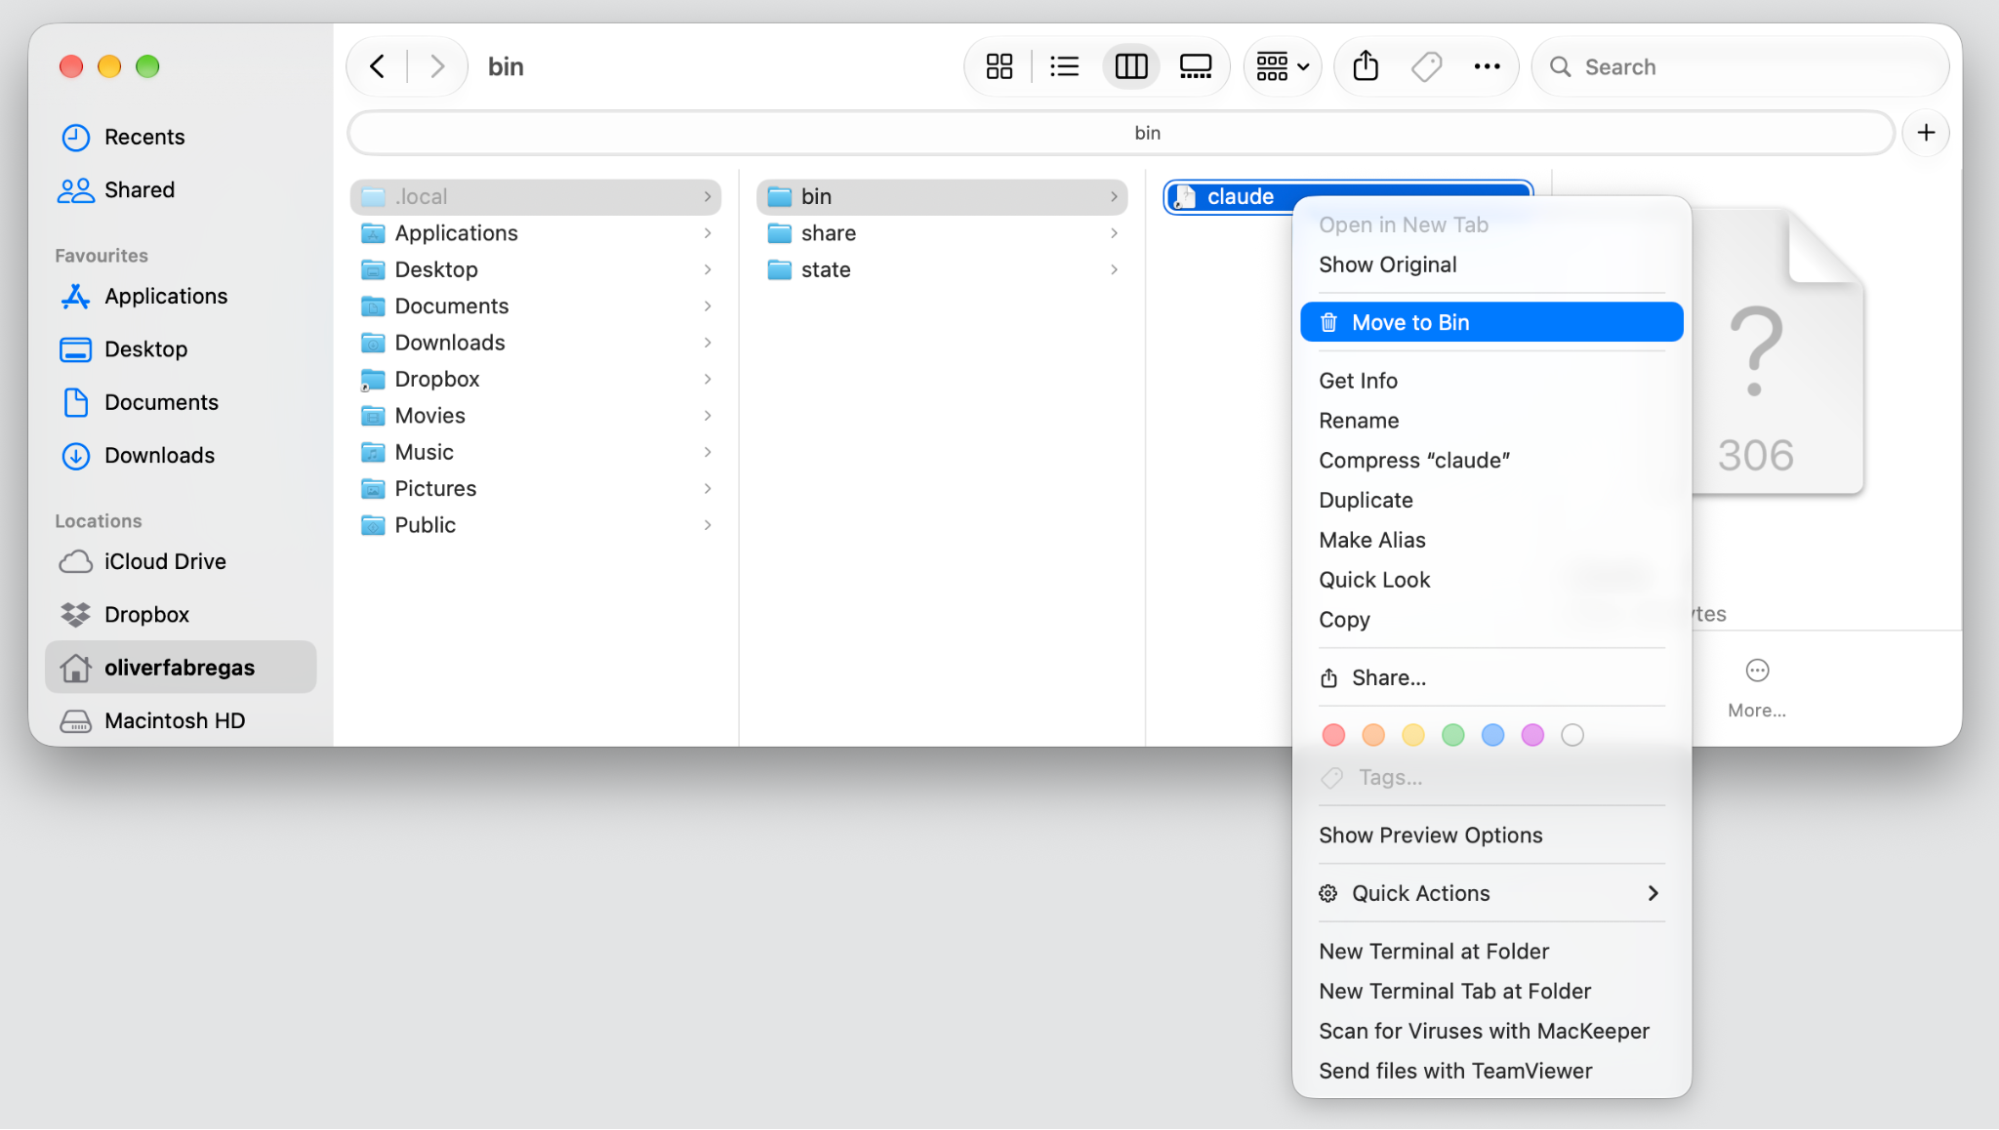
Enter ~/.local/bin and drag the claude file to the Bin.
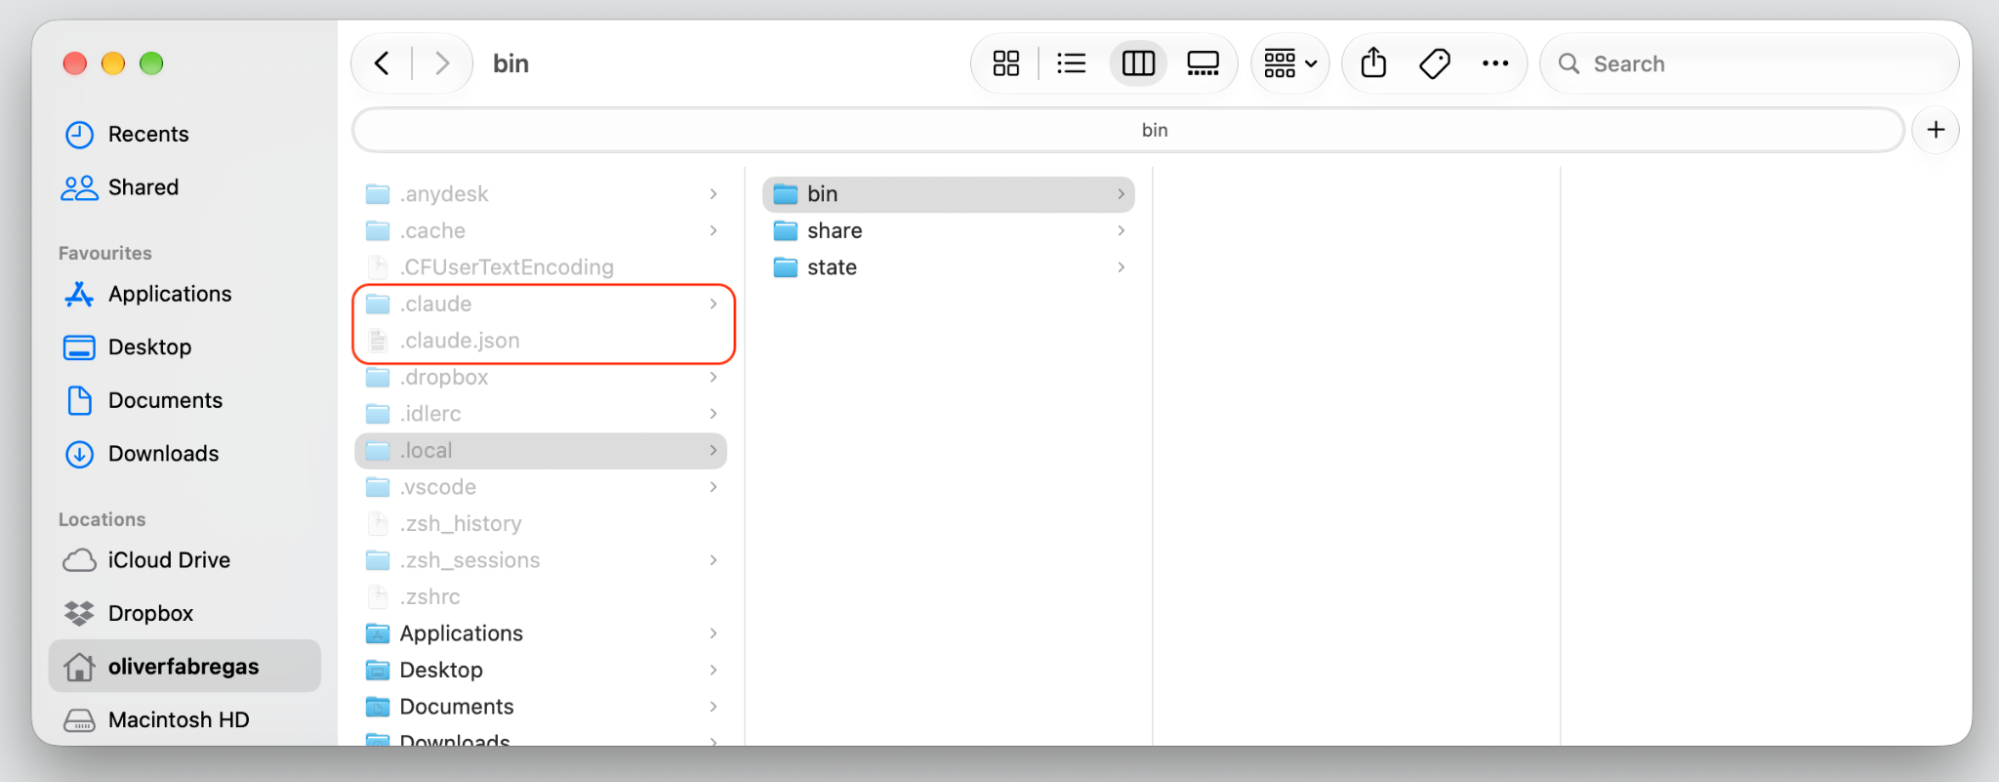
Press Command + Shift + . (period) to show hidden items, and remove the .claude directory.
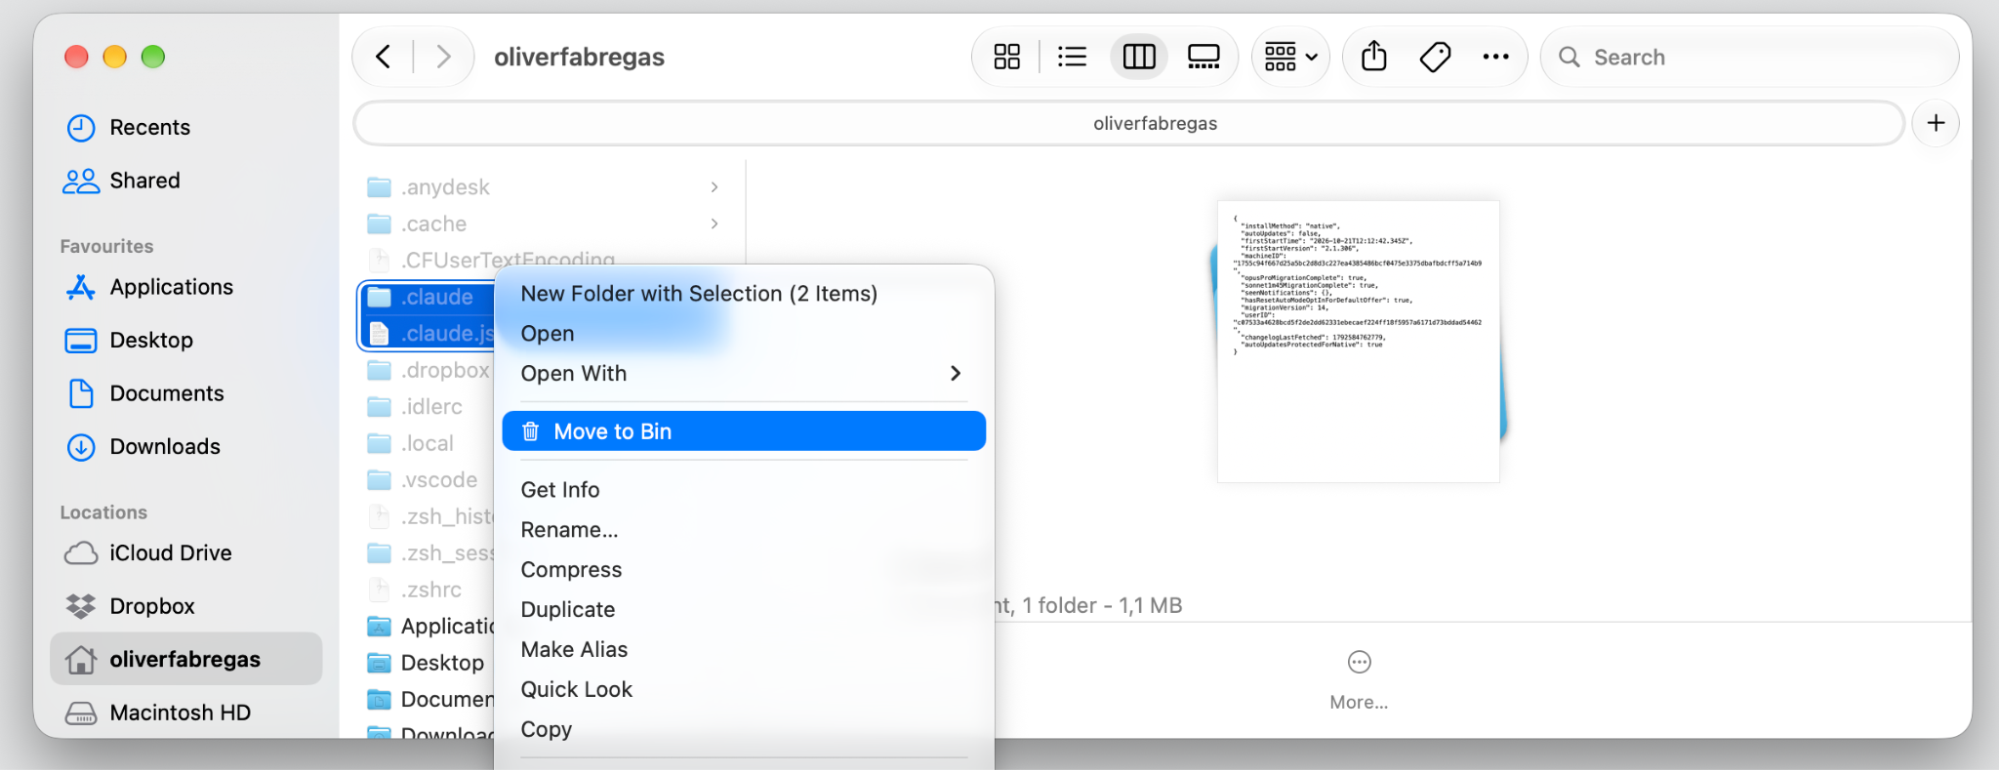
In the same view, delete the .claude.jsonand .claude file to clear the remaining settings and cache.
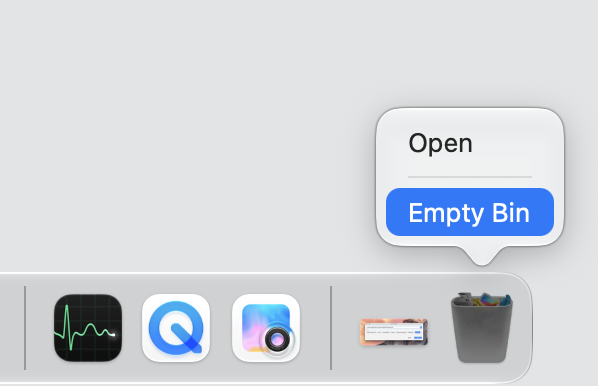
Empty the Bin to finish.
Step 1. Go to Finder > Go > Go to FolderStep 2. Type ~/.local/bin and hit ReturnStep 3. Select claude with Control-click and move it to the Bin Step 4. Press Command + Shift + . (period) to show hidden items Step 5. Select .claude.json and .claude folders with Control-click and move to the BinStep 6. Empty Bin
4. Remove native Claude Code installation in Terminal
Comfortable with a few commands? This is our fast route for the native install. If you’ve never had to run something in Terminal on Mac before, getting comfortable with the basics of how you run something in Terminal makes each line feel less mysterious.
A quick heads-up from our team—rm commands delete files permanently, with no trip to the Trash, so double-check each line before you press Return.
Ready? Enter these one at a time:
rm ~/.local/bin/claude removes the executable.
rm -rf ~/.claude clears the configuration directory, cache, and session data.
rm ~/.claude.json deletes the remaining config file.
Check ~/.local/share for a claude folder and remove it if it’s there.
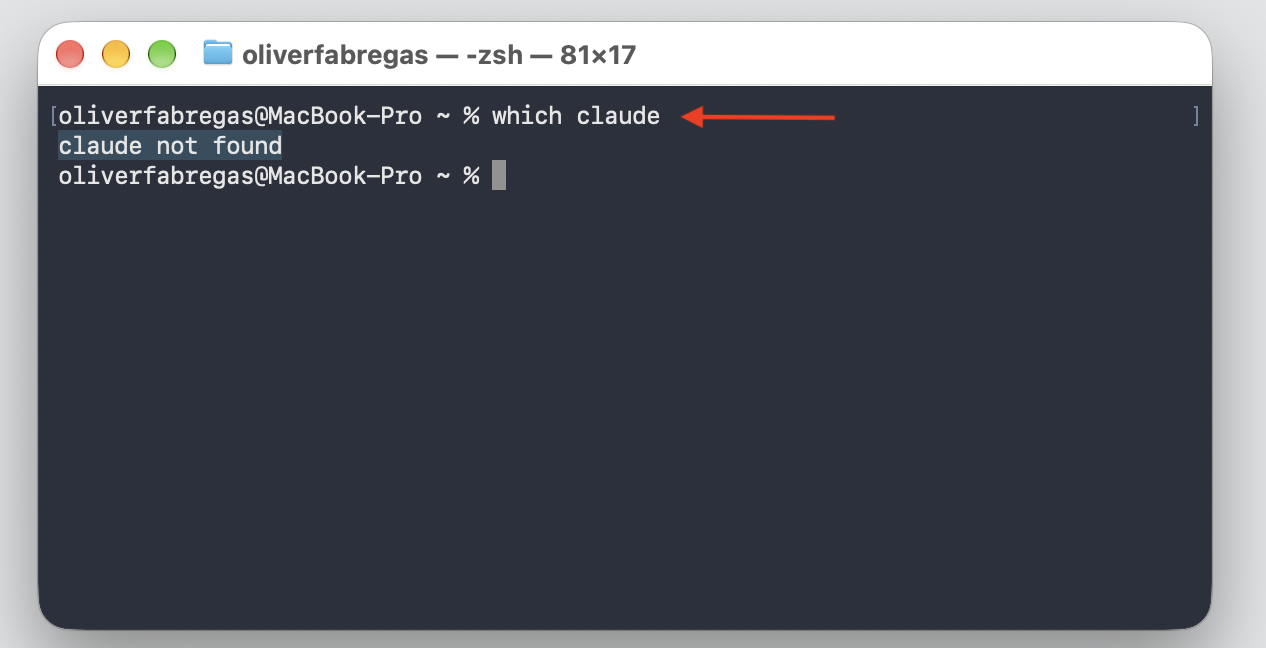
Run which claude to confirm nothing turns up.
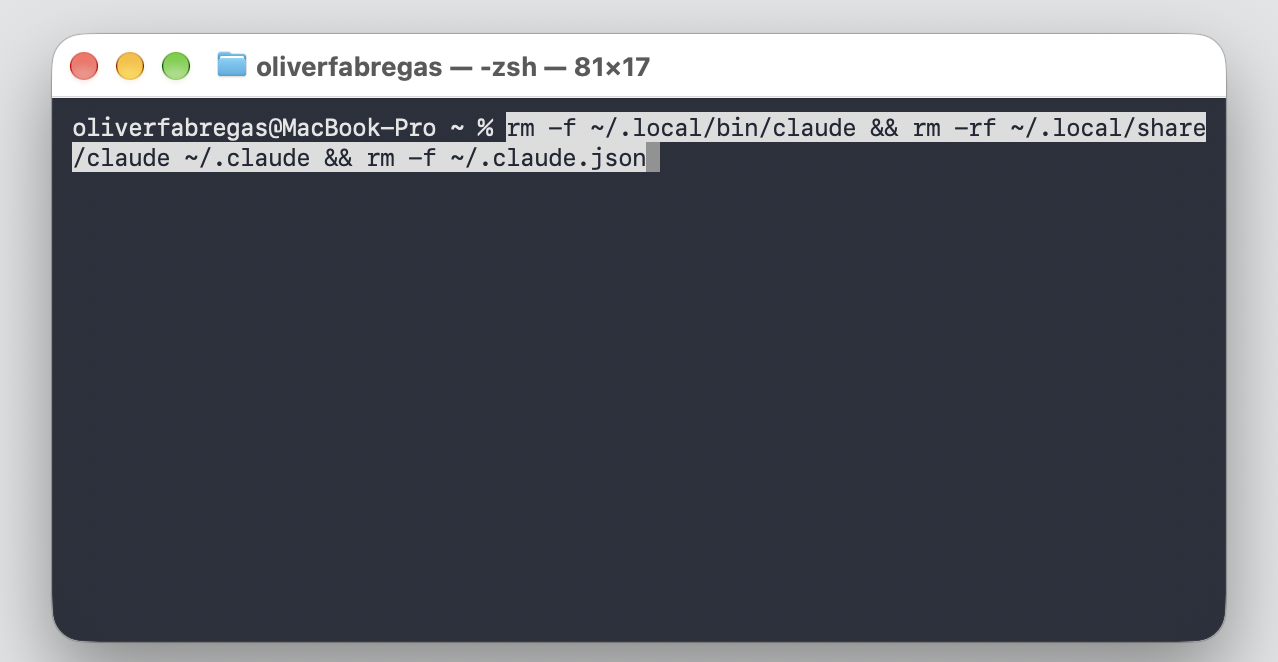
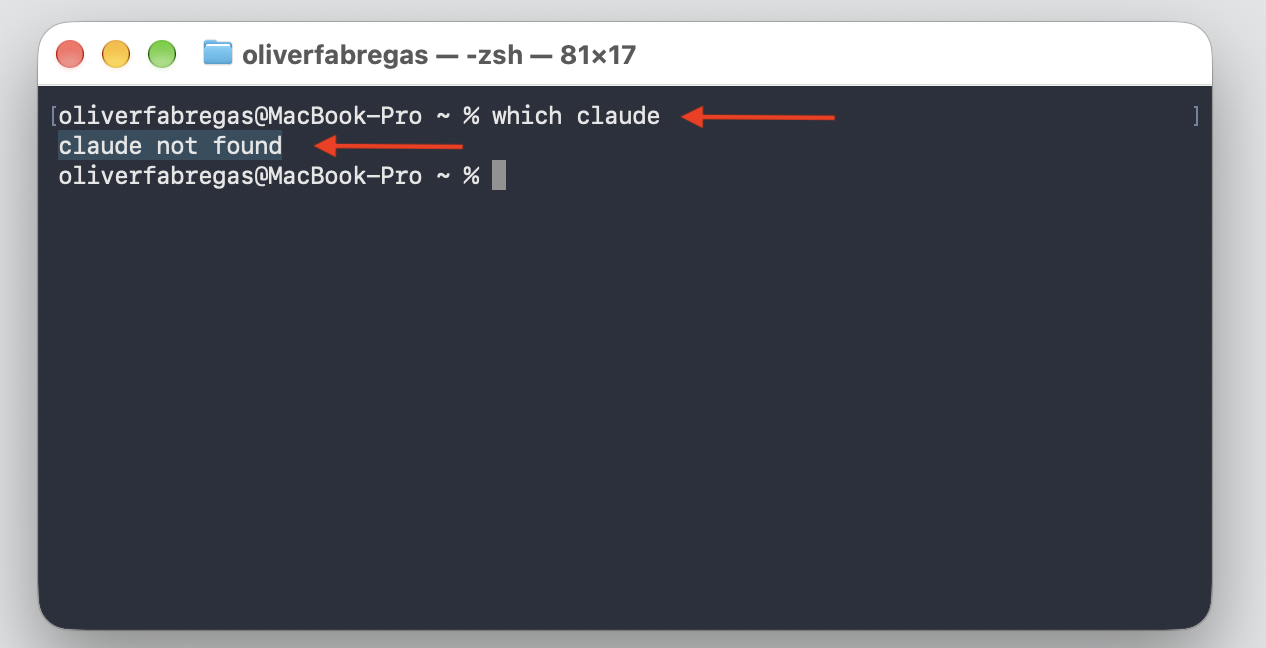
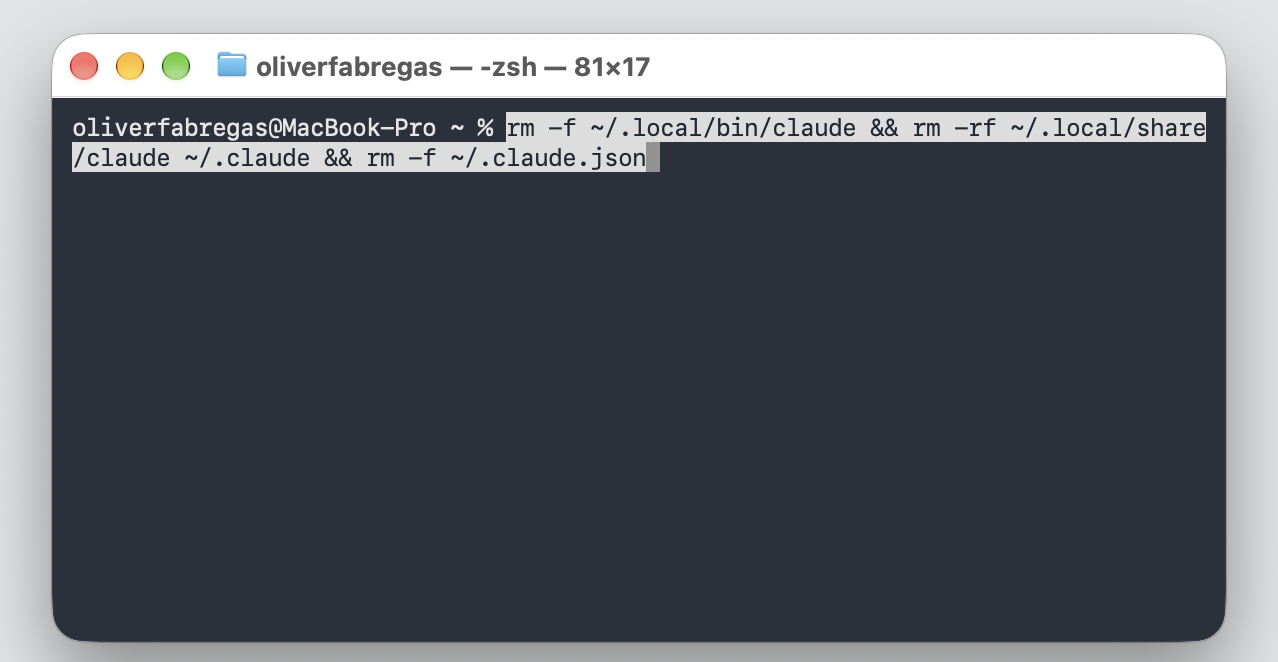
Step 1. Run the following command rm -f ~/.local/bin/claude && rm -rf ~/.local/share/claude ~/.claude && rm -f ~/.claude.jsonStep 2. Type which claude and hit EnterStep 3. The result must be “claude not found”
5. Uninstall Claude Code installed with npm
Installed it through npm? We’ll pull the global package first, then clear the personal settings and cache that npm leaves behind on your Mac.
Try this:
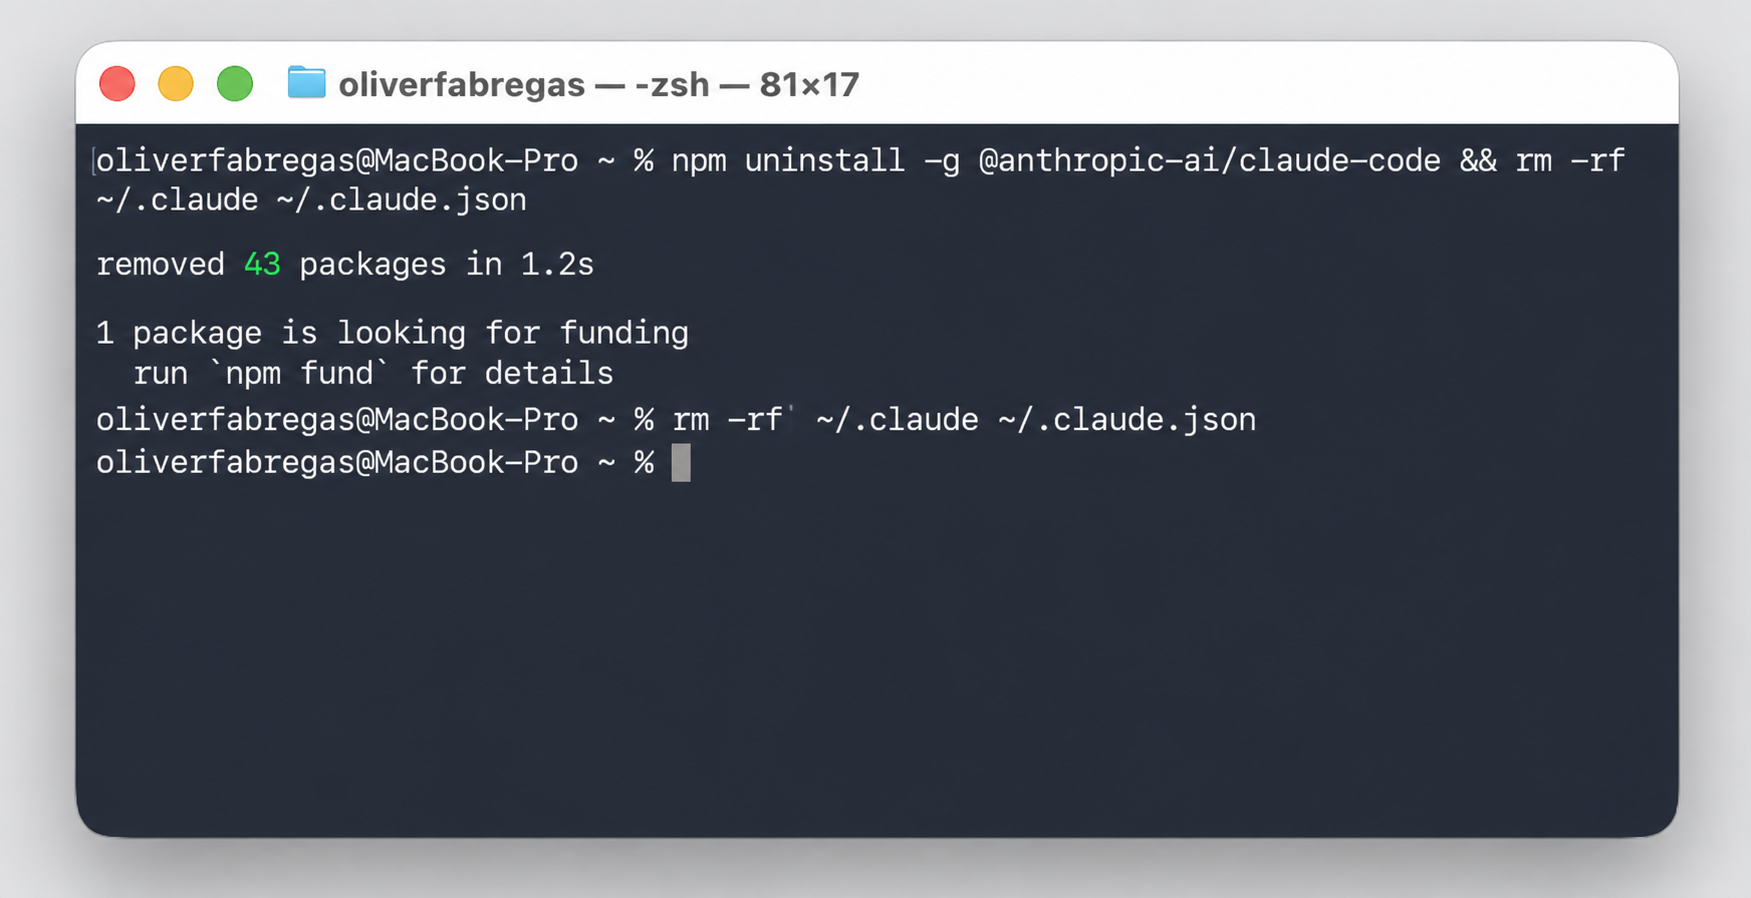
In Terminal, run npm uninstall -g @anthropic-ai/claude-code to remove the global package and its modules.
Confirm with which claude—if “claude not found” appears, the package is gone.
Delete the leftover ~/.claude directory and ~/.claude.json file, since npm doesn’t clear your personal settings or cache.
If you use several Node versions through nvm, switch to each one and repeat step one, because a copy can hide in every environment.
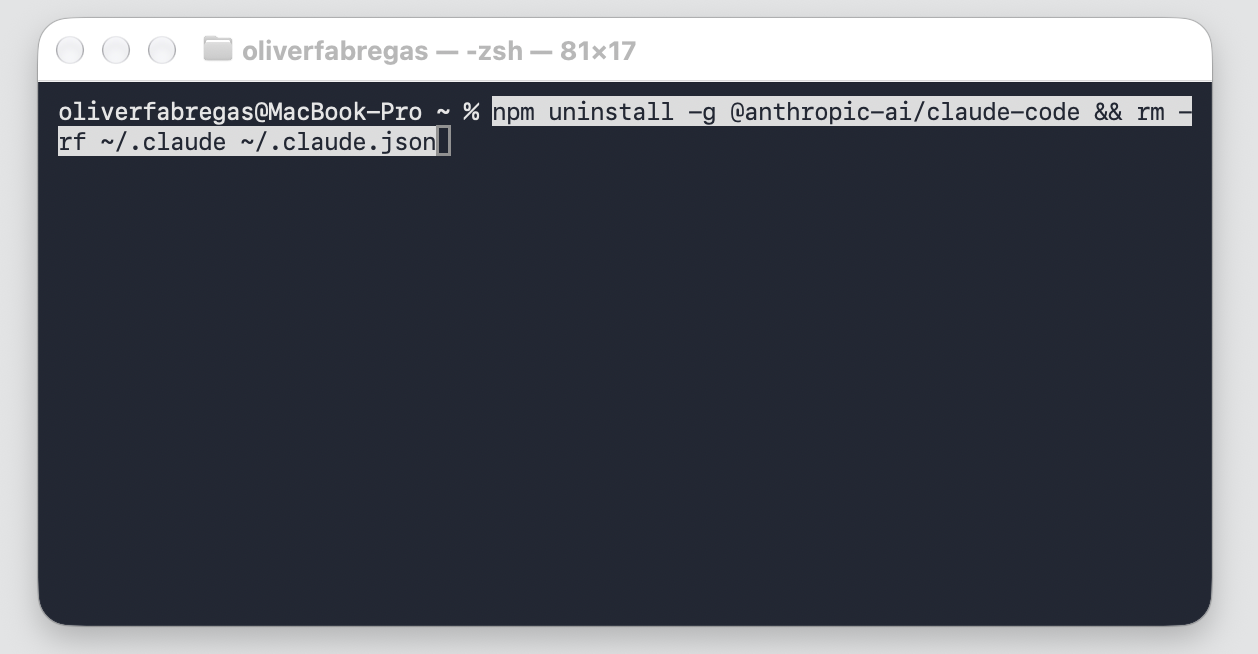
Step 1. Use the following command npm uninstall -g @anthropic-ai/claude-code && rm -rf ~/.claude ~/.claude.jsonStep 2. Check the result
6. Uninstall Claude Code installed with Homebrew
If Homebrew put Claude Code on your Mac, we’ll remove the matching package, tidy up the package manager, and delete the user-level files Homebrew doesn’t clear on its own.
Here’s the order:
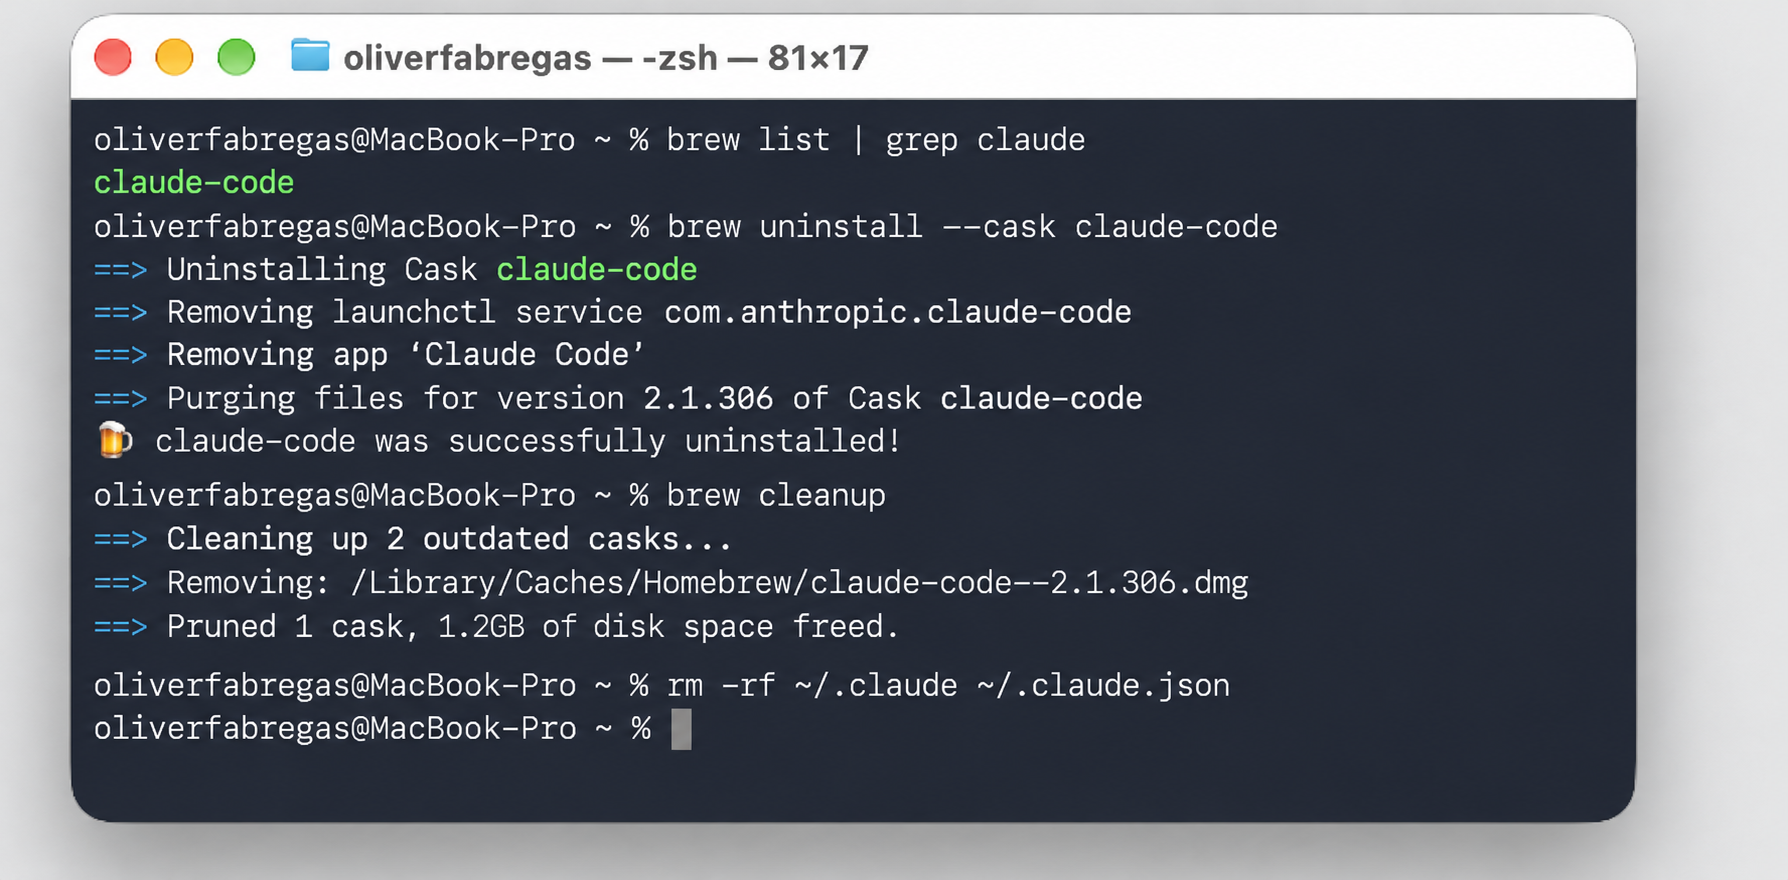
Run brew list | grep claude to find the exact package or cask name.
Uninstall it with brew uninstall , swapping in the name from the previous step.
Run brew cleanup to clear unused package-manager data and old versions.
Remove the ~/.claude directory and ~/.claude.json file, which Homebrew leaves behind.
Step 1. Use the following command brew uninstall --cask claude-code && brew cleanup && rm -rf ~/.claude ~/.claude.jsonStep 2. Check the result
Should you remove project-level Claude Code files?
Here’s a spot people often overlook. An individual project can hold its own Claude Code files—a CLAUDE.md with instructions, a .claude folder, or MCP settings tucked inside the project directory.
These stay put even after the CLI is gone, which is usually fine. Remove them only when you want to erase Claude integration from that project too, not as part of a routine uninstall. If a teammate still uses Claude Code on the same repo, leaving them in place keeps their setup intact.
How to check whether Claude Code was completely removed?
Let’s make sure the job’s done. A couple of quick checks confirm that Claude Code is truly gone rather than hiding in a forgotten corner.
Run which claude in Terminal—an empty result means the command is no longer on your path.
Run which -a claude to be certain no duplicate executable remains.
Confirm the ~/.claude directory and ~/.claude.json file are gone with ls -la ~ | grep claude.
Open a fresh Terminal window and type claude—the reply “command not found” is exactly what you want to see.
What to do if Claude Code is still available after uninstalling?
Type claude and it still runs? Don’t worry—a few common culprits explain why, and each has a simple fix.
A second install from a different method is still active, so run which -a claude to spot it.
Multiple Node versions each carry their own copy, which means you’ll need to uninstall from every one.
A leftover symbolic link points to a file that’s already gone, so remove the stray link from its bin folder.
Your shell cached the old path, which a quick hash -r or a new Terminal window clears.
An IDE extension quietly recreated the ~/.claude folder, so quit the editor before your final cleanup.
Conclusion
The key is simple—match the removal to the way you installed it, then clear the settings, cache, session data, and other leftovers that trail behind. Removing a command-line tool isn’t always obvious, especially when it hides outside your Applications folder and shares a name with Claude Desktop. Do both parts, though, and you completely uninstall Claude Code from Mac with nothing left cluttering your storage.
If hunting through hidden directories isn’t your idea of a good afternoon, let MacKeeper’s Smart Uninstaller do the searching. It finds an app’s scattered files and removes them together, so you can tidy up your Mac without second-guessing which file is safe to delete. Give it a look and reclaim that space today.
We respect your privacy and
use cookies
for the best site experience.
Privacy Preferences Center
We use cookies along with other tools to give you the best possible experience while using the
MacKeeper website. Cookies are small text files that help the website load faster. The cookies we
use don’t contain any type of personal data meaning they never store information such as your
location, email address, or IP address.
Help us improve how you interact with our website by accepting the use of cookies. You can change
your privacy settings whenever you like.
Manage consent
All cookies
These cookies are strictly necessary for enabling basic website functionality (including page
navigation, form submission, language detection, post commenting), downloading and purchasing
software. The website might malfunction without these cookies.