Creating browser bookmarks is a great way to save time—but you can go a step further. With a webloc file, you can open web pages like they’re apps or documents on your Mac. You can even add them to your Dock for extra-fast access. Got ads on a page? Block those ads and online trackers with MacKeeper’s StopAd.
A webloc file is essentially a hyperlink, in the form of a launchable file. The name ‘webloc’ is short for ‘web location’, because that’s what webloc files contain—the URL of a particular site, stored in an XML file. You can launch weblocs from your desktop or move files like this wherever you want.
Why create webloc files on Mac, though? It’s primarily a time-saving thing. Yes, you can bookmark web pages in your web browser, which creates shortcuts in that particular app, but webloc files offer something more.
When you make a webloc file, you can go directly to a page, without having to open your browser. That saves you a click.
You can also open webloc files in any browser, unlike browser bookmarks, which are usually tied to a particular browser.
A note from our experts:
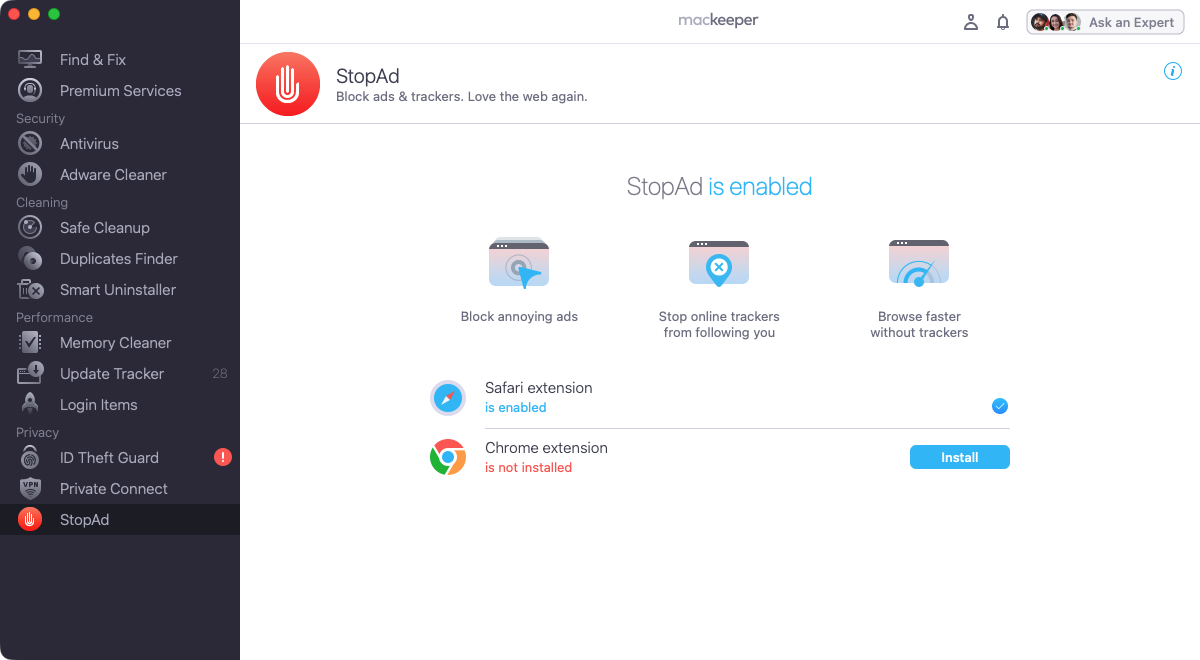
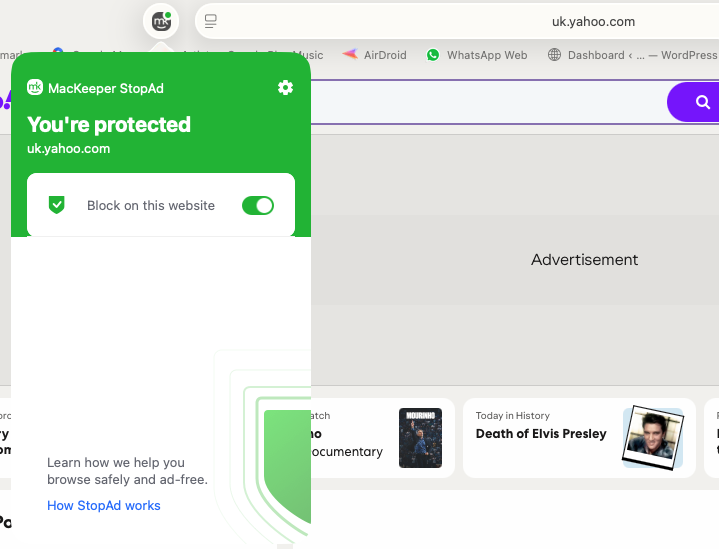
Saving a web page as a webloc is handy, but what if that is filled with ads, trackers, and annoying notifications? Block them with MacKeeper’s StopAd. Here’s how it works with Safari:
If the Safari extension isn’t enabled, click Enable.
In Safari, click the MacKeeper icon to open StopAd and check that it’s running on the current web page.
Step 1. Select StopAd, and make sure the Safari extension is enabledStep 2. In Safari, you can now select StopAd, and turn it on and off
How to create a webloc file on Mac?
Got a favourite site in mind for your first webloc file? Great! Creating a webloc file is quick and easy, and there are a couple of different ways to do it.
The first (and simplest) method is a drag-and-drop, like this:
Open any web browser on your Mac.
Visit the page you want to save into a webloc page.
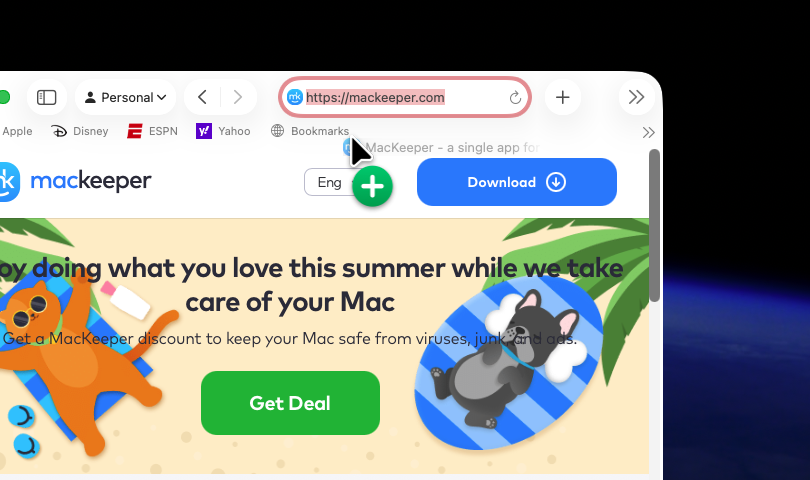
Click in the URL bar of your browser, and it should automatically select the URL.
Click and drag the web address, and you should see a green plus icon. If it doesn’t work, try clicking and dragging the site’s icon in the URL bar.
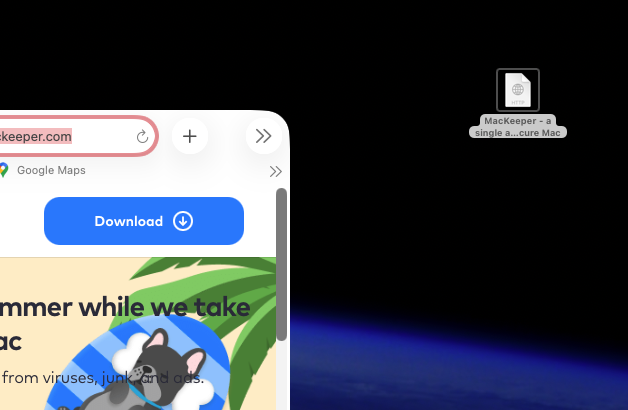
Drop the web address on your desktop or in a Finder window.
Your webloc file should now be ready, named after the URL of the web page.
Step 1. Drag and drop the URL from your browserStep 2. Your webloc file is now ready to use
Easy, right? But we also have a manual method. You can simply use a text template to create a brand new webloc file. Here’s how:
Open your Mac’s built-in TextEdit app.
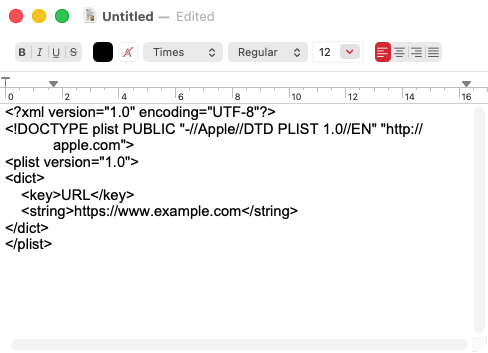
Copy and paste the command we’ll show you on the screenshot below, changing the example URL to whatever you want.
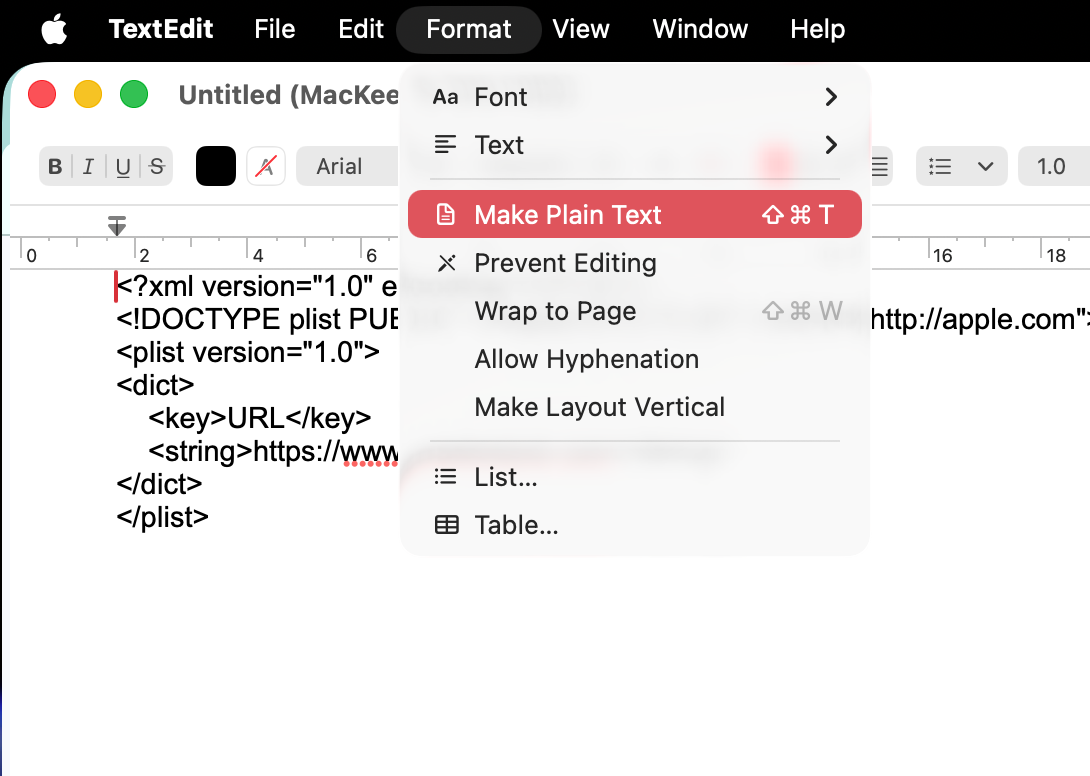
It’s important to convert this copy to plain text. From the menu bar, select Format > Make Plain Text.
Click OK.
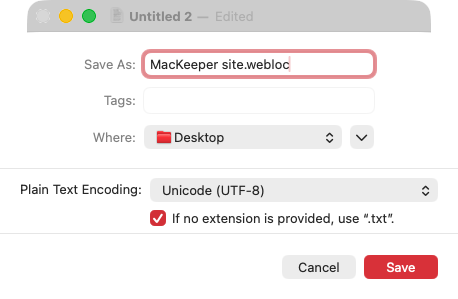
Press Cmd + S. Name the file, adding .webloc at the end. Click Save.
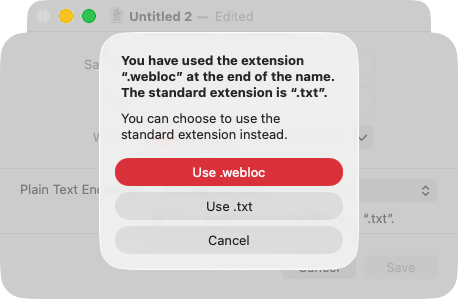
In the pop-up, click Use .webloc.
Now just open it like any other webloc file.
Step 1. Paste the template text into TextEdit, and change the example URLStep 2. Convert the copy to plain textStep 3. Name the file, and click SaveStep 4. Confirm that you want to change the file type to webloc
An extra hint from us:
Webloc files are tiny, but if you do have other files you want to shrink, read our guide on how to make files smaller. In this guide, we look at everything from zipping up files to using a converter app to compress video files.
How to open a webloc file on Mac
Once you’ve created a webloc file, simply double-click it to open it, and the relevant page will load in your default web browser, even if that browser wasn’t already running. If you already have the page open in your browser, macOS will simply take you to that browser tab.
What if you want to open webloc files in a different browser? You could change your default browser, but we have a simpler method:
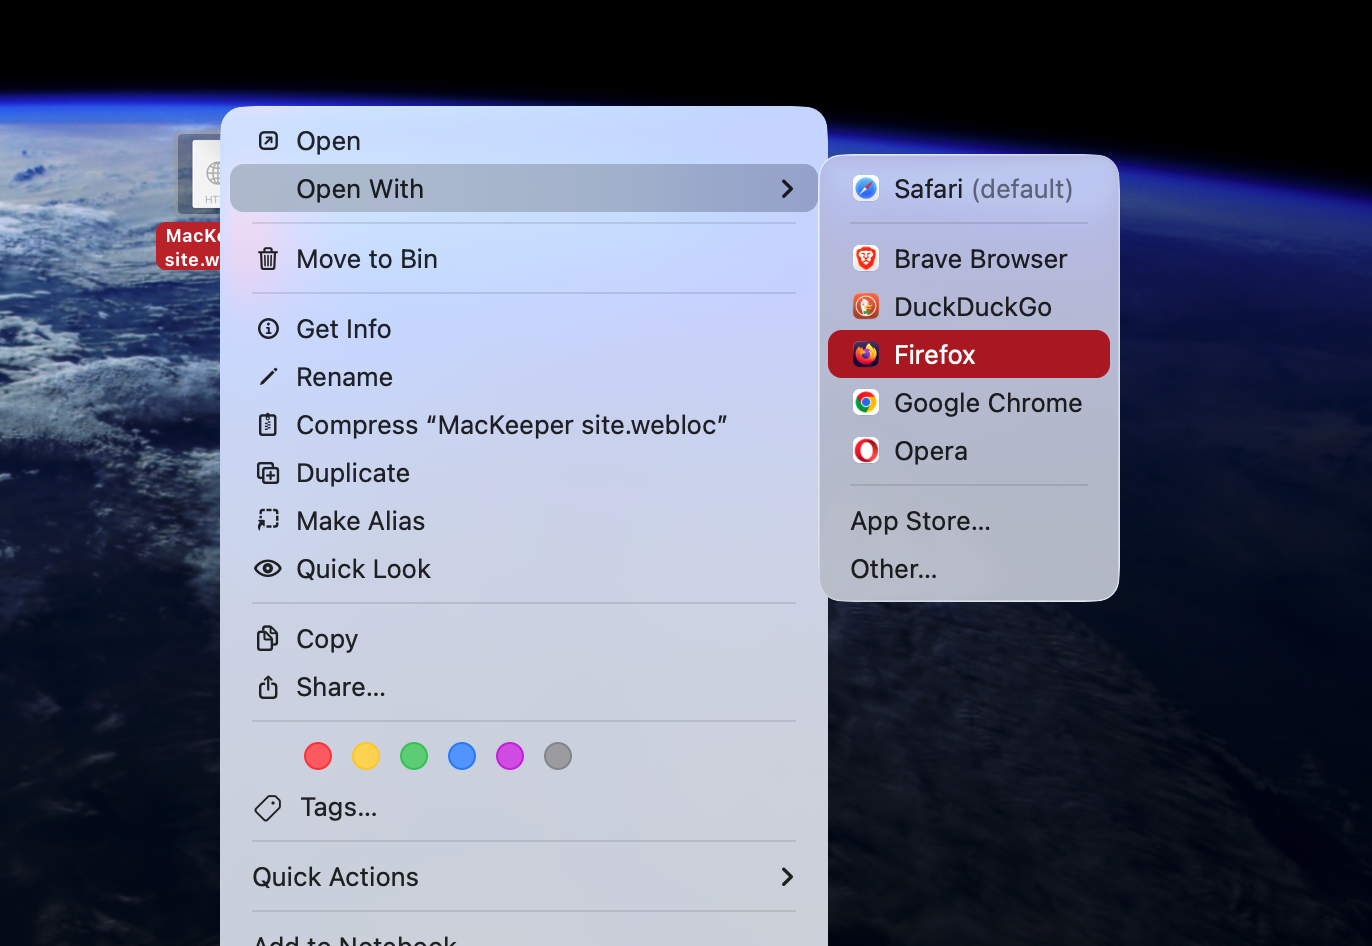
Right-click a webloc file.
Select Open With, and then select a web browser.
The webloc file will now open in that browser.
You can open a webloc in any browser of your choice
You can also quickly view a webloc file simply by selecting it and pressing your Spacebar. This brings up a cached image of the web page in question, without you having to open a browser—handy if you have a lot of webloc files to look through.
Accidentally deleted a webloc file or other data? Check out our tips on how to recover overwritten files.
How to add a webloc file to your Dock?
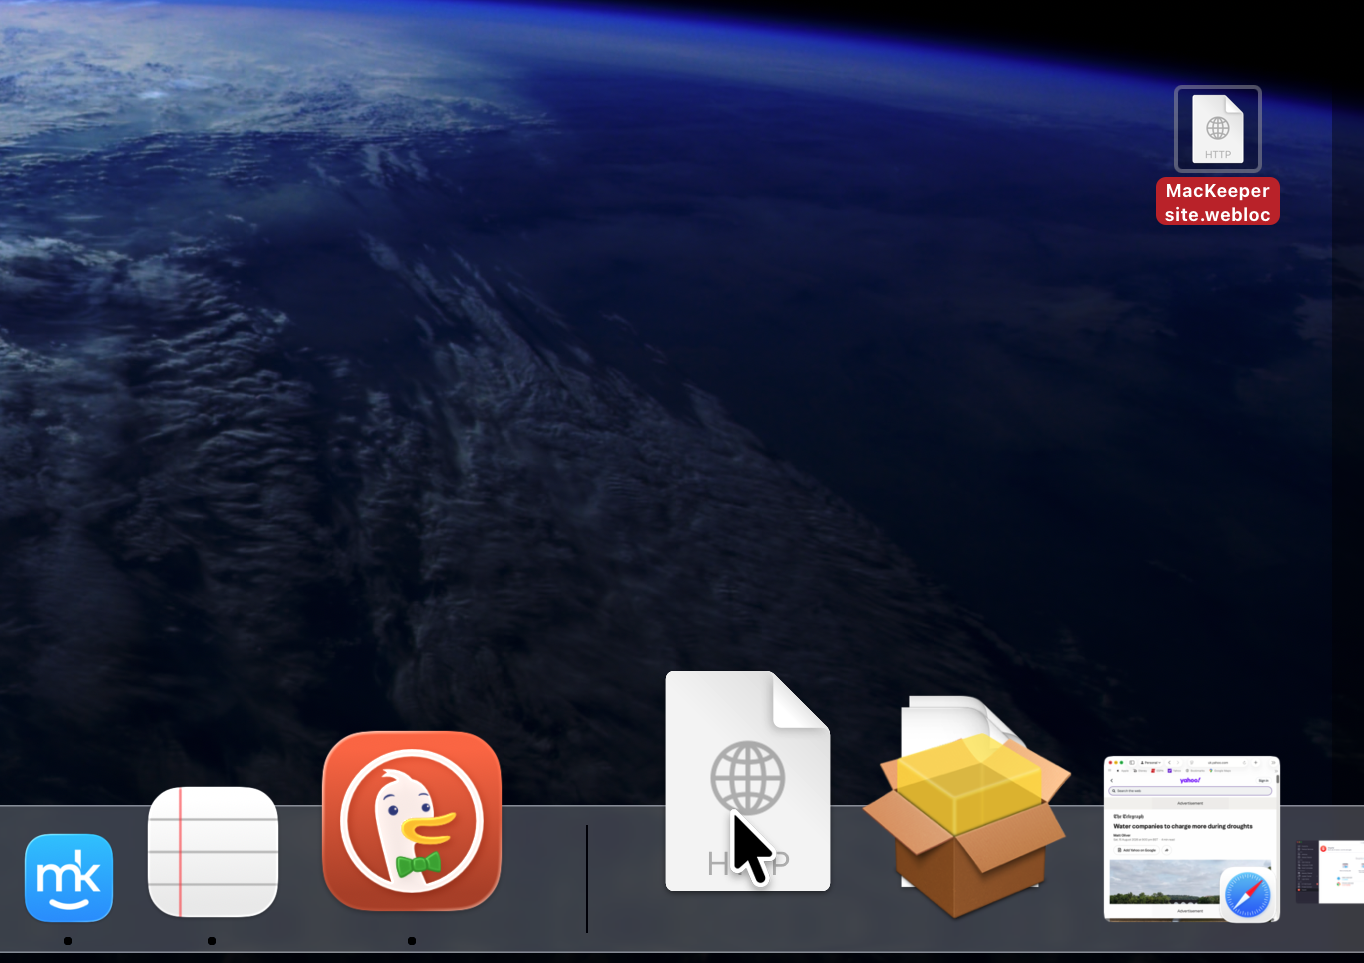
Once you’ve made a webloc file, you can add it to your Dock for even more convenient access. All you have to do is drag and drop your webloc file on the right-hand side of your Dock. It won’t fit anywhere else in the Dock, because those parts are reserved for apps.
To launch your webloc from the Dock, simply click its icon once—saving you yet another click!
Drag and drop a webloc file to your Dock for even quicker access
How to view webloc files on Mac?
Once you’ve created a webloc file, how do you view the text in the file and make changes to it? You can’t just double-click like other files, because that will open the linked web page in your browser.
You have two options:
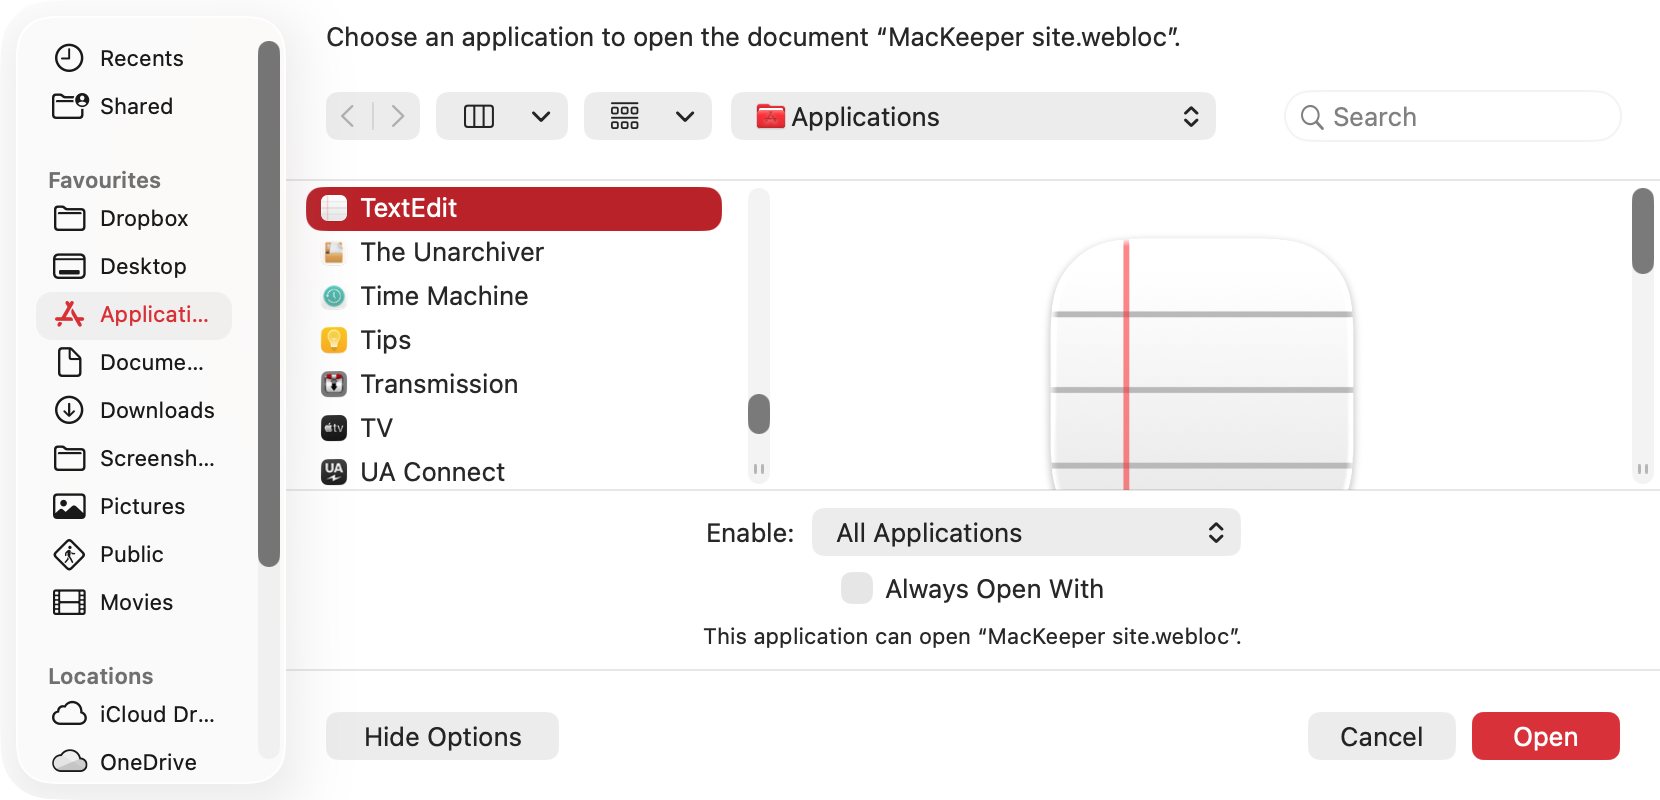
Drag and drop the webloc file onto the TextEdit icon in your Dock.
Right-click the webloc file, and select Open With > Other > TextEdit.
From there, you can see exactly what text is in the webloc file, and you can make whatever edits you want. However, we don’t recommend changing anything other than the URL. Otherwise, if you don’t know what you’re doing here, you risk breaking the functionality of the webloc file.
Created lots of webloc files and not sure how to handle them all? We hear you. We’ve looked at some of the best file managers for Apple Mac users—whether you’ve got an iMac, Mac mini, or MacBook, check it out.
Open a webloc file in TextEdit to view the text and make changes
Transform your browsing experience
Webloc files provide a quick and easy way to navigate to your favorite websites. They’re particularly useful if you have to visit a particular page every day. In most situations, we recommend just clicking and dragging the URL of the page from your browser to your desktop. Not only is this the simplest way of creating webloc files, but it will also create the name of the file for you, saving you a bit of typing.
If you’d rather use a manual method, then the webloc template we provided will do the trick, too. Just make sure you save it as a plain text file to avoid file type compatibility issues.
Whichever method you use, don’t let your web browsing experience get spoiled by annoying ads, intrusive online trackers, and irritating notifications. With MacKeeper’s StopAd, you can block all of them in Safari and Chrome, protecting your privacy and making browsing smoother. Give it a try today.
We respect your privacy and
use cookies
for the best site experience.
Privacy Preferences Center
We use cookies along with other tools to give you the best possible experience while using the
MacKeeper website. Cookies are small text files that help the website load faster. The cookies we
use don’t contain any type of personal data meaning they never store information such as your
location, email address, or IP address.
Help us improve how you interact with our website by accepting the use of cookies. You can change
your privacy settings whenever you like.
Manage consent
All cookies
These cookies are strictly necessary for enabling basic website functionality (including page
navigation, form submission, language detection, post commenting), downloading and purchasing
software. The website might malfunction without these cookies.