Is OneDrive eating up space or refusing to sync on your Mac? A bloated cache is often behind it. When you clear OneDrive cache on macOS, you free up storage and help syncing settle down again. Let MacKeeper’s Safe Cleanup do it for you in one click—no digging through hidden folders required.
OneDrive cache is a set of temporary files OneDrive stores locally on your Mac—copies of recent documents, sync details, and thumbnail previews. It lives in a hidden Library location so the app can load these items quickly, and it grows as you work.
Think of it as a notepad near OneDrive’s desk—it jots down what you use most, so it needn’t refetch everything from the cloud. On a MacBook or any Macintosh, this cached data speeds up offline access and reduces downloads.
Why should you clear OneDrive cache on Mac?
Over time, the cache can balloon in size and eat into your storage. Old or corrupted cache data can also confuse OneDrive, which leads to stalled uploads, missing files, or a sync that never finishes.
Here are the common reasons people empty OneDrive cache on MacBook models:
Freeing up disk space when you hit your storage limit
Sorting out syncing that’s stuck or won’t finish
Clearing leftover data from files you’ve already deleted
Refreshing the app when it acts oddly or won’t load thumbnails
Enjoying the ease to optimize Mac storage and keeping your laptop running the way you expect
Is it safe to clear OneDrive cache?
Yes—clearing the cache is safe in nearly every case. It holds only temporary copies, not your originals, and OneDrive rebuilds it automatically next time you open the app, so you won’t lose anything already synced to the cloud.
That said, it’s worth a quick check first. Before you erase anything, make sure your key documents show a green checkmark, which means they’re fully backed up online. If you’d rather play it safe, you can pause or disable syncing while you work.
A note from our experts:
Just as you need to clear the OneDrive cache, you need to do the same with the other apps on your MacBook. To do it all in one shot without much thought, use MacKeeper’s Safe Cleanup. Our tool will help you clean safely and easily.
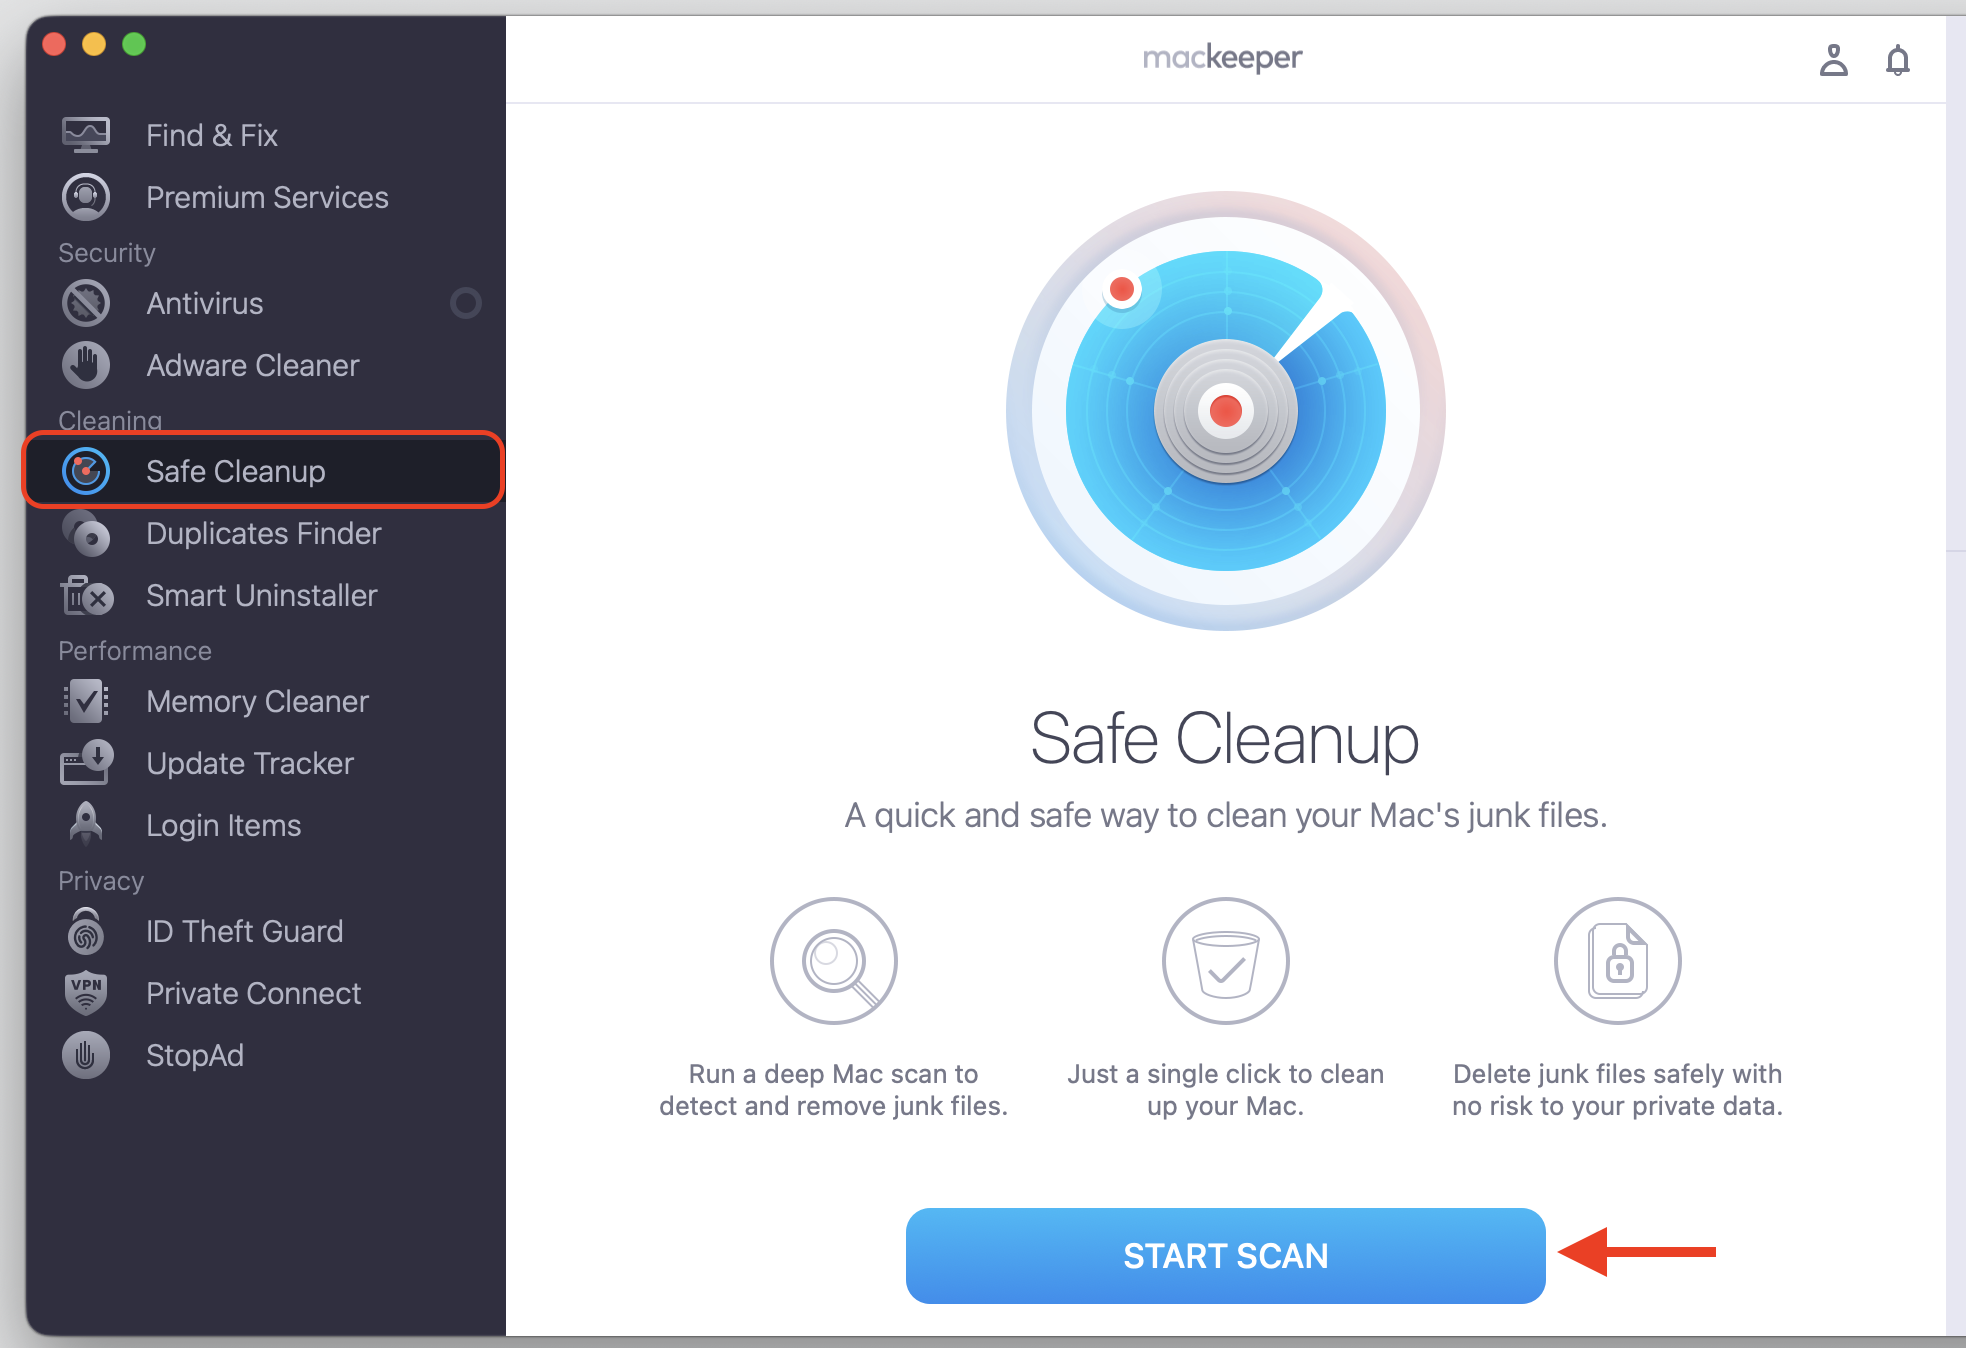
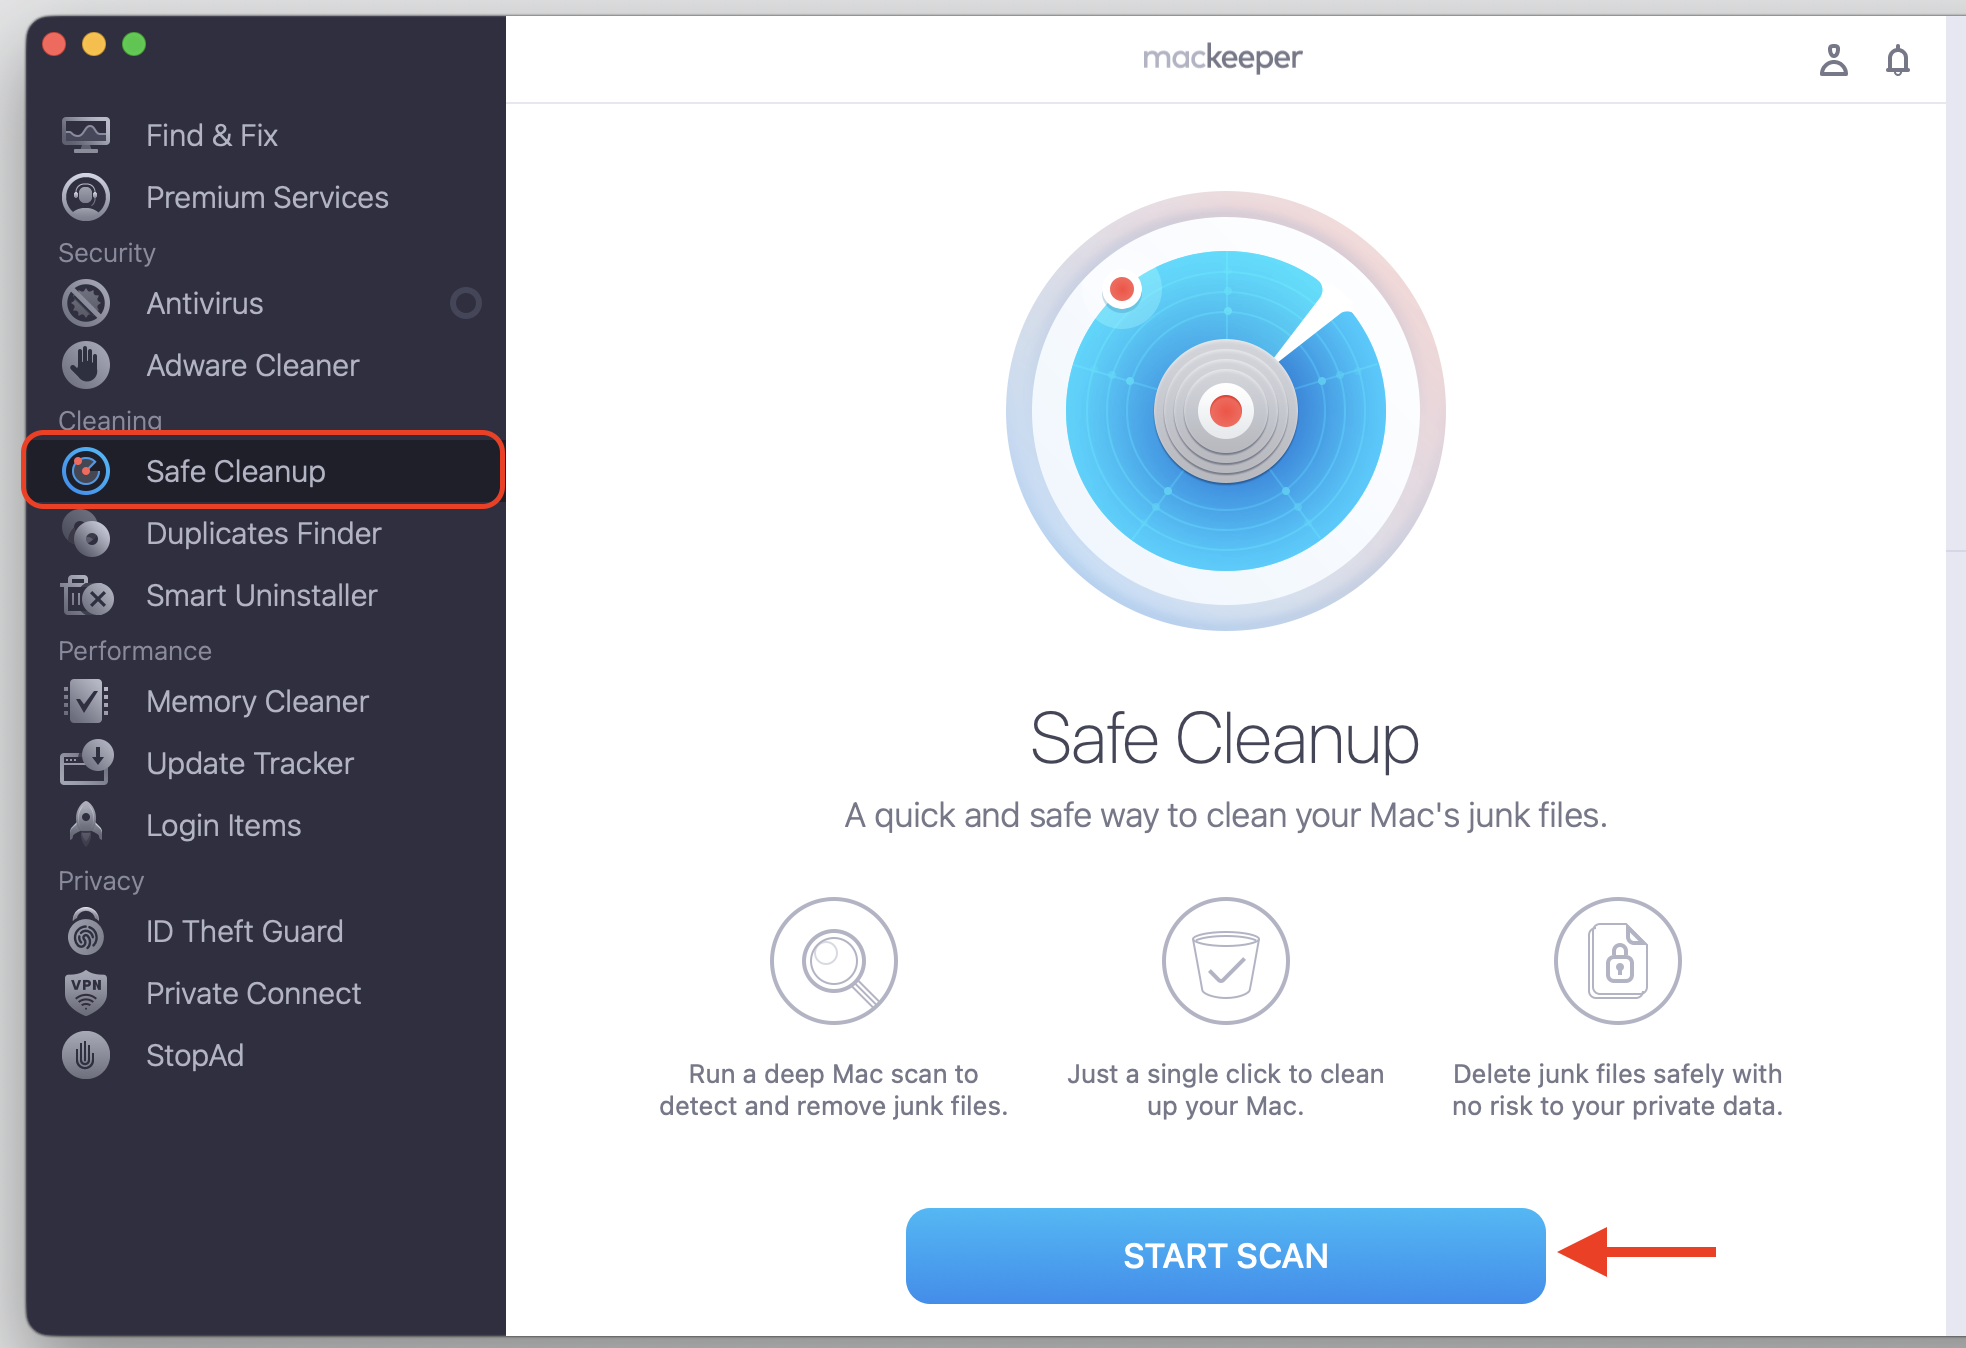
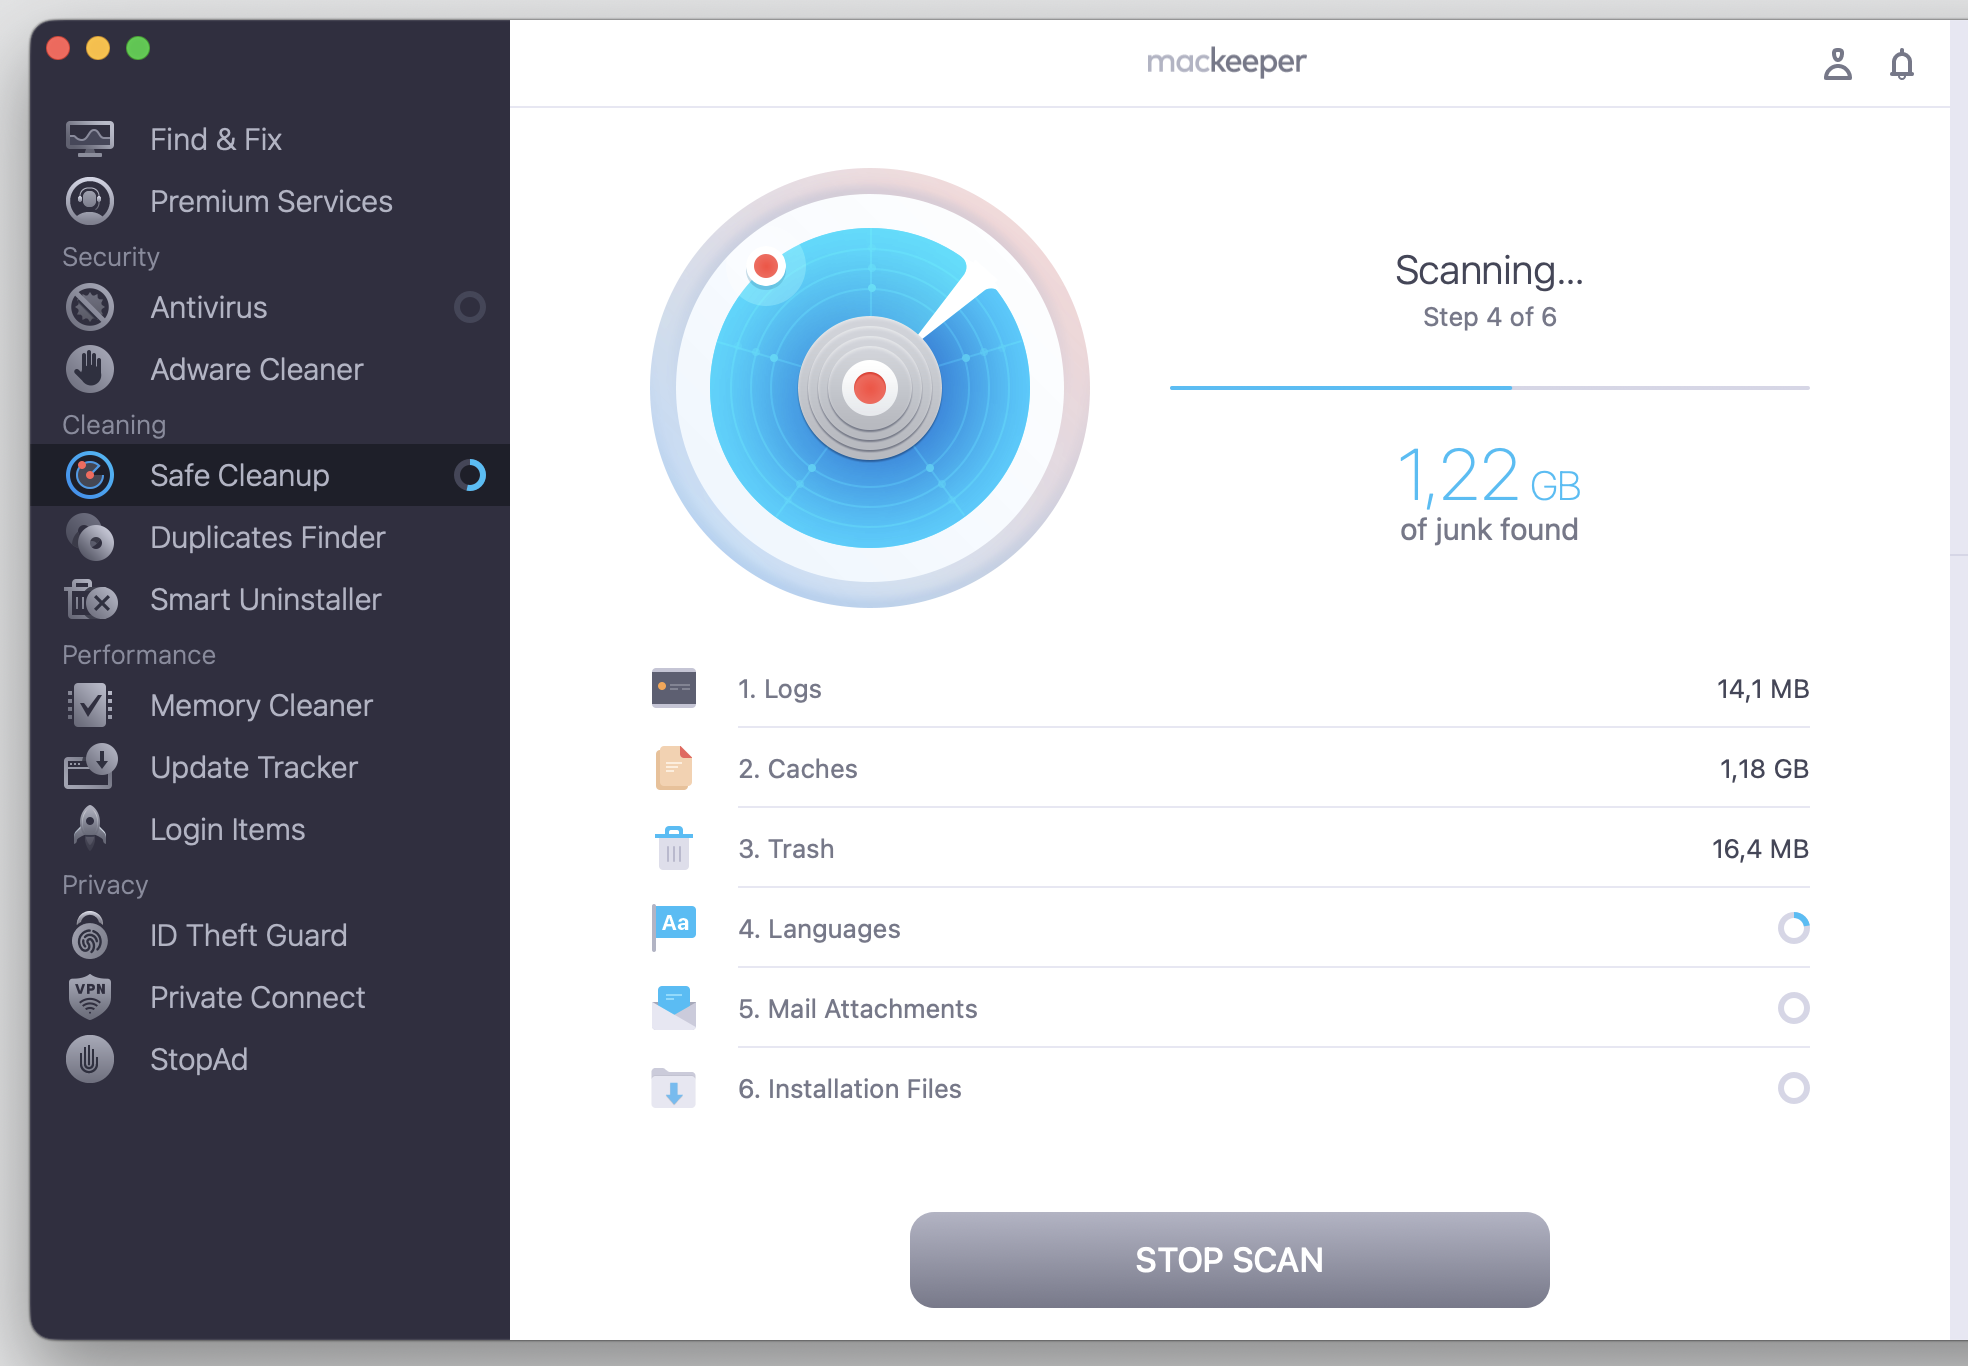
Find and choose Safe Cleanup followed by the Start Scan button.
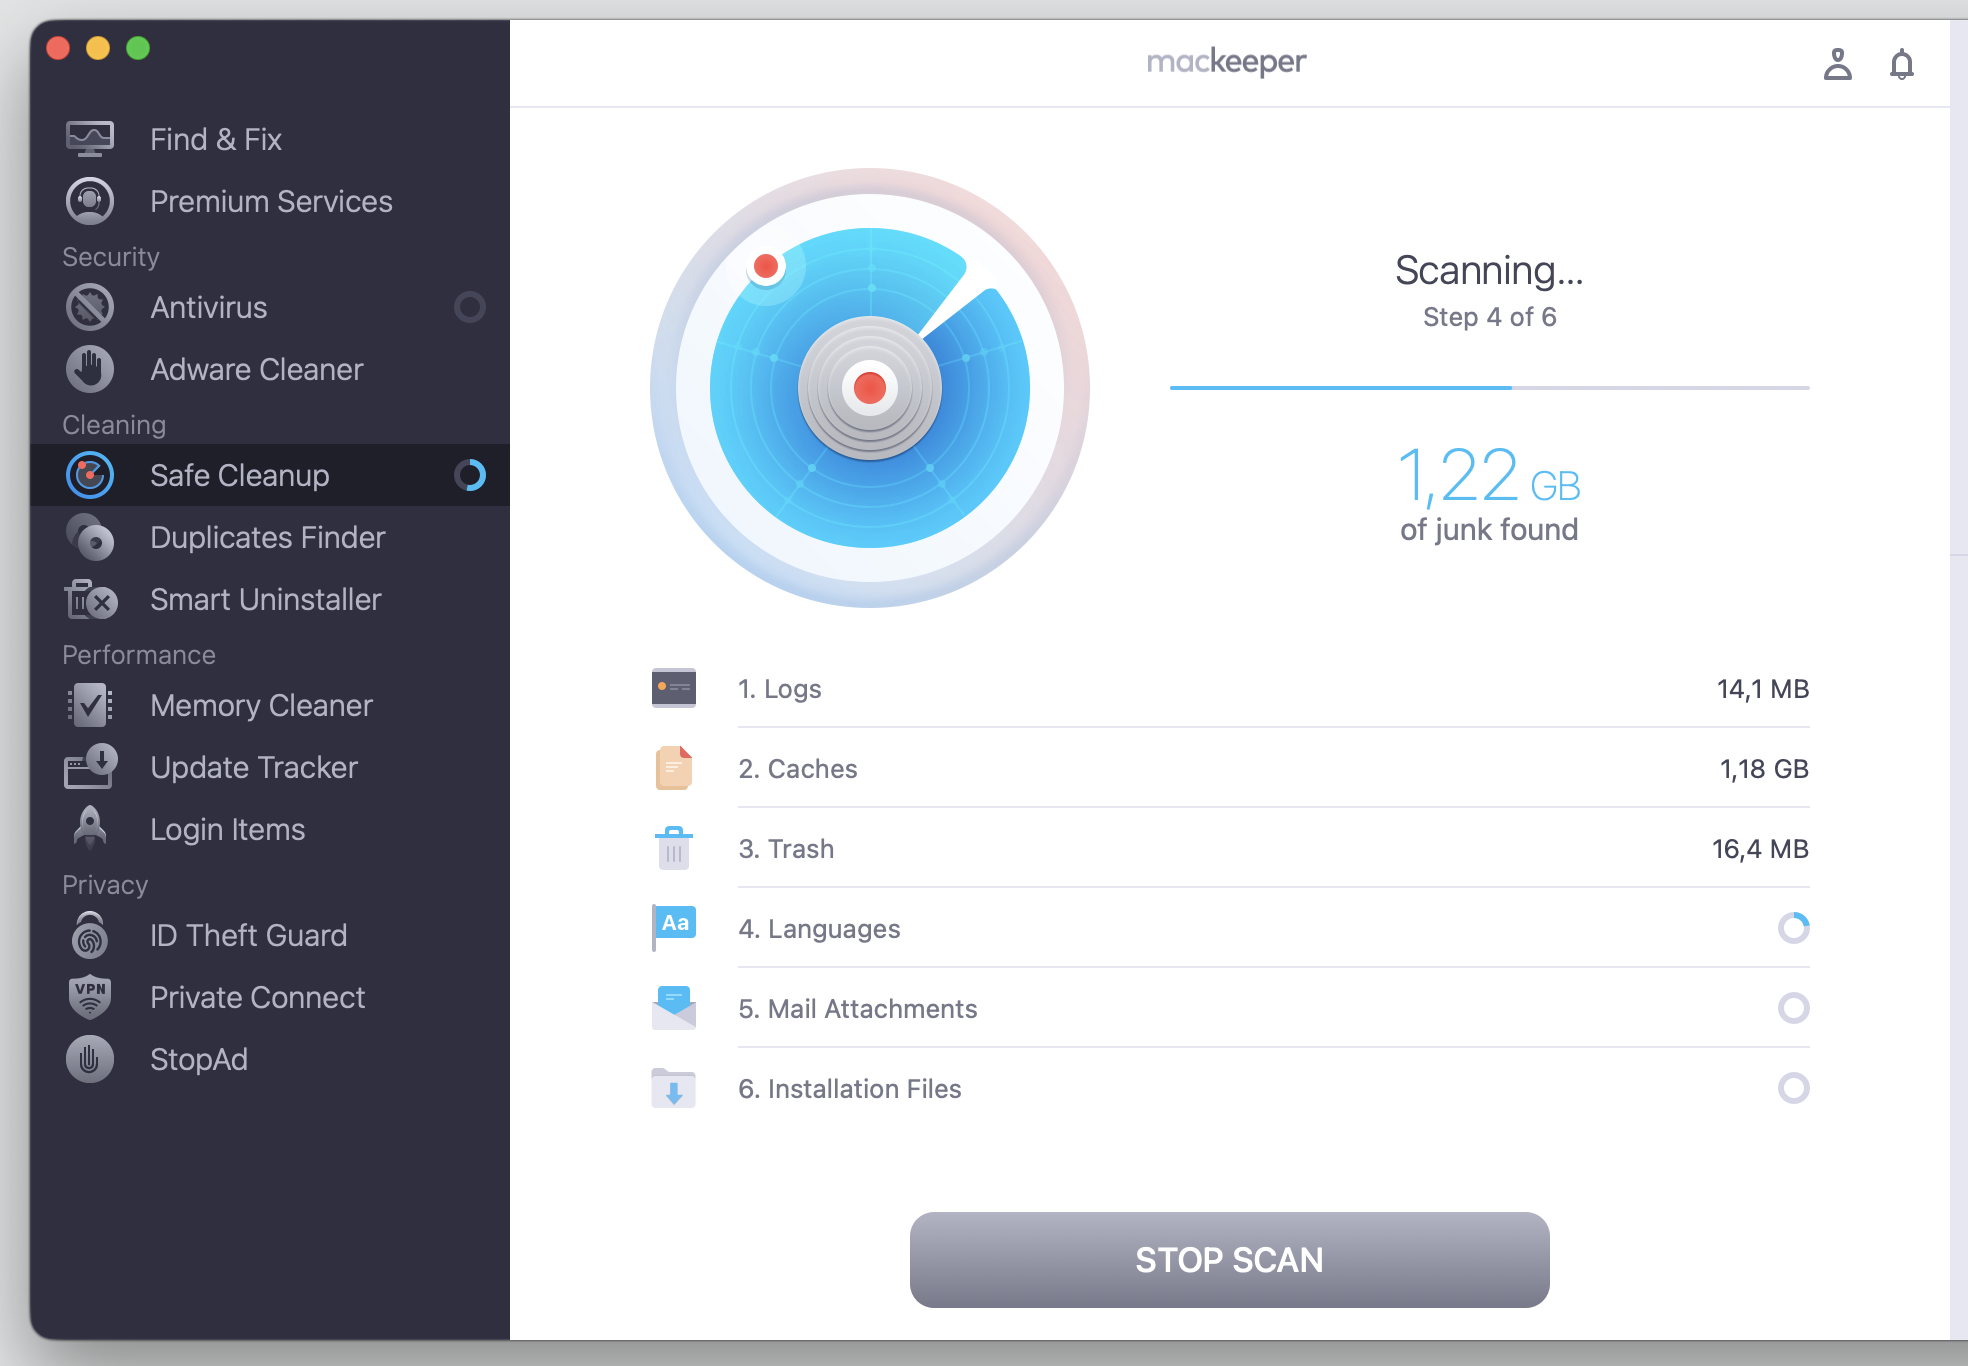
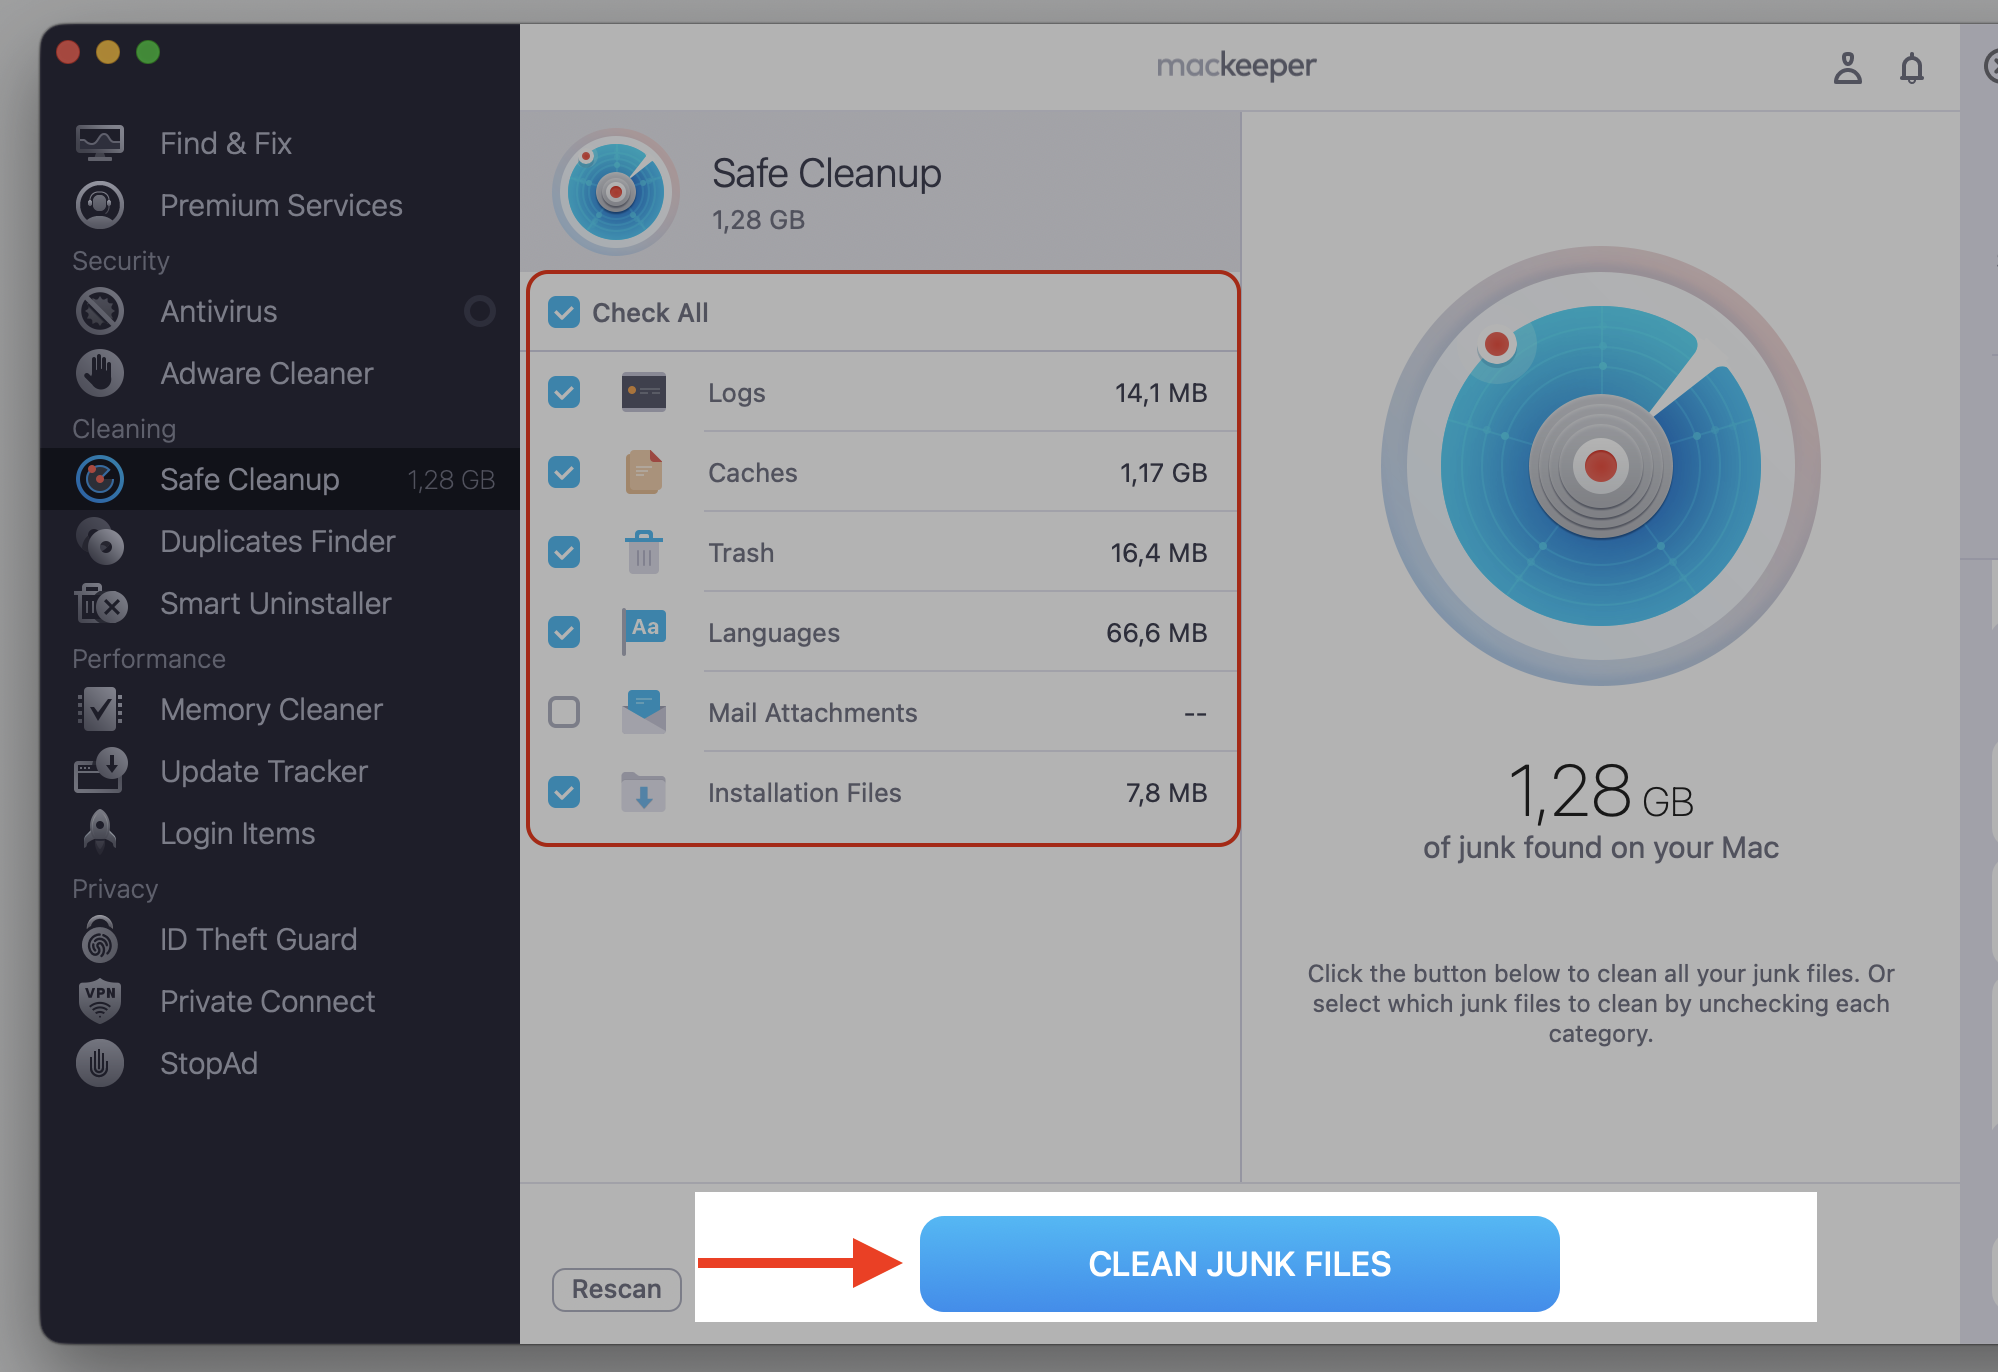
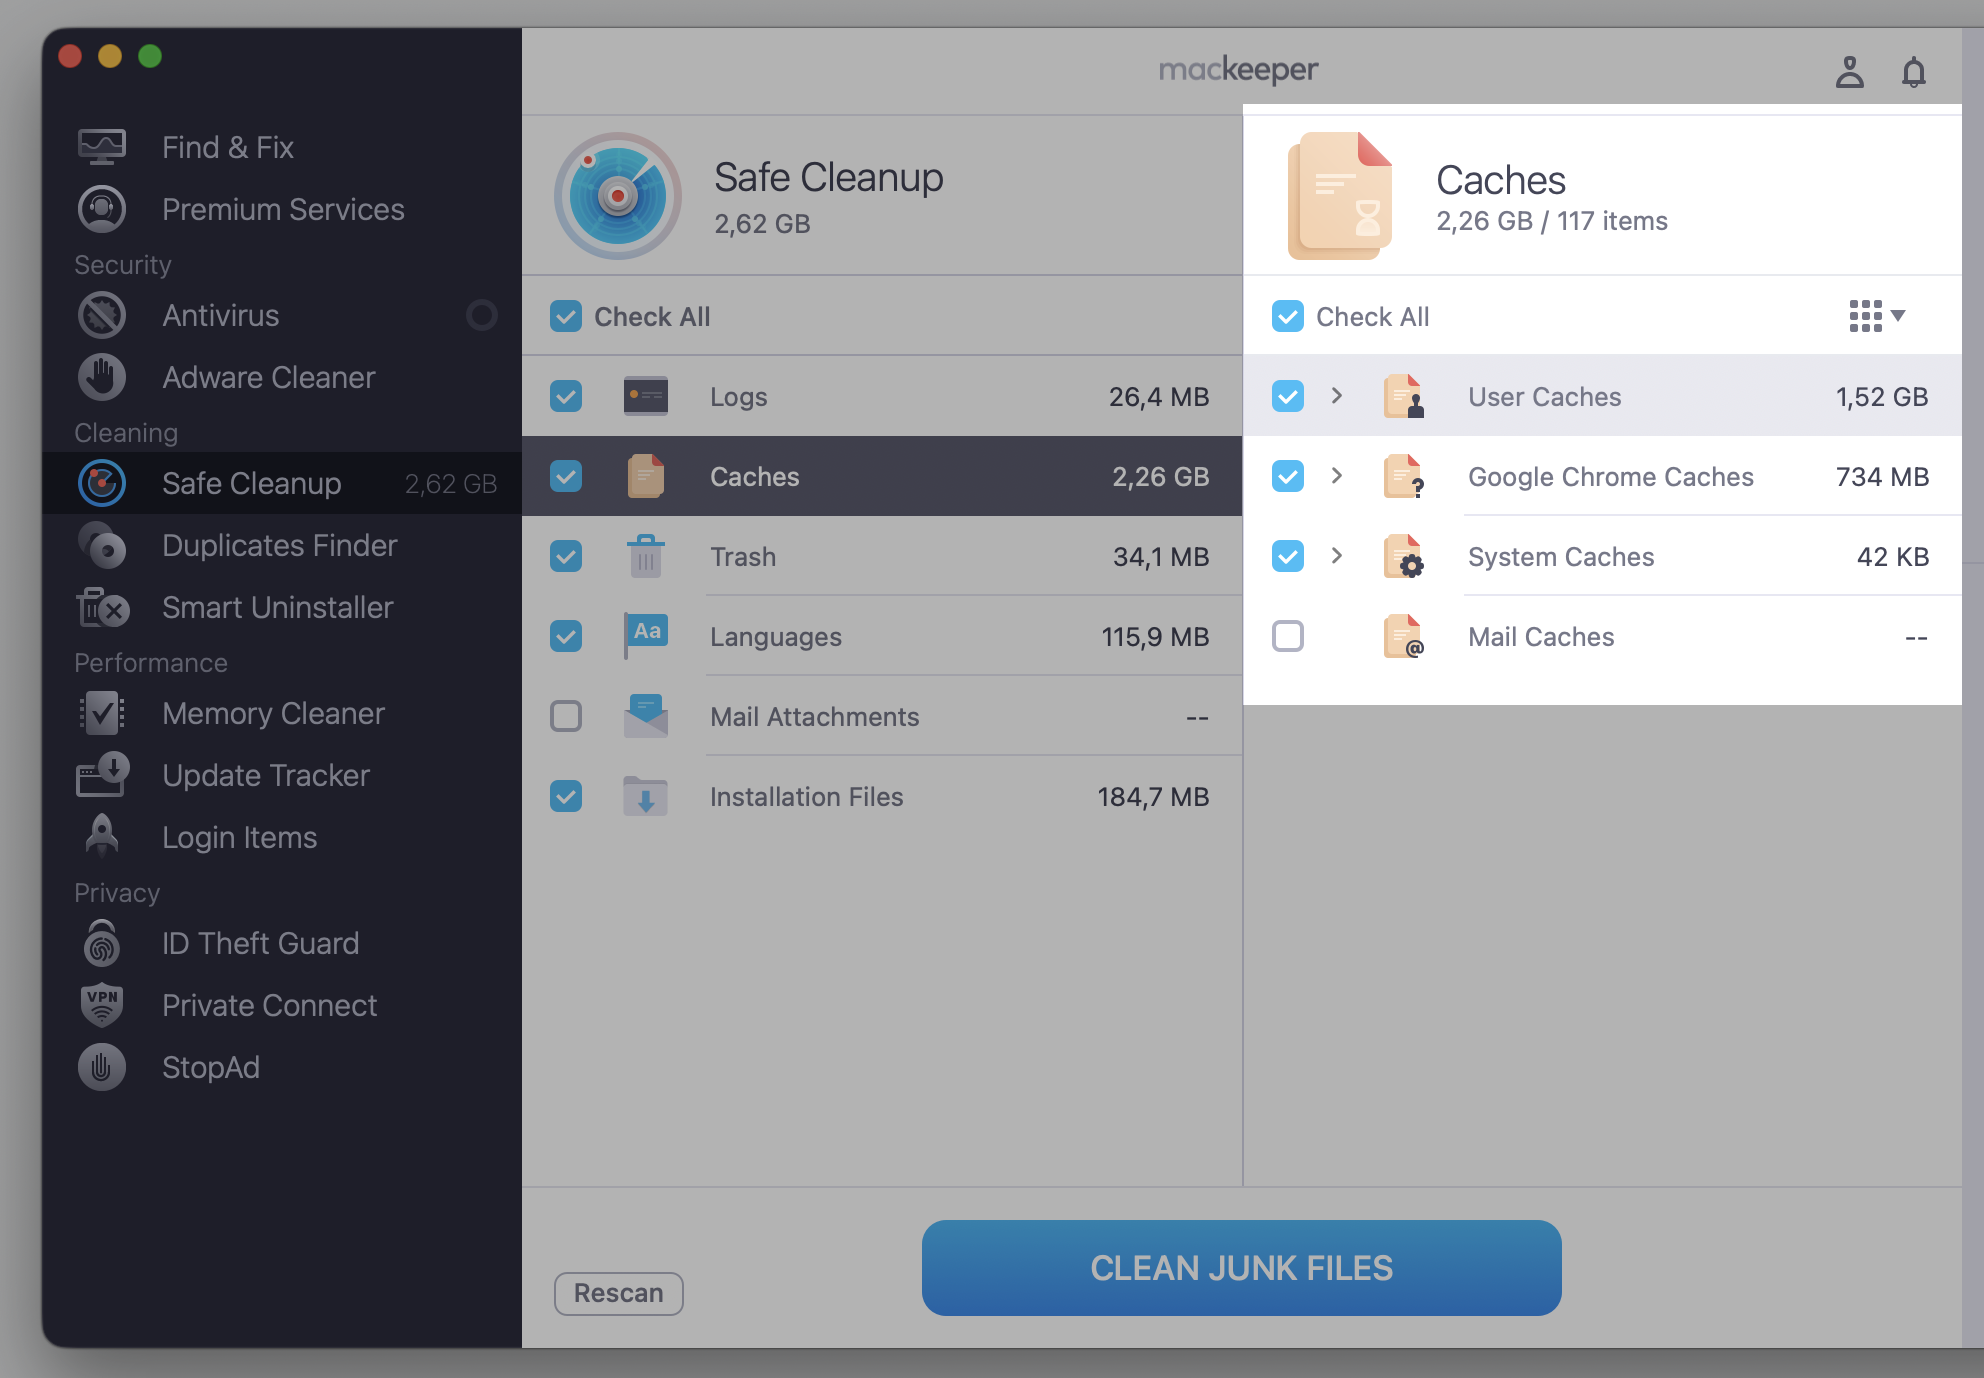
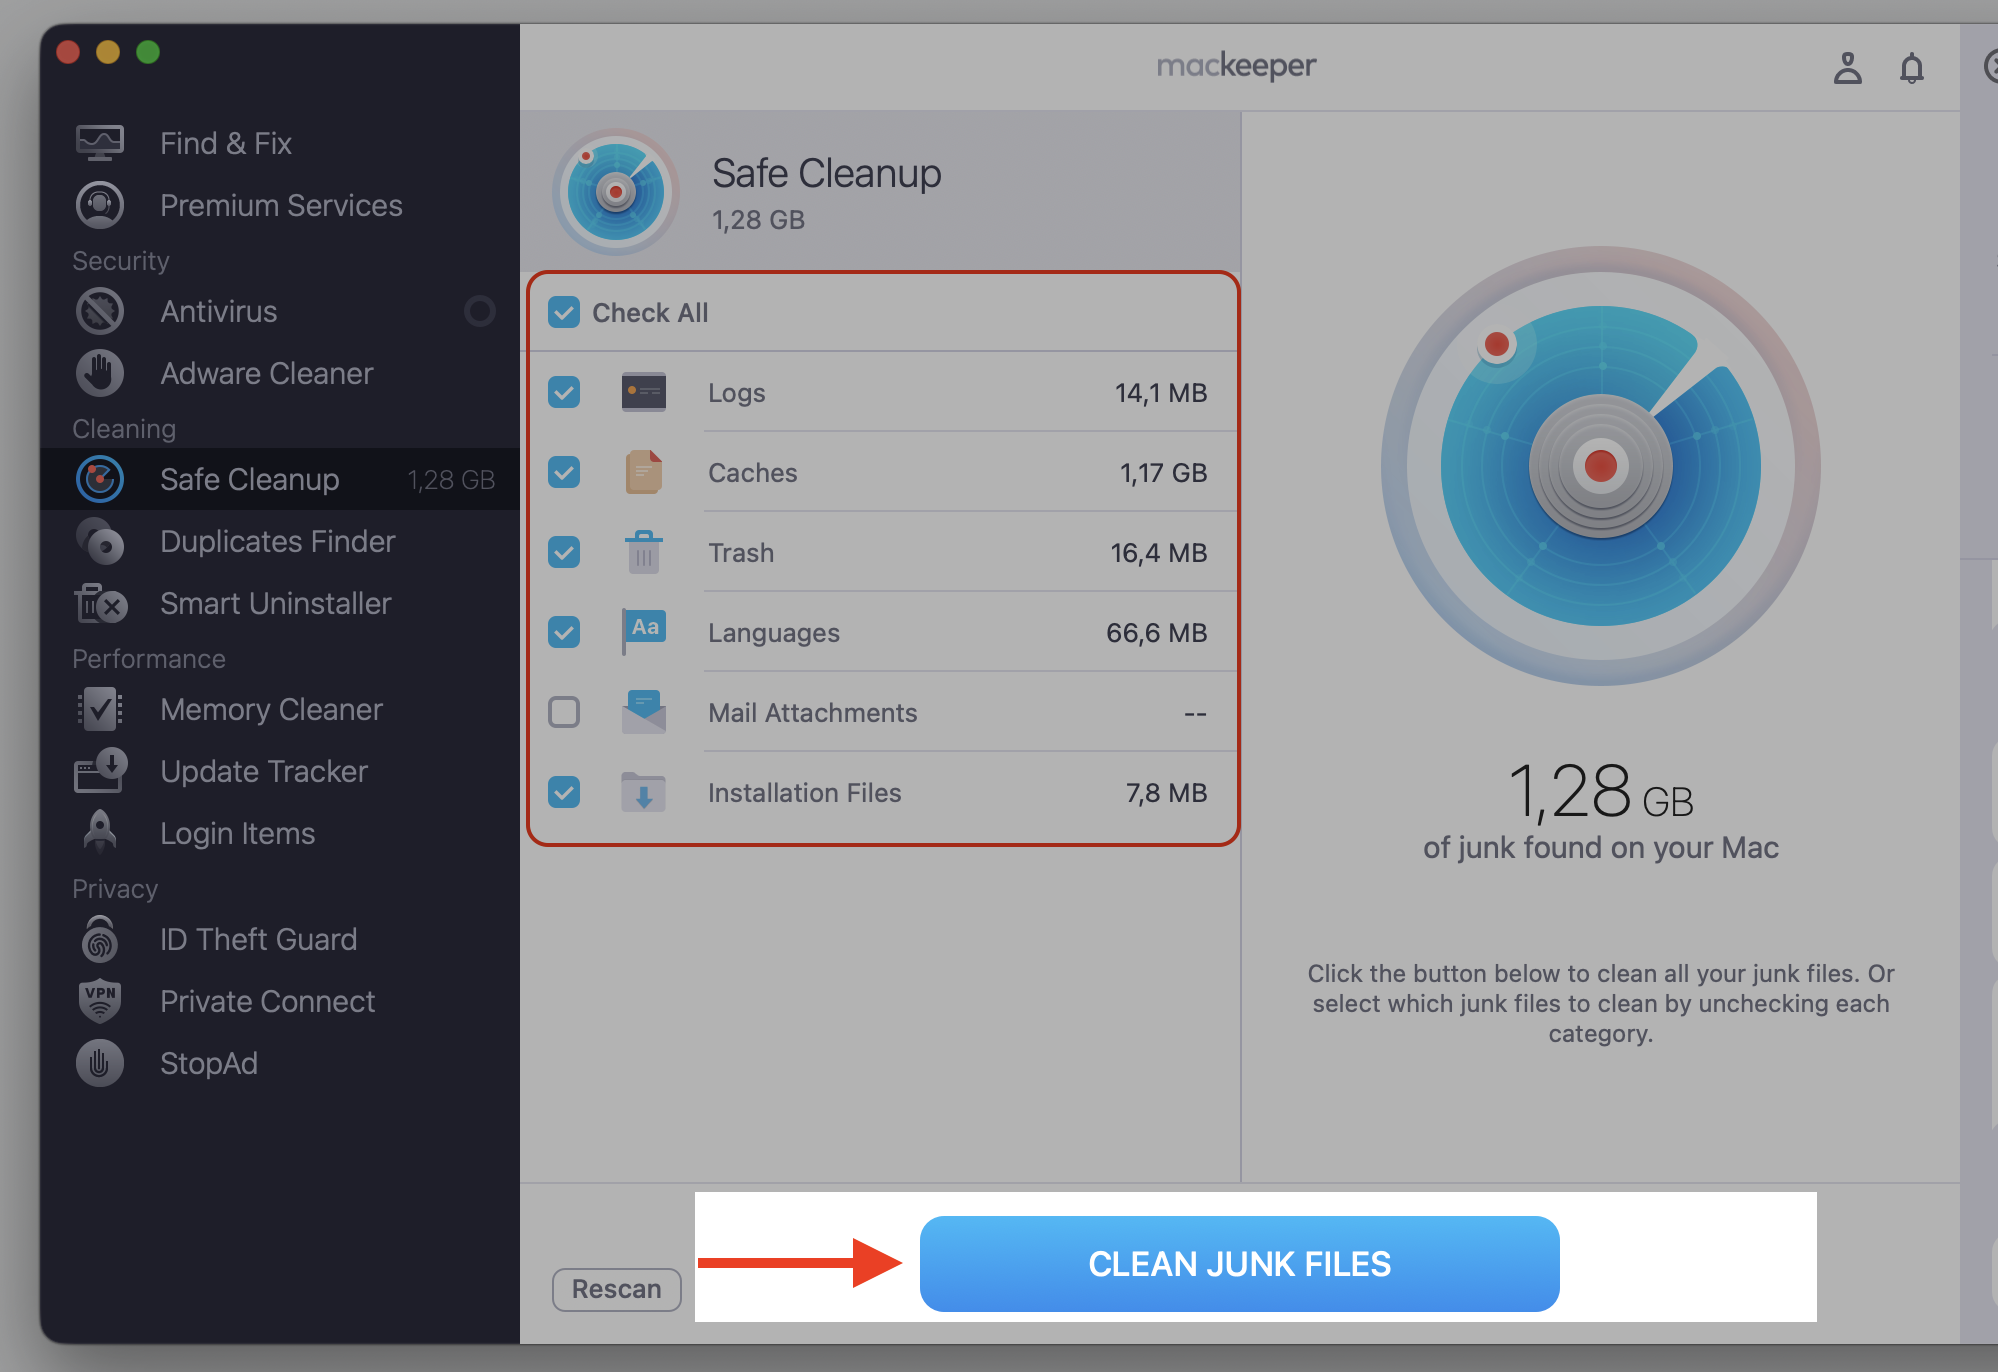
See the scan results when it’s over, check the necessary boxes on the left, and click Clean Junk Files to confirm.
Step 1. Go to MacKeeper > Safe Cleanup > Start ScanStep 2. Wait until scan is finishedStep 3. Check all setup and proceed with Clean Junk Files
How to clear OneDrive cache without losing files?
Before you delete anything, confirm your files are safe in the cloud. This matters most if OneDrive has unsynced changes or files marked as available on this device only.
Run through this short checklist first:
Open OneDrive and confirm it shows Up to date rather than Syncing.
Look for any files with a red warning icon or a pending sync arrow.
Right-click important folders and select Always Keep on This Device if you need them offline.
Let any in-progress uploads finish before you quit the app.
If your files won’t update at all, the trouble may be that OneDrive not syncing on Mac, rather than the cache, and getting OneDrive not syncing resolved first will save you time.
How to clear OneDrive cache on Mac?
There’s no single right way to clear OneDrive cache on Mac—the method depends on your comfort level and what’s gone wrong. A quick reset suits most people, while you can also clear the cache manually for more control. If you’d like to empty cache on Mac beyond OneDrive, the same steps apply to most apps.
We’ve ordered the methods below from quick to more hands-on, so read on and start with the one that matches your situation.
1. Reset OneDrive on Mac
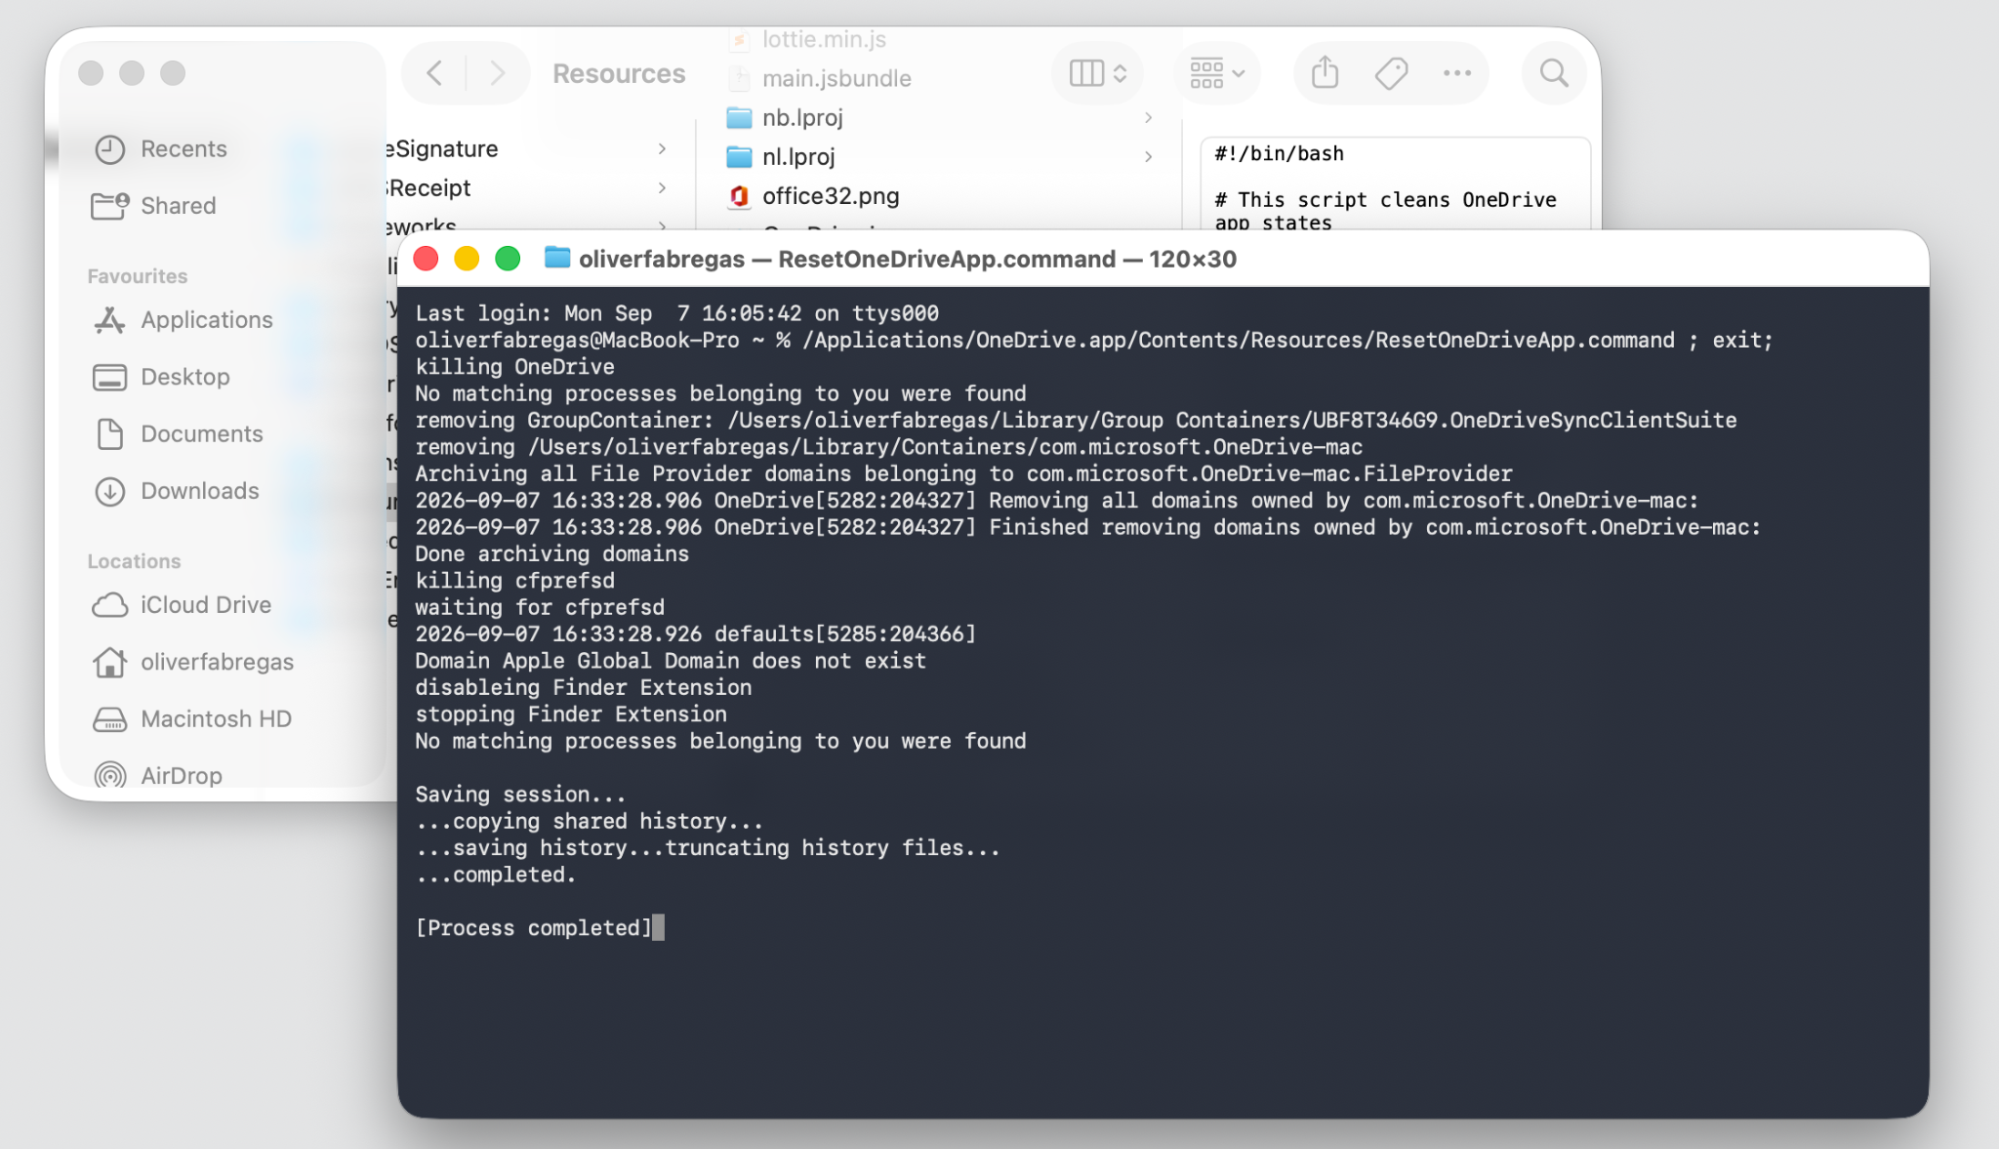
Resetting is the method we’d try first. It clears cached data, refreshes the app’s local settings, and reconnects your account without removing synced files—our go-to when OneDrive is slow, stuck, or showing missing files. It uses a built-in command from Apple’s apps, so you needn’t add any tools.
Just follow these steps to reset OneDrive cache on Mac:
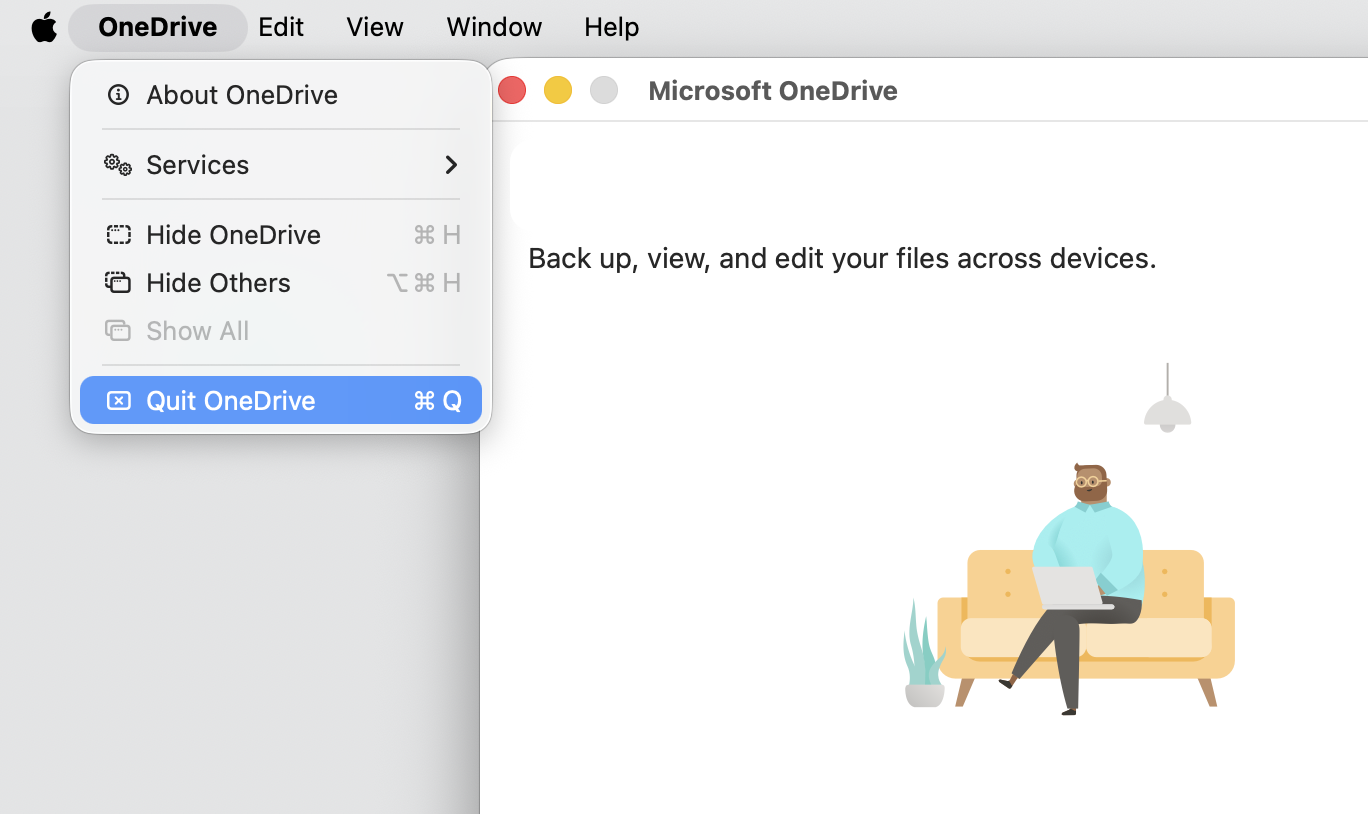
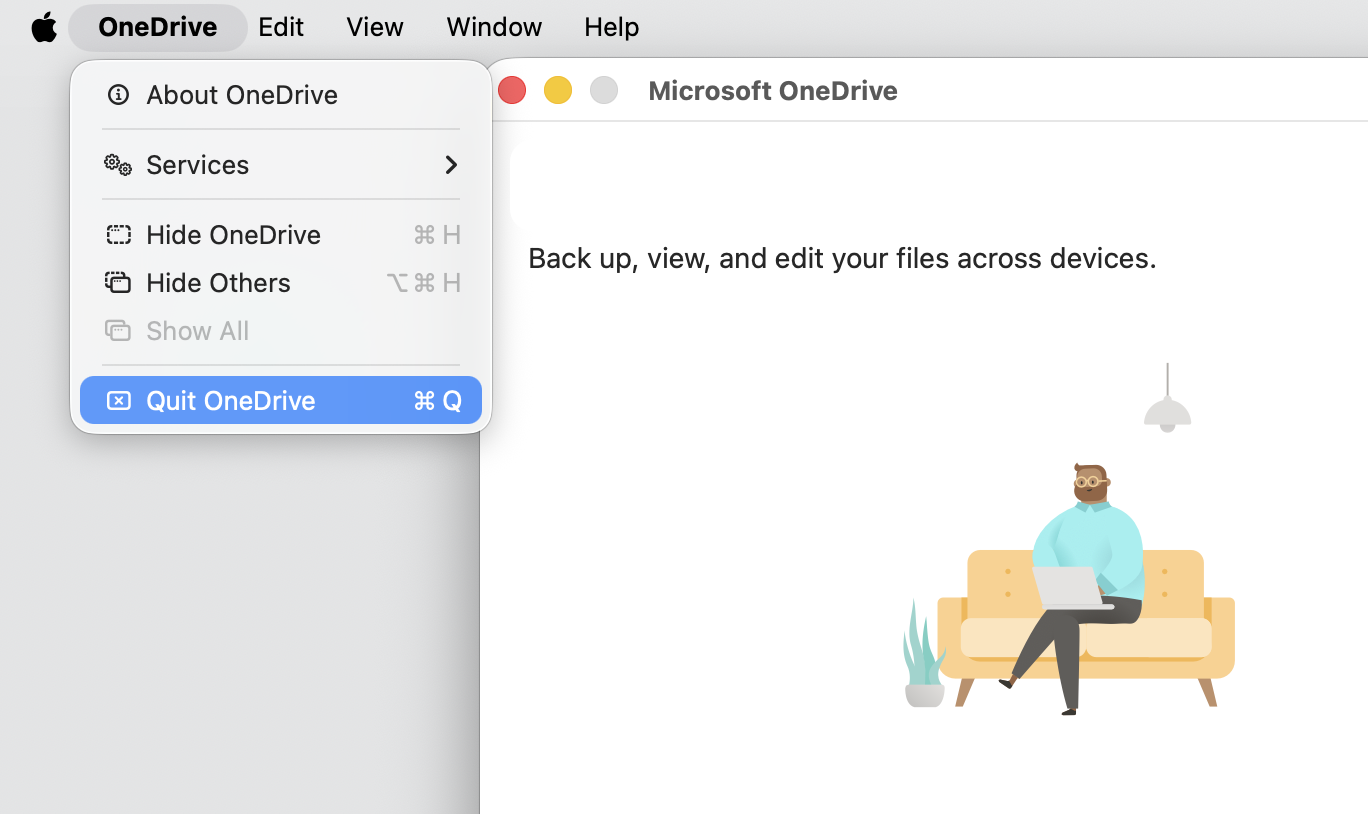
Quit OneDrive by selecting its icon in the menu bar, then choosing Quit OneDrive.
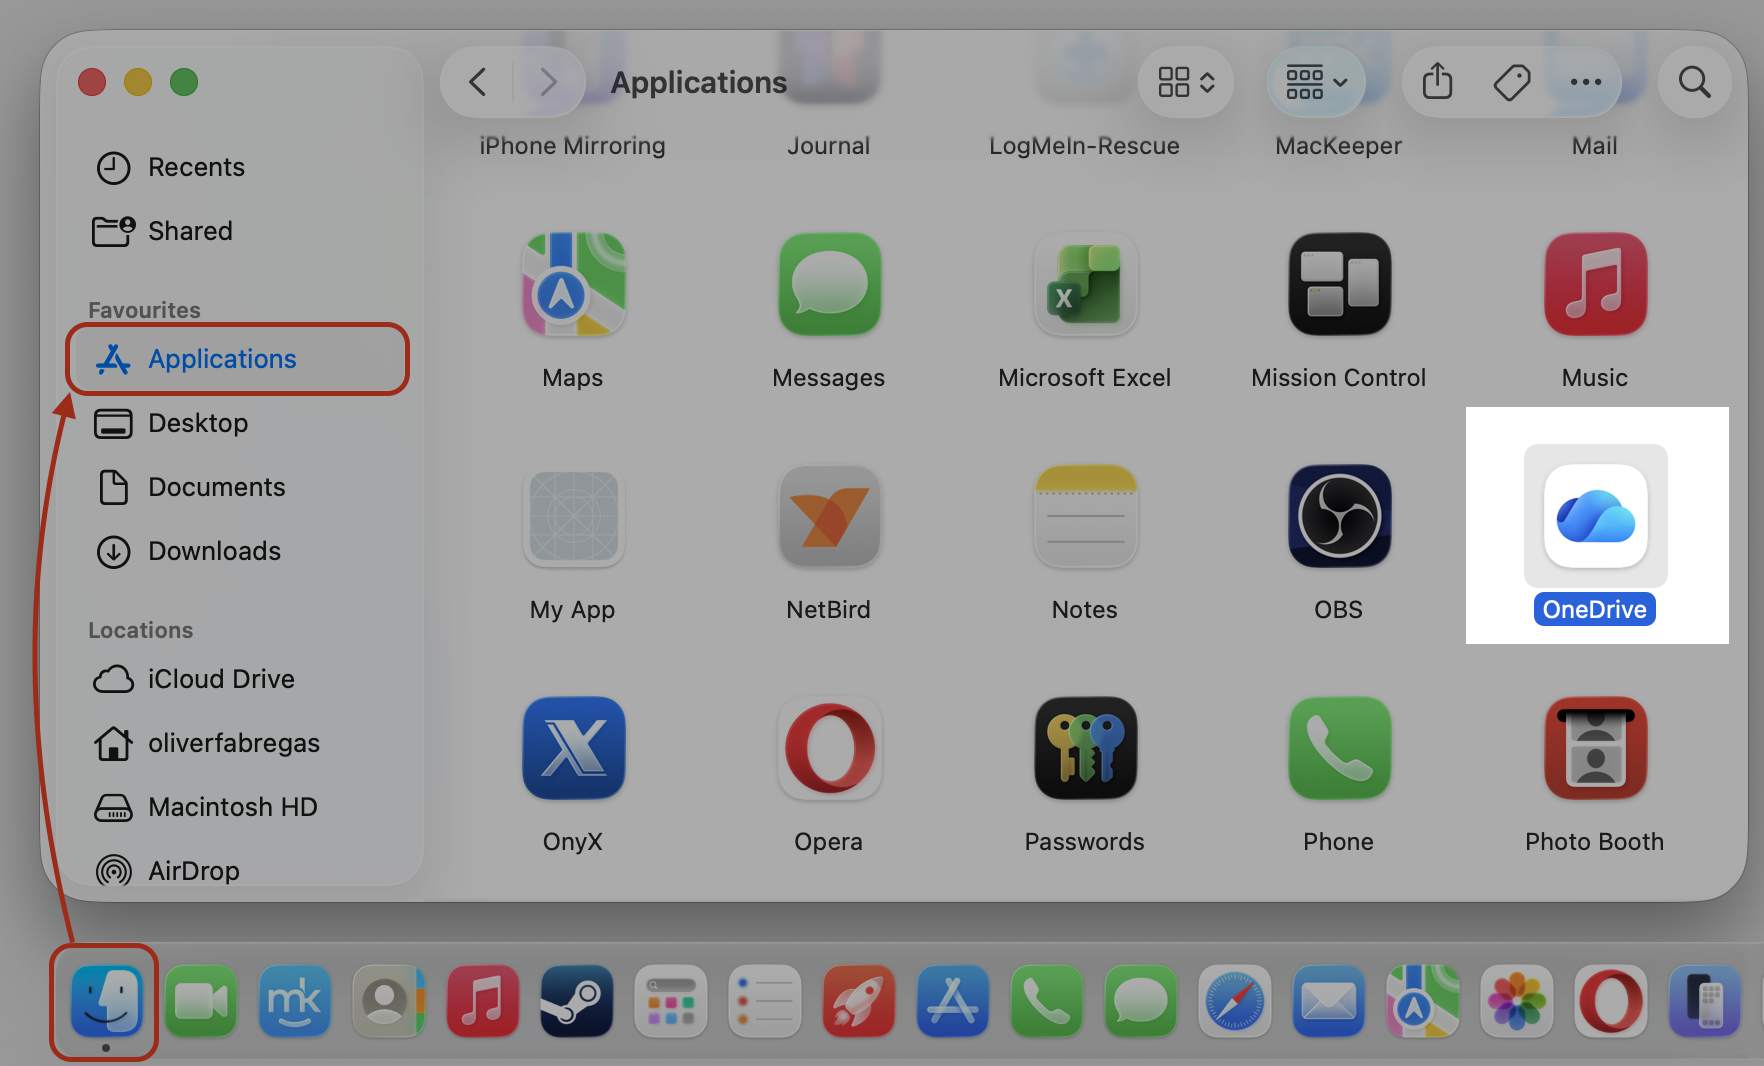
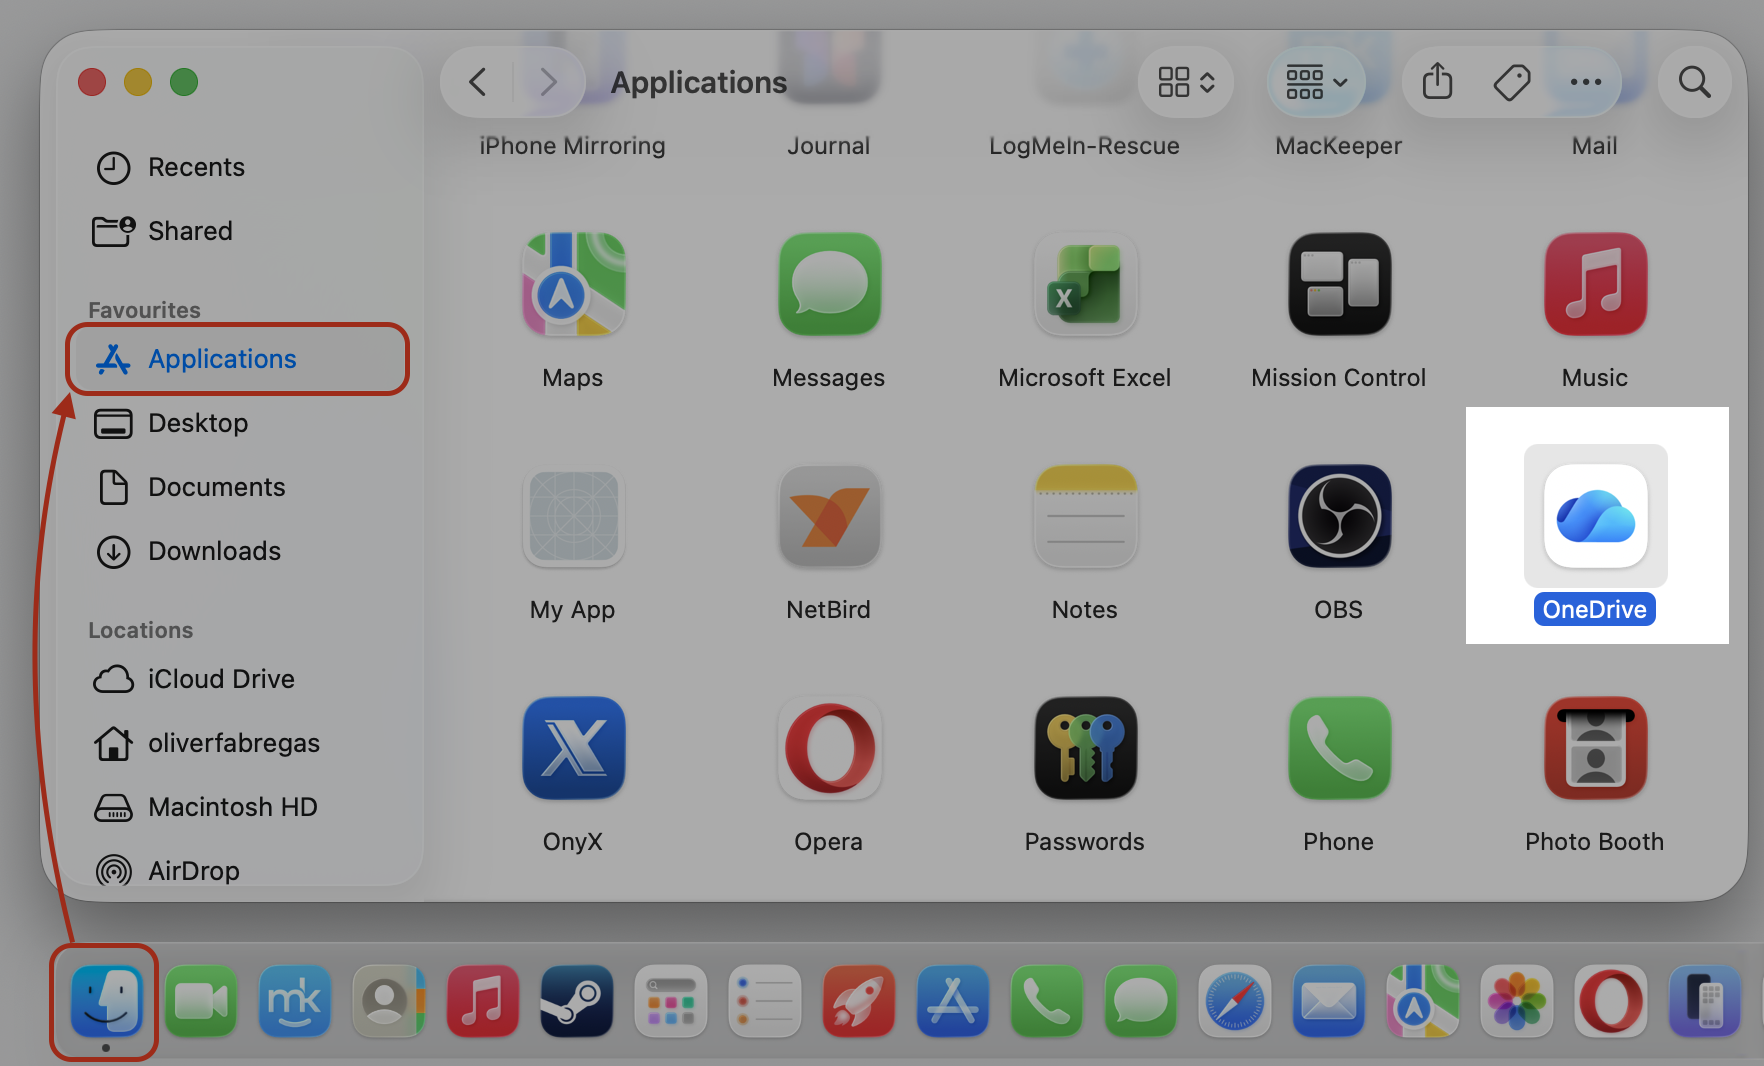
Open Finder and go to the Applications folder.
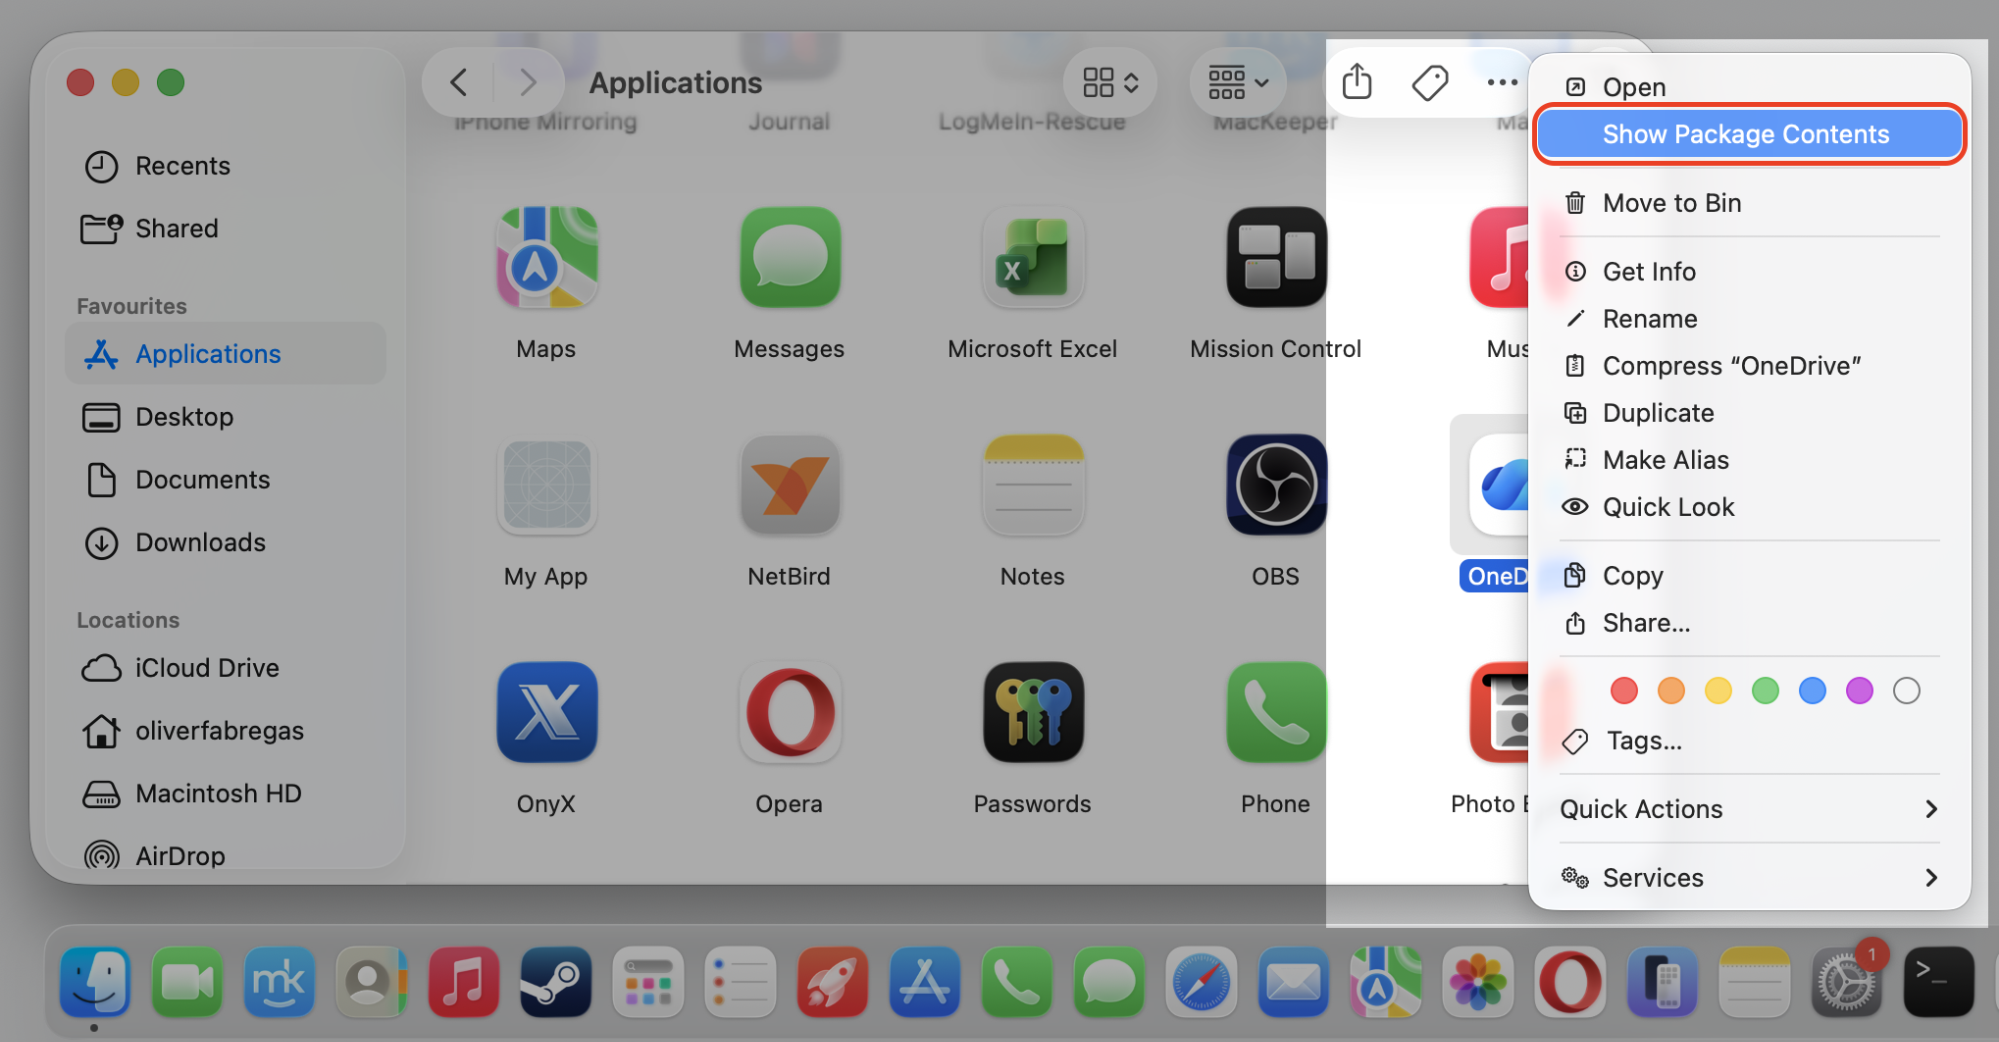
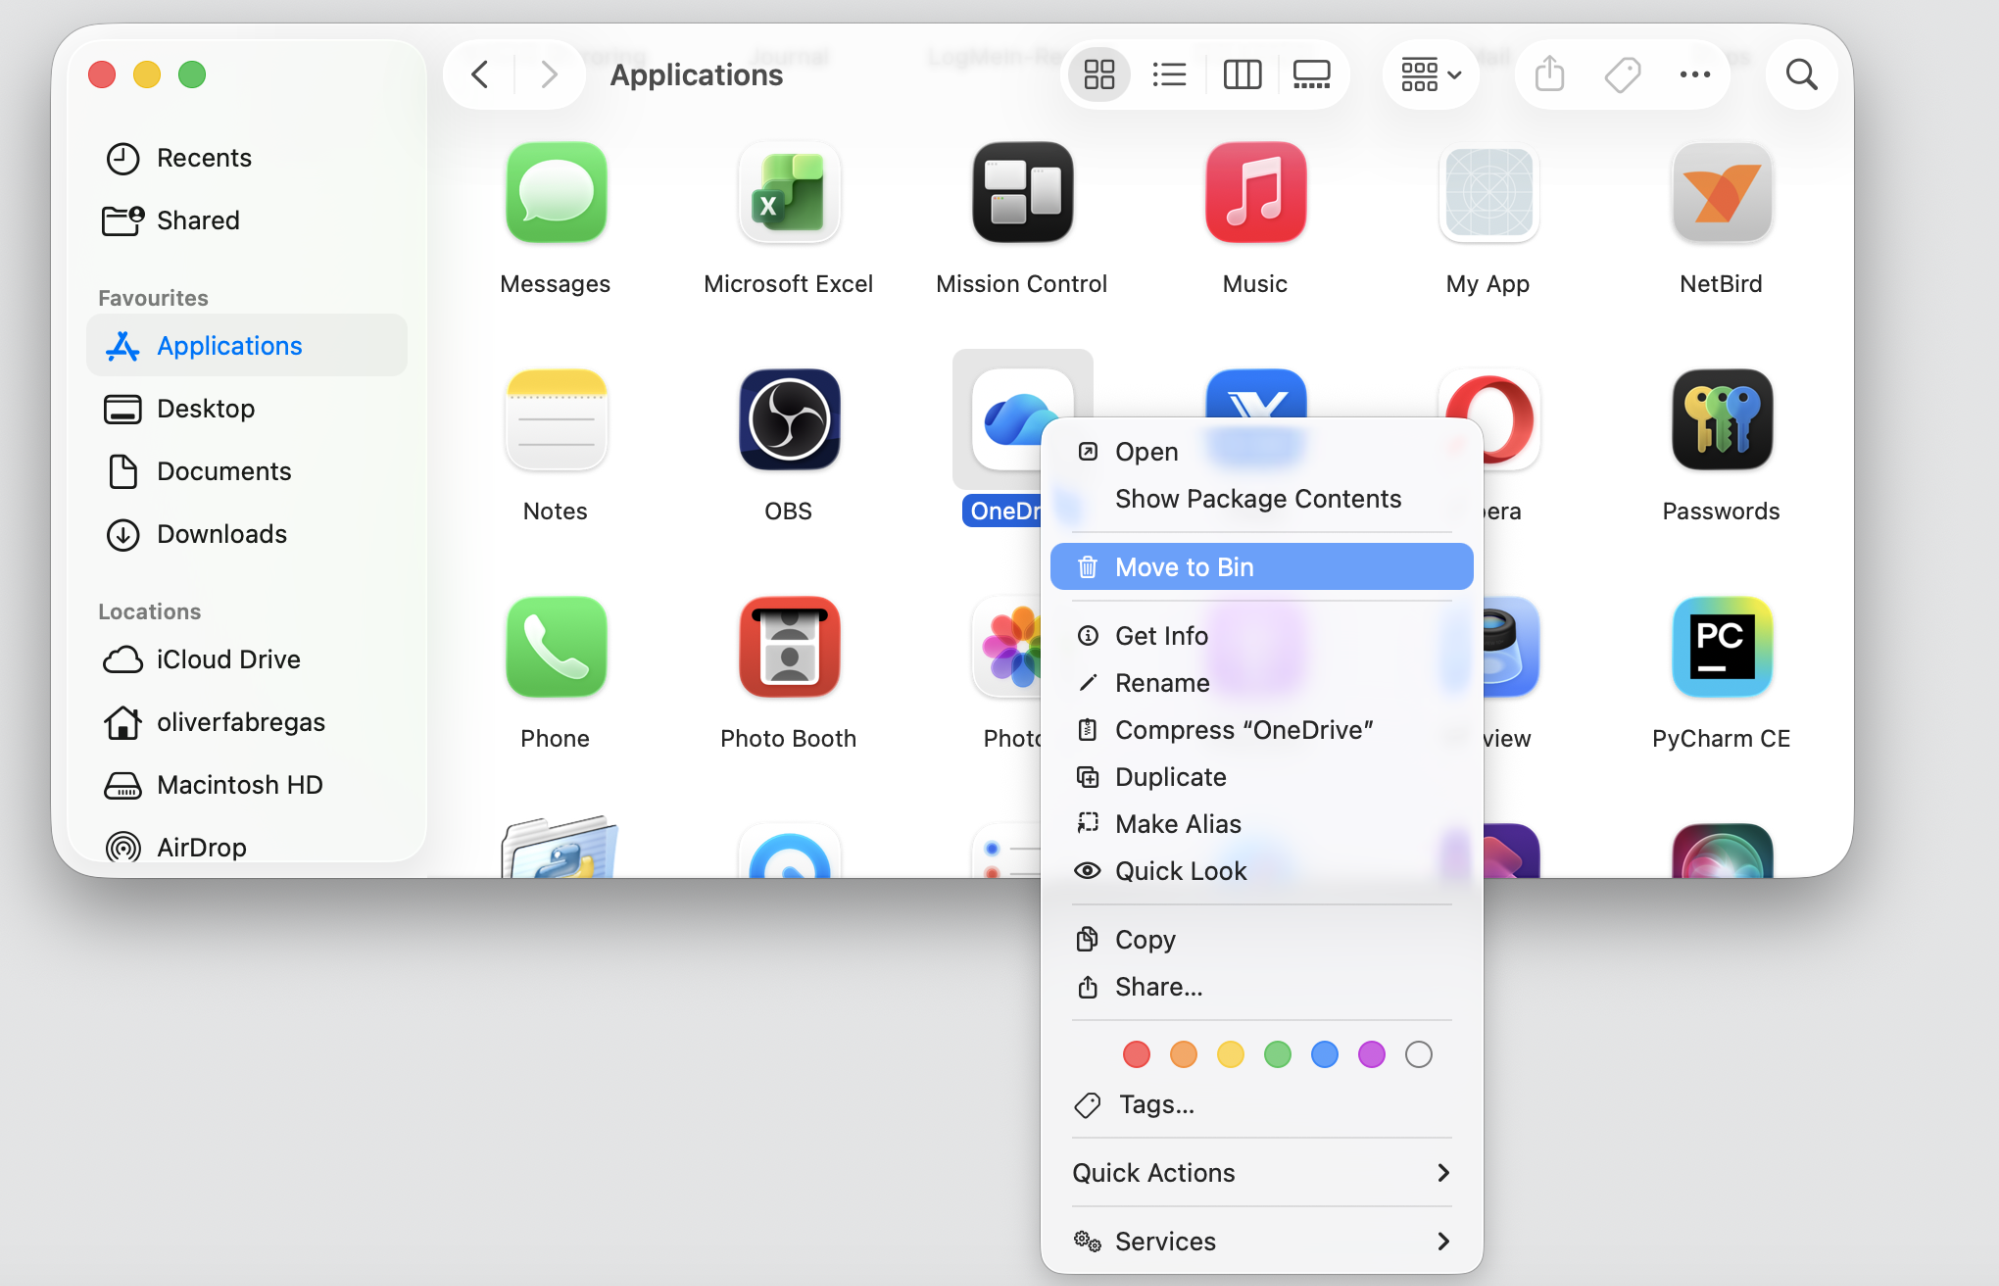
Control-click OneDrive and select Show Package Contents.
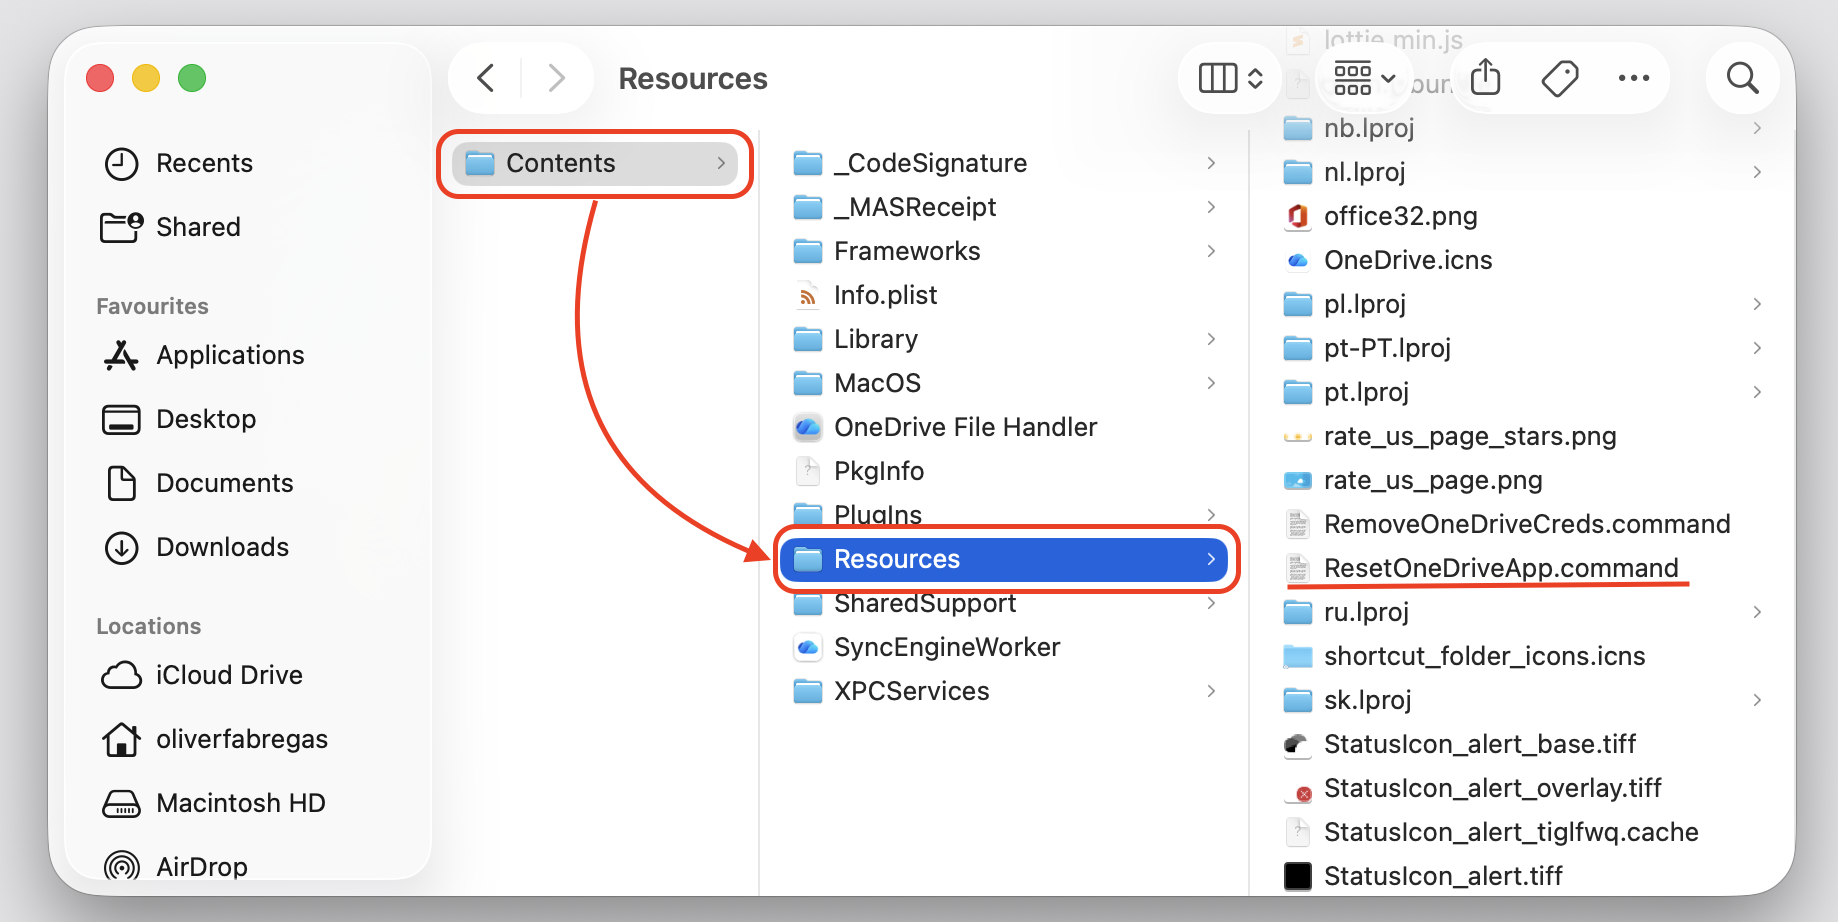
Open Contents, then Resources, and double-click ResetOneDriveApp.command (use ResetOneDriveAppStandalone.command for the standalone version).
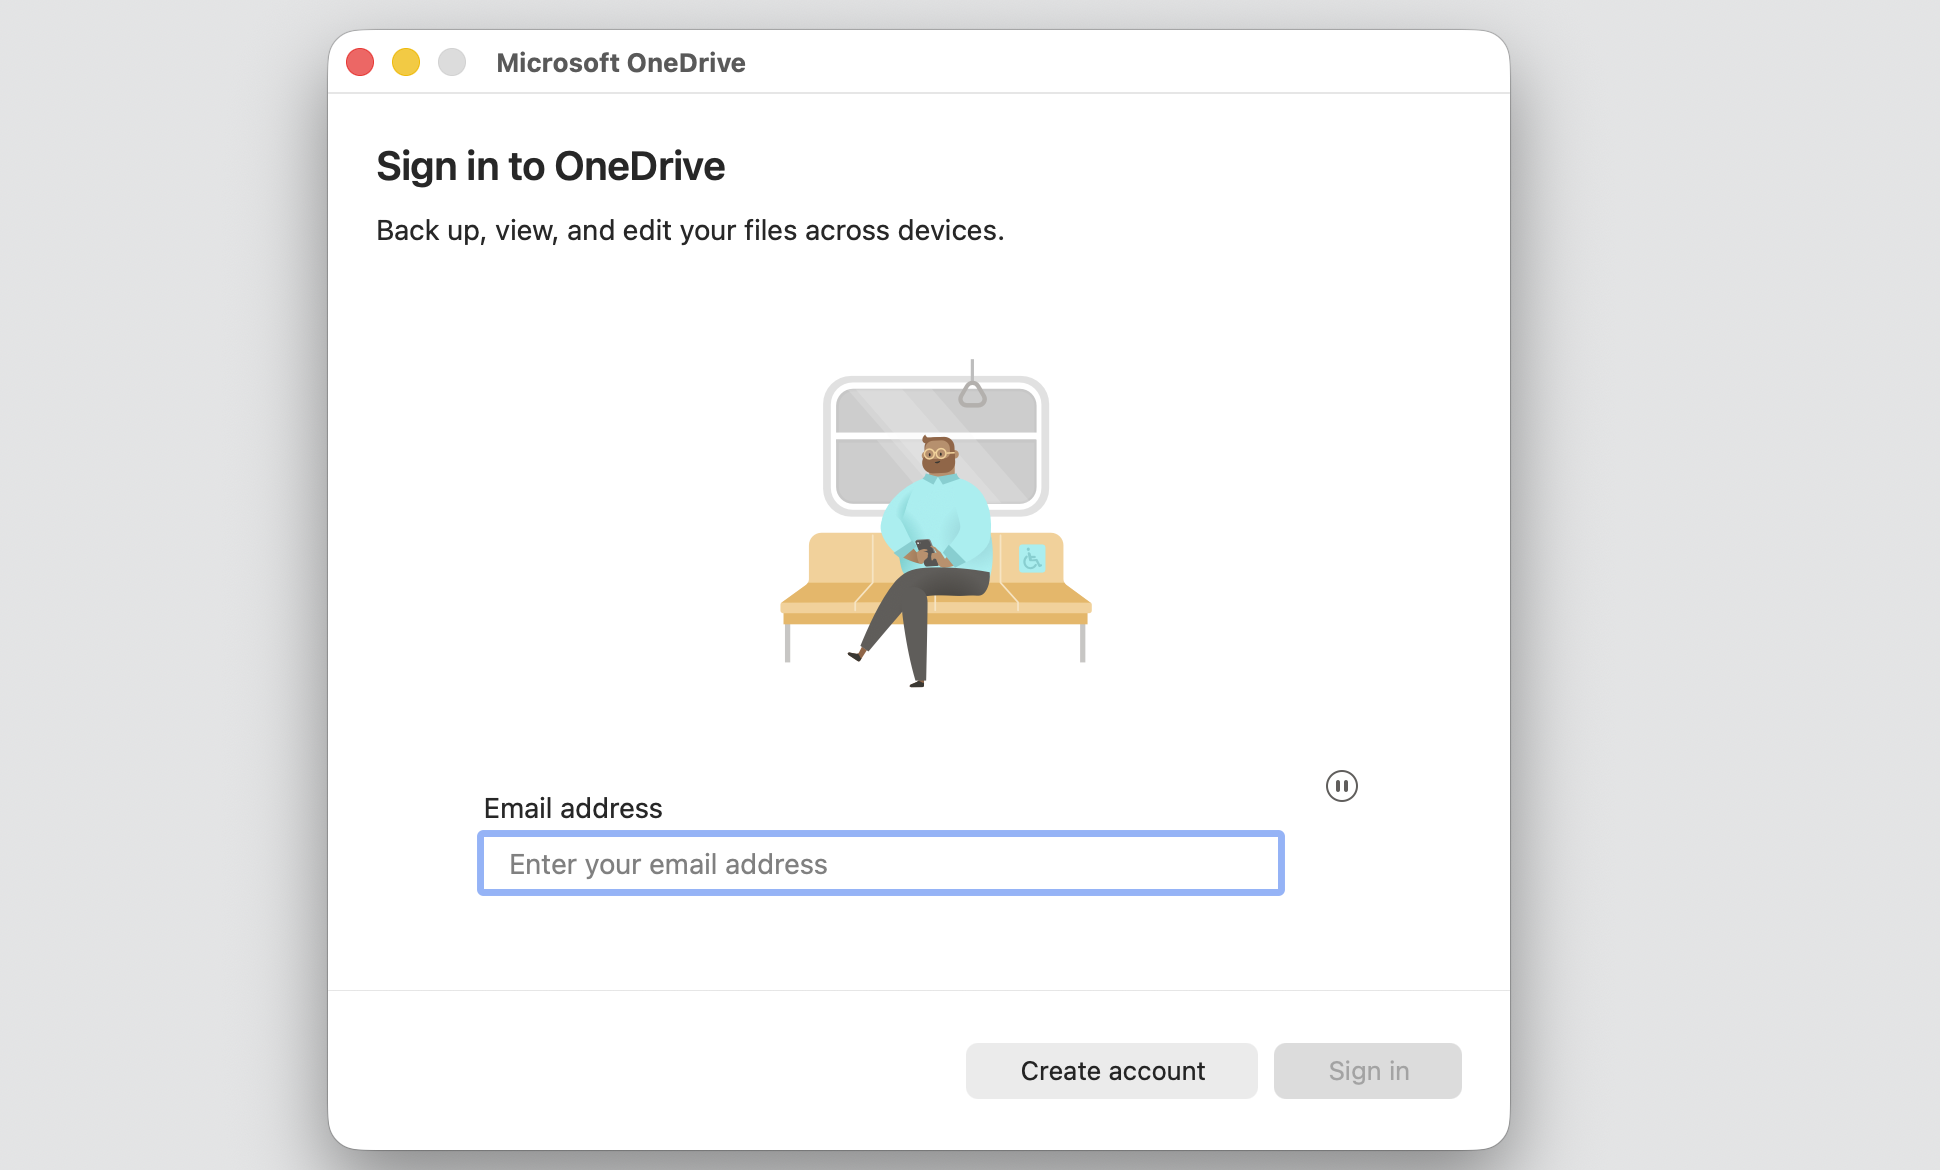
Wait for OneDrive to reopen, then sign in to your account again.
Step 1. Go to OneDrive menu and select Quit OptionStep 2. Go to Finder > Applications > OneDrive Step 3. Control-click on OneDrive and select Show Package ContentsStep 4. Go to Content > Resources > ResetOneDriveAppStandalone.commandStep 5. Double-click ResetOneDriveApp.command file and wait until the command completes the process
2. Manually delete OneDrive cache folders
Deleting the cache by hand suits users comfortable in hidden system folders. You’ll remove the cache directory yourself for a clean slate when a reset alone doesn’t help. Since these folders sit inside your Library, remove only the ones we list, and back up first.
To delete OneDrive cache on Mac by hand, do the following:
Quit OneDrive from the menu bar.
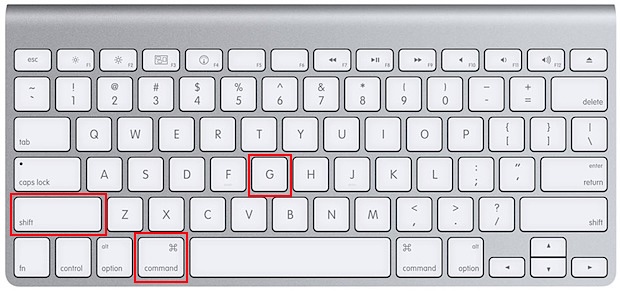
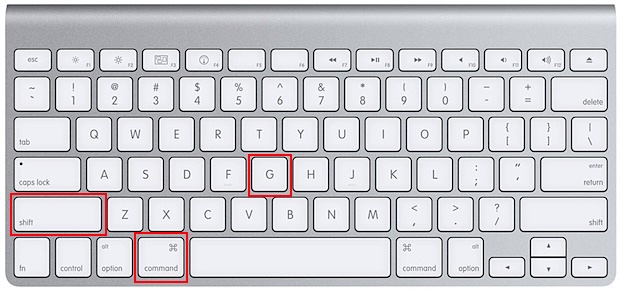
Open Finder, then press Command-Shift-G to open Go to Folder.
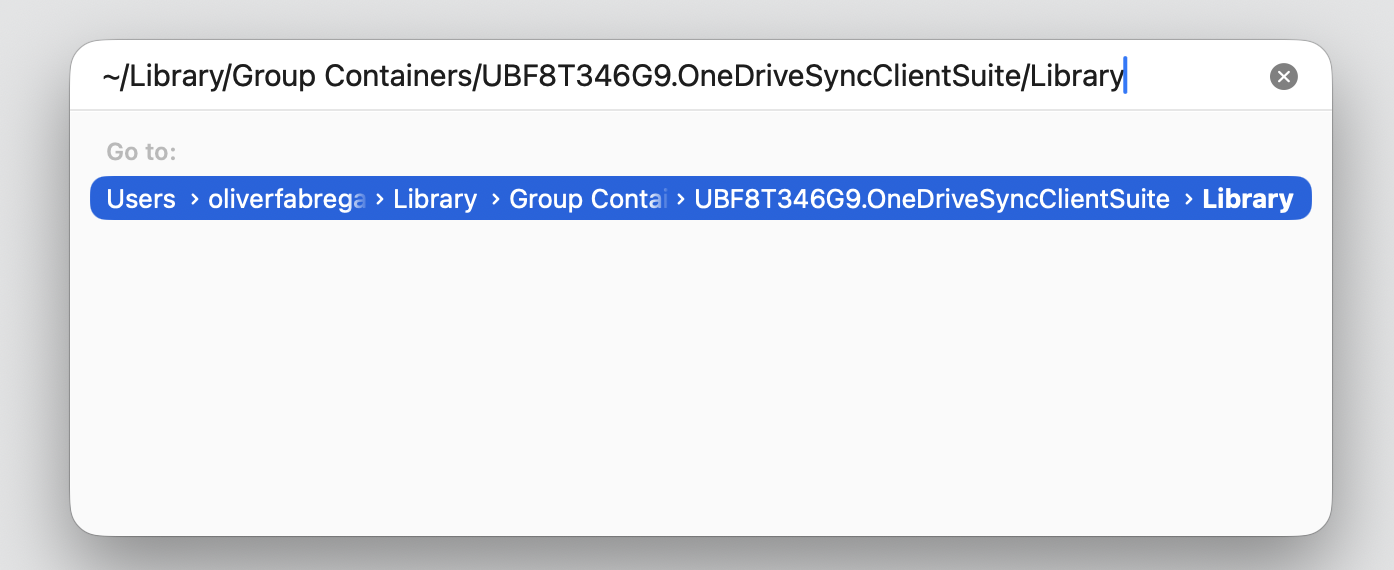
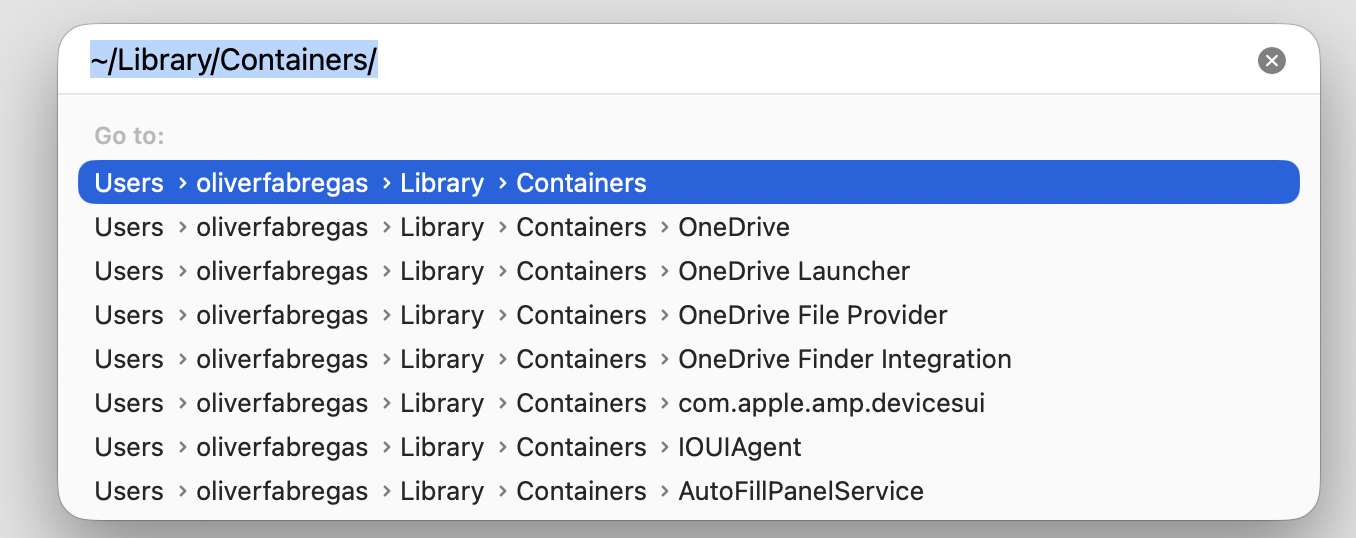
Type ~/Library/Containers/ or ~/Library/Group Containers/UBF8T346G9.OneDriveSyncClientSuite/Library, depending on the newness of your macOS into the path field and press Return.
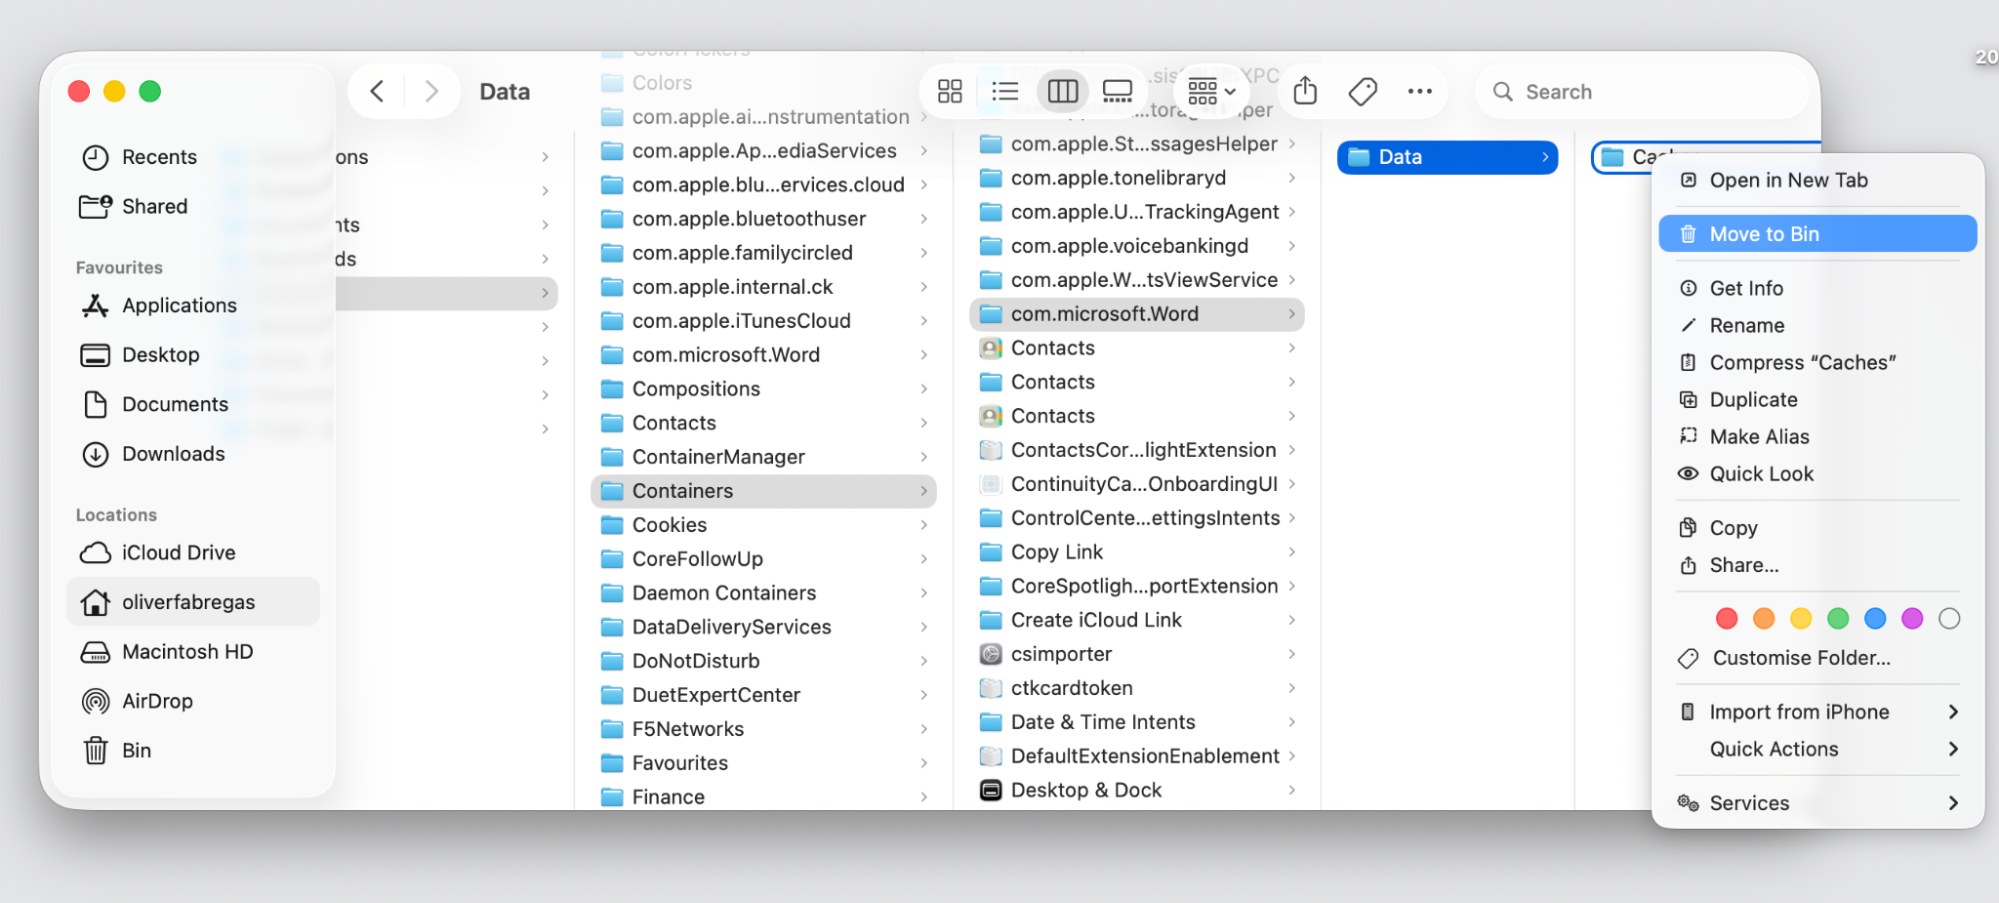
Find the folder named Caches and move it to the Trash.
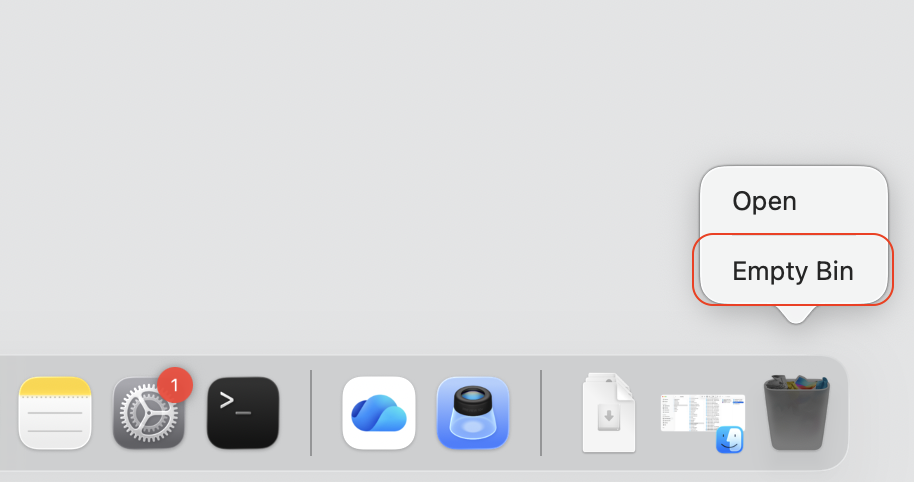
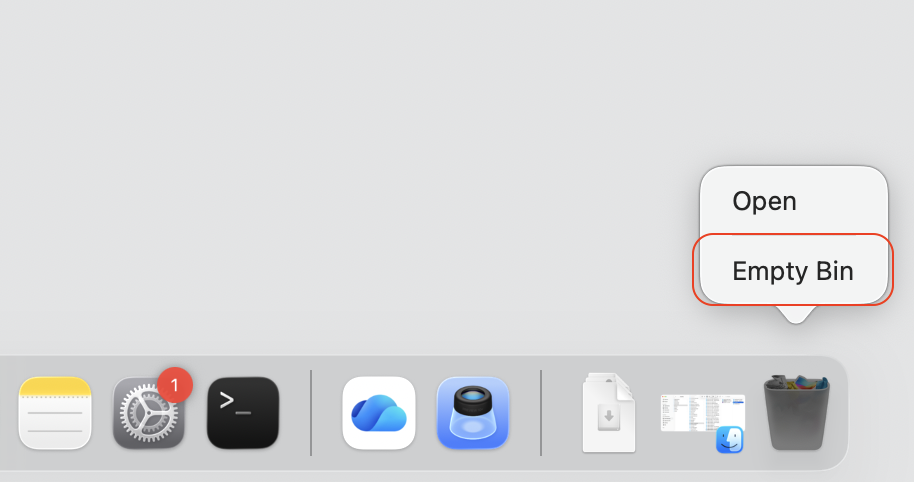
Empty the Trash, then reopen OneDrive so it rebuilds a fresh cache.
Step 1. Go to OneDrive menu and select Quit Step 2. Press Command + Shift + GStep 3. Type ~/Library/Group Containers/UBF8T346G9.OneDriveSyncClientSuite/Library and hit EnterStep 4. Control-click on the Caches Folder and choose Move to BinStep 5. Empty the Bin
3. Clear Microsoft Office file cache
If you sync Word, Excel, or PowerPoint files, the Microsoft Office file cache can get in OneDrive’s way. When it holds onto an old version of a document, uploads stall, or a file refuses to save to the cloud. Clearing it often gets document syncing moving again.
This pairs well with the others—in our experience, learning to clear Excel cache can solve upload trouble that looks like a OneDrive issue but starts in Office.
Clear the Office file cache like this:
Quit every open Office app, including Word, Excel, and PowerPoint.
Open Finder, then press Command-Shift-G to open Go to Folder.
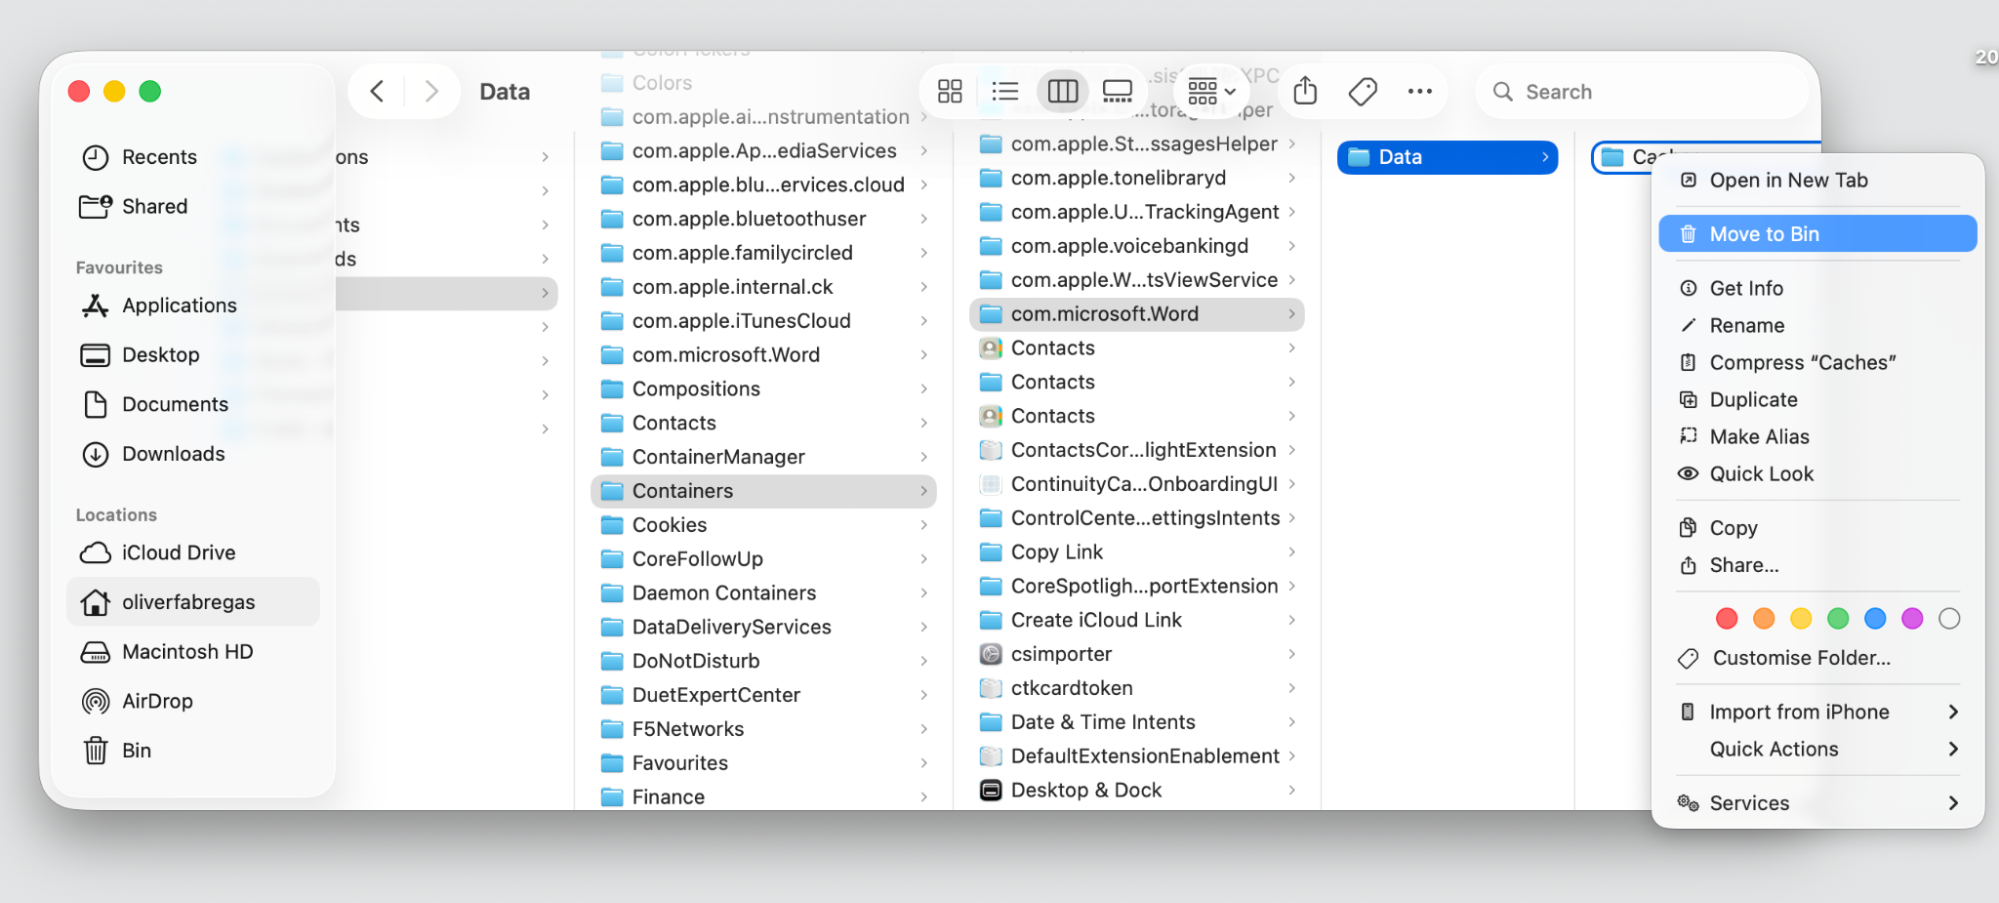
Enter ~/Library/Containers/ and look for the com.microsoft folders linked to Office.
Open each app’s Data folder, then its Caches folder, and move the cached items to the Trash.
Empty the Trash and reopen your apps so they rebuild a clean cache.
Step 1. Press Command + Shift + GStep 2. Type ~/Library/Containers/Step 3. Find any com.microsoft folders and delete Caches from Data Directory
4. Reinstall OneDrive
When a reset and manual cleanup both fall short, a fresh install often clears the slate. Reinstalling removes the app and its cached data, then sets up a clean copy that re-downloads your synced files—a good option for stubborn syncing, nothing else shifts.
If you want to fully remove OneDrive from Mac first, our steps cover the leftover files, which a simple drag to the Trash can leave behind.
When you’re ready to reinstall, work through these steps:
Quit OneDrive and drag it from the Applications folder to the Trash.
Empty the Trash to uninstall the app and its cache.
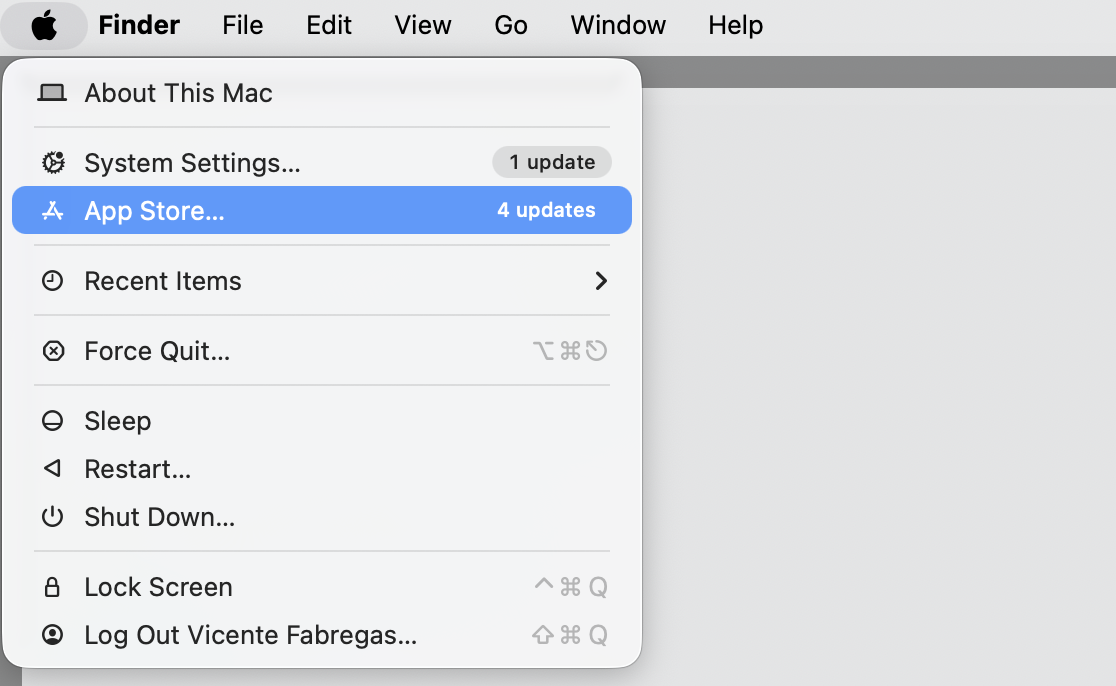
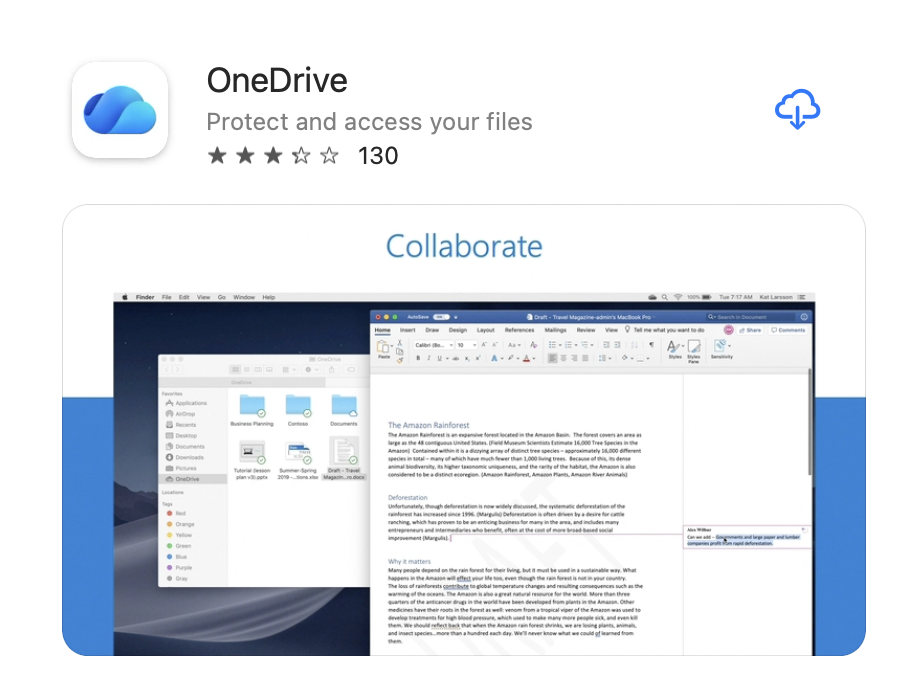
Open the App Store, search for Microsoft OneDrive, and install the latest version.
Run the installer, then sign in with your account login (your details are stored in Keychain).
Choose your folders to sync, and let OneDrive download a clean copy.
Step 1. Go to Finder > Applications > OneDrive Step 2. Move to the Bin with the Control-clickStep 3. Empty the BinStep 4. Go to AppStore from Apple LogoStep 5. Download the App OneDriveStep 6. Log in to your Microsoft Account
5. Use third-party cleanup app for Mac
If digging through hidden folders isn’t for you, a third-party cleanup app does the work safely. We’d reach for MacKeeper’s Safe Cleanup, which finds cache, logs, and other junk files across your Mac, then clears them in one click—without touching your personal documents.
Because it shows what it found before anything’s removed, you stay in control. You can review the results first—a clean, user-friendly way to keep cache from piling up.
Clearing your cache with MacKeeper’s Safe Cleanup takes just a few clicks:
Open MacKeeper and select Safe Cleanup in the sidebar.
Select Start Scan and wait for the scan to finish.
Review the cache and junk files MacKeeper found.
Select the items you want to remove, then choose Clean Junk Files.
Confirm, and MacKeeper safely clears the selected cache.
Step 1. Go to MacKeeper > Safe Cleanup and Start ScanStep 2. Wait until scan is finishedStep 3. Review the cache and junk files MacKeeper foundStep 4. Check all setup and proceed with Clean Junk Files
Conclusion
Clearing OneDrive cache on your Mac is worth doing when storage runs low or syncing stalls, since old or corrupted cache data is often the cause. We’d treat it as routine maintenance rather than a last resort. Start with a quick reset, then try manual cleanup, an Office cache clear, or a reinstall if the trouble lingers. Just confirm your files are safely synced to the cloud before you begin.
Want to clear cache without digging through hidden folders? MacKeeper’s Safe Cleanup can find cache, junk files, and other clutter on your Mac, then remove the selected items in one click.
We respect your privacy and
use cookies
for the best site experience.
Privacy Preferences Center
We use cookies along with other tools to give you the best possible experience while using the
MacKeeper website. Cookies are small text files that help the website load faster. The cookies we
use don’t contain any type of personal data meaning they never store information such as your
location, email address, or IP address.
Help us improve how you interact with our website by accepting the use of cookies. You can change
your privacy settings whenever you like.
Manage consent
All cookies
These cookies are strictly necessary for enabling basic website functionality (including page
navigation, form submission, language detection, post commenting), downloading and purchasing
software. The website might malfunction without these cookies.