Is the Google Drive app not syncing on Mac and leaving your files stuck? MacKeeper’s Premium Services connects you with our expert who’ll walk you through the fix over a live session, so you don’t have to troubleshoot alone.
Wondering why Google Drive stopped syncing on macOS? Before we get to the fixes, it helps to know what’s happening behind the scenes. In my experience, the trouble almost always traces back to one of a handful of everyday causes like this:
A weak or dropped network connection that stops files from uploading
Full cloud or local storage, which leaves no room to sync
An outdated Google Drive app that’s fallen behind Apple’s latest macOS
Privacy permissions that block Google Drive from reaching your folders
A corrupted cache or an auto-sync session that quietly got paused
You might notice the app is showing older versions of your documents, or that a few files unsync on their own. Seeing Google Drive not syncing all files on Mac—where some items upload and the rest stall—usually points to full storage or a shaky network. Either way, it’s worth sorting out, since Google Drive doubles as a reliable backup and an easy way to reach your files from any location.
Storage is the sneakiest culprit of the bunch. If your Mac is running low, synchronization grinds to a halt, and that’s the moment to increase storage on MacBook so Google Drive has room to work.
A note from our experts:
If you’re not sure why Google Drive isn't syncing on your Mac, our experts are available 24/7. MacKeeper’s Premium Services provide round-the-clock online tech support for Mac users.
To contact our experts, follow these instructions:
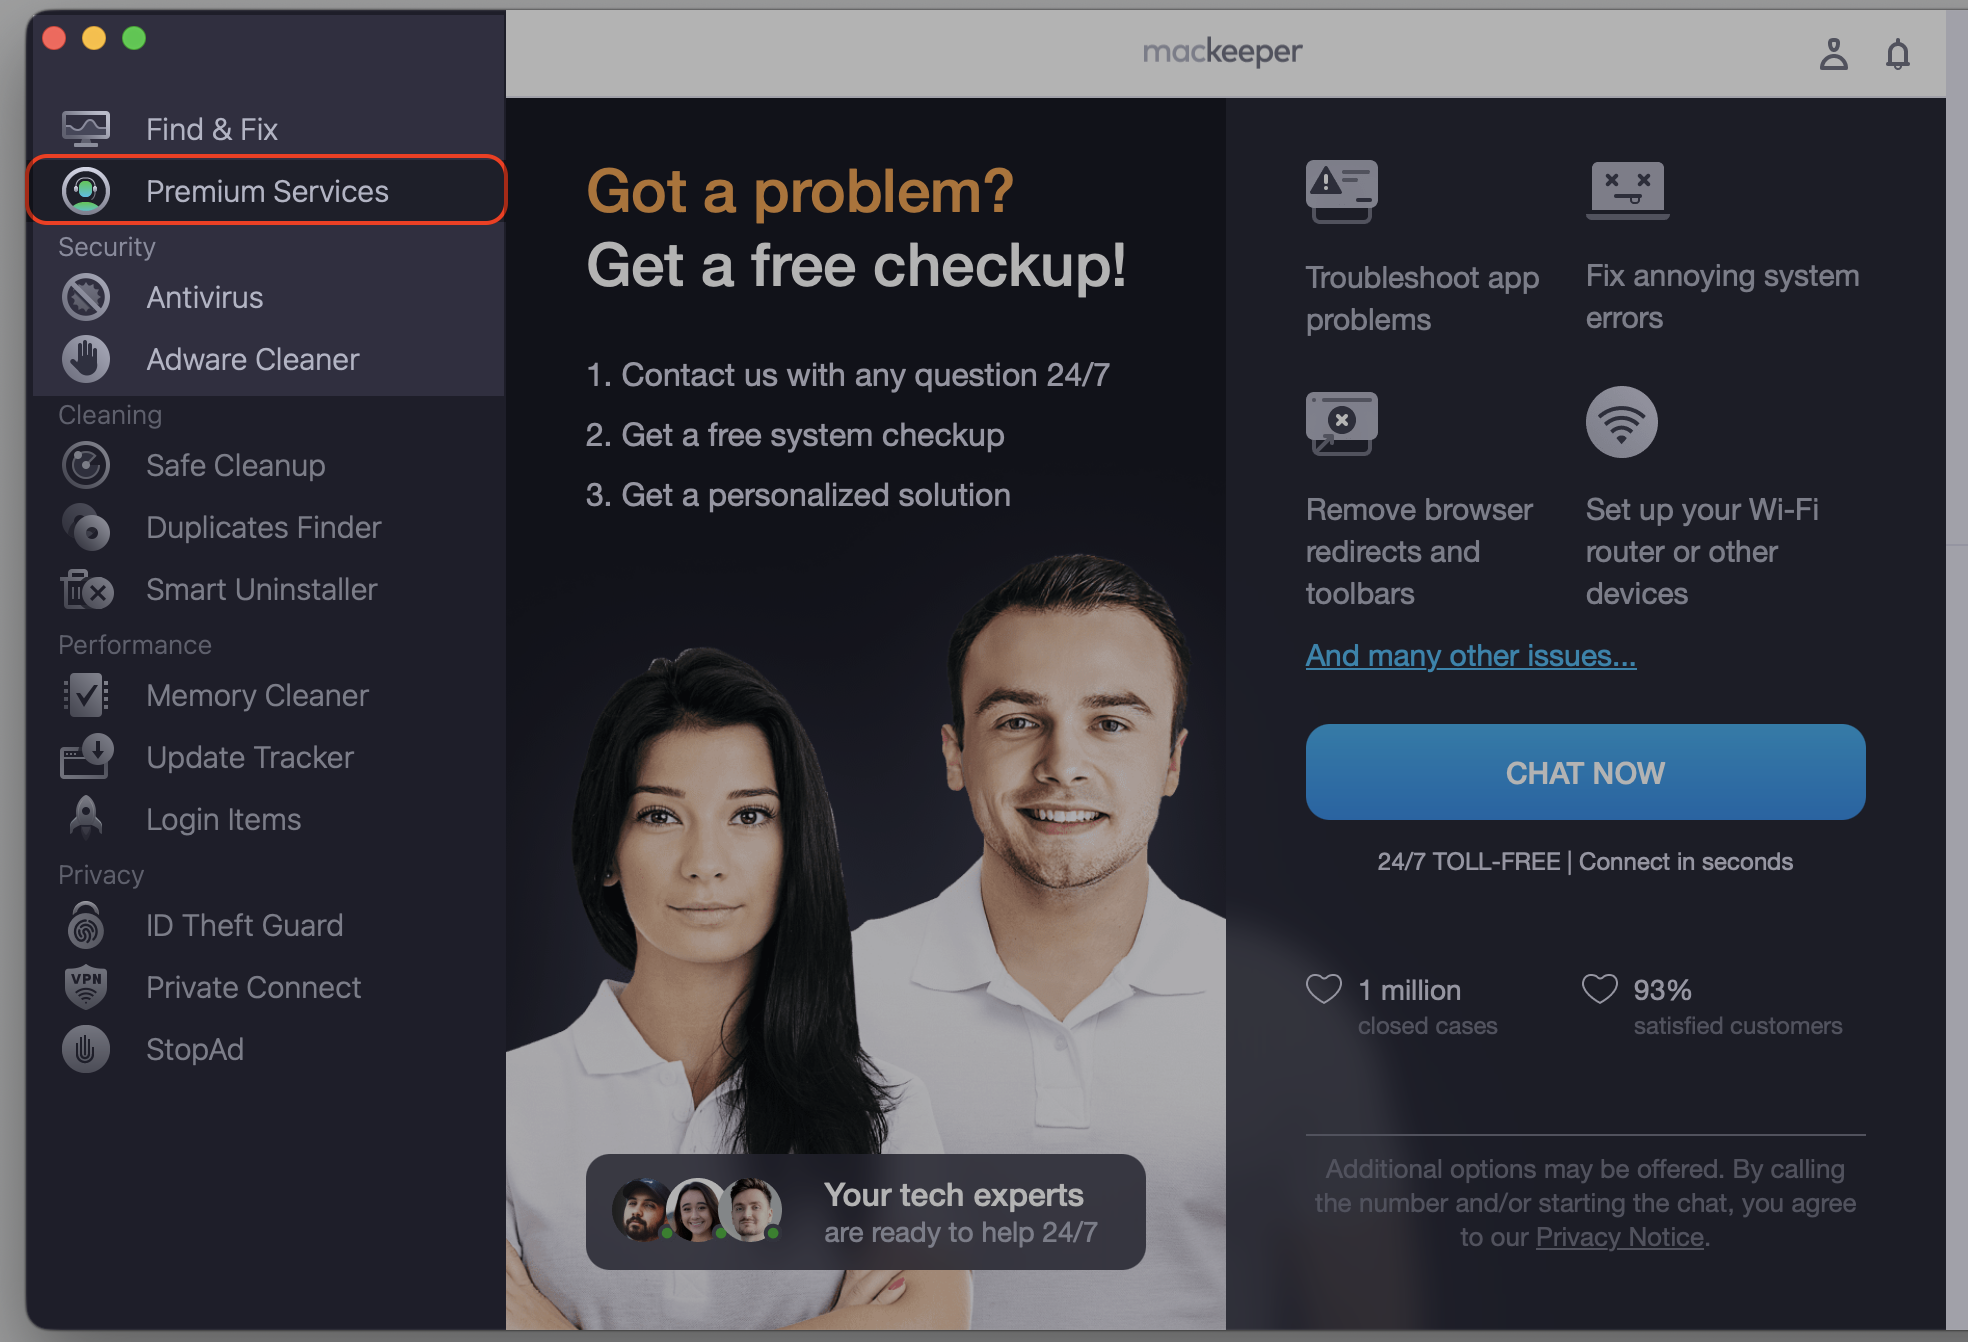
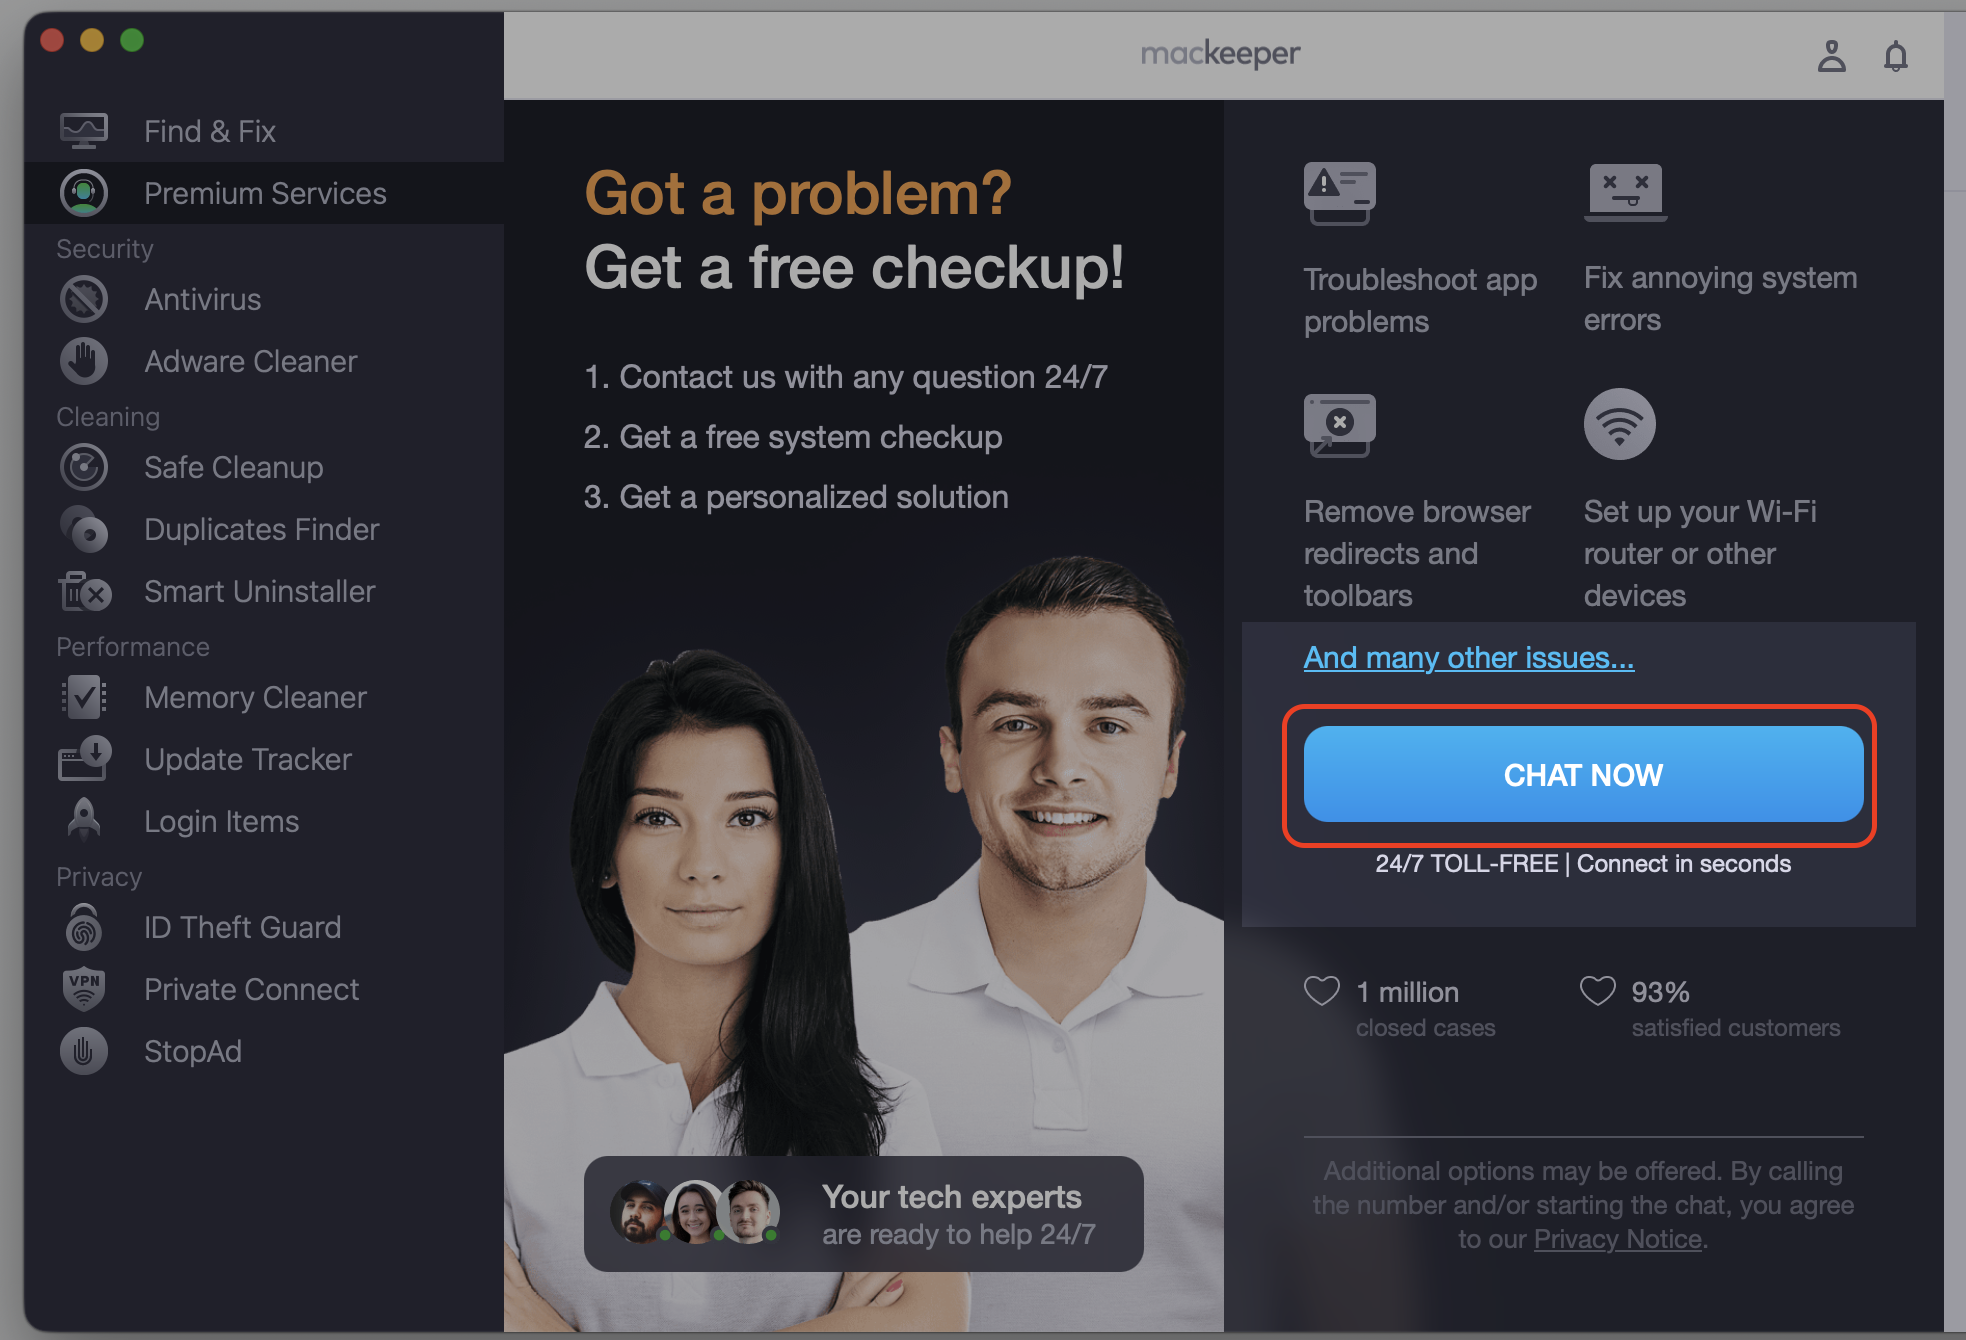
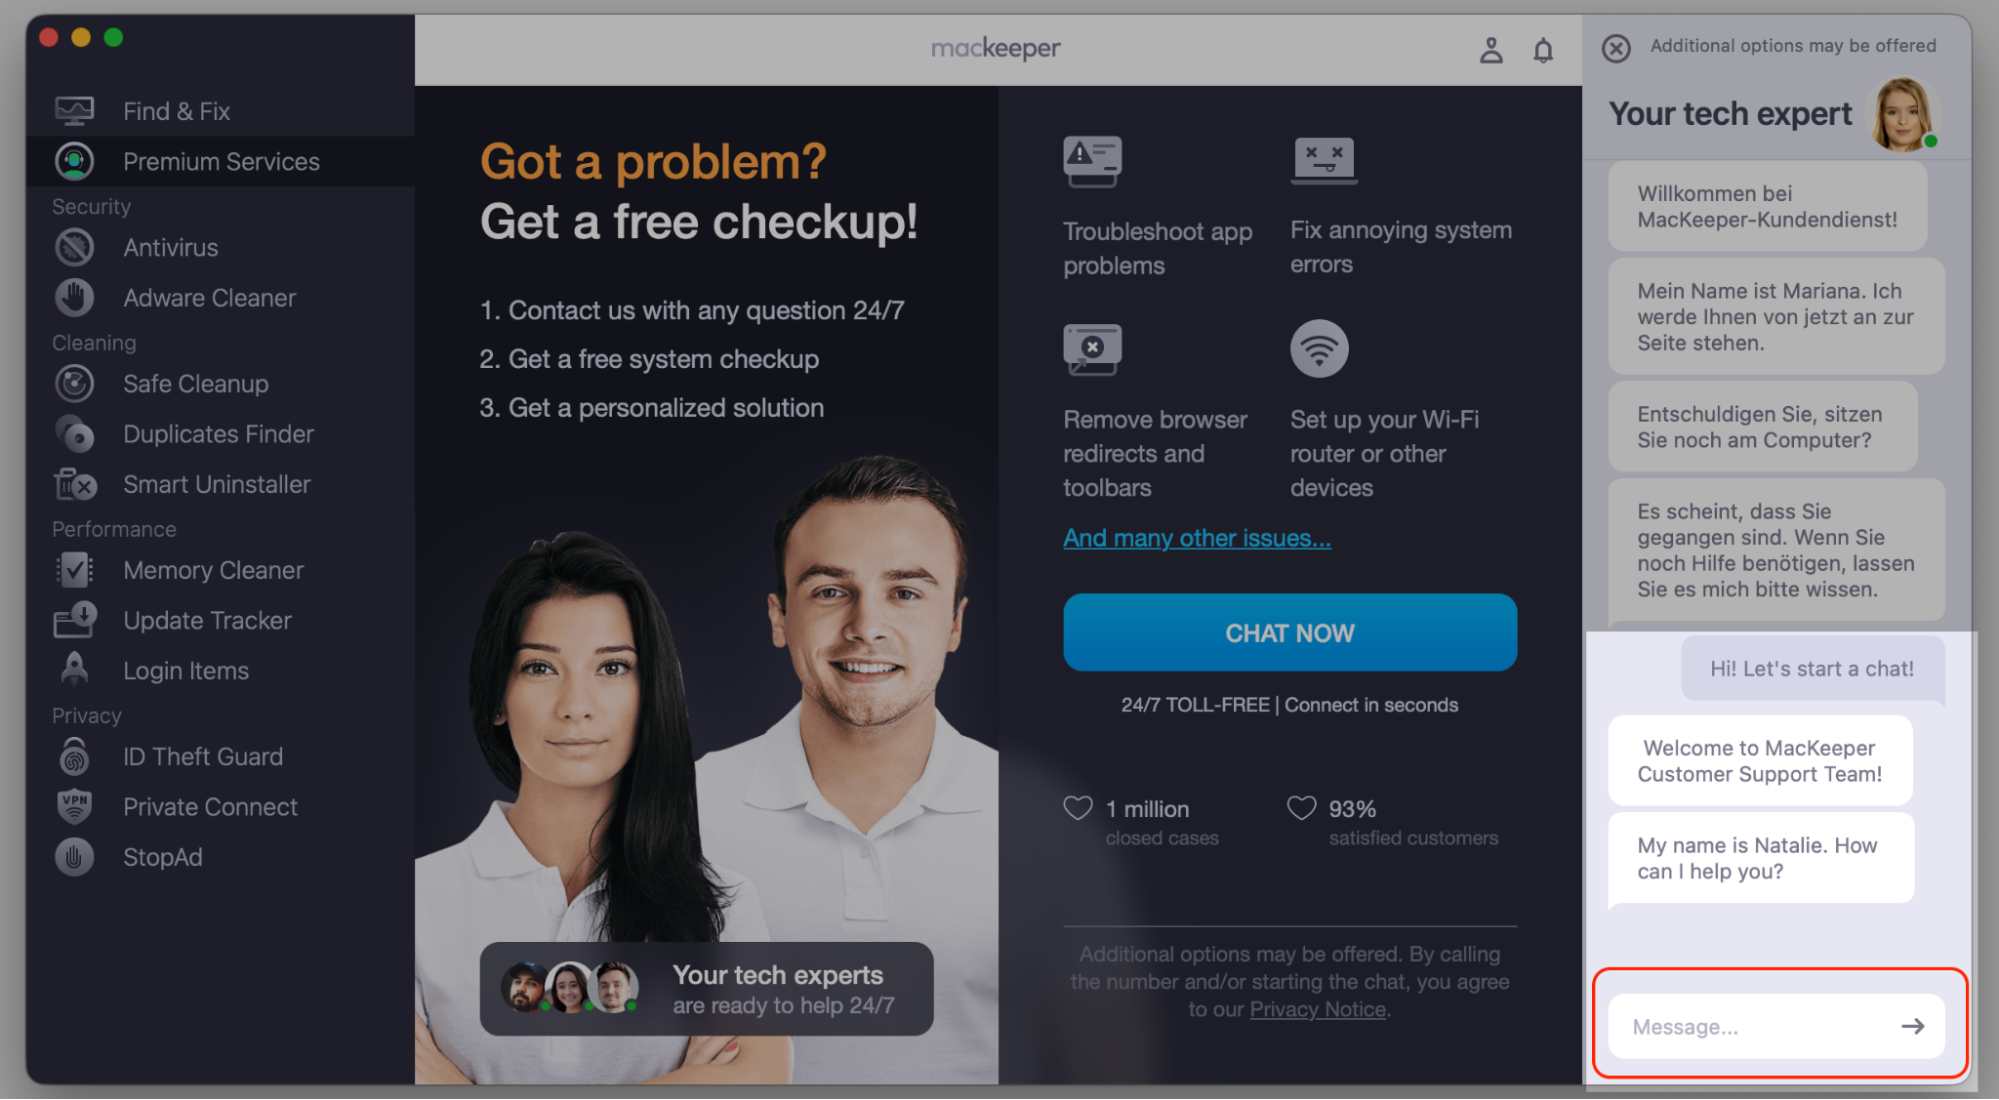
Step 1. Go to MacKeeper and choose Premium Services Step 2. Click Chat NowStep 3. Type in your message to explain the problem
How to fix Google Drive not syncing on Mac?
Good news—most sync troubles clear up with a few simple checks, and you won’t need any technical know-how to work through them. We’ve ordered the methods below starting with the simple checks and moving to the deeper ones, so start at the top and stop as soon as your files begin moving again. These steps work whether you’re on a newer MacBook or an older Macintosh.
If Google Drive won’t sync on MacBook even after you’ve tried the obvious, don’t worry. Let’s walk through the fixes together.
1. Check Google server status
Before we change a single setting on your Mac, it’s worth checking whether the trouble sits on Google’s side. If the servers are down, no local tinkering will help, so this is where we always begin.
Let’s rule out an outage on Google’s end first:
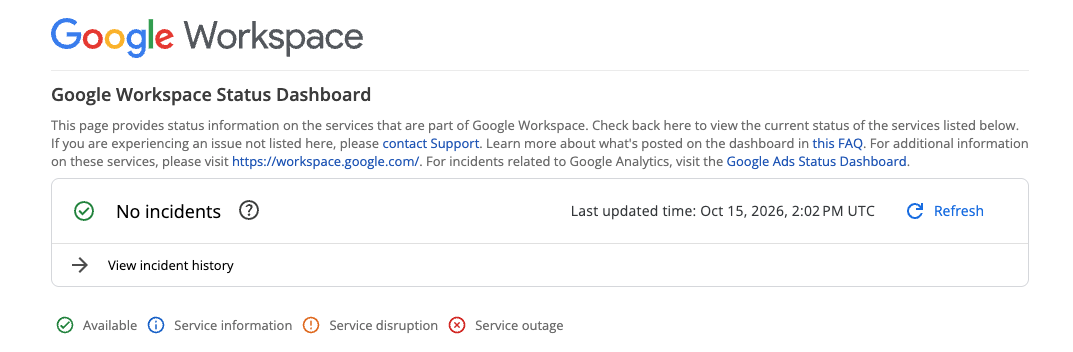
Open your browser and visit the Google Workspace Status Dashboard.
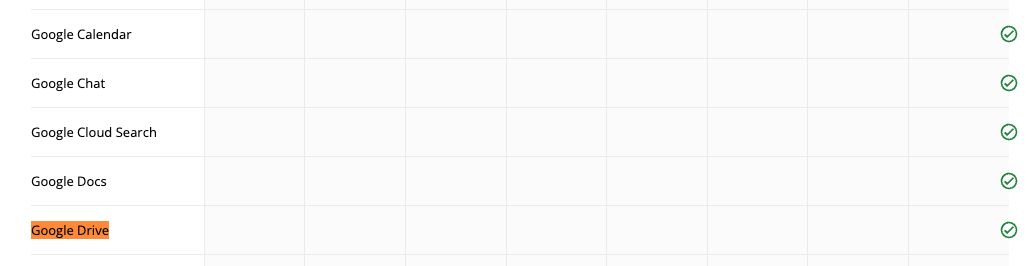
Find Google Drive in the list of services.
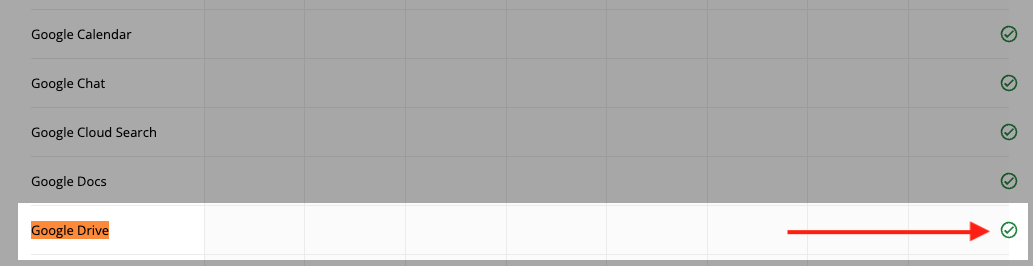
Look at the dot beside it—a green dot means the servers are running normally.
If the dot is orange or red, the servers are unavailable, so wait for Google to restore them before you change anything else.
Step 1. Go to https://www.google.com/appsstatus/dashboard/Step 2. Find Google Drive in the list of servicesStep 3. Look at the dot beside it for check status of service
2. Pause and resume sync
A stalled sync will sometimes sit idle until something prompts it to move. Pausing and resuming forces Google Drive to retry the transfer, and it’s a quick reset we reach for often.
Try pausing and resuming to nudge syncing back to life:
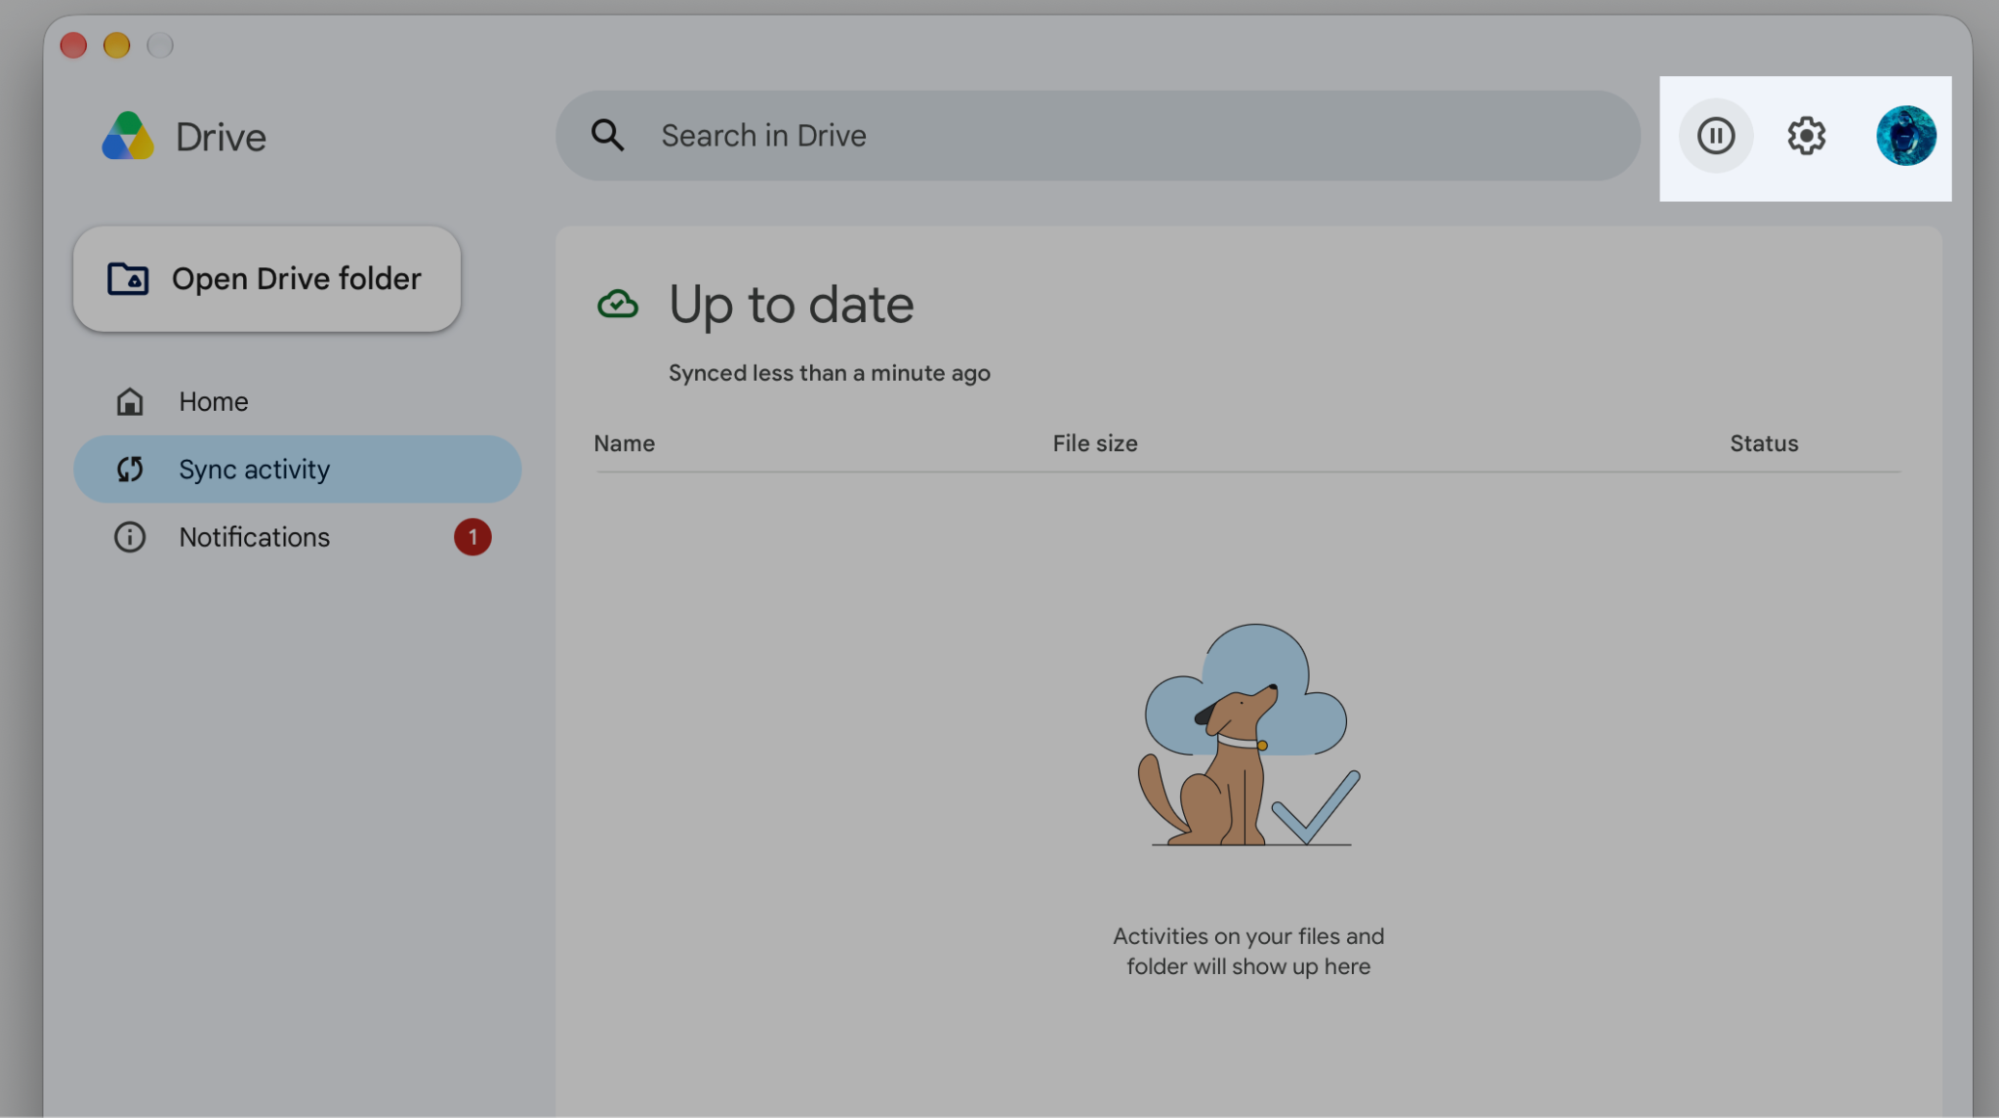
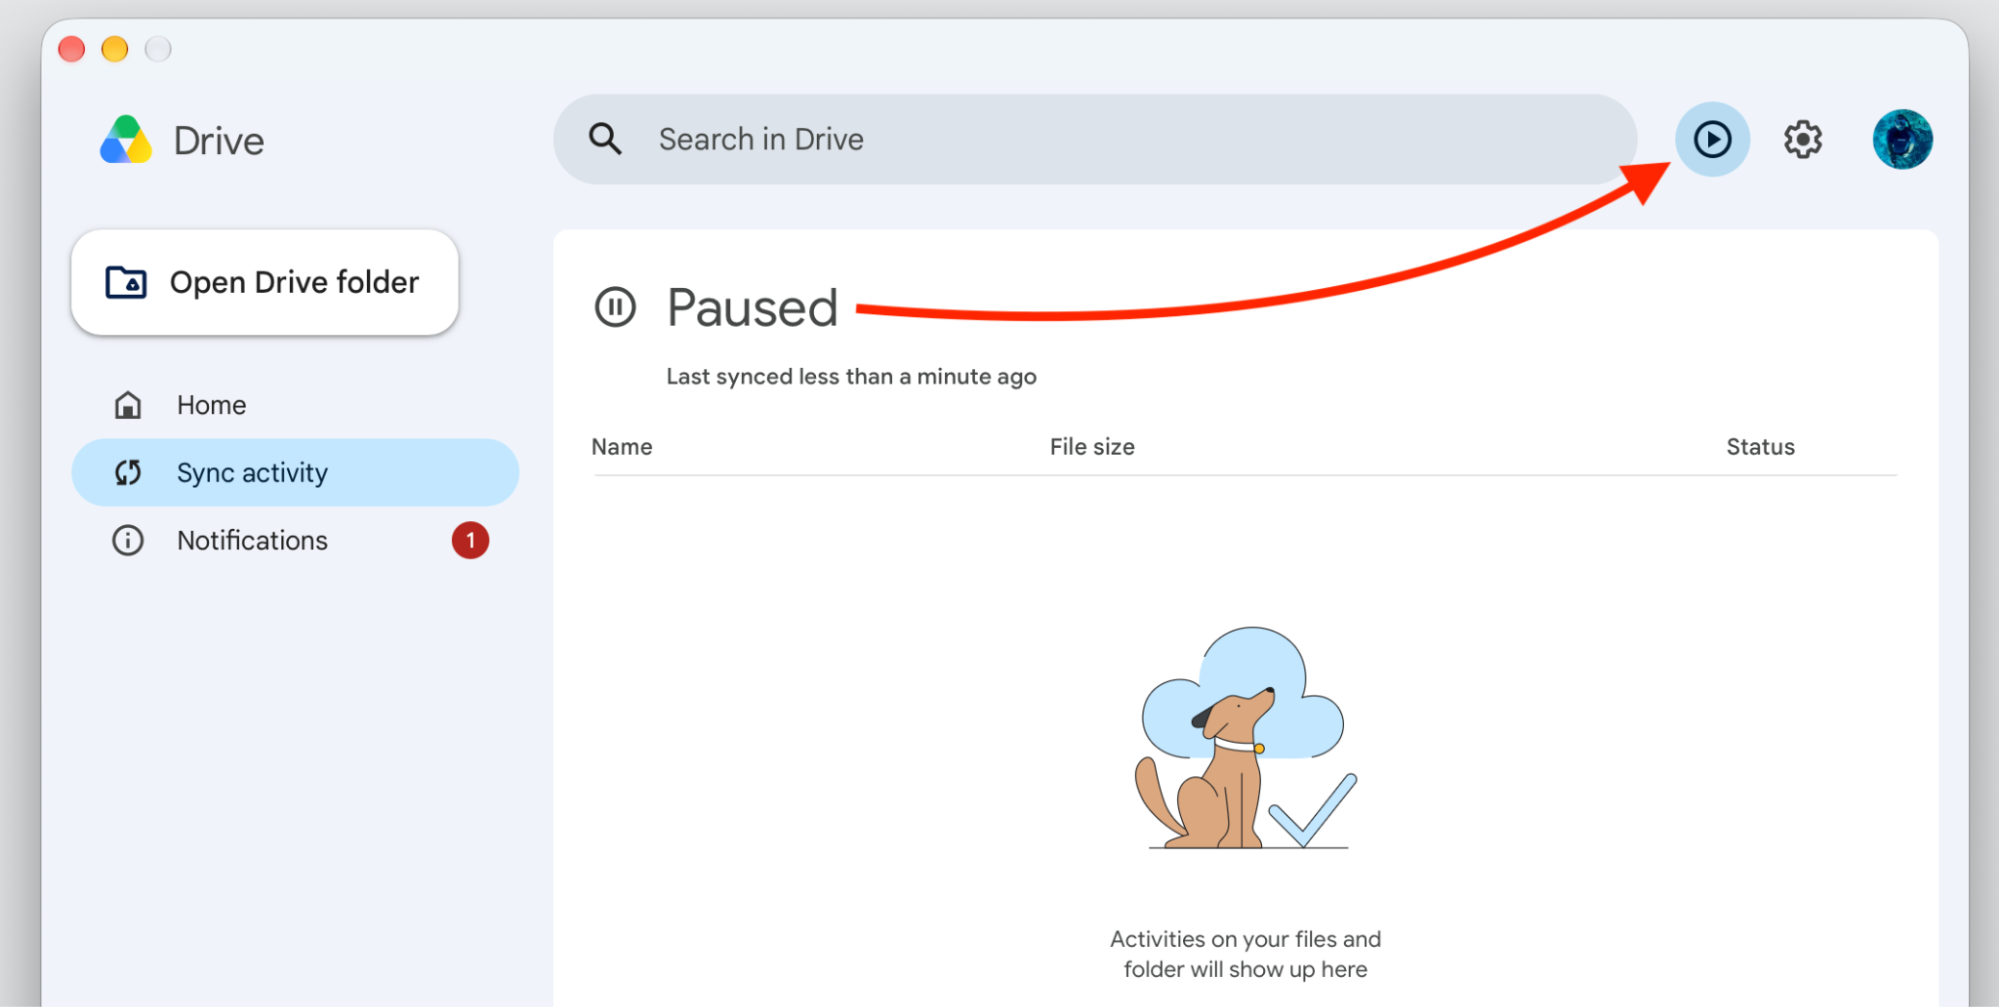
Select the Google Drive for Desktop icon.
Choose Pause syncing, then wait 10–15 seconds.
Select Resume syncing to force a fresh transfer and refresh the connection.
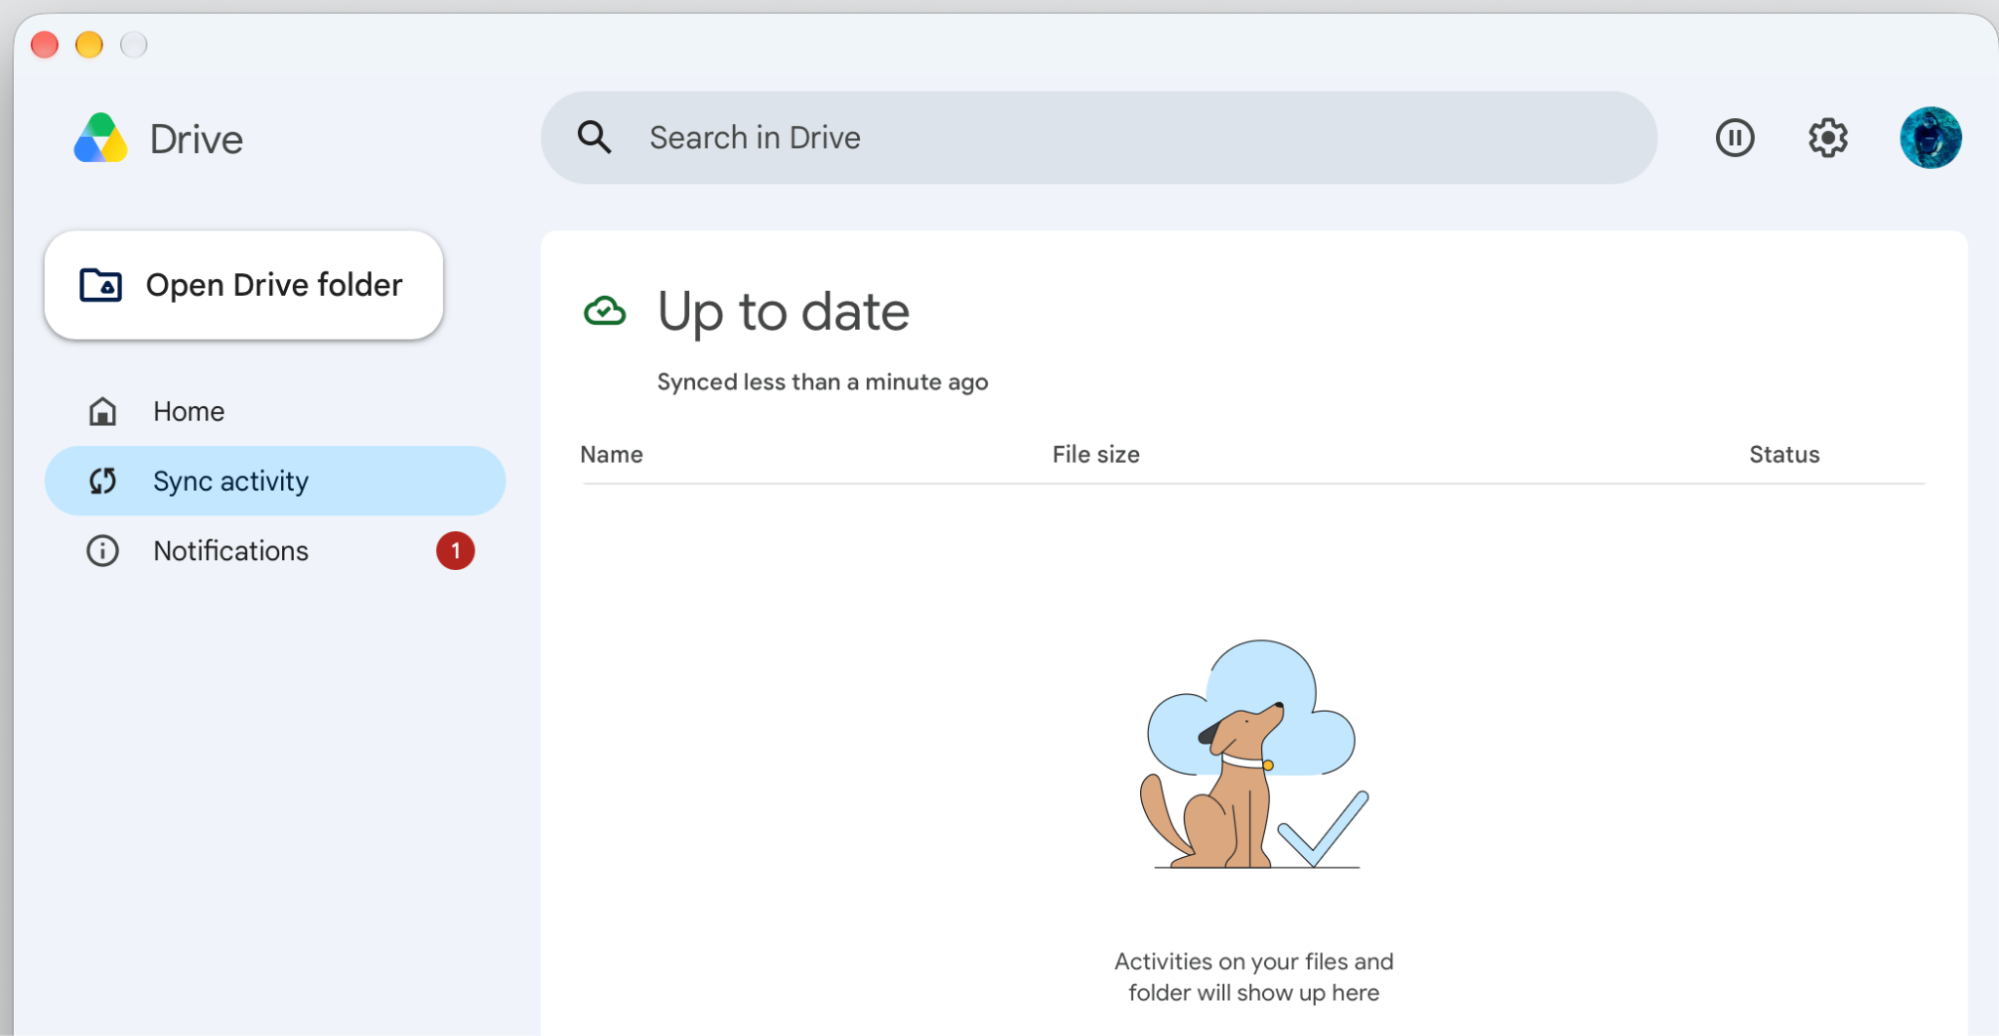
Step 1. Click the Pause button in the top-right corner of Google Drive for DesktopStep 2. Press Resume syncing
3. Restart Google Drive for Desktop
If syncing hangs but Google’s servers are fine, the app itself may be stuck in the background. We find that quitting Google Drive for Desktop and launching it again gives it a clean start.
Restart the app with these quick steps we provide:
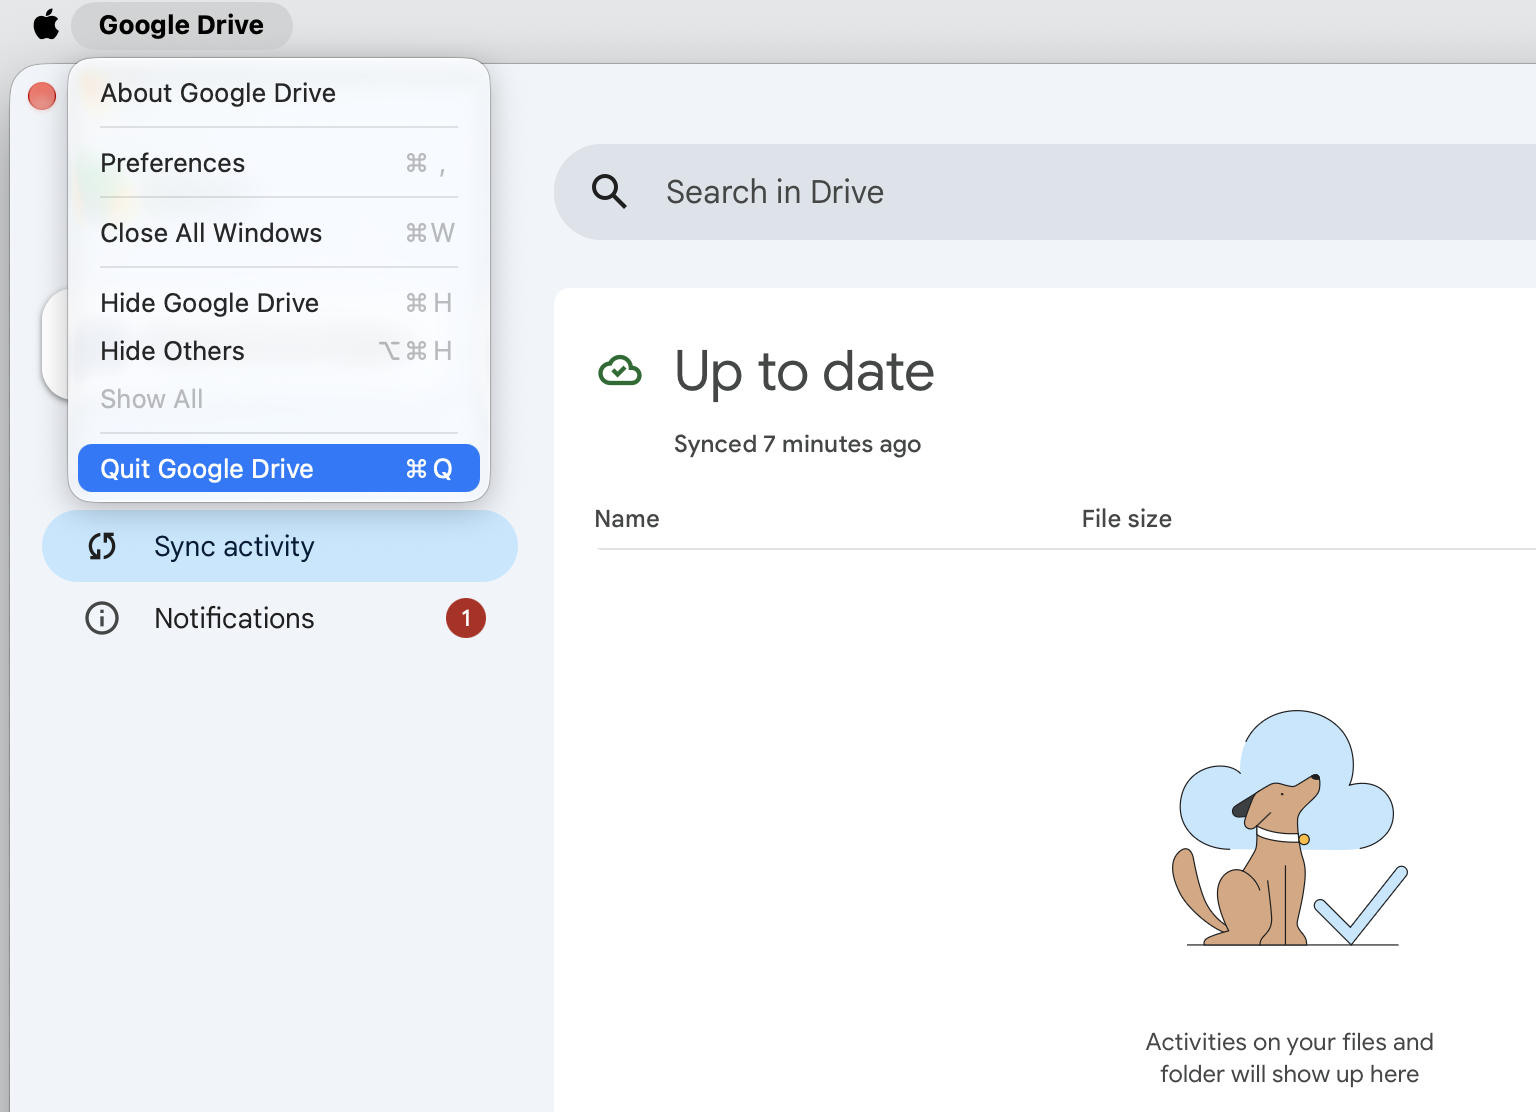
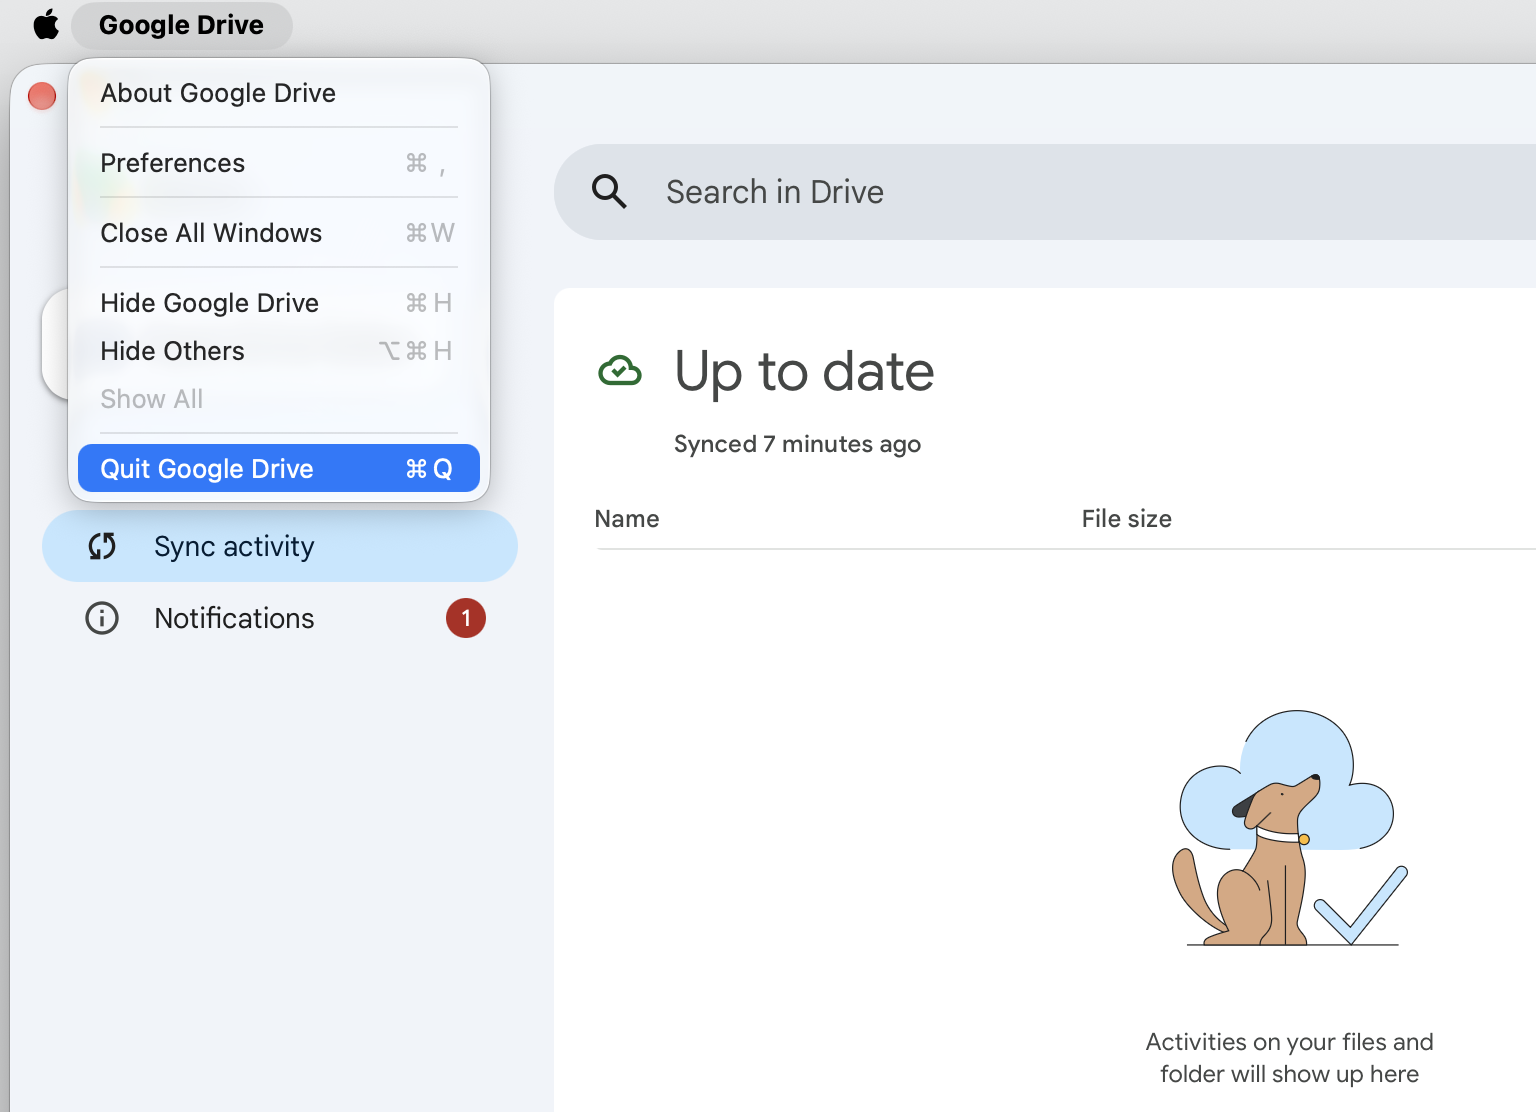
Select the Google Drive icon in the menu bar and choose Quit.
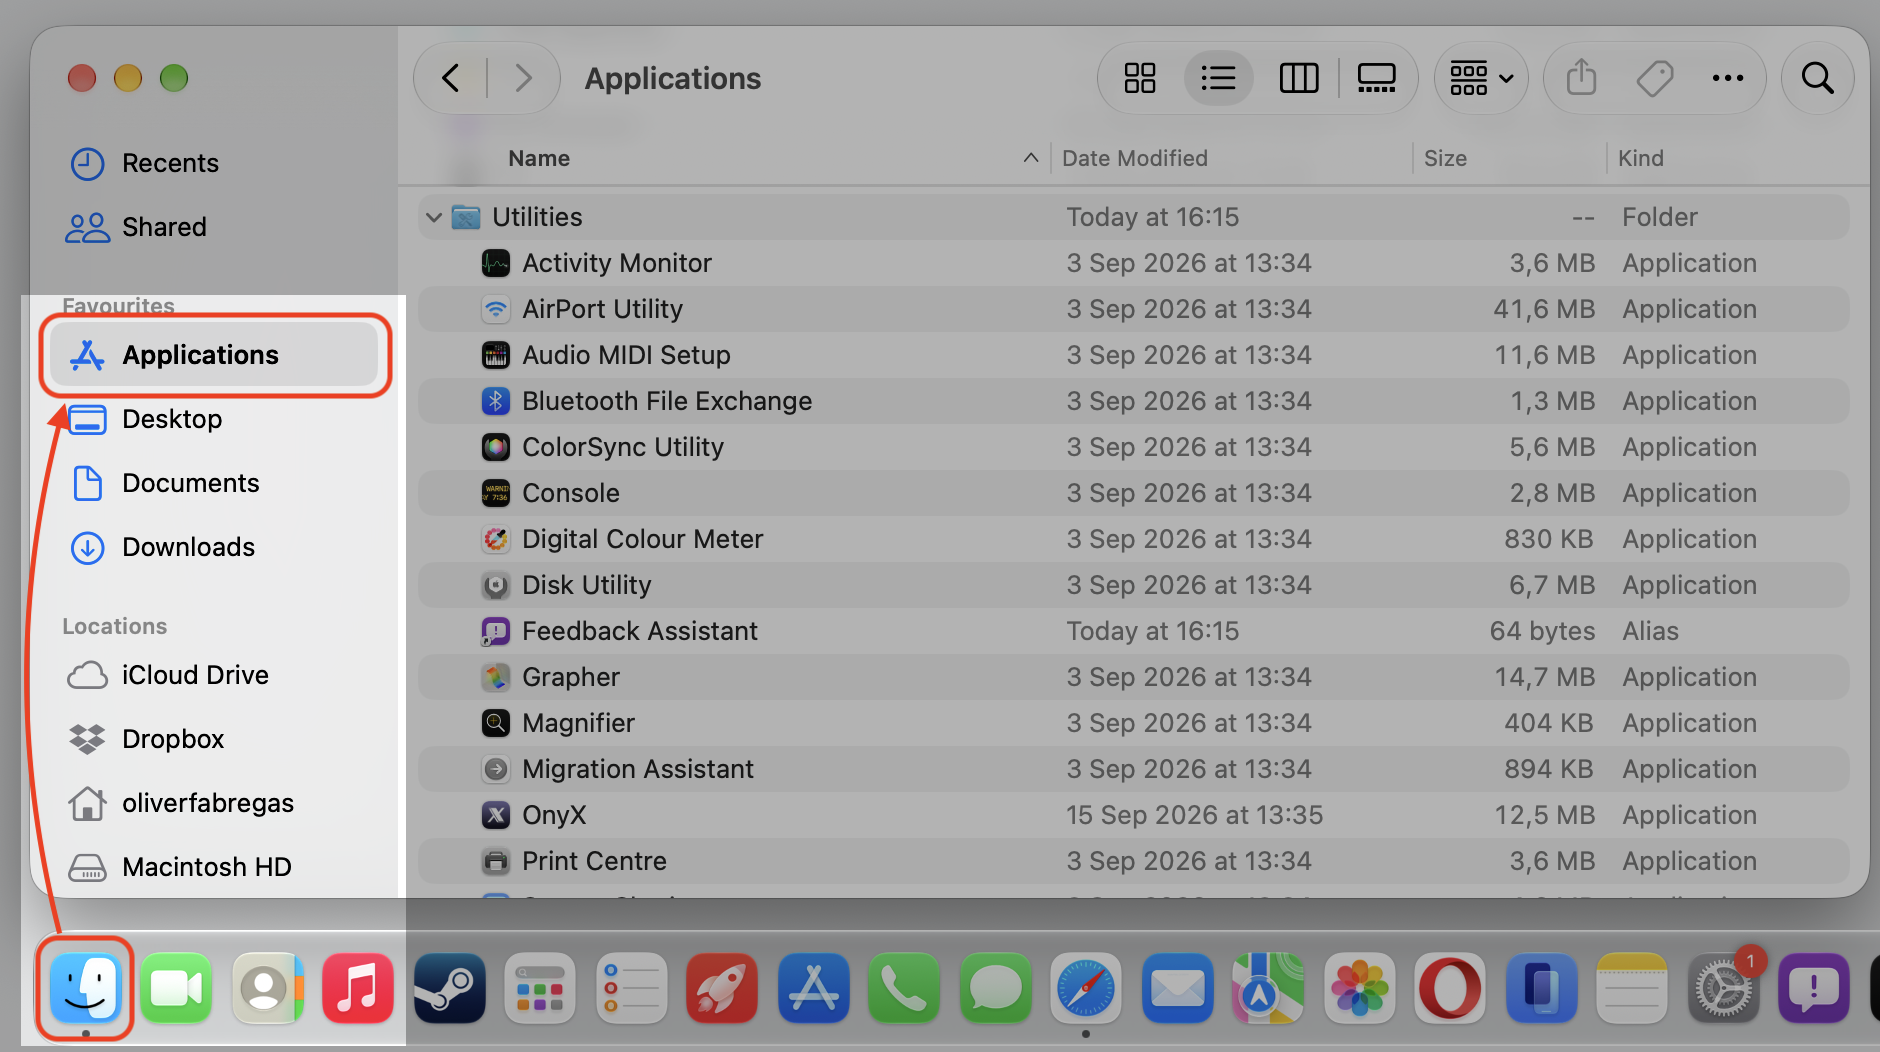
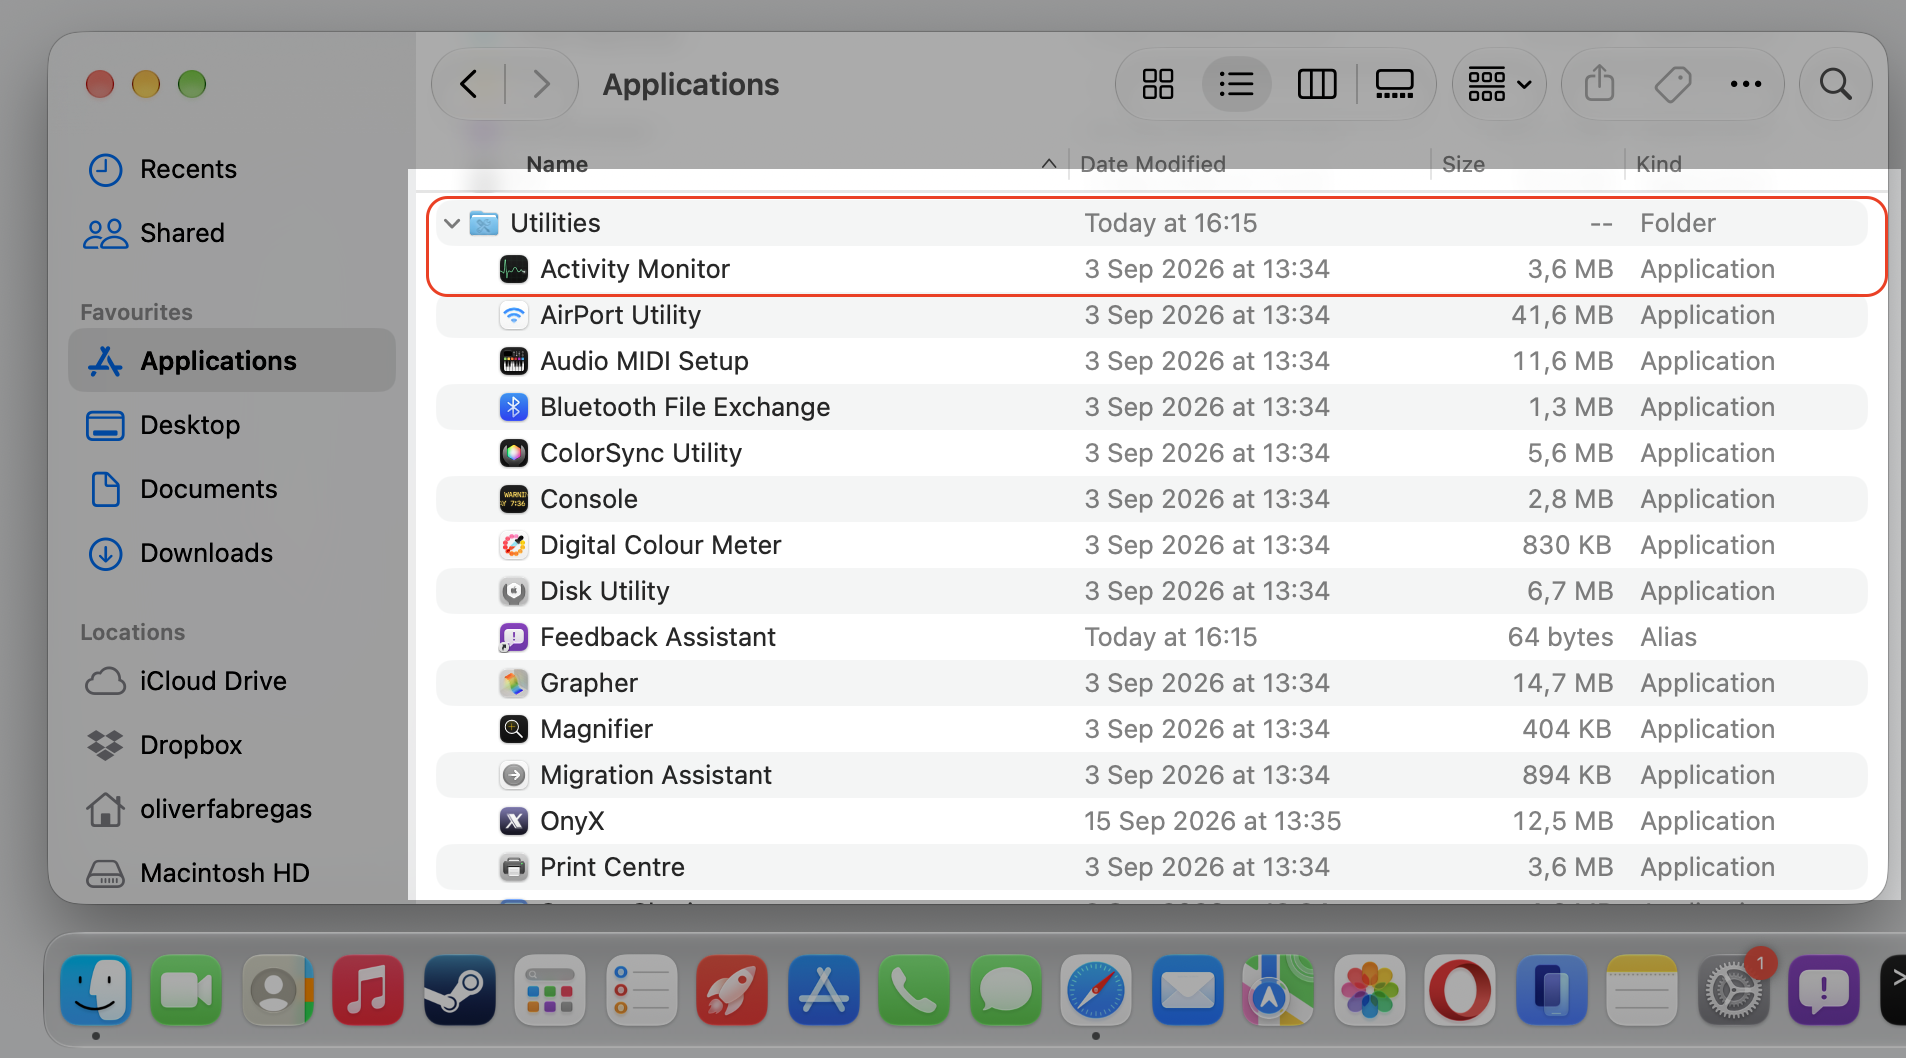
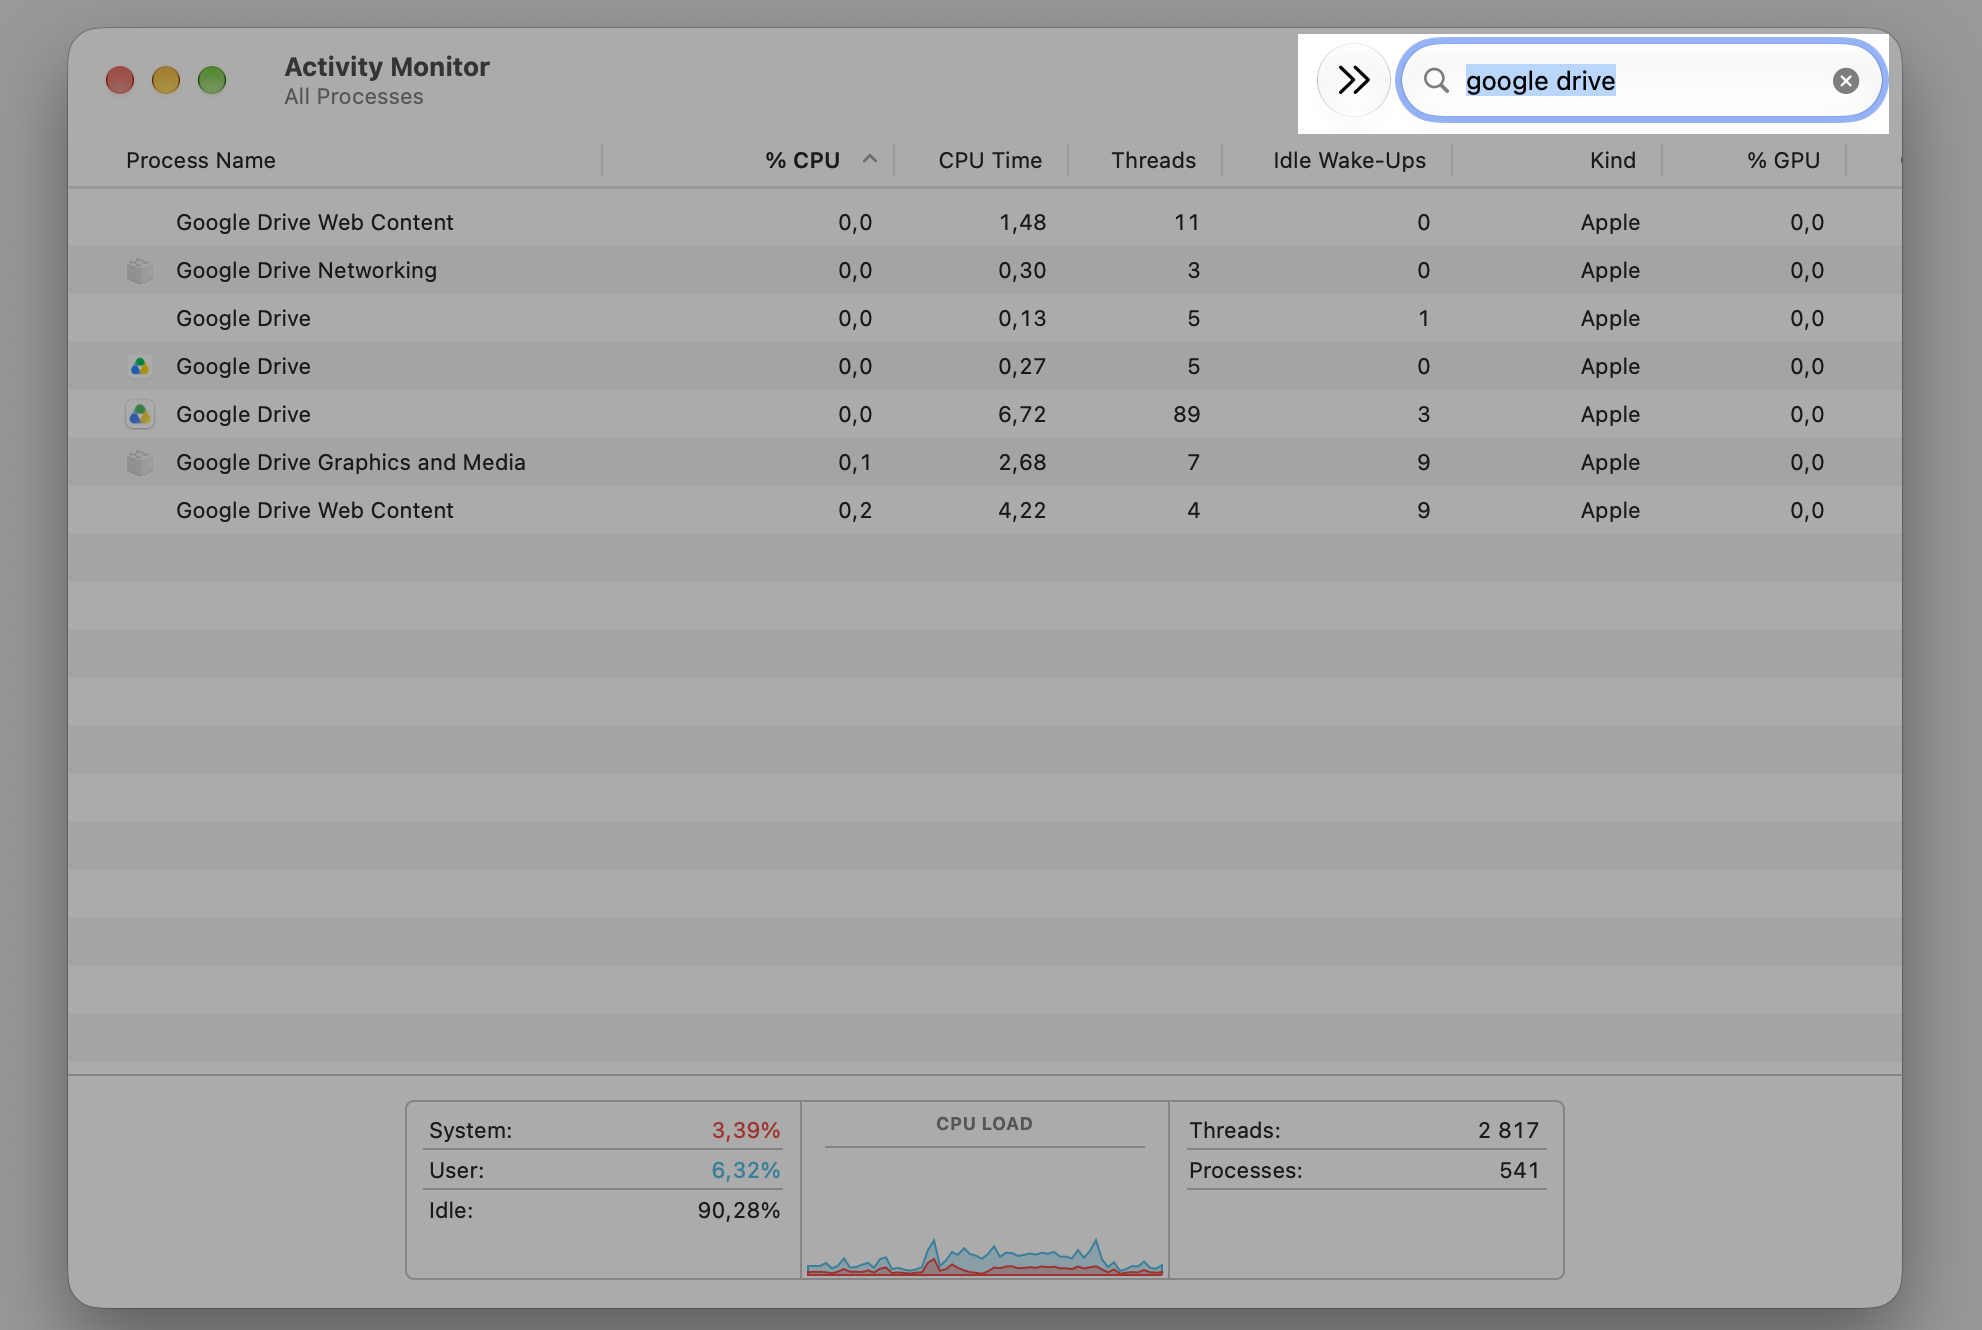
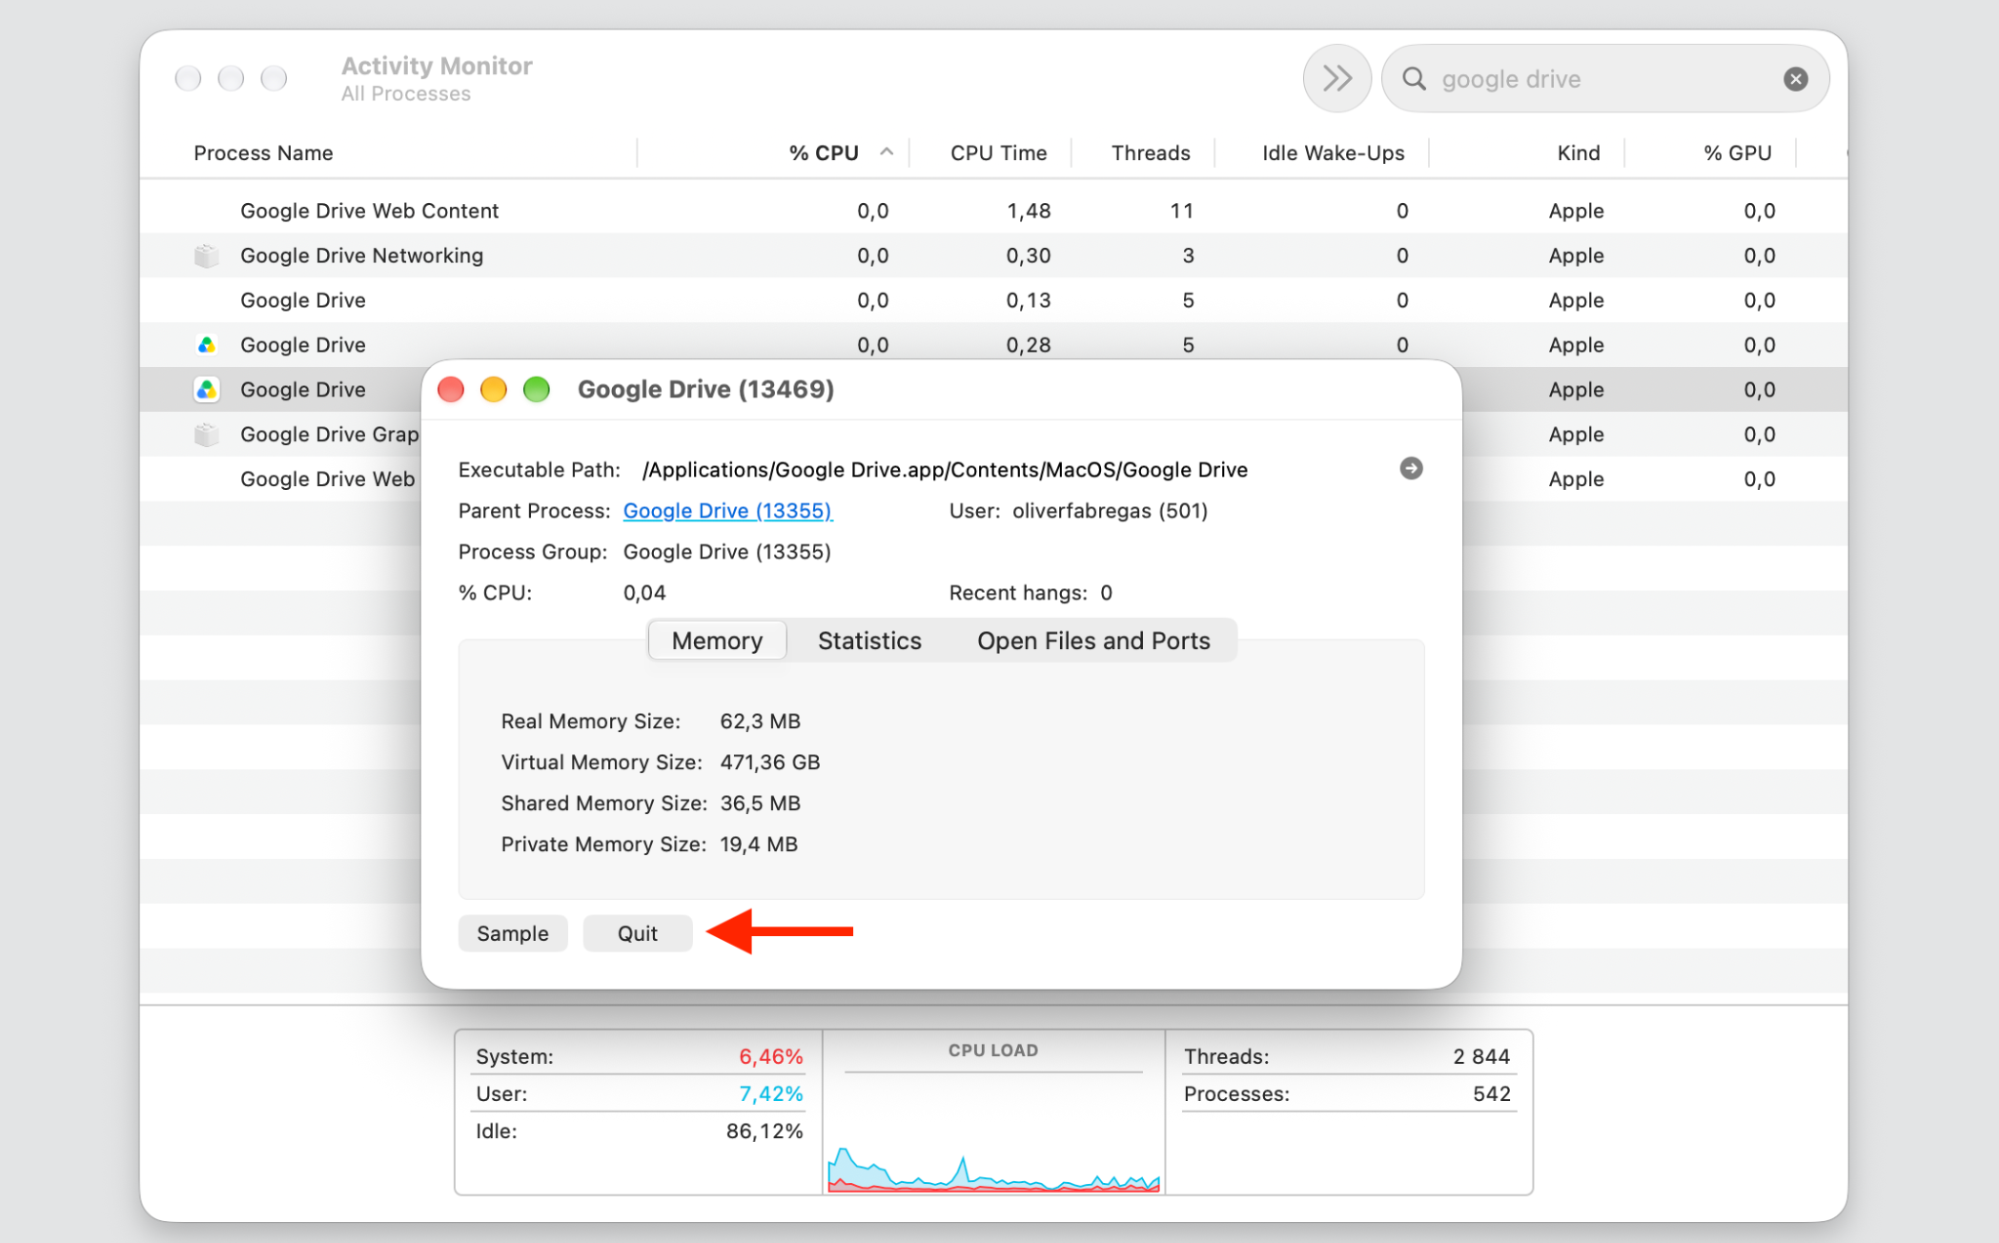
If the app won’t respond, open Activity Monitor from your Applications folder, select Google Drive, and force quit it.
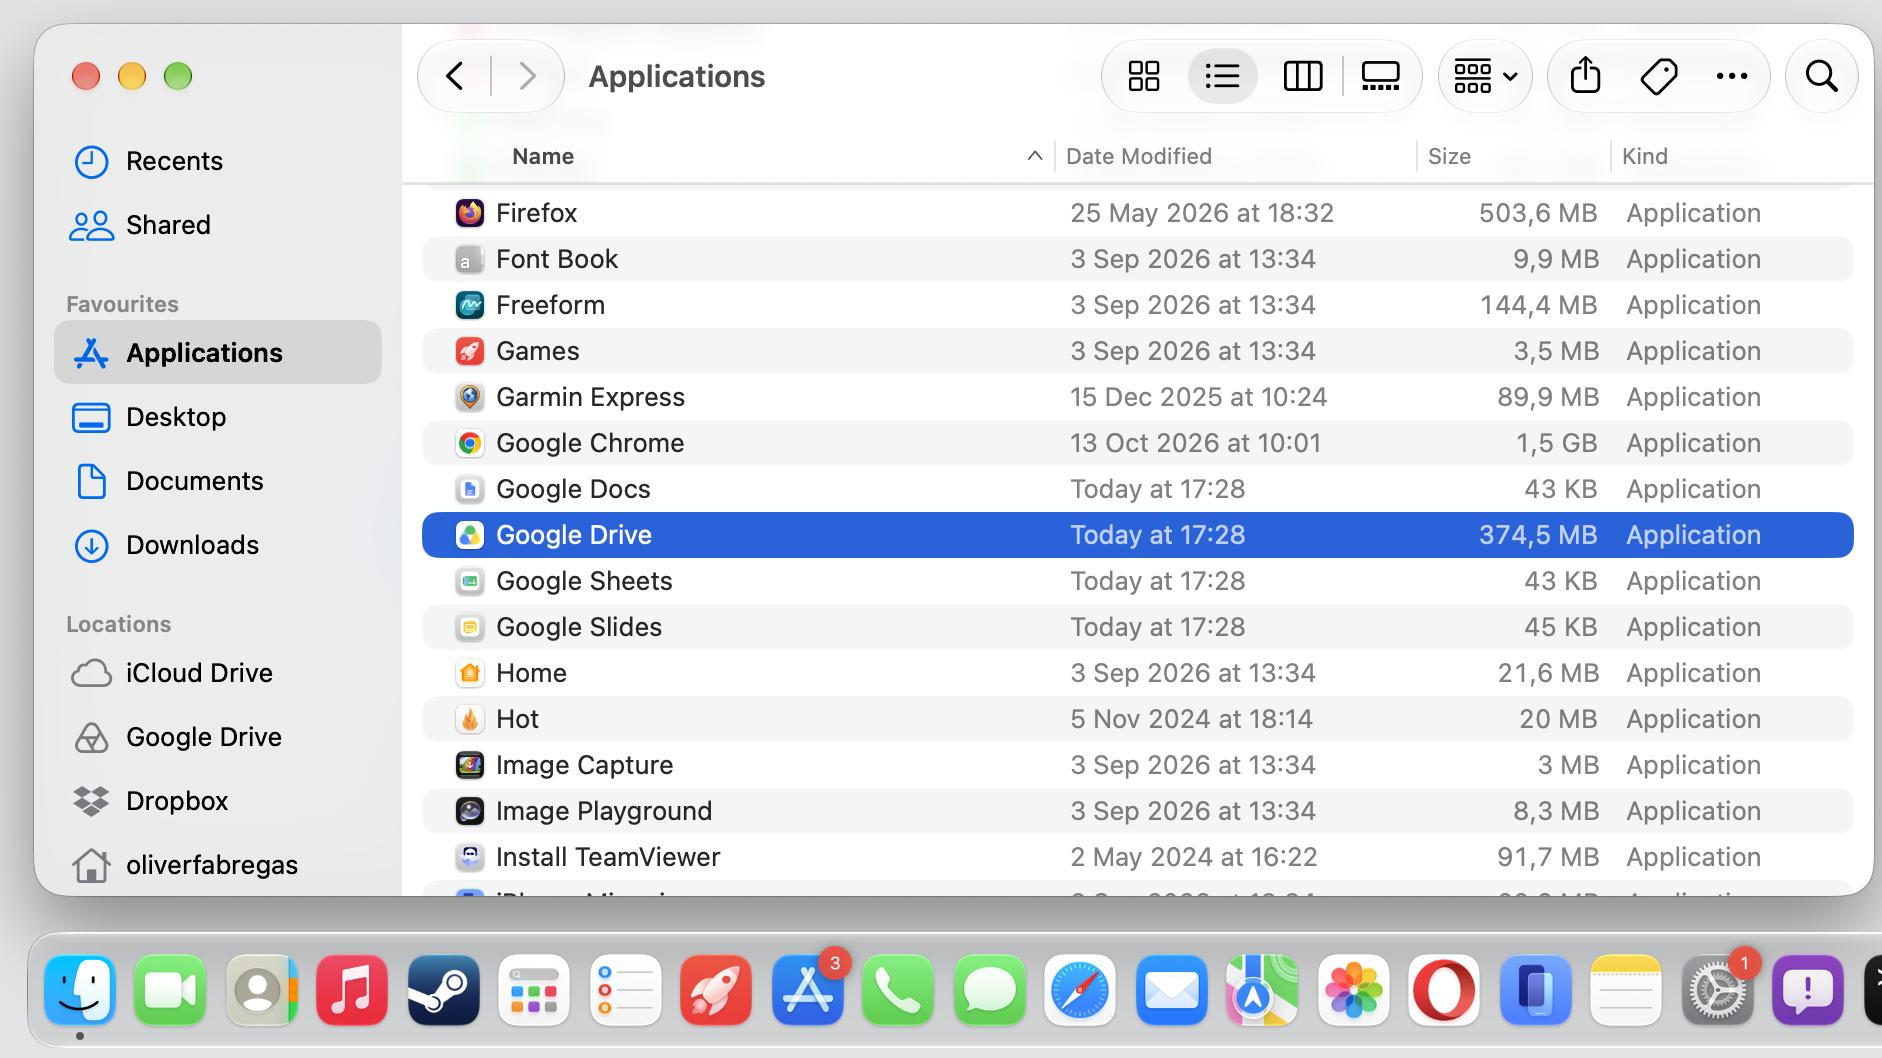
Head to your Applications folder and reopen Google Drive for Desktop.
Give it a minute to finish launching and loading your files.
Step 1. Go to Google Drive preferences and select QuitStep 2. Go to Finder > ApplicationsStep 3. Select Activity Monitor from the Utilities folderStep 4. Type Google Drive in the search barStep 5. Select the app, then click Force Quit
4. Restart your Mac
When the app restart isn’t enough, a full reboot often does the trick. We find that a quick move to restart your MacBook clears temporary background glitches, refreshes system daemons, and resets any hung sync tasks in one go.
Give your Mac a full reboot to clear the slate:
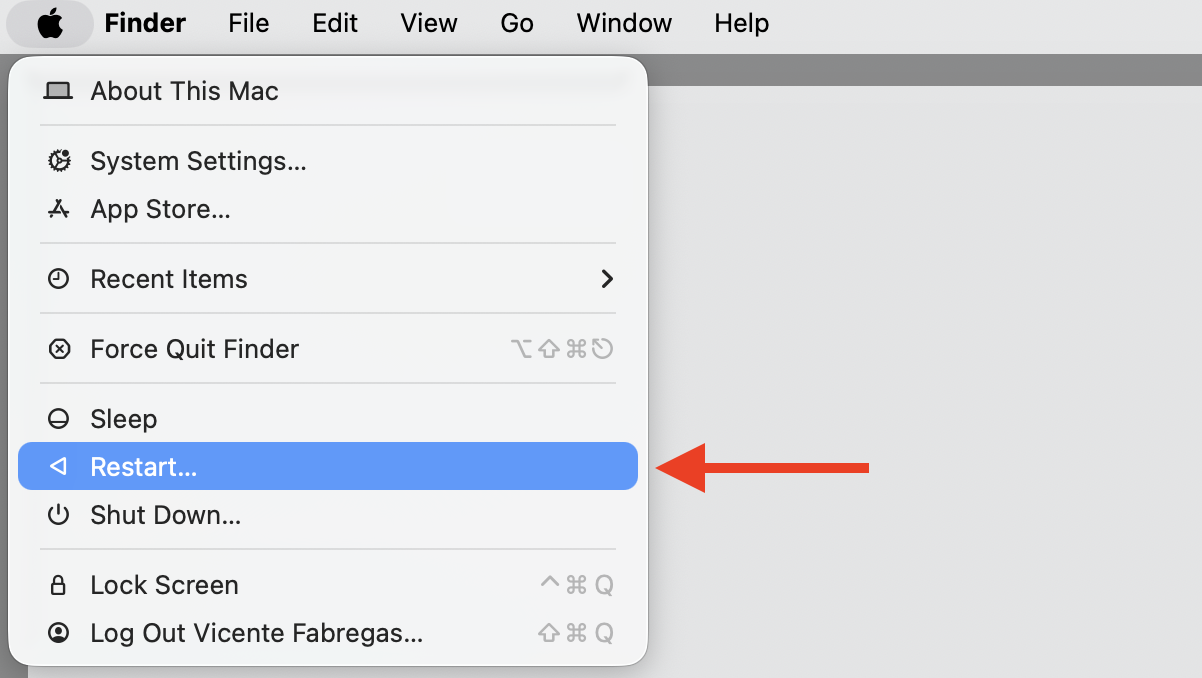
Select the Apple menu in the top-left corner of your screen.
Choose Restart.
Once your Mac loads back up, reopen Google Drive and watch for changes to start syncing.
Step 1. Restart your Mac from the Apple LogoStep 2. After restarting, open Google Drive from Finder > ApplicationsStep 3. Check that the status is Up to Date
5. Check and free up Google Drive storage
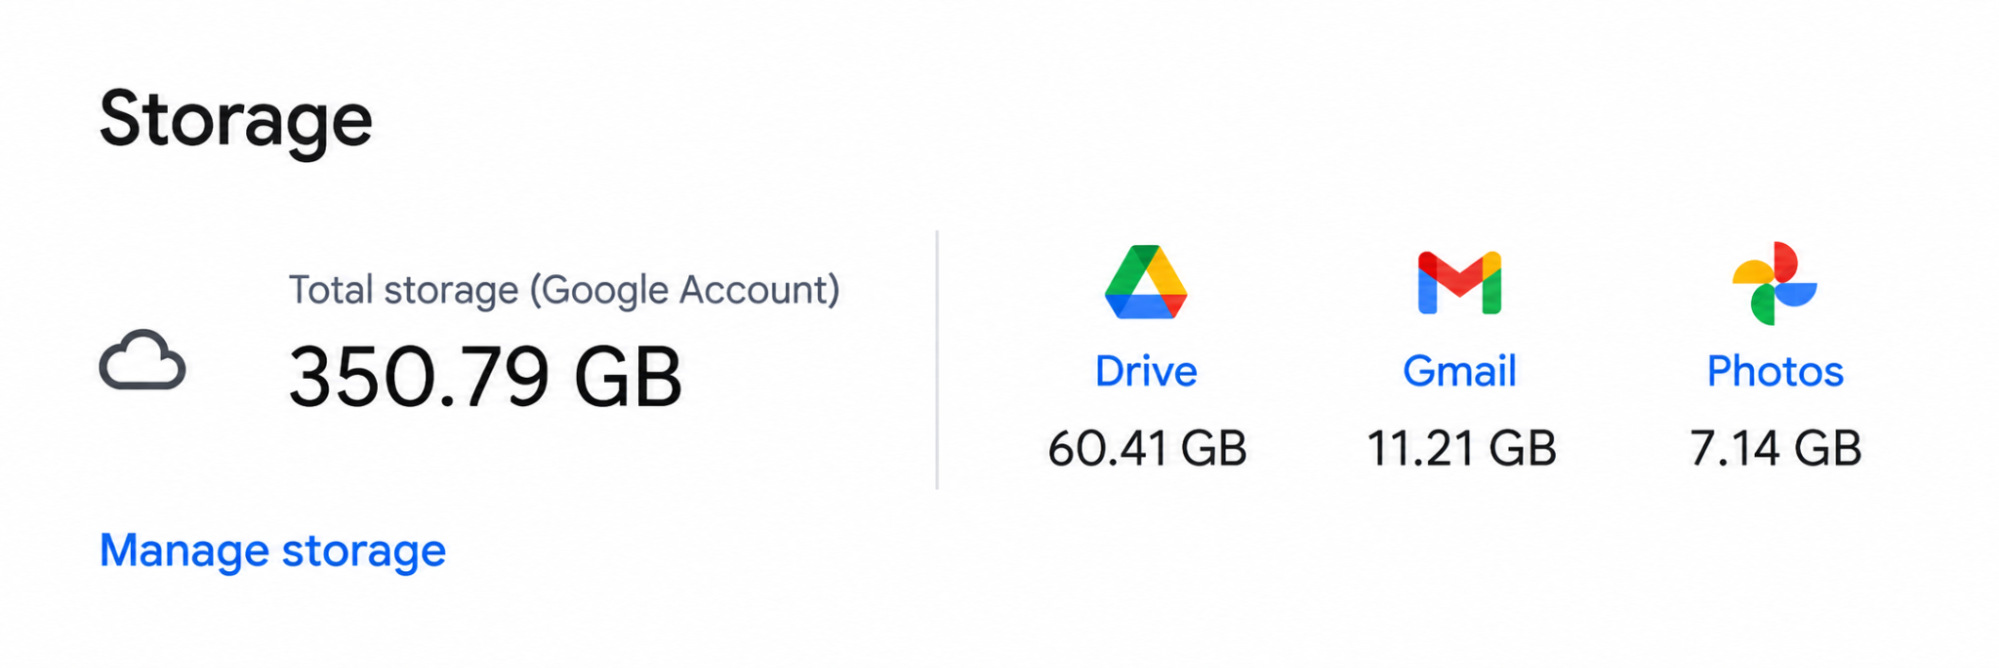
Remember, your free Google account shares 15 GB across Drive, Gmail, and Photos, so we often find that a full quota is why files stall.
Look at the storage bar to see how much of your 15 GB is available.
If it’s full, delete large files across Drive, Gmail, and Photos to make room.
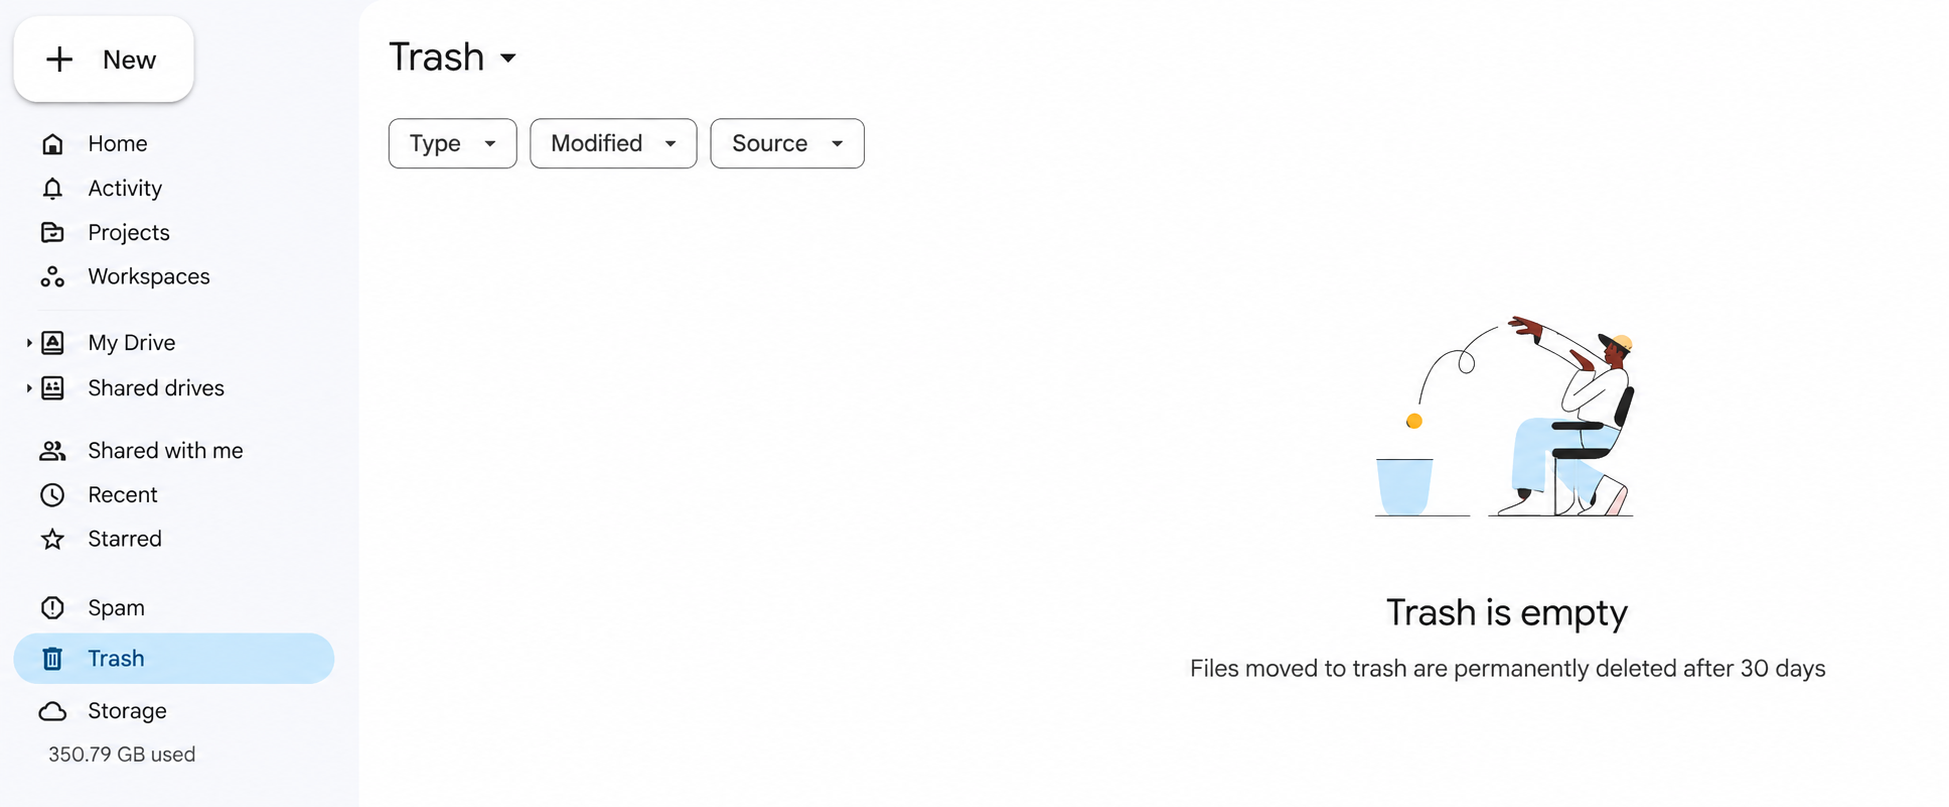
Empty your Drive trash so the space is actually freed up.
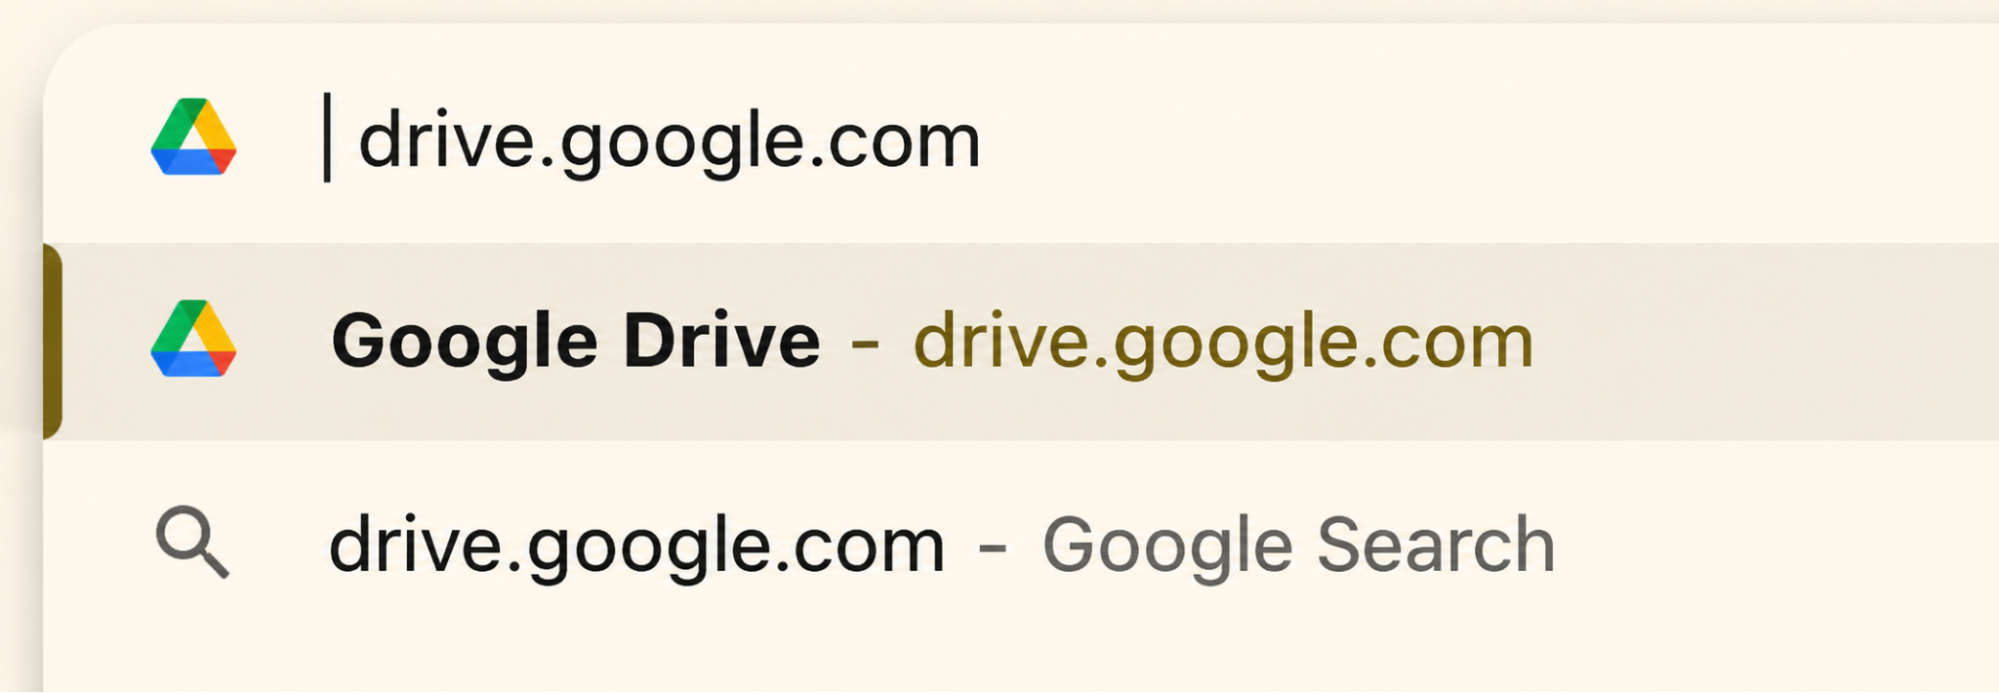
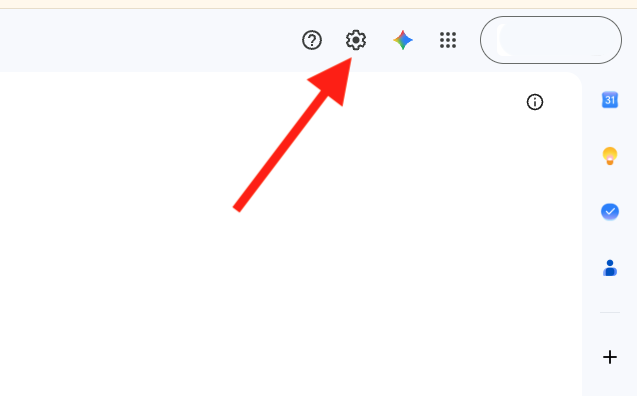
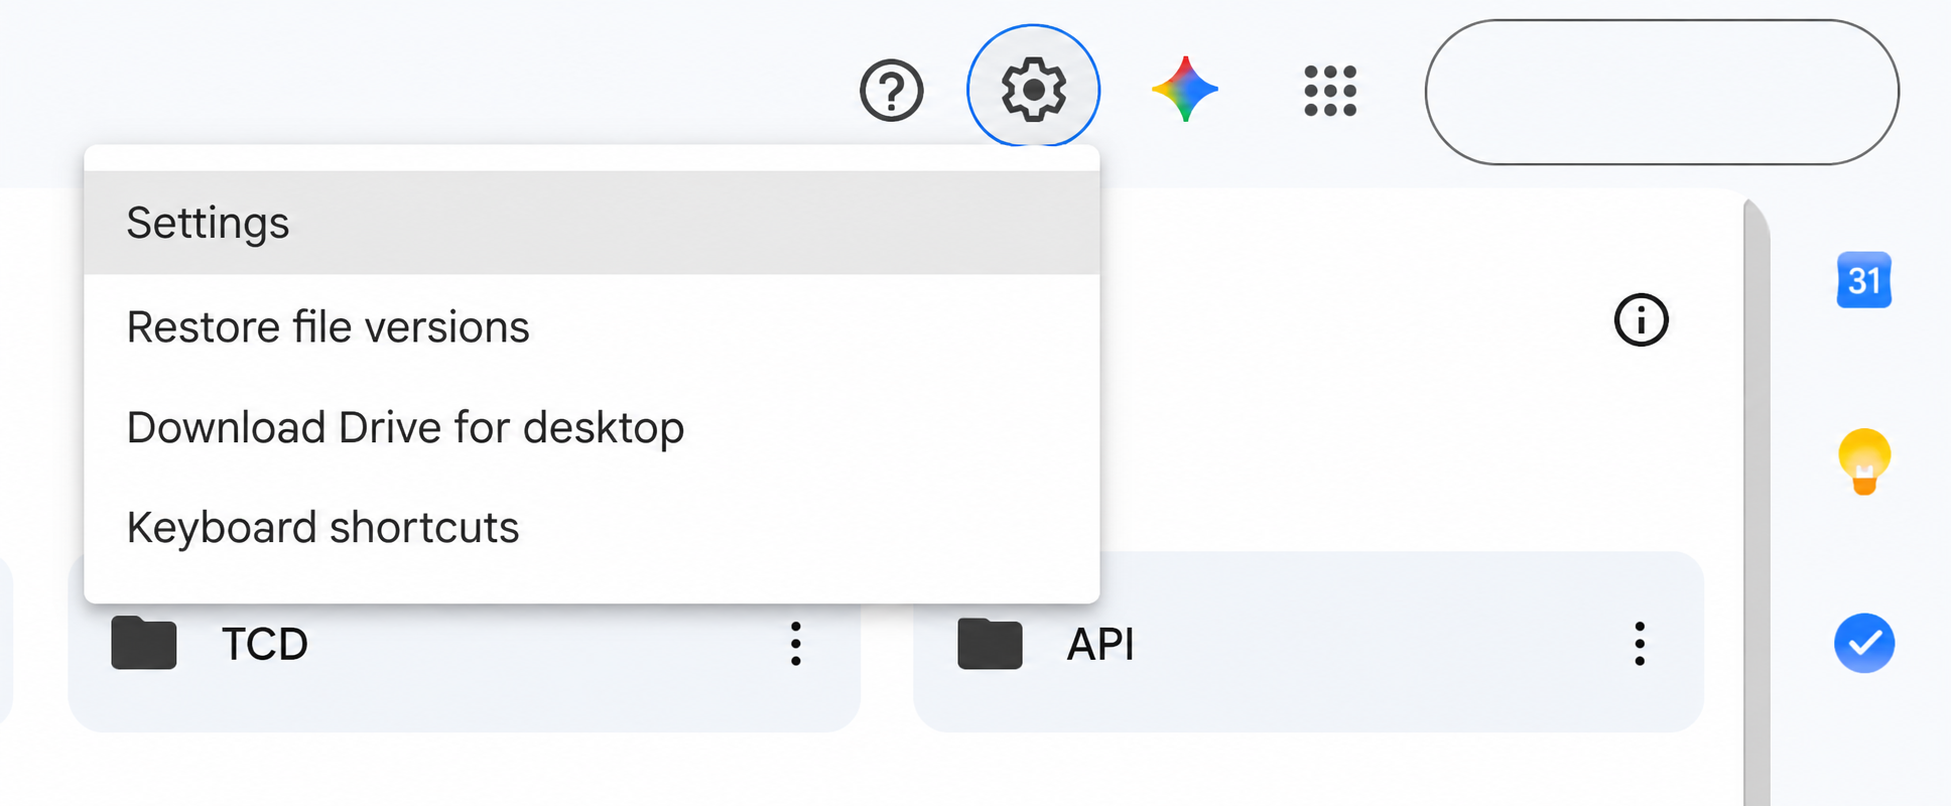
Step 1. Go to drive.google.com in your Google browserStep 2. Select the gear iconStep 3. Go to SettingsStep 4. Check the Storage capacityStep 5. Go back to the Main Menu and check the Trash capacity
6. Verify macOS privacy and disk permissions
Apple’s macOS keeps a tight lid on which apps can reach your files, and in our experience, Google Drive needs the right permissions to sync. Turning on Mac Full Disk Access lets the app read and write your folders without interruption.
Grant your Google Drive the permissions it needs like this:
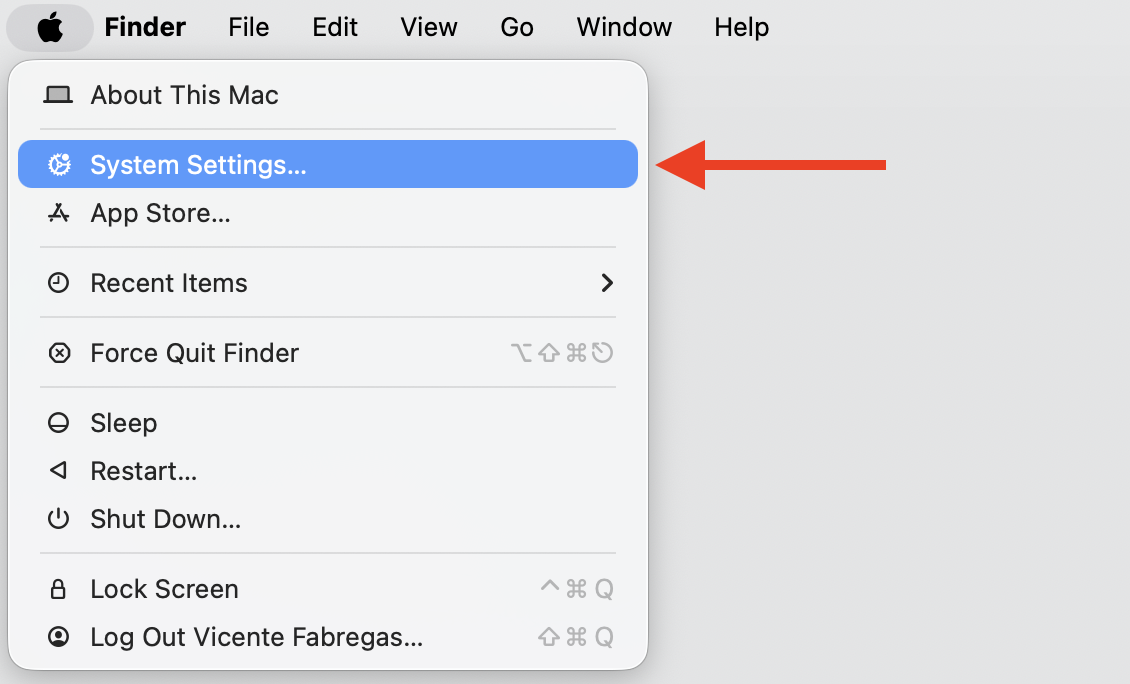
Open the Apple menu and choose System Settings.
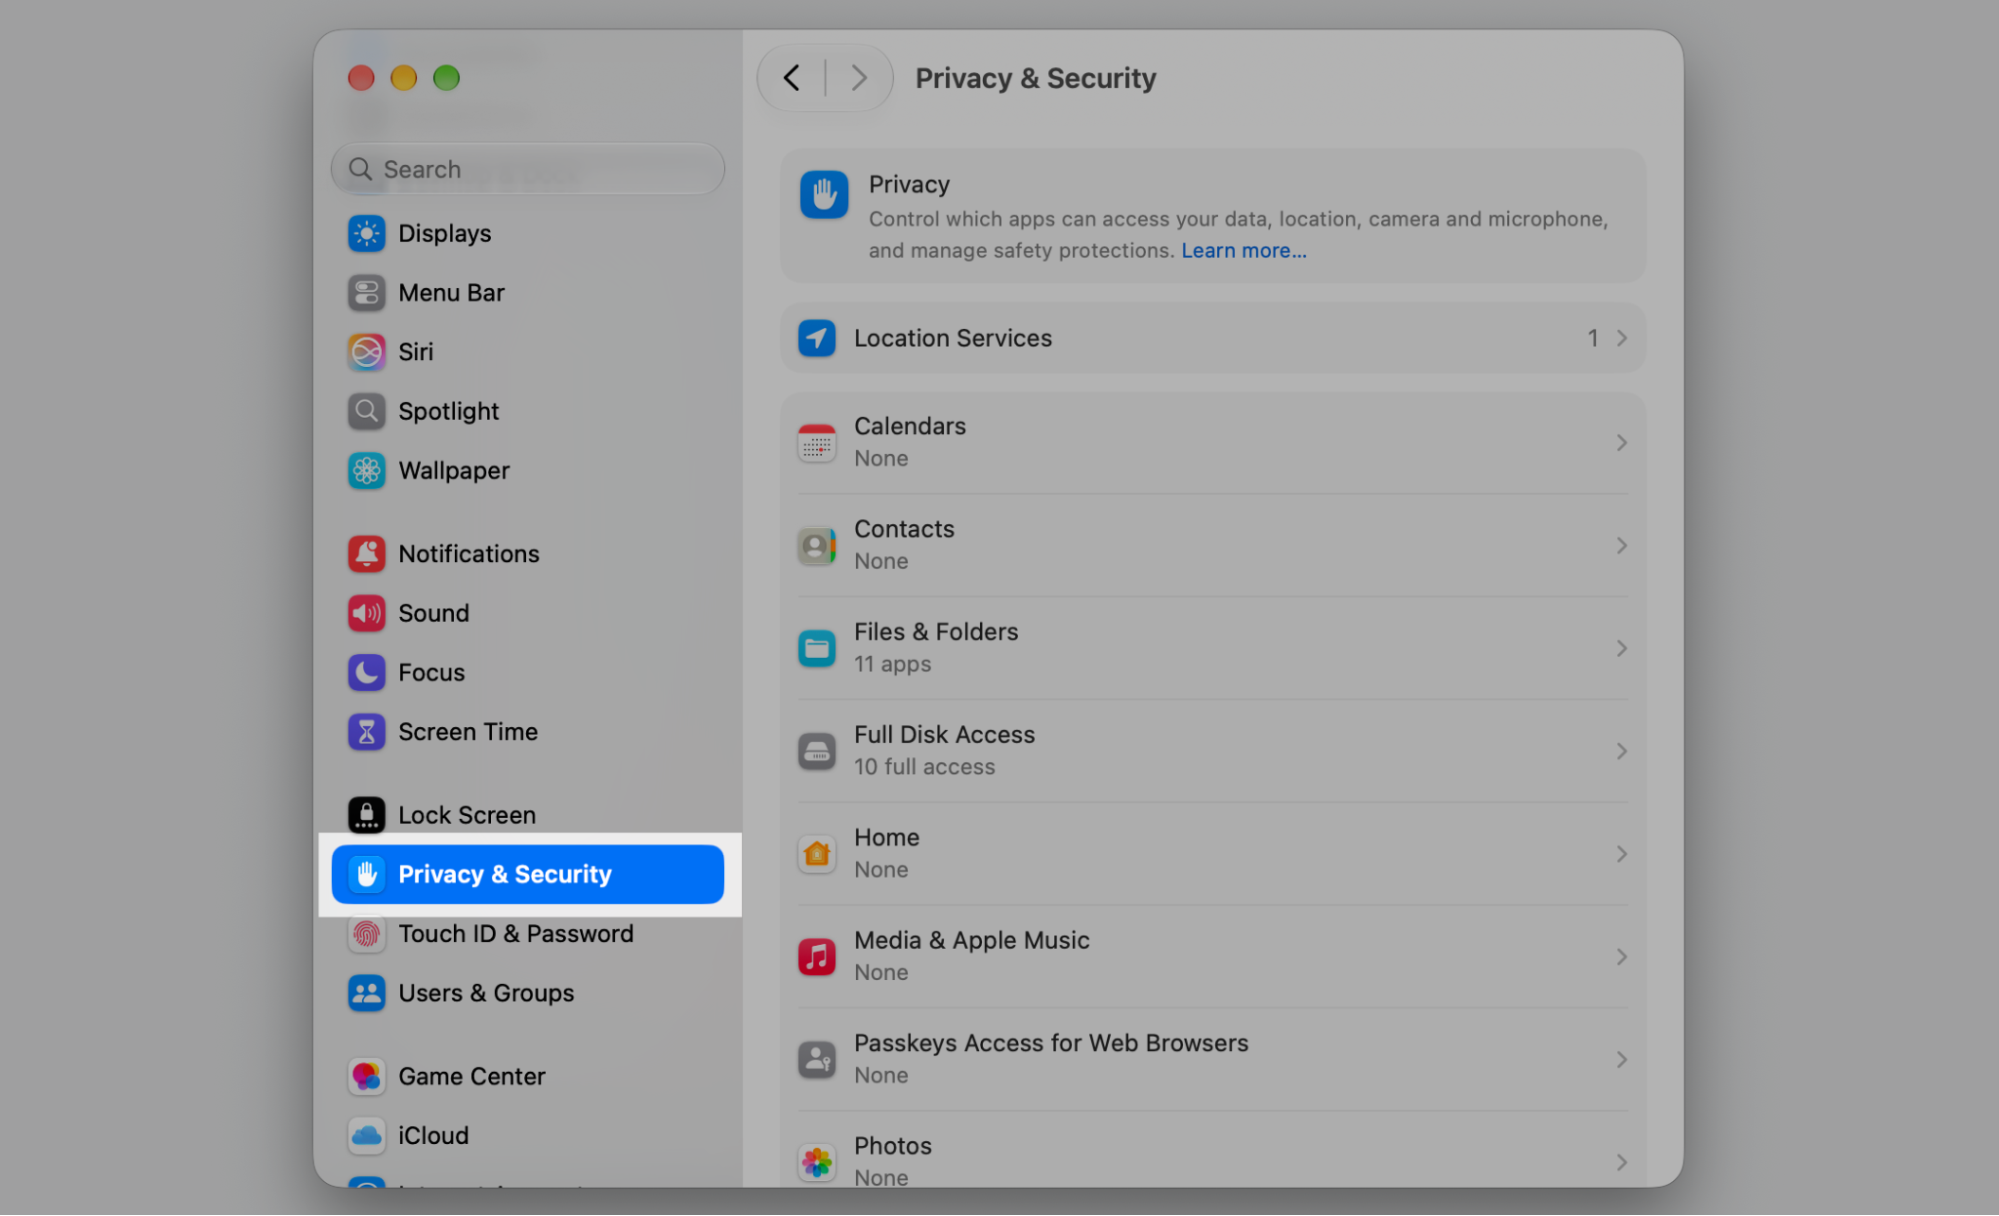
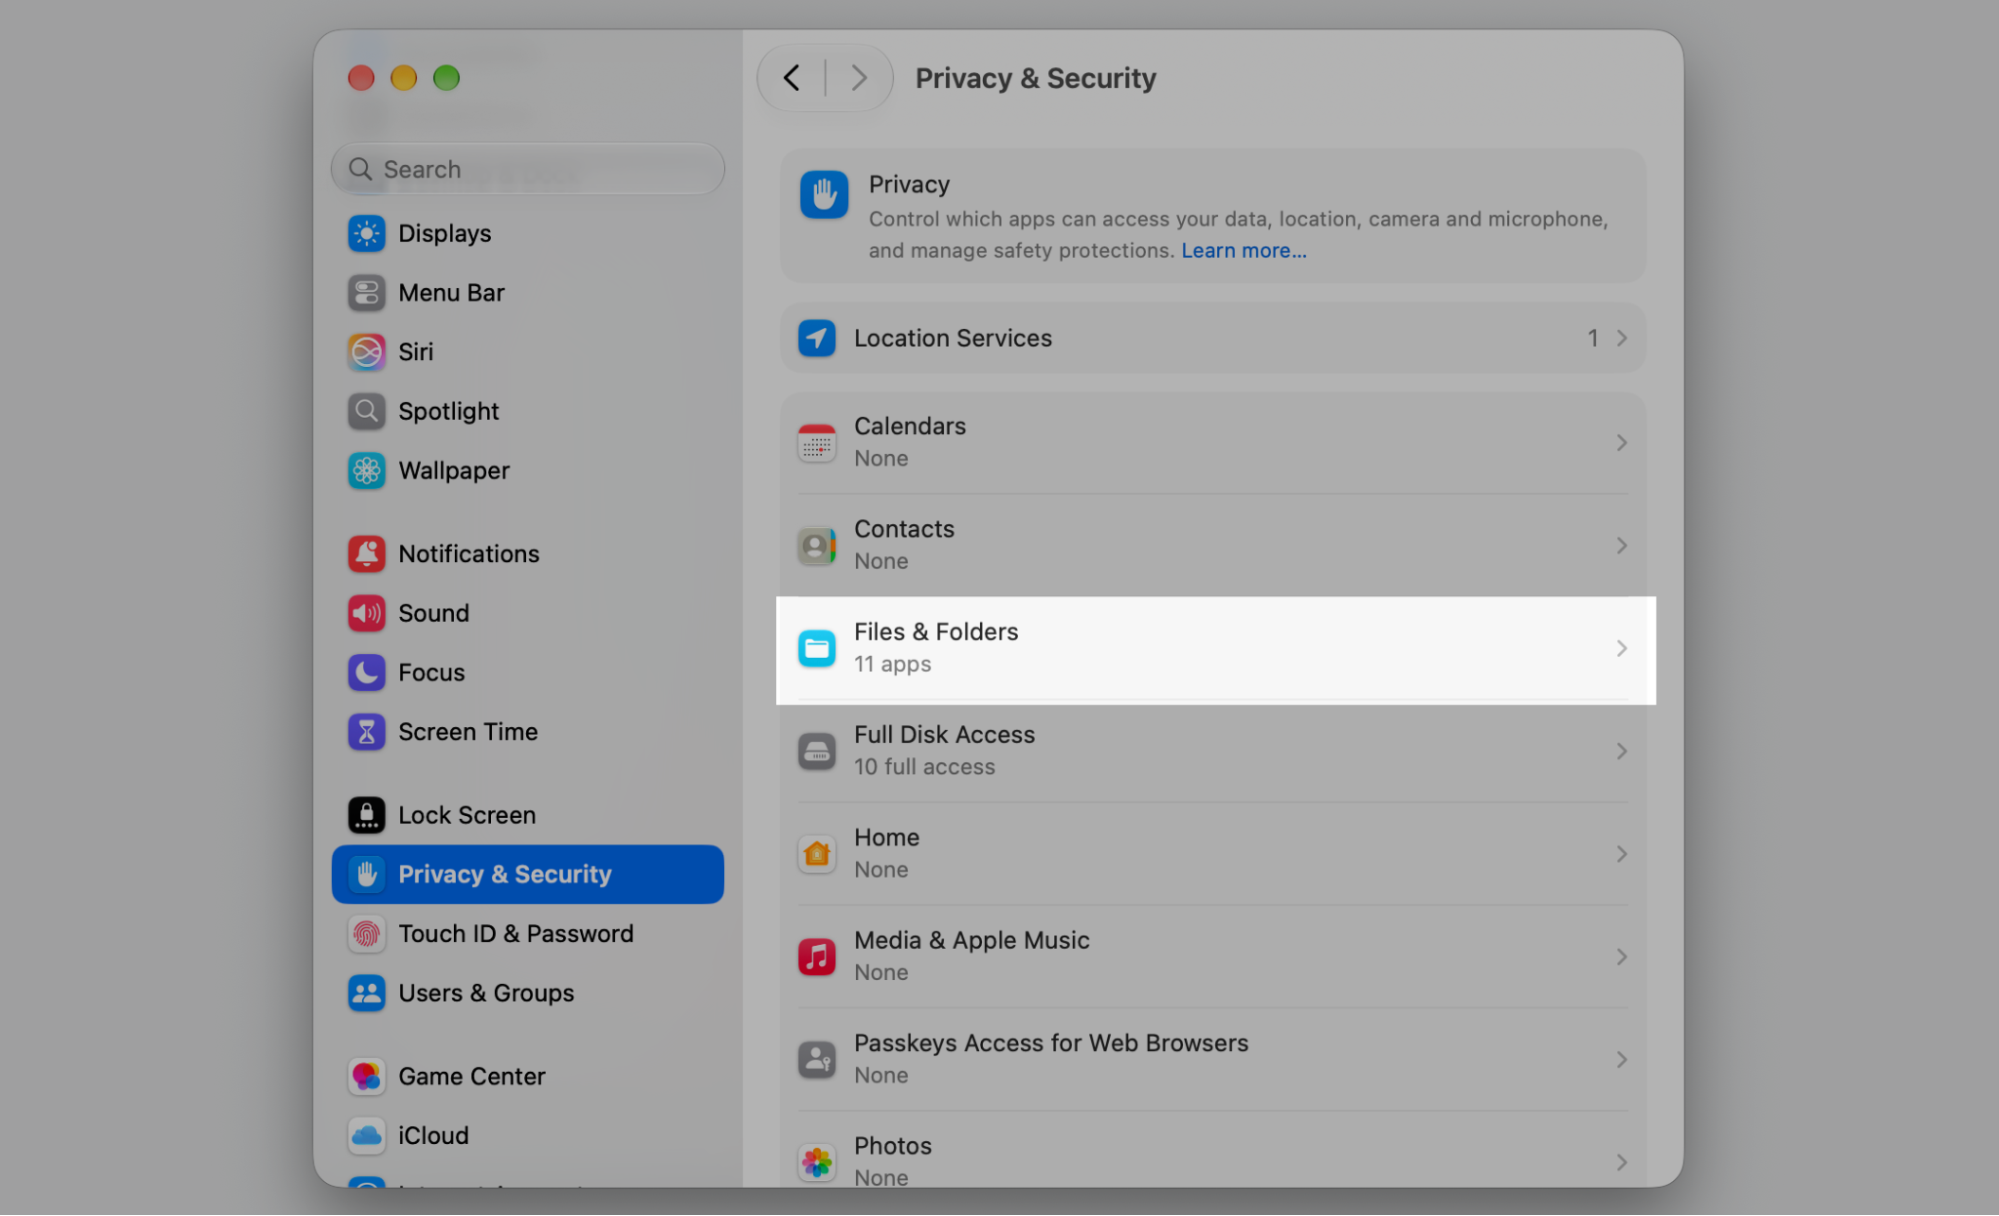
Select Privacy & Security in the sidebar.
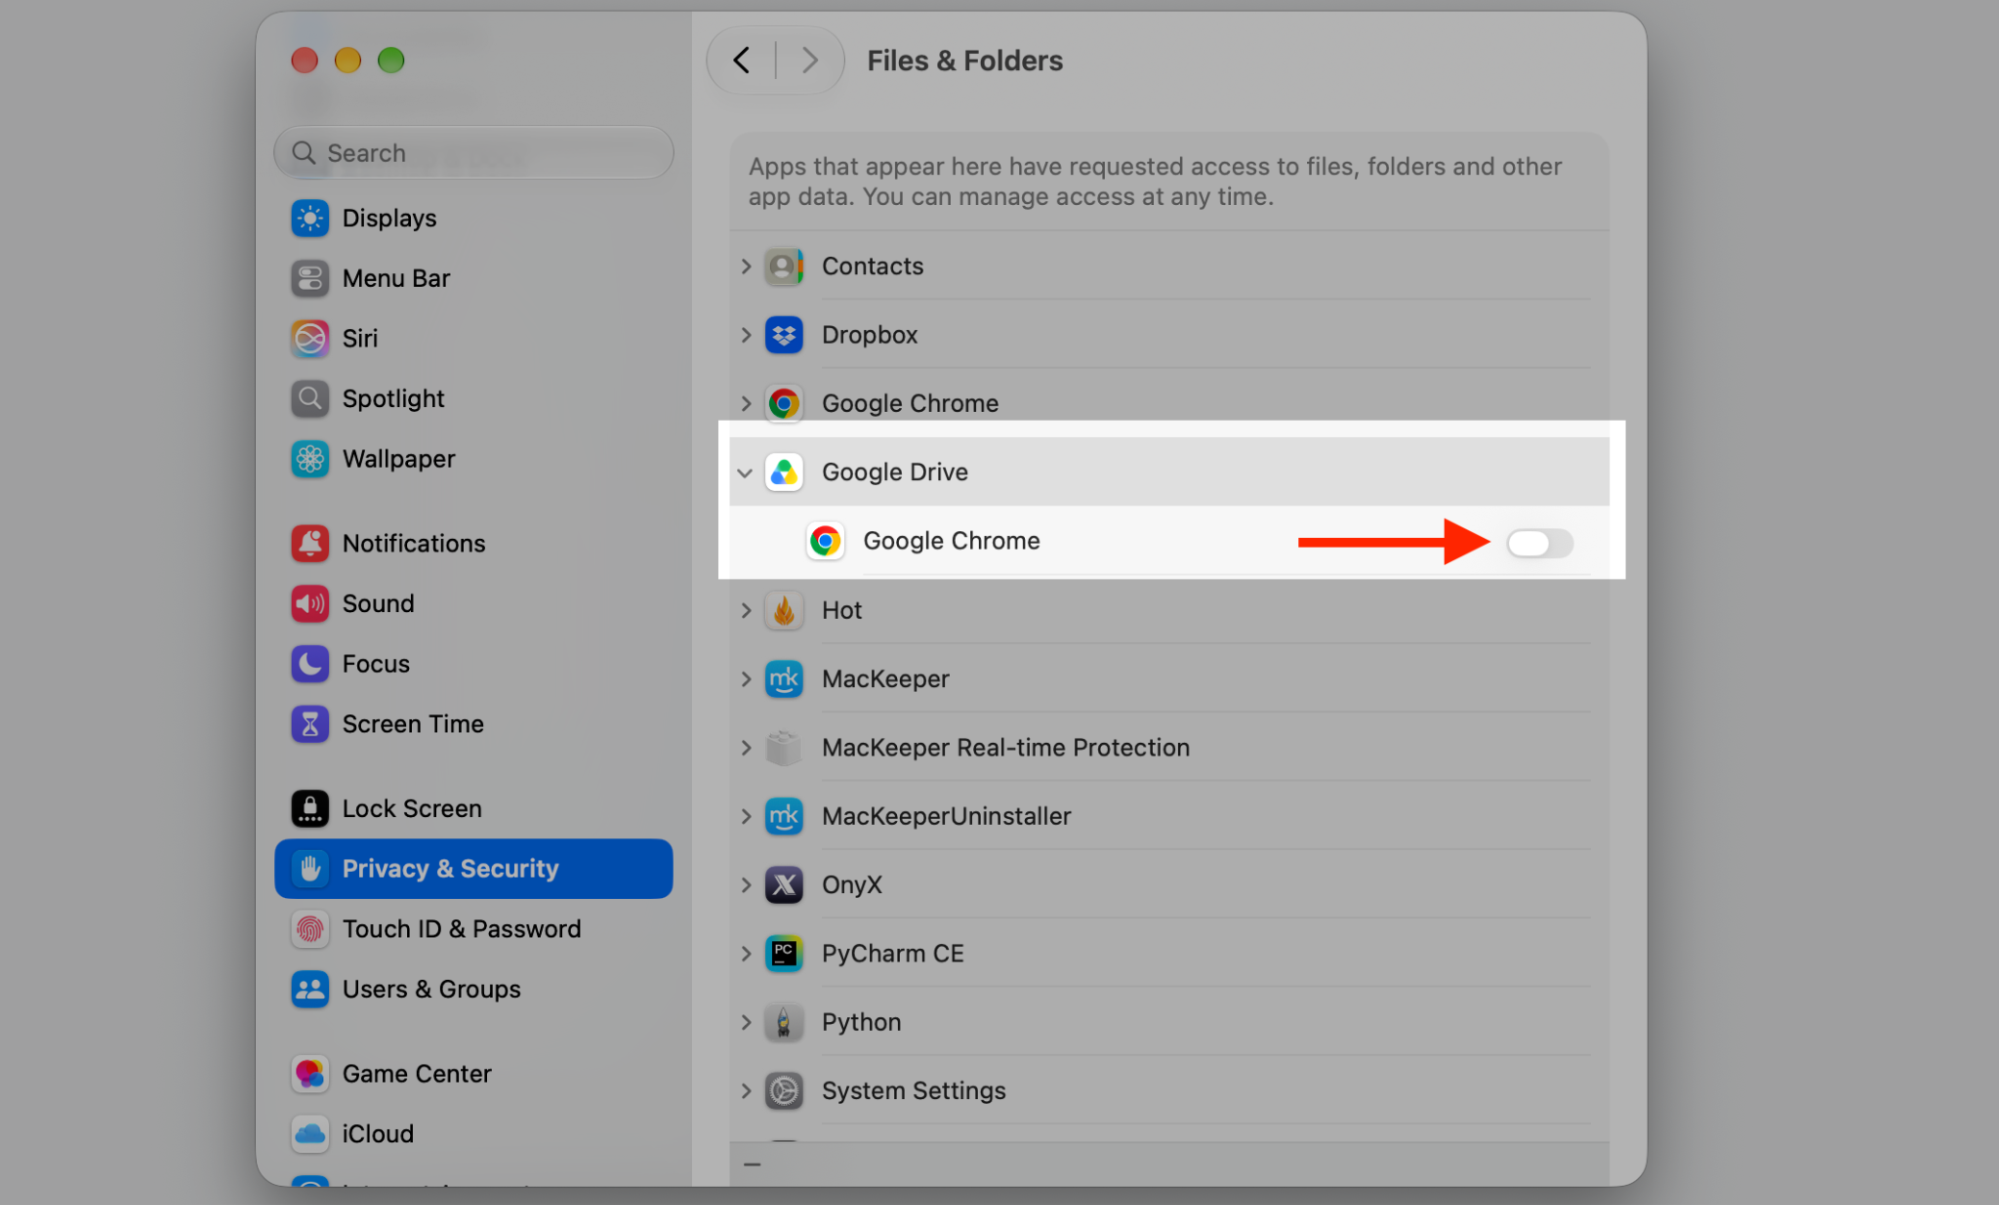
Open Files and Folders and make sure Google Drive is selected.
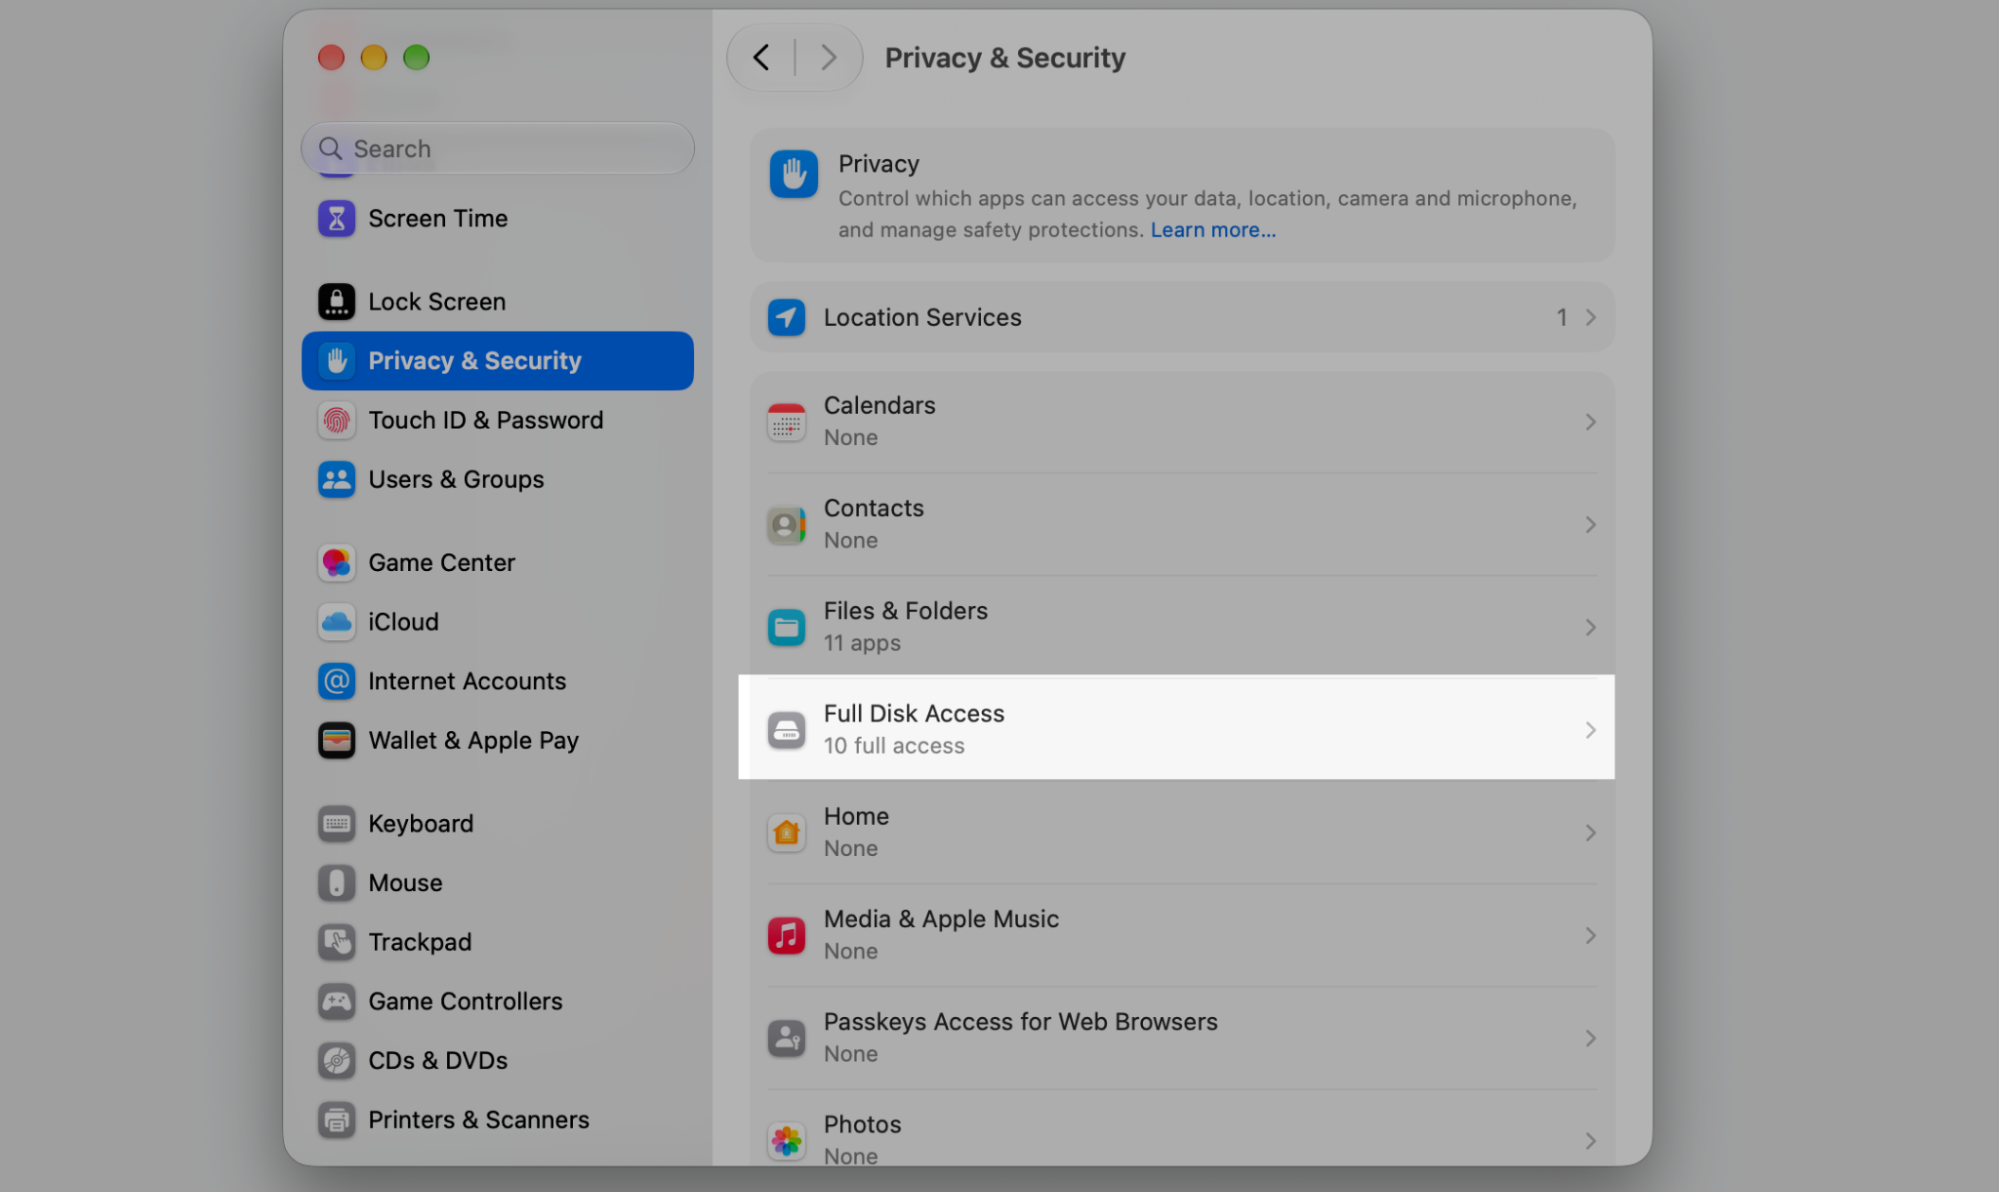
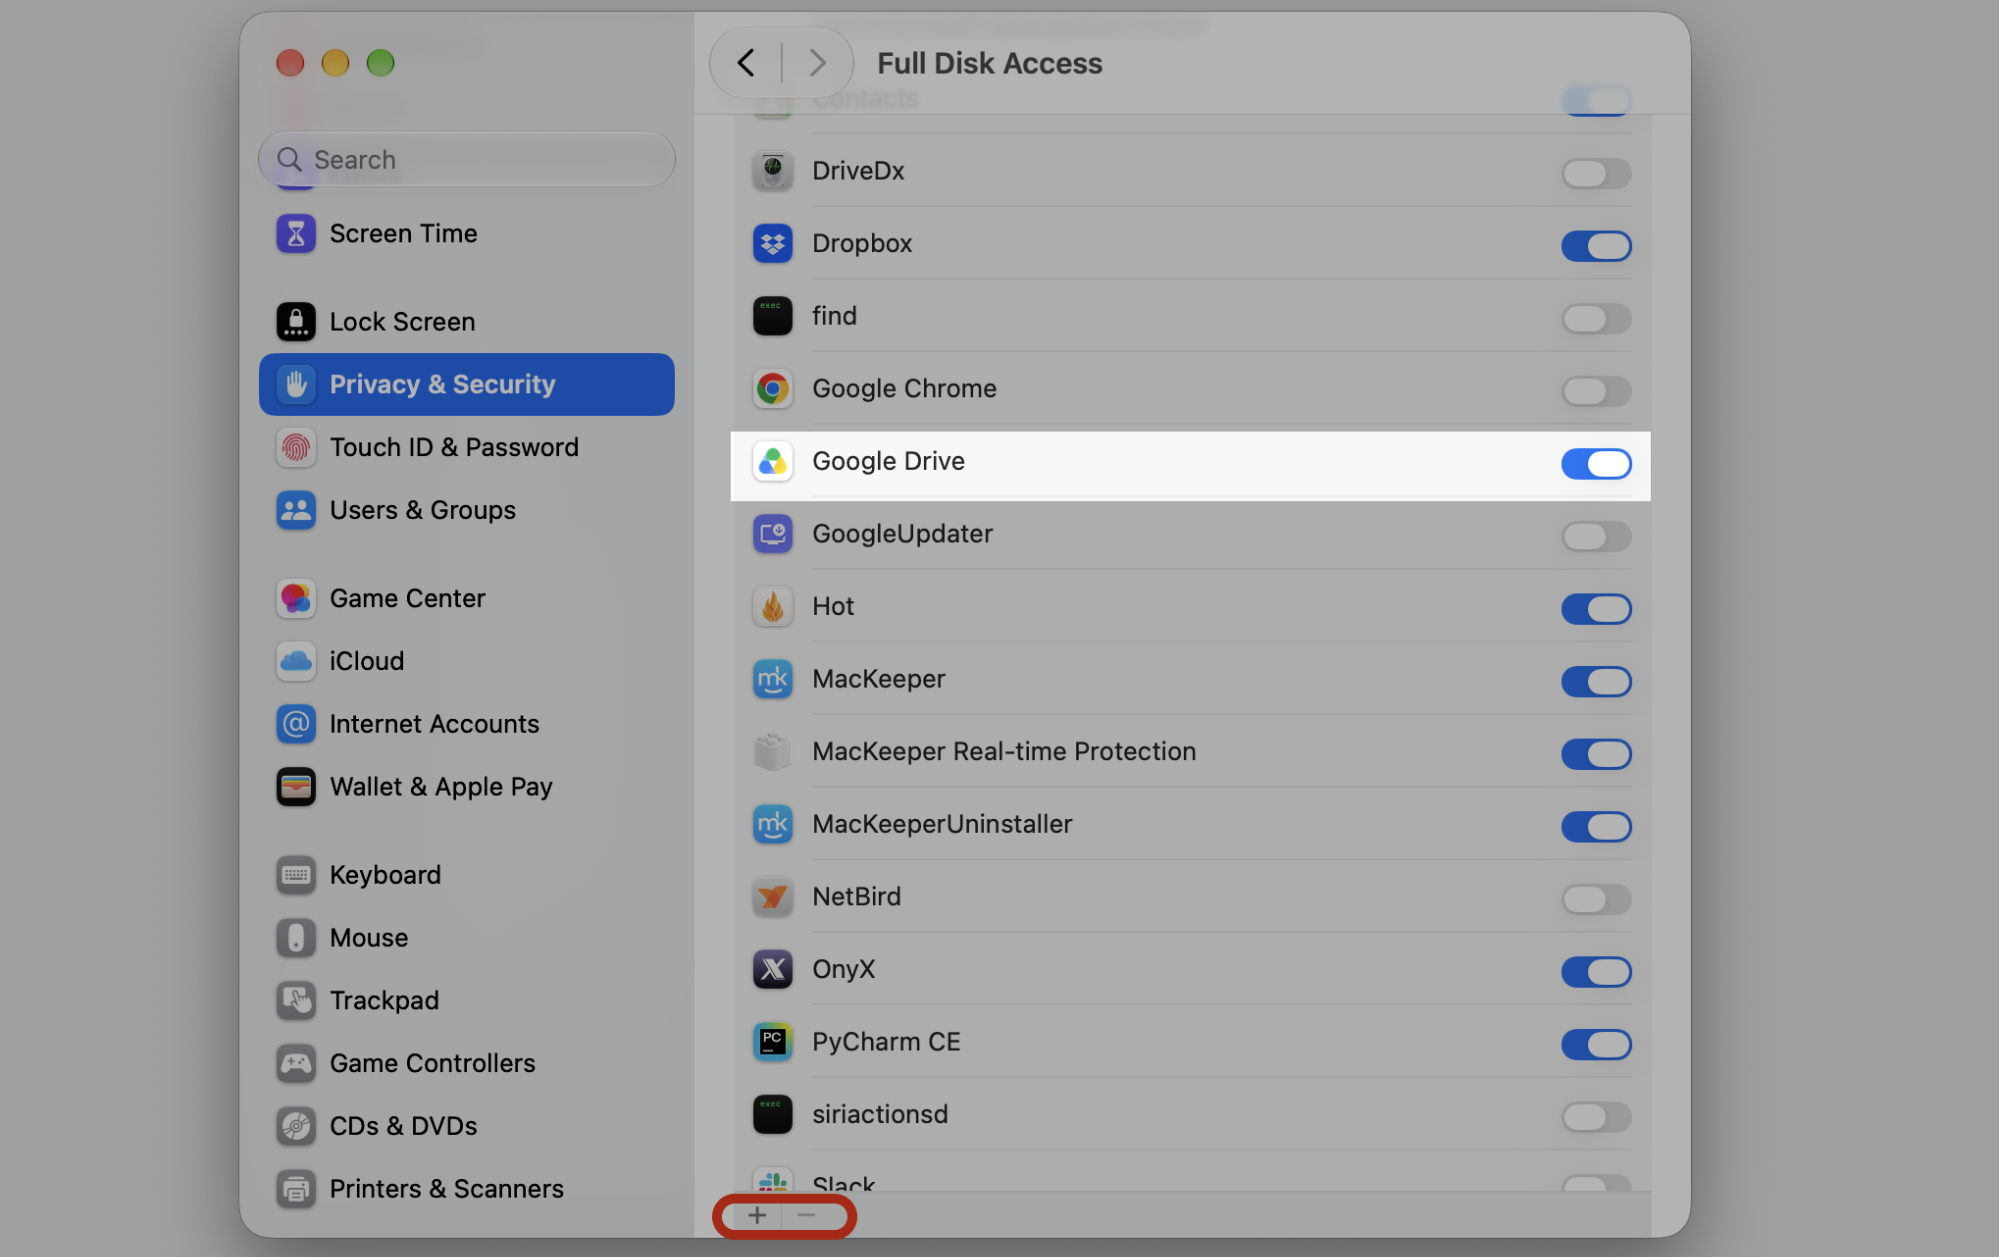
Open Full Disk Access and select Google Drive there too.
Step 1. Go to Apple Logo > System Settings…Step 2. Select Privacy & Security in the sidebarStep 3. Go to Files and FoldersStep 4. Select Google Drive and turn on the toggleStep 5. Go back to Full Disk AccessStep 6. Check if Google Drive is enabled
7. Disconnect and reconnect your Google account
Disconnecting your account and signing back in refreshes the authentication tokens that keep syncing alive, and we reach for this whenever a login gets stale.
Refresh your login by signing out and back in:
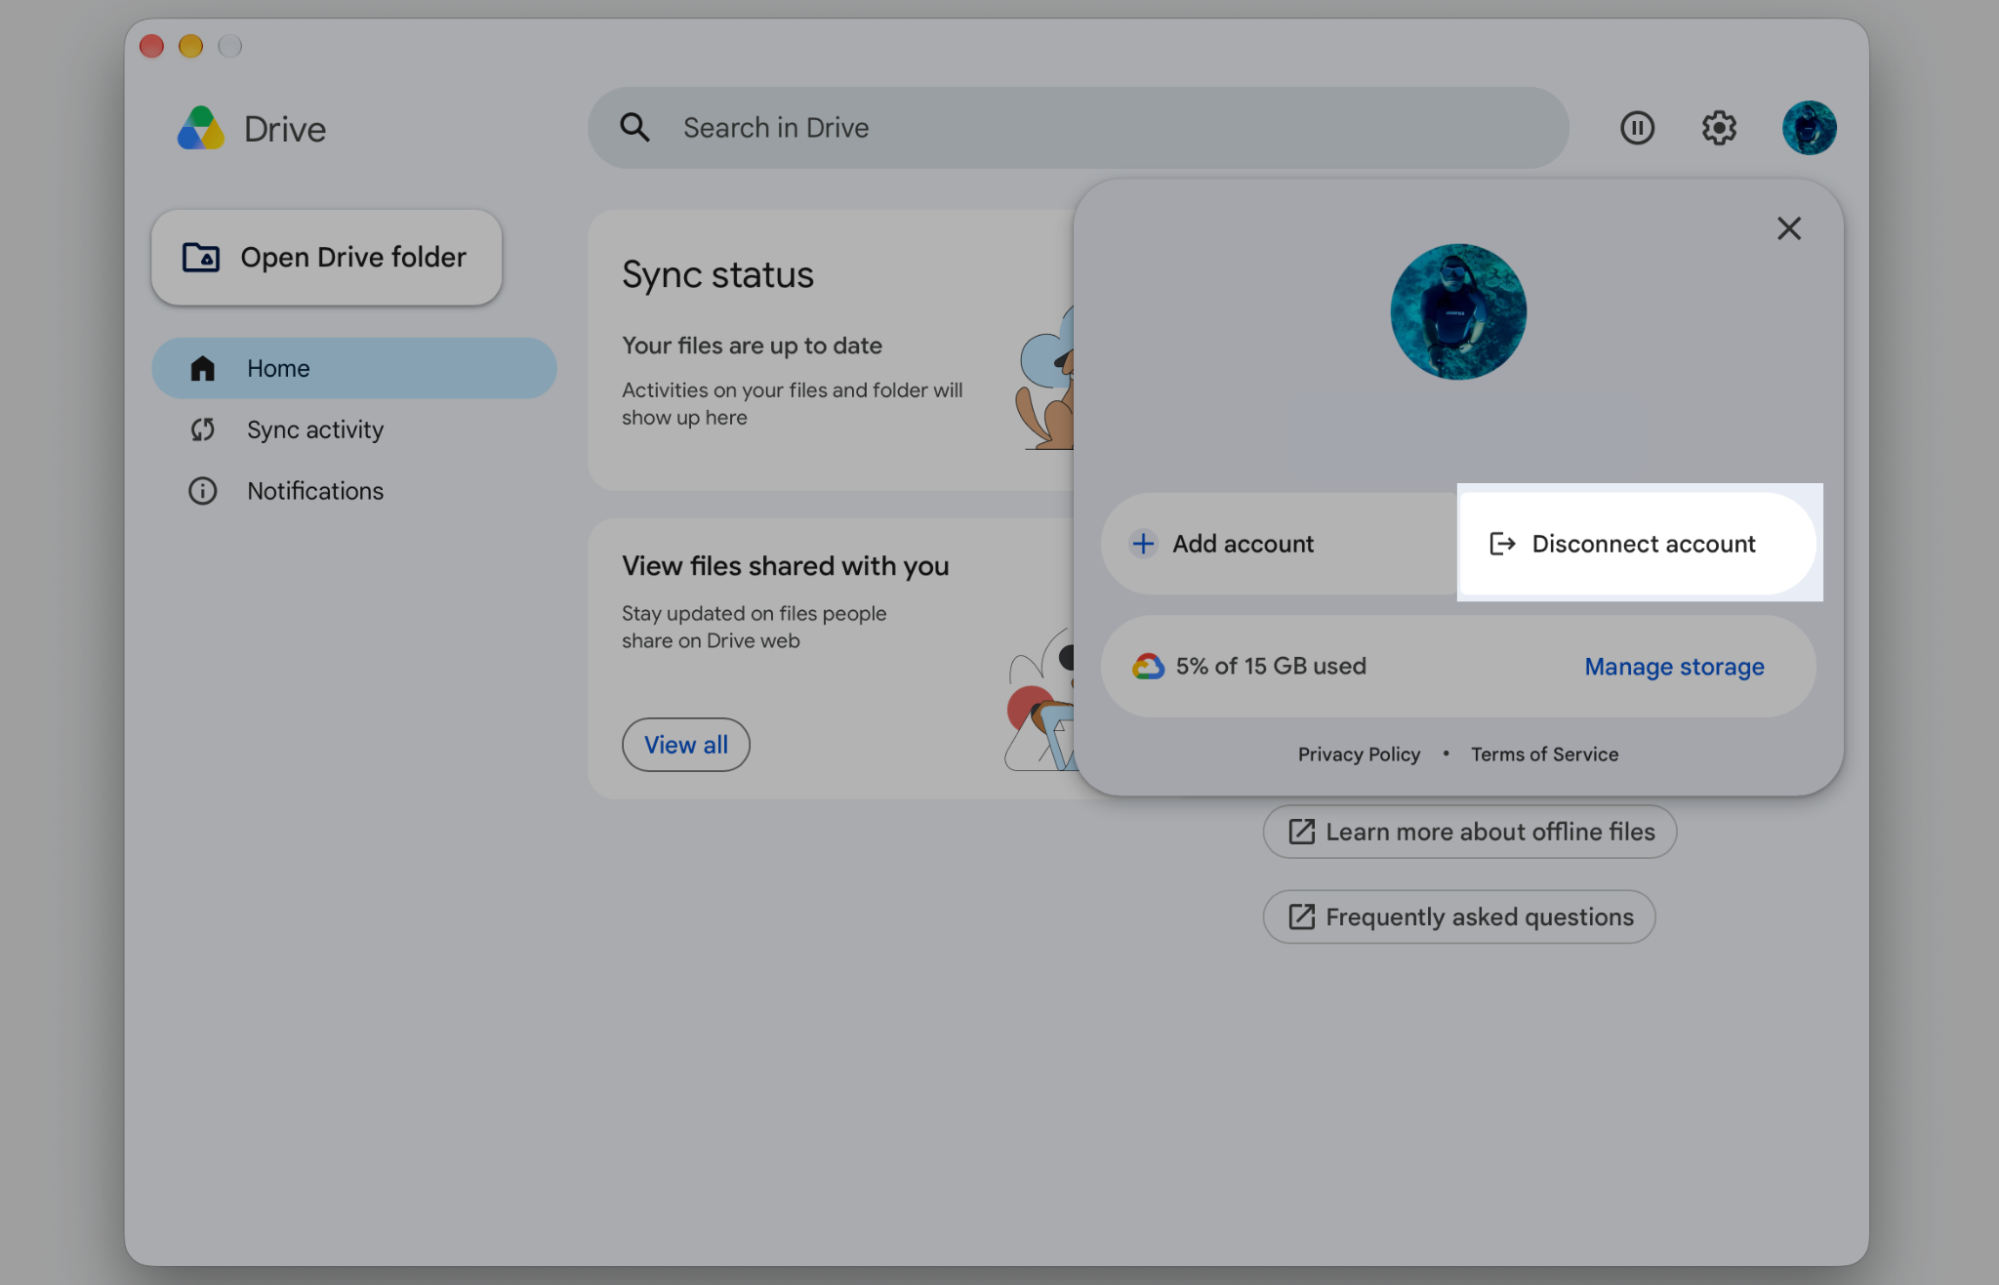
Select the Google Drive for Desktop icon in the menu bar, then open Settings.
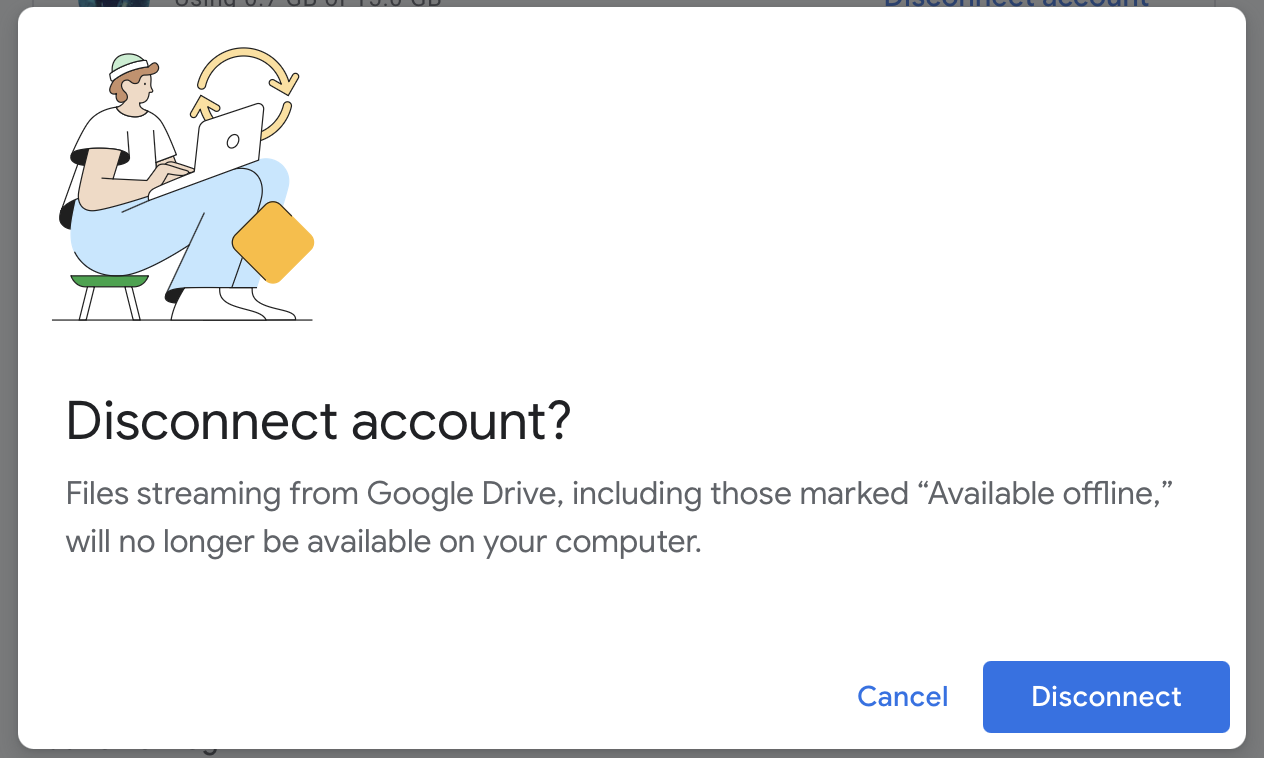
Choose Disconnect account.
Sign back in through your browser to reconnect and refresh your authentication.
Wait for Google Drive to reload your files.
Step 1. Go to Google Drive for Desktop > Settings > Disconnect accountStep 2. Continue with DisconnectStep 3. Once the process is complete, sign back in to your account
8. Update Google Drive to the latest version
Running an outdated version can quietly break syncing after a macOS update, so we recommend updating the app to put things right.
Bring the app up to date to smooth out compatibility:
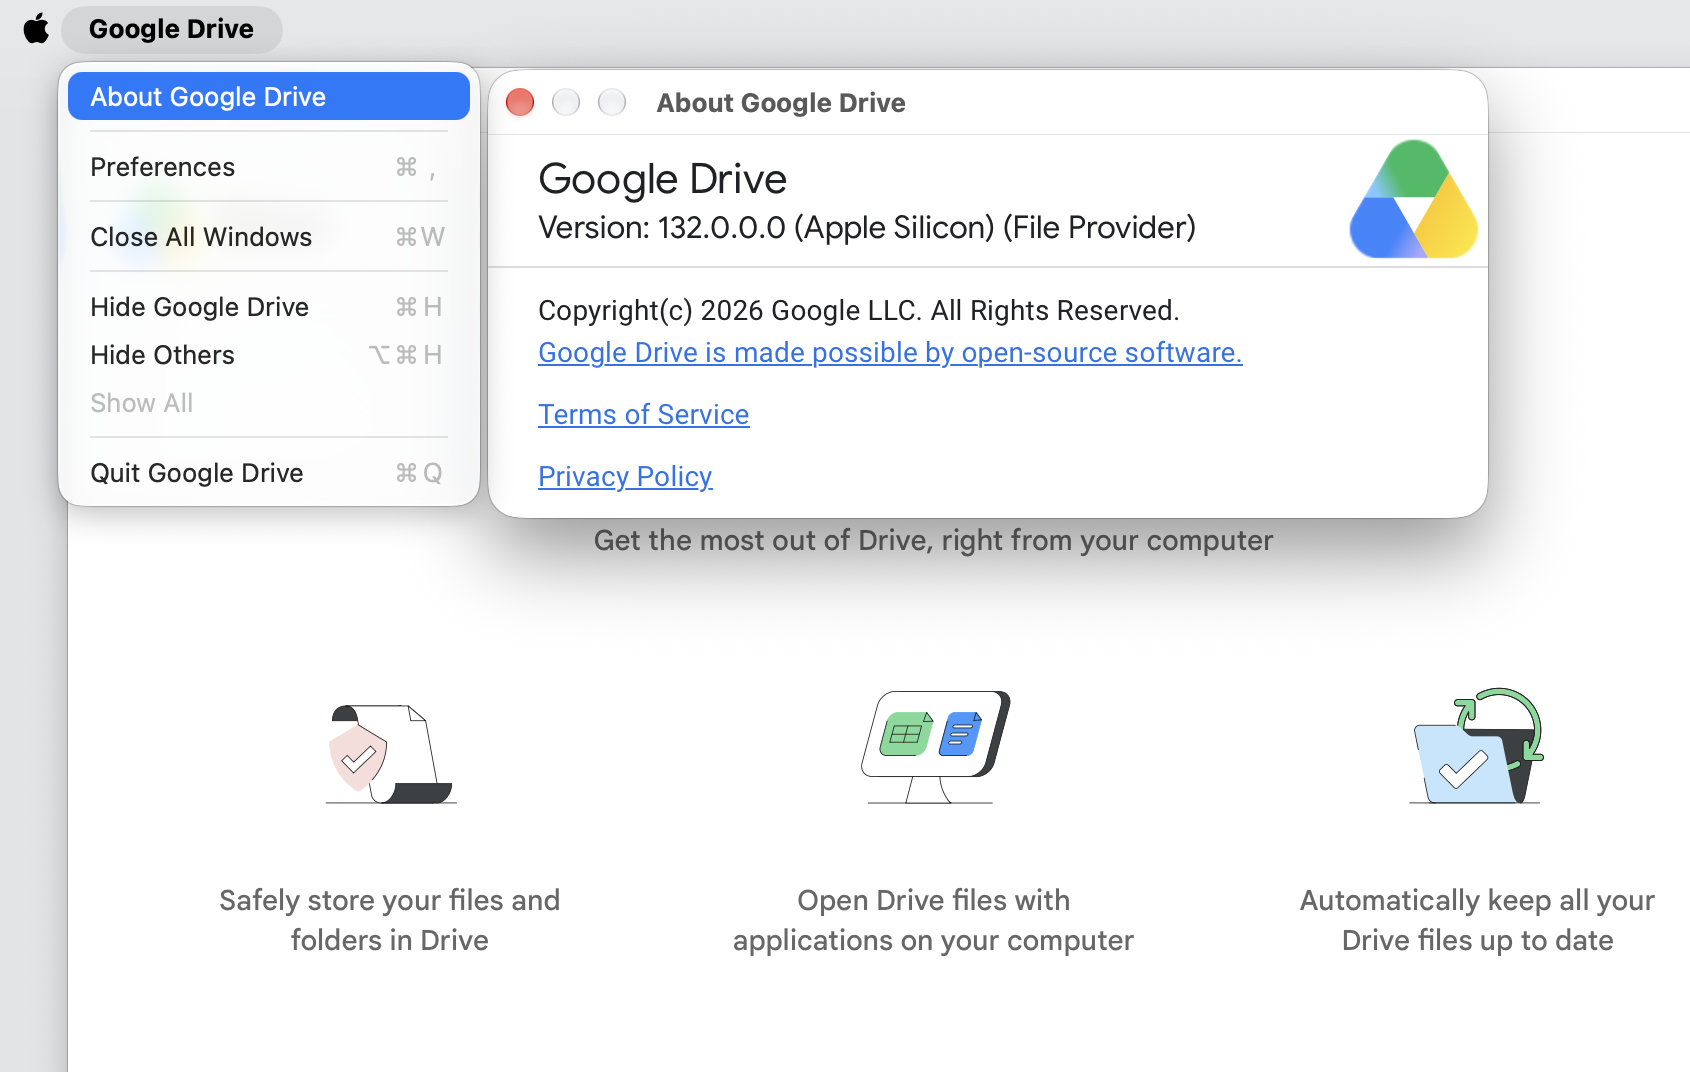
Select the Google Drive icon and open Settings to check your current version.
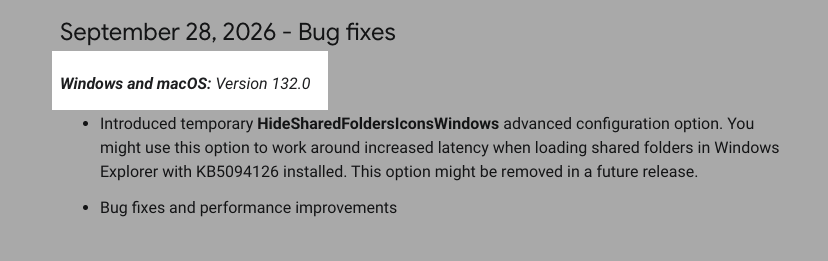
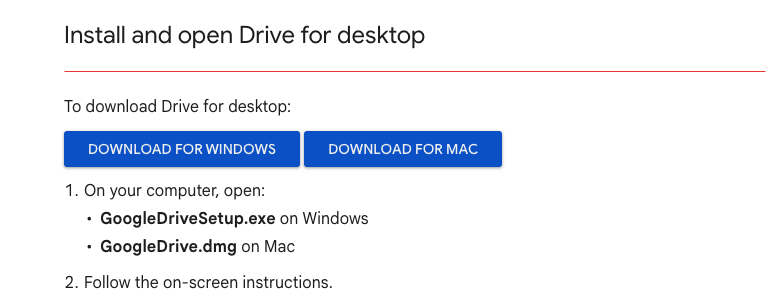
Visit the official Google Drive website to see the latest release.
Download the newest version if yours is behind.
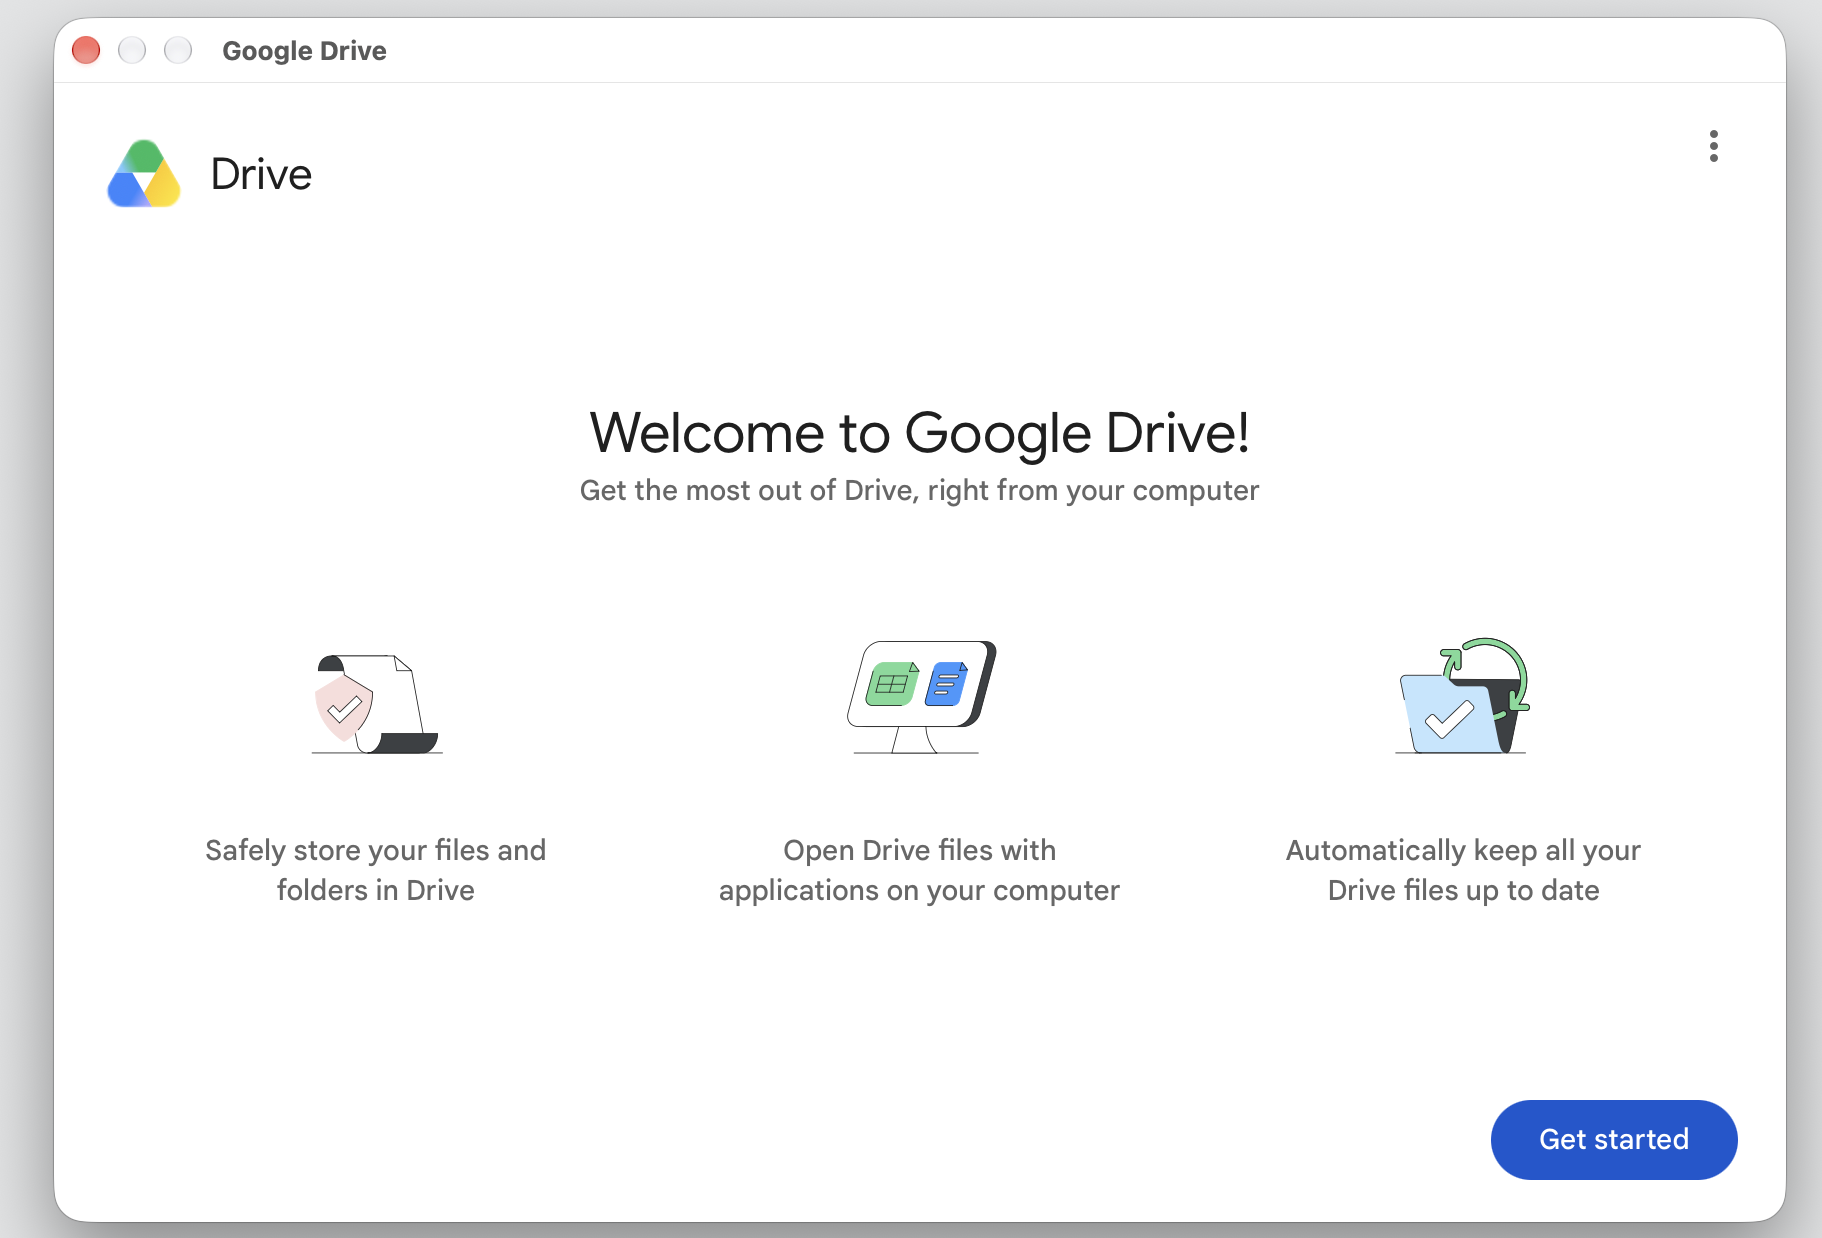
Install it, then relaunch the app.
Step 1. Go to Google Drive Preferences > About > Check the VersionStep 2. Visit the official Google Drive website to see the latest releaseStep 3. Download the newest version of Google Drive if yours is behind
9. Clear Google Drive cache
When a damaged cache is behind the trouble, our fix is to clear Google Drive cache on Mac, which wipes the stored data and forces a fresh sync.
Wipe the cache to force a clean sync:
Quit Google Drive from the menu bar.
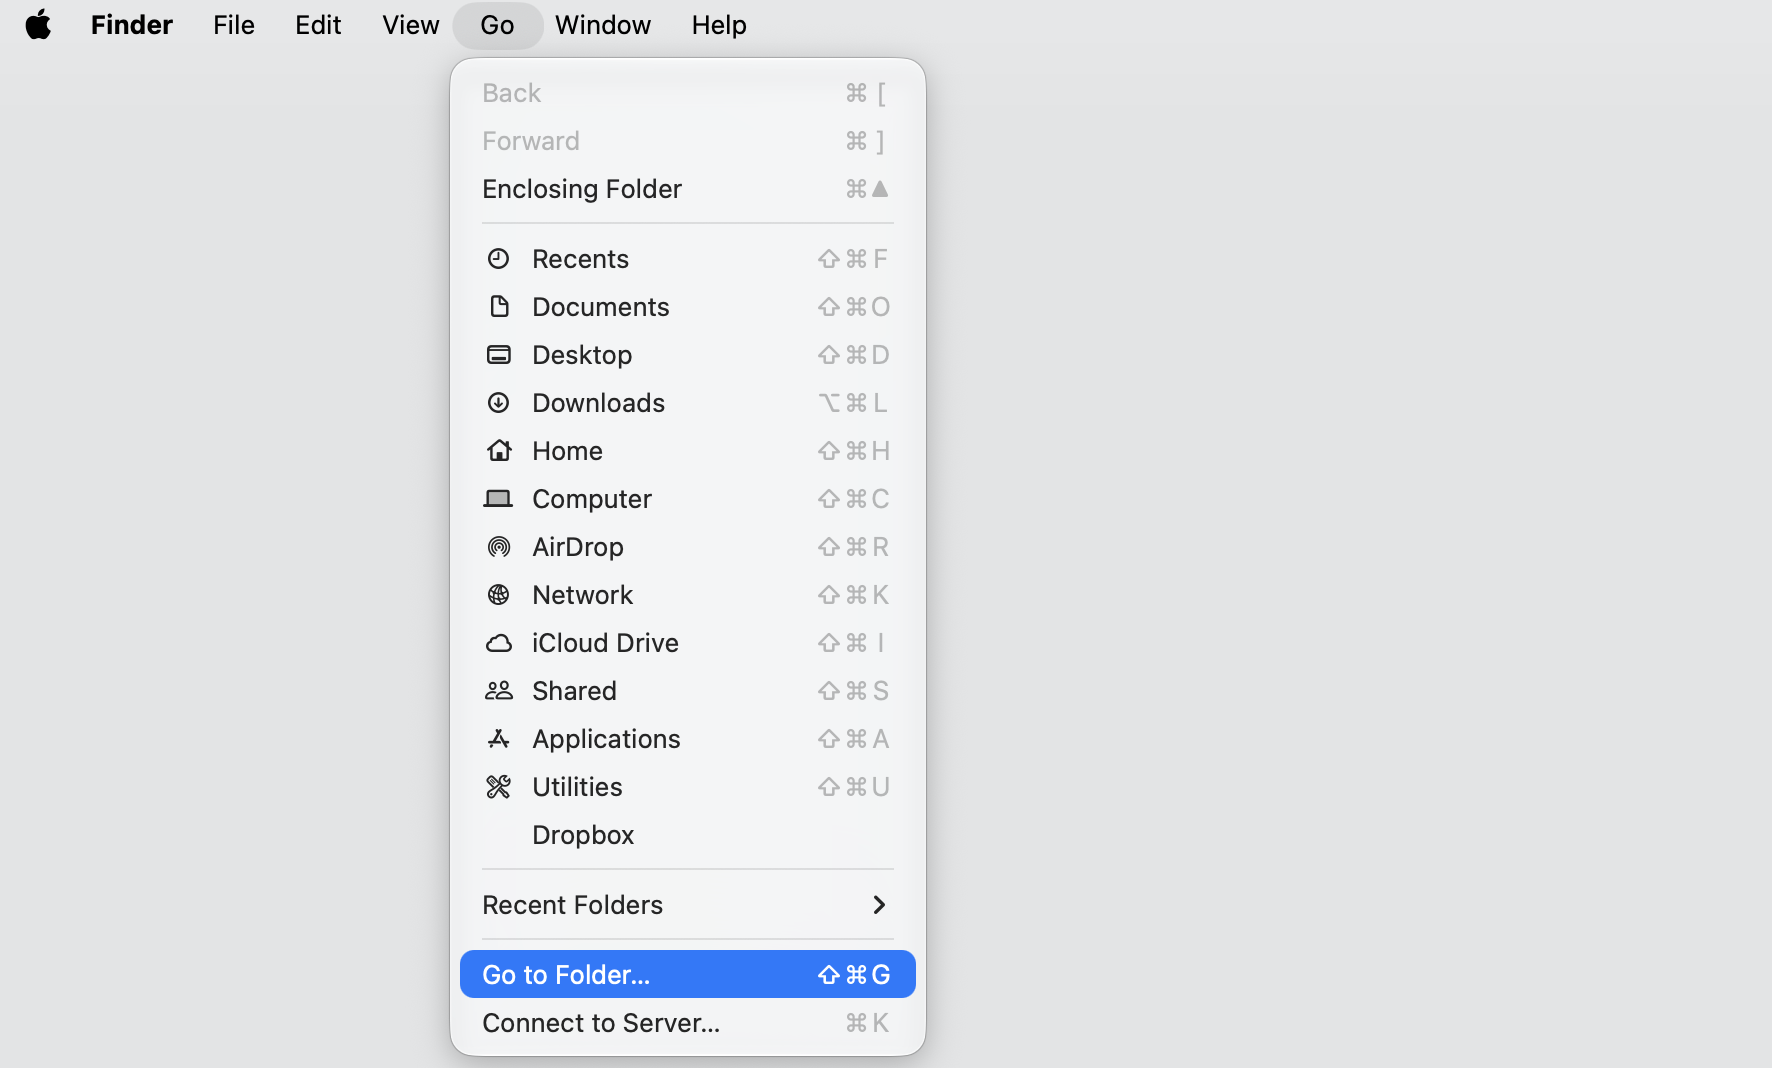
Open Finder, then choose Go > Go to Folder.
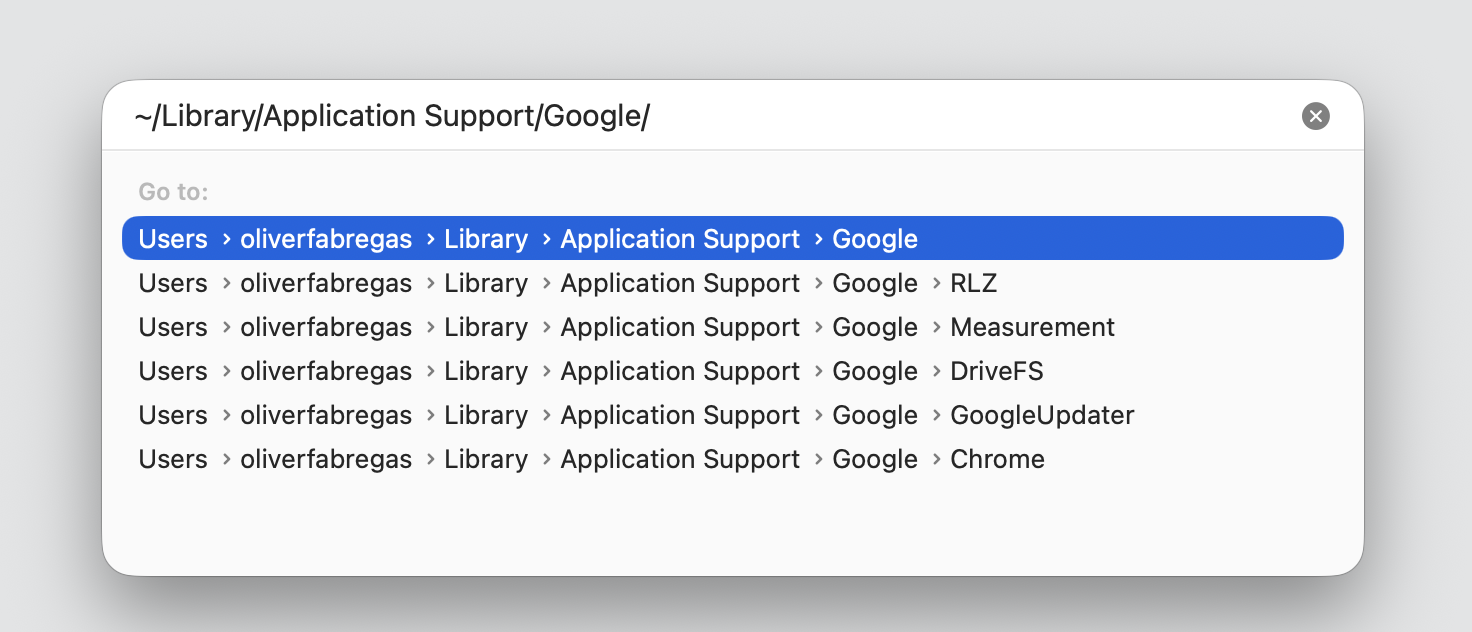
Enter ~/Library/Application Support/Google/ and open it.
Delete or rename the cached data folder, then restart your Mac to trigger a fresh sync.
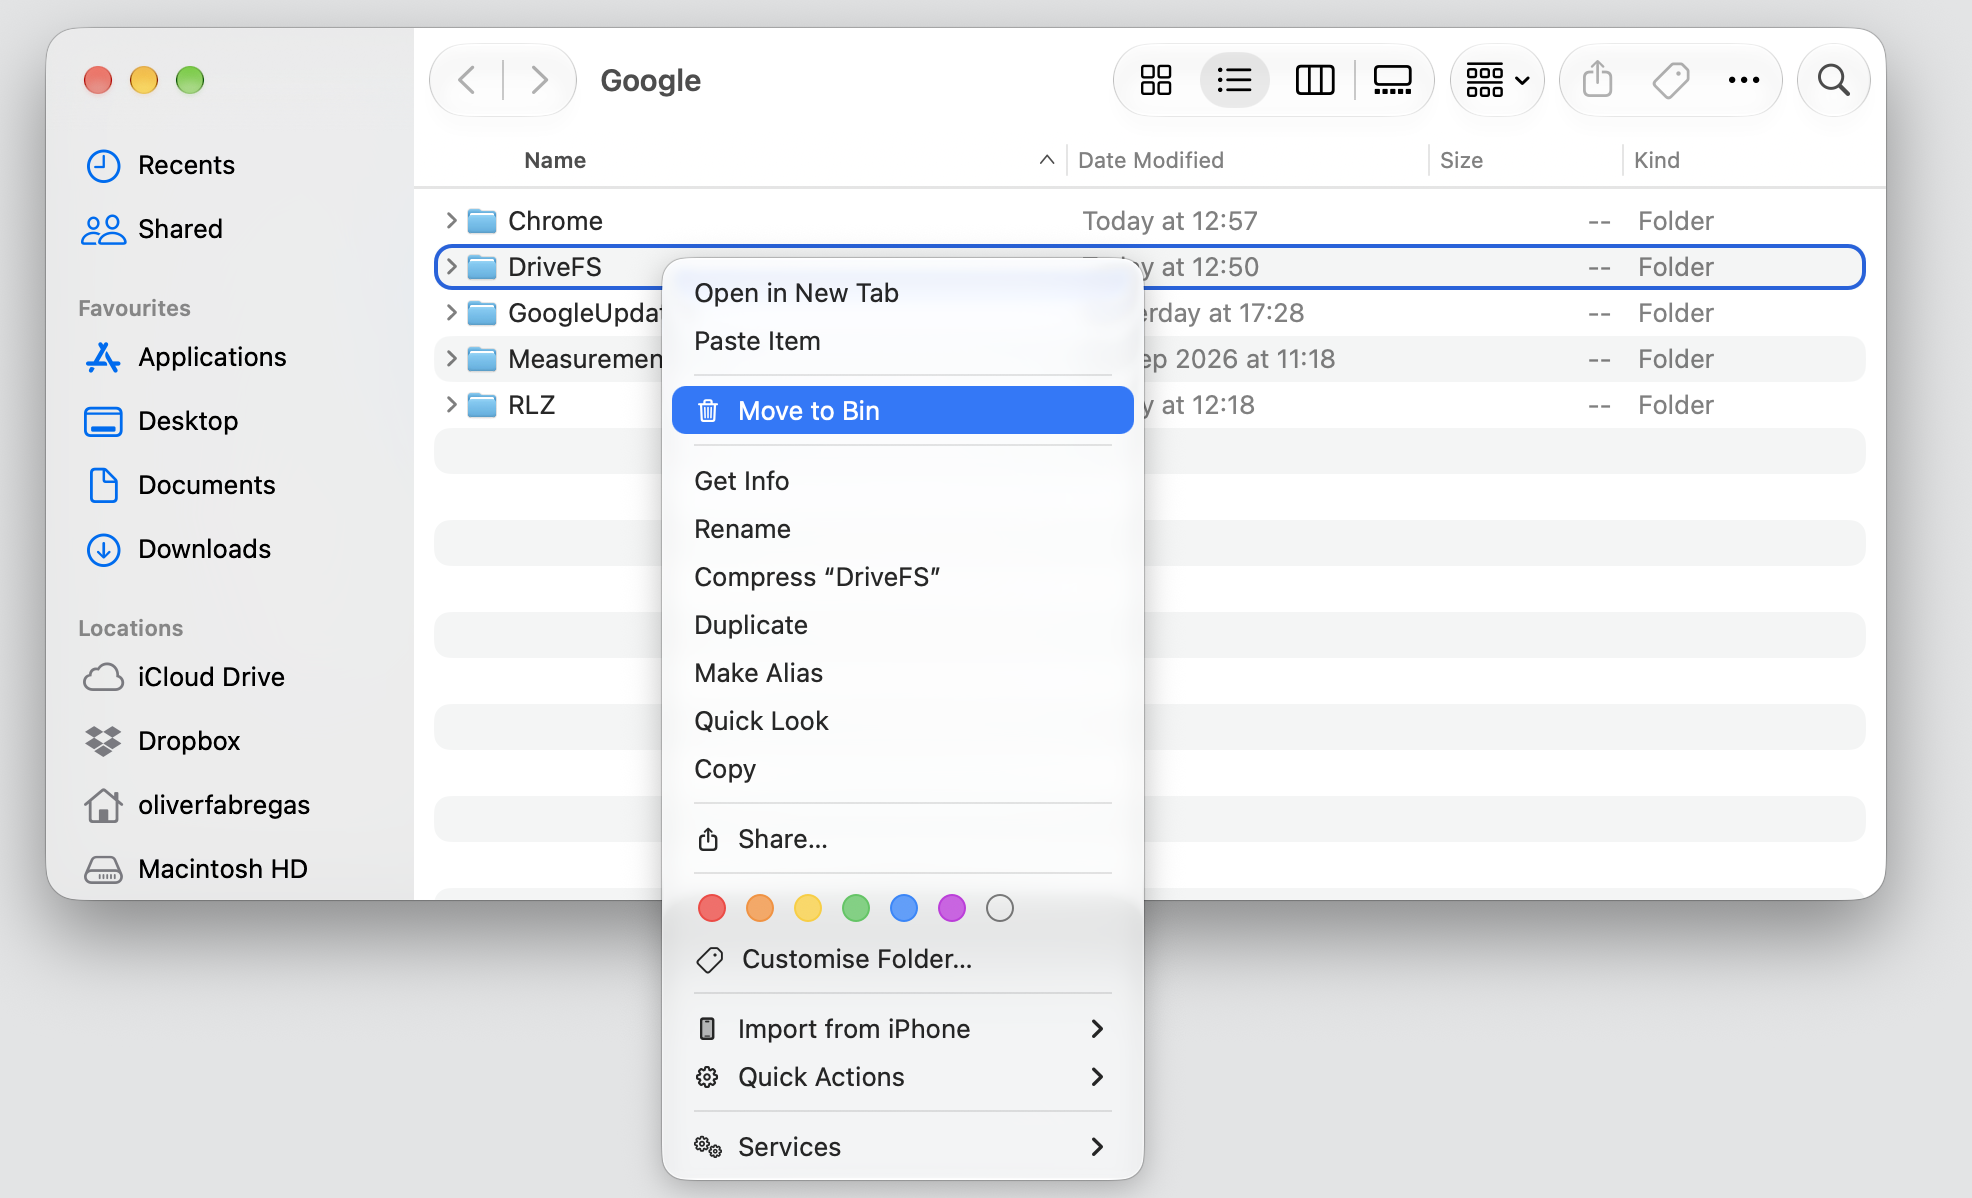
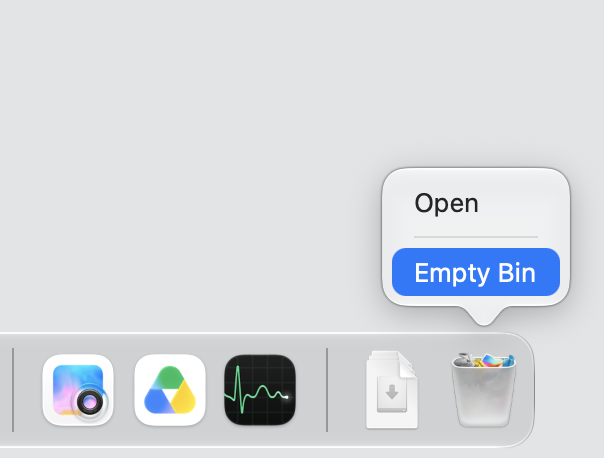
Step 1. Go to Google Drive preferences and select QuitStep 2. Open Finder, then choose Go > Go to FolderStep 3. Type ~/Library/Application Support/Google/ and press EnterStep 4. Control-click the folder associated with Google Drive and select Move to BinStep 5. Empty the Bin
10. Reinstall Google Drive for Desktop
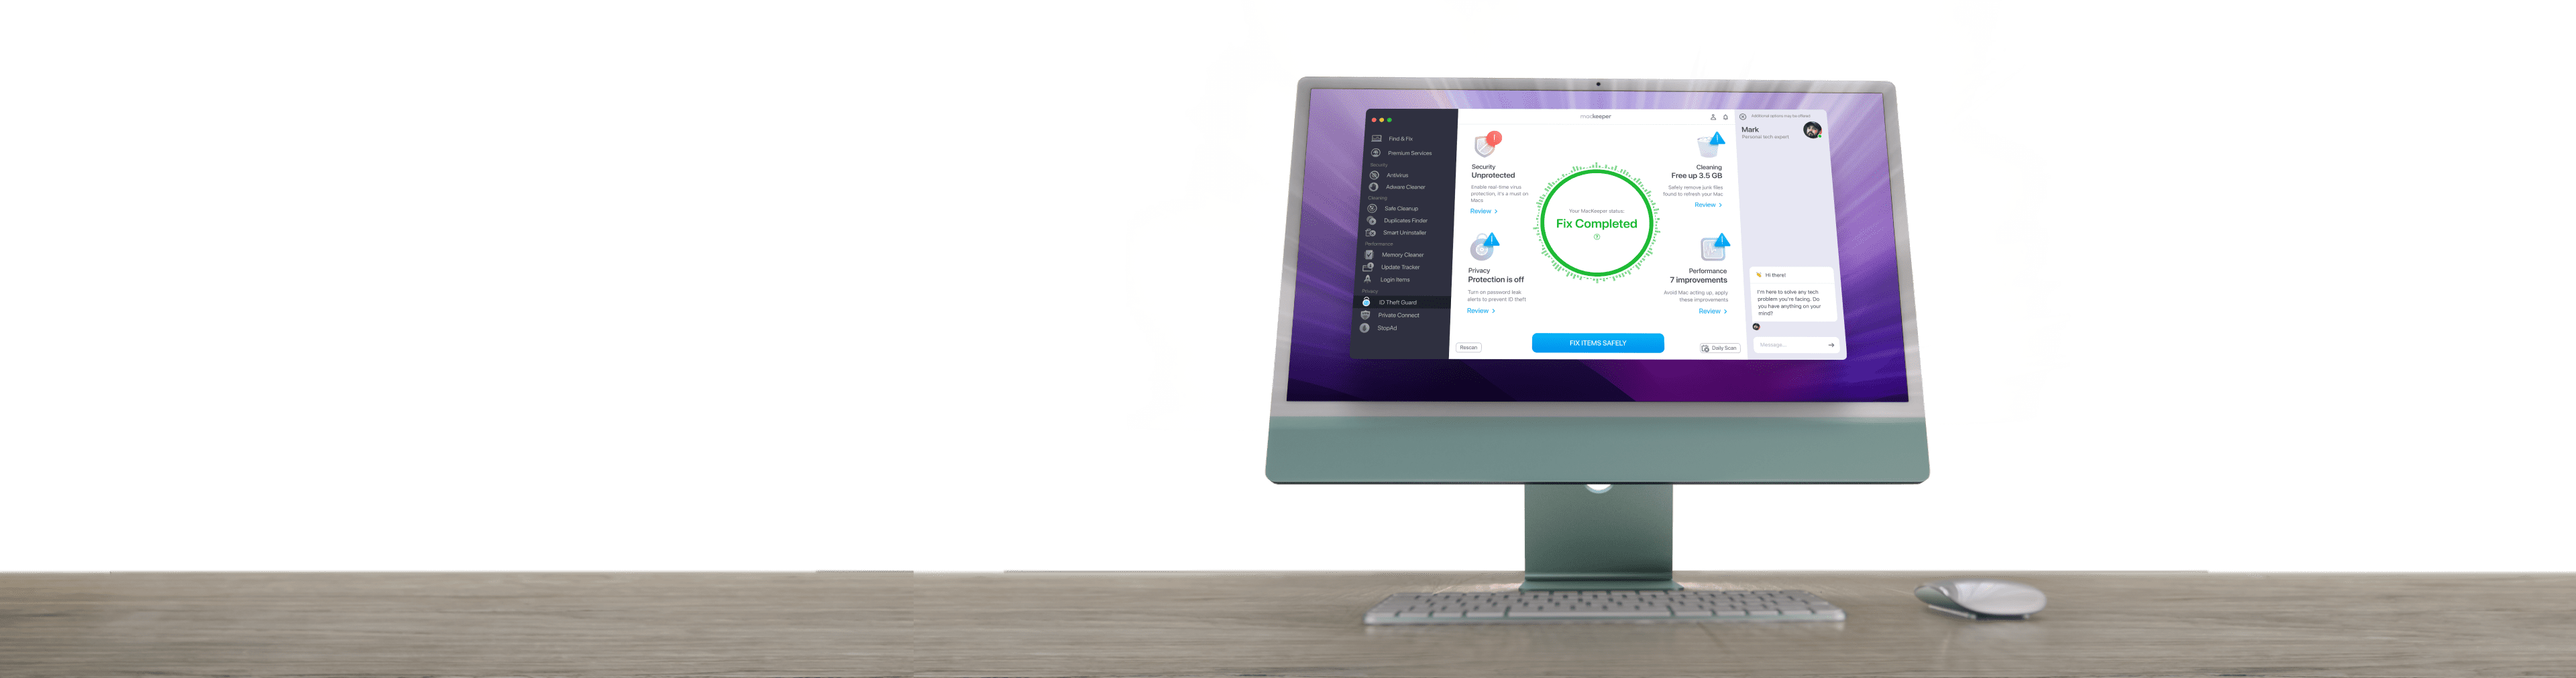
If the trouble sticks around, we suggest you remove Google Drive from Mac and set it up again from scratch. Dragging the app to Trash can leave behind plugins and stray files, so we lean on MacKeeper’s Smart Uninstaller to clear the leftovers for a clean removal.
Start fresh with a clean reinstall. Follow our instructions:
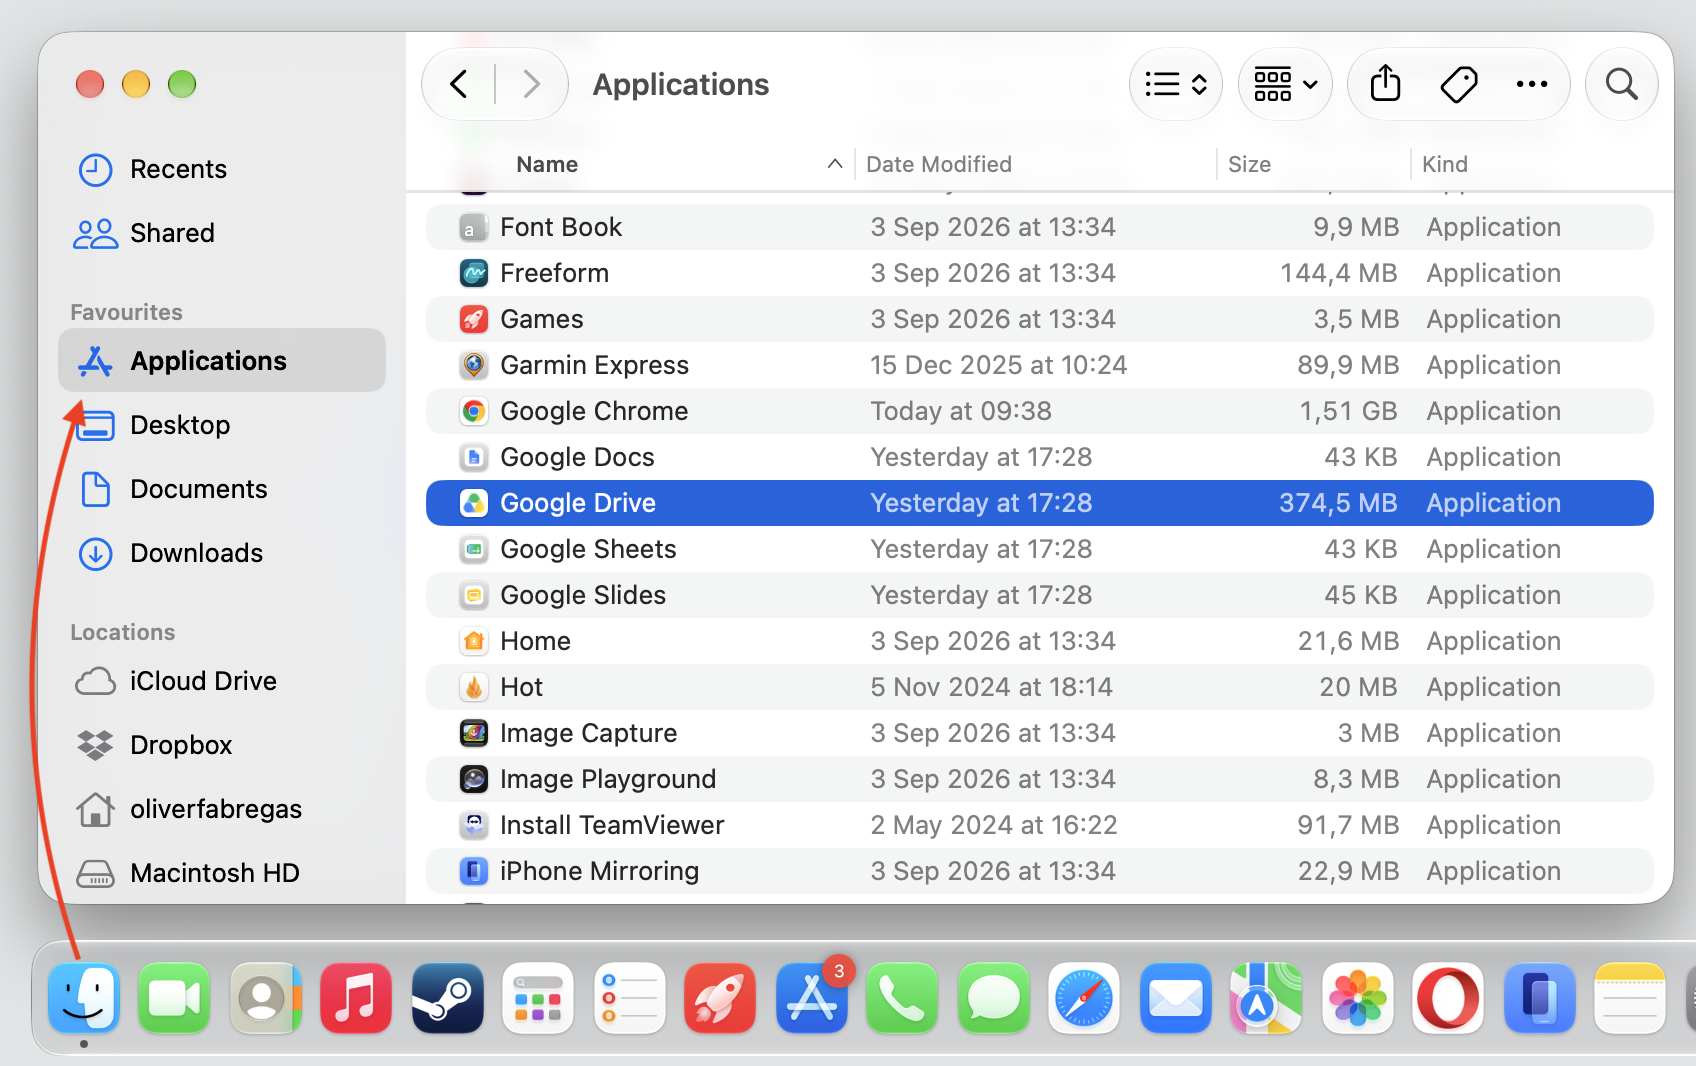
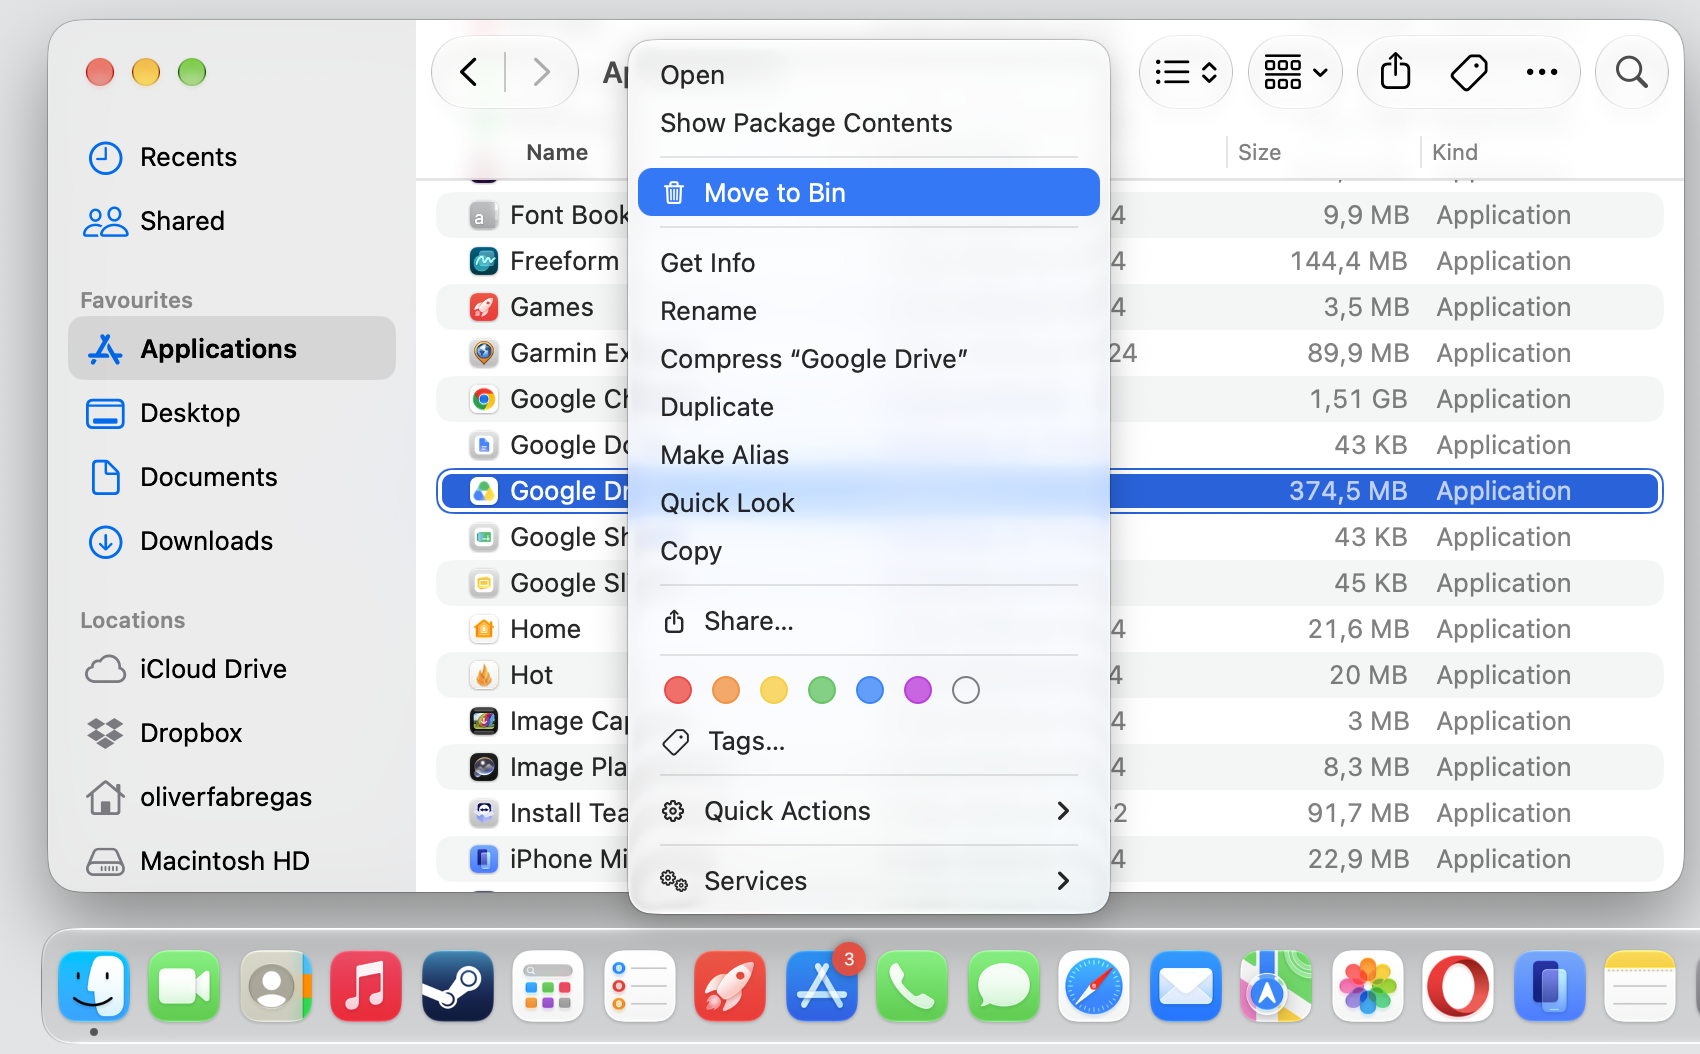
Open your Applications folder and drag Google Drive to the Trash.
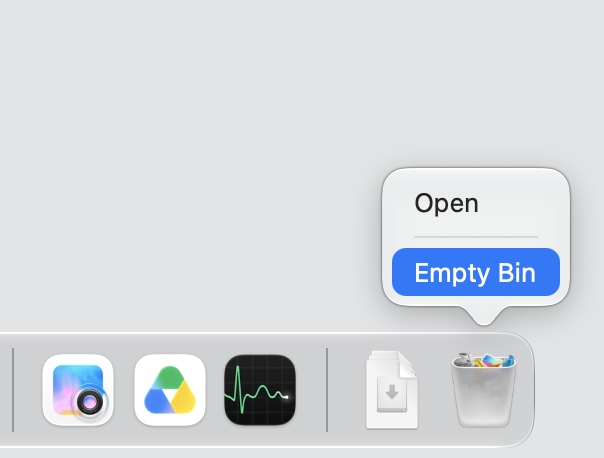
Empty the Trash to remove the app.
Restart your Mac to clear any lingering background files.
Download the latest version from the official Google Workspace website and reinstall it.
Step 1. Go to Finder > Applications > Google DriveStep 2. Click Move to BinStep 3. Empty the Bin
Conclusion
Google Drive not syncing on Mac is frustrating when you’re counting on your files to be there, but as you’ve seen, it’s usually a quick fix. Keeping enough free storage, granting the right macOS permissions, and updating the app regularly go a long way toward keeping everyday synchronization reliable.
And if the Google Drive app not syncing on Mac still has you stuck, you don’t have to figure it out solo. MacKeeper’s Premium Services pair you with a friendly expert who’ll get your sync working over a live session through the 24/7 Help Center, so you can get back to what matters. Tap the button to connect whenever you need a hand.
We respect your privacy and
use cookies
for the best site experience.
Privacy Preferences Center
We use cookies along with other tools to give you the best possible experience while using the
MacKeeper website. Cookies are small text files that help the website load faster. The cookies we
use don’t contain any type of personal data meaning they never store information such as your
location, email address, or IP address.
Help us improve how you interact with our website by accepting the use of cookies. You can change
your privacy settings whenever you like.
Manage consent
All cookies
These cookies are strictly necessary for enabling basic website functionality (including page
navigation, form submission, language detection, post commenting), downloading and purchasing
software. The website might malfunction without these cookies.