In this article you will find the following:
When you buy a new iPhone, the last thing you’d want to do is spend the day manually sending your files to an external drive because you don’t want to lose them. Or worse, you wouldn’t want to wish you had backed up your files after your iPhone gets lost or stolen.
Thankfully, you can avoid both of these scenarios. You can backup your iPhone to your MacBook Pro, MacBook Air, or iMac—which makes it easy to access your precious files on your Apple devices as needed. It’s advisable that you back up your iPhone to avoid losing your special photos and text messages and free up storage on your phone, too.
Before we begin
Backing up your files is one way to keep them safe. Another method is to use a VPN when using the internet. This allows you to browse the internet anonymously. Using a VPN protects more than your device’s contents; it protects your personal information as well. There’s no telling what hackers can do with your personal information—like stealing your identity and opening credit cards in your name. That's why you must be proactive in protecting your data.
MacKeeper’s VPN Private Connect is a safe and reliable VPN service. It hides your IP address, so you can browse the internet with peace of mind. It achieves this by hiding your real IP address from hackers to keep them off your trail. When using MacKeeper’s VPN Private Connect, you can rest assured that your personal information is protected from bad actors. Get started using it today.
- Download MacKeeper and select Private Connect in the left pane
- Click the Turn On button to connect
- Select Connect automatically when I start my Mac to ensure you’re always protected when your Mac is on.
Now that you’ve enabled browsing protection, let’s look at the three practical ways to take backup of iPhone to Mac. These include using Finder, iTunes (if your Mac supports it), and backing up without a USB cable. These methods are quick, easy, and effective. Let’s get started.
Backup iPhone to Mac with Finder
The first and simplest way to backup your iPhone to Mac is in Finder. Finder is where you manage all your files on Mac. That includes…
- Downloads
- Recent files
- Pictures
- Applications
- Documents
… and more.
It’s also where you manage your drives. Naturally, Finder is where you can backup your iPhone, too. Follow the steps below to learn how.
1. Connect your iPhone to your Mac using a USB cable
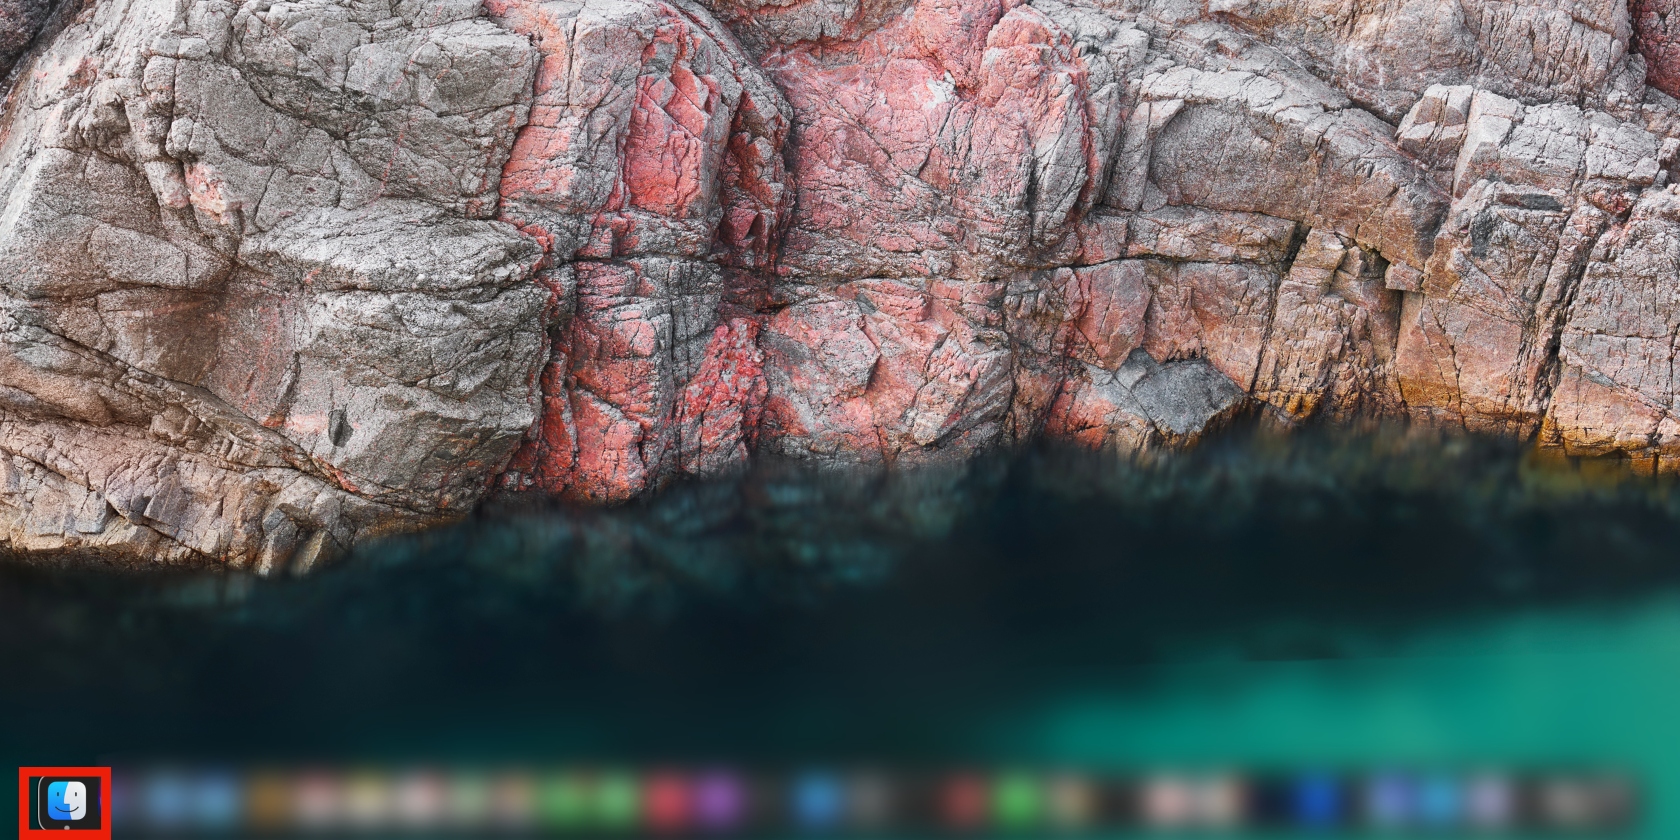
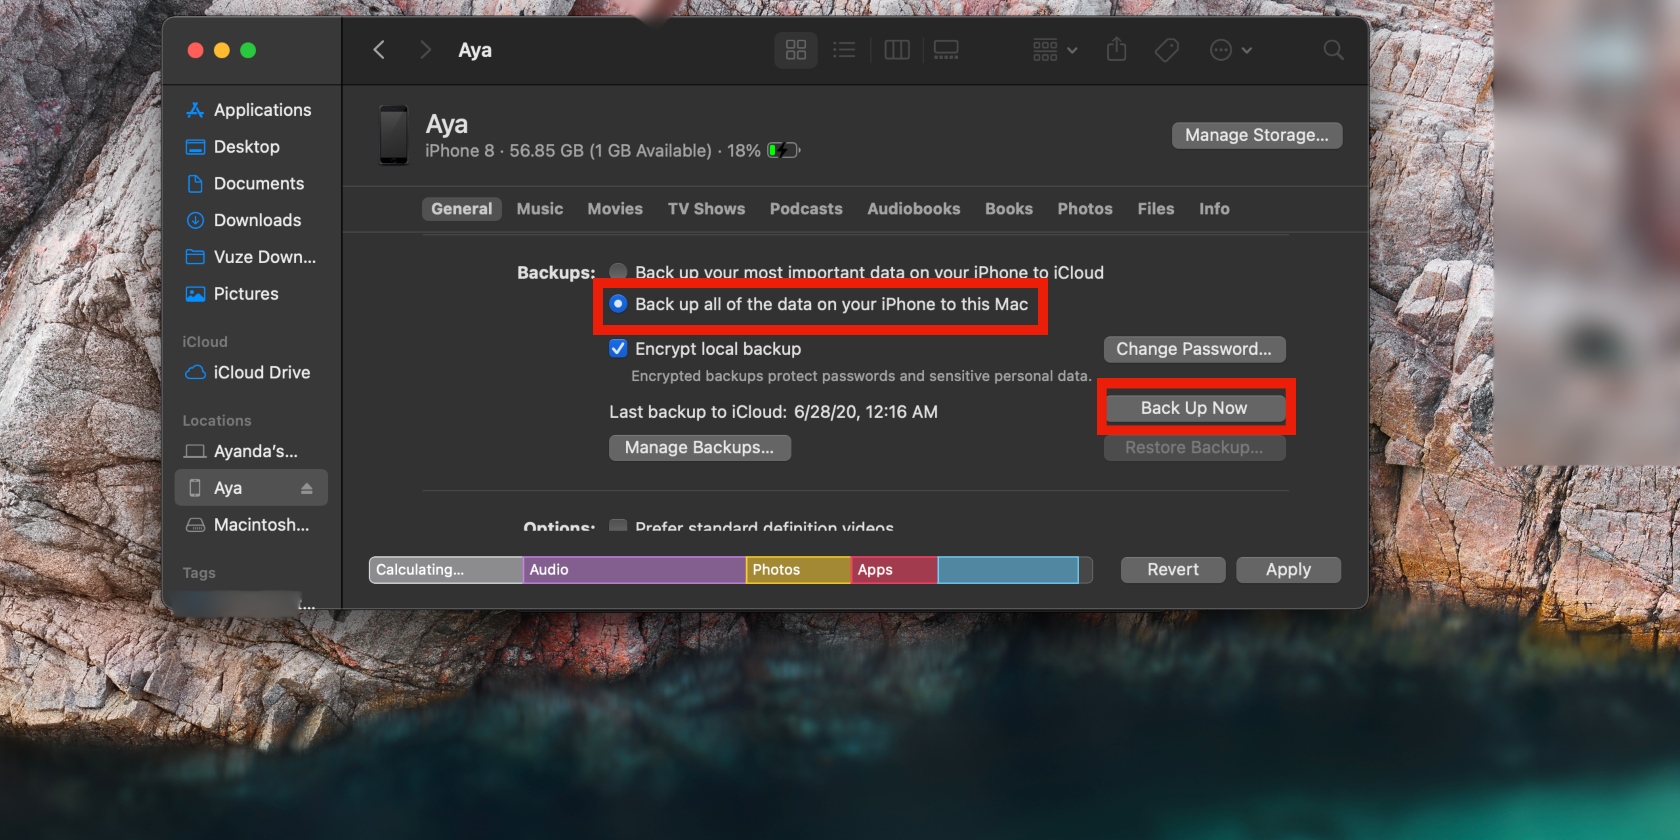
2. Click the Finder icon in the bottom-left corner of the screen and choose your iPhone under the Locations tab on the left. If you’ve never connected your iPhone before, select Trust when prompted after you connect

3. Now, select the General tab
4. Go to the Backups section and select Back up all of the data on your iPhone to this Mac. When you’re done, click the Back Up Now button.

If you encounter any issues with Finder, read through our guide on how to fix Finder not responding. You should be able to solve the problem within minutes.
Did you know your iPhone isn’t the only Apple product you can backup? Don’t leave anything to chance—learn how to backup Mac for the same reasons you’d back up your iPhone—in case of loss or theft.
Backup iPhone to iTunes on Mac
The next method is to backup your iPhone using iTunes on Mac. You may be familiar with iTunes—it was a popular app for backing up files back in the day. Although it isn’t as common as iCloud, it’s still a convenient way to backup your iPhone.
Many Apple users have been wondering how to backup their phones with iTunes on their laptops since Apple did away with it years ago. If you’re one of them, we’ve got you.
If your computer is running macOS Mojave or earlier, you can use iTunes for backups. However, this method isn’t available for macOS Catalina (2019) and newer macOS versions like OS X Big Sur, Monterey, and Ventura.
It’s probably been a while since you managed the backups you created many moons ago. We get it. Many people have forgotten that iTunes exists or where their backups are stored. Learn how to delete your iTunes backups to free up some much-needed space on your Mac before proceeding.
Once that’s done, follow the easy steps below to backup your iPhone to iTunes on Mac.
- Connect your iPhone to your Mac using a USB cable and open the iTunes app
- Follow the on-screen instructions. You may be asked to enter your Mac’s passcode or confirm you trust the Mac you’re using
- Now, select your device and click Back Up Now.
That’s it, your iPhone is now backed up successfully. If your Mac is running an older version of macOS, you might want to upgrade to a newer version to ensure your Mac continues to work optimally.
Backup iPhone to Mac without USB cable
Now that you’ve synced your mobile phone to your Mac, the final step is to backup your iPhone to Mac using Wi-Fi.
This method ensures that you don’t always have to enable syncing between the two devices each time you connect your iPhone. Of course, you must have a stable Wi-Fi connection to do this. Here’s how:
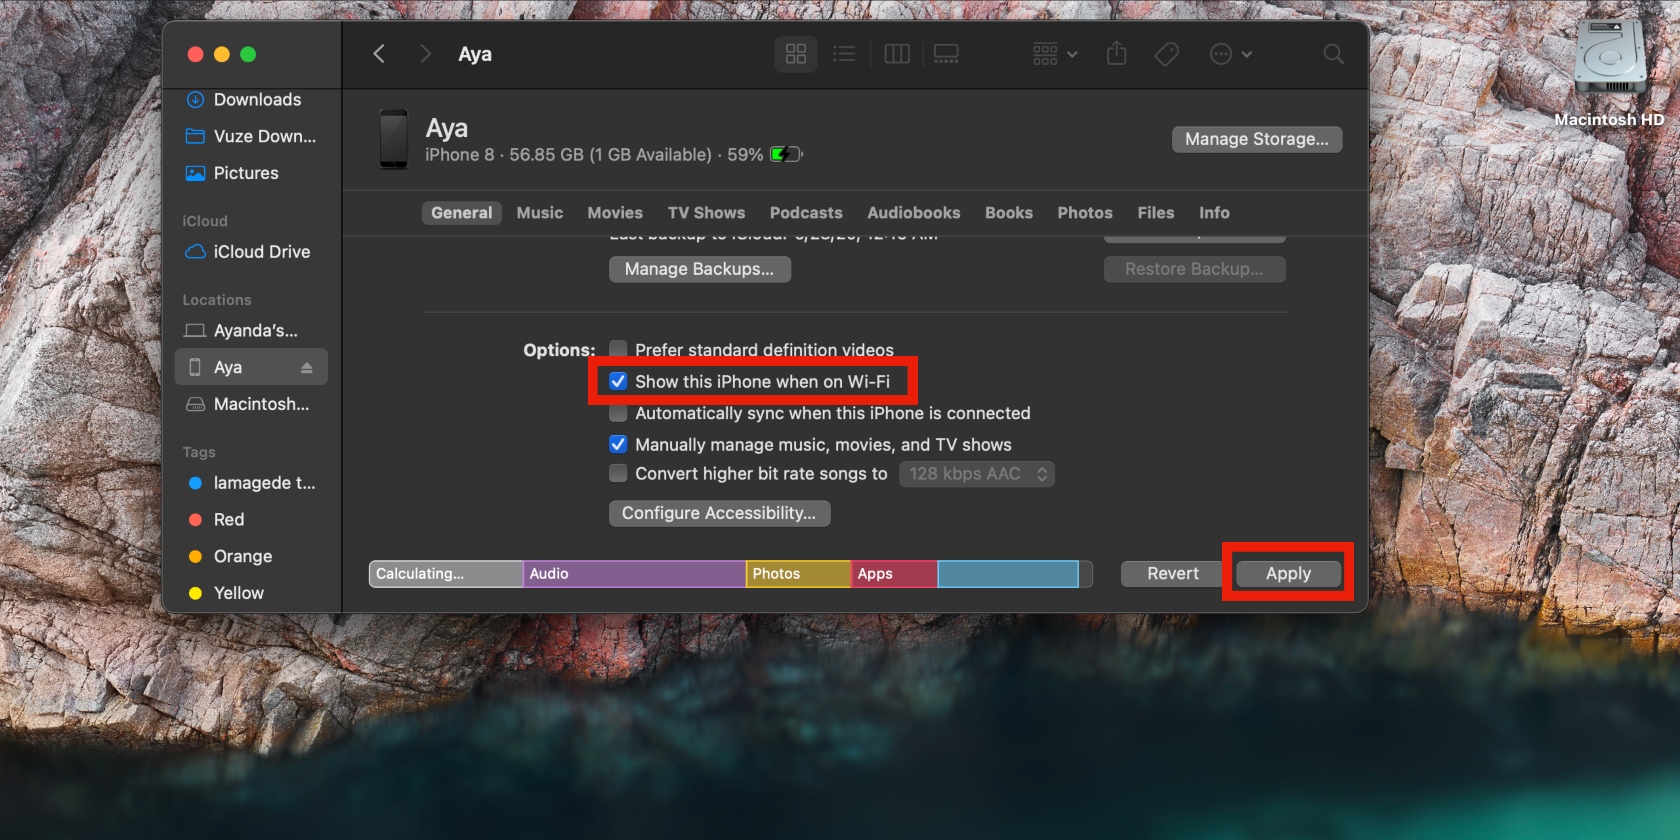
- Go to Finder, click on your iPhone, then click the General tab as you’ve done before
- Find the Options section and select Show this iPhone when on Wi-Fi, then click Apply.

If you’re still struggling to backup your iPhone, try the following fixes:
- Check that the USB cable is properly connected to your Mac
- If that doesn’t work, try connecting to a different USB port
- Ensure you select the “Trust” option when prompted to do so upon connecting your phone to your MacBook
- Restart your Mac and try again.
Keep your personal information safe at all times
The average person has lost a valuable item, like a phone, in their lifetime. Nowadays, that has more repercussions, given how much personal information our phones hold. That’s why it’s crucial to backup your iPhone to your Mac. This simple step ensures that you don’t lose anything important or of sentimental value on it.
More importantly, use MacKeeper’s VPN Private Connect to protect your device from hackers around the clock. If you do this, you’ll rest assured that your personal information is safe from prying eyes online.


