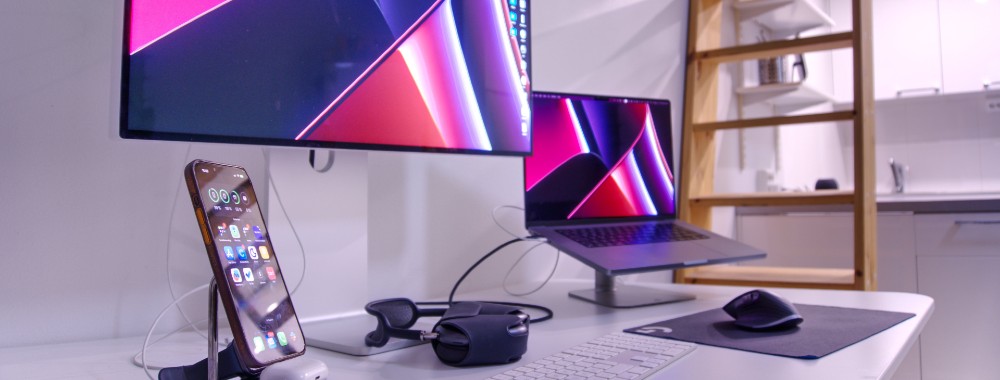
Running a two-monitor setup and stuck with the Dock on the wrong display is a small but constant drag on your focus. To move Dock to other screen Mac, hover your cursor at the bottom edge of the screen you want and hold it there for a couple of seconds. MacKeeper’s Login Items lets you control which programs launch.
Yes, you can. From our experience, macOS lets you shift the Dock to any connected display without changing your primary screen, as long as the Dock sits at the bottom rather than the side. The one catch is that macOS shows the Dock on a single screen at a time, so you’re moving it, not duplicating it.
This has worked the same way across recent macOS versions, so whether you’re on a MacBook plugged into an external monitor or a desktop Mac with two or more displays, the process stays consistent. The Dock simply waits in the background and appears on whichever screen you summon it to, which keeps your workspace flexible as you move between tasks.
If it ever vanishes entirely instead of moving, our guide on what to do when your MacBook Dock disappeared helps you bring it back fast.
A note from our experts:
While you’re fine-tuning your multi-monitor workspace, why not tidy up what launches in the first place? Removing unnecessary startup items helps your macOS load faster, since your Mac won’t waste resources loading programs you don’t need. MacKeeper offers adware and malware removal. Moreover, our Login Items functionality gives you optimized app management by letting you filter exactly which programs run at every startup, so your Mac boots faster and stays responsive.
Here’s how to do it:
Launch MacKeeper, select Login Items from the left sidebar, and click Start Scan.
Review the scan results, selecting the checkbox next to any app you don’t recognize or don’t want launching at startup.
Click Remove Selected Items, then confirm the action by clicking Remove in the warning dialog.
Step 1. Open MacKeeper, select Login Items from the sidebar, and click Start Scan to list every app launching at startupStep 2. Select the checkboxes next to unneeded apps, then click Remove Selected Items and confirm to clean up your startup
How to switch Dock to another monitor Mac?
There’s more than one way to switch Dock to other monitor Mac, and the right method depends on how your displays are arranged. Before you start, make sure the Dock is set to the bottom of the screen, because none of these tricks work when it’s pinned to the side.
If you haven’t set up your second display yet, our guide on how to extend display on Mac walks you through arranging both screens first.
1. Moving cursor to bottom
From our experience, this is the quickest way to drag Mac Dock to other screen, and in our experience it’s the one we reach for most. You simply push the cursor past the bottom edge of the screen you want, and the Dock follows.
Follow these steps:
Move your cursor onto the secondary screen where you want the Dock.
Slide it down to the very bottom edge and keep pushing, as if moving off-screen.
Hold it there for two or three seconds until the Dock appears on that display.
Move your cursor to the bottom edge of the second screen and hold it there until the Dock jumps across
2. Switch Dock to other monitor with System Settings
When the cursor trick feels fiddly, we prefer setting the target display as your main monitor in System Settings. This moves the menu bar and Dock together, giving you a more permanent result that won’t drift back the moment your cursor strays.
Do the following:
Open the Apple menu and choose System Settings.
Click Displays and select the screen you want as primary.
Сhoose Main Display.
Confirm the Dock and menu bar have moved to that screen.
Open System Settings, click Displays, and set your preferred screen as the Main Display
3. Vertical arrangement
If your screens are stacked one above the other rather than side by side, the cursor method still works—you just aim for a different spot. From what we can tell, the corner is the sweet spot for a vertical layout.
Try these steps:
Confirm your displays are stacked vertically in Displays settings.
Move the cursor to the bottom-right corner of the top screen.
Hold it there until the Dock drops onto the bottom screen.
Move your cursor to the bottom-right corner of the top screen to send the Dock to the lower display
How to get Dock back on main screen Mac?
Got the Dock on the wrong display again? Getting it back is just the same gesture in reverse: move your cursor to the bottom edge of your main screen and hold until the Dock returns. In our experience, a stray cursor lingering at the bottom of the other screen is usually why it wandered off in the first place.
Keep in mind that macOS won’t show Dock on all screens at once, so the goal is always to pull it back to the display you’re working on.
If the Dock keeps jumping back on its own, there are a couple of things we’d check. First, make sure your displays are properly aligned in the Displays settings, since a mismatched arrangement can prevent the Dock from moving cleanly between screens. Second, confirm your cable connections are secure, because if your Mac briefly loses the primary display, the Dock will relocate on its own. Turning the external monitor off and on again usually settles it.
Keep the Dock from jumping back
Once you've moved the Dock, it can be maddening when it drifts back to the other screen on its own. In our experience, this happens because your cursor lingers at the bottom edge of the screen that doesn't have the Dock, and macOS reads that as a request to move it. The good news is that a few small adjustments make your setup far more stable, so you can move Dock to another Mac and actually keep it there while you work.
Try these steps:
Open the Apple menu, choose System Settings, and select Desktop & Dock.
Turn on Automatically hide and show the Dock so a stray cursor is less likely to trigger a move.
Confirm your displays are aligned correctly in the Displays settings, since a mismatched arrangement makes the Dock slip between screens.
Check that your monitor cable is secure, because a brief disconnection can send the Dock back to your main display.
Open System Settings, select Desktop & Dock, and turn on Automatically hide and show the Dock
Conclusion
Learning how to add Dock to the second screen on Mac comes down to one reliable habit: keep the Dock at the bottom, then hover and hold at the edge of whichever display you want it on. Whether you use the cursor gesture, set a main display in System Settings, or aim for the corner on a vertical setup, you can move the Dock wherever your workflow needs it in seconds.
And while you’re optimizing your setup, MacKeeper’s Login Items is a practical companion. MacKeeper is a macOS utility software developed by Clario Tech that protects your Mac and is trusted by millions of users, so filtering startup apps to keep your Mac fast and clutter-free takes just a few clicks.
We respect your privacy and
use cookies
for the best site experience.
Privacy Preferences Center
We use cookies along with other tools to give you the best possible experience while using the
MacKeeper website. Cookies are small text files that help the website load faster. The cookies we
use don’t contain any type of personal data meaning they never store information such as your
location, email address, or IP address.
Help us improve how you interact with our website by accepting the use of cookies. You can change
your privacy settings whenever you like.
Manage consent
All cookies
These cookies are strictly necessary for enabling basic website functionality (including page
navigation, form submission, language detection, post commenting), downloading and purchasing
software. The website might malfunction without these cookies.