In this article you will find the following:
Have you downloaded Disk Drill on your computer but have now decided that you want to remove it? Maybe you want to declutter your Mac, but the app is taking up too much space. Or perhaps you’re experiencing performance-related problems and would like to delete the app (even if only temporarily) to fix that issue.
Regardless of why you want to uninstall Disk Drill, the process is relatively straightforward. Keep reading, and I’ll reveal all the best ways to remove Disk Drill from Mac.
Before we begin
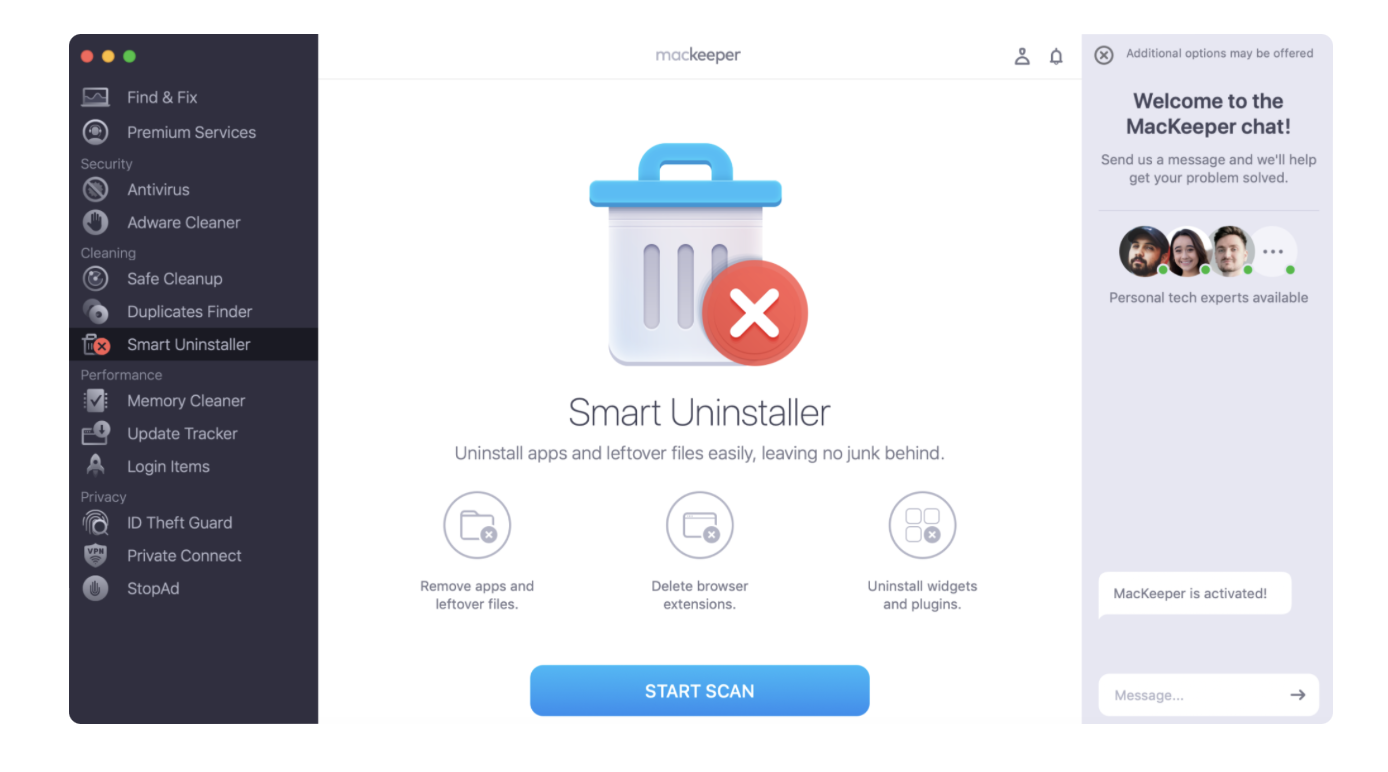
Manually uninstalling Disk Drill can consume a lot of your time. Therefore, it’s often better to use a third-party solution. MacKeeper’s Smart Uninstaller is an efficient and safe way to delete programs like Disk Drill, and you’ll have a better-performing computer after using this method.
To remove unnecessary apps with MacKeeper’s Smart Uninstaller:
- Download MacKeeper.
- Go to Cleaning > Smart Uninstaller.
- Tap Start Scan.
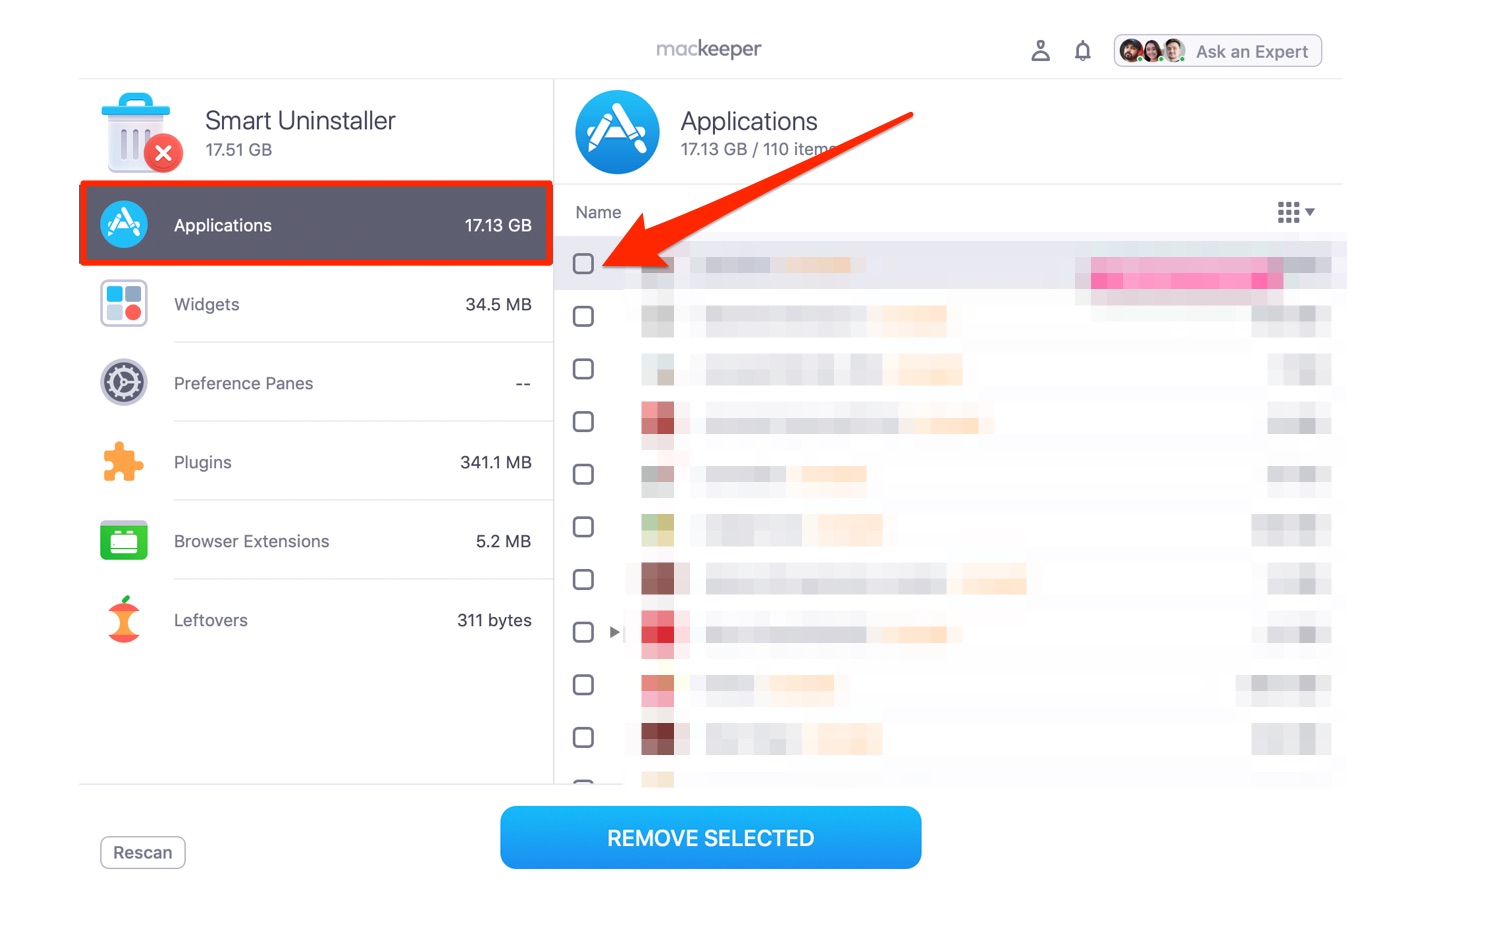
- Go to Applications and choose the app(s) you want to remove.
- Tap Remove Selected and confirm your decision if asked to.
What is Disk Drill
Disk Drill is a program that allows you to recover lost data on your Mac. You can use the app to retrieve unreadable files, and it’s useful for finding information you’ve lost on your external hard drives. You can use Disk Drill even if you’ve permanently deleted macOS files.
Downloading Disk Drill gives you access to numerous features. For example, you can find backups for both iOS and Android devices. Moreover, you can install an emergency version of macOS in case something goes wrong with your computer. Below, I’ll outline each of Disk Drill’s main key features.
- Byte-to-byte backup: Back up a complete version of your hard drive to prevent potentially losing your files.
- Recovery vault: Safely store all the metadata for your files.
- Disk health monitoring: Use a feature called S.M.A.R.T monitoring (self-monitoring, analysis, reporting, and technology) to track possible problems with your hard drive and take action before it’s too late.
- Data shredding: Permanently remove content on your computer and ensure that your information doesn’t fall into the wrong hands.
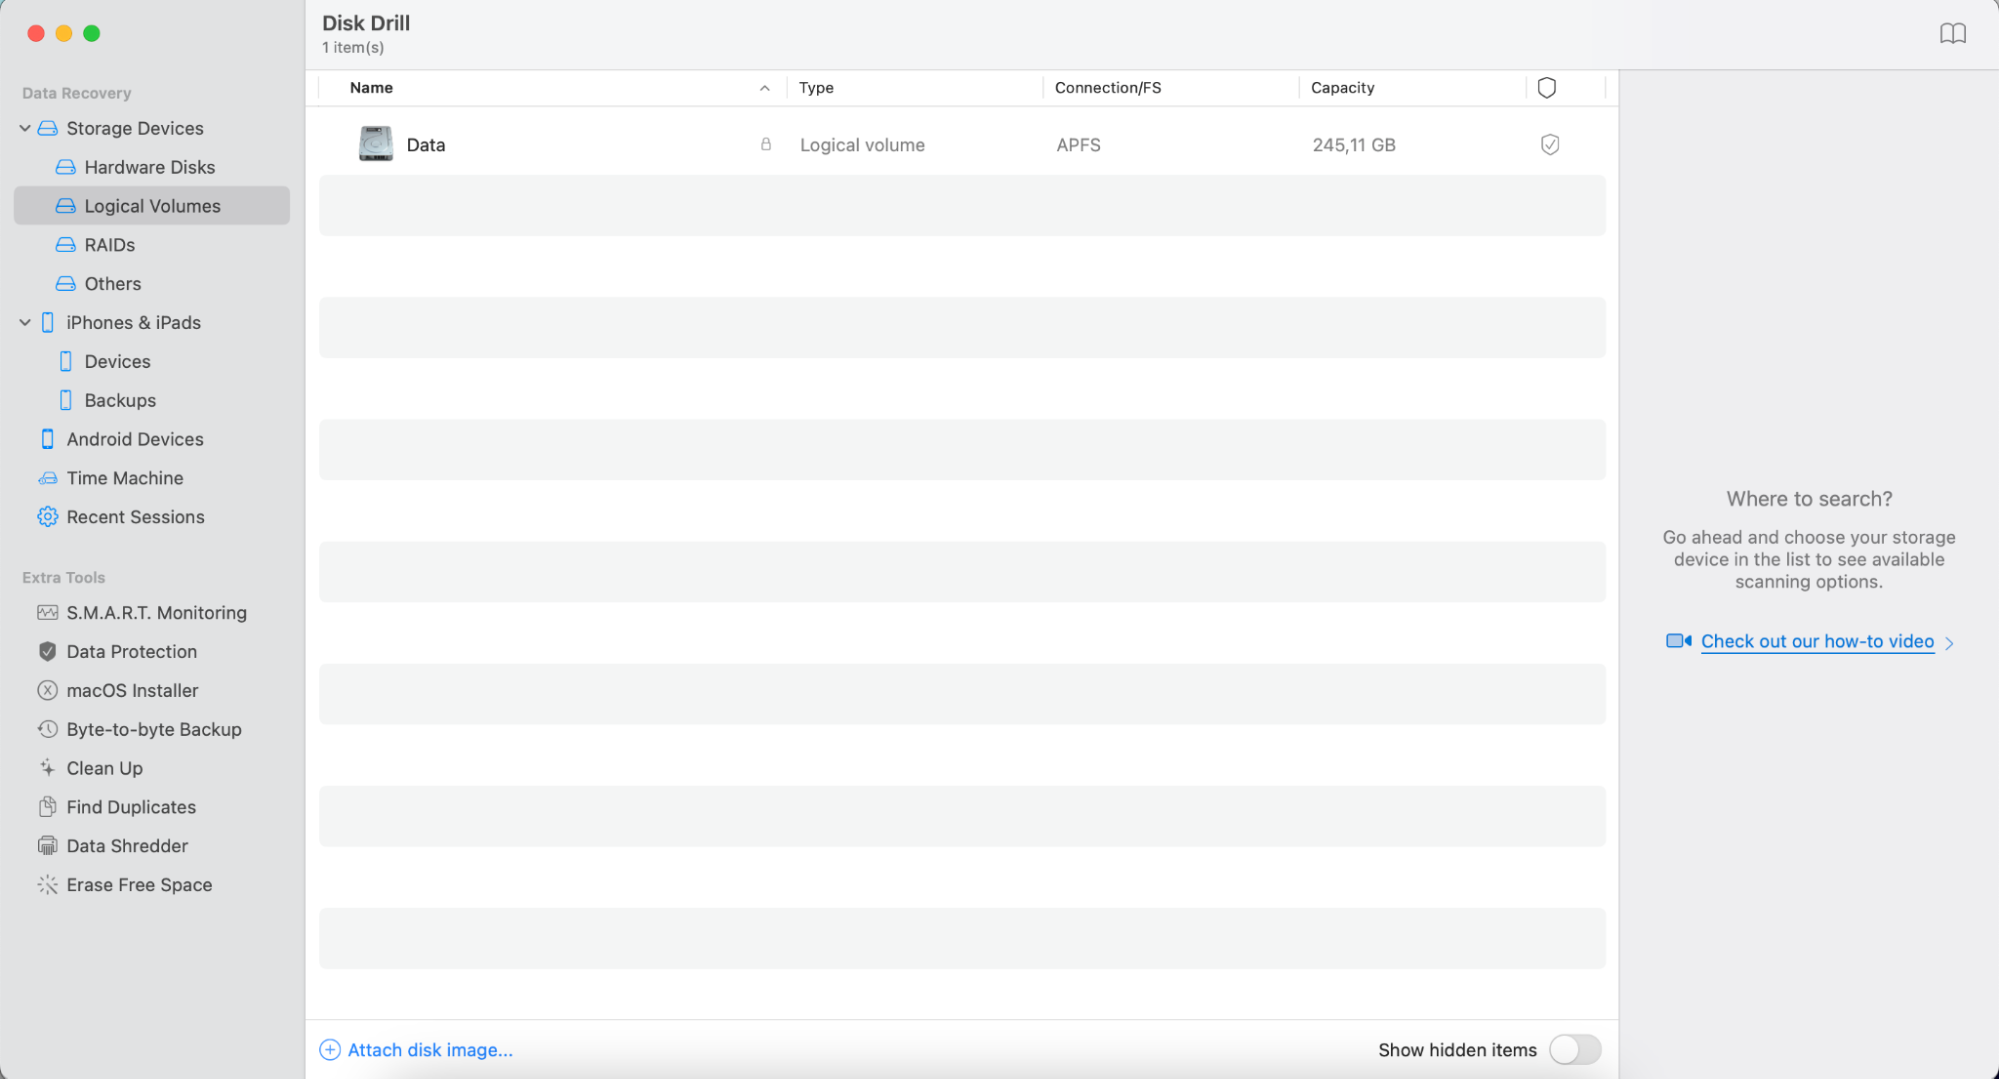
Still, despite its overall utility, there are cases when you might want to delete Disk Drill. Follow our guide to effectively deal with it.
How to remove Disk Drill from Mac
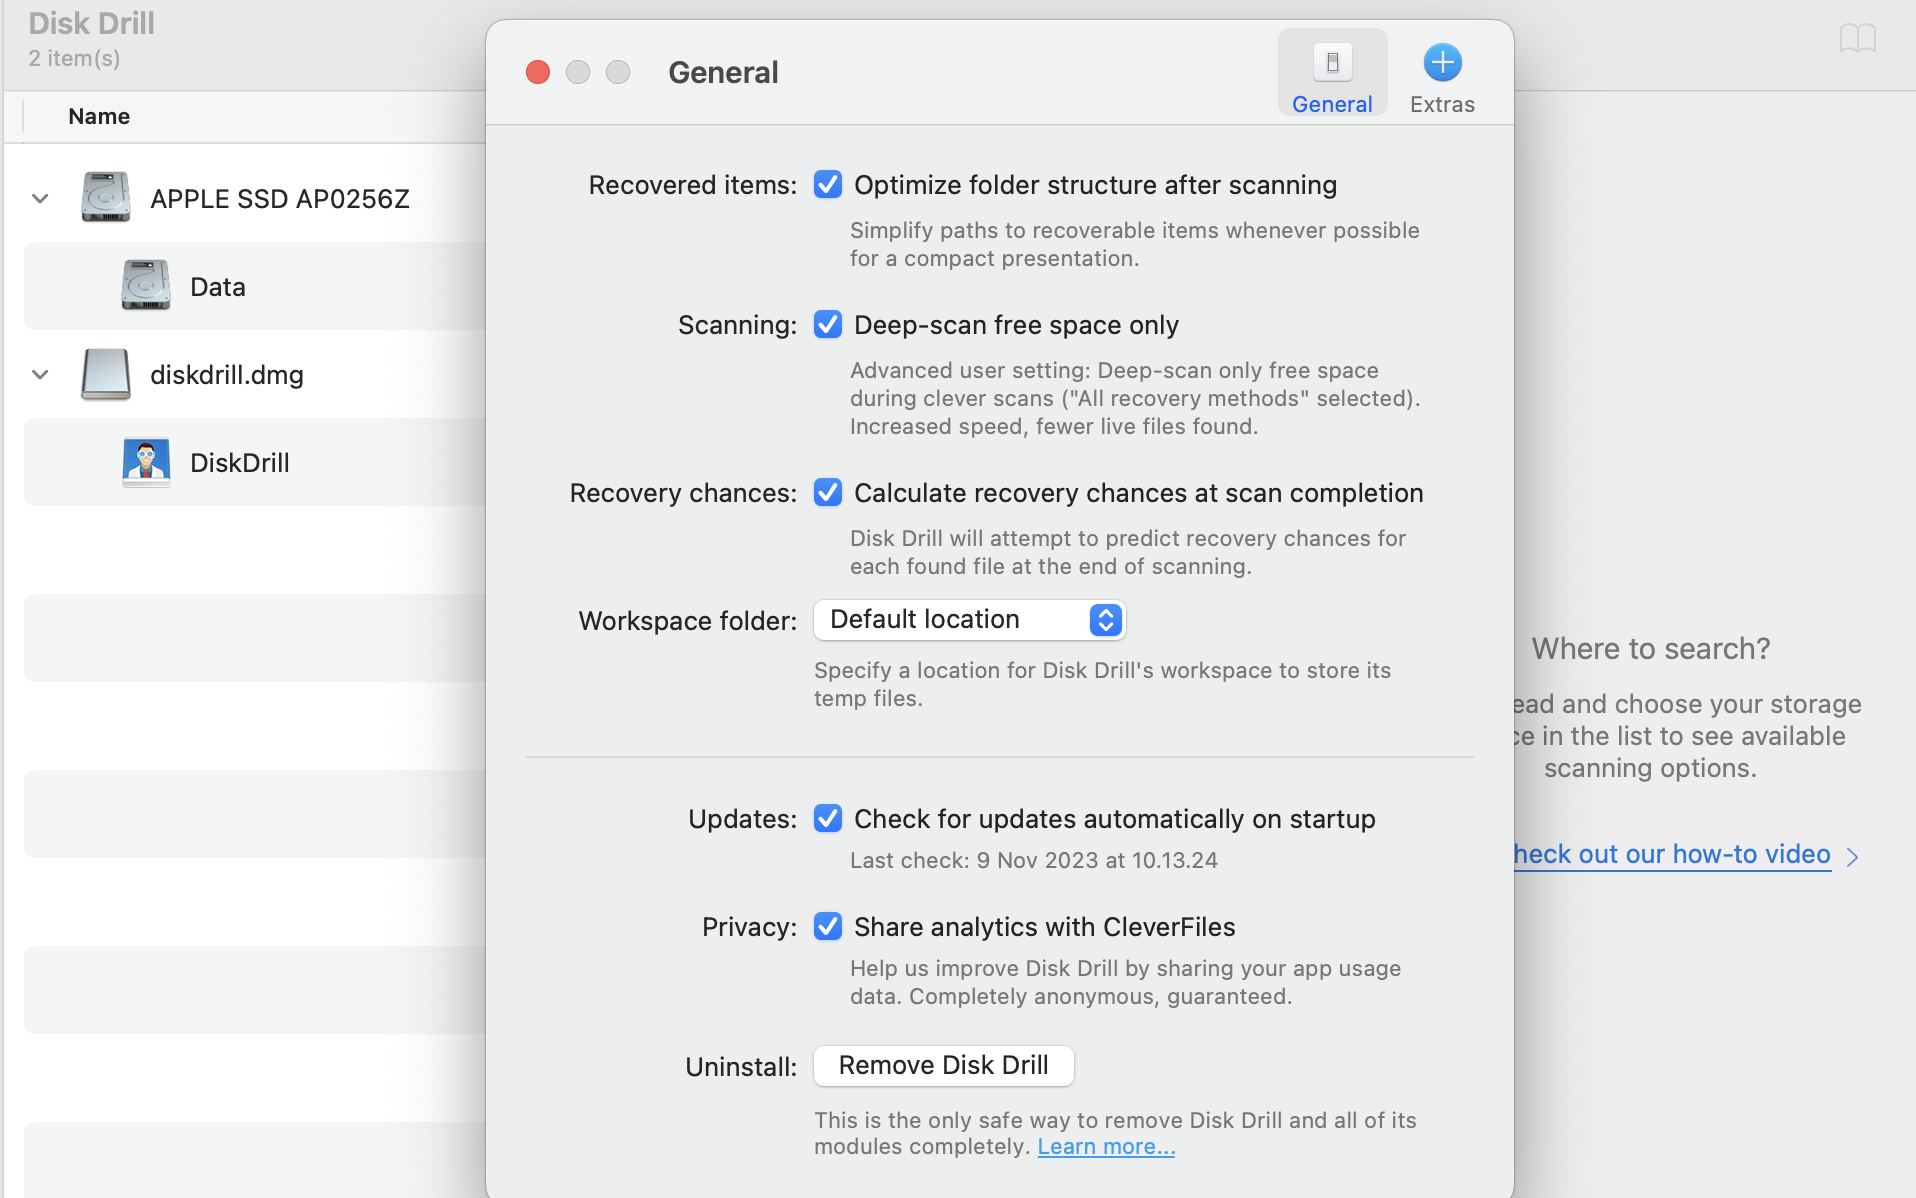
Follow these instructions to uninstall the app from Disk Drill settings:
- Go to Disk Drill > Preferences after opening the app.
- At the bottom, you’ll see a button titled Remove Disk Drill next to Uninstall. Select this option.
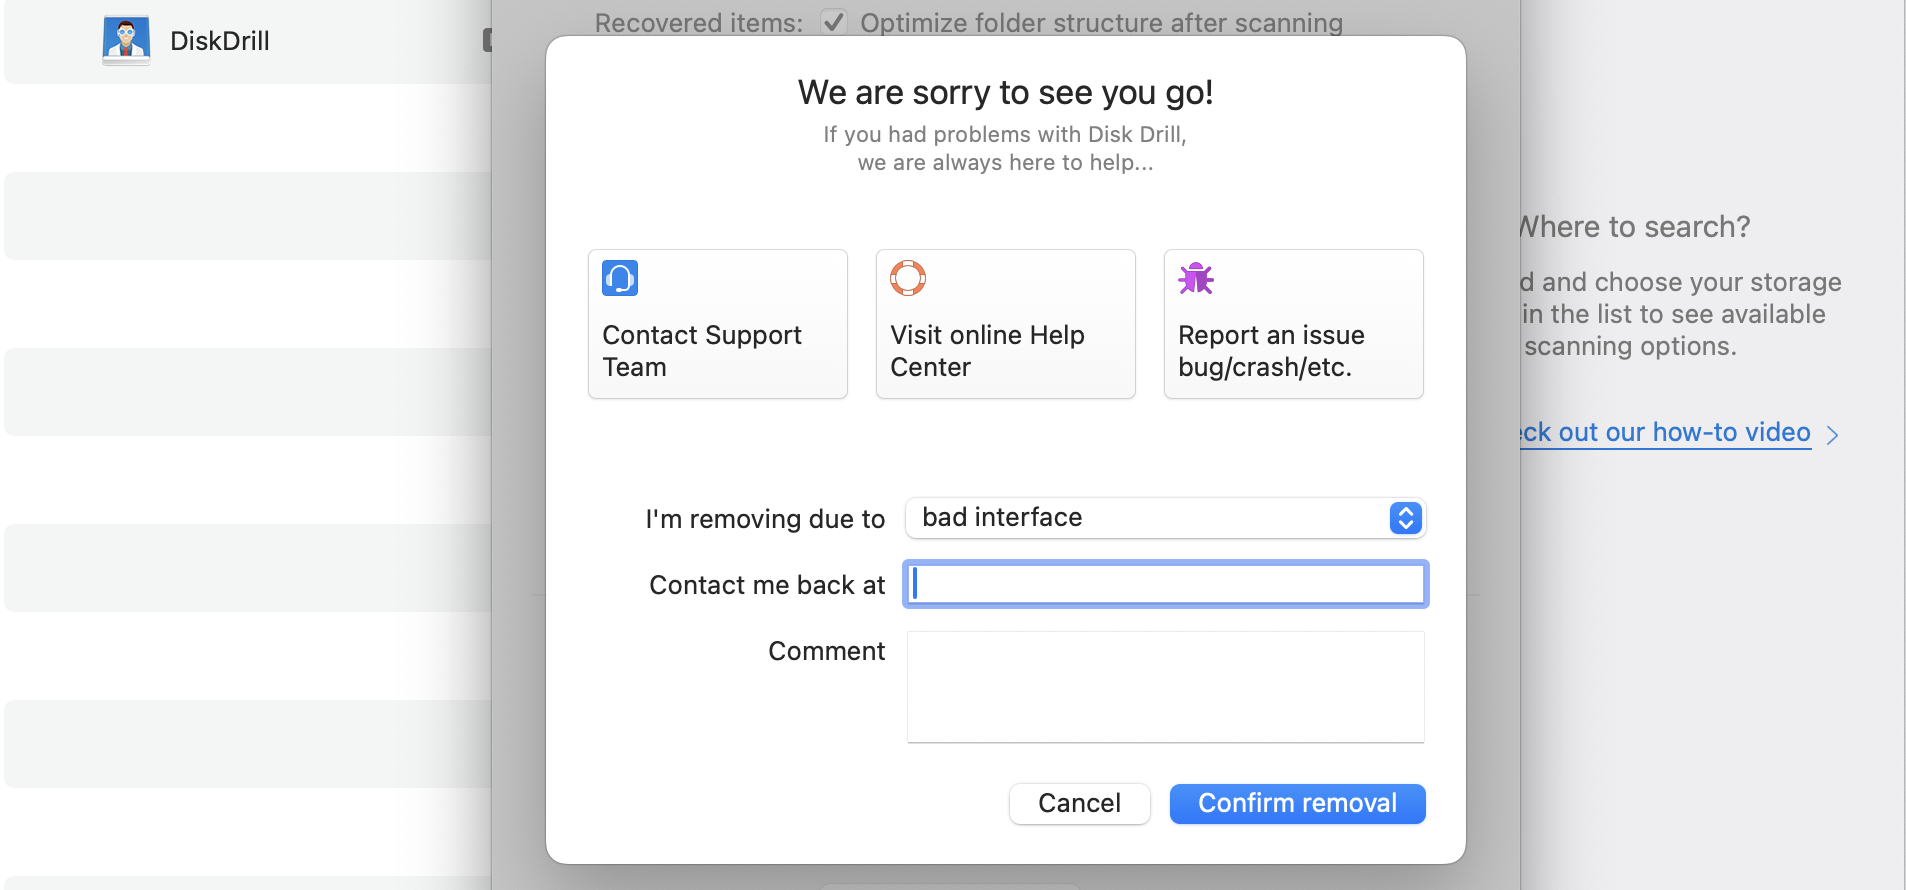
- A confirmation window will appear and ask you to get rid of Disk Drill. Tap Confirm removal.

1. Remove Disk Drill manually
In addition to using the app’s settings, you can also delete Disk Drill manually. Below are the steps to follow:
- Close Disk Drill on your Mac.
- Go to Finder > Applications.
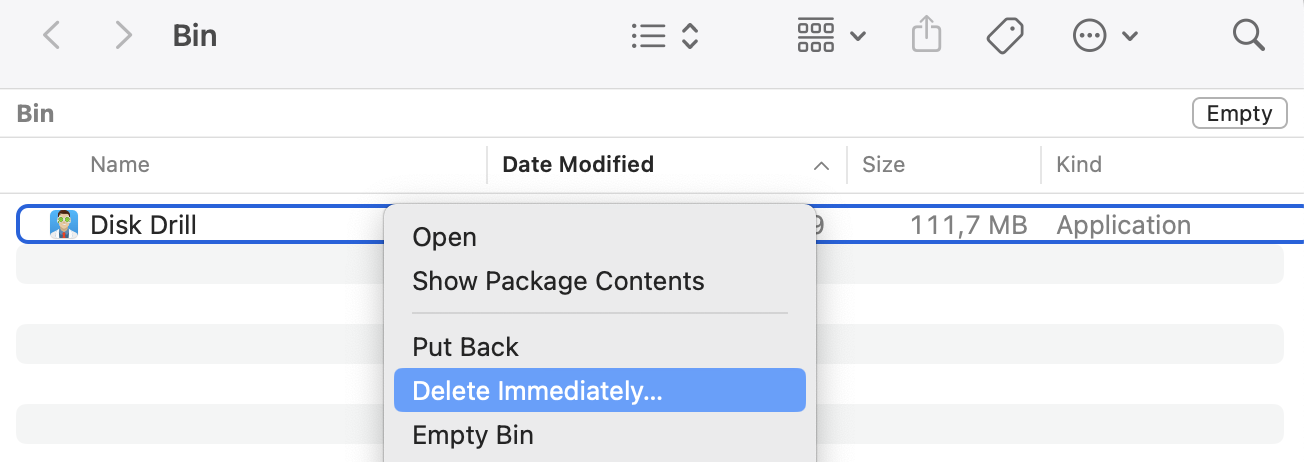
- Highlight Disk Drill, click on control + trackpad, and select Move to Trash/Move to Bin.
- Go to your Trash and highlight Disk Drill again, before selecting Delete Immediately.

Note from our experts:
After deleting Disk Drill, you may want to consider reformatting your external hard drive. This will remove all of your files, though, so you should back them up somewhere safe. After doing that, read on how to format USB on Mac.
2. Delete Disk Drill using Terminal
Terminal is an effective way to get rid of Disk Drill. Now, remove the app from your device with its help:
- Go to Spotlight and type Terminal.
- Open Terminal when the search results appear.
- Enter: Volumes/DiskDrill/Disk\Drill.app/Contents/Resources/uninstall and tap the Enter key on your Mac.


Using Terminal to delete Disk Drill can sometimes result in problems with your SDD, so you should be careful. Learning how to deal with a disk repair on Mac is a good idea if you want to prevent potential damage.
3. Get rid of Disk Drill with uninstaller
Remove the potential risks of disk damage caused by Terminal by using MacKeeper’s Smart Uninstaller instead.
- Open MacKeeper and go to Cleaning > Smart Uninstaller.
- Select Start Scan.
- Click on the Applications tab.
- Tick the box next to Disk Drill when the list of options appears.
- Choose Remove Selected.
- Confirm your decision when the next window appears.
If you need more assistance with this MacKeeper feature, you can check out the complete guide on how to use Smart Uninstaller.
Save space and safely uninstall Disk Drill on Mac
While Disk Drill is an effective data recovery tool, users may want to free up storage or use Apple’s programs like Time Machine. Disk Drill is very easy to uninstall from your device, and you can click on a simple button within the app’s settings. However, other options are also available and equally efficient.
If one day you feel the need to delete Disk Drill, use MacKeeper’s Smart Uninstaller. You’ll safely declutter your device while saving time, and you can even delete default apps on Mac. On top of those advantages, you also have the option to clear caches and much more.


