In this article you will find the following:
Whenever you have trouble connecting to the internet, you typically check your internet or Wi-Fi connection first—whether it's still connected and how strong the signal is.
To solve the issue, you might switch the Wi-Fi, or even your device, off and on again. That’s everyone’s quick fix in such cases. But there’s a more effective way to get to the root of any Wi-Fi connection issues—running a Wi-Fi diagnostics test on your Mac. More on that below.
Before we begin
Using the internet is a risky undertaking. At any given moment in time, bad actors are trying to identify your IP address and obtain your personal information. The best way to curb this is to protect your privacy with MacKeeper’s VPN Private Connect.
MacKeeper’s VPN Private Connect conceals your real IP address, so you can browse the internet anonymously and keep your personal data safe. Setting it up is as easy as one, two, three…
- Download MacKeeper on your Mac
- Click on VPN Private Connect in the left pane
- Click the Turn On button.
That’s all there is to it. Continue reading to learn how to run wireless diagnostics on Mac to pinpoint the root of your Wi-Fi connection issues.
What is Mac’s wireless diagnostics?
Mac’s wireless diagnostics is what it sounds like—it’s Apple’s diagnosis of the reasons for your Wi-Fi issues. Also known as Mac network diagnostics, the wireless diagnostics tool is like Mac’s Apple diagnostics, but for Wi-Fi connection issues.
You can prompt Mac to “diagnose” the issue when you have trouble connecting to Wi-Fi. The issues you may experience typically include slow connections while doing any of the following:
- Loading internet pages
- Loading emails
- Streaming music or video.
Mac does better at getting to the bottom of it than we could ever do. That’s because, although we may troubleshoot the root cause of these issues, we would most likely be grasping at straws.
Not only does Mac’s wireless diagnostics find the root issues by performing analysis, but it provides solutions to fix the problems, too. It also gives you a guide on best practices when using Wi-Fi on your Mac.
As a result, you’ll be able to speed up your Mac’s slow internet and start browsing the internet without hassle again.
How to run a wireless network diagnostics analysis on Mac
The most effective solution for fixing Wi-Fi and connectivity issues on your Mac is running a wireless diagnostics test.
By doing so, you save both time and money—why spend hours picking your Mac apart or pay someone to do what your Mac can do itself?
OS X wireless diagnostics
The steps you’ll have to follow to use Mac’s wireless diagnostics tool will depend on your Mac’s version of macOS or OS X.
This article outlines how to use it with macOS Big Sur (11) through macOS High Sierra (10.13). If all else fails, find the wireless diagnostics tool using Spotlight search as prescribed below.
How to solve Wi-Fi issues with macOS wireless diagnostics
When you encounter issues with your Wi-Fi connection on your Mac, running a wireless diagnostics test should be your first course of action.
This allows you to identify the true cause or causes of the problem. It also reduces the time wasted trying to figure it out by prodding around your Mac or, worse, consulting Dr. Google.
From there, you’ll know exactly what to do to fix each issue.
Follow the steps below to run a wireless diagnostics test on a Mac.
- Start by quitting all open apps on your Mac
- Click on the Wi-Fi status icon in the top-left corner of the screen to try to join the Wi-Fi network that’s giving you problems, unless you’re already connected to it
- Now press and hold the Option key, click the Wi-Fi status icon in the menu bar, then click on Open wireless diagnostics. Alternatively, you can search for wireless diagnostics by name via Spotlight by pressing the Cmd and Space bar keys
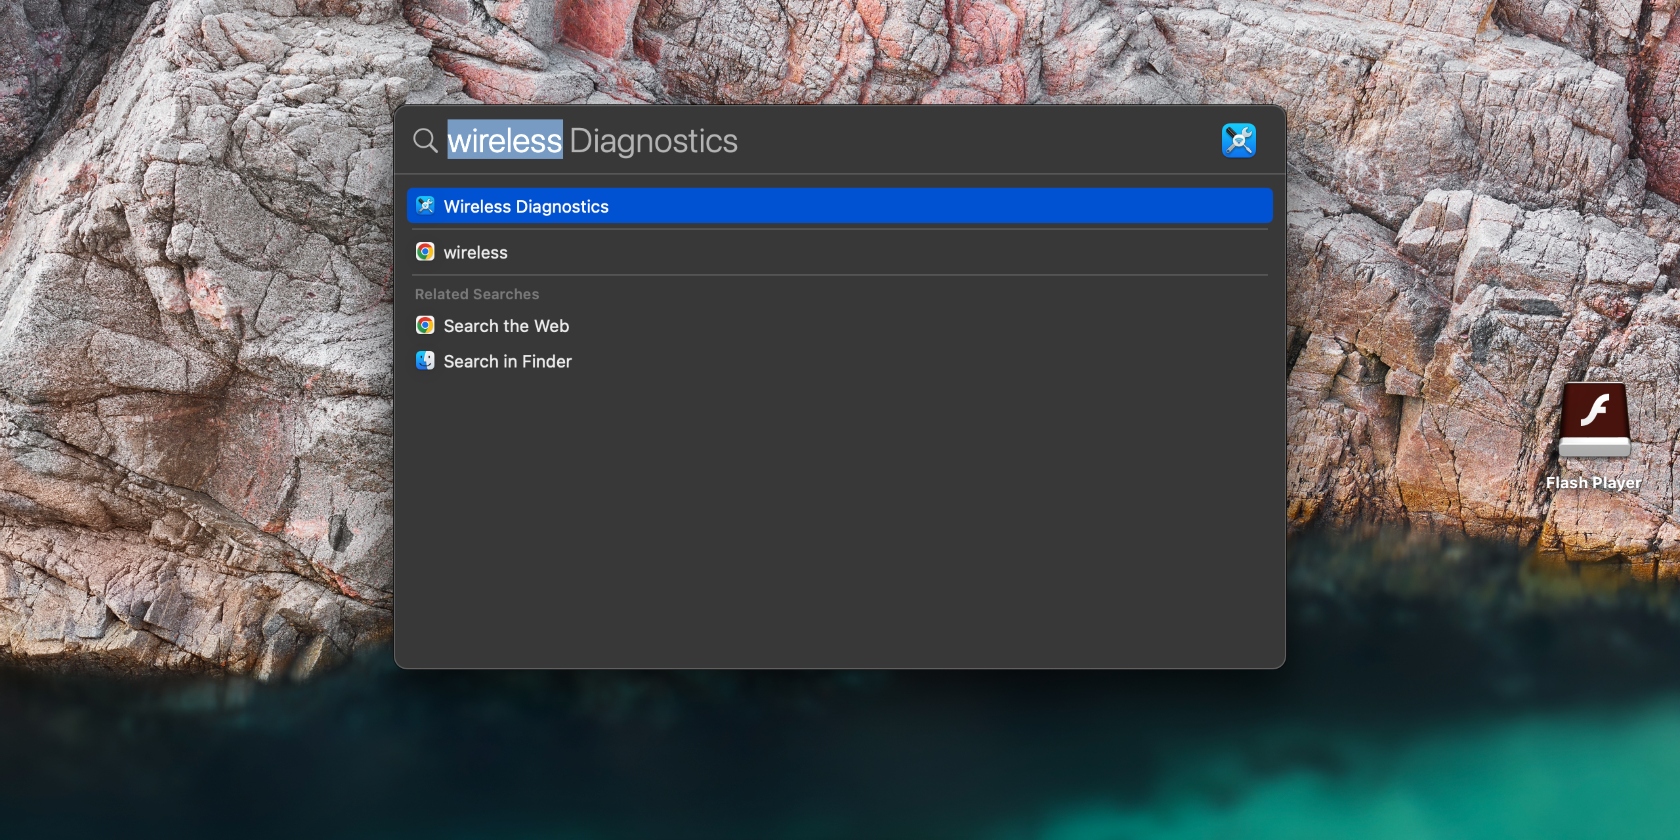
4. Follow the on-screen instructions to start analyzing your Wi-Fi connection. Press Continue until the analysis is complete
5. Once that’s done, you can read about each issue listed on the Summary page. To do this, click the Information icon next to each issue.
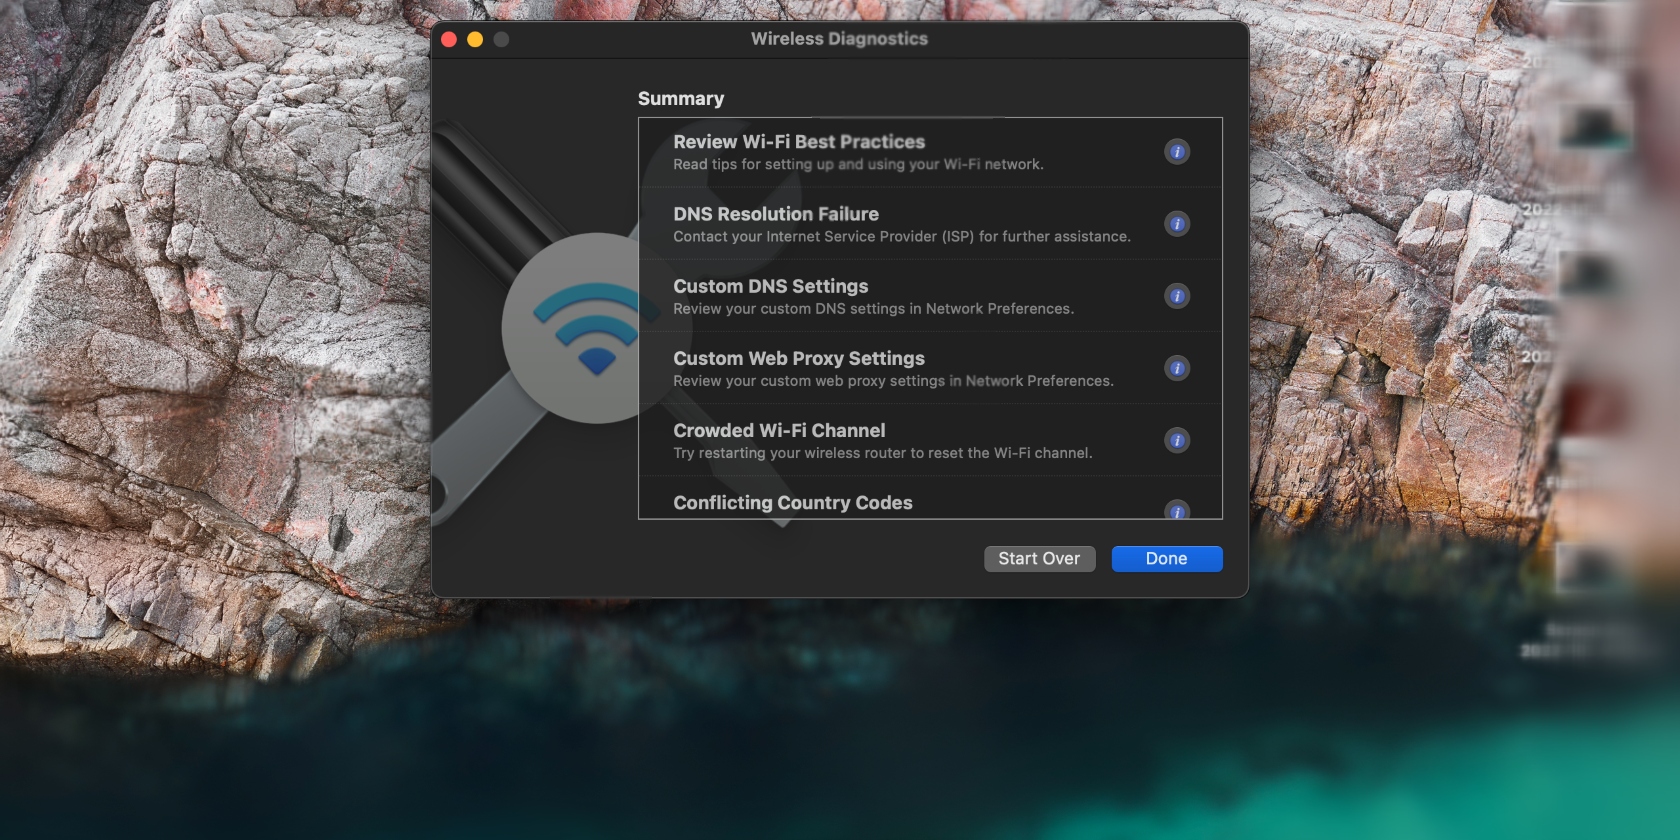
Once you’ve read up on each issue identified by Mac, click Done. Mac will show you a file of the report in Finder, which you can go through afterward.
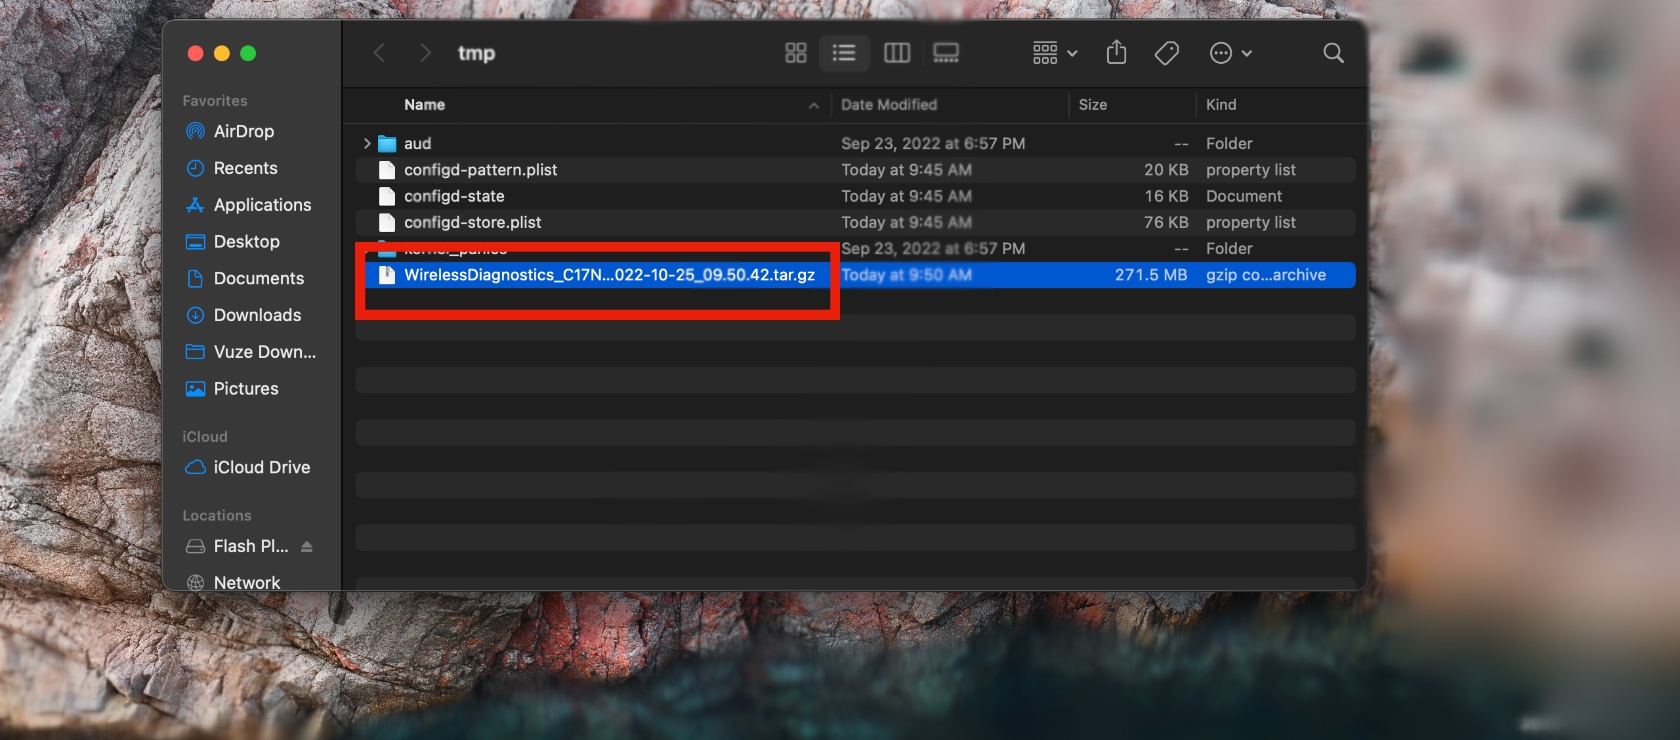
Additional useful tools in macOS wireless diagnostics
It might be worth checking out the best Wi-Fi practices to ensure you’re supporting your Wi-Fi to perform optimally. This will help prevent any further issues or inconveniences.
All you have to do is click on the Information icon next to Review Wi-Fi Best Practices on the Summary page for tips on setting up and using your Wi-Fi network.
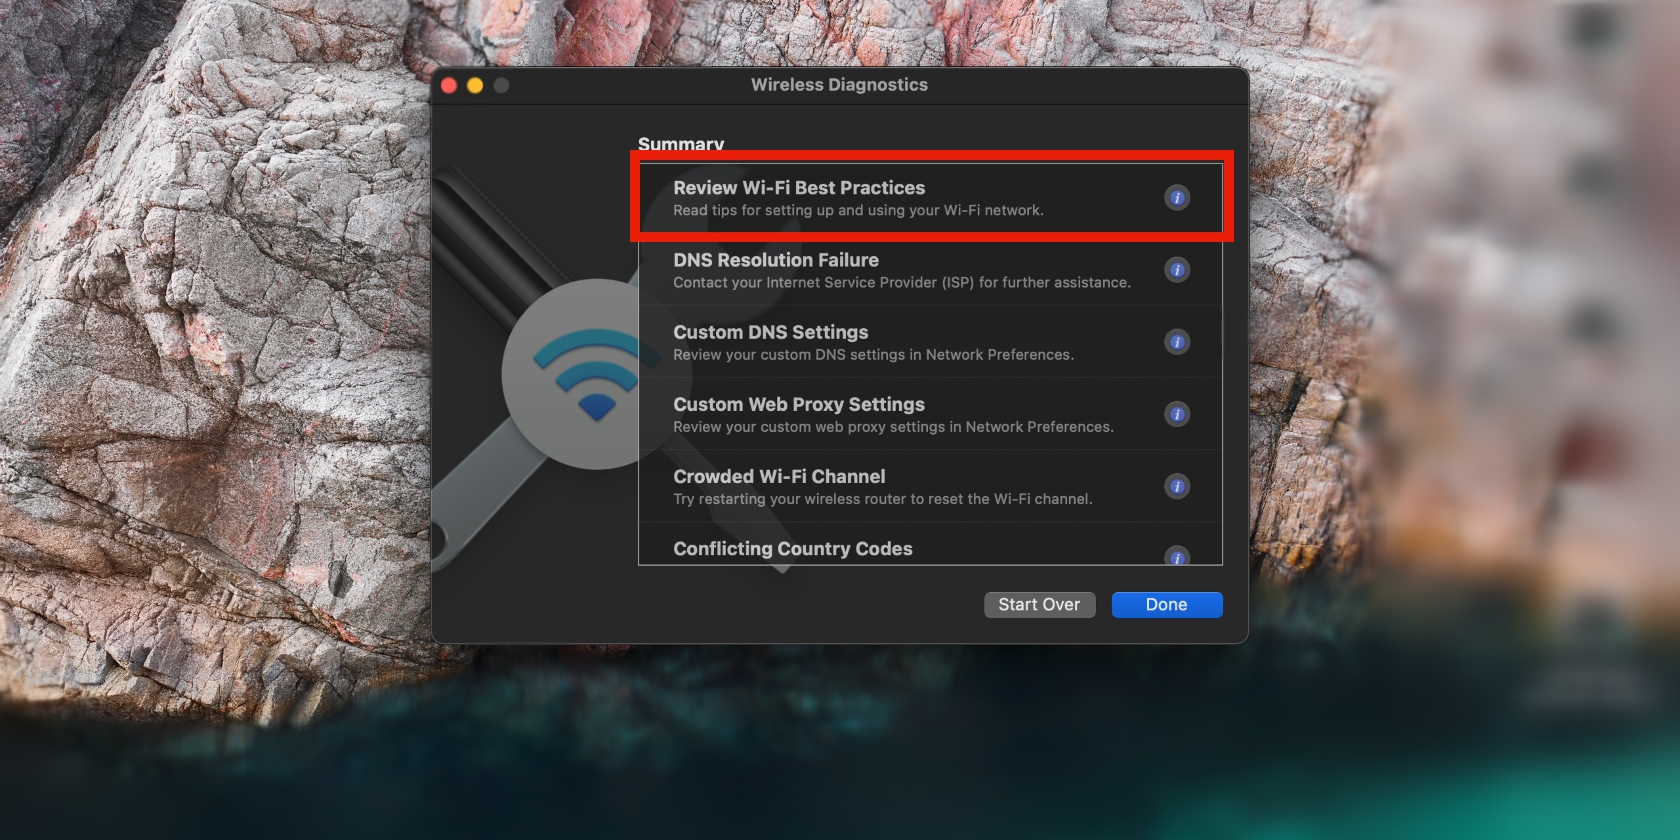
Go through the guide meticulously to identify anything you might need to implement. Take a screenshot or jot down each best practice, so you can refer back to it in the future.
More importantly, ensure you protect your personal data, no matter what Mac model you use or the macOS it runs. This is essential, no matter what network you use—whether private or public—as hackers can find your IP on both.
MacKeeper’s VPN Private Connect is a reliable, easy-to-use VPN that gets the job done.
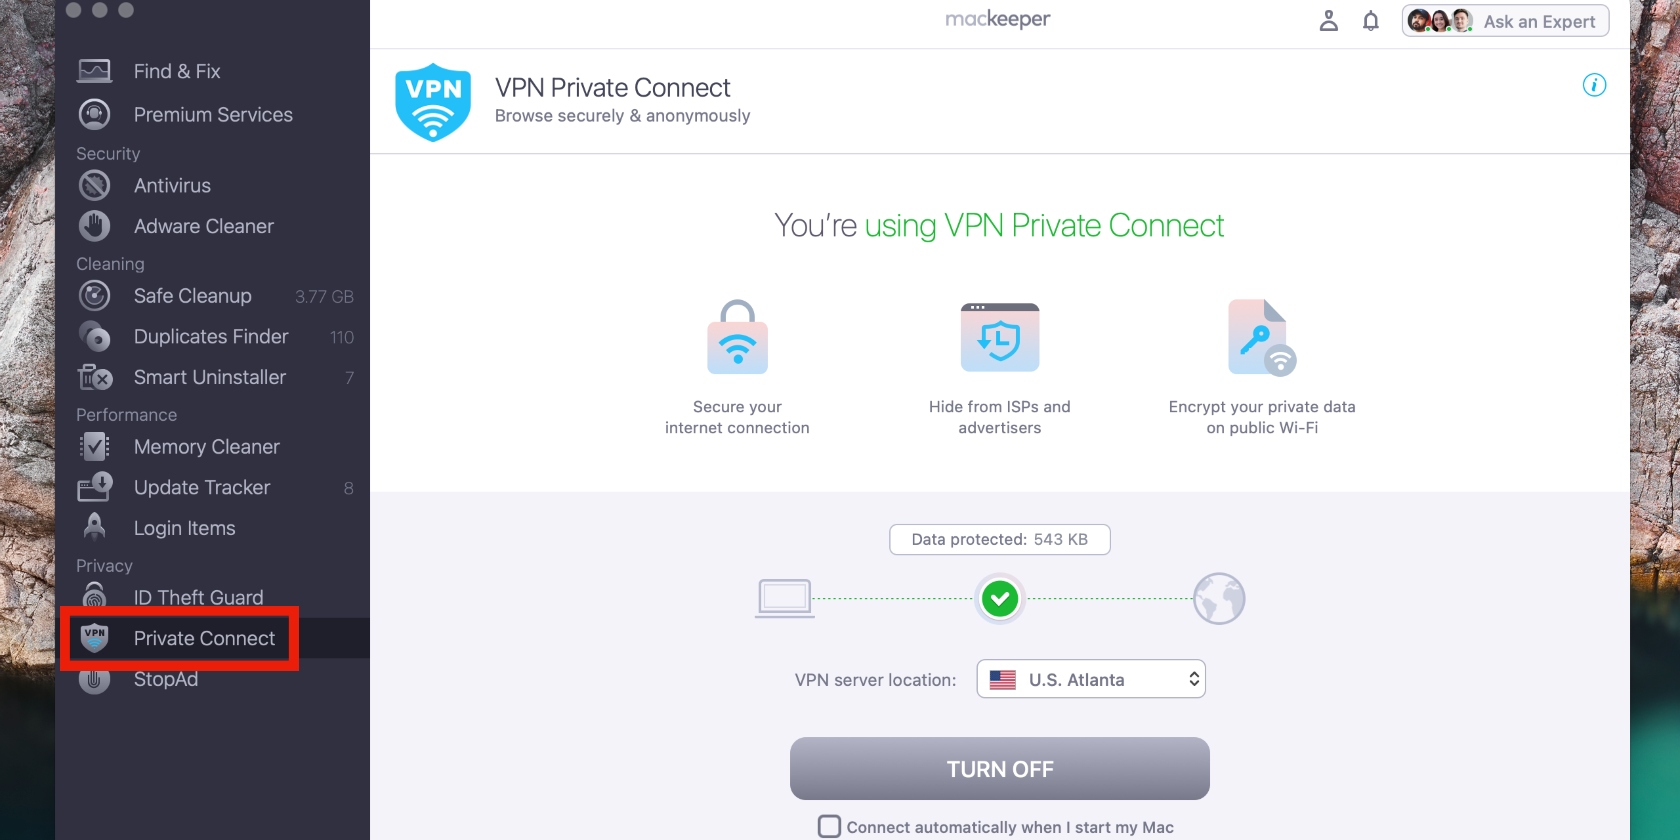
And with one free fix, you can give it a test drive before making a financial commitment. Here are some of its benefits:
- Encrypt your data while using public Wi-Fi
- Protect your Mac and the important files on it
- Protect your personal information, like online account login details.
All of this is achieved by hiding your real location as you browse the internet. It prevents your personal details from ending up on data dumps on the dark web.
No one wants to go through the admin of having to do extensive damage control when their computer has been hacked. That’s why it helps to use MacKeeper’s VPN Private Connect as a preventative measure.
Wrapping up
It’s common to experience Wi-Fi connection issues on your Mac. In fact, it happens to people everywhere, every day, using any computer.
Fortunately, Mac’s wireless diagnostics tool is there to help. It eliminates any guesswork on your part, so you can find out exactly what’s wrong with your Wi-Fi connection and take the steps necessary to fix it.


